


Sharpening your image in the best way can be tricky since there are so many steps along a post-processing workflow, where you could sharpen. So when should you sharpen and should you only do it once?
Many photographers and the guys over at Nik Collection by Google suggests that you sharpen your image three times. The logic behind this is pretty simple and is not tied to a specific software. It is the approach to sharpening that matters. However, in this tutorial, I will use Nik Collection Sharpener Pro 3 Pre-Sharpener / Output Sharpener plugins. The whole Nik Collection has recently been made free.
3-Step Sharpening Logic
First, a subtle pre-sharpening will remove the softness that comes from the anti-aliasing filter in your camera.
Secondly, all areas of your image might not require the same amount of sharpening, why it makes sense to apply some creative sharpening to selective areas only.
Finally, outputting your image for print and web use requires a different amount of sharpening, because the image size and the intended viewing distance is very much different for an 800px wide web image and a 30-inch print.
The first step towards master sharpening in Photoshop is to let go of the tempting idea of sharpening the whole image in one go using the sharpen slider in Lightroom or Adobe Camera Raw.
Step 1: Pre-Sharpening
The global sharpening slider in Adobe Camera Raw or Lightroom can work well for pre-sharpening as long as you remember to keep it very subtle. If you go too far with the pre-sharpening, you will get issues later on.
The idea with pre-sharpening is just to remove softness and get a better starting point for creating precise selections. The anti-aliasing filters the many cameras cause a bit of softness in the raw image file. You address this with pre-sharpening.
It is not meant to be so strong that it introduce noise to the image, but just enough the get more refined edges. Anyway, it is better to look out for noise appearing due to sharpening, because then you have gone way too far.

In the image above, which is zoomed in at 300% you can see the very subtle sharpening done in the pre-sharpening step.
Nik Collection’s Pre-sharpener and Noise reduction plugins tool does a fantastic job in keeping this very subtle and automatic if you use Nik Collection plugins. Run the RAW Pre-Sharpener first and then the Define tool to control the noise. Just remember to disable Lightroom’s or Adobe Camera Raw’s default sharpening before going into Nik Collection/Photoshop.
Click here to see a complete workflow for using the Nik Collection Plugins.
Step 2: Creative Sharpening
Creative sharpening is about directing the viewer to a part of the image where your subject is.
The term creative sharpening emphasizes that this sharpening is done as a creative touch instead of just using a global slider to sharpen the whole image, making everything sharper.
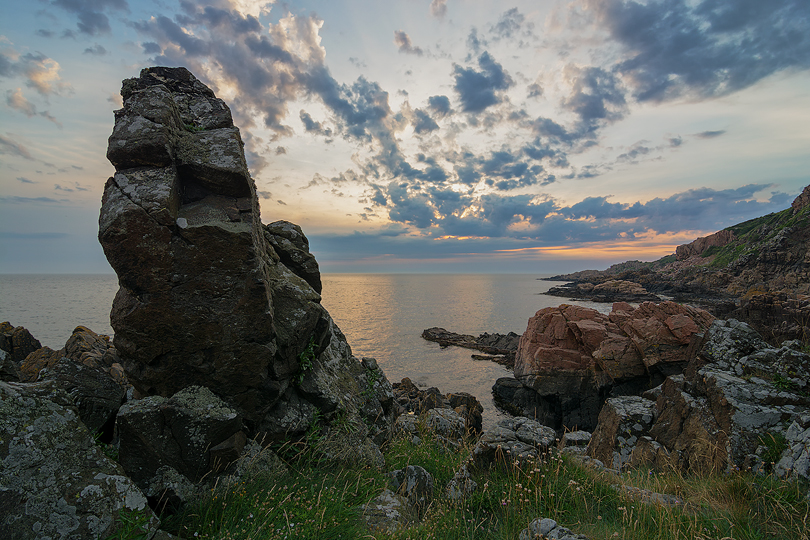
If you have an image with a narrow depth of field, you don’t want to sharpen the out of focus areas canceling out the effect of using a large aperture. In landscape images, you often don’t want to apply the same amount of sharpening to lakes, oceans, and the sky as you would to rocks, building and other very solid elements in your photo. Applying global sharpening will not be a perfect solution.
Creative Sharpening in Nik Collection
You can use the Nik Sharpener Pro 3: Output Sharpener tool with control points to create a very precise selection of what you want to sharpen. For creative sharpening, just keep the output sharpening method set to default (display output).
One of the strengths of using Nik Collection’s tools for sharpening is the use of control points, which lets you make precise selections with only a few clicks.
In the image below I have placed eight control points on the rocks to get an accurate mask of the what I want to become sharper. To keep the sky and water from being affected, I could place a few extra control points there and just set the Sharpening strength of these extra control points to zero. It took just 30 seconds to create this mask.

There are four sliders that affect how the creative sharpening is applied. All of them work on a global level unless you apply control points. When applying control points, you can change the settings of each control point and thereby control the how the sharpening is applied to specific areas of the image.
Output Sharpening Strength
This slider is the main slider to adjust the global sharpening applied to the image.
The Structure Slider
With the structure slider, you can either emphasize texture and fine details or reduce it for a smoother surface.
Local Contrast Slider
This slider controls local contrast throughout the image. Increasing the slider increases edges of small objects while pulling the slider to the left, will lower the contrast of edges and give a diffusing effect.
Focus Slider
Pulling this slider to the right will increase the overall strength of the adaptive sharpening and moving the slider to the left decreases the adaptive sharpening, giving a slight blur effect.

Step 3: Output Sharpening Depends On How You Will Use The Image
Depending on whether you want to print your image or use it on the web, you should use sharpen to different output formats to get the best results.
Sharpening for Print
If you are planning to print your image, you can apply another smart sharpening filter to the areas that need sharpening. Prints often become better if you give your image a little extra sharpening.
However, I use Nik Collection Sharpener plugin to help optimize the image to both the printer, the paper type and the intended viewing distance.

Sharpening for The Web
I normally use Photoshop instead of the Nik Sharpener Pro plugin when sharpening for the web.
When resizing an image to a size that is optimal for use on the internet, it loses sharpening to an extent that it looks kind of soft.
Therefore do the resize first and then apply sharpening again by using Filter >> Sharpen >> Sharpen in Photoshop.
If you don’t think the file looks sharp enough, duplicate the layer by using CMD+j (Mac)/CTRL+j (Win) and apply sharpening again.
Concluding words
I hope this 3 step sharpening workflow helps you become more aware of how and when to sharpen your image. As I mentioned, in the beginning, there are many different tools, and ways to sharpen, but the key points here is to move away from thinking that sharpening is best applied globally to the whole image and forgetting to take the output format into consideration.
Peter Bredahl
August 2016


Elevate Your Vision


Read this story and all the best stories on The Luminous Landscape
The author has made this story available to Luminous Landscape members only. Upgrade to get instant access to this story and other benefits available only to members.
Why choose us?
Luminous-Landscape is a membership site. Our website contains over 5300 articles on almost every topic, camera, lens and printer you can imagine. Our membership model is simple, just $2 a month ($24.00 USD a year). This $24 gains you access to a wealth of information including all our past and future video tutorials on such topics as Lightroom, Capture One, Printing, file management and dozens of interviews and travel videos.
- New Articles every few days
- All original content found nowhere else on the web
- No Pop Up Google Sense ads – Our advertisers are photo related
- Download/stream video to any device
- NEW videos monthly
- Top well-known photographer contributors
- Posts from industry leaders
- Speciality Photography Workshops
- Mobile device scalable
- Exclusive video interviews
- Special vendor offers for members
- Hands On Product reviews
- FREE – User Forum. One of the most read user forums on the internet
- Access to our community Buy and Sell pages; for members only.
You may also like


