


by Paul L. Richman, Ph. D.
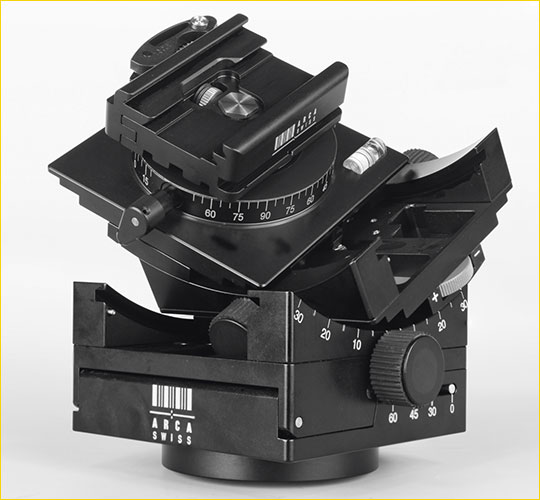
Figure 1 – ARCA-SWISS C1 Cube
1. The Problem
“Ok. I’ve placed my Nikon D3x into my Markins ballhead clamp. Turn, turn the clamp’s quick release knob and we’re locked in. Now turn the knob to loosen the ballhead, holding onto the camera, and frame the subject. Ah, the framing is justpurrrfect! Now tighten the ballhead knob and let go of the camera. Oops! The camera dropped down just a tad after I tightened the ballhead. Must be front heavy. Hmmm. Ok, loosen the ballhead, move the framing up a bit to try to accommodate for the drop after tightening. Tighten the ballhead. Oops again. Still not quite right. One more time…. Maybe two…. Ugh! Ok, got it. Hmm, it’s actually not quite level. Darn. Ok, let’s do it again. And again. Ok, level now. But wait, I want to change the framing slightly. Oh no, here we go again….”
Have you been there? I have, all too often. If your camera and lens are heavy, most (all?) ballheads behave this way, despite occasional advertising to the contrary.
When I don’t bother to use a tripod, I am willing to take whatever framing inaccuracies I get from my own shaky hands. But when I take the time and trouble to carry, setup and use a tripod, I want precise framing. I do love precision. Yes, you can frame generously and then rotate and crop to get similar results. But if you don’t frame generously enough, or if you have to rotate too much, you may not get the frame you want. And besides, when I pay for 24.5 mega-pixels, I want my images to get all of them! I don’t want to trim precious pixels away. My business model primarily involves selling 24” x 36” fine art prints, and my clients love to see tons of detail in them, as do I.
___________________________________________________________________________________
2. The Solution
Until recently, I thought I would just have to live with this little ballhead foible. What else is there, after all? But then I discovered the ARCA-SWISS C1 Cube geared head, thanks to Michael Reichmann. There have been other geared heads in the past, but they were too heavy to consider, at 10 pounds (4.5 Kg) or more. This little beauty weighs in at just 2 pounds (0.9 kg). Yes, my Markins Q-Ball M-10 ballhead only weights 1.09 pounds (0.5 kg), but you see it’s got this problem….
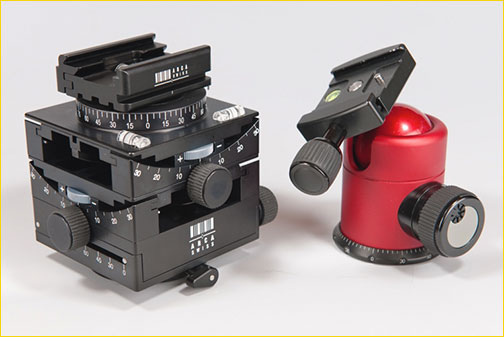
Figure 2 – ARCA-SWISS C1 Cube and Markins Q-Ball M-10
Stated more clearly (thanks to Jack Flesher, who I paraphrase in the next few paragraphs), the problem with ballheads is that they cannot easily fine-tune adjustments on the separate axes independently. Geared heads like the C1 afford precise fine adjustments with slight turns of knobs. The knobs are essentially self-locking; once positioned with the knob, even excessive force at the platform will not move it. Thus geared heads are superb tools to use for precision work, as they are very solid, fine-tuning is easy and no time is spent locking and unlocking the head for each subsequent adjustment – even with heavy cameras.
Each axis on the Cube is geared and adjustment knobs are conveniently available on all four sides of the head. The gear mechanism is a rack and pinion design, which definitely saves weight over other designs, but it isn’t as securely self-locking so ARCA-SWISS added friction adjustments on each axis. Even with my heaviest lens, a Nikkor 200 – 400mm Zoom, on my Nikon D3x, I find that the lowest friction adjustment works just fine.
The primary geared movements allow plus or minus 30?of adjustment and built-in levels on each axis are readily visible. The base is also hinged, which allows another 60? of tilt, permitting the head to tilt over at a full 90?.
Because the C1 moves your camera on arcs within a sphere (rather than arcs on top of one, as ballheads do), you can easily adjust the horizontal and vertical axes of your frame with minimal movement of the optical system’s entrance pupil. You can rotate both the top clamp and the whole cube, independently.
Doug Peterson, Head of Technical Services of Capture Integration in Miami, wrote an interesting brief post on the Cube in an obscure (to me) large format forum. Here are his salient points, with a few minor clarifications, based on a phone conversation with him:
“The purpose of one cube is to level the platform of the camera even if the tripod itself is not perfectly level. This is great because the process of leveling a tripod is imprecise, time consuming, and requires a lot of bending over, whereas leveling a cube is incredibly quick, very precise, and can be done without bending over. Imagine you’re on a rocky cliff in the winter with heavy clothing/coat, and you can see where the difference can be anything but minor.
By leveling the camera base you can now pan your camera left and right along a level horizon, even if the tripod is not level.
What if you want to take a shot with the camera pointed slightly down or up (for instance to place the horizon at a rule of thirds). A single cube makes doing this very easy for a single image. First, rotate the camera/clamp on the cube until it matches one of the axes of the cube. Then use the cube’s tilt to accomplish the needed rule-of-thirds composition and use the cube’s other axis to level the horizon perfectly. Fast and easy.
The long-standing problem is when you want to pan-and-stitch left-to-right, in this pointed up or down scenario. With one cube on a tripod that is not level, you can’t do it! The camera will not remain horizon-level as you rotate the top platform (i.e., by rotating just the camera and clamp). For example, if the camera is pointed down at your starting point, then after you pan 180?, the camera will be pointed up!
So you COULD just level your tripod – what any sane person would do in this situation. Then you could rotate your camera by rotating the base (not the clamp) of the cube, and keep the horizon in your panning shots as your rotate even through 180? or 360?.
However, if you’re crazy, you could use a second cube. You use the bottom cube to provide a level base and you use the top cube to tilt-and-pan (by rotating the base of the top cube) to your hearts content.”
While I love and agree with almost all that Doug says here, I disagree that “the main purpose of the cube is to level the platform of the camera”. There are many less expensive ways to level a camera’s platform. But the Cube probably does this easier, quicker and better than the alternatives, and in addition, offers precise movement on two opposing axes, movement that stays put.
The cube has a tiny, shiny metal rod (not mentioned in its manual) pointing straight down from a corner of its clamp. Aligning this rod with one of the “0” or “90” marks on the clamp’s rotation base will precisely rotate the camera on the cube to match one of the axes of the cube, as Doug suggests above. This is the best position to start a Cube framing process, with the Cube’s levels on the near side so they are easy to see and use.
While most sites selling the C1 do not advertise its load capacity, I did findonethat listed it as 150 lbs. That’s a lot of gear, although I take such numbers with a large grain of salt, especially since load capacity depends a lot on how centered the load is on the head.
___________________________________________________________________________________
3. The Catch
Of course, there is a catch. (Why is there always a catch?) The C1 is way expensive. No, not as much as some of the video fluid heads that can set you back anywhere from thousands to tens of thousands of dollars. The C1 is currently on sale for $1700 (sans case) in the USA, but has sold for $2600 (with case) in past years.
Is the C1 worth it? Well, that depends on you. For most folks, probably not. For me, yes, emphatically, yes. Any reasonably well-heeled gear-head who loves precision would love it as I do.
___________________________________________________________________________________
4. The Case
The Cube’s leather case is now a $240 option. I thought I wanted one, so I ordered it from B&H Photo/Video. It is a lovely old-style leather case whose design echoes its origins in Switzerland. But the interior is unpadded and it is not a close fit, so the cube would just rattle around a bit in there. (See Figure 3 below.) I just didn’t find this case appealing for its intended use, so back it went. (This sentiment is echoes a lot in forums on the web.) A case is rather superfluous for me, as I intend to keep the C1 on my tripod almost all the time.
The C1 fits perfectly in my Giottos 31” tripod bag, mounted on either my Gitzo GT2531EXorGT3531 tripod. The C1 is not that heavy to carry, given the other gear I lug. And did I mention what a joy it is to use?
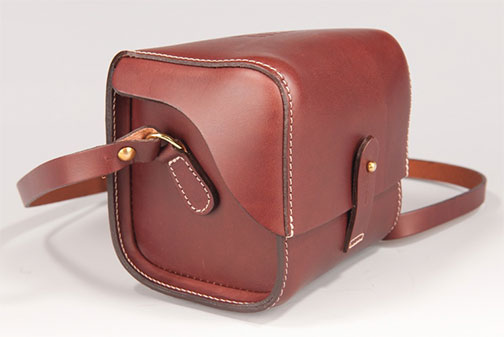
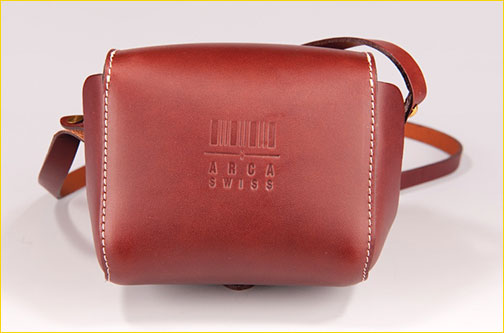
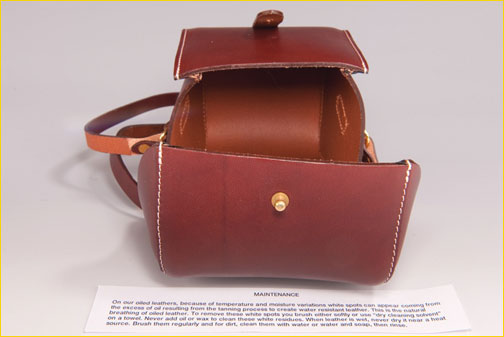

Figure 3 – C1 Cube Leather Case
___________________________________________________________________________________
4. C1 with a DSLR?
“But isn’t the C1 just for large format cameras?” you ask. Well, yes, it was made specifically for them by one of the premier makers of large format cameras. But hey, it works great with my Nikon D3x, and even with my Panasonic Lumix GH1.
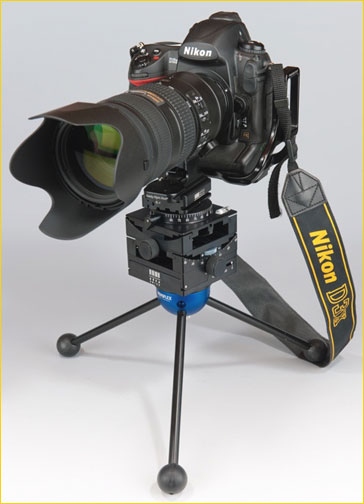
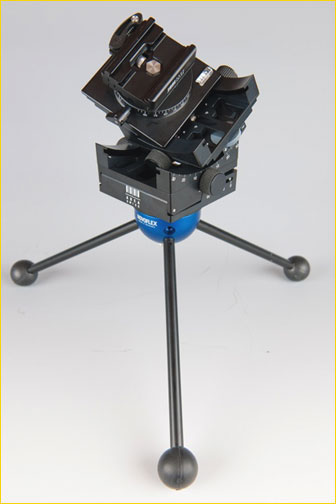
Figure 4 – Nikon D3x + Nikkor AF-S 70-200mm f/2.8G ED VRII zoom lens + Novoflex tripod
___________________________________________________________________________________
5. Fit and Finish
I was a slightly disappointed with the finish of the Cube, in terms of surface texture (see Figure 1), although the C1 is lovely enough in its own right, largely because of its spectacular design. The satiny, scratch-resistant, finishes of Markins heads and others I’ve used just can’t be beat.
Fit is a different story. The C1 works flawlessly. The adjustment knobs each have separate tension adjustments. The lowest tension works just great for my gear. Both the base and the top platform can rotate, which is very nice. Rotation can be locked by levers that again work flawlessly.
One concern I have comes from its open design. (See Figures 1, 5 and 7.) Seems like it would be all too easy to get grit and sand in the gearing, so I will be careful where I use it.
While writing this article, I discovered that literally all the current promotional images on the web of the Cube are of an older version. (See Figure 5.) Compare the knobs in this figure with the knobs and levers shown in the other pictures here of the Cube I just received.
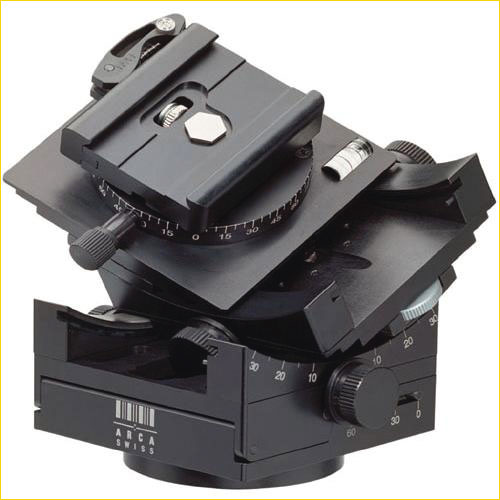
Figure 5 – An older version of the C1 Cube
___________________________________________________________________________________
6. Ease of Use
I was afraid that the C1 would slow me down too much. Ballheads are so quick to move and adjust. The C1 has knobs that must be turned a lot to get where you want to go. (You can turn opposing knobs with both hands, which speeds the process.) But, since framing with the C1 stays precisely where you put it, and framing with ballheads does not, I find that the C1 is essentially as quick to use as a ballhead. The C1’s camera rotation within a sphere minimizes movement of the optical system’s entrance pupil during framing, making for speedier framing free of a ballhead’s perpetual height and focus adjustments. This is especially valuable in macro photography.
With a ballhead, I’m reluctant to try slight reframes, because this often involves multiple tries to account for camera drop after ballhead lock. With the C1, this is no problem whatsoever. I value this because reframing often gives me better photos. I want my equipment to encourage, not actively discourage, reframing.
The top platform has two bubble levels that are easy to see and use. This, together with the top platform’s rotation makes panorama shooting a breeze (as discussed in Section 2 above).
Figure 6 shows the four corners of the C1, so that you can see it from every side. Figure 7 shows the C1 opened for full tilt.
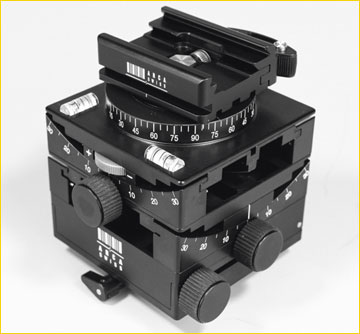
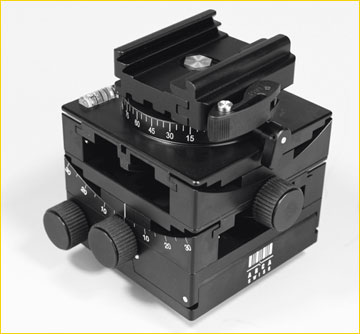
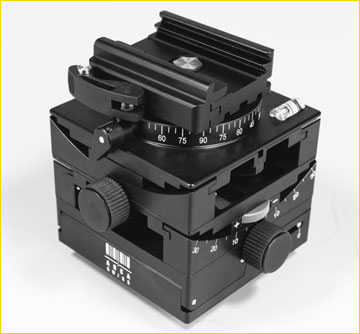
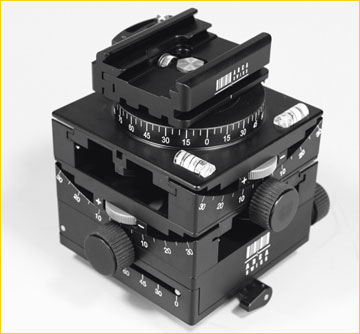
Figure 6 – The Four Corners of the C1 Cube
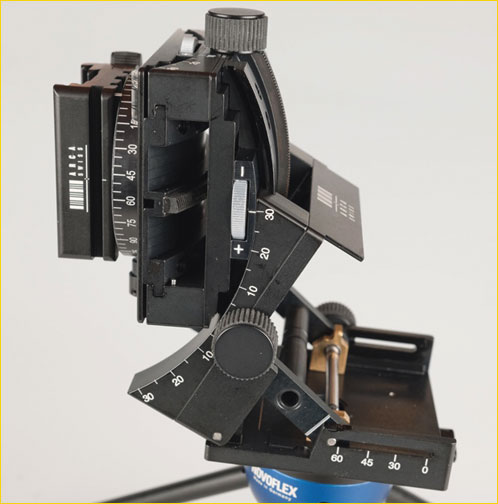
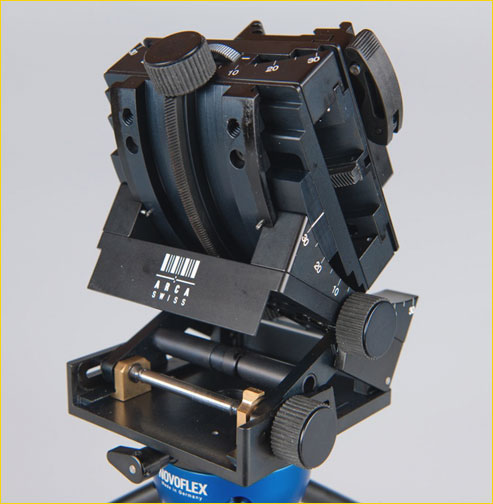
Figure 7 – C1 Opens Wide
___________________________________________________________________________________
7. Clamp Operation
The C1 comes with an integrated, patented, ARCA-SWISS Flip-Lock® quickset device (a.k.a. quick release clamp). When it arrived, I put aside the instructions and just dived in (of course!) The quick release clamp immediately stymied me. I just could not figure out how to open it!
I quickly gave in and looked at the diagram on page 3 of the brief manual. See Figure 8. From the fully closed position (middle diagram), you have to pull out the release button (A), between thumb and first finger (1), and then swing the lever 90? (2), to obtain the sliding position. In this position, an inserted camera can slide within the clamp.
To open the clamp fully, you slide the cogged axel (B) with the thumb (3) and fully open the quickset device another 90? (4). Phew! In practice this can be done very quickly, faster than tightening the Markins quick-release knob.
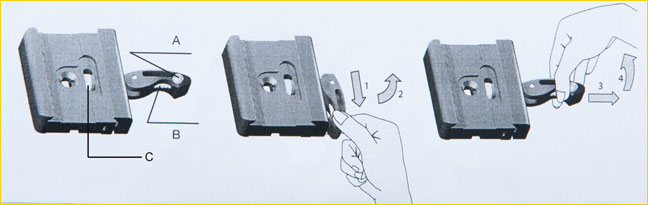
Figure 8 – C1 Clamp Operation (from the manual)
Figure 9 provides photographs of the clamp in its closed, half-open and open positions.
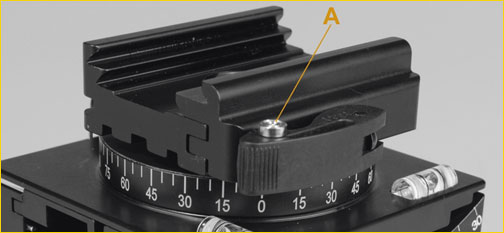
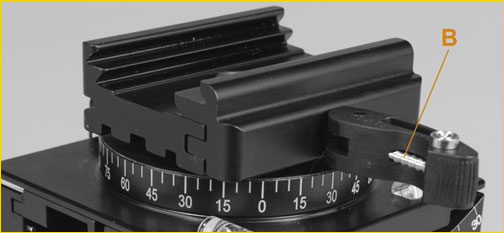
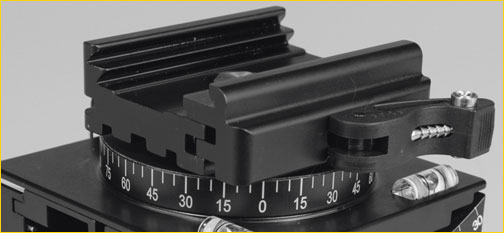
Figure 9 – C1 Clamp Operation
This clamp affords extra safety from accidental release and camera crash. Another nicety! You see, when the clamp is locked with the camera in place, you simply cannot accidentally unlock the clamp. With other lever clamps, like the otherwise excellent Really Right Stuff quick release clamp, you can catch it on a coat and flip it open, and then drop goes the camera!
In Jack Flesher’s C1 review (the only review I could find on the web), he mentions that his C1 came with a defective clamp. This clamp required some hack (physical machining) adjustment to work properly with his quick release plates (unidentified).
Jack ordered his C1 from B&H Photo/Video, and B&H refused to accept its return. Apparently there was a warning on a secondary page of the B&H item description that had been overlooked. Jack wrote his review shortly after the Cube was first released, 5 or 6 years ago. At that time, its price was only $1499 for both the C1 and its leather case.
Well, there is no longer such a warning, and B&H insists that this is now a regularly stocked item that is returnable for any reason within 15 days, their normal policy for stocked (non-special order) items. I almost always prefer ordering from B&H, as their fulfillment process is impeccable, pricing is usually excellent, customer service is always helpful and knowledgeable, and returns are easy. I did get mine from B&H, but I’m not going to return it!
I was a bit worried about getting a defective clamp, but mine turned out to be just fine for my Really Right Stuff and Kirk plates. However, to enable my Really Right Stuff plates to slide in the half-closed position, I had to turn the small adjustment wheel (C) about ¼ of a turn (with the clamp closed).
Yes, this amazing clamp is user adjustable, but be careful. My first adjustment was much larger. I used this adjustment for a couple of days, but while shooting nearly straight up at the blue moon on new year’s eve, with my heaviest setup, my camera slid in the locked position! I quickly fixed this, and I recommend that you test any adjustments you make to the clamp in a similar manner with your heaviest setup. It is possible to adjust the clamp so that so that your heaviest setup will not budge, even when pointed straight up, and yet you can still slide your camera in the half-closed position with some pressure.
___________________________________________________________________________________
8. An Alternative – The Photo Clam Multiflex
There is new option out there, the Multiflex from South Korean maker Photo Clam. It is very similar, a knockoff of the cube. While the maker and most of the few sellers and reviewers on the web do not advertise its load capacity, I did find one that listed it as 100 Kg (220 lbs!). Photo Clam confirmed to me by email that the Multiflex has the same load capacity of the C1 Cube, no surprise.
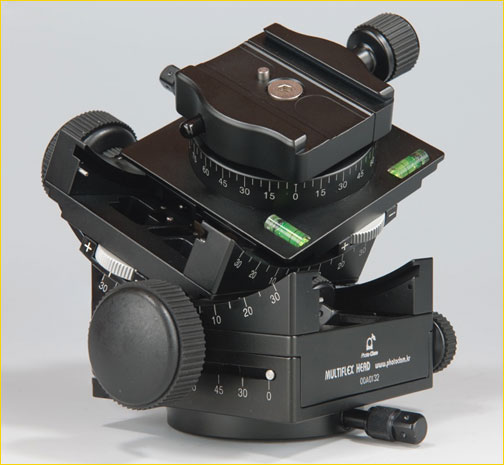
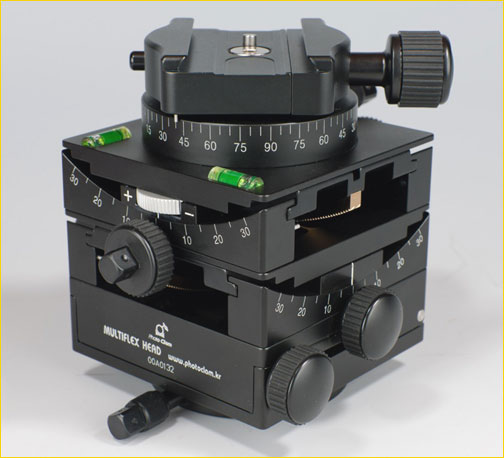
Figure 10 – Multiflex by Photo Clam
You can currently order the Multiflex directly from the manufacturer for $1049, with a $49 shipping charge to the USA. They are now shipping a 2nd generation version of the Multiflex. This version has a removable larger knob that slips on and off aiding users in turning the smaller attached knobs, and upgraded design pan knobs, which make them easier to tighten.
Photo Clam recommends ordering a 2nd knob for an additional $32. The Multiflex comes with a leather pouch (Figure 11).
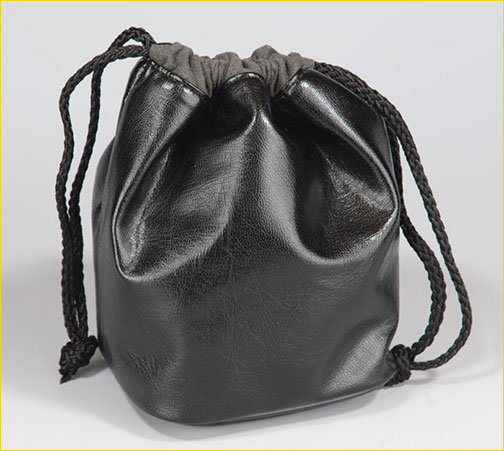
Figure 11 – Multiflex Leather Pouch
They gave the following return policy:
“If you are not totally satisfied with our products you can return the undamaged product (original condition) with all original accessories and packaging materials within 15-days of purchase. The buyer will be responsible for the shipping and 5% restocking fee from the product price.”
I ordered mine, with an extra knob (and two of their ballheads), and the package arrived two days later, on Christmas Eve, all the way from Korea. I was impressed! Photo Clam ballheads look quite a bit like Markins ballheads, which are also made in Korea. (See Figures 12 – 14.) Hmm, both made in Korea….
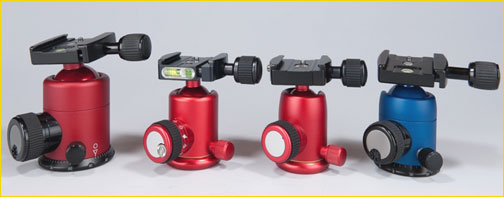
Figure 12 – Markins Q-Ball M10, Photo Clam PC-33NS and PC-30N, and Markins Q-Ball Q3
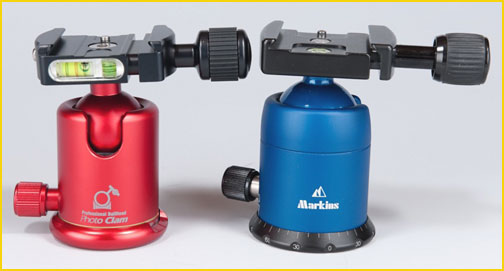

Figure 13 – Photo Clam PC-33NS and Markins Q-Ball Q3
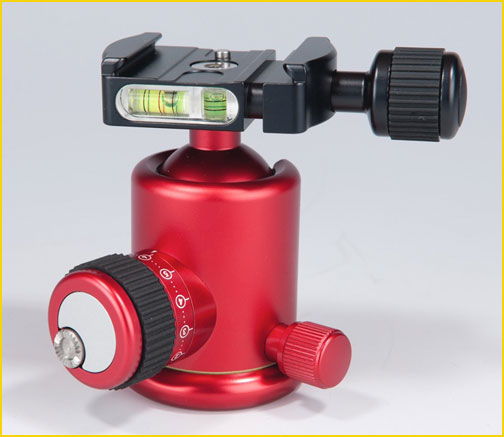
Figure 14 – Photo Clam PC-33NS
The PC-33NS is lighter and smaller than the Markins Q3, is just as smooth in operation, fits nicely inside the reverse-folded Gitzo traveler tripod (unlike the Q3), has bubble levels on the side of the clamp (nice!), and carries the same load (65 lbs) as the Q3. I’ve decided to sell my Markins ballheads and use the PC-33NS when I need the lightness and compactness of a ballhead.
I’ve momentarily digressed from geared heads to ballheads, just to give context for the maker of the Multiflex. Photo Clam makes some top tier ballheads!
Here’s a view of the Multiflex product box, along side the C1’s product box (Figure 15). Figure 16 shows the Multiflex fully opened, with the two large knobs below.
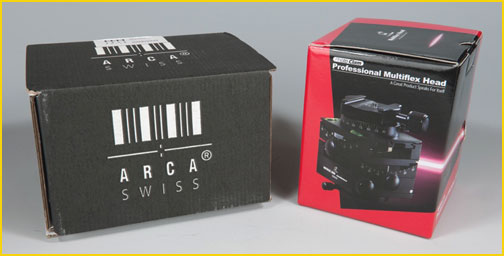
Figure 15 – C1 and Multiflex Product Boxes


Figure 16 –Multiflex Fully Opened & Extra Knobs
___________________________________________________________________________________
9. The C1 Cube versus the Multiflex
Figure 17 shows the C1 next to the Multiflex. They are essentially the same size and weight.
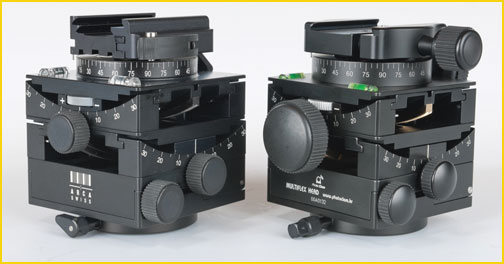
Figure 17 –Multiflex & C1 Cube
The Multiflex is quite nice and basically does what the C1 Cube does, but for about ? less cost. (Stated another way, the C1 costs 50% more than the Multiflex at this time.) That makes the Multiflex an excellent relative value.
There are several aspects of the C1 that make me much prefer it to the Multiflex, despite its extra cost:
I really love the C1’s patented quick release clamp. It operates so quickly and smoothly, and is a remarkable design. And when closed, it is well out of the way. But the Multiflex clamp is certainly adequate, although more bulky and slower to operate. Neither could be accidentally released to cause a camera crash.
The C1’s knobs and levers are easier to work, and do not require extra add-on knobs. Add-ons are too easy to lose and require extra effort to put in place. Swiveling the Multiflex platform can knock off an add-on knob, making it easy to drop and lose.
The C1’s bubble levels are larger and easier to read, although the Multiflex’s are adequate.
The C1’s panning movements are easy and smooth. Multiflex panning is very stiff, but with camera attached, and while holding the camera, panning is easy enough.
The knobs on the Multiflex can get in each other’s way, but not so on the C1.
For example, if the upper platform has been positioned so that the clamp’s knob is next to the platform’s rotational locking knob, then these knobs are too close to each other. It is then difficult to turn the platform rotation knob, and impossible to put the extra large knob on it for extra traction.
Also, you can’t have large knobs on both the upper platform’s locking knob and the adjacent horizontal movement knob.
Aside from pricing, there are a few minor things about the Multiflex that I do prefer:
Its surface texture is smoother and cleaner looking, and does not pick up fingerprints and mars as easily as does the C1.
Its included leather case (Figure 11) is much nicer and more modern than the optional leather case for the C1 (Figure 3). I will use it when traveling with the C1. (Yes, I’m keeping both geared heads. The Multiflex will mostly live in my studio.)
The manual base tilt on the Multiflex opens and closes fully with no hitch. The cube opens fine, but does not fully close easily.
You must carefully check that the cube is indeed fully closed.
I like Multiflex product packaging better.
For me, the Cube would be a perfect device if only:
Its rotations were geared, so that all my compositional movements were geared.
Its manual base tilt did not require extra knob loosening to close.
It had a scratch resistant, more even finish that did not mar so easily.
The Multiflex would be a better competitor if only:
It did not require extra knobs to work as well as the Cube.
Its rotation was not so very stiff.
___________________________________________________________________________________
10. Conclusions
I wrote this review to answer all the questions I had when I first discovered the Cube
– Would it really be better than a ballhead for precise framing? Emphatically YES!
– Does this large-format head make sense for use with a DSLR? Sure it does.
– If I order one, would it be returnable for a refund? Probably, but ask.
– Is there still a problem with the quick release clamp? Seems to have been fixed.
– Would it slow me down too much, compared to a ballhead? Not really.
– Is its optional leather case worthwhile? Not really.
– Are there less expensive alternatives? Yes, the Photo Clam Multiflex.
– If so, how do they stack up? Fairly well.
– And I wanted to see lots of product pictures to help answer these questions. Figures 1 – 17.
There are cryptic answers to some of these questions buried in on-line camera forums, but they are not easily accessible and do not go nearly far enough. Hopefully, this review will help others who find themselves with these questions. Of course the answers given here are just my own opinions and personal bias, so your mileage may vary.
At least for me, geared heads like the C1 Cube and the Multiflex are a joy to use. They turn framing frustration into framing fun. They make me want to use my tripod more. That’s a good thing, as tripod shooting slows me down (I’m often too quick on the trigger!) and often enables me to make better and sometimes sharper compositions.
If you want the very best portable geared head, and money is no object, then the C1 Cube is the clear choice at this time. (This could change in the future as both products keep evolving, and pricing changes.) And it is the original, not a knockoff.
If you want the benefits of a portable geared head, but prefer a better value, then the Multiflex is presently the clear choice.
March, 2010
___________________________________________________________________________________
Paul Richman
Paul Richman has been a professional photographer for a decade. He retired from his first career as a Computer Scientist (Ph. D. from Stanford) with over 20 patents, a dozen articles in prestigious math and computer science journals, and 32 years service at AT&T Bell Laboratories. This technical background prepared him well for his second career as a photographer.
Paul has a permanent gallery at the Millennium Harvest House Hotel in Boulder, and another permanent display at the Sloat Law Offices in Boulder. He has also displayed his photography elsewhere in Boulder, including Wright-Kingdom Realty Offices, and in Beaver Creek Galleries.
All of Paul’s extensive portfolio can be seen on his website at www.PixelsByPaul.com. There you will experience his passion for landscapes, flowers, wildlife, architecture, sculpture, portraiture, studio work, and more. His gallery and displays only show a very small percentage of his portfolio. Paul adds new content to his site weekly, so come often and stay long.
Paul loves to hear from his website and gallery visitors, so do drop him a line.


Elevate Your Vision


Read this story and all the best stories on The Luminous Landscape
The author has made this story available to Luminous Landscape members only. Upgrade to get instant access to this story and other benefits available only to members.
Why choose us?
Luminous-Landscape is a membership site. Our website contains over 5300 articles on almost every topic, camera, lens and printer you can imagine. Our membership model is simple, just $2 a month ($24.00 USD a year). This $24 gains you access to a wealth of information including all our past and future video tutorials on such topics as Lightroom, Capture One, Printing, file management and dozens of interviews and travel videos.
- New Articles every few days
- All original content found nowhere else on the web
- No Pop Up Google Sense ads – Our advertisers are photo related
- Download/stream video to any device
- NEW videos monthly
- Top well-known photographer contributors
- Posts from industry leaders
- Speciality Photography Workshops
- Mobile device scalable
- Exclusive video interviews
- Special vendor offers for members
- Hands On Product reviews
- FREE – User Forum. One of the most read user forums on the internet
- Access to our community Buy and Sell pages; for members only.
You may also like


