


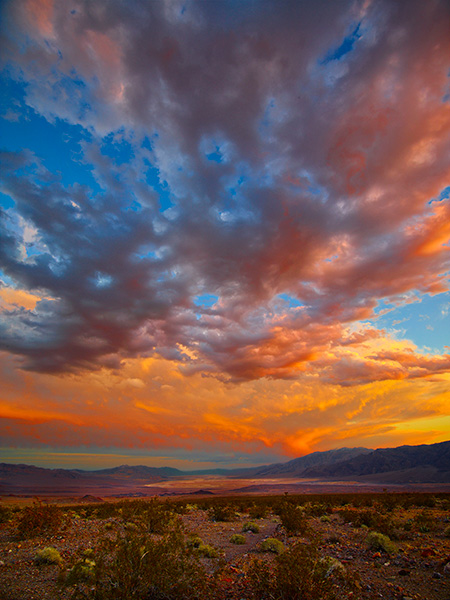
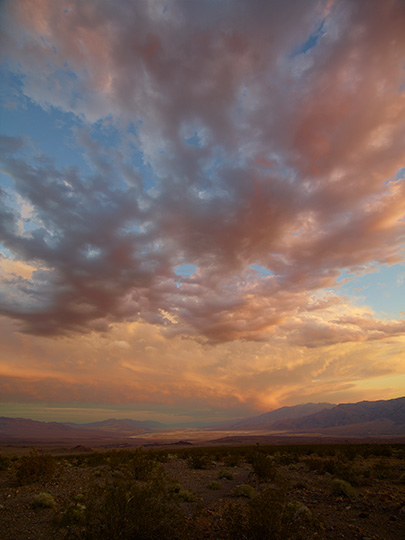
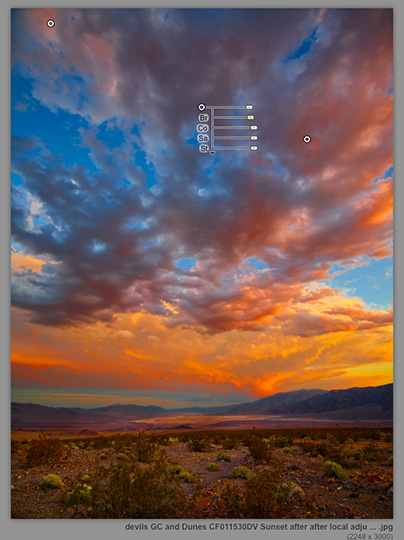
The image above was shot in Death Valley with a Phase One DF camera with a 28mm lens and IQ180 digital back. This article will explain how to maximize the image potential for sunset images like this.
This shot was made during a PODAS workshop. We had just finished an afternoon of shooting in Beatty, NV, and were headed back to the hotel when things began to change quickly. On the way back to Death Valley it became very apparent that we would be in for a great sunset. The problem was we were not in the right place, so it was pedal to the metal to get to a location I knew would give us the shot. Over the pass back into Death Valley and a little ways down the hill I made the turn towards Furnace Creek and pulled over. It was all hands on deck as we poured out of the vans and got set up. The light was changing fast and it was such a dramatic sky, with great clouds and beautiful color.
This was a shot that called for a 28mm wide angle lens to capture the clouds as they were moving overhead. I shot a number of exposures, paying very close attention and making sure I had a good histogram. The Phase One camera gives amazing dynamic range and allowed for a histogram that would give me all the details in highlights as well as shadows. The trick would be bringing all the image potential out in RAW Processing.
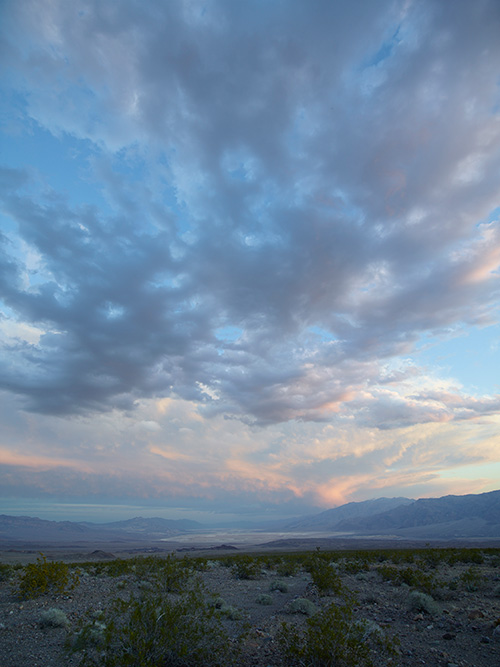
Once the RAW files were loaded into Capture One I saw the image as shown above. This was not the way I remembered the sunset. This image was a result of shooting with Daylight White Balance with the camera compensating for the warm colors in the image.
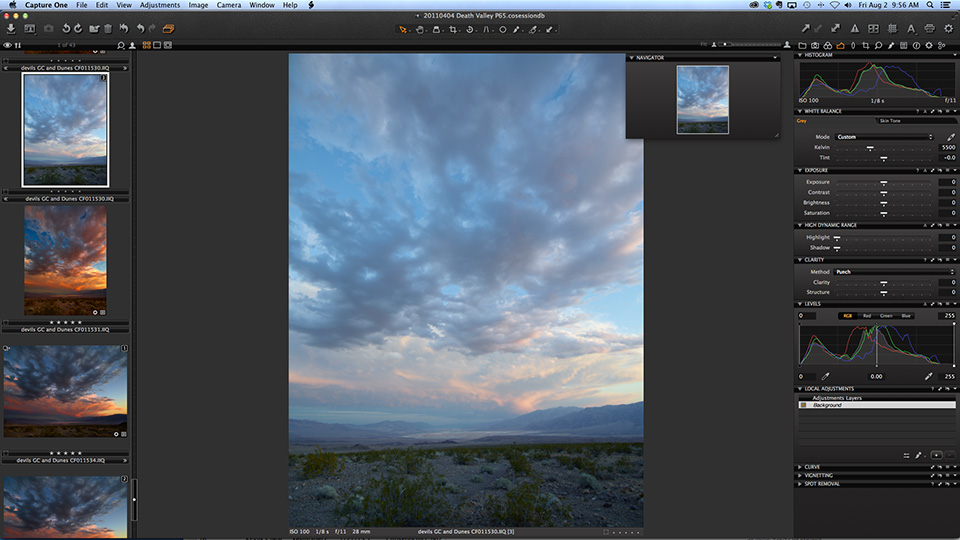
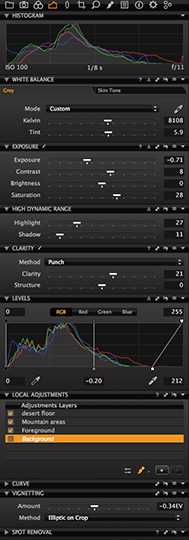
This is what the Capture One window looked like with the original image from the camera in the main preview screen. You can see there is hardly any color, the kind of image many people would just throw out and move on. I used Capture One 7.1.3 to make the adjustments described in this article. You could most likely perform the same type of adjustments in another RAW processor, but Capture One for my uses does a great job at maximizing image potential. You could use Lightroom just the same for the most part to accomplish what I am showing here.
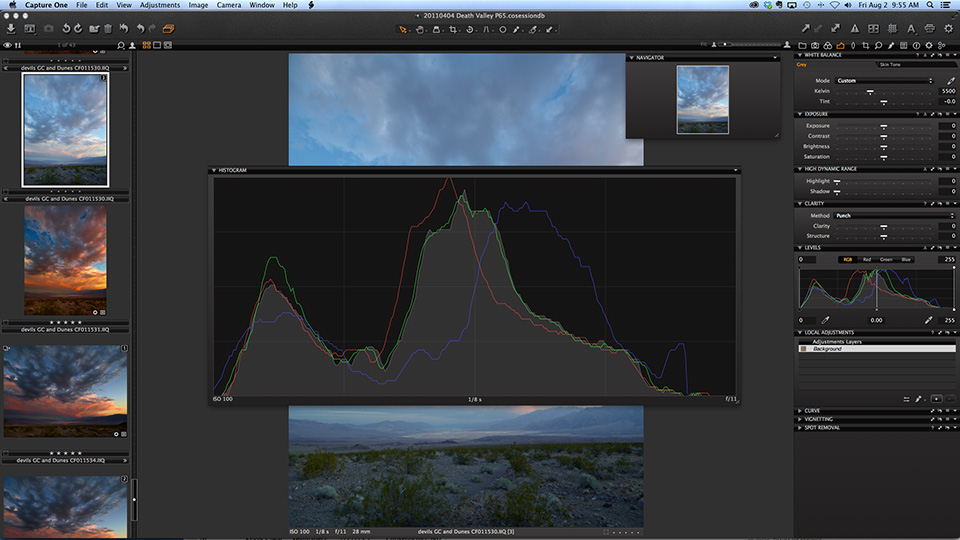
My first step in any image evaluation is making sure I have a good histogram. As you can see in this image the histogram had a foot on both ends with good data throughout: highlights, mid-tones and shadows. Knowing this, I knew how to make this image one that I would want to keep for my portfolio.
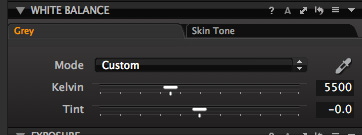

My next step would be to warm the image up a bit and add some magenta. As shown above you can see the starting point on the White Balance slider and the end point.
I then made the corrections shown above. I slightly reduced the exposure, increased contrast and added saturation. Now I know some of you may jump on the too-much-saturation bandwagon but I felt in this case it helped bring out the strong colors of the image.
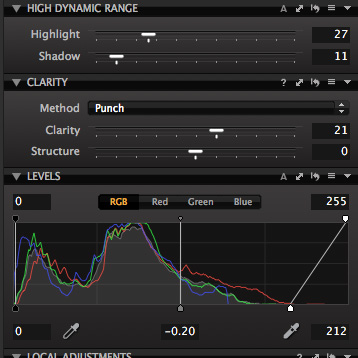
In the High Dynamic Range setting of Capture One I increased the detail in highlights. And made slight adjustments for the shadow detail. I knew I would bring out shadow detail in local adjustments as shown below. A small amount of clarity was added and then adjustments were made using the levels tool as shown above. The levels tool in Capture One allows for remapping of the tonal range. Much like setting a white point and black point for the image.
The image now looked like the above image. Getting closer, but still a ways to go.
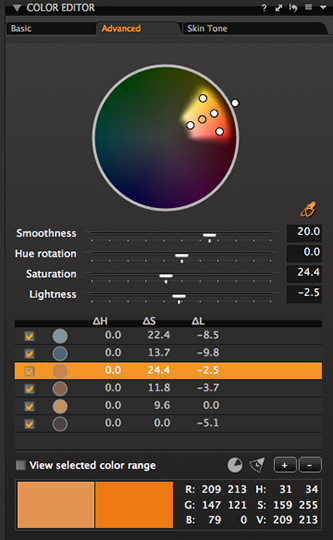
In addition to the HDR tool of Capture One there is also a Color Editor. This is an amazing tool that allows you to select certain colors and the range of that color and then adjust these colors to brighter or darker as well as making adjustments to the saturation. You can select a number of different colors and their ranges and apply these to the image. You can see the color adjustments I made in the image above. Next we start to adjust certain parts of the image.
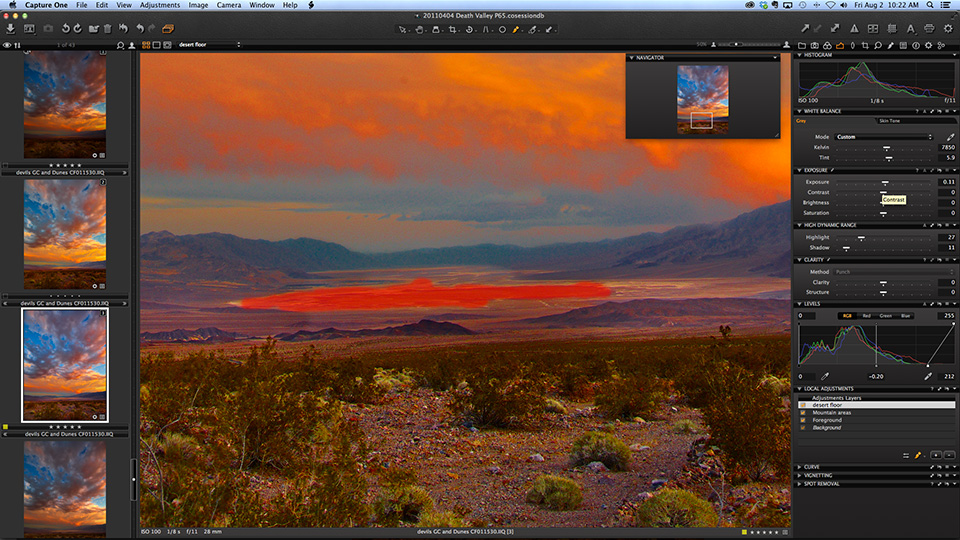
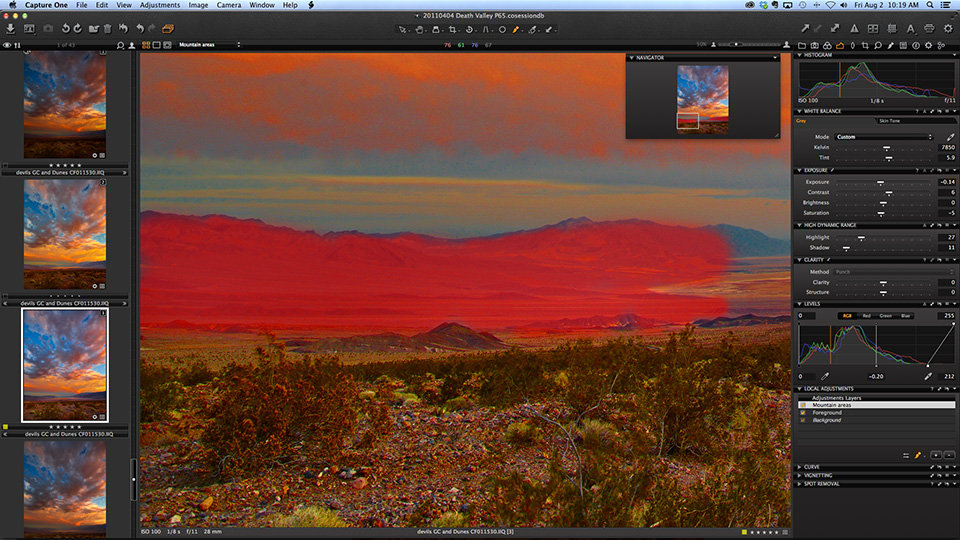
Just as in in traditional printing, there are times you want to lighten or darken or even change the color of certain areas. In the old darkroom days we called this selective dodging and burning. In Capture One we will use Local Adjustments that accomplish the same thing. This tool allows us to paint in regions and then we can make local adjustments like brightness and contrast just in these areas. You can see above some of the regions where I masked areas to be worked on. There is also a very good gradient tool that allows you to select a region like the sky and then lighten or darken the region. I added a gradient layer for the sky, a layer for the desert floor and a region to lighten the foreground. Lastly, I added one for the mountains.
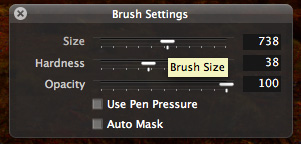
You can also select the softness and hardness of the brush being used and if you work with a tablet you can set this by pen pressure.
After the adjustments were made I did an output to a 16 bit, RGB Tiff file. In Photoshop I opened the file and made some tweaks using NIK software’s Viveza plug-in as shown above. The NIK Tools have become a must-have tool set.

Michael and Kevin Inspect The Final 30×40 Print
Finally, I printed the image to a 30×40 inch size using an Epson 9900 Printer on Epson Lustre paper. Michael and I are shown above viewing the print.
I shoot every image in RAW format. This allows me to maximize the image potential for the gear that I work with. It is crucial to obtain a good histogram. There are a number of articles on this site that will help you understand the benefits of a good histogram. After the images are downloaded into the computer comes the time for knowing how far you can take the image using the data that has been captured. I do everything possible to get the most out of the RAW file before going to the output stage.
I tend to like my images a bit saturated with some punch. As the artist, that is my vision and using these tools allows me to merge the best of both worlds: the way my mind wants to see it as well as the way I did see it.
January 2014


Elevate Your Vision


Read this story and all the best stories on The Luminous Landscape
The author has made this story available to Luminous Landscape members only. Upgrade to get instant access to this story and other benefits available only to members.
Why choose us?
Luminous-Landscape is a membership site. Our website contains over 5300 articles on almost every topic, camera, lens and printer you can imagine. Our membership model is simple, just $2 a month ($24.00 USD a year). This $24 gains you access to a wealth of information including all our past and future video tutorials on such topics as Lightroom, Capture One, Printing, file management and dozens of interviews and travel videos.
- New Articles every few days
- All original content found nowhere else on the web
- No Pop Up Google Sense ads – Our advertisers are photo related
- Download/stream video to any device
- NEW videos monthly
- Top well-known photographer contributors
- Posts from industry leaders
- Speciality Photography Workshops
- Mobile device scalable
- Exclusive video interviews
- Special vendor offers for members
- Hands On Product reviews
- FREE – User Forum. One of the most read user forums on the internet
- Access to our community Buy and Sell pages; for members only.
You may also like


