


1-2-3 Contact
There has been a resurgence in interest by photographers of all stripes in working in Black and White. I attribute this to the growing popularity of digital image processing technology during the past few year. You can read my musings on this subject in the article entitledBlack & White Revival.
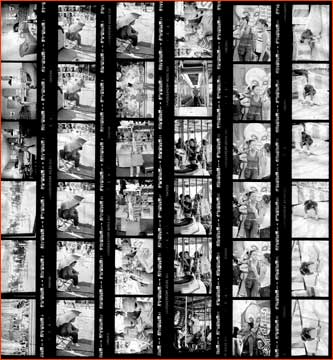
Working with colour transparencies we routinely examine our film under a magnifier on a light box to identify those images that are worth printing. With colour negative or chromogenic films most photographers will get a set of inexpensive machine-made wallet sized prints at the time of developing to use in evaluating results. But for photographers who want to work with B&W film the only alternative is to make a contact sheet.
Since wet darkrooms are quickly going the way of the Dodo bird, and custom labs can charge $10 for a B&W contact sheet, how does one make a digital contact sheet at home?
From Chemical Trays to Flatbed Scanners
In the B&W chemical darkroom the first step after processing, drying and cutting up the film and placing it in sleeves is to make a contact sheet. This required a darkroom, a contact printing frame, a light source ‚ usually an enlarger, trays, bottles, chemicals, etc.
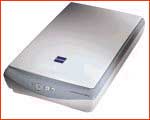
Things are much simpler in the digital darkroom. All one needs is a flatbed scanner. Now, most serious workers do their film scanning with dedicated film scanners, not a flatbed. So if you don’t own a flatbed scanner you might consider buying one, even if it’s just for this purpose. Even the least expensive scanners around (and there are many between $100 and $150) will be perfectly adequate for this task. TheEpson 1240Uis one model that I’m familiar with that will do a fine job.
The Drill
The first step is to place your cut film in clear polyethylene filing sleeves. You likely do this already. Recommended brands includeClear-FileandUltima Print File. Now place the sleeve containing the film on the scanning bed of your flatbed scanner.
If the scanner has a white inside to the lid (like the1240U) then you can proceed to make a scan. If the lid’s inside is black (like theAgfa Duoscan) then you should place a piece of white paper on top of the film sleeve. This is to provide a reflective background.
Settings on the scanning software will differ depending on the scanner used. You ideally want to set the scanner for mono (grayscale) scanning and if the software allows it for a negative image. If you can’t set the software tonegativedon’t worry about it, since you’ll easily be able to reverse the image in Photoshop, or whatever editing software you use.
Set the scanning software to 240 PPI. Higher resolution isn’t needed and will simply create unnecessarily large files. Try and set the scanner’s brightness and contrast controls to give as good a range of highlights and shadows as possible. TheAutosetting will likely do a poor job.
Once the scan is completed and the image is in Photoshop (or whatever software you use) you’ll need to convert the scan to a positive if your scanning software didn’t already allow this. In Photoshop useImage / Adjust / Invert. You’ll likely need to adjust the center (gamma) slider onLevelsquite a bit to produce a decent looking image.
Print It
That’s all there is to it. Size the image to fit on an A4 (8.5"X11") sheet of paper and print it. A glossy paper is best at showing fine detail. You’ll notice that there are many small black specks, particularly visible in white areas. These are from imperfections and minute dust particles on the plastic sleeves. Also, the resolution isn’t terribly high. But since a contact sheet is simply an aid to judging what’s on your negatives this should not be of any great concern. Enjoy!


Elevate Your Vision


Read this story and all the best stories on The Luminous Landscape
The author has made this story available to Luminous Landscape members only. Upgrade to get instant access to this story and other benefits available only to members.
Why choose us?
Luminous-Landscape is a membership site. Our website contains over 5300 articles on almost every topic, camera, lens and printer you can imagine. Our membership model is simple, just $2 a month ($24.00 USD a year). This $24 gains you access to a wealth of information including all our past and future video tutorials on such topics as Lightroom, Capture One, Printing, file management and dozens of interviews and travel videos.
- New Articles every few days
- All original content found nowhere else on the web
- No Pop Up Google Sense ads – Our advertisers are photo related
- Download/stream video to any device
- NEW videos monthly
- Top well-known photographer contributors
- Posts from industry leaders
- Speciality Photography Workshops
- Mobile device scalable
- Exclusive video interviews
- Special vendor offers for members
- Hands On Product reviews
- FREE – User Forum. One of the most read user forums on the internet
- Access to our community Buy and Sell pages; for members only.
You may also like


