A Photographic Expedition to Ethiopia
By Michael Reichmann
Complimentary Article
This article documents a photographic expedition to Ethiopia during early December, 2015. It was organized by world famous photographer Art Wolfe, who I have worked with in the past, and also four other friends, David, Aram, Gavriele and Anthony. We came from the US, Canada, Thailand and Europe.
Our guide was Robel, one of the most experienced in Ethiopia, and a truly nice guy as well. He speaks at least four local languages,
Our goal was to spend eleven days traveling in Northern Ethiopia and in particular the Afar region bordering on Eritrea. This is an area not frequented by tourists, and you’ll soon see why.
Who – What – When – Where – Why?
Our plan was to spend 11 days in-country, beginning in Addis Ababa, then Lalibela (stone churches), Makelle, Hamed Ela (Danakil Desert), Dallol Salt Lake, Erta Ale Volcano, Erta Ale salt mines, Semera, and the Awash National Park.
We were to be camping in the desert for four of the eleven days.
My route to Addis turned out to be much easier that I had expected. I live in Toronto, Canada, and I found that Ethiopian Airlines flies non-stop between Addis and Toronto twice a week using Boing 788s. It’s 13 hours going east and 16 hours westbound, but better than the 24-32 hours that other routings and connections offer. Decent headphones, two or three movies, a few scotches and a sleeping pill helped.
Day 1 – Addis Ababa

My flight from Toronto to Addis was to have been 13 hours, non-stop. But over mid-Atlantic another of the passengers became ill (it was likely a heart attack), and after being attended by a couple of onboard doctors the decision was made to return to the closest place in Canada so that he could receive immediate medical attention.
We landed in Gander, Newfoundland, and this whole process then added another four hours to the flight. While I’m at it, I want to add how impressed I was with Ethiopian Airlines in every regard. Really first rate.
The rest of the gang all arrived within about 12 hours of each other, having originated variously in Bangkok, Seattle and London. No one else had any travel adventures, and all arrived in great spirits.
Our first day was intended as a buffer day in case of flight delays, and to help everyone recover from jet lag. But, we were all eager to get out shooting, and Robel, our guide for the expedition, took us to the Marcato, which Wikipedia describes as … “the largest open air market in Africa, covering several square miles and employing an estimated 13,000 people in 7,100 business entities.” It was overwhelming.
Like most third-world outdoor markets it offers incredible street shooting opportunities, but is not all that safe for foreigners (‘firengi’ in the Amharic language). This is mostly due to pick-pockets. For this reason Robel hustled up a couple of uniformed guards – who are available at the market for just this purpose, and for the most part there were no issues at all.
I would say that with a smile on my face, and an openly carried camera, 80% of the people smiled back and didn’t mind being photographed. Some did, while others started mugging for the camera, asking to have their picture taken. Go figure.

On a technical note, you’ll notice that the two shots seen on this day’s segment were taken with the Sigma 24-35mm f/2 in Canon mount, but on a Sony A7RII. A Metabones IV adaptor was used.
This lens was a last-minute addition and ended up in my bag replacing the Sony / Zeiss 35mm f/1.4. Some tests done just before leaving home showed this lens to be as stunning a performer – as discussed in the various test reports that I have recently read.
This evening was a birthday dinner for one of the expedition members, and then at 6am the next morning we flew to Lalibela, our first in-country stop.
Day 2 – Lalibela
The morning had us leaving our hotel in Addis at 6am to catch a flight to Lalibela. After checking into our modest hotel and having lunch we went to the first of Labella’s stone churches.
If you are unfamiliar with these hand-hewn churches and their role in history and the Ethiopian Orthodox Church I can suggest this Wikipedia page. They are a Unesco World Heritage site, and one of the most remarkable feats of religious architecture in the world. Entire churches carved out of sold stone, right down to the finest details.
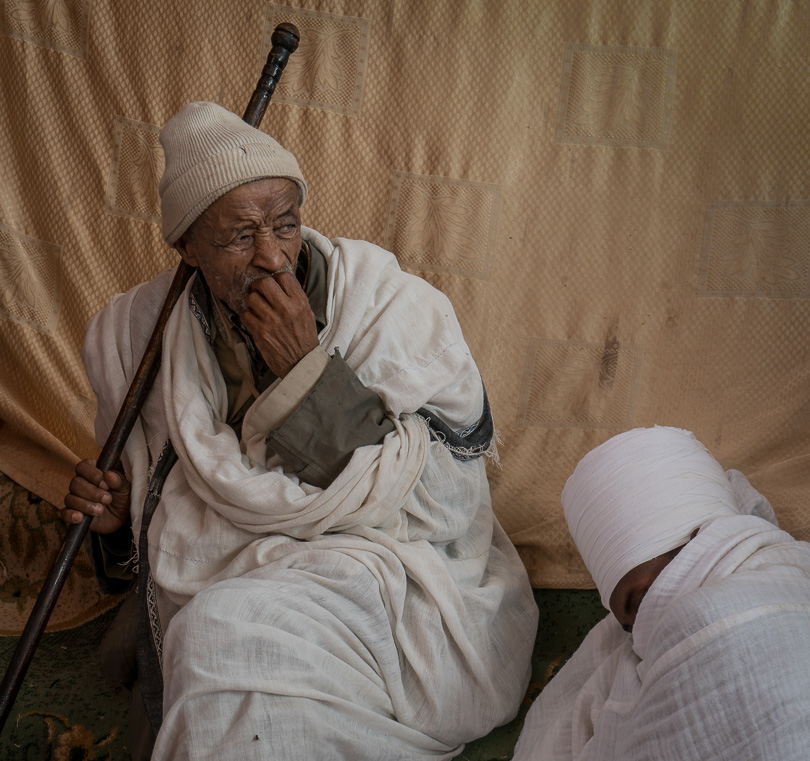
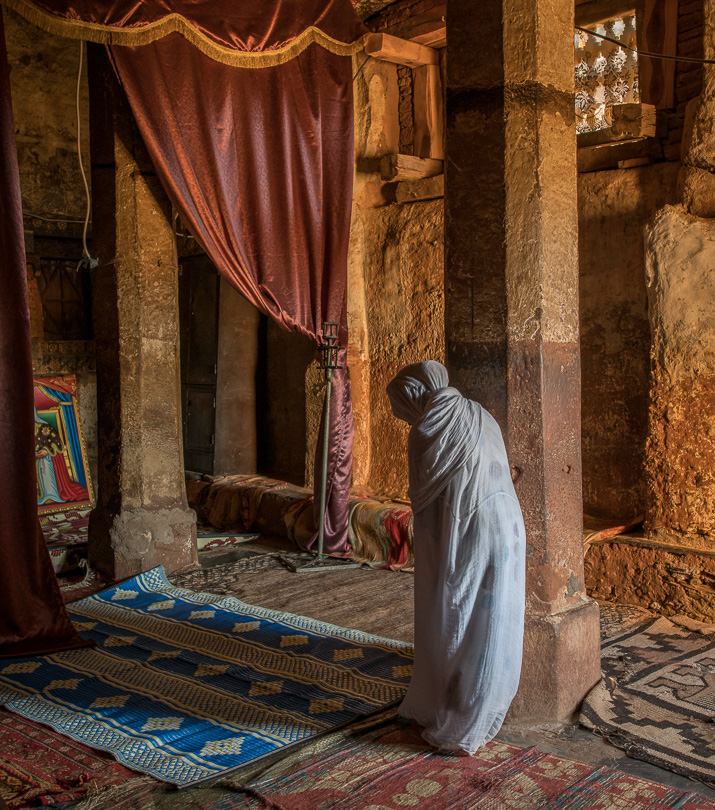
Biete Medhane Alem was as fascinating as I expected it to be. But we were remarkably lucky to find ourselves there for a Christmas religious service, and were able to freely photograph not just from the periphery but also from within.
I found the experience very moving. I saw parallels in the chanting and service procedures of Orthodox Judaism, and quite simply was overwhelmed with the sense of timelessness that the church and the Ethiopian Orthodox service created.
I have placed just a couple of images from that afternoon here, including in a book which I am planning.
Day 3 – Lalibela
Our second day in Lalibela began an hour before sunrise. We drove out of the town toward a high point that overlooks a large valley. This wasn’t for a sunrise shoot per-se, but so that we could shoot the farming villages and fields below.
Over the next hour we worked with long lenses, observing people walking the paths and trails below to the fields, and also children starting their walk to school, which apparently can be as much as an hour. Rural farm life everywhere in the world can be hard.
Following this we drove down into one of the farm areas and had an opportunity to explore and photograph. Everyone we met was most hospitable.
Returning to our hotel for a late breakfast we then visited another of the stone church complexes.
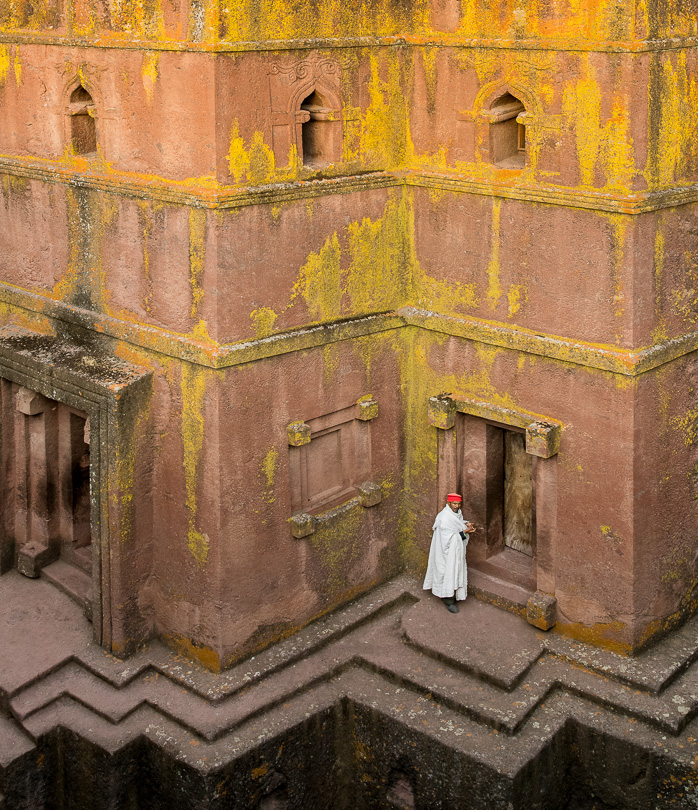
In the afternoon we chilled a bit to recover from our early start and to work on our files, and then a couple of hours before sunset we went to the St. George church, to my mind the most impressive of them all. Hand carved of-a-piece from the solid stone mountain in the 13th Century, it is one of the most remarkable structures that I have ever seen.
Tomorrow we leave Lalibela early in the morning for an all-day drive to Mekelle, the gateway to the Afar region of northern Ethiopia and the Danakil desert, reputed as the world’s most inhospitable place.
Day 4 The Road to Mekelle

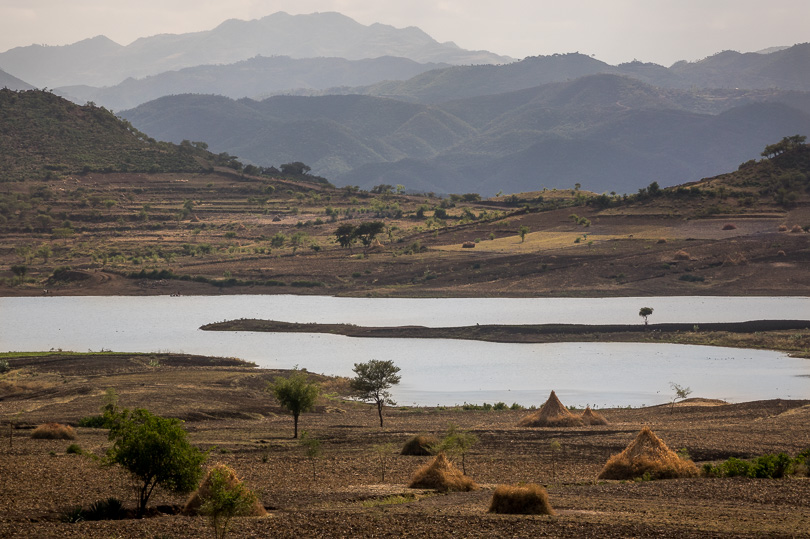
Today was a travel day, most of it spent driving in our Toyota Land Cruisers from Lalibela to Mekelle, the gateway to the Afar region and the desert. There were a few stops, but very little photography though the landscape of the Great Rift Valley is nothing short of amazing. We appreciated the opportunity to just sit back and recover a bit from the intensity of our first three days.
I’ll add parenthetically that from this day until the end of the trip in Addis a week later we had no Internet access. The hotels that we stayed at all claimed to have it, and indeed on our phones and laptops we saw a network, but these were mostly not hooked up to the Internet itself, and if they were it was even too slow for e-mail.
Fortunately, through northern Ethiopia as well as most of Africa cell phone service is very good, even in remote areas.
Day 5 – The Road to The Danakil Depression
On our way out of Mekelle for the drive to the Afar region we stopped at a church which dated from the 4th Century, one of the earliest churches in Ethiopia that is still extant.
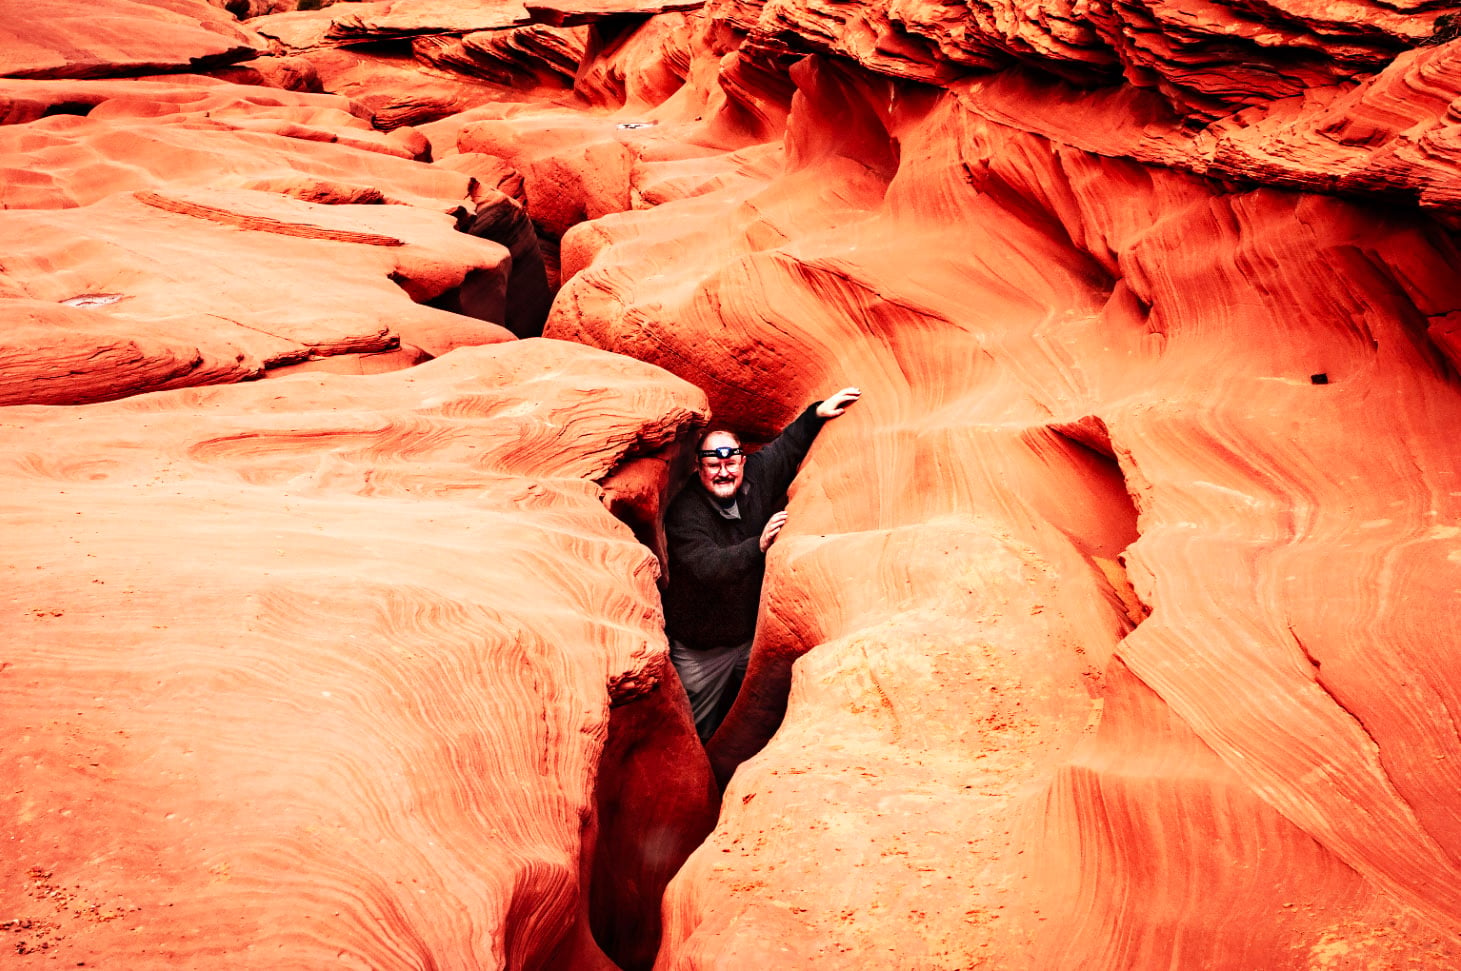
Once out of the cool mountains we descended toward the Danakil Depression, some 400 feet below sea level. We stopped at a small settlement to pick up a military escort and then continued to an area which an issue of National Geographic once described it as “One of the cruelest places on earth”.
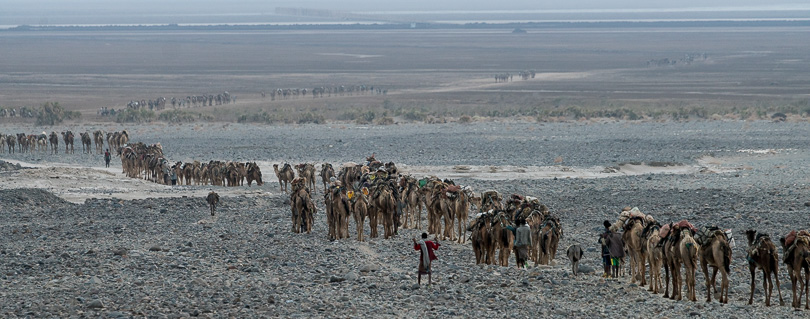
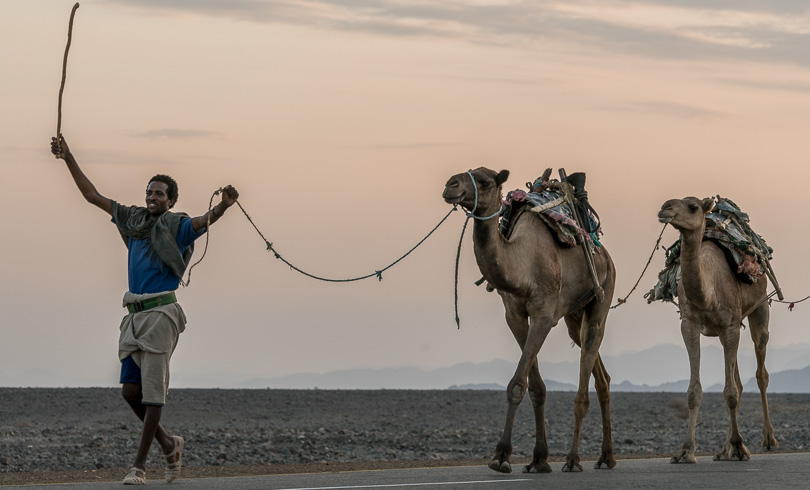
We had hoped to encounter a salt caravan once we got there, and were extremely fortunate in doing so in the late afternoon. The camels numbered in the hundreds and it was a tableau straight out of history. One can imagine almost the same scene happening a thousand years ago and it wouldn’t appear much different.
Day 6 – Hamed Ale Camp
The camp was not great. Robel and his team had done their best, but the location is foreboding and we almost literally felt we were at the end of the world. It was extremely hot, and there was no way to be inside a structure of any sort, so we slept on cots under the stars.
The camp site was unhygienic because of the hard-scrabble surface and lots of goats, camels and their droppings. The flies were legion. But this was the only choice since there is a military camp nearby and it isn’t safe to camp in the open desert.
We awoke at dawn to a caravan passing nearby.
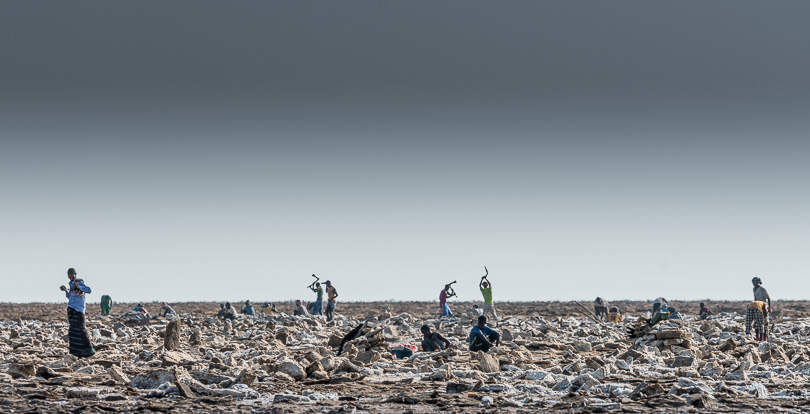
We then spent the day in punishing heat (near 40C and brutally dry) visiting the area where the salt pan is mined. We also hiked to a sulfur spring with toxic bubbling pools of minerals which had almost psychedelic colours, and at the end of the day the edge of a salt lake that looked more like frozen ice than anything else.
Day 7 – An Aborted Attempt to Erte Ale
The day began with all of us in high spirits. We set off along a desert track that would lead us to Erte Ale, the active volcano where we hoped to either hike and ride camels to the summit and spend the night camping at the crater rim.
But not more than an hour from camp our third vehicle, the one with all the camping supplies, became stuck in a sand drift and simply could not be extracted.
Even with the air conditioning running in the Toyota Land Cruisers (one not so well), the near 40C heat was debilitating. Fortunately, we were still within cell phone range of a military installation and we called for help. About an hour later a large army vehicle came and was able to extract our stuck SUV. But, for some reason its engine would no longer start, and it was clear that we would have to turn back.

Some thought was given to pressing on with just two vehicles, but it was decided that this was cutting the safety odds too thin, and that if there was another vehicle failure it could well have been life-threatening.
By the time we got back to the camp a few more of us had become ill, and by late afternoon it seemed as if just about everyone was laid low. In a way, it’s a good thing that we turned back, because we likely would not have been able to make an ascent of the volcano even if we had gotten there.

Day 8 – Back to Mekelle

By the time we woke up at camp some of us had started to feel better while others were feeling worse. It seemed like a combination of heat prostration and a bacterial gut infection. The only thing for it was to head back to Mekelle where we could have a hotel room, clean sheets, respite from the heat and the flies, and a chance to recuperate.

I’ll take a moment here to comment on the safety situation.
Many people had warned us that travel to the northern Afar region was not safe. The US and Canadian government web sites advise strongly against it. But, that information is old.
About a year ago (2014) a two lane paved road was completed to the Dankill. In addition to opening up the area, the government had constructed it to extend its reach more solidly into the region (remember, we were within 15km of Eritrea, which in 1991 had broken away from Ethiopia in a civil war). The road was also built to service a large new potash mining operation built by an Israeli company.
Because of the road and the active presence of the Ethiopian military in the region, there are no longer military incursions in the area, and any disaffected Afarians are dissuaded from hassling visitors. But, it is still a requirement that visitors to this area have a police or military escort, and its reassuring when one does.
Day 9 – Mikelle to Samer
This was mostly a long travel day, driving from Mikelle to Samer, which is located deep in Afar territory, close to the border with Djibouti.
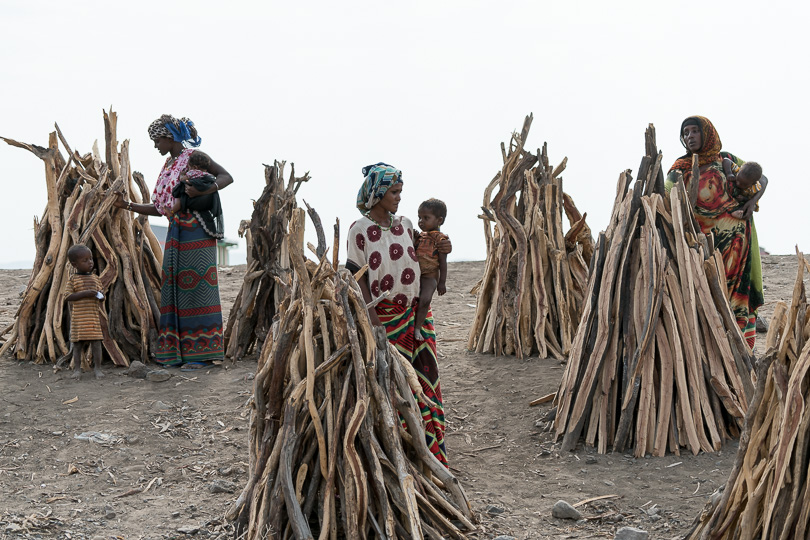
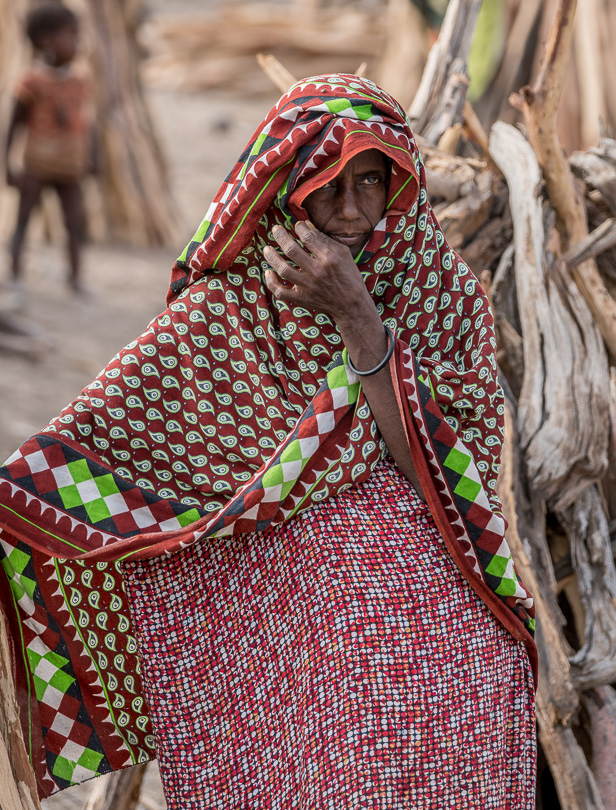
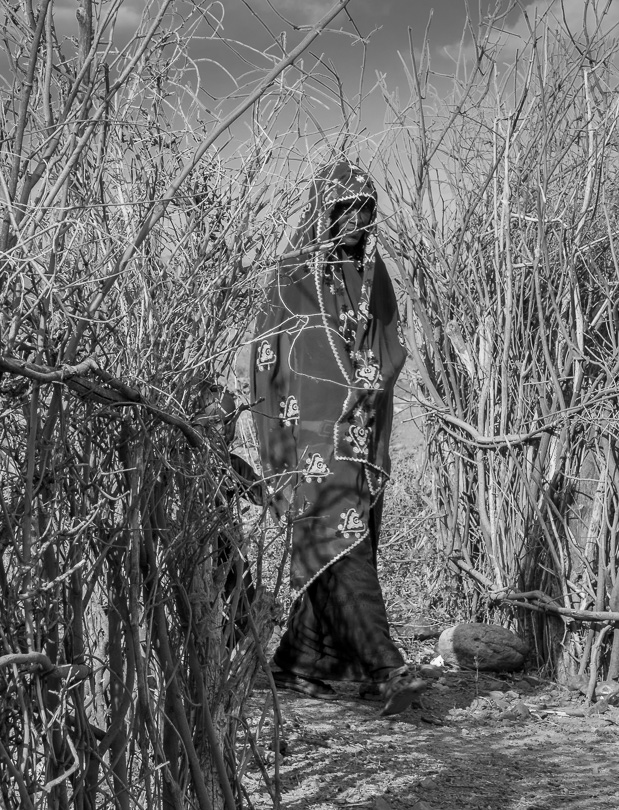
We encountered our first Afar villages, where the people who stick to their traditional nomadic lifestyle are found. In one small village we were told that we were the first Ferengi (foreigners) that had ever visited them.
Day 10 – Samir to Awash
Between the long day’s driving and the turns we would take being ill, toward the end the days started to merge together. Even now, referring to my notes as well as the time and dates stamps on the images, it all tends to blur together.

One event that stands out is an encounter with a water delivery to a road-side encampment. A large water tanker, paid for by the government, was delivering water to a roadside encampment of local Afar people as well as Somali refugees. It was heart-rending.
Summary
There is much more to write, but hopefully this will provide a taste of what a photographic adventure such as this is like.
The images displayed are just those taken by me, Michael Reichmann, and represent only a small fraction of the more than 100 publication-quality images that I was able to produce in nine shooting days.

Top to Bottom
Aram – Gavriel – Anthony – Robel
Elia – David – Art – Michael – Gaga
Equipment Notes and Commentary

Taken with Leica SL and 24-90mm APO-Vario-Elmarit
Put six photographers together and you’ll get seven or eight opinions on equipment choices. Of the six of us, four were shooting with Sony A7RII cameras and a mix of Sony and Canon lenses via Metabones adaptors.
Two shot Canon only, and the ones with Sonys and some Canon lenses had Canon bodies as well; mixing and matching.
My friends Aram, who lives part time in London, had a Sony / Canon hybrid set-up but he also had been able to get the just-released Leica SL with 24-90mm lens for the trip from the Leica store in Mayfair. I personally want to thank the good folks there for making it possible for us to have the SL on the trip. An SL is due to arrive at Kevin’s office within the next few days.

While well equipped with a Canon 5D S/R and a Sony A7RII, Aram gravitated early on to the Leica SL and by the end of the trip had totally fallen for it. On about our third day he lent it to me for an afternoon and I shot about 200 frames with it.
I have to admit that I too became enchanted with the SL. It takes a bit of time to become comfortable with the simple four-button interface, but when I did, and set some customization, I found the camera incredibly responsive.
I’ll simply add that with the world’s highest resolution EVF, a rear touch screen, 11 FPS shooting speed with a decent buffer and superlative image quality, there’s a lot to like, not to mention the incredible built quality and superb APO-Vario-Elmarit lens.
I’ll have a lot more to write about the Leica SL when our review sample arrives. Now all I have to do is figure out how to sell a kidney so I can afford one.
Turning now to my own shooting, using the Sony A7RII, I was very happy with it for the most part. One complaint is that though it can shoot at a reasonable 5 FPS (the 11FPS of the Leica spoiled me) the buffer isn’t big enough, and takes too long to clear before the camera becomes responsive again. When shooting the types of human subjects we were, firing bursts is very worthwhile, because the peak emotional moment can be very hard to predict, particularly with people whose body language is so unfamiliar.

As for lenses, in the end I found myself shooting mostly with the Sony A series 70-400mm, and the new Sigma 20-35mm f/2. The 70-400mm I knew to be excellent, and it didn’t disappoint. The Sigma turned out to be a star. One of the best wide angle lenses I’ve ever used, and in Canon mount with the Metabones IV it worked flawlessly.
Aram was shooting with the new Canon 100-400mm MKII and at one point I tried it side-by-side with the Sony A 100-400m. There’s no doubt in my mind that it is a slightly superior lens to the Sony, but no so much so as to tempt me to get one.
Another highly regarded Canon lens that people are using on their A7RII’s is the Canon 24-70mm f/4. I borrowed one, and during some down time did a comprehensive comparison of it against the sometimes maligned Sony / Zeiss 24-70mm f/4, which I own.
My results show that the lenses are close enough to each other at all focal lengths and apertures to be a quibble, even at pixel peeping magnification on screen.
Another star piece of equipment for me turned out to be the Sony RX10 MKII. Most of the time while we were on the road I sat with the A7RII and 70-400mm on my lap. This proved to be the ideal lens for most spontaneous situations. But I also had the RX10II sitting lens down on the vehicles cup holder, able to cover the range of 24-200mm (eq) when needed. The quality from this little camera always amazes me.
Other than these items there were little by way of surprises. No one had equipment failure of any sort, and there were no gear mishaps.
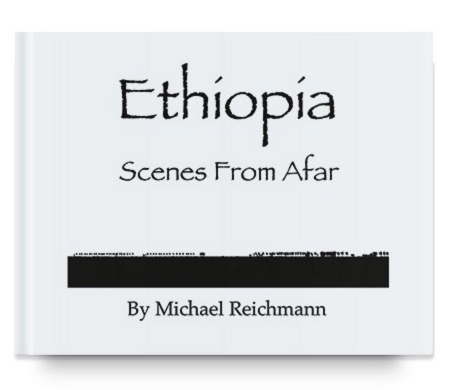
Following this expedition I self-published a book of 27 images. The purpose of this hard-cover book was to share with friends and family some of my best images from this remarkable trip.
I worked with Toronto-based on-demand book printer Pikto. I have had a long-standing relationship with them, and they have published previous books and folios of mine as well as hosted exhibitions of my work in their gallery.
For Ethiopia – Scenes from Afar we used a new cold-press matte fine art paper from Hahnemühle specifically designed for the first time for use with Indigo printers. The quality of the pages is fully comparable to the best individually produced fine art matte prints.
Because several people have requested copies of Ethiopia – Scenes from Afar, together with Pikto I am making a limited edition run of these books available.
This limited edition will consist of 50 books and each one will be numbered and hand signed by me. This limited edition will only be available until February 1, 2016. After that time the book will continue to be available, but will not be part of the signed limited edition.
The cost of Ethiopia – Scenes from Afar is USD $110, or CDN $150. Shipping charges are calculated at the time of purchase and will depend on where in the world you are located.
ORDER HERE
Camera Gear Choices Before The Trip
This section was written before departure, and previously published. I’ll simply note that once in-country I decided not to shoot video, but to concentrate on shooting stills. Anthony shot video of the trip, including with a drone, and this footage will be available here some time in late December.
I currently own two main camera systems; a Pentax 645z and two of the Sony A7 series. I love using the 645z; the big bright OVF and the camera’s handling and the superb all-around image quality. But in the end the Sonys won the selection for this shoot because of lighter weight, smaller size, and versatility.
For the past couple of years the Sony A7 series have become my go-to cameras for general photography, and I fully expect Ethiopia to encompass everything from landscape to wildlife to urban street photography. I will also be shooting video for a documentary.
The new 43 Megapixel A7RII is a swiss army knife, well suited to all of these. For resolution and dynamic range it comes in a slight second to the 50MP Pentax. For discrete urban shooting there’s its available silent electronic shutter and ability to go small with the battery grip removed. And, of course, there’s excellent 4K video when in Super-35mm crop mode, none of which the Pentax offers.
My backup camera will be the Sony 24MP A7II. It doesn’t offer any special advantages over the A7RII, and so likely will be on hand as a spare, just-in-case, and for when having different lenses at the ready without having to change them on a single body offers advantages.
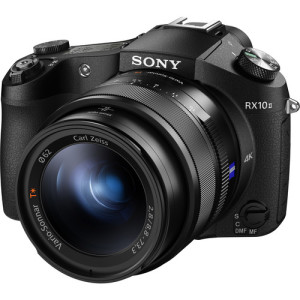
I will also have the new Sony RX10II in my bag. This will have a role in the event that there are dust storms or other conditions where changing lenses is problematic. It offers a Zeiss 24-200mm focal length equivalent f/2.8 lens. It also shoots very good 4K video, has a built-in ND, and excels at slow motion video. The new A7sII does as well, but I don’t own one and likely won’t, as I am satisfied with the A7RII for video, especially when I also have the RX10II for slo-mo.
Lenses
I own thirteen different lenses for the A7 series. I wish I could bring them all. But airline carry-on weight restrictions when flying and bulk restrictions in the Land Rovers means keeping bodies and lenses to a single backpack-style camera bag.
My final lens selection ended up being…..
Sony FE Carl Zeiss Vario-Tessar T* 16-35mm F4 ZA OSS
Rokinon 24mm f/1.4 ED (special use…see below)
Sony FE Carl Zeiss Vario-Tessar T* 24-70mm F4 ZA OSS
Sony Carl Zeiss Distagon T* FE 35mm F1.4 ZA
Sony FE Carl Zeiss Sonnar T* 55mm F1.8 ZA
Sony 70-400mm f/4-5.6 G (A mount using LA-E3 adaptor)
My take on these lenses, most of which I have used extensively over the past couple of years, is that the 35mm and 55mm are super-stars. These are among the best lenses of their type that I’ve ever used. The 28mm is also quite excellent.
The 16-35mm and 24-70mm are reasonably good. Not excellent, but then few zooms are, especially on a 43MP camera. Both of these lenses have had their share of criticism in various reviews, but I have tested my copies and compared them with similar Canon and Nikon lenses, and have little to be concerned about. I do avoid using them wide open when I can, and the excellent low light capability of the A7RII means I rarely have to. In any event, for my use these are outdoor daylight lenses, and are usually used at f/5.6 or f/8 where their convenience trumps any small IQ disadvantage.
For urban and low light shooting I have the Sony 28mm, 35mm and 55mm lenses. The 35mm f/1.4, though excellent, is a bit on the chubby side for discrete work. But, the 28mm and 55mm, along with the A7RII’s silent shutter, are a great combo for low light urban shooting.
The Sony 70-400mm, when used with the LA-E3 adapter has turned out to be a superb lens on the A7RII . This allows the camera’s 399 point phase detection AF to be used. I brought this combo with me on a shoot in Italy in September, 2015 and it performed beyond expectation. I also own the Sony 70-200mm f/4, but because of the extra reach of the 70-400mm this A series lens will be my choice for wildlife in the Awash National Park and for landscape work elsewhere. My Tamron 100-600mm is simply too large to schlep on this trip.
The Rokinon 12mm f/2.8 is a wildcard. It may spend the entire trip in the bag, or it may save the day. When we visit the stone churches at Lalebela and the lava lake at Erta Ale it might just provide a unique perspective on these sites. Or, it could be gimmicky. If I don’t bring it I feel that I could end up kicking myself, so I’ll find a spot for it in my kit.
The Rokinon 24mm f/1.4 ED is a special-use lens for me – doing astrophotography. In the northern Ethiopian desert, where we will be camping for four days, I expect to be under some of the clearest skies on the planet. I won’t be doing shooting with a tracking mount this time out, but rather I expect to do some combination landscape / starscape shooting.
If you do some web research you’ll find that one of the most popular full-frame lenses for astrophotographers for this type of shooting is this Rokinon 24mm f/1.4 ED. 24mm is a Goldilocks focal length for this application. Importantly, the Rokinon has the lowest coma of any similar lens, regardless of manufacturer. Coma is an optical defect that causes circular highlights to become tear-drop shaped. Not a shape you want for your stars. This tends to be most prevalent at wider apertures, which is, of course, what you use for astrophotography.
My tests show that the lens is truly excellent in terms of resolution from f/2.4 onward. At f/1.4 it’s a bit soft in large prints or when viewed on-screen at 100%. At f/2 it’s very good, and another half-stop down, beginning at f/2.4 it’s excellent both center and corners, right through to f/16. It’s also relatively inexpensive for a limited-use lens.
There may sharper 24mm f/1.4 lenses (actually it’s T/1.5), but no WA lens has as low coma. I bought this lens just for combination landscape / starscape shooting for this trip, and if its use works out the way I hope it will you can expect a full review here early in the new year.
I should mention that based on pre-Ethiopia testing of the Sony A7RII and the Rokinon 24mm f/1.4, the so-called 500 rule goes out the window. This rule, is that the longest length of time for a sky exposure at night, without star movement, is 500 divided by the focal length of the lens, So, a 24mm lens should be fine with a 20 second exposure.
No so with the 43 MP sensor of the Sony. It should be called the 200 rule when using this camera, because I found that at 100% on-screen an 8-second exposure with the 24mm is the longest possible before star movement is visible, at last when shooting to the west or east, where star movement is the fastest. Fortunately, the A7RII’s high ISO capability is such that ISO 28,000 is quite usable, and so good dark-sky exposures of the Milky Way should still be possible.
Binoculars

When working in wide-open spaces, such as deserts and mountains, I find a pair of quality binoculars to be invaluable, not to mention pleasurable to use. I currently use a pair of Swarovski EL 10×32 . These are expensive, but as with top-quality camera lenses, first rate binoculars don’t come cheaply.
Over the years I have looked through various binoculars belonging to members of my photo trips and expeditions, and it always seemed to me that Swarovski offered the brightest and most high contrast images. So, a few years ago I bought a pair and have been extremely pleased with them. There are other top binoculars available, such as those from Zeiss and Leica, but for me there’s just something about the feel and the view provided by the Swarovskis that appeals.
Memory Cards
For this trip, I’ll be carrying two 128GB Sandisk Extreme Pro UHS-I SDXC U3 (Class 10) memory cards, and two 64GB cards of the same rating. In compressed raw mode this is several thousand raw images, or nearly 5 hours of 4K video without having to reuse the cards.
Incidently, with regard to the new uncompressed mode on the A7RII, I feel that this has been a bit of a tempest in a teapot. After looking at many hundreds of A7RII images and dozens of test shots trying to duplicate what some people report, I haven’t seen much of an issue. I’m not saying that it’s not here – just that I haven’t seen it.
So, for this reason, on my Ethiopia trip I’ll be shooting in compressed raw in daylight conditions and only switching to uncompressed in tough situations. To use it all the time I would have to bring twice as many cards, spend twice as much time copying files, and need double the drive space if I were to shoot everything uncompressed. On a day trip, no big deal. But on a long adventure such as this I don’t feel that any advantage that might be offered is worthwhile.
Tripod and Head
Flying half way around the world with a lot of other gear, and then likely spending much of the trip doing extensive hiking, means having to compromise when it comes to the tripod and head. I would have liked to bring my Really Right Stuff TVC-34L tripod with ARCA SWISS C-Cube head. This is the King of tripod systems. But, instead I settled for a minor Prince, the Gitzo 1542T with an Acratech head. There’s no point in a big solid system that has to stay behind in the Land Rover and at camp.
Filters
I’ll have three types of filters with me… UV filters on all lenses as protection (especially against dust and sand in the desert), polarizers in all required sizes, and variable neutral density filters for shooting video.
Audio Gear

For making audio notes and for recording “wild sound” for my video documentary I will be using an older Olympus LS10 audio recorder. (The current model, shown above, is the LS14). I use this for recording interviews and also ambient sounds, and street music – which makes great background audio for documentary footage. It lives in my vest pocket whenever I’m on a shoot.
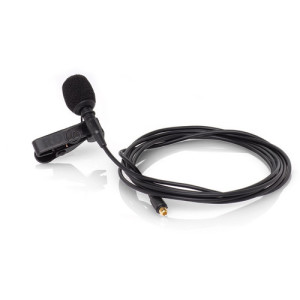
I also use a Rode Lavaier microphone along with my smartphone. This is much preferable to using a hand-held mic and separate recorder when doing stand-up commentary in-camera for videos. The iPhone is capable of excellent quality audio quality recordings when using Rode’s app with this mic, though there are similar apps available for Android.
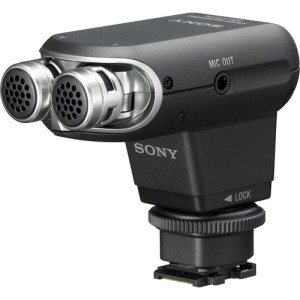
For use on-camera I have the Sony XYST1M shoe mount microphone. I like to use this on Sony cameras for ambient sound because it doesn’t require a dangling cable as it connects audio via the smart shoe. It is also powered by the camera via the smart shoe.
Flash
I hate on-camera flash. For the type of photography that I do I rarely use flash at all. I had a small studio flash set-up for years, but when I moved a year ago I gave the system to a friend who does serious portraiture.
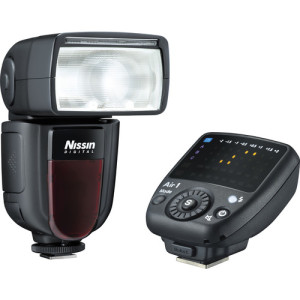
But a flash of some sort is a necessity and so I replaced it with the Nissin Di700A Flash Kit with Air 1 Commander, for use on those odd times that a bit of fill light or a kicker is needed. I also expect to use this for light painting when doing some night landscape shooting.
Remote
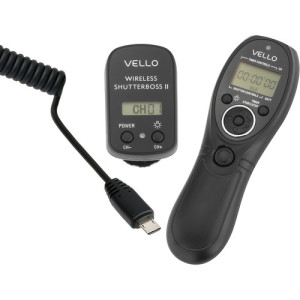
The best wireless remote and intervalometer that I’ve found for Sony cameras is the Vello Wireless ShutterBoss II. This is a three-in-one device which offers an intervalometer, as well as wired or wireless remote capabilities.
Bags
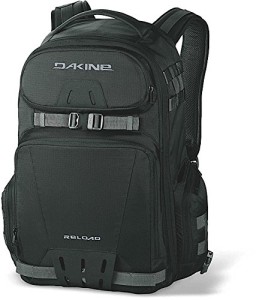
Camera bodies and lenses fit in an airline carry-on-legal camera backpack, the Dakine Reload 30L. My other piece of carry-on is a rolling briefcase, the Targus Metro Roller. This holds my laptop and just about everything that either must be in my carry-on, or which needs to be.
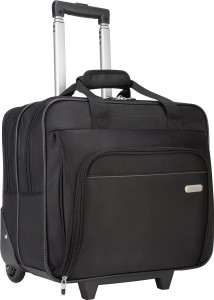
I like this combination of bags, because the backpack simply gets attached to the telescoping briefcase handle for navigating through airports. The Targus will fit under the seat, and the Dakine in the overhead.
Clothing and everything else goes into a large rolling duffle bag.
Special Gear
Batteries / Chargers and Power Supplies
As you’ll read below, there will be a four day period when we will be camping in the desert, and on one of those days we’ll be hiking to the top of an active volcano and spending the night there. This means almost two days without access to battery charging.
Otherwise, the vehicles have generators, so chances are good that we’ll be able to charge all of our camera batteries, laptops and other devices in the evenings, or in the vehicles during the day.
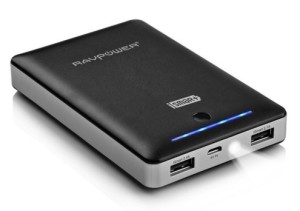
Nevertheless, and even with a total of eight Sony camera batteries, I still felt the need for backup power, so I purchased a RAVPower 13000 external battery. It’s worth noting that the Sony A7RII, which will be my main camera body, can be powered via USB, and so a device like this can be used to keep the camera going. This would be just the thing for long time-lapse sequences.
Note though that these A7 series cameras can not be charged via USB if the battery grip is attached.
Computer and Drives
These days, a nature photographer without a laptop is like a turtle without a shell. I’m currently running a mid-2012 15″ Macbook Pro Retina, with a built-in 500GB SSD drive, 2.6Ghz i7 processor and 16GB of main RAM. Though it’s now more than three years old, Apple has not brought out anything that does the job better, at least for my needs.
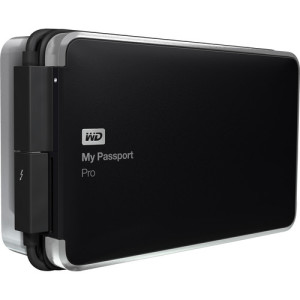
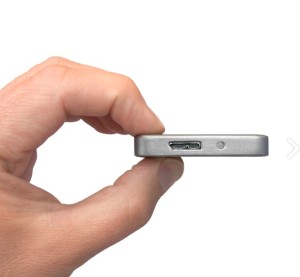
For this trip my main drive will be a WD 4TB My Passport Pro Portable RAID Storage Drive. This drive can be configured in RAID 1 for redundancy, and also RAID 0 for speed. I use it in RAID 0, which means that the two 2TB drives are stripped, and appear as a single fast 4TB drive. Though I don’t expect to need all 4TB, I may do some video editing while on the road, and rendered video files can take up a lot of disk space.
I take care of the redundancy aspect and concerns about the possibility of physical damage or data loss though the use of an Oyen 4 Shadow Mini; a tiny 1 Terrabyte SSD drive.
Yes, it’s expensive, but I feel much more secure using an SSD as a redundant backup than a spinning drive. Also, this drive’s small size means it can always be with me when traveling.
I use Lightroom to import the day’s shoot onto the RAID into date-named subdirectories, and then I copy these subdirectories to the Oyen. This SSD drive always lives in my zippered vest pocket, next to my wallet and passport, while the RAID drive lives in my briefcase. The original SD cards (which are not erased until I’m safely home and backed-up) travel in my camera bag.
Paranoid? Maybe. But stuff happens, and I hope to come home from Ethiopia with some pretty exciting still images and video footage. I’ll therefore do whatever it takes to ensure that they come back with me safely.
Sandwich Bags & Black Electrical Tape
As of mid-2015 the rules about flying with Lithium Ion batteries have changed. Implementation of the rules varies by airlines, but my recommendation would be to check the current status of what’s allowed and what isn’t before you fly with a lot of gear, anywhere in the world.
The new rules are generally simple. No Li-Ion batteries in checked luggage. None. Zip. Nada. You will have to have all batteries with you as carry-on. Some airlines allow them in checked luggage if they are installed in a device. Some don’t.
But if these batteries are inside a device as carry-on, such as a camera – that’s fine. If they are seperate spares, then the rules state that they need to be packaged separately and the terminals have to be covered to prevent shorting. (The reason for the rule is a fear that shorted batteries may be a fire hazard. It has been suggested that missing flight MH370 was downed by a fire caused by shorted Li-Ion batteries).
The simple solution for photographers is to place every spare camera battery that you are taking on the trip in a Zip-Lock style sandwich bag, and have the electronic contacts taped over so as to prevent possible shorting. These then go into one of your carry-on bags.
Apps
There are two apps that are musts for a trip such as this. One is maps.me and the other is Solocator. Maps.me has downloadable maps of virtually the entire globe. Pick the countries that you want and you now can use your device’s GPS to help with navigation. Garmin, for example, doesn’t have a map of Ethiopia, but Maps.me does. The maps reside on your smartphone and no airtime is needed.
Solocator allows you to take a picture with your phone which contains your GPS coordinates, compass direction and date and time. If your camera doesn’t have a GPS function, just take a snapshop when at a new location and you’ll then easily be able to match up where you were with your images – using the map function in Lightroom, for example.
These programs are available for both iOS and Android.
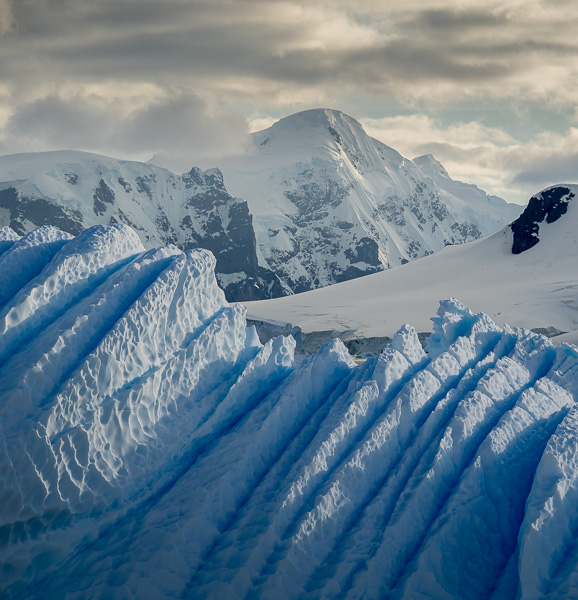
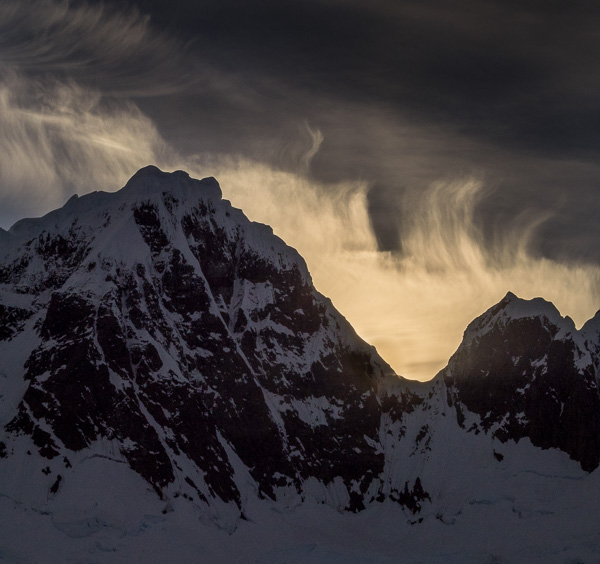
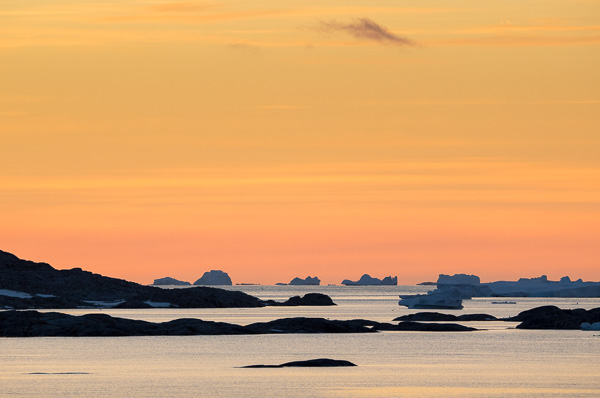
Sat Phone
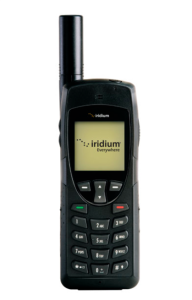
I bought an Iridium 9555 satellite phone some years ago for wilderness travel, especially for my Antarctic trips. It will connect when outdoors anywhere in the planet, and adds considerable peace of mind when one is in a remote location, away from cell service or even land-lines.
I don’t keep mine with an active plan. Instead, I simply buy a pre-paid SIM card when I head off on a trip. A 75-minute card costs $150 from Roadpost; ie, $2 / minute. This is more than enough air time for a one to two-week trip, with brief check-in calls to friends and family, and of course emergency use, if needed.
Dust Protection

Though I own it for camera and lens protection in heavy rain, the E-702 will, I believe, come in handy for dust and sand protection. It weighs almost nothing, and scrunches up into a backpack’s side pocket. It just might come in handy.
Lawn Leaf Bags
Because we will be in desert terrain most of the time, driving, walking and camping in dusty and sandy conditions, I will be bringing a dozen or so large clear plastic bags… the type that are available for collecting leaves for the trash collector.
I will use these to pack my clothes (sand in one’s briefs in the morning isn’t fun), and also to place my camera bags and briefcase in when necessary to protect them from the elements.
I have always found these to be invaluable when traveling in the desert.
Clothing and Other Supplies
I won’t bore you with a basic clothing list, other than to mention that just about everything will be wash-and-wear, no-iron. It’s also important that pants and shirts be long sleeved, (regardless of the heat) for mosquito and sunburn protection.
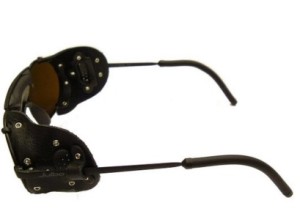
A wide-brimmed Tilley hat is a must (I am Canadian, after all) and also disposable face masks (the kind used by house painters). This is in case we find ourselves in a very dusty situation. In addition, I’ll have a summer-weight sleeping bag along with a thin air mattress. Finally, a high power headlamp as well as a regular flashlight. Hiking poles for our volcano ascent, as well as sunglasses with side protection.
There will be the usual supplies such as sunscreen, mosquito spray, soap and so forth. The things one needs for desert camping. Oh yes, and Starbucks VIA, the best instant coffee, in my opinion, used to get the blood flowing before those pre-dawn shoots.
One Final Hint
After many decades of flying to all seven continents I have learned one “trick” for dealing with that sometimes capricious creature known as an airline check-in agent. The rules about carry-on size and weight are clearly spelled out on each airlines web site. Meet the letter of the law and you’ll rarely have trouble. But even when one does comply I have encountered agents who says. “I don’t care what the web site says… you can’t carry on that bag on this aircraft today”. You can not win that argument, and if you try too hard he or she might call security. You don’t want that.
But there is a simple solution. Wear a shooting vest when you fly. These are very handy for all the small things that you need in-flight such as music player, headphones, book / reader, boarding pass and credit card, passport, a pen for customs forms, and so on.
But they are also your “get out of jail free card” if a check-in agent tells you that your carry-on is overweight. Simply take a couple of the heavier lenses and place them in your shooting vest pockets. There are no rules about passenger weight, and it’s totally legal. The agent may glare at you, but you smile, and carry on. It works.
December, 2015
Michael Reichmann

Elevate Your Vision


You may also like