


© 2004, Glenn E. Mitchell II, Ph.D.
ofThe Light’s Right Studio
I was looking at some of the recent work of Michael Reichmann. I was struck by one of the photos from a fair in Seville. Michael added a diffuse glow to a group of women, and it really added a defining touch to the image. It gave the image a dreamy look, as if the image truly was painted with light. Michael took an excellent image and made it exquisite.
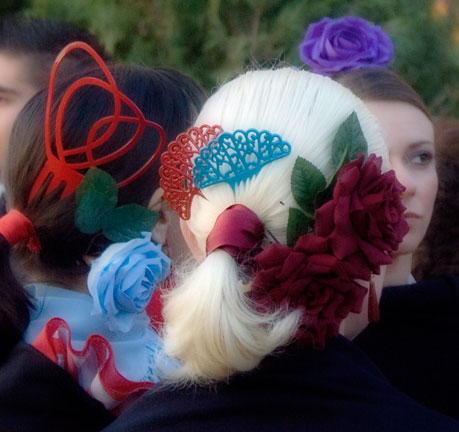
Hairpieces — Seville, Spain. April, 2004
Figure 1. “Hairpieces” by Michael Reichmann. © 2004, Michael Reichmann.
The traditional technique with film for adding a glow was to take a long exposure. Infrared images get their eerie glows in that way. With Photoshop, we can add a diffuse glow quickly and easily.
_______________________________________________________________________________
Adding a Diffuse Glow to Your Photo
Giving your images a diffuse glow with Photoshop is a combination of blurs, layer blend modes, and blending techniques. Rather than blurring the entire image, we instead add a halo to a desired range of tones. We can add richness and shape the tones in an image in this way without sacrificing a lot of image details.
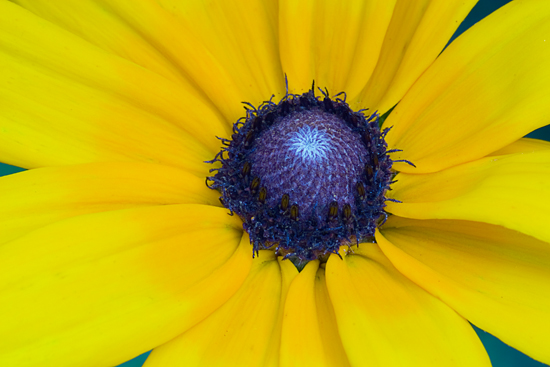
Figure 2.A macro view of a Black-Eye Susan
at Maclay Gardens SP, Tallahassee, Florida.
The Black-Eye Susan inFigure 2is a good candidate for a diffuse blur. Softening the petals will add interest, but it is also important to hold some of the details in the “eye” of the flower.
Adding a diffuse glow begins by duplicating the image up to that point on a separate layer. The easiest way to do this is to use the keyboard shortcut alt-ctrl-shift-n-e on the PC (option-command-shift-n-e on the Mac). This will merge all of the visible layers into the new layer without flattening the image.
The next step is to duplicate this layer. Ctrl-j on the PC (Command-j on the Mac) will make a duplicate.
(If memory is cramped or you prefer to work with fewer layers, you could flatten the image. All you would need to do in that circumstance is make a copy of the Background layer with ctrl-j.)

Figure 3.Adding a diffused glow begins by adding a merged layer for applying a blurfilter effect.
The merged layer is then duplicated.
We need to soften the image on topmost layer. Filter | Blur | Gaussian Blur is a good choice. It applies a smooth blur to finer image details. Adjust the Radius setting to control how much softening is applied. For a diffuse glow, you want a setting large enough to soften the image but not so soft that it obliterates all of the image details. I selected a Gaussian Blur of 25 pixels for this image.
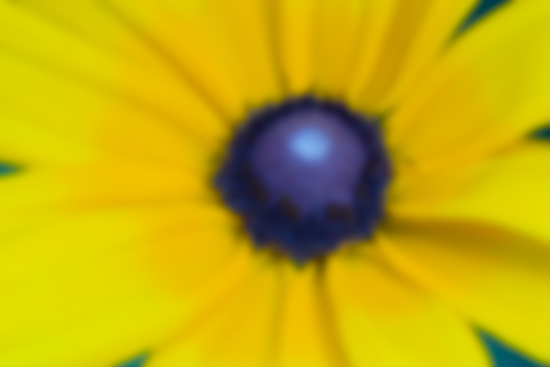
Figure 4. A Gaussian Blur of 25 pixels adds considerable softness to image details.
When you apply a Gaussian Blur, the details tend to spread out as they soften. This is the source of the halo. When the Gaussian Blur layer is blended with the underlying layer, details will soften and a halo will develop.
The next step involves a creative choice. You need to select a Blend Mode for the Gaussian Blur layer.
• Darken or Multiply blends will darken image details while also softening features and adding a halo. Ideal for soft, expressive shadows.
• Lighten or Screen blends will lighten the image instead. Perfect for adding high key or highlight glows.
• Soft Light and Overlay will add contrast and saturation. This is my preferred blend for landscapes and still life.
I decided that the image of the Black-Eyed Susan inFigure 2would benefit from an additional boost in contrast and saturation, so I applied an Overlay blend.
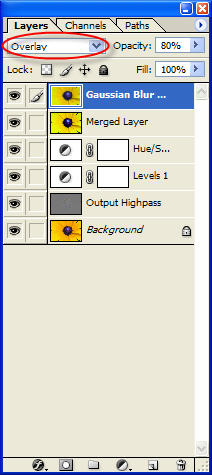
Figure 5.The Layers palette after applying a 25 pixel Gaussian Blur
and setting the layer blend mode to Overlay.
The Overlay layer blend gave the petals a more dramatic personality. The yellow tips developed an almost-buttery appearance, both in color and texture. 100% opacity was a bit too much. So I backed off a bit and reduced Opacity to 80%.
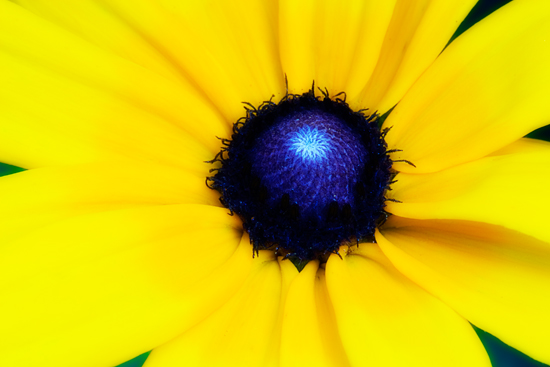
Figure 6. The petals have taken on a creamy, soft appearance.
Unfortunately, shadow detail was also lost.
If all we wanted to do was soften the image generally, we could stop right here. The secret to adding a diffuse glow, however, is limiting the halo to specific tonal areas. A B&W image of a baby, for example, might benefit from a “high key” glow that is applied only to the highlights, perhaps reaching down into the brighter one-quarter tones.
I was pleased with the petals inFigure 6.There is a noticeable loss of sharpness in the “eye” of this Black-Eyed Susan, however. I went to a lot of trouble to capture a lot of detail there. I used a Canon 180mm “L” Macro lens at a narrow aperture (2 sec. at f/18) to get sharp details and lots of depth of field.
Some might prefer the more diffuse “eye.” I wanted more of the original detail to “punch through.” My solution was to adjust the Blend If sliders for the Gaussian Blur layer.
_______________________________________________________________________________
Using Blend If to Dampen Your Glow
There are four sliders on the Layer Style dialog that receive little attention in most books on Photoshop. They are the Blend If sliders. Some books do not even mention them at all.
To access them you need to open the Layer Style dialog. You can do that in one of three ways:
• Double-click a layer thumbnail. (For an adjustment layer, double-click on the layer to the right of the layer name.)
• Choose Layer | Layer Style | Blending Options on the main menu.
• Choose Add a Layer Style | Blending Options from the Layers palette menu.

Figure 7. The “Blend If” sliders.
The Blend If sliders let you control which pixels from the active layer and from the underlying visible layers will appear in the final image. You can also define a range of partially blended pixels to smooth the transitions between blended and unblended areas in your image.
You use the black and white “This Layer” sliders to specify the range of pixels from the active layer that will blend with the visible layers below. When you drag the white slider toward the center, pixel values from active layer to the right of the slider remain unblended. They are ignored. If you instead pull the black slider toward the center, pixel values from the active layer to the left of the slider are ignored. This lets you limit an effect of the active layer to the shadows, the midtones (by pulling both sliders towards the center), or the highlights.
If you alt-click on a slider (option-click on a Mac), the slider will split in two. By separating the two halves, you can define a range of partially blended pixels.
To help explain how the Blend If sliders work, I created a B&W wedge. Then I duplicated it and flipped it 180 degrees, copying the reversed wedge back into the original image as a new layer.
Figure 8. A B&W wedge for testing how the “Blend If” sliders work.
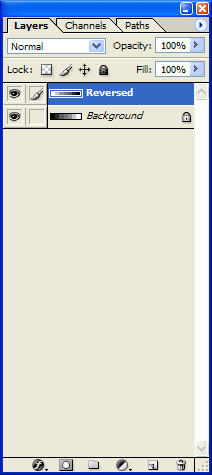
Figure 9.The complete test harness for comparing various “Blend If” settings.
With the “Blend If” sliders set at their default, every pixel in the active layer is subject to blending with pixels from the visible layers underneath.
“Underlying Layer” is misnamed. Its black and white sliders determine the range of pixels from all of the underlying visible layers that will blend with the active layer. Its effects are not just limited to the most immediate layer beneath the active layer.
Now, here’s the important point to remember about the “Underlying Layer” sliders! When you move the black slider toward the center, pixel values to left are excluded from blending. You might be tempted to believe this means they are ignored and only pixels from the active layer are used. Quite the opposite happens! Instead of being blended, pixels with those values “punch through” from the underlying visible layers and replace pixels on your active layer. Be careful with the “Underlying Layer” sliders.
Let’s look at a couple of examples. We’ll start with a look at both B&W wedges, where the wedge on top represents the active layer and the wedge underneath represents the visible underlying layers for the image.


Figures 10a – 10b. The B&W wedge on the top represents an active layer . The B&W
wedge beneath it represents the visible underlying layers.
If we pull the black slider for “This Layer” toward the center, from 0 to 50, pixels darker than 50 in he active layer will be ignored. Those pixels are at the right edge of the uppermost B&W wedge above. Since those black pixels go unblended and are ignored, the white pixels from the underlying image show through at the right side of Figure 11. The white pixels were underlying the dark pixels. The resulting B&W wedge has white pixels at both ends.

Figure 11. When the black slider for “This Layer” is set to 50, the shadows in the active
layer are ignored and we get white pixels at both ends.
This is another point where care is required. When you pull a slider and exclude pixels from blending or allow pixels to punch through, those pixels can be completely different from the pixels in the active layer. You are not necessarily replacing highlights with highlights or shadows with shadows, as the example above shows.
If we instead restore the black slider for “This Layer” to 0 and pull the black slider for “Underlying Layer” to 50, the shadows from the underlying layers will “punch through” the active layer and replace pixels in the active layer. We instead get dark pixels at both ends of Figure 12.

Figure 12. The black slider for “Underlying Layer” is instead pulled to 50, permitting the
shadows from the underlying layers to “punch through” the active layer.
By using different combinations of the Blend If sliders and splitting them with alt-clicks (option-clicks on the Mac), you can apply your diffuse glow with surgical precision and blend the effect smoothly.
_______________________________________________________________________________
Back to the Black-Eye Susan
I wanted to keep the diffuse glow away from the shadows, where the image would lose important detail. A quick adjustment to the black “This Layer” Blend If slider added some depth back to the shadows.
When you adjust the Blend If sliders, the result is interactive. You can see the image change in response to the sliders. I zoomed to 100% and watched the detail in the “eye” of the Black-Eye Susan as I adjusted the black “This Layer” Blend If slider. I found that a setting of 55 restored just enough shadow information from the underlying visible layers to add some interest to the photo without making the “eye” nearly so dominant a feature as inFigure 2.
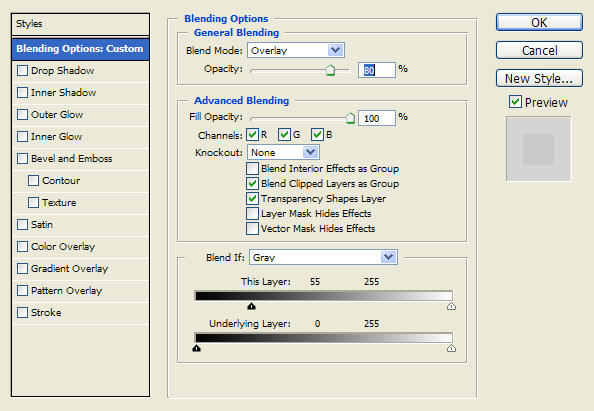
Figure 13. The Blend If settings to restore shadow details in the “eye” of the Black-Eye Susan.

Figure 14. Careful adjustment of the black Blend If slider for “This Layer” restored
some shadow detail that would otherwise be lost when the petals were blurred.
_______________________________________________________________________________
Conclusion
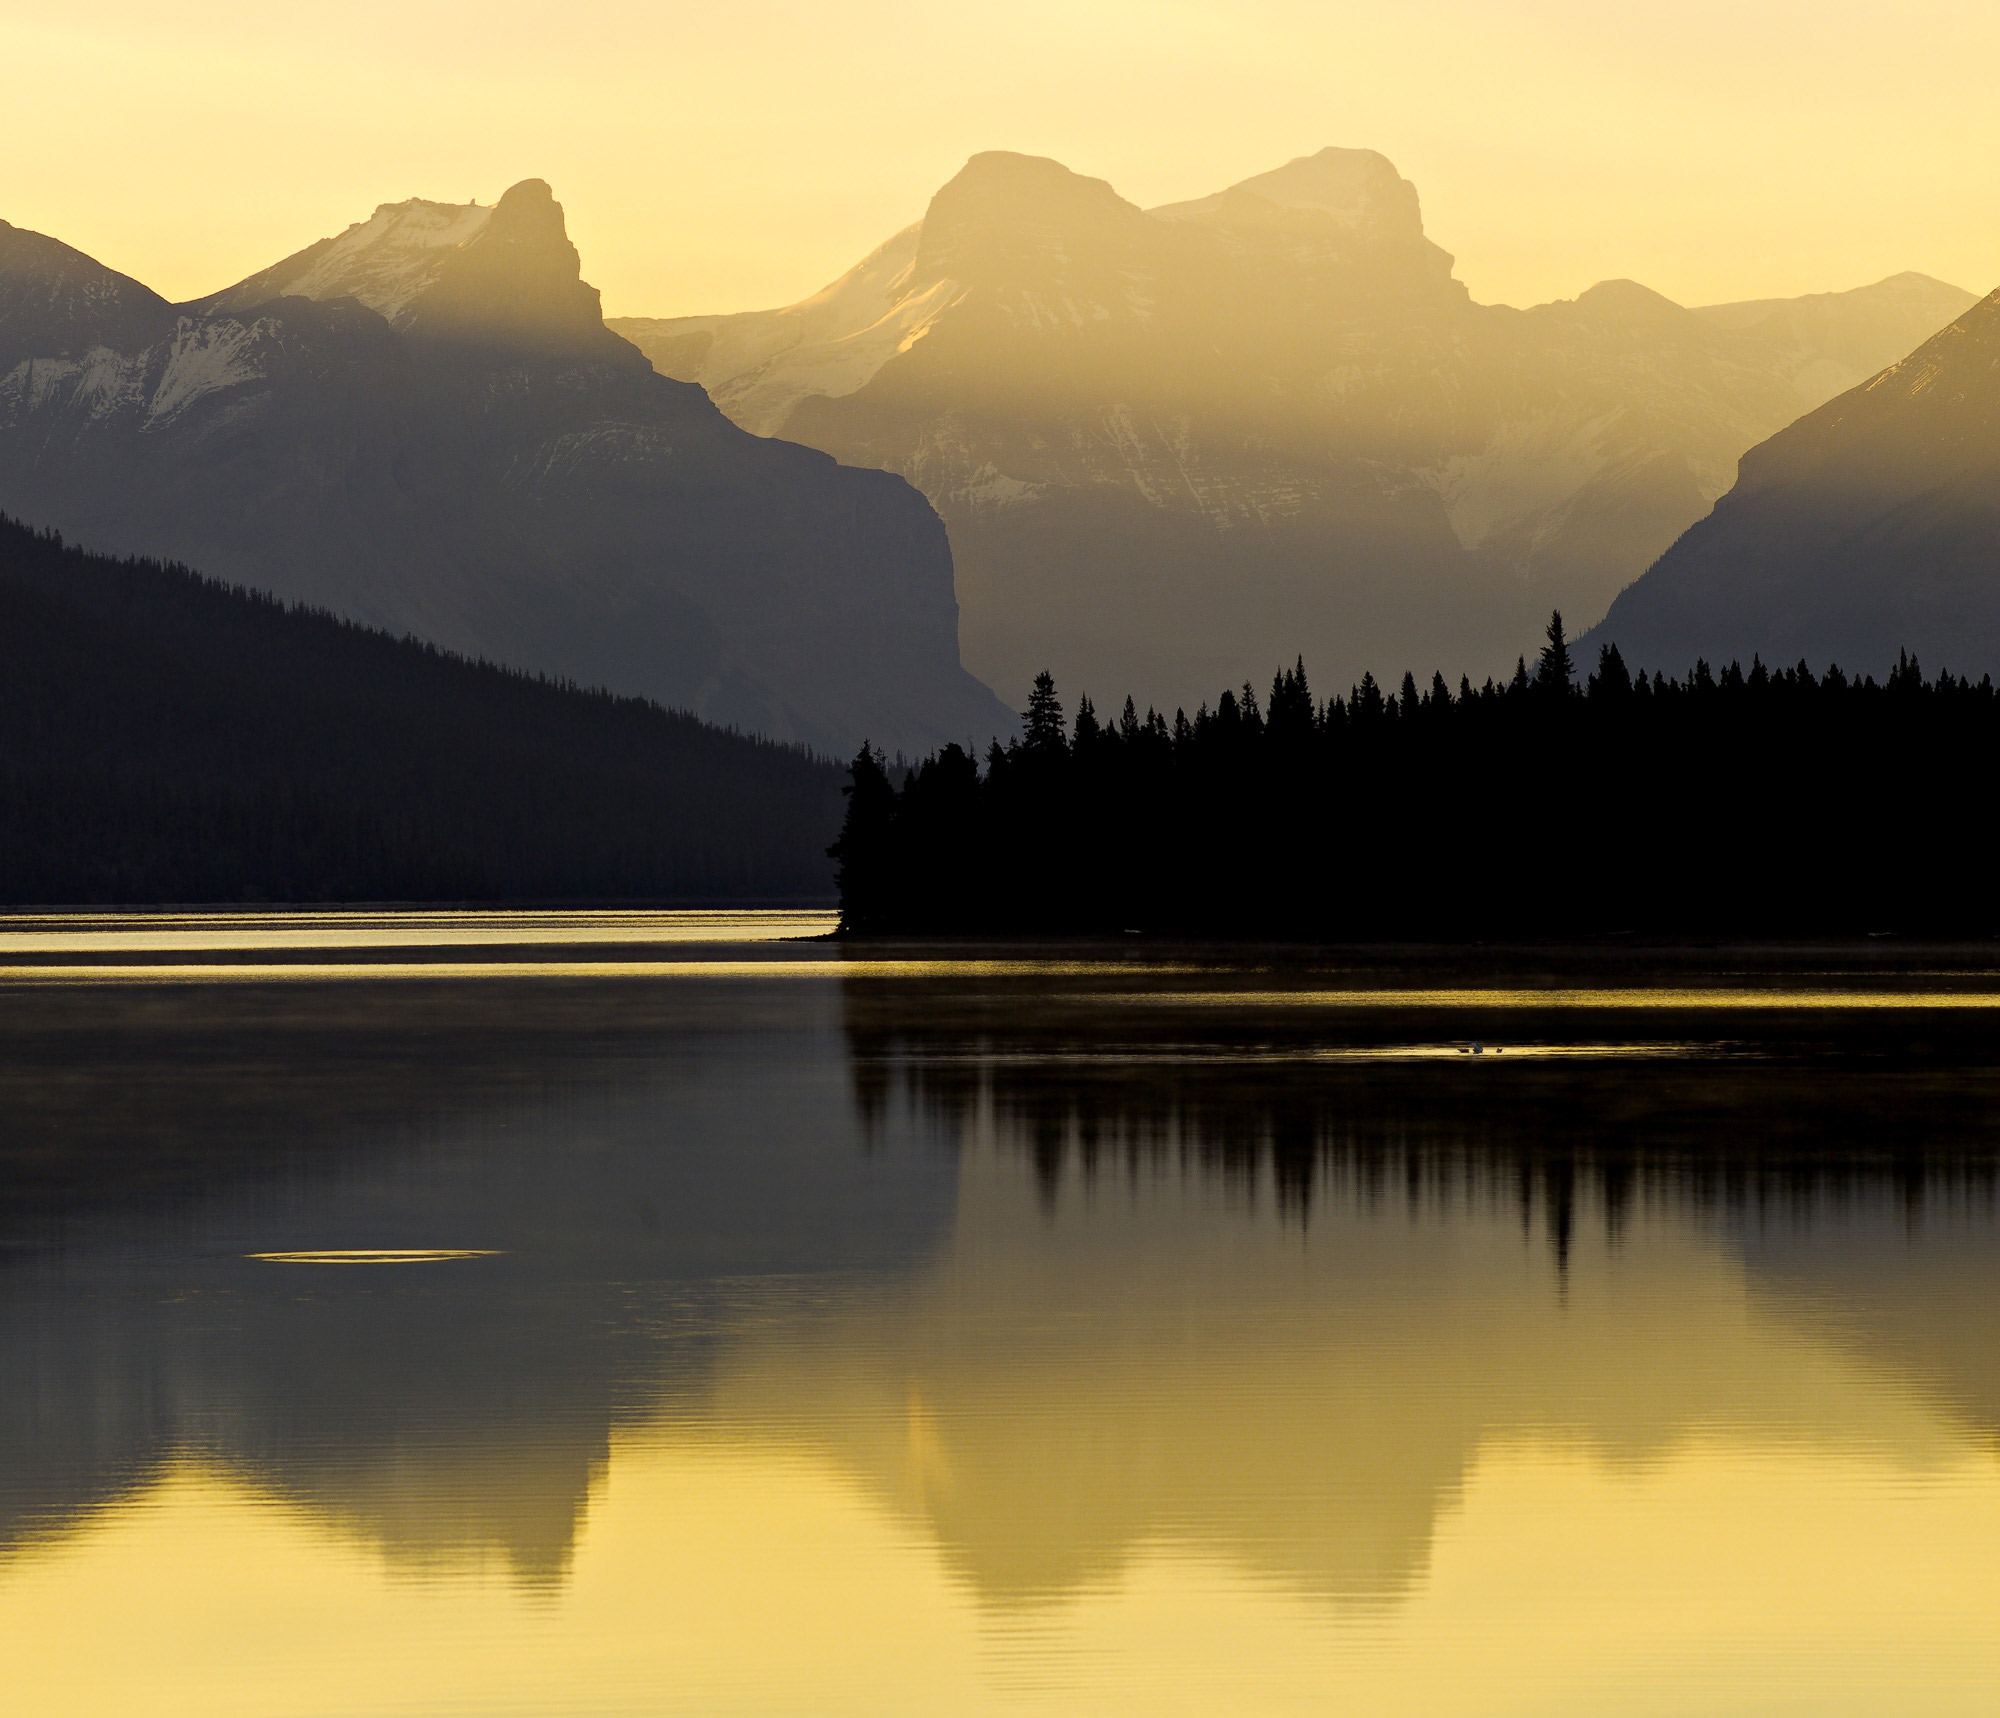
The combination of blurs, blending modes, and blending techniques can be used to add a diffuse glow to an image. Wedding photographers can use the technique to add a romantic touch to images of the bride in her white bridal dress. Portrait photographers can use the technique to soften features and add a glow to highlights or to provide rich, smooth shadows. Landscape photographers can use the technique, to increase contrast and smooth tones.

Figure 15. Sunrise at St. Marks NWR, St. Marks, Florida. 10 pixel Gaussian Blur.
Soft Light blend at 80% opacity. Black “This Layer” Blend If setting at 10.
The technique starts with the application of a Gaussian Blur. The goal is to add richness by adding a halo or aura to the image and still maintain important detail. The next steps are to select an appropriate blend mode and to then adjust the Blend If sliders so important details are preserved. Different effects can be achieved by using different blending modes and Blend If settings.


Elevate Your Vision


Read this story and all the best stories on The Luminous Landscape
The author has made this story available to Luminous Landscape members only. Upgrade to get instant access to this story and other benefits available only to members.
Why choose us?
Luminous-Landscape is a membership site. Our website contains over 5300 articles on almost every topic, camera, lens and printer you can imagine. Our membership model is simple, just $2 a month ($24.00 USD a year). This $24 gains you access to a wealth of information including all our past and future video tutorials on such topics as Lightroom, Capture One, Printing, file management and dozens of interviews and travel videos.
- New Articles every few days
- All original content found nowhere else on the web
- No Pop Up Google Sense ads – Our advertisers are photo related
- Download/stream video to any device
- NEW videos monthly
- Top well-known photographer contributors
- Posts from industry leaders
- Speciality Photography Workshops
- Mobile device scalable
- Exclusive video interviews
- Special vendor offers for members
- Hands On Product reviews
- FREE – User Forum. One of the most read user forums on the internet
- Access to our community Buy and Sell pages; for members only.
You may also like


