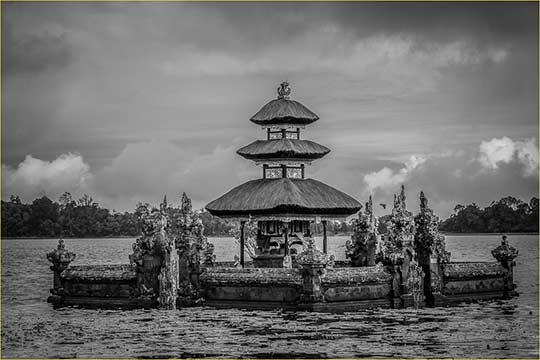
Sacred Site Bali
The majority of image processing for this photo was conducted in Lightroom 4.1
with some final, subtle enhancements in Photoshop CS6.
Back in the day I think it’s fair to say that part of being a good photographer was being able to see in the way your camera and film did. To be able to do this it’s important to understand what’s not possible, by which I mean under what conditions does the camera fail (sometimes dismally) to record the scene in the way our eyes and brain see and remember it.
Think of all those times when the subject in a backlit portrait photographs too dark. Perhaps the sky looks great, but its now hard to discern the identity of the subject.
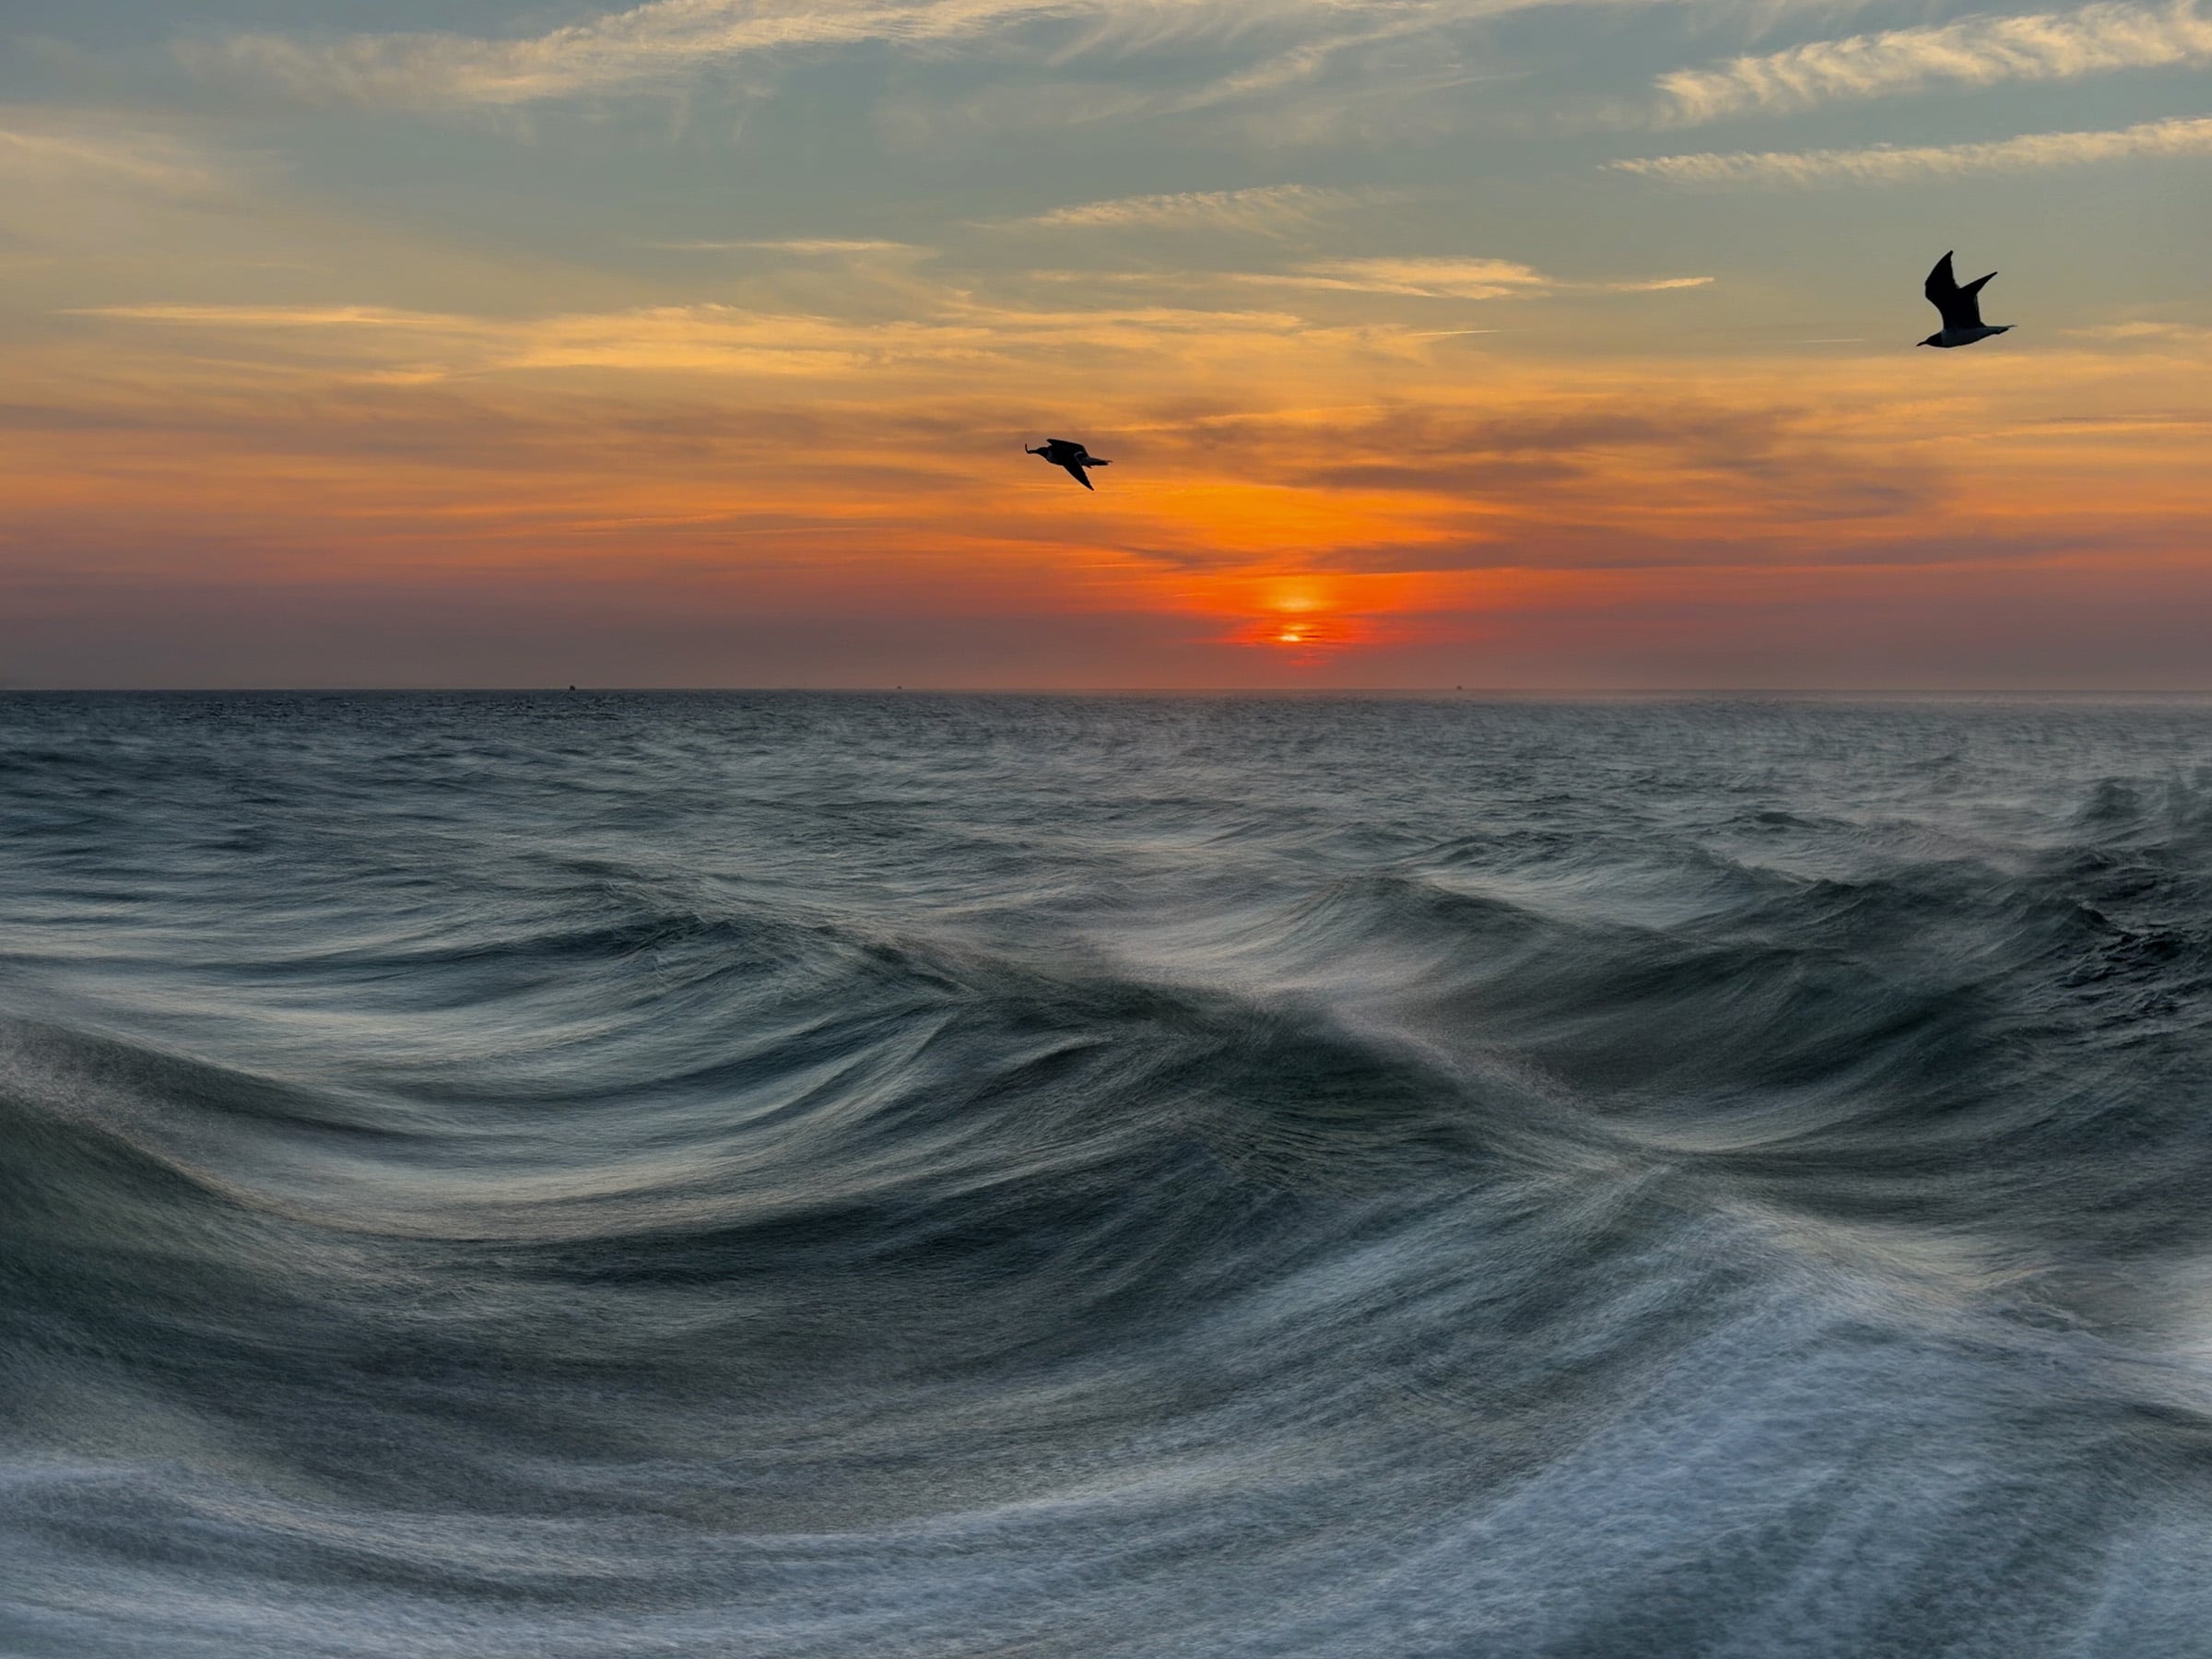
Except in the case of a deliberate silhouette there was just no way I’d photograph into the sun. That was breaking one of the most basic rules of photography. Don’t photograph into the sun is right up there with those other two gems my mum called out to me as I headed out to do my first wedding as an 18 year old.
Do you have a hankie (i.e. pocket handkerchief)? It wasn’t just Bilbo who headed out on his first big adventure without one
Don’t forget to take your lens cap off
You can imagine what a confidence boost that advice gave me. Particularly with a number of the neighbours standing out the front of their houses watching me. In retrospect it was one of those watershed moments, a kind of ritualistic event when I was heading out into the world, no longer as a child. I had to grow up and take control of the situation. And I had to do it NOW.
Successful Silhouettes
Of course it was always possible to make great pictures when photographing into the light. But, to do so, you had to understand that the subject would photograph much darker than expected. A background significantly brighter than the subject would cause the subject to silhouette. So a backlit photo of a young, vigorous tree photographed, in its entirety, on a lovely spring day would be problematic. The tree, including those lovely green leaves, would likely photograph as one large black blob.
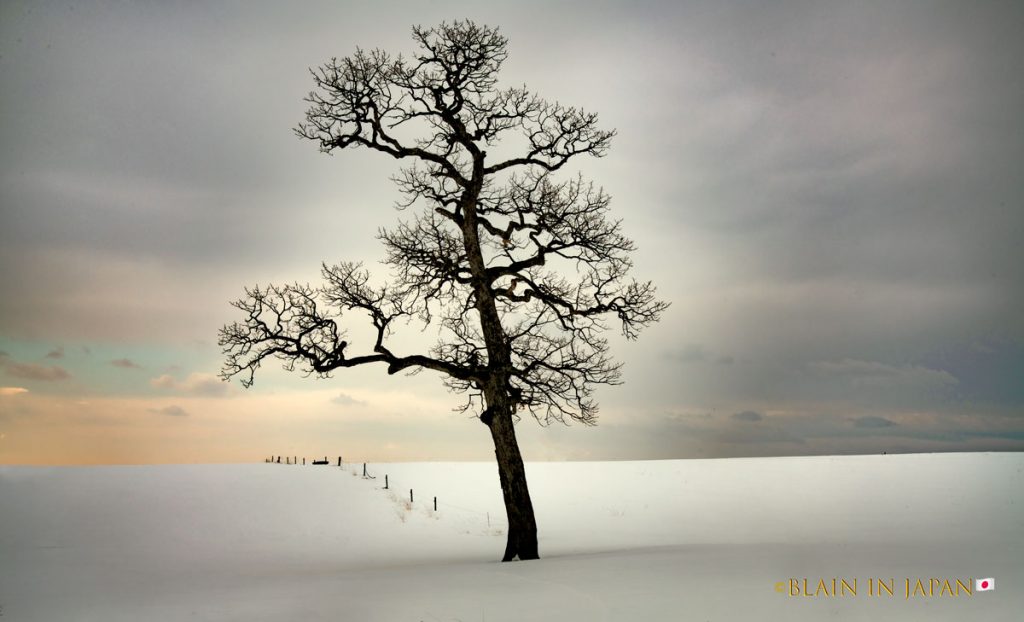
An old barren tree, photographed in the depths of winter, would likely be a better candidate for a silhouette. The graphic nature of the tree’s bare trunk and branches, particularly when photographed against a clear blue sky, would produce a very dramatic result. It is the graphic nature of a subject that determines its success as a silhouette. So think line and shape when composing silhouettes.
The Direction of Light
The direction of light is a critical element in your ability to successfully tell the story you want to tell. The color green sings to us that spring has arrived. It is the color of life and a symbol of renewal. To make best use of color, as an important compositional element in story telling, it’s usually best to photograph with the light behind you. And this is true for all but translucent subjects (e.g. stain glass windows and whisky bottles).
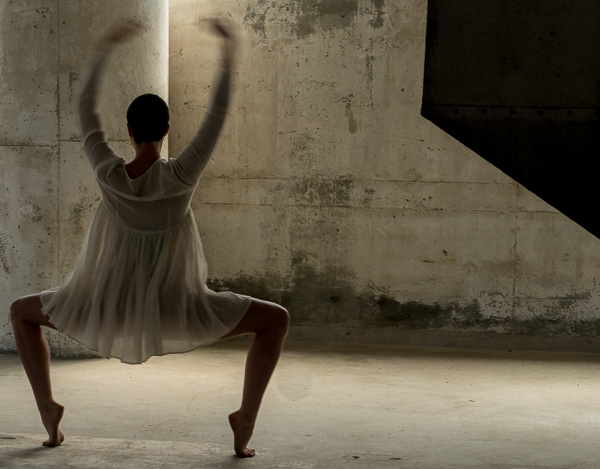
Silhouettes are great. Think of a pregnant mother. Let’s call her Jill. A nude photograph of Jill, made near the end of her pregnancy, is probably best made in silhouette. Front lighting would reveal too much information at a time when Jill would probably prefer to be photographed in a less confronting manner. But turned side on to the camera and photographed in silhouette the image becomes not so much about Jill, the individual at an important stage of her life, but about deeper notions such as motherhood, nature and life. Rather than a portrait about an individual the image, thanks to appropriate posing and backlighting, becomes iconic. And therein lies its power.
But, of course, there are times when, despite not wanting a silhouette, we have no choice but to photograph into the light. This article deals, primarily, with the variety of approaches we can take to making great images under such conditions.
New Technology, New Reality
The good news is that the days of not being able to photograph directly into the light are gone, or at least they can be with the right techniques. Photographing towards the sun, in a way that doesn’t cause the darker foreground to render as black in your final image, is now possible. Here are the options available to you.
Nikon D800/D800e
I believe these cameras represent a revolution in DSLR photography, offering a dynamic range previously only available in medium format digital cameras. The Nikon D800 and D800e cameras incorporate a sensor that is capable of recording subtle highlight texture and, at the same time, maintaining detail in very dark shadows. This technology gives you the ability to photograph under much higher levels of contrast (dynamic range) than is possible with any other 35mm-like DSLR or rangefinder camera currently available. The benchmark has been raised and other manufactures, and I’m sure their marketing divisions, are likely scrambling to catch up.
HDR Workflow
We begin our HDR workflow with a series of exposures combined into a single, composite image. For optimal results, so as to avoid an out of register composite, a tripod is recommended.
The idea is to make a series of images, ideally of a stationary subject or scene, at different brightness levels. This procedure is commonly known as Exposure Bracketing. You might make 3, 5, 7 or even 9 images, depending on the contrast inherent to the scene. The distance between each exposure is likely to be 1 or 2 stops.
Most folks take an overall exposure of the scene, with their cameras set to Matrix/Evaluative or Centre-Weighted Averaging metering. That becomes their base exposure to which they add darker and lighter exposures. It seems that most folk who work within a HDR workflow make a series of 3 exposures at 2 stop intervals. Let’s say your base exposure was 1/125 second at f8 with an ISO of 100. Here’s what you’d end up with.
- 1/500 second at f8 ISO 100 equalling a MAR – 2 stop exposure
- 1/125 second at f8 ISO 100 equalling a MAR (base) exposure
- 1/30 second at f8 ISO 100 equalling a MAR + 2 stop exposure
By Way of Explanation
The term MAR stands for Meter As Read. It refers to the way light meters work by measuring the brightness of the scene at which they are pointed and adjusting Shutter Speed and or Aperture (and, in some cases, even ISO) to achieve a mid tone rendering of the scene. This is extremely problematic, particularly when the scene is made up of predominantly light (i.e. beach, snow, wedding dress) or dark (i.e. close up of a dark tree trunk; person wearing dark clothing and/or of a dark complexion) subject matter.
So trusting the cameras light meter to produce a correct exposure is often folly. And that’s as true today, whether you set your DSLR to RAW or JPEG, as it was in the days of film. It’s not until we accept this fact and understand when and how to override the camera’s built in light meter that we are in control of exposure. High contrast (dynamic range) introduces other concerns, which I’m addressing in this article.
Whether your camera produces the 3 separate exposures (-2, MAR and +2) in the order described or, for example, as a MAR, -2 and +2 sequence is dependent on the degree of adjustment you select and the order in which you program the camera to record each exposure.
What’s critical in HDR photography is to ensure that it is only the Shutter Speed that changes from one exposure to the next. This is a good reason to avoid your camera’s Shutter Priority mode, which would usually result in your series of bracketed exposures being made at the same Shutter Speed, but with different Apertures. Changing the aperture will often result in different levels of Depth of Field (DOF) in each individual exposure. And that would be problematic when trying to assemble the composite HDR file. Ideally, the only thing that changes between each exposure in the bracket sequence is brightness.
Likewise, having your camera set to Auto ISO might cause the camera, not wanting to introduce camera movement under low light conditions, to increase the ISO for your plus (e.g. MAR +2) exposure. That might result in a variation in noise from image to image that might, conceivably, cause problems when producing the composite HDR image.
Choice, Choices, Choices
My recommendation would be to turn the Auto ISO function within your camera’s menu OFF. If you feel the need to change the ISO for one or more of the images in the sequence, so as to minimize the chance of movement (e.g. wind blown leaves, grasses or clouds) during the longer MAR +2 exposure, it might be better to turn the Auto ISO back ON just for that particular sequence of exposures. But this suggestion is opinion based and your choice to follow or not.
Essential Action
Once you’ve achieved accurate focus, it’s important to set your camera/lens to Manual Focus to avoid it adjusting focus from one frame to the next. The last thing you want is an out of register composite image.
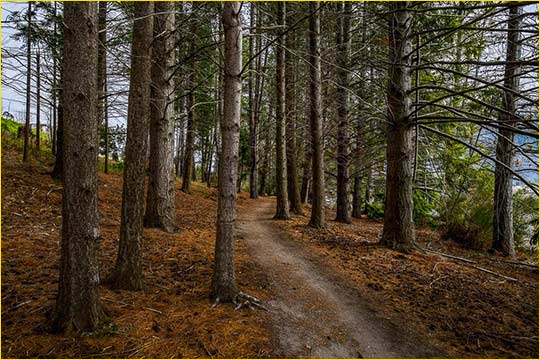
Trail-through-the-pines-queenstown-new-zealand
While not, strictly speaking, a backlit image it’s correct to say that the contrast within this scene was well beyond the ability of even the mighty Nikon D800e camera to retain within a single exposure. I wanted to produce an image that was close to how I remembered the scene. That required a 7-stop series of bracketed exposures, made at 1-stop increments. From there a composite .tif file, via the Lightroom 4.1 to Photoshop CS6 pathway described in the next section of this article, was produced. Final enhancements were completed in Photoshop CS6.
Lightroom
Version 4 of this excellent product features controls within the Basic panel of the Develop Module that provides the user with amazing control over the lighter and darker areas of the image. A significant improvement on its predecessor, Version 3, the Highlight and Shadow sliders are fantastic tools for aspiring and professional photographers alike.
More experienced operators may wish to avail themselves of the pathways between Lightroom (version 4.1 and higher) and Photoshop CS6 which provides the ability to Tone Map their images, in 32 Bit no less, and thereby further their control over high contrast situations. This is my current favoured workflow.
Begin by selecting your original bracketed RAW (camera generated or .dng) exposure file sequence inside Lightroom. Basic spotting and White Balance are generally all that’s required, if at all, prior to exporting the files from Lightroom into Photoshop CS6 via thePhoto>Edit>Merge to HDR Proin Photoshop command. There are numerous options that await but, as a general rule, I favour theLocal Adaption Tone Mappingoption with the Mode set to 32 Bit. Check theReduce Ghostbox to reduce the likelihood of ghosting when the scene contains moving subject matter.
The resulting file may well look awful. Don’t worry about it. Your monitor is just not capable of accurately displaying all of the 32 Bit generated data. Simply save and close the file. The resulting composite .tif file will be brought, automatically, back into Lightroom where you can develop it.
Now this is where the fun begins. You’ll be amazed at how much more information you have to work with, evident by moving the sliders, in this new composite image. For example the Exposure slider now as a +/- 10-stop range. Incredible! A few simple moves in the Basic menu and your image should be much closer to the result you desire.
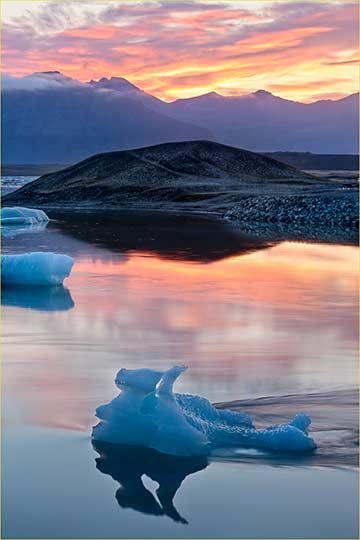
Jokulsarlon-lagoon-iceland
The difference in relative brightness between the sky and water and the darker icebergs and hills was significant.
I produced a 5-stop series of bracketed exposures, at 1-stop increments, from which I made a composite .tif file
in Photomatix Pro. Final enhancements were completed in Photoshop CS6.
HDR Pro 2 and Photomatix Pro
Another option is to include one of several non-Adobe applications into your HDR workflow. Once you have your images imported into Lightroom select the image sequence in question and open them into a HDR software application. The two most popular are Nik Software’s (purchased by Google in September 2012) HDR Pro 2 and the HDRsoft product Photomatix Pro. The nature of these programs is not only to produce a composite image with reduced levels of contrast (Tone Mapped) compared to that of the original scene, but also to apply one of a range of looks or treatments to the final image. While you have considerable control over just how processed (relatively realistic, artistic, or down right freaky) that image becomes, it’s likely going to be considerably different in appearance to any of the original camera-generated files.
Of the two I prefer the interface and controls within HDR Pro 2. What’s more, though I’ve had success with it, I’ve often found that the composite file generated in Photomatix Pro tends to contain levels of noise that I consider unacceptable.
As mentioned earlier a very successful Tone Mapped composite image can now be achieved via the Lightroom 4.1 (and higher) to Photoshop CS6 return pathway. Simply select the files in Lightroom, bring them into Photoshop to produce the Tone Mapped composite image prior to saving them back into Lightroom (usually as a single composite Tiff) for further processing as required. This is a great option when you want to retain highlight and shadow detail, within a high contrast scene, without producing a look that says (or screams) HDR processing. Once the .tif has been developed in Lightroom you may wish to open a copy of the file in Photoshop CS6 for final image enhancement.
Conclusion
Back in the day we’d deal with high contrast situations in a range of manners including the following:
Wait for the weather to change or come back at a different time of day and/or different time of year (a tough ask when travelling)
Composition, by which I refer to the practice of excluding very bright and/or very dark areas from the frame
Placing a diffuser between the light and the subject to both reduce the brightness and soften the quality of light reaching the subject and, as a consequence, reduce the intensity and hard-edged appearance of the shadows
The use of a reflector or flash to reduce (fill) the difference between a dark foreground and a much brighter background
Deliberately over exposure black and white or color negative film to lighten shadows and then under develop to reduce the brightness of the highlights
Any number of dodging, burning and print processing procedures to reduce contrast and direct attention to important focal points within the frame.
These days its possible to deal with the devil that is high contrast in camera, through some of the methods described above; through the use of the amazing Nikon D800 or D800e camera; and by employing Lightroom 4.1 (or higher), either on its own or in conjunction with Photoshop CS6 and/or a dedicated HDR software application. The choice is yours and the options available to you are incredible. I hear there’s even an iPhone app that creates a pretty reasonable HDR result.Strewth!
And next time you hear someone drumming on about notions of reality or truth (and by truth they probably mean fact) in photography just remember that a traditional black-and-white darkroom generated print has very little to do with the way we perceive the world. It’s a 2 dimensional, monochromatic representation of the world. You know the very same world that we perceive in 3 dimensions and in color.
What’s more it’s possible that, within a few years, advancements in sensor technology and in-camera software may negate the need for the current HDR workflow. I wonder if the fact that the benefits of Tone Mapping will occur, automatically in-camera, will somehow restore the false notion of truth (as in fact, as opposed to artistic intention) in photography. And if so might that suggest that, just because the hocus pocus will occur in-camera, rather than on the desktop, that it will be more palatable to today’s doomsayers. Personally, coming from a very traditional film/darkroom background, I have no truck with folks taking personal responsibility for the look of their images and doing the work themselves. There’s a reason it’s called the digital darkroom.
Like me, you may not like the look of an overly processed (subjective valuation) HDR image, but it’s hard to argue against the benefits that a composite Tone Mapped image provides. Given what technology offers photographers today, it’s a workflow that really should be considered when photographing under high and extreme contrast conditions.
So, there you have it. Where we are now and what’s likely to be available to us in the future. These are some of the reasons why, to quote Michael (hopefully not completely out of context), this really is “The Golden Age of Photography”. So, why fight it? Get up, get out and get to it. Photography is life, as we experience, remember and represent it.
July, 2013
© Copyright 2013
All Rights Reserved
Glenn Guy, Travel Photography Guru
Glenn Guy is a photographer with over 30 years industry experience. He is the owner and content author ofTravel Photography Guruan educational photography blog and website which aims to share the beauty of our natural world and its people with an ever-wider audience.

Elevate Your Vision


Read this story and all the best stories on The Luminous Landscape
The author has made this story available to Luminous Landscape members only. Upgrade to get instant access to this story and other benefits available only to members.
Why choose us?
Luminous-Landscape is a membership site. Our website contains over 5300 articles on almost every topic, camera, lens and printer you can imagine. Our membership model is simple, just $2 a month ($24.00 USD a year). This $24 gains you access to a wealth of information including all our past and future video tutorials on such topics as Lightroom, Capture One, Printing, file management and dozens of interviews and travel videos.
- New Articles every few days
- All original content found nowhere else on the web
- No Pop Up Google Sense ads – Our advertisers are photo related
- Download/stream video to any device
- NEW videos monthly
- Top well-known photographer contributors
- Posts from industry leaders
- Speciality Photography Workshops
- Mobile device scalable
- Exclusive video interviews
- Special vendor offers for members
- Hands On Product reviews
- FREE – User Forum. One of the most read user forums on the internet
- Access to our community Buy and Sell pages; for members only.
You may also like