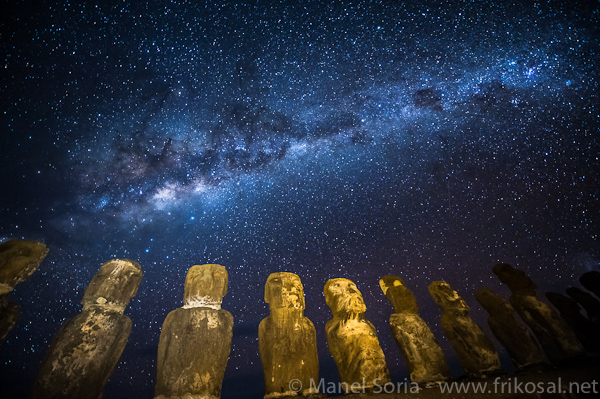
The Milky Way above the moai in Ahu Tongariki, Easter Island (Chile).
Imagine you’re alone in the wilderness, in a place far removed from city lights. It’s late in the afternoon; the last traces of daylight are vanishing, but the sky remains a shade of deep blue. The brightest stars of the summer are becoming visible – Arcturus, Vega, Daneb, Altair and others- and with them, a faint arc of light appears: it’s the Milky Way.
Would you like to capture the magic of these precious moments with your own camera? If so, in this brief article I’ll try to explain what Landscape Astrophotography is, why it’s become technically possible only in recent times, and how can you begin to incorporate the starry night as yet another subject in your photographic pursuits.
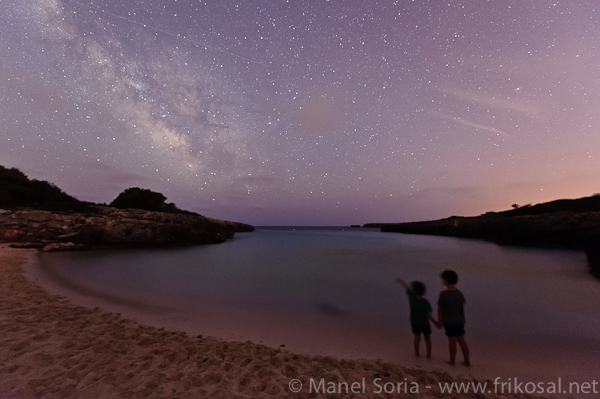
Discovering the Milky Way alongside the Mediterranean Sea.
Astrophotography, which is the imaging of celestial objects through telescopes, came into being around 1900. The slow film used in those days required very long exposure times. Then – and even nowadays – to keep the stars from looking blurry, the telescope had to rotate very precisely to compensate for the Earth’s rotation, thus keeping each star in a fixed position on the camera’s plate (by plate, I refer to the type of large negative used in what were known as Plate Cameras). This technique, although involved, was soon vastly improved, and by the 1920s, astrophotography was already a very important tool for astronomers.
Among various remarkable astrophotos from those days, it’s well worthwhile recalling Edward Emerson Barnard’s delicious images of dark nebulae http://www.library.gatech.edu/search/digital_collections/barnard/index.html, or the pair of plates that allowed Clyde Tombaugh to discover Pluto in 1930 http://en.wikipedia.org/wiki/Clyde_Tombaugh.
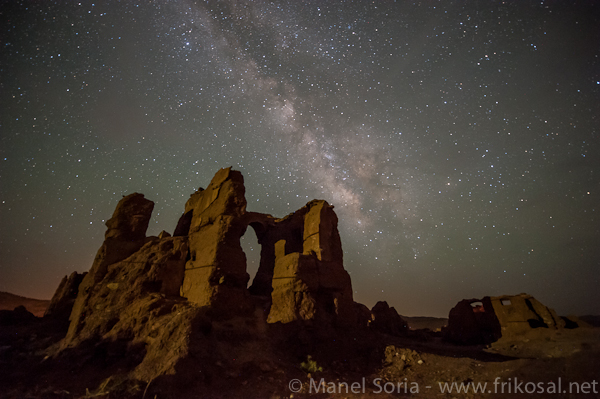
The Milky Way above a ruined kasbah, in the Atlas Mountains (Morocco).
Today, we have easy and frequent access to amazing photographs of celestial objects; for instance, see NASA’s Astronomy Picture of the Day page http://apod.nasa.gov/apod/astropix.html. However, images taken through a telescope usually lack a sense of place; in other words, a visual reference that the observer can easily recognize, and that also allows him/her to identify just how small, far or faint the portrayed object really is.
For that reason, there’s a growing interest in Landscape Astrophotography, a term used to describe photographs that include both the landscape and the celestial objects, as though we were there and could see it with our own eyes… or even better than that, since our own night vision is limited and we’re unable to distinguish the full range of colors.
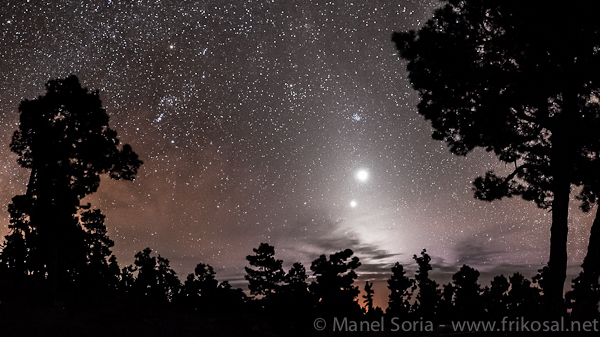
The Zodiacal light seen from a forest in La Palma, Canary Islands (Spain).
In Landscape Astrophotography, the Milky Way, the Andromeda Galaxy or the Zodiacal light are combined with rock formations, trees or ancient buildings. And unlike conventional Astrophotography, a field in which amateur photographs can’t possibly compete given the incredible images taken by the Hubble Space Telescope, in Landscape Astrophotography, your main limit is not the equipment, but rather your own imagination and ability to find interesting locations.
However, there are some difficulties. First of all, everything is more complicated at night. You’ll need to practice to learn how to focus properly and even to frame your compositions. All of that can be solved, but then you’ll have to face the next problem: your subjects are not only very faint, they’re also moving. To expose for the brightest areas of the Milky Way, you’ll need at least what I call one Q of light: the equivalent to a 30-second exposure at F2.8 and 3200 ISO. If your camera is too noisy at 3200 ISO, or your lens is not fast enough, then you’ll need more exposure time. But, it’s not possible for you to increase the exposure time to good effect, because the stars are turning around the celestial North or South Pole (well, actually, it’s the Earth that’s rotating, but for our purposes, it’s all the same).
If your camera is fixed to a tripod, and the exposure time is increased, then the result will be star trails in your photographs, instead of the fixed points of light that your eyes see. So what is the best maximum exposure time? On the Internet, you’ll find detailed formulae to calculate it, but as a first approach, a 30-second exposure produces acceptably short trails when used with a 14mm lens. If the focal length is doubled, reduce exposure time by one half.
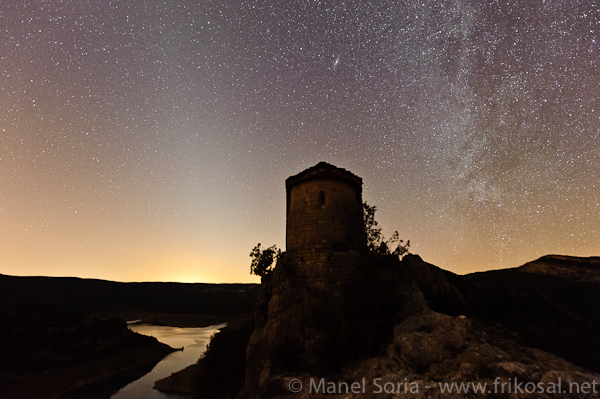
Zodiacal light above La Pertusa chapel, Montsec (Spain). In addition to a 60-second exposure time,
an equatorial mount was used, so that stars remained fixed and the chapel was only slightly blurred.
Consider using an equatorial mount, which makes the camera rotate – as though it was a telescope – to compensate for the Earth’s rotation. Thanks to the mount, exposure time can be increased without producing trails in your images, but keep in mind that the Earth itself will be blurred. However, to some extent that result may be preferable to ending up with star trails that are longer than you want. Yet another option is to use very long exposure times deliberately, as star trail photographs can be very interesting, too.
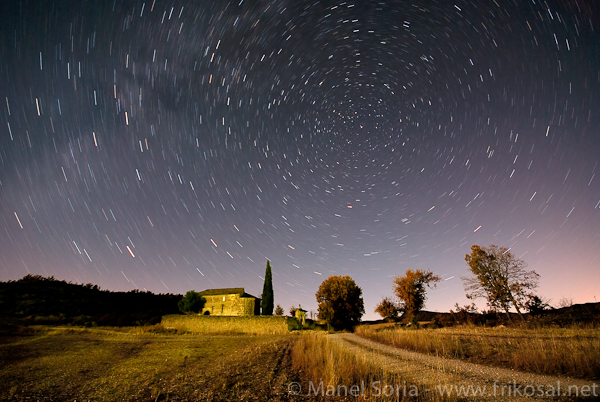
Star trails in Huesca (Spain). Exposure time was 12 minutes, at F4 and ISO 100.
As you can see, Landscape Astrophotography is not without technical complications. But if you’re serious about it, you’ll definitely experience unforgettable moments, as well as the joy of exploring a relatively new field of photography open entirely to your creative ideas.
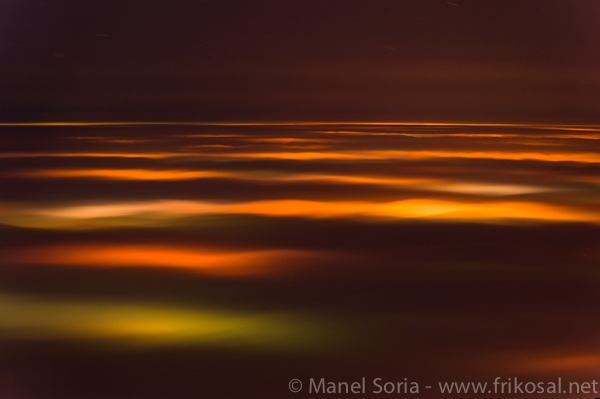
Light pollution: city lights below a layer of mist create this strange effect in an image taken in Montserrat mountain, near Barcelona (Spain).
I would like to finish up with some tips so that you can begin to practice:
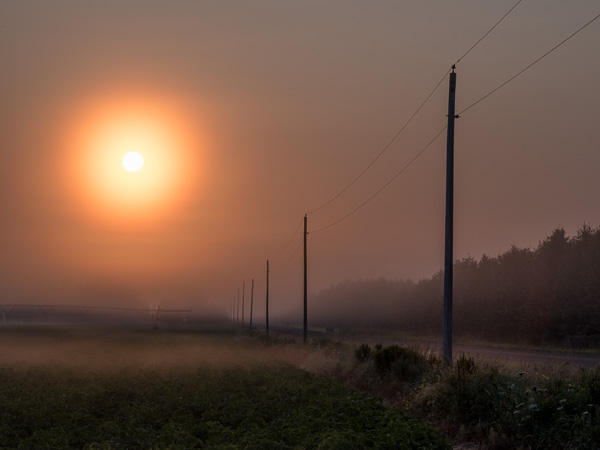
1- Artificial light is your enemy. The main problems of Landscape Astrophotography are not so much due to technical complications, but to light pollution. The exposure necessary to capture the Milky Way will detect lights of cities up to 100-200 miles (or more) in the distance. This light pollution will be easily visible in your photos as bands of yellow or orange lights next to the horizon. For that reason, you should make every effort to go to the most remote areas you can find. The photos for this article were taken in places such as the Atacama Desert, Easter Island, the Atlas Mountains (next to Sahara desert), and the Pyrenees mountain range between France and Spain.
2 – Know your subject. A deep knowledge of astronomy is not really necessary, but you will find Landscape Astrophotography far easier if you are familiar with the main constellations. But take your time, instead of trying to learn everything quickly, enjoy discovering a new constellation every night.
3 – Use software to predict what the sky will look like. If you plan your images in advance, they will certainly turn out better. You don’t need to be an expert to know if the beautiful Cygnus or Scorpio constellations will be visible next month at 3:00 a.m., just download and install the excellent programStellarium, and it will display a very high-quality simulation of the sky, at any location and time in the future or past.
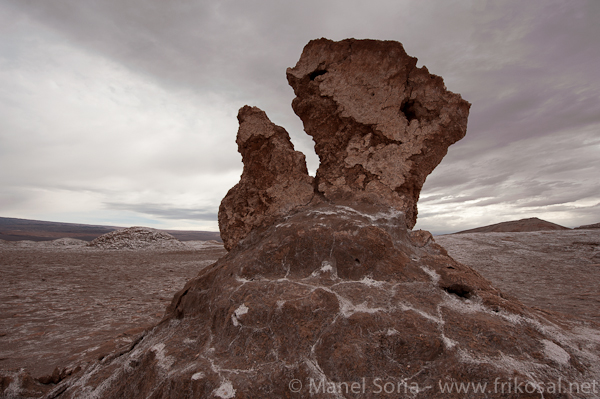
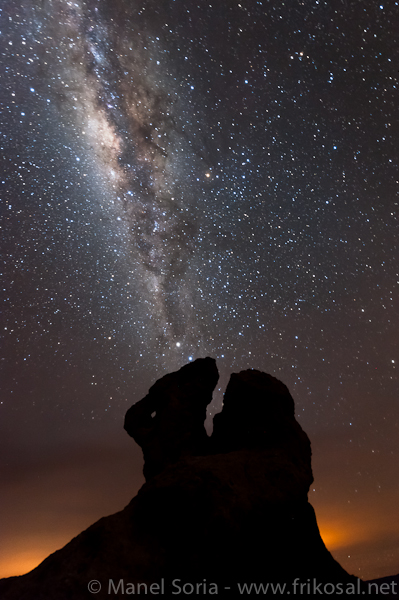
A rock that seems nice but not so special during the day can look like a strange beast at night. In the Atacama Desert (Chile).
4 – Locate the best places during the day. At night, you won’t be able to find rock formations or trees with interesting outlines. It’s far easier if you drive or hike around the place in the daylight. Use a GPS to mark the most interesting locations, then come back at night.
5 – Equipment. While you should not be too preoccupied with your equipment, it is important. You need fast wide-angle lenses. Make sure that when wide open, they are free of coma and other aberrations at the corners, which are more visible in photographs of the stars. Full frame cameras tend to be better at high ISO, but recent DSLRs with smaller sensors are also good enough.
6 -Begin with the basics. Star trails are probably the best way to learn. You don’t need special equipment -such as fast wide-angle lenses- to capture them, only a DSLR, a cable to allow long exposures in B mode, and a good tripod. As a first guess, you may try 10 minutes at F5.6, ISO 200. For longer exposure times, you’ll need to stack several images, such as 15 frames of 4 minutes each.
7 – Safety first. Nighttime in remote areas can be dangerous. Make sure to bring a GPS (and know how to use it), a headlamp with spare batteries and appropriate clothing. The latter is very important; night is always surprisingly cold, even during the summer. Unless you know what you are doing, don’t walk alone at night in the wilderness, always go with a group.
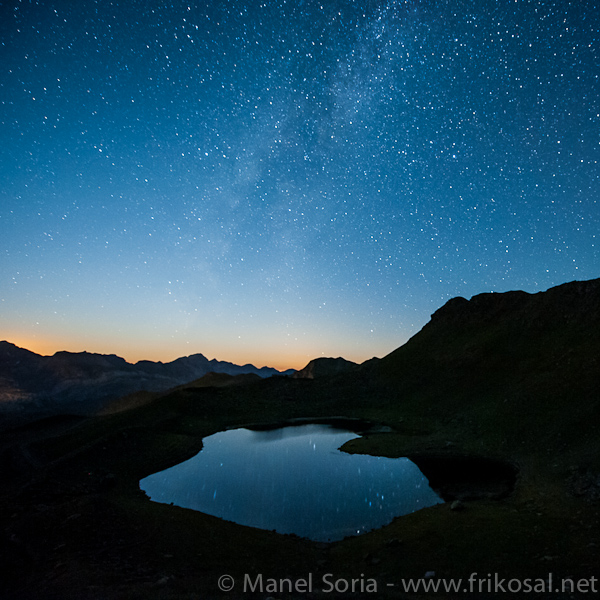
Stars reflected in a glacier lake in the Pyrenees mountain range.
In conclusion, I hope you’ll enjoy Landscape Astrophotography as much as I do. In my case, it’s carried me to really amazing places at totally unusual hours. I’ve experienced breathtaking scenes such as the Milky Way above the Moai in Easter Island, or the Zodiacal light in the island of La Palma.
Text and photos © Dr. Manel Soria
Barcelona, July 2012
www.frikosal.net

Dr. Manel Soria lives in Barcelona (Spain) and his background is in science.
He programs parallel supercomputers to solve turbulence problems and he works as a professor in Universitat Politècnica de Catalunya,
in the fields of Thermodynamics and Computational Fluid Dynamics (CFD). Another of his great passions is Nature Photography.
His preferred subjects are invertebrate animals, such as dragonflies, and landscapes. Since 2008, he has specialized in Astrophotography
Landscape, and he publishes reports, sells fine art prints and gives workshops about this subject.
Elevate Your Vision


Read this story and all the best stories on The Luminous Landscape
The author has made this story available to Luminous Landscape members only. Upgrade to get instant access to this story and other benefits available only to members.
Why choose us?
Luminous-Landscape is a membership site. Our website contains over 5300 articles on almost every topic, camera, lens and printer you can imagine. Our membership model is simple, just $2 a month ($24.00 USD a year). This $24 gains you access to a wealth of information including all our past and future video tutorials on such topics as Lightroom, Capture One, Printing, file management and dozens of interviews and travel videos.
- New Articles every few days
- All original content found nowhere else on the web
- No Pop Up Google Sense ads – Our advertisers are photo related
- Download/stream video to any device
- NEW videos monthly
- Top well-known photographer contributors
- Posts from industry leaders
- Speciality Photography Workshops
- Mobile device scalable
- Exclusive video interviews
- Special vendor offers for members
- Hands On Product reviews
- FREE – User Forum. One of the most read user forums on the internet
- Access to our community Buy and Sell pages; for members only.
You may also like