


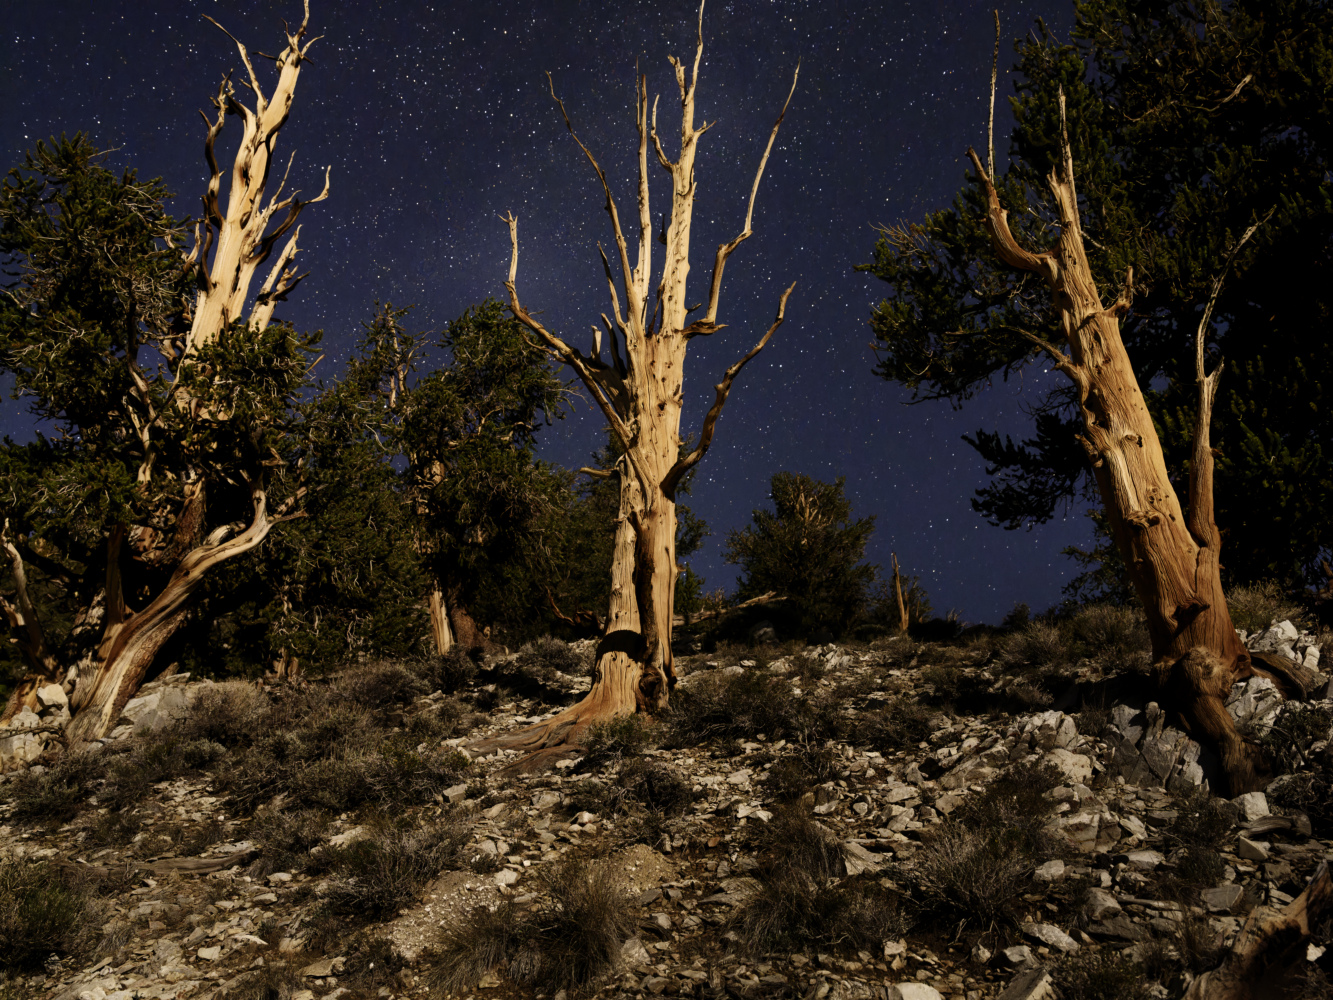
Introduction:
What is image quality, really? How much of it do we need? It’s not just resolution, although resolution plays some role. If we keep the subject constant, so we are eliminating the (critical) effects of the photographer’s creativity and technical skill, what factors in the camera and lens affect the overall quality of the raw file we begin post-processing, editing and preparing for print (or screen display). For the purposes of this article, except in the discussion of smartphones, I am going to assume that most LuLa readers are shooting raw, rather than relying on their camera’s internal processing to produce a processed image automatically.
There are a couple of reasons to dive deeply into digital imaging technology and image quality now. First, image quality appears to be plateauing, with new cameras gaining versatility rather than actual image quality (an exception to this is that we are still seeing big improvements in image stabilization on a regular basis). Developing new sensors that might bring major increases to any aspect of image quality is expensive, and the market for non-phone cameras is at best static – so nobody really wants to put the money in.
The State of Image Quality Today
I suspect there is a (relatively) major sensor generation arriving in the next year or two, with higher pixel densities than we have seen so far, but that it won’t change all that much about the kind of images we can make. The 40 MP APS-C Fujifilm X-H2 is perhaps the first camera with a sensor of that next generation, and we don’t know a lot about it yet, but it seems to be essentially a high-resolution X-T4. It has the resolution of a full-frame pixel monster, but the dynamic range of a really good APS-C camera (it IS a really good APS-C camera, so that should be no surprise).
Early reviewers are seeing excellent, typically Fujifilm colors and surprisingly little noise for such a dense sensor. I look forward to shooting one myself (it’s on the list for this winter, and I have a video-loving colleague and the combination of X-H2 and X-H2s lined up for a shoot – maybe January?). What it seems to do is push the maximum print size up a bit from the X-T4. If you have an X-T4 (or some other 26 MP Fuji) and you have a print size you’re almost comfortable with, it’ll probably be really comfortable with an X-H2. If you are wondering if you can push one size farther than your X-T4 can do, try it…
It’s a nice little boost, but it isn’t a revolution. Ten years ago, a major new sensor generation might have offered a similar resolution boost, PLUS a stop of dynamic range at low ISO, PLUS improved color, PLUS lower noise, PLUS an extra sharpness boost from disabling the AA filter (for less than half the price). Don’t believe me? That’s what the Nikon D800e offered over the D3x, its immediate predecessor of a few years earlier – and the D3x was itself a revolutionary camera that can be said to have ushered in the modern era of digital image quality. The D3x, with one of the first 24 mp sensors (in a world where sub-10 mp cameras were still common), offered a full stop more low-ISO dynamic range than Canon’s contemporary EOS-1Ds mk III, and more than two stops over the 1Ds mk II, still a professional workhorse at the time.
We just aren’t seeing that kind of generational improvement in any aspect of image quality any more. Going from a Nikon D1 or a Canon EOS-D30 to a D3x was a revelation – from a D3x to a GFX 100s is a really nice improvement, akin to going from something like the 1Ds mk II to the D3x (or a little more), not the D30 to the D3x. In the eight years from D30 to D3x, we saw resolution (pixel count) and dynamic range go up by a factor of eight, while color went from “odd, and struggling with sRGB” to “very smooth Adobe RGB with a few boosts outside Adobe RGB”. In the twelve years from D3x to GFX 100s, resolution and dynamic range went up by a factor of four, and color went from very smooth Adobe RGB plus a bit to … very smooth Adobe RGB plus somewhat more. The most recent twelve years are more like five years in the earlier days when overall image quality improved by leaps and bounds every couple of years.
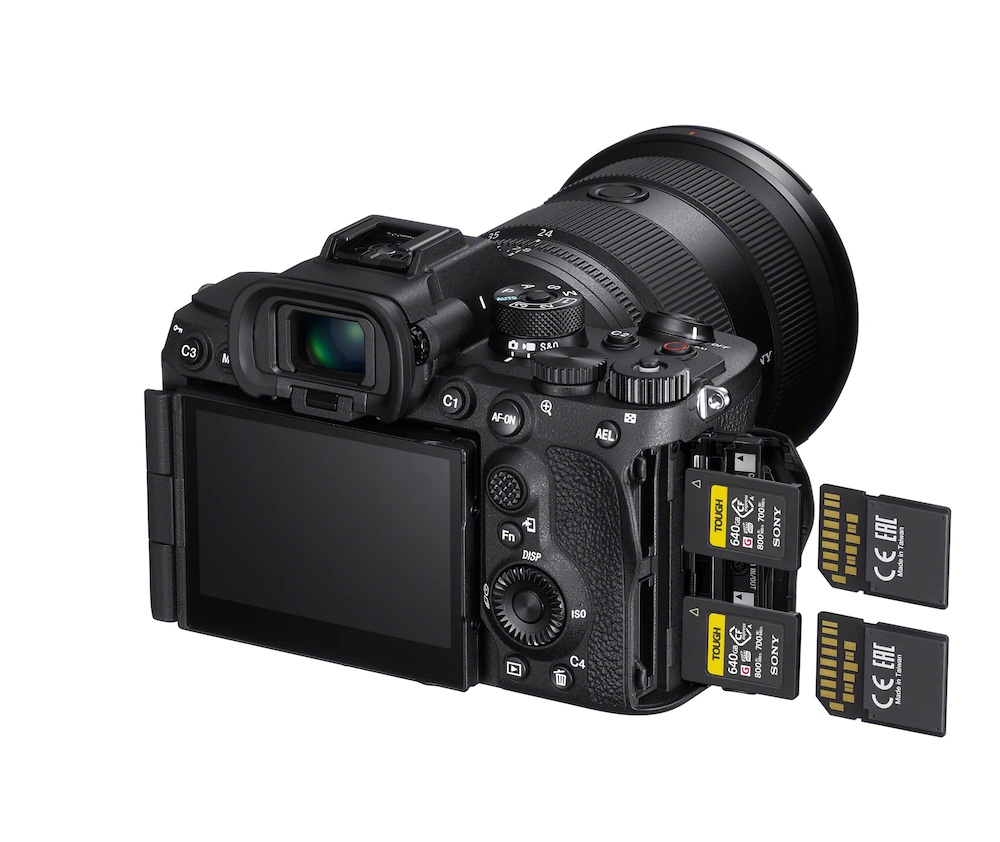
We’ve just seen four of the last camera introductions of 2022 – it’s unlikely that there’s a major camera remaining from any manufacturer, as Nikon having just dropped the 600mm f4 lens without a body probably makes a late-year body update less likely, and essentially everybody else has just introduced something. Two of the four cameras didn’t touch the imaging pipeline directly at all. The Sony A7r V is a usability revamp of the A7r IV, much as the A7r III was a usability revamp of the A7r II. Sony seems to have set a pattern in the “r” line – big imaging upgrades every even numbered generation, with upgrades to just about everything outside the imaging pipeline in the odd generations. From the spec sheet, there’s no single upgrade as big as the A7r III’s new battery. Most Sony-loving photographers have happily forgotten the days of the old NP-FW50, a tiny battery built for the pocketable NEX-5 and pressed into service on the power-hungry early full-frame bodies. A couple hundred shots on an A7r or A7r II was doing pretty well, and it was easy to get as few as 150 or so with a long, stabilized lens and a little too much chimping. The NP-FZ100 (introduced on the A9, went mainstream on the A7r III) really made Sony full-frame much easier to use.
The headline improvement on the A7r V is a new, AI based autofocus system that Sony claims outperforms even the A1. I haven’t seen an A7r V yet, but my first move when I do see one will be to toss the 200-600mm on it and go looking for birds to try out the new focus tracking. Other improvements include a new image stabilizer – Sony claims no less than eight stops of stabilization. While I believe it will be a great stabilizer (the modern ones are a lot better than most of what was around (other than Olympus) when the A7r IV debuted in 2019), I’ll believe eight stops when I see it! I have a 500mm lens for FE mount (the 200-600mm at 500), and I simply don’t believe I’ll be shooting it pixel-sharp handheld at half a second. I can see the 24-105mm f4 at a quarter second (five stops) or maybe even a half second, although even that would be impressive. The only camera I’ve EVER handheld a half second on (and with a portrait lens, not a long telephoto) is the much lower resolution E-M1 mk II, which also has a huge amount of stabilizer travel due to the small sensor.
There are quite a few smaller improvements – Sony has tossed their best 9.44 million dot viewfinder in the A7r V – although the A7r IV already had an excellent 5.76 million dot unit. They’ve put their new menu system in, which I’ve played with on an A7S III and an A1. It’s a real improvement over the previous (and confusing) Sony menu system. Other than the A7C and superseded cameras left in the line, all current Sonys now use the modern menus. They’ve added a new screen which tilts in any direction a screen might possibly tilt, and a few more besides. The A7r V offers losslessly compressed raw files (and reduced resolution raws as an option), while the A7r IV had a choice between huge uncompressed raws and Sony’s lousy lossy compression.
There are a few things it still doesn’t do. It’s still using the (excellent) 61 mp sensor that debuted in the A7r IV, so video is still hampered by the slower readout of the 2019 sensor. There is plenty of rolling shutter in most video modes, and there is no full-width video (at any resolution) faster than 30 fps – anything faster is cropped. It DOES offer 10-bit video and substantially higher bit rates than the A7r IV (including a limited 8k mode if you can figure out how to show 8k video). It’s still fundamentally a mechanical-shutter (or electronic first-curtain) camera – the rolling shutter makes using full electronic shutter unattractive in many circumstances. It’s not a fast camera by modern standards – getting it to go faster than 6 fps means turning on the lossy compression, and why would you bother with this lovely sensor only to turn on lossy compression? What it is is a very, very refined resolution-specialist camera, not a high-resolution hybrid. It has one of the two best full-frame sensors on the market (the other is Nikon’s 45 mp beauty, which has less noise due to a very low base ISO to offset the Sony’s higher resolution) in a thoroughly modern body.
The Sony A7r V has no image quality improvements over its predecessor, but its predecessor is already in the running for the highest overall image quality of any camera short of medium format. Much more disappointingly, the new OM System OM-5 rehashes the worst sensor currently on the market and adds relatively few usability improvements to the EM-5 mk III. Yes, the unlamented Same Old Sensor is back – not only is it a small sensor, but it is also the oldest sensor on the market, dating back to July of 2015 and Panasonic’s GX8. It’s a full generation behind other older sensors and two full generations behind more modern sensors. It could even said to be 2.5 or three generations behind some stacked sensors or the X-H2 sensor.
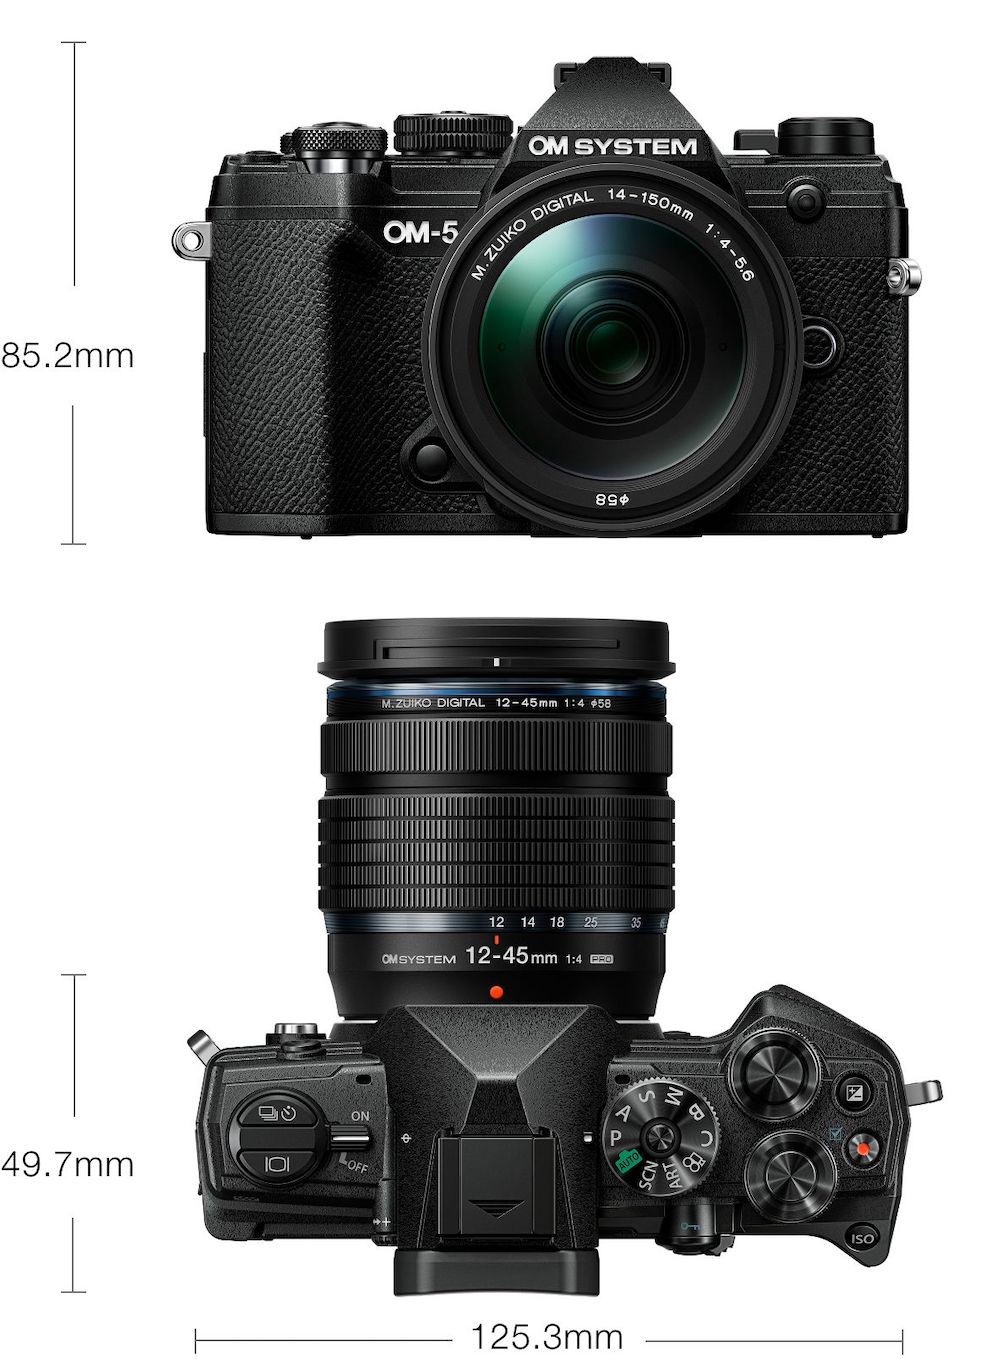
I had hoped the Same Old Sensor was gone from new cameras when we saw the OM-1 and GH6 arrive with new sensors. Neither was focused on still image quality, as the OM-1 prioritized speed and the GH6 prioritized video. Given update cycles, I expect the Same Old Sensor may still be sold new on its tenth birthday in 2025!?!? An unusual lifespan, especially given that its image quality lagged the market the day it was introduced. One of the few cameras on the market today to merit a clear Not Recommended based on image quality alone (no, I haven’t used one, but I HAVE used other cameras with the Same Old Sensor, and they clearly lag just about anything else – although they have some nice lenses that massively outperform the sensor).
Fujifilm’s X-T5 is a cross between the X-H2 and the X-T2. It’s a small, light, photography focused camera like the X-T2, but it has the brand-new 40 MP sensor and the processor from the X-H2. The X-T2 was the most photography focused of the X-T series cameras, and it was an absolute joy to use. I carried one (with the l little 18-55mm f2.8-4.0 lens and the 10-24mm f4 lens) for 500 miles on the Pacific Crest Trail in 2017, and it survived – still works! It brought back absolutely wonderful images, and it was a huge amount of camera for the weight. Were I going to do a similar hike today (and I’d love to), I’d consider two camera choices, both from Fujifilm.
One would be the GFX 100s, simply due to the extraordinary image quality. On any adventure less than a long-distance hike, the GFX is my choice. I backpack with it frequently, and I get images that make it worth it… To get it down to the same weight, I’d probably have to bounce-box a lens. I’d carry the 32-64mm (or maybe the new 35-70mm, which is substantially lighter) for a couple weeks, then mail it a couple weeks ahead while carrying a wide-angle, either the 20-35mm or the 23mm. When I caught up with the 35-70mm, I’d bounce the wide-angle up the trail. I’d only have one lens at a time, but I’d have the perspective of both over time.
The other choice would be the X-T5. It’s about the same body weight as the X-T2, and it takes the same lenses, although I’m not sure how the little 18-55mm would stand up to the 40 MP sensor. If it didn’t, the system loses some of its compactness – all the more modern zooms in. that focal length range are quite a bit larger than the 18-55, which really looks like it should be a Micro 4/3 lens. For that same weight (the X-T5 is 50 grams heavier, but all of that is in a much more powerful battery – I carried seven NP-W126s on the trail, and I can’t imagine carrying more than four NP-W235s), one gets nearly twice the resolution, significantly improved AF, in-body image stabilization and more. It’s even a competent modern video camera, although it is expressly NOT nearly as much of a video camera as the X-H2 twins. I can’t wait to try an X-T5, preferably on an adventure.
For a long-distance hike, most full-frame cameras I can think of would be too close to the GFX in weight to carry two lenses without bounce-boxing one. If I’m going to bounce a lens, why not carry the GFX? One possibility might be a Z7 II (or original Z7 – the differences don’t matter much for landscape) with the 24-70mm f4 and 14-30mm f4, both of which are very compact and quite light. Neither Canon nor Sony can match that small, light 24-70mm with excellent image quality. Canon doesn’t even bother with a 24-70mm slower than f2.8, while Sony has one, but it’s the vintage 2012 “Zeiss” lens, not even close in quality to the excellent little Nikkor. A modern Sony G lens would open up several Sony bodies as possibilities…
The last camera of 2022, barring a surprise, is Canon’s EOS-R6 mkII. This full-framer has a brand-new, Canon-manufactured 24 mp sensor. It will be very interesting to see how its image quality stacks up – the headline specs are all about speed. Despite not having a stacked sensor, it’ll shoot at 40 frames per second, without losing autofocus, or the viewfinder, or raw mode. VERY few cameras are that fast with so few limitations, and I can’t think of another one that gets there without a stacked sensor and its increased costs. It has Canon’s newest autofocus, borrowed from the EOS-R3, and the expected wide range of video modes. Like most recent Canons, it speaks fluent Canonish. Early Canon mirrorless cameras, both the M-series and the EOS-R and RP, were all over the place in terms of interface. When Canon introduced the original EOS-R5 and R6 a few years ago, they returned to an interface that was very familiar to Canon DSLR shooters, which they’ve stuck with since.
What the A7r V (and the lack of an EOS-R5 mk II) suggests is that we’re probably a year or so away from a full-frame (or medium format) version of the X-H2 sensor, or any other sensor in that density class. The high overall image quality of the X-H2, which doesn’t seem to have lost much else when it increased resolution, suggests that such a sensor is possible, but the A7r V suggests that it isn’t imminent. Sony wouldn’t have released a 61 mp camera as their resolution leader if they were sitting on a 90+ mp sensor that would be ready soon. They aren’t likely to make that sensor for a hypothetical Nikon Z7 III or Z8 when they’ve JUST released a camera of their own with a much lower resolution. Canon doesn’t use Sony sensors, so they’re a slightly more likely candidate – but they haven’t shown any signs of being almost ready to release a really high resolution camera. If they were really close, they would have been likely to pre-announce in order to rain on Sony’s parade, and the EOS-R6 mk II announcement would have been the time to do that.
The new EOS-R6 mk II, along with the X-H2 and X-H2s, really put the nail in Micro 4/3’s coffin, except for the GH series as video cameras. None of them are much more expensive than an OM-1, and the X-H2 is actually slightly cheaper. All three are close to as fast, without taking the big image quality penalty to reach those speeds. The two Fujis may be close to as rugged as the OM-1 – Canon is likely to have saved their most rugged design for the EOS-R3.
As image quality has plateaued, it has plateaued at a very high level. The old EOS-D30 was somewhat equivalent to medium-speed 35mm film in overall image quality (although it had different quirks), while today’s full frame pixel monsters are pushing 4×5” quality levels, and good medium format digital can best be compared to 8×10” film (really good APS-C is somewhere in the range of excellent medium format film shot at a large frame size like 6×9 cm). None of the modern cameras are especially quirky – they all produce very versatile raw files in a wide range of conditions, and with a lot of headroom for creative decisions (or simply to fix errors!). When the smallest serious format is competing with 6×9 cm film, and there are reasonably portable cameras shooting something like 8×10” equivalent while remaining weather sealed and image stabilized, we have truly excellent image quality available to us. Lenses, too, have improved greatly in the past twenty years

Image quality, of course, interacts with how easy it is to get the image. A camera with no autofocus at all doesn’t necessarily have any different image quality from one with the most modern focus tracking – but you’d far rather have the latter when shooting a basketball game. Camera features (getting the image) are continuing to improve, with incredible speeds and AI driven focus tracking. Many current mirrorless cameras do double duty as digital cinema cameras, and the best of them compete with anything short of a RED. Image stabilization has gone from “a stop or two, mainly on expensive telephoto lenses” to “use it every day, handhold 1/15 second pixel-sharp”. All of these features are improving far faster in 2022 than maximum possible low-ISO image quality.
The good news is just HOW good modern cameras and lenses are – in many cases, they’re better than any way we have of sharing the image. There was a huge jump in image quality, only somewhat attributable to increased resolution, with the 24 mp sensor generation. Most of the 24 mp sensors (and Nikon’s 20 mp APS-C sensor), whether full-frame or APS-C, offer 10 stops or more of really usable photographic dynamic range. Their color rendition is excellent – choose your favorite color rendition by choosing a camera manufacturer, since they all tune it a little differently.
How Much Image Quality Do We Need
For screen display, excluding the edge case of 8K displays, any 24 mp (or higher resolution) camera will offer superb image quality. Unless you are cropping enormously, the camera will outresolve even a 4K display by quite a bit. The dynamic range and color rendition of the camera will exceed that of the display or projector, with some headroom for editing. Essentially any modern camera with an APS-C or larger sensor, from the 24 mp generation on will have quite a bit “left in the tank” when using the full capabilities of the best displays you are likely to encounter (other than 8K). You don’t actually need the 24 mp resolution for screen
For screen display, excluding the edge case of 8K displays, any 24 mp (or higher resolution) camera will offer superb image quality. Unless you are cropping enormously, the camera will outresolve even a 4K display by quite a bit. The dynamic range and color rendition of the camera will exceed that of the display or projector, with some headroom for editing. Essentially any modern camera with an APS-C or larger sensor, from the 24 mp generation on will have quite a bit “left in the tank” when using the full capabilities of the best displays you are likely to encounter (other than 8K). You don’t actually need the 24 mp resolution for screen display. A 4K display is only 8 mp or so, and the 5K standard Apple likes on some iMacs and external displays is between 14 and 15 mp – but the 24 mp generation is when image quality really modernized in other ways.
Yes, this excludes the Same Old Sensor. My concerns about it for display are basically about editing – a perfect shot with a Same Old Sensor camera will more than use the full capability of most displays, but it won’t offer the same latitude, either for fixing mistakes or for creative control, that another sensor will. 20 mp is more than enough for any non-8K screen – I’m pointing out the “fragility” of the image under extensive editing compared to other sensors. At the other extreme, for an extremely robust image, there is some advantage to something like a GFX 100s over an older 24 mp APS-C camera (for example), even for screen display. The advantage is in latitude for editing, even excluding the enormous crop I can make with a 102 mp sensor. The GFX also has an extra couple of stops of dynamic range, and can boost a shadow that the APS-C camera simply crushed, or bring in a highlight that looked blank. As a GFX shooter, I have some extra color, and more flexibility to edit color without strange casts and artifacts. The higher the quality of the initial image, the more room there is to be creative with it (and this shows even on screen). That doesn’t mean that it takes a GFX to produce screen-sized, sRGB jpegs, just that all cameras are not equal on screen – there’s some flexibility gained at the extremes by using the best you have access to.
For smallish prints, the 24 mp generation still works – the most important place to upgrade is in the lenses. A kit lens with soft corners that might go unnoticed on social media will stand out upon careful examination in a print. Fujifilm has a huge advantage among APS-C manufacturers in having a very wide selection of good to excellent lenses, although there are also quite a few available for Sony E-mount. In full-frame, Sony has the widest selection including quite a few excellent lenses (both their own and from Sigma and other third parties) and Nikon has a rapidly expanding line of almost uniformly very high quality lenses, although most of the third-party lenses for Nikon continue to be cheap and from lesser-known brands. Canon has been more erratic, with some world-class lenses and some quixotic ones, and they are aggressively keeping Sigma and others off the RF mount. Without cropping, a 24 mp camera will make a 10” wide print at 600 dpi (it won’t be quite 8” tall) and a 20” wide print at 300 dpi. 8×12” will be a 500 dpi print, which is very high resolution even for close inspection, and 16×24” will be at 250 dpi, which is adequate for most uses, although it is noticeably lower than ideal resolution for a medium-sized print. 12×18”prints will exceed 300 dpi – the best practice is to scale to 300 dpi (it’s very close to 300 dpi, so it’s not worth going up to 600 dpi) using a good resizing algorithm, as discussed below. A 300 dpi 12×18” print is excellent for wall display, although noticeably less sharp than a 600 dpi print if closely inspected in the hand.
With careful resizing (using the print module in Lightroom Classic, a specialized resizing program or a specialized printing package), 16×24” from 24 mp will work for all but the highest-quality display applications. Even making 8×12” prints, it’s worth resizing with a good piece of software. Most raw converters other than Lightroom Classic just send the file to the printer and let the printer driver scale it – and printer drivers are nowhere near as good at scaling images as programs made for the job. Lightroom Classic’s print module and all specialized print software (QImage, ImagePrint, etc.) automatically scale to the right resolution for the printer (either 300/600 or 360/720 dpi) – the other option is to scale and export the file manually. In any case, scale to 300 or 360 dpi (depending on the printer), and for critical prints where you have significantly more than 300 or 360 dpi available, scale to 600 or 720 dpi.
For medium sized prints, anything that you can print on a 17” desktop printer, the full-frame pixel monsters in the 40 to 61 mp range do a wonderful job. Is the APS-C X-H2 a true pixel monster? I’m very interested to find out… As the print gets bigger, the effect of lens quality becomes all the more obvious – pick a good lens – fortunately, all of the major systems have quite a few excellent options. All of the 40 to 61 mp cameras are comfortably above 300 dpi and at least right around 360 dpi when making a 16×24” print. In most cases, the resolution is close enough that you want to scale to 300 or 360 dpi at that print size, throwing out a little bit of information instead of upscaling by quite a bit. It IS worth experimenting with the higher printer resolutions and a carefully upscaled file. One case where upscaling almost certainly makes more sense is with the combination of the 61 mp sensor, a great lens and a 300/600 dpi printer – the camera is close to 400 dpi, and it’s worth preserving the real detail that’s there, especially if the original is very sharp. For any print 12×18” or smaller, scale to 600 or 720 dpi, you have the resolution to make the printer’s high-resolution mode worth it, and the relatively small print invites close inspection. A pixel monster will also make the maximum use of any 8K displays you might happen to run across – 8K only requires about 33 mp, but the screen is enough longer and skinnier than the camera sensor that it wants a ~42 mp sensor with the standard 3:2 aspect ratio cropped at top and bottom .
The pixel monsters open up the possibility of excellent prints in the 20×30” and 24×36” size range. The 61 mp sensor is actually above 300 dpi at 20×30”, and the others are quite close. At 24×36”, they range from about 230 to 264 dpi – enough for a really nice print, if you work with the file carefully. These cameras also produce files with world-class color and dynamic range if well handled, and the best lenses available for them are among the best anywhere. Once you’re printing this big, you’re no longer using a desktop printer, but a big roll-fed machine. You REALLY don’t want to just send it a 275.2 dpi file and let the printer driver throw a nearest-neighbor resize at it – take the time to resize to what the printer expects with a good algorithm. If you’re printing at this level, dedicated printing software starts to make a lot of sense.
For the best quality in the 20×30” and 24×36” size range, and to go larger than that (as well as for a very special print one size smaller, around 16×20 and 16×24” – that one was a real surprise to me), use all the camera you can come up with, ideally 100 mp+ medium format if you have access to it and the image works with the slower camera. My tests of the 102 mp medium format sensor against everything else that I can lay my hands on have left me quite clear that the benefits on truly large prints are enormous, and that it is surprisingly beneficial in medium sized prints. That sensor also has the best color and dynamic range available today (with the possible exception of the 151 mp Phase One sensor). It’s not JUST a very high-resolution sensor, it’s a REALLY pretty sensor even beyond the resolution – it has a very good color filter, among other things. The Fujinon lenses I have used with it are world class, and I have read equally good things about the Hasselblad lenses available for their X2D 100C (I’ve also read good things about the Hasselblad’s color, but I haven’t used it, and it won’t be identical to Fujifilm’s). This isn’t to say that you can’t make a very good large print with another camera, just that you can make a noticeably better one with the best sensor on the market and a really excellent lens.

The native 600 dpi print size of this sensor is around 16×20”, and there is an incredible clarity to a print like that – the only thing I can compare it to is a contact print (or a small enlargement) from large format film. You probably won’t notice it on the wall except under very close inspection against a very good print from a smaller sensor , but you WILL notice it with the right subject as you go through a portfolio box. I tried this test with observers including seasoned photographers, professional artists and lay people, and the big sensor jumped right out. Will a 100 mp class full-frame sensor strike people the same way? I’m not sure – was the reaction to a native 600 dpi print, or to the other aspects of image quality that also scale with sensor size (either in concert with or actually independent from resolution)? Will a 100 mp full-frame sensor offer the dynamic range and color that make the medium format sensor come alive?

At 300 dpi, the native print size of the big sensor is very close to 30×40”, and we start running into an interesting phenomenon – the prints get so big that we have to step back. At 42×56”, the largest “whole inch” print size we can make on a 44” printer with a sensor with a 4:3 aspect ratio, we have to scale 208 dpi up to 300 dpi to make the print – but the viewer will almost inevitably be several feet from a print that size. The 151 mp Phase One sensor offers a little over 250 dpi at that size – what viewing distance will it take to notice? There probably IS a difference at some rational distance, but we get more and more into a box of print sizes and viewing distances. With even larger prints, the viewing distance increases even more. There is a limit to useful resolution imposed by the human eye, a point where you have to be far enough back from the print to see it all that more resolution won’t help. I’ve seen numbers from 120 mp or so on up to 500 mp or so…
History
Even the early adopters among us had probably never handled a digital camera until 2000 or so, when the Nikon D1 and the Canon EOS-D30 were popular. There were earlier digital cameras, notably from Kodak, but they were clunky, low-resolution devices that generally cost well over $10,000 and were purchased primarily by the press. If you were a working photojournalist as far back as 1991 (or even earlier if you were testing a prototype), you might have used an early Kodak DCS camera, but most photographers outside of journalism didn’t use them, especially if you exclude the later models that competed with the D1 and EOS-D30.
These early cameras had very limited dynamic range, low resolution and color that is charitably described as “somewhat creative” – less charitably as missing large chunks of sRGB, let alone any larger color space, with poor white balance. They were very noisy, especially above base ISO. The image quality limitations of the hardware had enormous impacts on what images could be produced. The press dealt with them for the workflow improvements that digital brought, but they were of little interest to serious photographers in any genre outside of photojournalism. There were a few Kodak cameras with much better image quality at low ISOs, but they were generally over $20,000.
The EOS-D30 was an important breakthrough, in that it brought the compromises of digital to rough parity with the compromises of 35mm film at a somewhat reasonable price around $3000. Resolution and noise (grain to film shooters) were more or less comparable to same-speed 35mm film – the 3 mp sensor had a little less detail than some slower films in 35mm format, but digital noise was less than the grain of same-speed film. Dynamic range was between six and seven stops at lower ISOs – much lower than many films, and far less than the Zone System assumption that one should be able to capture ten stops between film and development. Six or seven stops, though, was perfectly normal for a good color transparency film, and more than some especially picky favorites.
The D30 was capable of capturing colors that exceeded sRGB in a number of areas, and was not missing much of sRGB, if any. It even had an Adobe RGB mode, although this was generally regarded as optimistic – more about preserving some colors outside of sRGB than about actually coming close to capturing all of Adobe RGB. Some more technically inclined D30 shooters realized that its gamut was relatively close to ColorMatch RGB, a colorspace intermediate between sRGB and Adobe RGB invented by Radius, a maker of wide-gamut Mac monitors. Many of us used ColorMatch as a working space with D30 (and other early digital) raw files.
Making a color print from 35mm film that held more color and tonal information than a good inkjet print from a D30 was possible, but it required careful choice of film and paper, along with some real skill as a printmaker. At the same time the D30 was taking digital image capture mainstream, we were seeing the first really decent inkjet photo printers at consumer prices. Early experiments with digital fine-art printing had begun about a decade earlier, but the IRIS printers that Graham Nash and others were using were around $100,000. It may not have been absolutely necessary to have a previous career as a rock star (Crosby, Stills, Nash and Young) to experiment with high-quality digital printmaking, but it certainly helped. The Epson Stylus Photo printers of the early 2000s offered good print quality (if limited print life – but that was also true of most other ways of printing color) for under $1000, and they were soon joined by Canon and HP. A print from a well edited D30 raw file on something like an Epson Stylus Photo 1270 was superior in just about every way to the minilab prints that were the predominant way we saw our film photographs. It wasn’t archival – but neither were minilab prints. It was also the first time most of us had the chance to edit our own color images – working in the color darkroom required exceptional care, expensive equipment or both, and most color processes didn’t offer anywhere near the control that black and white darkroom workers were used to.
. Noise and tonal range of a D30 file converted to black and white were similar to what one might get out of 35mm film at the same speed, but couldn’t come close to really slow black and white films, let alone to larger formats. Since black and white film was easy to process in a reasonably priced darkroom, many photographers were using 120 rollfilm, 4×5” sheet film, and occasionally 5×7”, 8×10” and even larger exotic formats. Black and white printing was also easily within reach of artists and hobbyists alike, and materials and control were far better than anything available in color. There were literally hundreds of black and white papers available, in a range of contrast grades, tones, surface types and qualities. At the higher end of the market, papers ranged from the soft sepia tones of Agfa Portriga-Rapid to the crisp blue-blacks of Oriental Seagull. Most better papers were fiber based, with the feel of a fine writing or watercolor paper, and if carefully handled, especially in the washing stage, prints could last for centuries. Inexpensive resin-coated papers developed quickly and had a lot of latitude for error, caring less about developer freshness, time and temperature, but they didn’t have the superb archival characteristics nor the beauty of the fiber-based papers.
Both color darkroom printing and early color digital printing offered a choice of two or three paper surfaces, all of them resin-coated. Glossy and a couple of variations on the luster and satin theme were relatively easy to come by, and there were some plasticky matte surfaces available. No combination of paper and chemistry or inks offered a particularly long lifespan – the best darkroom processes tended towards 40 years or so, and the best early inkjet processes were in that range or less.
Color darkroom work offered much less control over tone and contrast than black and white, and, while Photoshop offered a lot of control over digital files, the digital files themselves didn’t have enough information in them to fully use that control. You could change exposure in the digital darkroom, but there really wasn’t a lot of headroom in the file. If you tried to tone down a highlight, it was likely to be a featureless light gray area because the camera had blown the highlight and captured only pure white.. Similarly, if you tried to lift a shadow, it might go from pure black to a featureless, noisy dark brown or gray since there wasn’t enough signal in the shadow to overcome the sensor noise.
Really fine color printing was the province of larger format negatives or transparencies printed using one of several exotic processes. Ilfochrome prints from transparencies were about the least exotic of these options, and were just barely within reach for the dedicated hobbyist or part-time artist. Ilfochrome offered more longevity and more control over exposure and color than RA-4 printing from color negatives, but it was a tricky, high contrast process that offered very limited contrast control. There were processes that exceeded the control and longevity of Ilfochrome, like dye-transfer and carbon pigment printing, but they required years to learn, and were each practiced by a handful of printmakers at any given time. You could commit a huge amount of time to learning these crafts, or you could pay hundreds of dollars per print to a craftsperson who knew them well. No wonder that most serious photographic art was black and white.
We’ve come a long way from those beginnings to a modern digital image workflow that offers exceptional image quality for any form of photography. Where the early cameras offered 3 mp resolutions that competed with 35mm film, we have 100 mp medium format sensors that compete with 8×10” film in total image detail (while 8×10” probably offers more raw resolution, the nearly grainless digital file with additional dynamic and color range prints at least as well) and offer nearly unlimited print size. Even the best APS-C sensors found in entry-level cameras are comparable to medium format film – often to 6×7 and 6×9 cm formats. Where the early cameras offered only the dynamic range of finicky slide films and were very prone to blowing highlights and crushing shadows, the best current sensors offer 12 stops or more, recording tones few films could ever capture.

Rather than adapting the principles of the Zone System to sensors that could not capture the full ten zones, and that were risky outside a range of Zone III to VIII or so, we can now adapt in the OTHER direction to tools that can capture some detail in Zones -I and XI, and get the beginnings of tonal differentiation even in Zones -II and XII. All ten Zones of Adams and Picker’s original conception hold detail, and we can choose to place a really meaningful shadow on Zone II or an important highlight in Zone IX, both outside where they could fall in the darkroom. The best combinations of printer, paper and ink can put between nine and ten stops on the paper, from where the brightest highlight fades into paper white to where shadow detail descends to pure black. Instead of trying to get a good print out of limited tonal range, we are now trying to take a digital negative that holds detail across a wider range of tones than we can print and creatively assign those tones within the range of the print. Not only do we always have a multicontrast paper, because contrast is a function of file editing rather than paper choice, we can even choose to handle contrast differently in different parts of the same image – a capability that was always limited if not absent in the darkroom.
Color gamuts have also expanded, giving the photographer enormous creative control there as well. Twenty years ago, only better digital cameras could even reach the full sRGB gamut of inexpensive monitors and most web browsers. Today, most mirrorless cameras and DSLRs easily exceed Adobe RGB. Printers, too, can print well outside of Adobe RGB, reaching deep greens, blues and oranges that were out of range for most earlier color processes. The richness of color available from a modern inkjet print exceeds anything we could ever print before, whether digitally or chemically. At this point, the gamuts of both the camera and the printer are likely to exceed both the monitor’s display capability and even the working space you might be using in your editing software (ProPhoto RGB is still much larger than any camera or printer can reach, and it even contains some colors beyond the human visual range).
The working space problem is easy to fix – most raw processors either default to or support a wide gamut working space. Adobe Lightroom Classic has always used Melissa RGB, which is closely related to ProPhoto. Capture One does not go into detail on its internal working space except to say that it is very large (strongly implying some variation of ProPhoto or something similar). DxO used Adobe RGB as a working space until recently, but PhotoLab 6 supports a space called DxO Wide Gamut, which is in the size range of ProPhoto, but they claim it is better tuned to human vision. Some editors outside of these three use ProPhoto as a working space, while others use Adobe RGB, which can be limiting.
The challenge is that no monitor as of this writing (and no projector a photographer is likely to have access to – some digital cinema projectors DO exceed Adobe RGB) supports a colorspace larger than Adobe RGB. Some high-end editing monitors support some colors outside of Adobe RGB even though they don’t support a larger standard colorspace, and should be calibrated to their native gamut if you will be working in a wide gamut space. It’s worth using a wide gamut working space even if you can’t see all of the colors on the monitor – some printable colors will be preserved, and can enhance the print.
Most Luminous Landscape readers should be using a calibrated, Adobe RGB capable editing monitor – we tend to use cameras that can take advantage of those capabilities, and many of us print on printers that can as well. DCI-P3 is a colorspace around the size of Adobe RGB, but optimized for video, that can be used as an alternative to Adobe RGB. Most Apple devices and some higher-end Windows laptops are calibrated to DCI-P3 and don’t have an Adobe RGB setting, while most external displays that support one or the other support both and should be used in Adobe RGB or native gamut mode for photography.
The resolution, dynamic range and color available to photographers in 2022 offer an enormous range of creative control. Camera features such as incredibly fast and precise autofocus, uncanny image stabilization and blistering frame rates mean that we can capture images in a wide range of situations that would have previously been very difficult or impossible. The rapid pace of progress in digital imaging technology means that the creative options available to us have expanded tremendously even in the past decade or so. At this point, a digital color print from a raw file made with any modern camera with an APS-C or larger sensor and an excellent lens, edited with current software and output on a modern inkjet printer can be among the technically finest color photographs humans have ever had access to. At the extreme, with a 100 mp medium format camera and the best 12-ink printers, only a carbon-pigment print from an 8×10” negative or transparency can hope to compete. If a black and white print suits the subject, the best digital cameras and processes can rival the best of silver-gelatin and platinum-palladium printing from large format negatives.
One of the major roles that remains for chemical processes is for specialized and alternative (generally) black and white processes ranging from printing-out paper to gum bichromate, from wet plates to cyanotypes. A few photographers are still working in daguerreotype, the first viable photographic process. Black and white alternative processes will almost certainly remain viable for decades, generations, centuries – they are often relatively simple, possible for a small group of enthusiasts to keep alive – and they offer unique looks that an inkjet print can’t duplicate. Black and white film photography itself could easily survive as an alternative process – it is possible to manufacture black and white film in a home darkroom, and easy in a small lab/factory. The prognosis for color film is far less robust for two reasons. First, color film is much more complex to manufacture and requires a significant industrial scale. Right now, there is enough demand from a combination of a few filmmakers still using 16mm and 35mm movie film, a small market for disposable cameras (perhaps for weddings and parties), some artists using Lomos, Holgas, Dianas and other “crappy” cameras and a small number of users of higher-end film cameras to keep a few film coating plants running.
The number of color films available goes down every year, and the price of what’s left keeps going up. It may not be too long until keeping a full-size film coating plant going simply doesn’t work economically – and color doesn’t lend itself to small-scale production the way black and white does. The second problem faced by color film is that there simply aren’t the unique color processes we see in black and white. There are a few possibilities like infrared photography, but most chemical color printing is relatively “straight” – and inkjet is better at that than any chemical process except the ultra-exotic carbon pigment, and is rapidly closing in on that. There just aren’t the choices for different looks like platinum-palladium, gum bichromate and cyanotype. Even color infrared can be done digitally – it involves replacing filters in the camera, a somewhat difficult “surgery” – but it’s commercially available, and more viable than expecting color infrared film and processing to remain for the long term. The world of color alternative processes is largely about unusual inkjet printing materials – and there is a world of THOSE out there that no color darkroom process could ever match. From silk to Duratrans, from Washi to metallic papers (and true metal prints), and from canvas to watercolor paper to Barytas and Platines, color inkjet printing offers enormous creative control.
Reading the recently republished LuLa article entitled “Beyond Calibration”, I was struck by how much of a difference a decade of technology makes. The principles in the article are sound (and the images are gorgeous), but the specific numbers are completely different from what we have today. Sensor dynamic ranges on today’s best cameras are three or four stops greater than on many cameras that would have been common in 2008 when several of the example images were made – we no longer have to boost that valuable shadow to Zone IV in camera. If it’s sitting on Zone II in the raw file, we can print it wherever we want it. The bright highlight that would have gone irretrievably to paper white on an EOS-1Ds mk II will now have full detail.
Resolution has reached the point where we very often run out of printer or wall space long before we run out of pixels. There are reasonably accessible cameras whose native print size at 300 dpi is as large as 30×40”. We can capture colors that no standard film ever made could record, and we can make prints that last for centuries using a process that has very few esoteric requirements. The cameras we tend to use have much higher overall image quality capabilities than the 35mm film cameras they might look like. Even a good APS-C camera with a nice lens will print at a quality that would have required one of the larger medium format film sizes like 6×7 cm or 6×9 cm. Many full-frame DSLRs and mirrorless cameras are highly competitive with 4×5” film in overall quality, while medium format digital is capable of quality once reserved for 8×10” film. In all of these cases, I’m comparing a raw file at or near base ISO to a relatively standard film negative of a similar ISO – unusual very low ISO films and developers can certainly resolve more detail, although they may well be grainier than the digital file. An excellent APS-C camera and lens will make a beautiful print of a high-detail subject around 16×20” or 16×24”,while there are plenty of full-frame cameras that are gorgeous at 24×36”. Medium format? I’ve always managed to run out of printer before I run out of resolution…
Current technologies also allow us to make images in many other previously unthinkable ways. Other than in certain types of photojournalism (and espionage) and for artistic effect where grain was desirable, few photographers used film speeds (or pushed film) above ISO 400 or maybe 800. Anything higher was a specialty film, and anything above about ISO 3200 was extremely specialized. Modern back-side illuminated sensors are superb well past 1600, and I have made high detail landscape images at ISO 10,000 on occasion.


Image stabilization allows incredibly slow shutter speeds without a tripod, increasing the range of places a camera can go, and the images we can make. Imagine trying to handhold an 8×10” Deardorff with a modest telephoto lens at 1/10 of a second. I get about a one image in five hit rate (enough to try, for example, blurring moving water without a tripod with a reasonable chance of success) handheld with the GFX 100s and the 120mm lens at a speed that slow, and I’m very nearly at a 100% hit rate by 1/30 second. There are a few camera and lens combinations that allow handholding as slow as a full second, assuming the subject isn’t moving! With a modern stabilized camera and lens, subject movement rather than camera movement is generally the limiting factor except in night photography.
The fastest professional 35mm film cameras had drive speeds around 10 fps (a very few cameras with fixed mirrors and often 250 exposure bulk film backs could go faster). Medium format film cameras maxed out at less than two frames per second, while large format was measured in frames per minute (or was that minutes per frame). Today, most non-specialized cameras can shoot close to 10 fps, and a notably fast camera is anything 20 fps or faster. 30, 40 and even 120 fps are possible on a few cameras, generally with limitations on file formats or image sizes. Fast, precise autofocus anywhere in the frame is almost a given with a modern camera – the differences between them are almost always in capabilities that not even the most specialized sports camera had in the film era.
No single camera does all of this – the best-known “hand of God” image stabilizers capable of one second shutter speeds are found on Olympus/OM System cameras that are also incredibly rugged, but have lower overall image quality than most other cameras, with modest resolution and quite limited dynamic range. Features like 20 fps drive rates and the very fastest autofocus generally require stacked sensors, which impose a small image quality cost and a significant price increase compared to a comparable camera with a non-stacked sensor. The very highest resolutions, dynamic ranges and color gamuts are found on medium format cameras, which are slow and expensive compared to cameras with smaller sensors.

What Affects Image Quality

In some cases, we need certain technical features of the camera, the lens or both to record an image at all, or certain features make it much easier to record a satisfactory image. An extreme case is the unique 1200-1700mm zoom lens Nikon once built to capture images of the pitcher (at 1200mm) and batter (at 1700mm) during professional baseball games. One of the best angles is facing the batter, and the focal length required is surprisingly long. A 600mm lens would work beautifully – if the photographer was standing on second base. Given that second base is going to get a bit crowded with runners, fielders and umpires during a game, the alternative is to use a 1700mm lens from behind the center field wall. Nikon actually built a lens for that specific shot, and they made it a zoom so it could also fill the frame with the pitcher. In less extreme examples, high frame rates make sports and wildlife photographs easier to capture, and telephoto lenses make those images possible at all. Weather-resistant cameras are especially useful for landscape photography, and fast slight telephoto lenses are especially useful for weddings and portraiture. Leaf-shutter lenses are advantageous when using flash, especially studio lighting. None of these things directly affect the quality of the raw file, but all of them affect the types of images a specific camera can capture. The Fujifilm GFX 100S is capable of creating some of the highest quality raw files in the world – but there are certain types of images where it is far from an ideal choice. A sports photographer would gladly give up some of that quality to get the frame rate and sophisticated autofocus of a Sony A1 or a Nikon Z9, which would get them far more of the images they wanted than the GFX.

Assuming that all cameras under consideration can capture the image reasonably (no 3 fps medium-format cameras at a ballgame, no rangefinders for wildlife, etc.), what features of the camera and lens affect image quality? We’ll discuss the sources of image quality first, then image sensors themselves, then the toppings over the sensor, then the remainder of the camera body, and finally the lens.
In most cameras a LuLa reader might use, we have a chain of choices affecting image quality (from when the light hits the front element of the lens) that goes something like this.
1.)Lens (including any filters mounted on the lens – choice of lens, aperture, zoom position if a zoom lens)
2.)Camera Body (shutter, image stabilizer, lens mount, etc.)
3.)Sensor “toppings” (color, anti-alias (low-pass), IR-cut, and any other filters mounted between the lens and the sensor, also things like phase detect pixels)
4.)Image Sensor
5.)Amplification
6.)In-camera processing
7.)Import (capture sharpening, color space conversion, etc.)
8.)Raw processing (exposure, color balance, local adjustments, creative sharpening, combining images, etc.)
9.)Output (final resizing, output sharpening, choice of printer and paper (or screen display)).
Many of us take every one of these technical elements into account when we make our images. They are the tools that we use to support our artistic visions, and we should be choosing them with care. We make many of the choices separately, while those that occur within the camera body are linked and only partially separately controllable. We can certainly choose shutter speed and often even type of shutter (electronic, hybrid, manual). We can make some choices about in-camera processing, and we can turn the amplification up and down (ISO, although it’s a bit more complex than that since it happens in several different ways).On the other hand, we choose the type and size of sensor and the sensor toppings when we buy the camera, and it’s not a choice we can revisit for every image (although we might be able to choose from among a couple of cameras in our bag or vehicle). Still, there are at least seven or eight areas where we make technical choices image-by-image that affect the final print. Some of them are made rather quickly (ISO), while others are complex processes (raw processing).
The Unique Case of Smartphones
If you make a photograph with a smartphone, really the only control you have over any of these technical factors is when you buy the phone. Pushing the button generally gives you an image that is about as ready for final output as it’s going to get, and the degree of control you have over everything that happens in between is extremely limited and generally indirect. Some third-party camera apps offer direct control over a few parameters, but they often disable AI-based features that are the only reason the image looks decent to begin with. Since the phone is stacking multiple images at different shutter speeds and ISOs (smartphone lenses generally have fixed apertures), forcing the phone to capture a single image in order to control either of those parameters disables the stacking algorithm. The problem is that turning off the AI reveals the weaknesses of the sensor and lens.
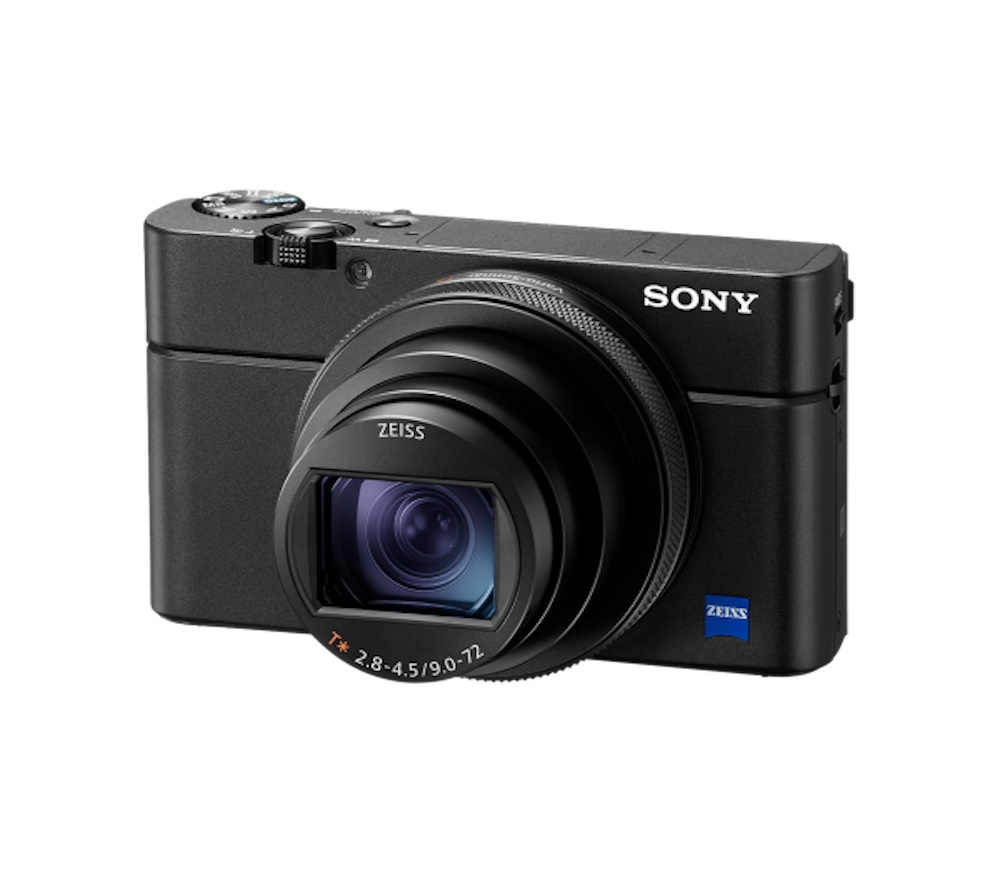
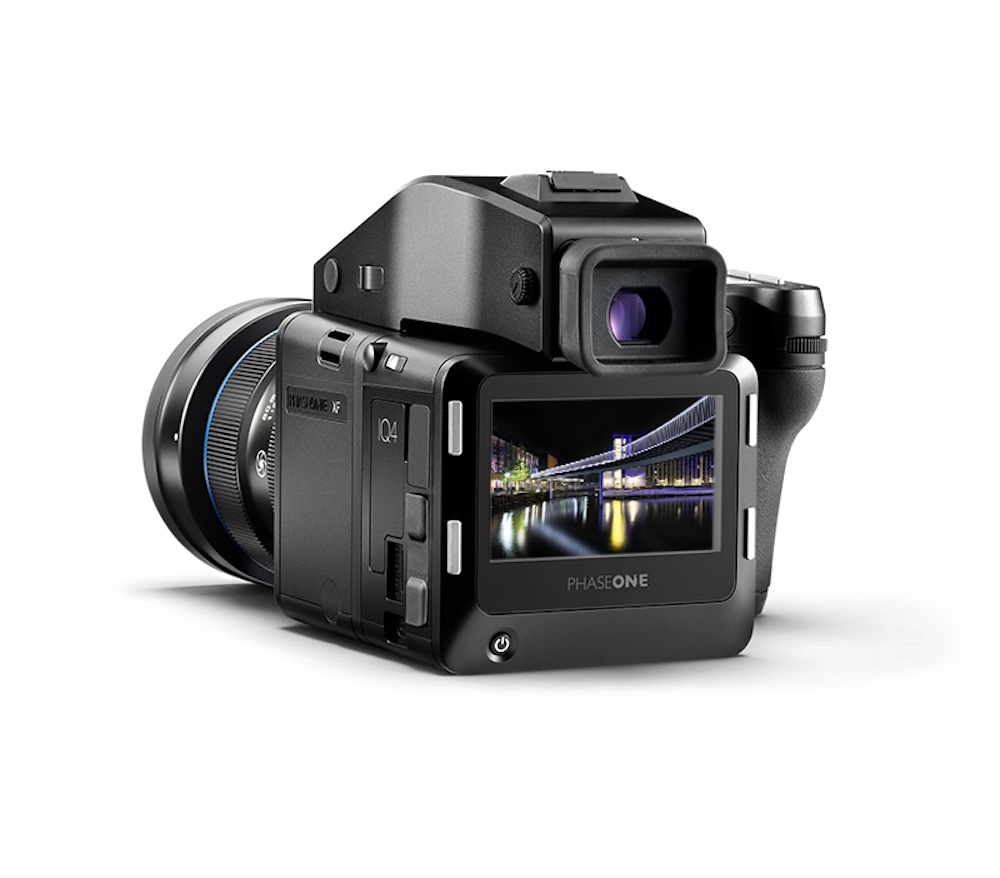
This is what makes smartphones convenient, but it also makes them less flexible than essentially every other camera on the market. Any camera that can output a true raw file, from a Sony RX100 VII compact to a Phase One back, allows the separation of creating the score from performing it in the digital darkroom. Any camera with an interchangeable lens of course allows separate choices of camera body and lens. While you can’t choose your image sensor, sensor toppings and other body features on a shot-by-shot basis, you can when you buy your camera. A videographer might choose the 12 mp sensor on Sony’s A7S III, while a landscape photographer might prefer the 61 mp A7r IV. They are very similar cameras with very different sensors and very different capabilities based on the capabilities of the sensor. That clear a choice of essentially the same body with different sensors is a bit unusual – but an informed choice of a camera involves picking a set of sensor, toppings and features that match your image quality preferences.
A smartphone allows none of that flexibility. Even Apple’s “ProRAW” and similar DNG files from other smartphones contain an enormous amount of pre-baked AI editing. Some third-party camera apps do allow access a true raw file, but it is inevitably disappointing, because even the best smartphone cameras use very small sensors and lenses that are compromised to fit into a thin, fashionable phone. While there are none on the market right now, and there really haven’t been since the rise of computational photography, the occasional smartphone with an oversized image sensor and a less flattened lens has offered improved image quality at the cost of a monumental camera bump.
In order to compensate for their very small sensors and highly compromised lenses, smartphones employ both multiple exposures and extremely sophisticated processing. Apple’s “Deep Fusion” technology, along with similar technologies from other manufacturers, is essentially an automated form of HDR merging that can’t be turned off (except by third-party camera apps that return some control to the photographer at a huge cost in image quality). It goes beyond what most of us would think of HDR merging, where the shadows from one image are combined with the highlights from another at a different exposure, also using stacking as employed by astrophotographers (exposure from multiple images is added together). Both types of stacking are employed simultaneously and automatically. In addition to stacking, smartphones are using AI-based noise reduction – more comparable to the best noise reduction available in post-processing than to anything any other type of camera can do internally.
Smartphones have two advantages over other cameras when it comes to internal processing, but there are also several disadvantages to NEEDING that amount of processing. The first advantage is the power of their processors. A top of the line smartphone from 2022 (an iPhone 14 Pro) has a higher multi-core Geekbench score than a top of the line desktop iMac from as recently as 2017. The iPhone’s single-core score is almost identical to a single core from a top desktop processor in 2022 (Intel’s Core i9-12900K – AMD processor fans note that only the very latest Ryzens beat that score). Geekbench is certainly not a perfect measurement, but it IS a relatively fair way to evaluate processor performance across different kinds of devices. No camera is going to have a processor that runs only five years beyond an upper-midrange desktop computer, much less one that can match a current desktop in per-core performance!
The second advantage is the small file sizes being fed to that processor. Really good noise reduction and AI-based stacking are both enormously computationally intensive, and the larger the image, the more computationally intensive the processing. Almost every smartphone image is actually 12 mp, even on phones with much higher claimed resolutions. When you see a phone sensor over 12 mp, that’s probably not a “real” resolution – the pixels at full resolution are so tiny that the image noise overwhelms the image itself even at low ISO. The camera is “binning” the pixels back down to 12 mp (using multiple pixels as one) to deal with the noise – and the Bayer filter that determines the colors is actually only 12 mp – four or nine adjacent pixels share a color patch. 48 mp sensors bin in 2×2 arrays, while 108 mp sensors generally bin in 3×3 arrays. They’re both really 12 mp sensors almost all of the time, with a rarely useful mode that produces much higher resolution images with a lot of noise and questionable color. While the color on pixels that tiny would never be great, the 12 mp Bayer filter actually makes the color in high-resolution mode worse. Since the high-resolution mode is rarely used, the 12 mp Bayer filter is the best compromise, prioritizing accurate color for 12 mp images.
By modern standards, 12 mp is a small image, and that gives the phone’s processor a huge advantage over trying to do similar calculations on a 45, 61 or 102 mp image (which would take roughly 8x as long as on a 12 mp image). It would be impossible to perform sophisticated stacking or noise reduction in real time on large images, even if cameras had phone-level processors (or desktop computer processors – really good noise reduction on a large file is time-consuming even on a powerful computer, and stacking can be worse). Many seconds or even minutes of processing time per image is clearly not acceptable in the field – especially not with fast cameras that can shoot 10 frames per second or more.
Smartphone images have a particular look to them, the result of the heavy processing required to get a pleasing image. A lot of phone images look like they have a clumsily applied HDR effect, or heavy noise reduction, or the depth of field doesn’t look quite natural. There are also processing artifacts in some images, where the stacking doesn’t quite work. I can generally tell a phone image from a non-phone image, even looking at a small file online – once you know what to look for, the processing gives phones away most of the time. You can’t readily turn the processing off, because the true raw image is so poor, but the processing itself is affecting the image. The same thing was true of minilab prints in the heyday of one-hour photo labs in the 1980s and 1990s. The automatic exposure and color fixed a lot of fast film, bad flash and photographer error – but the auto-corrections themselves took a toll.
What’s Coming
In the next several pieces, we’re going to work from the sensor outward to the lens as we look at the effects of camera and lens technology on image quality. The issue of sensor size and sensor technology will be the focus of the next chapter, because, within a technological generation (and holding things in front of the sensor constant), sensor size is actually much more predictive of image quality than resolution is. Sensor generation (sensors advance by a generation roughly every three or four years) also plays a huge role in overall image quality. We’ll look at sensor generations first, then size, and then move on to resolution and dynamic range to conclude the first installment. The second installment will cover the camera body outside of the image sensor itself, including color and low-pass filtration along with the shutter and image stabilization. The third installment will look at lenses, getting us to the point where we have a raw file ready to process and print (where The Camera and The Negative gave way to The Print in Ansel Adams’ classic series). The next series of articles will take that raw file through the processing pipeline, all the way to a 42×56” print.
Dan Wells
November 2022


Elevate Your Vision


You may also like


