


Now Shipping – 100 Pages – Hard Cover
Only $29.95
– OUT OF PRINT –
Have you ever thought about publishing a book of your photographs? Not just an inkjet portfolio, but a book – hardcover, 4 colour, offset printed, about 100 pages?
Many photographers have, but then they discover that the new skills required, and the costs, are prohibitive. Of course one could always try finding a publisher, but the world of fine-art photographic books is crowded and competitive, and even if you do get a publishing deal, are you willing to settle for just an 8% financial return after all that hard work? No, I thought not.
But still the dream of seeing ones work in a coffee table book, with high quality reproduction, is one that lives on. How then to accomplish this at a cost that doesn’t break the bank?
______________________________________________________________
100 Books Publishing Company
Dudley Harrisof100 Books Publishing Companyhas an answer. Working with high quality but reasonably priced printers in both China and India, Dudley has put together a program that allows photographers to produce a minimum of 100 copies of a 100 page, 9″ X 12″ hardcover book for well under $10,000. That’s a cost of about $82 / copy if just 100 copies are ordered.
Seems expensive, doesn’t it? But, if you go to 1,000 copies the price drops to just $11.50 / copy. The reason is that most of the costs are not in the actual paper and ink, but in the printer’s setup. So, if you believe that your book has a potential market, and accepting that the final cost for 1,000 copies will likely be closer to $15,000 ($15 / copy) when dust cover art, spine printing and a few other extras are factored in, this is still a very reasonable price. Books like this sell at retail for $35 – $45, and so there’s some hefty margin to be made, assuming of course that there are a thousand people who might buy your book. Or, if you’re feeling philanthropic and have a lot of friends.
______________________________________________________________
The Project
I heard about Dudley and his company shortly after he began to offer his services to photographers in early 2005. Since I’d been planning on producing a book of my work to be sold though this web site, and a sample book which Dudley sent to me was quite impressive, I decided to embark on producing one through his company. Though my work has appeared in numerous books, I’ve never been involved directly myself in the entire design, layout and page creation processes. It looked like a fascinating challenge.
The following is a diary of the process, from initial contact to selling books. I hope that you find it informative.
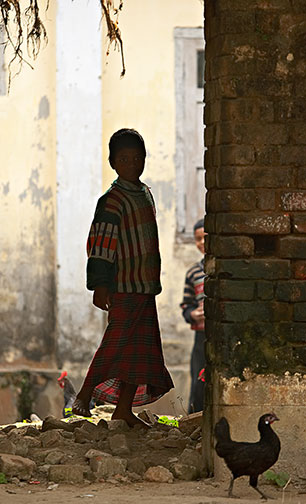
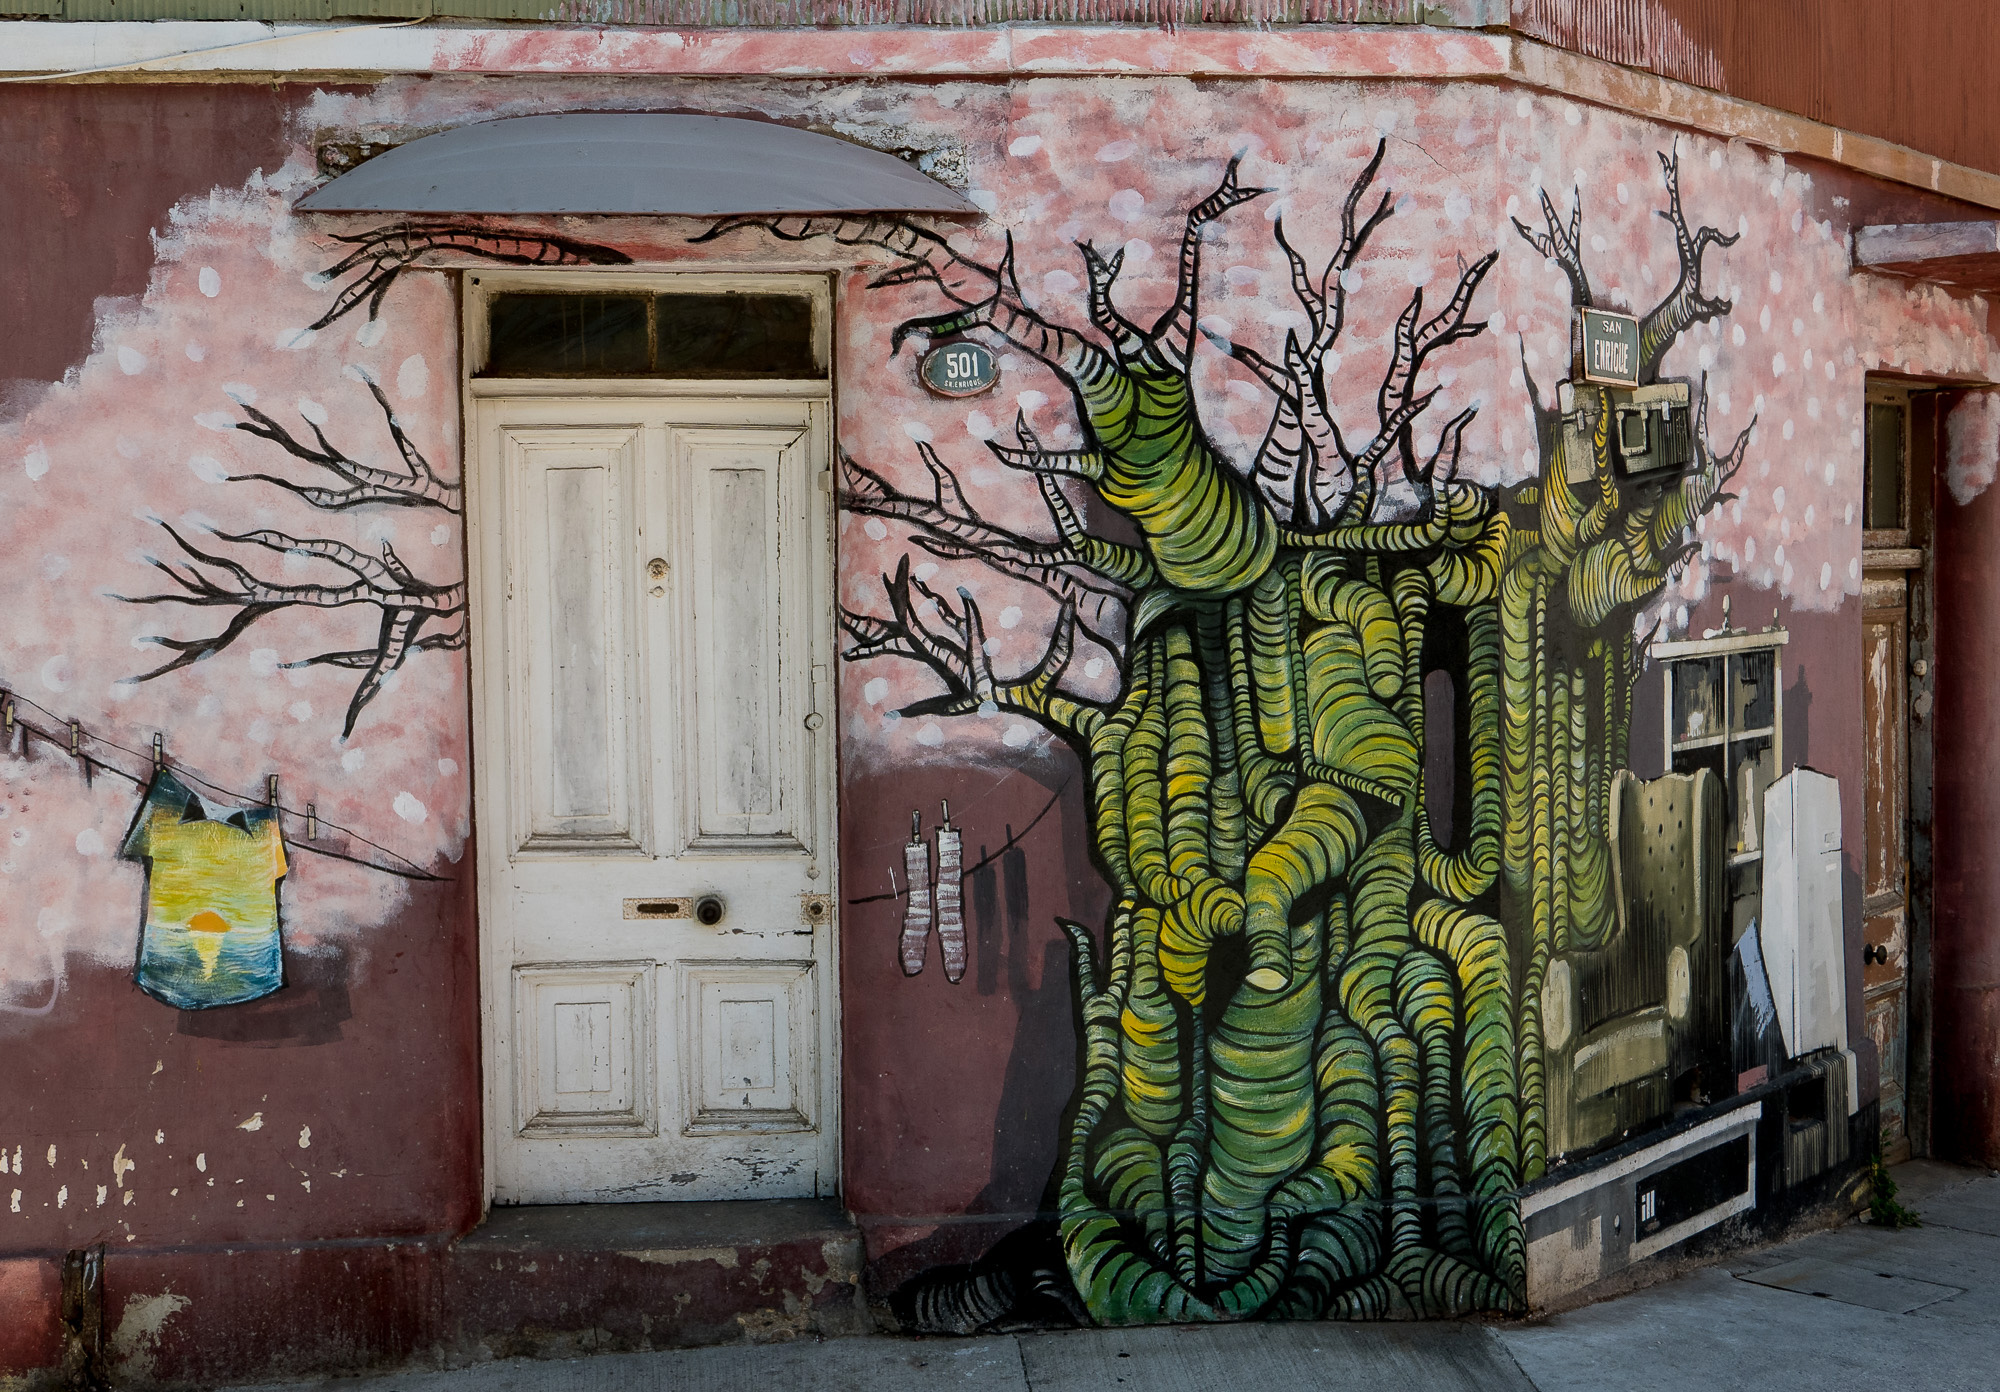
Boy and Rooster. Natori Rajburi. January, 2005
Canon 1Ds Mark II with 70-200mm f/2.8L IS lens at ISO 400
______________________________________________________________
First Steps
I had ordered Dudley’s sample book, and was impressed. It wasn’t the highest quality 4 colour offset printing that I’d ever seen, but it was clearly as good as most books by typical publishing companies. The paper used has good weight and gloss, and the binding was properly done. All in all, a book that was indistinguishable from ones that you would see in the photographic section of any book store.
The sample book is US $40 and also comes with a CD containing files and information that you need to proceed with your project.
After reviewing the book, and a couple of telephone calls with questions, I was ready to begin the process. I figured that I would not have any great difficulty selling a thousand copies of my book via this web site as well as other related channels, and so the financial risks were acceptable.
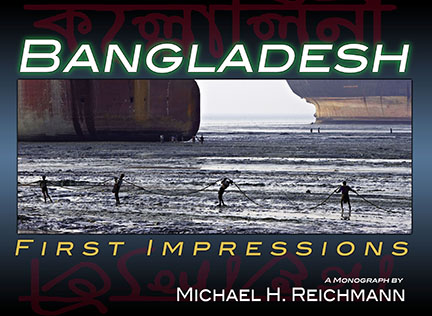
I chose to do my book on theBangladeshshoot that I had done in January of 2005. This had produced some 75 portfolio grade images, and a subsequent gallery exhibition and fine art portfolio, which were received with some considerable critical acclaim . But the portfolio sells for $550, and though it has sold well, it is not something with broad accessibility. People who visited the show were constantly commenting on how seeing the images on the web site was only a pale comparison to seeing them in person, and so a Bangladesh book seemed to be a natural outcome. Put this together with the100 Books Publishingopportunity, and it was a project too good to pass up.
______________________________________________________________
The Test Print
All you need to get going (in addition to the required amount of money), are a copy of Photoshop CS, and between 75 and 100 images and text that you’d like to include in your book.
The first thing to do is to follow the directions in the text file on the CD, and do theGreen Square Exercise.This consists of loading a template that is in the CMYK colour space, and a file consisting of a green square that’s in the RGB colour space. You copy the green square to a new layer and then drag it into the CMYK template.
Oh dear! What happened to the colour? It’s lost brightness and saturation.
Exactly.
CMYK, which is what commercial printing presses use, has a much narrower gamut than RGB devices like monitors and inkjet printers. (If anyone writes to tell me that an inkjet printer is really a CMYK device I’ll bop them).
What Dudley is doing is helping to impress this upon you, so that you understand the inherent limitations when moving forward with your project. These aren’t limitations imposed byhistechnology or presses, but byalloffset presses – at least those that are within the financial reach of most publishers. (Try stochastic Hexachrome printing if you really want to blow the budget, but then finding a printer that can do this well is another story).
The next step is to produce a sample file that you send to Dudley, and which he will then return to you with a print sample that looks comparable to what you can expect on the pages of your book.
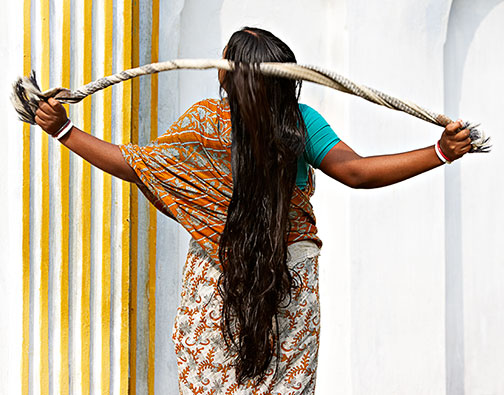
Hair Drying – Hindu Temple, Bangladesh. January, 2005
Canon 1Ds Mark II with 70-200mm f/2.8L IS Lens at ISO 100
Pick an image that is representative of what will be in your book, and ideally one that has some strong saturated colours. I choseHair Drying, seen above, because the clean and pure whites would help me identify colour casts, and the saturated yellows, oranges and greens would be an object lesson in gamut limiting.
I opened the provide template, which is in 8 bit CMYK mode, and changed it temporarily to 16 bit mode.
I then opened my image, which is in 16 bit mode, and made a duplicate layer. Following the instructions I resized it to fit so that it has a size no wider than 9 inches and no higher than 6.5 inches. The resolution should be set to 350 PPI . This is the proper sizing so that the image will fit comfortably in the book’s 9″X12″ pages. You can usePhotoshop’s Bicubic Sharperif you’re ressing down, andBicubic Smootherif ressing up to this size.
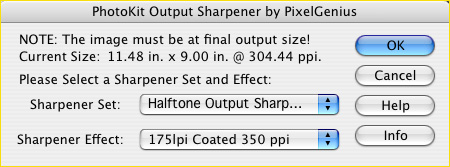
I then appliedOutput SharpeningusingPhotokit Sharpener. This is my preferred tool for every aspect of sharpening, and it has a special selection of settings specifically for sharpening for offset printing. Based on the use of 350 PPI, this means that the printing will be done with a 175 LPI screen and the paper is coated, so as seen above, this was the setting chosen.
After flattening the sharpening layers I duplicated the background layer and then dragged it onto the already open template, and used the guides to center it on the page.
Comparing the way this image looked, now that it was in the CMYK colour space, was informative. I found that the yellows had desaturated somewhat and so I increased saturation in the yellows a bit. This is one of the reasons for staying in 16 bit mode as long as possible, to be able to make these adjustments with minimal degradation to the file.
I then did a final layer flattening and converted the file back to 8 bit mode.
Following this I burned the file to a CD and mailed it to Dudley along with $200. This amount will be credited to the final cost of the book., but is non-refundable in the event that you decide not to proceed.
Now it was a matter of sitting back and waiting for a sample print to be returned.
But, in the meantime, I decided that I would get started on the dust jacket for the book. I’m not much of a graphic artist, and don’t know anyone appropriate locally, so I decided to follow up on an offer that Dudley had made to use a designer with whom he worked.
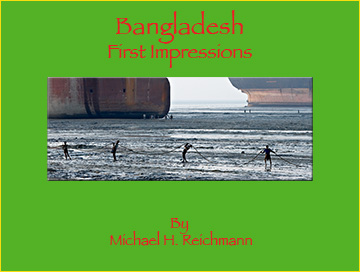
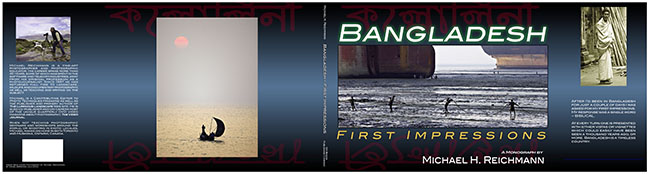
I did a rough mock-up that would show the designer something of what I wanted the dust jacket to look like. It is based on the look of my recently publishedlimited edition print portfolio. Green and red are the colours of the Bangladeshi flag, and the image was the signature image formy exhibition in Toronto in March. The typeface that I chose has a slightlyexoticlook, but of course the designer would be free to use another typeface that may work better.
I e-mailed this to Dudley with my instructions to have his designer go ahead with a draft design.
Over the next several weeks we went back and forth with a couple of different designer’s concepts, until I found one that I liked. Then I submitted text as well as additional images for the front and rear fly leaves, and eventually, and without too much pain, ended up with what I believe to be a very attractive dust jacket design. Not at all what I had envisioned, but far better.
______________________________________________________________
Second Steps
Ten days later I received a package from Dudley. It contained a proof print, a couple of CDs, and a small stack of paperwork.
The Proof Print
The proof print was very good. Almost exactly how my own test print had looked. It was made on Red River Zeppelin paper using a calibrated Epson 2200 and a SWOP v2 profile. This is apparently as close as Dudley can match the output from the offset press without actually running a Press Proof. An actual Press Proof is available, but at a cost of $2,500, so this wasn’t something that I felt was necessary.
My first concern was that this paper has a flat sheen to it in the shadows that is unlike the look of the coated stock that the book will eventually be printed on. I decided to live with it though, because it looked pretty similar to test prints that I had made of this same image. But, as will be seen in a while, this isn’t the whole story about proofing by any means.
The Paperwork
The paperwork included a project check list, a contract specifying the total price, to be paid in full, in advance. One thousand copies of a 100 page book, at a size of 9″X12″, printed on 157gm #2 acid free paper, using a 4-color plate offset press with spot varnish, came to US $11,500.
This includes stitched binding with a hard cover, and with foil stamp on the spine, with glossy dust jacket. Books are FOB my location, shipped by sea freight in 45lb boxes bound to custom-made pallets.
The art work for the dust jacket was an extra $500.
Also among the paperwork was anAcceptance Formfor the proof print, and aLiability Release Formrelated to photographs of people that might appear in the book. All of these need to be signed and returned with payment prior to the project officially getting underway.
The final item was a charge of $275 for an ISBN, and barcode fee. This is necessary if one ever wants to sell the book through retail channels.
The Design CDs
There are two CDs provided. One of a template along with instructions for the design and layout of the dust jacket. Since I had decided that having this professionally done for $500 was preferable to my spending my time on this in addition to the book itself, I have not reviewed these instructions.
The second CD is titledBook Construction. It provides comprehensive details on how to create the book’s various pages. There’s little point in explaining the process in detail, but here are the main points.
You load a page template into Photoshop, let’s say for the sake of example, Plate 37. This template is in 8 bit mode and is set to the CMYK colour space. You now also load the image file that you intend to use for Plate #37. This may be in 16 bit mode and almost certainly in RGB. If it’s in 16 bit mode you need to do the CMYK proofing in 16 bit mode by either doing it on the original file and then copying it to the template, or by converting the 8 bit template temporarily to 16 bit mode. Either way, the CMYK conversion and any file editing should be done in 16 bit mode, but the completed template needs to converted back to 8 bit mode when done. More on CMYK conversion shortly.
______________________________________________________________
Layout
One of the more important esthetic challenges of designing a book yourself is the ordering of the images. While Dudley’s template takes care of as much of the design and layout process as possible, the order and relative placement of your plates (images) is something that only you will be able to best decide.
List of Templates
001 Title of your book. (Nothing goes here but the title).
002 Plate 1. This should be a strong image that characterizes your work.
003 Title with your name and the name of the publisher.
004 Blank
005 Preface or Notes written by you or your friends
006 continued
007 continued or blank
008 Dedication
009 Plate 2
010 Plate 3
011-96: Plates 4 – 89
097 Plate 90
098 Notes on the Plates or Blank
099 Copyright page
100 Blank
The list above is taken from the instruction file on the layout CD.
What’s important here is not the absolute number of pages, (100 is the maximum) but rather their sequencing and pagination. If you have less than 100 pages that’s fine, but the order in which they appear, and especially how they appear in terms of left and right pages is critical to an attractive and meaningful layout. I found that I spent as much time on this as I did on any other aspect of the book’s layout.
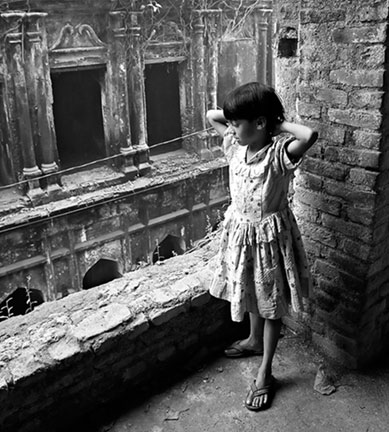
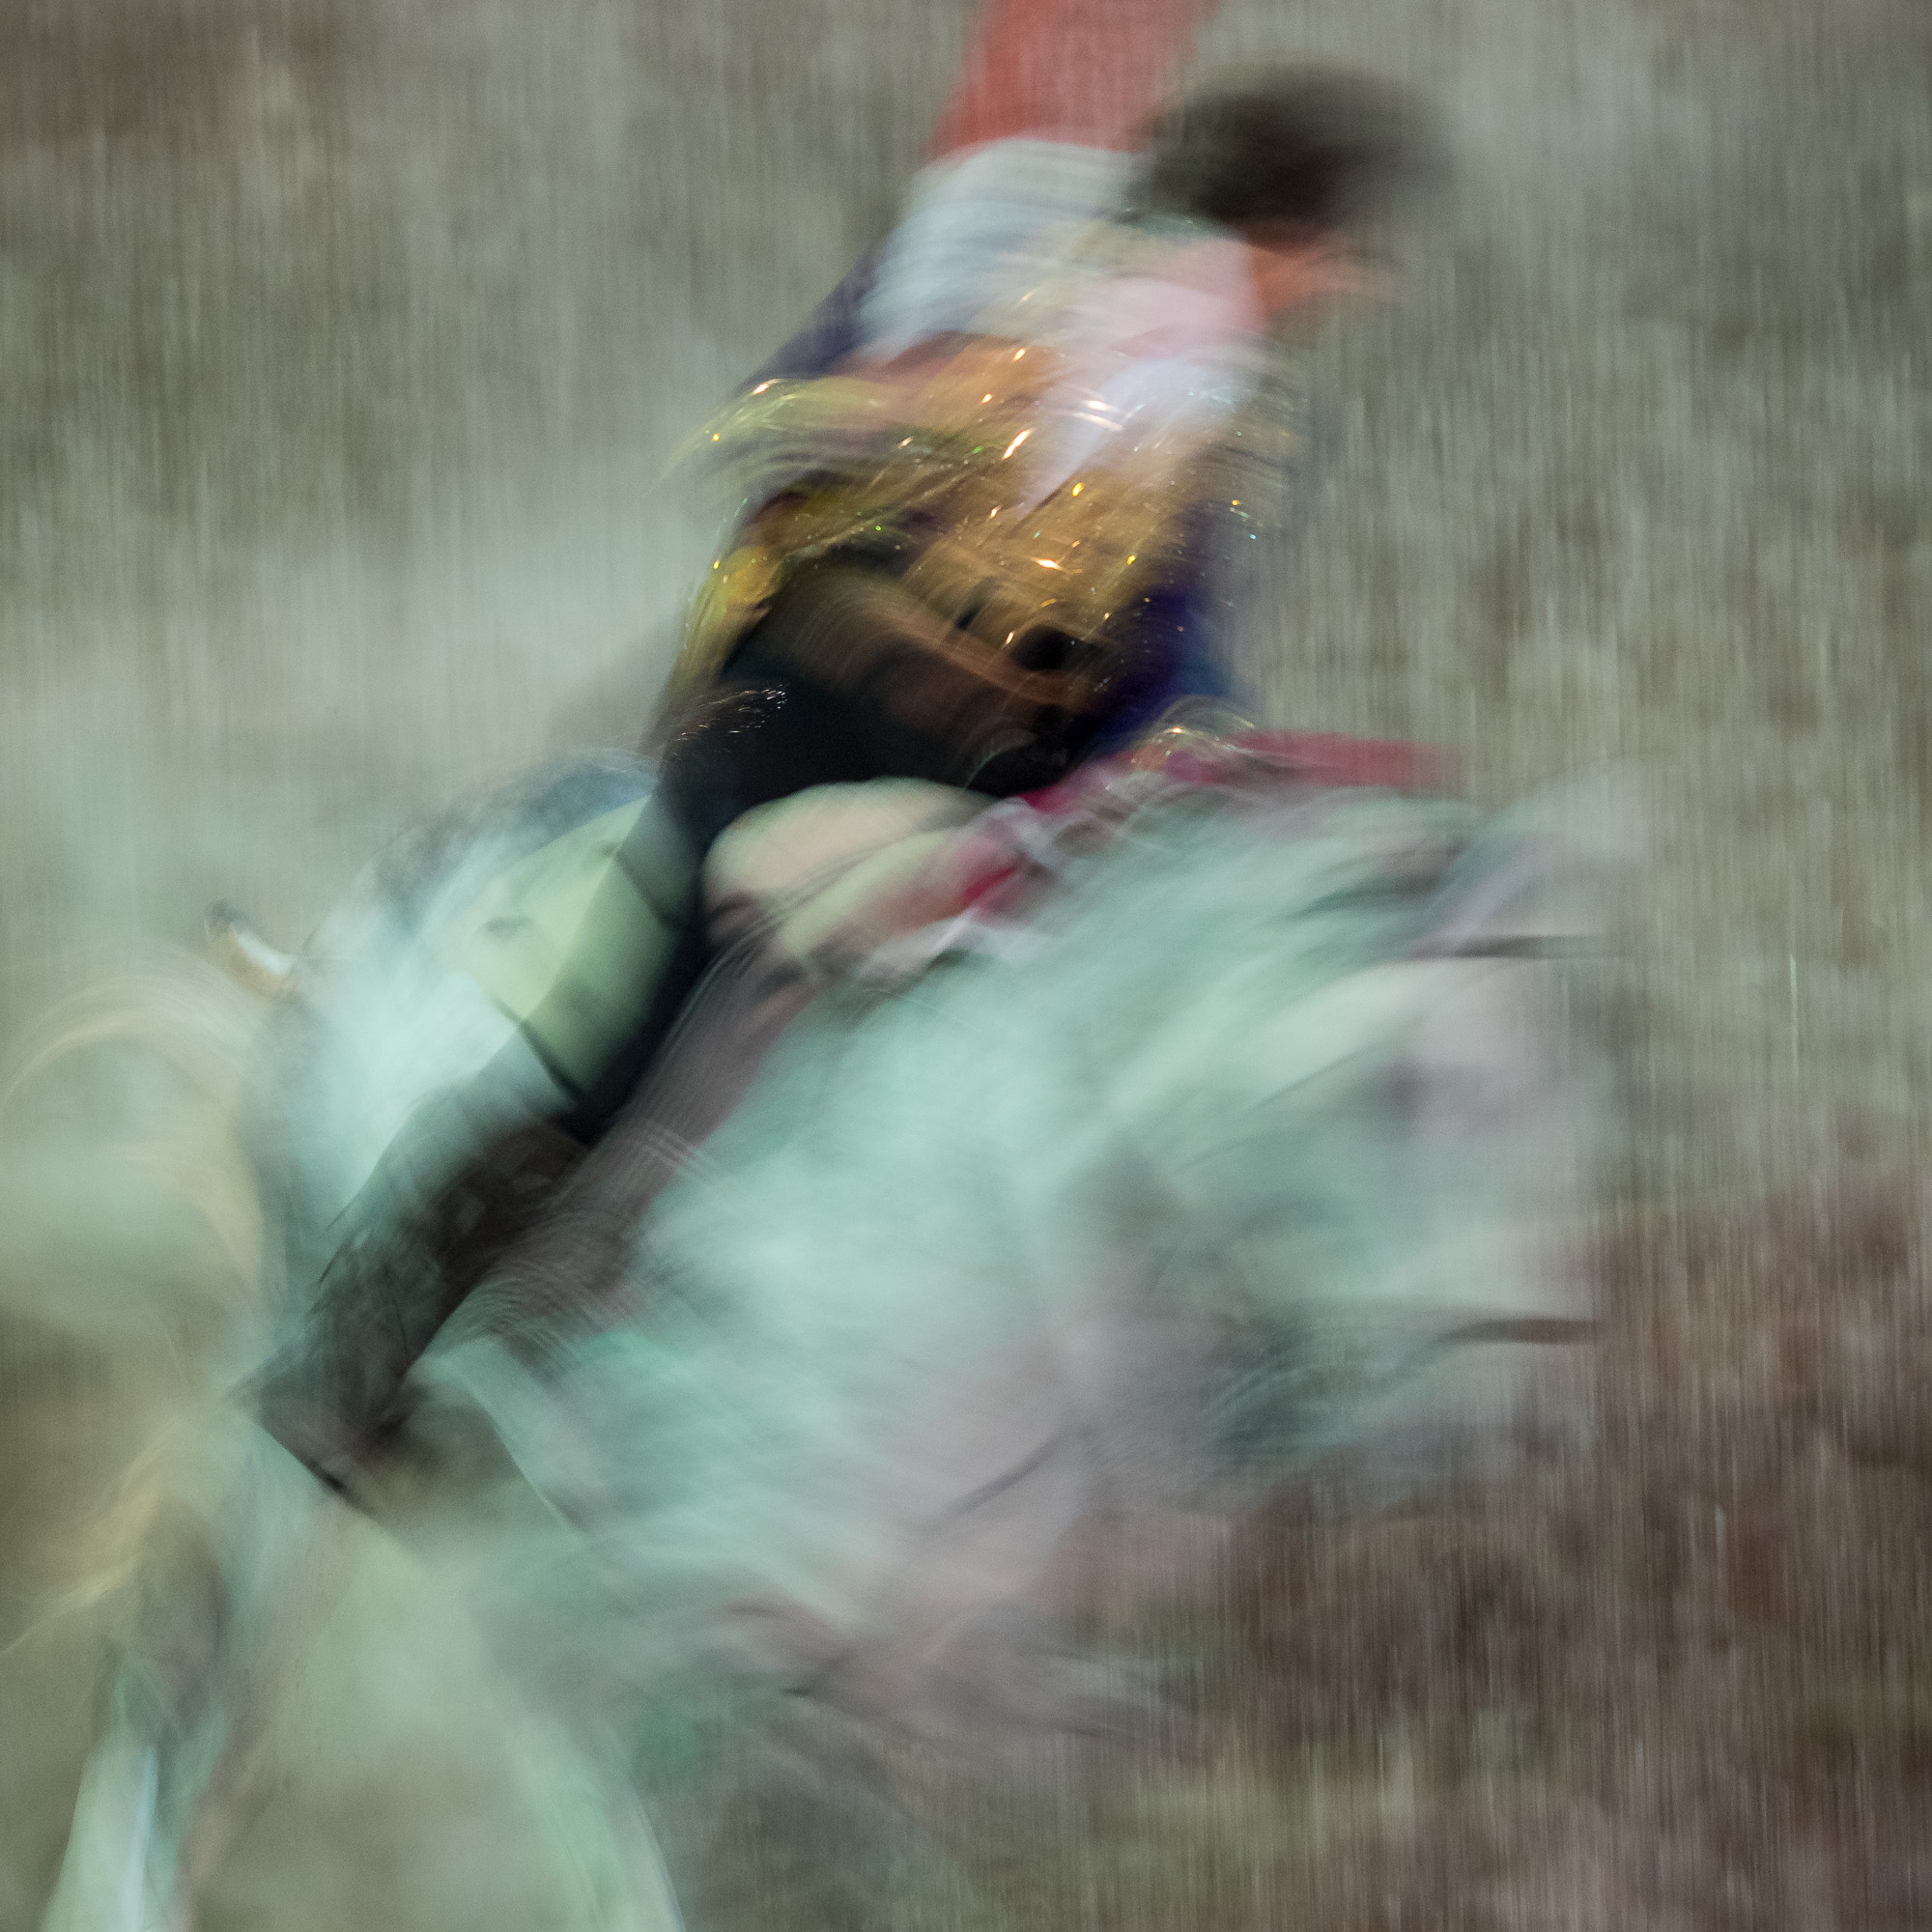
Girl in Ruins. Sonagoran, Bangladesh. January 2005
Canon 1Ds Mark II with 24-70mm f/2.8L lens at ISO 1250
A simple way of doing this is to use Photoshop to print a contact sheet of the images that you’ll be using and then to cut them into individual prints. These can be sorted and organized on a table top; left page – right page, etc, until you have a flow and a sequence that pleases you.
______________________________________________________________
Preparing the Images
Sometimes when you work with a publisher and printer the printer asks for RGB image files and then does the CMYK conversion for you. This takes away one element of control from you, but on the other hand, assuming that the pre-press technicians are good at their jobs, it’s one less headache for the photographer.
But the way that100 Books Publishingworks is that you are provided with CMYK page templates in Photoshop PSD format, and it’s your job to convert the image files to CMYK and then place them on the template. Easy you say, just drag the RGB image onto the CMYK page template and the conversion is done. Or, it’s easy enough in Photoshop to simply selectImage / Mode / CMYK.
But the CMYK colour space and the RGB colour space are quite different, and you still then don’t know how the conversion will look, and especially how the 4 colour press’ profile will handle the image.
There is a solution, and it’s called Soft Proofing. What you do is load the RGB image, preferably in 16 bit mode, and then first resize it. For this book the image area can be no more than 6.25″ high and 9″ wide. You then sharpen them appropriately for half tone printing (I use Photokit Sharpener Pro and their special sharpening mode for half tone printing).
At this point I want to correct the colours so that they will print properly on the printing press, and so underView / Proof Setupin Photoshop I select the profile for the printing press (provided by Dudley), setting the rendering Intent asRelative Colorimetric,Black Point Compensationon, andSimulate Paper Colouron.
Now, I can soft-proof the image as it will appear when printed. I also toggle on the Gamut Warning, so that I can see what colours, if any, will be out of gamut.
Because offset prints tend to be a lot duller and less saturated than inkjet prints I want to increase the saturation on some images. On others, I may want to reduce the saturation, particularly when the colours go out of gamut. To do this I use the Hue / Saturation control, toggling Gamut Warning on and off, while viewing a soft proof of the image through the printing press’ profile. I do this in Layers, so that I can make small adjustments later if needed.
When my soft proof shows me an image that I’m satisfied with on-screen, I flatten the file, convert it to 8 bit mode, convert the image to CMYK, and make one final evaluation before dragging it onto the appropriate book page template. You do less damage to the bits by doing your colour editing in RGB mode than doing so in CMYK.
Once the page is completed (more on this below), I will then make a hard proof. This can be done out of Photoshop by simply printing out from the proofing space, which is your press’ profile
The paper that I used for this isEpson Premium Semimatte Photo Paper 250. Though it has the wordmattein its name, it is actually a gloss paper, because it uses the Epson Ultrachrome Photo Black ink, rather than Matte Black ink. It is a paper that most closely resembles the surface finish of a coated offset press’ paper stock. The paper is bluer than most offset press papers, but the proofer profile compensates for this when you print, at least within the image area. One just has to try and ignore the comparative bluishness of the paper borders. (This paper is only available in 16″ wide X 100 foot rolls, and 17X22″ sheets.
With these techniques one can quite accurately control and proof the book’s images, both on screen and on paper. But, (and you knew that there was a but, didn’t you), being able to do this assumes that you have the right equipment.
The critical pieces include a good quality monitor that is properly calibrated and profiled. I am using a Sony Artisan CRT calibrated with a Gretag Macbeth spectrophotometer and ColorEyes software.
You will also need a proper print viewing station (or D50 light source). Put all of this together, and one can actually do a very decent job of creating CMYK files for offset printing.

Sunken Boat at Sunset – Bangladesh. January, 2005
Canon 1Ds with 70-300mm f/5.5 DO IS Lens at ISO 800
______________________________________________________________
The Wait
Once you have prepared all the plates and page templates you will need to write whatever text pages are desired. Then it’s simply a matter of choosing a font and pouring the text onto a page.
After you’ve checked and double checked that everything is the way it should be, and the way you want it to be, simply burn a DVD (actually 4 in my case) and send it off to Dudley. From this point till a palette of books turns up on your doorstep is about 60 days, most of which is taken up with the books sitting on a boat crossing the Pacific.
As of July 1st, 2005, when this page was completed, this is where things stand. I estimate that I should have completed books ready to sell by early September.
I won’t take pre-orders, but I am curious to know how many people expect to order the book.The price will be just US $29.95, plus shipping and handling.
If you think that you will be ordering a book,drop me a line. Put the word BOOK in the title along with your full name in the body of the email. That’s all that’s needed. If you do, there’s no commitment, but I’ll see that you get an autographed copy when you do place your order. Knowing how many people anticipate ordering the book will help me gauge how many copies to print and what fulfillment mechanisms to set up.
This article will be concluded once the books have arrived and orders have started to ship.
If you’re interested in undertaking your own photography book project, contactDudley Harrisat100 Books Publishing Company.
July 1, 2005
Michael Reichmann
______________________________________________________________
UPDATE:
Since this article first appeared I have heard from numerous readers around the world telling me of similar publishing, layout and printing services around the world.
Obviously I am not in a position to try these all, and therefore am hesitant to recommend or even mention something with which I have no familiarity.
If you have actually self-published a photographic book I would enjoy hearing from you regarding your experience.
______________________________________________________________
Blue Line
About three weeks after sending the disks off to Dudley I received from the printer in China aBlue Lineof the book. This is a version, printed on thin paper, intended as a final content proof. It shows both how the pages are sequenced and is a last chance to check for any typos. It is not intended as any sort of colour proof.
Fortunately the diligence that I’d put into the page organization and initial proofing paid off, because I could find no fault with any of the pages, or with the page layout or sequencing. After giving Dudley the green light for the printers to proceed ti was just a matter of waiting for a handful of first-off-the-press books, which I’d requested, to arrive by courier.
______________________________________________________________
The Samples
On September 20, about 10 weeks after sending off the CD’s with final images and text I received a Fedex from China with two copies of the finished book. Needless to say I was very anxious to see how things had turned out.
In a word, the quality of the finished printed book isexcellent. Materials, paper, binding, printing, colour balance – everything rates an “A”. The quality of production is as good as almost any of the hundreds of photographic books in my collection. The best summary I can give is that I will be proud to sell the book and have my name on it.
I can nit pick. There are a few B&W plates that are not as neutral as I would wish, and on one of the colour plates the balance is a bit off (only I will notice this). But other than these few items it’s a printing job that I feel properly reflects the quality of my photographs.
The final step was for me to order boxes for the books to be shipped in, which I have now done. I await the arrival of the shipment (hopefully by early November). At that point I’ll announce availability and begin taking orders.
If you’re interested in undertaking your own photography book project, you may wish to contactDudley Harrisat100 Books Publishing Company.
______________________________________________________________
The Challenge
27 September, 2005
The books are now on a cargo ship somewhere on the Pacific Ocean.
If you are interested in possibly self publishing a photography book you really owe it to yourself to pick up a copy of the current issue ofLenswork, #60, Sept–Oct, 2005. It contains an essay byBrooks Jensen, the magazine’s publisher, titledSome Unvarnished Truths About Book Publishing. This article is a must read, and if you’re not already a fan, or a subscriber to this bi-monthly magazine, you owe it to yourself to discover it. To my mind it’s the finest magazine about photography (not equipment) published in America today.
______________________________________________________________
Completed
11 November, 2005
Nothing ever happens as quickly as one would wish. The books arrived on schedule in early October. The shipment was complete, and the books were as expected – of excellent quality. I am very pleased with the colour reproduction and the printing. There is a slight lack of neutrality to some of the B&W plates, but that’s to be expected. Doing Duotones would have increased the cost of the book substantially. There are a couple of typos in the text, but these are my fault, not the printers.
Overall the book is one that I am very proud of.
Though the books arrived on schedule, I was out of the country for much of October. Also, I needed to have custom shipping boxes prepared. But, finally in the second week of November everything is in place and I can begin accepting orders and start shipping.
Bangladesh – First Impressionsis now available fromThe Luminous Landscape‘s on-linestore.
The book sells for U.S. $29.95, plus the shipping method of your choice.
I hope that you enjoy this book. When you’ve received your copy and have had a chance to look at it in depth, drop me a line and let me know what you think.
Toronto – November, 2005
Now Shipping – 100 Pages – Hard Cover
Only $29.95
Order Here Now
______________________________________________________________
Purchaser’s Comments
I received my copy of Bangladesh: First Impressions in the mail today, and find it totally inspirational.
Thanks for sharing your work and your advice on Luminous Landscape and the LLVJ, and for publishing this book. Though I enjoy seeing your work posted online, it is far more powerful and inspirational in print.
– – – – – – –
Mine came today, and it is quite handsome. The B&W and color reproductions all look quite good, and the overall quality appears excellent….
Nice work, Michael (no surprise there.) I find it very useful to see the concrete results of your experiment with self-publishing. The book and articles complement each other very nicely, and the book would be beautiful and a fine purchase even if one had no interest in self-publishing.
– – – – – – –
I have been following your book publishing articles with great interest and it is great to see the final result. Your efforts have paid off! I am convinced that you will do well in sales. Bravo, and looking forward to your next book!
– – – – – – –
I am very pleased with my purchase. First Impressions is very good. Quality of the prints, colour, contrast … are paying credit to the great images you bring back for our pleasure.
– – – – – – –
Michael…I just received my book today…..FANTASTIC! I collect photography books and yours will be a welcome addition. I want to thank you for sharing the information about self-publication. It has inspired me to think of that possibility, and now that I have seen the quality I’m even more impressed.
Thanks again, and thank you for adding some bonus photos of your other location work.
– – – – – – –

Elevate Your Vision


Read this story and all the best stories on The Luminous Landscape
The author has made this story available to Luminous Landscape members only. Upgrade to get instant access to this story and other benefits available only to members.
Why choose us?
Luminous-Landscape is a membership site. Our website contains over 5300 articles on almost every topic, camera, lens and printer you can imagine. Our membership model is simple, just $2 a month ($24.00 USD a year). This $24 gains you access to a wealth of information including all our past and future video tutorials on such topics as Lightroom, Capture One, Printing, file management and dozens of interviews and travel videos.
- New Articles every few days
- All original content found nowhere else on the web
- No Pop Up Google Sense ads – Our advertisers are photo related
- Download/stream video to any device
- NEW videos monthly
- Top well-known photographer contributors
- Posts from industry leaders
- Speciality Photography Workshops
- Mobile device scalable
- Exclusive video interviews
- Special vendor offers for members
- Hands On Product reviews
- FREE – User Forum. One of the most read user forums on the internet
- Access to our community Buy and Sell pages; for members only.
You may also like


