


Sony is at it again. This time they have announced the NEW 16-35mm G-Master lens. This is a lens myself and a lot of Sony users have been desiring and speculating about for quite some time. The Sony 16-35mm G-Master lens has a usable f/stop of 2.8 throughout its total zoom range.
This lens is available for pre-order at B&H Photo and Amazon
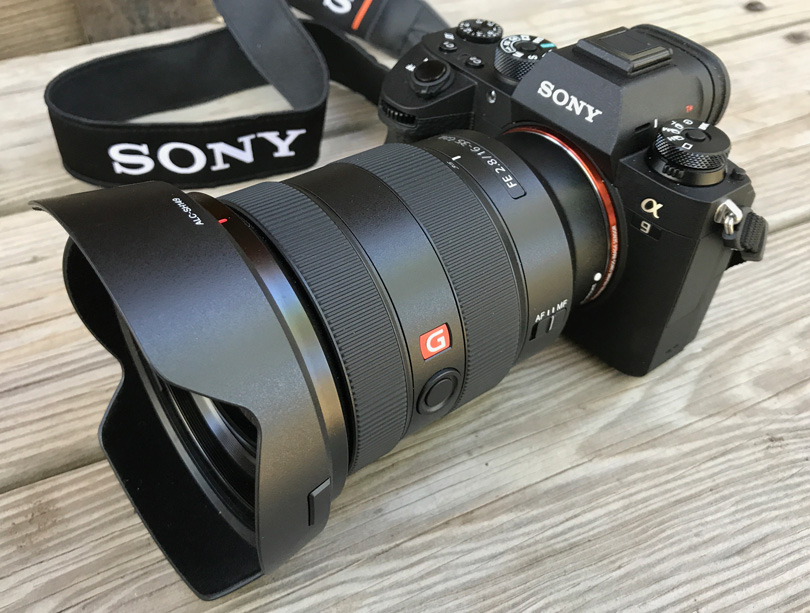
This article has numerous shots made during my day with the a9 and 16-35mm lens (shown below). You can click on any images where indicated and zoom the image to 100% size. You can then drag and view the image. When finished click on the upper left arrow to be returned to the article.
I was invited to an exclusive preview at the Sony Kando press event with some other press and content providers in Santa Barbara, CA. It seems like it was just about a month ago we were all together in New York City for the announcement of the a9 camera. Once again proving Sony is moving through this year like a fast freight train. I’m sure this pace will continue, and we will see many more exciting products from Sony throughout the year.

This lens is unique. It now fills the ranks for G-Master glass, giving full frame focal length from 16mm to 400mm, consisting of 5 different G-Master lenses. The G-Master lenses are the NEW 16-35mm, 24-70mm, 85mm, 70-200mm and the 100-400mm. The G-Master series is all about performance, high-quality build, and optical performance.
The NEW FE 16-35mm F2.8 lens is a lens I have wished for a while now. It covers the popular zoom range with a F/2.8 wide aperture. The specs are 16-35mm (24-52mm APC-S), max magnification 0.19, minimum focus of .28 meters (11.02 inches), filter diameter of 82mm (similar to other G-Masters lenses), 88.5 x 121.6 mm (3.48 x 4.79 inches), with a weight of 680 grams (23.9 oz). Maximum aperture is f/2.8 and minimum is F/22.

The lens offers the ability to enjoy the perspective with a corner to the center sharpness that you must see to appreciate, with an exquisite bokeh made possible by an 11-blade aperture that gives more rounded circles in the background bokeh. I was surprised at how fast this lens focused both on the Sony a9 and a7rII cameras. This is made possible by two DDSSM focus drives that are not only super precise but also very quiet.

Much of the optical performance also comes from advanced coatings like the Fluorine coating on the front lens that resists dust and fingerprints. Although it’s not waterproof, there are a large number of seals in the lens, making it moisture and dust-resistant.
Lens construction consists of 13 groups and 16 elements. While I don’t claim to be an expert on lens design, I was impressed by the fact that Sony used three different XA (extreme Aspherical) lenses to help suppress curvature of field and distortion, chromatic aberrations and spherical aberration. This results in an impressive MTF chart as shown below.

In my use of the lens as shown in a few images below, I was surprised not to see some of the issues that I get from the present f/4 version of the glass, as well as some other manufacturers’ glass of similar focal length. I saw no aberration in my test images or purple fringing in areas of contrast differences like tree branches and other similar items.
One of the things that’s most obvious when you put the lens on the camera for the first time is how light is. Canon and Nikon lenses are bigger and heavier. Canon weighs in at 27.8 oz and Nikon at 34.2 oz. With Sony’s lens at 23.9 oz., the balance of the camera and lens feel great to work with. The zoom motion is smooth with the adjustment being about a quarter of a turn. It was very easy to zoom and rapidly compose while I was taking some of the sample shots I attached below. For much of my work along with aging eyes, I prefer Auto-Focus. I did try out Manual-Focus with this lens, and it was very smooth and precise. This was with the help of the EVF magnifier as well as focus-peaking.

As a side-note, this is the part where mirrorless technology is so good. If you do a lot of Manual-Focus, you can see the image magnified in the EVF as well as focus peaking (that shows the in-focus part of the scene in a color of your choice – I prefer red). You can also have a histogram that shows exposure values, and just about any camera data, you could wish for. All of the data that appears in the viewfinder is optional and customizable, so you can have as much as or as little data as you want.
On the side of the lens is a customizable Focus Hold button. I prefer to leave this as is (push to lock focus), but you can program it for many features. Some photographers like to use it for depth of field preview. There are many options, which can be accessed from the camera menu. There is also a switch for AF or Manual-Focus.
Many times when using wide-angle lenses, you are faced with the challenge of shooting directly into the light. During my tests, I shot this lens right into the light with very minimal or no flaring at all. It’s kind of funny since many people do not like flare, while there are others who do like it. If you are one of those that don’t want it or like it, you’ll find this to be an excellent lens.

I did most of my testing on the a9 camera, and I couldn’t believe how fast and how accurately it auto-focused. I was shooting some tough scenes, and you could see the AF lock on in the viewfinder and then track the subject. Look at the image below of the bikers, skateboarders, and horse jumping. Don’t forget you can zoom in on any image below 100% and do your own pixel peeping. I didn’t apply any lens correction for these shots. I presume by the time this lens is released, Capture One and Lightroom will have lens profiles for any distortions the lens does have, which seemed to be minimal.
The 16-35mm G-Master lens will be available late August, and you can pre-order one now at B&H and on Amazon. The list price is $2200.00 USD and $3000.00 CAD.
I was impressed with this lens for the one day I had it. It simply is a lens many of us have been waiting for, and once more proves that Sony is very serious about where they are heading in the Pro-Photography market. I have placed my order for this lens to add to my Sony kit. I’ll do a follow-up review with a production unit when I receive my lens later this summer. We were told that the lenses we were using were the final release products.
Sony 16-35mm Images
The images below were made with the Sony FE 16-35mm G-Master lens. You may click on any images to see enlarged to 100%. Have fun!
For the action shots I used a Sony a9 camer. I set the shutter speed and f-stop and then used auto ISO . Frame rate was at 20fps. Note how well thje lens handles backlit subjects. I shot the tree at the bottom of the group to show what it was like shooting into light. I was very impressed at sharpness and no defraction or purple fringing. All iamges were processed in Capture One. It was a very bright and contrasty day. Since I ahve ordered this lens, I’ll do more testing and share more images when I can take it out for a more extended spin.
Click on the image above to view at 100%. Zoom in with the magnifying glass to 100%. Pan around to check out details. Use the arrow on the top left to return to the article.
Click on the image above to view at 100%. Zoom in with the magnifying glass to 100%. Pan around to check out details. Use the arrow on the top left to return to the article.
Click on the image above to view at 100%. Zoom in with the magnifying glass to 100%. Pan around to check out details. Use the arrow on the top left to return to the article.
Click on the image above to view at 100%. Zoom in with the magnifying glass to 100%. Pan around to check out details. Use the arrow on the top left to return to the article.
Click on the image above to view at 100%. Zoom in with the magnifying glass to 100%. Pan around to check out details. Use the arrow on the top left to return to the article.
Click on the image above to view at 100%. Zoom in with the magnifying glass to 100%. Pan around to check out details. Use the arrow on the top left to return to the article.
Click on the image above to view at 100%. Zoom in with the magnifying glass to 100%. Pan around to check out details. Use the arrow on the top left to return to the article.
Click on the image above to view at 100%. Zoom in with the magnifying glass to 100%. Pan around to check out details. Use the arrow on the top left to return to the article.
Click on the image above to view at 100%. Zoom in with the magnifying glass to 100%. Pan around to check out details. Use the arrow on the top left to return to the article.
Click on the image above to view at 100%. Zoom in with the magnifying glass to 100%. Pan around to check out details. Use the arrow on the top left to return to the article.
Click on the image above to view at 100%. Zoom in with the magnifying glass to 100%. Pan around to check out details. Use the arrow on the top left to return to the article.
Click on the image above to view at 100%. Zoom in with the magnifying glass to 100%. Pan around to check out details. Use the arrow on the top left to return to the article.
Click on the image above to view at 100%. Zoom in with the magnifying glass to 100%. Pan around to check out details. Use the arrow on the top left to return to the article.
Click on the image above to view at 100%. Zoom in with the magnifying glass to 100%. Pan around to check out details. Use the arrow on the top left to return to the article.
Click on the image above to view at 100%. Zoom in with the magnifying glass to 100%. Pan around to check out details. Use the arrow on the top left to return to the article.
Click on the image above to view at 100%. Zoom in with the magnifying glass to 100%. Pan around to check out details. Use the arrow on the top left to return to the article.
Next article will focus on the new 12-24mm lens.
Kevin Raber
May 2017


Elevate Your Vision


You may also like


