Travels With My Camera
Introduction
Back in the days when I was a photojournalist, traveling to do photography had its advantages. I had no weight limitations on luggage, I had an assistant to schlep my bags and frequently, enough time to work a location sufficiently to get the images I needed.
Today, in addition to my back and shoulders being some 25 years older, I can only find a couple of weeks a year away from my family and other obligations. To make the most of this time I have developed some tricks and techniques which you may find of some help.
Have a look as well at the article onArches & CanyonlandsNational Parks. Though some of the items discussed are dated a few years much of the information there compliments that below.
Planning
I typically plan a 5—6 day trip. Since I travel from the Northeast to the Southwest, an early morning flight will get me to my jumping off point (frequently Las Vegas), by noon. This gives me a half day to drive to my first destination — in fact often with time to have a sunset location planned.
The reverse is true on returning East. Because of the time change the final day is wasted with travel, and I usually plan on arriving at a hotel near the departure airport the night before.
I never plan a trip without consulting Robert Hitchman’sPhotograph Americaguides. I have the complete set and it’s unlikely that there is a place in North America worth shooting in depth that Hitchman hasn’t visited and written about. Other worthwhile guides include theNational Geographic Guide to the National Parksthough it’s more travel than photography oriented. TheCalifornia Automobile Associationmap of Indian Country is also invaluable because it shows back-roads that regular maps have never heard of. Order one!
Driving
I always rent a 4 wheel drive vehicle such as a Ford Explorer, in part because of the traction and high ground clearance, but also because of the room. I like to work with my camera bags open and available, and with my tripod extended. The open hatch of a 4X4 is a much more convenient working platform than the back seat of a sedan.
Depending on where you rent, and from whom, you may notice that 4X4’s have notices saying, "This vehicle must not be used off paved public roads". Duhhh! My approach is to obey, but with one change — I ignore the word "paved". Many of the Southwest’s roads are unpaved and to obey this to the word would restrict you from many wonderful locations. You probably couldn’t even get to half the interesting spots. I don’t go rock-climbing in my rented Explorer. I just drive where I see other tire tracks 🙂
Packing & Flying
With the airline’s crack-down on carry-on luggage, a week-long photography trip can require some planning. Since I won’t check my camera bodies, lenses or film, everything has to fit in a regulation-sized bag along with the other must-haves of a trip. The bag that I use is the LowePro Omni-Trecker. I have one for my Canon system and another for the Rollei 6008 gear. It’s large enough to hold a couple of bodies and film backs and 3—5 lenses, as well as accessories and film for a week. It converts to a back-pack and thus is quite versatile.
My tripod, these days usually a Gitzo 1349 Carbon Fiber with Arca Swiss B1 head, gets packed in a duffel bag with my clothes, with the head wrapped in a sweater for protection.
Flying With Film
Do notplace your unexposed or unprocessed film inchecked baggage. There are now very high power X-ray machines that willdefinitelyfog even low-speed film with just a single pass. There have been articles in the major photo magazines about this during the spring of 1999, but in case you that have missed them, take heed. Carry film on-board with you or buy it on arrival. Similarly with exposed film; processes it before returning or carry it onboard.
As for taking film through the passenger carry-on X-ray, the common wisdom is that it is safe for film up to ISO 1600. To be extra safe I ask for a hand inspection, which I make easier by unwrapping all film and throwing away unneeded cardboard packaging. I then place the film in large transparent plastic freezer bags. I have never been refused a hand inspection in North America, but elsewhere this is possible. At London’s Heathrow airport, for example, not even a note from the Queen will prevent them from having to pass your film through the carry-on X-ray machine.
The biggest mistake made by photographers in a hurry is to neglect using a tripod. 35mm users are the worst offenders. I can’t count the number of times that I’ve been shooting at a famous location in a National Park and seen photographers (I’m talking typically Nikon F5s and 70~200 f/2.8 zoom level gear), hop out of the car and take a hand-held shot at full zoom. Don’t!
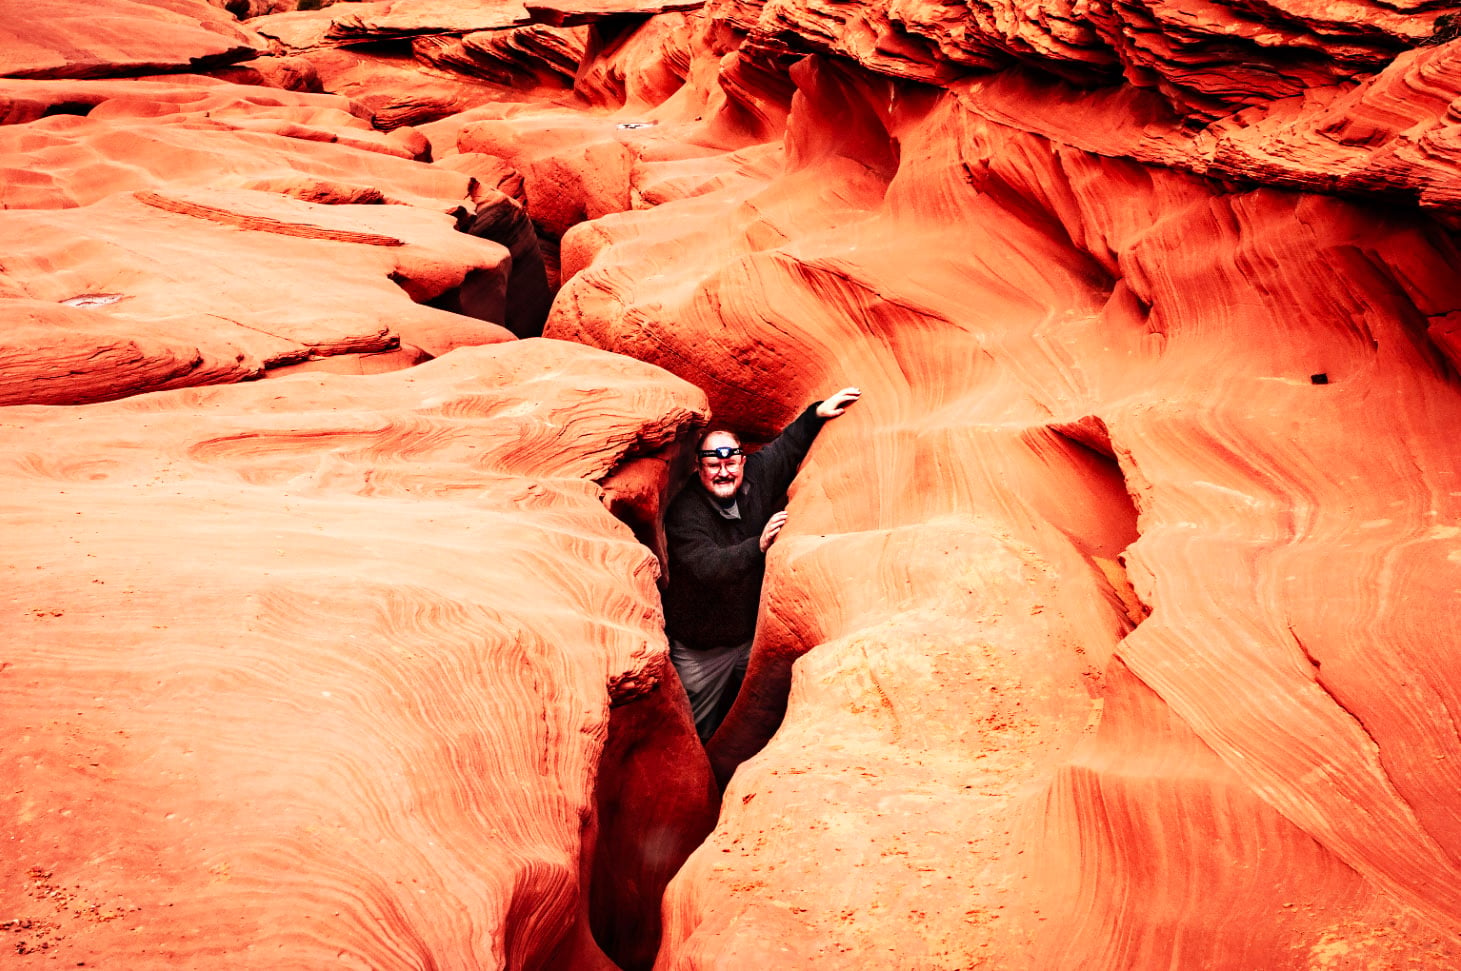
Unless pressed by the situation (seeherefor the shot of the sheep in the sand dunes), Inevershoot without a tripod. Even at high shutter speeds you run a risk of unsharpness (particularly with long lenses), and your framing and composition just won’t be as refined as it could and should be.
After a tripod, possible the most useful addition is a high quality ball-head. There are several good ones (as well as bad), on the market. I use the Arca-Swiss B1. For large format work though I find that a geared head is preferable. I like and use the Bogen/Manfrotto Model 410.
Buy the largest and most solid tripod that you can, but temper this with weight and bulk considerations. I therefore use two different models. For air travel and for hiking I use the Gitzo 1349 Carbon Fiber, while for large format work and with very long lenses I use the Bogen/Manfrotto Tri-man.
Clickherefor some further thoughts on tripods.
Planning a Day
If possible I plan a trip around the time of a full moon coinciding with sunrise or sunset. There is a great shareware program calledEye On Sunrisethat provides this information. Thus armed I start by figuring out where I want to be for sunrise and sunset of each shooting day. Then, frequently using Hitchman’s suggestions, I’ll book motels for each night.
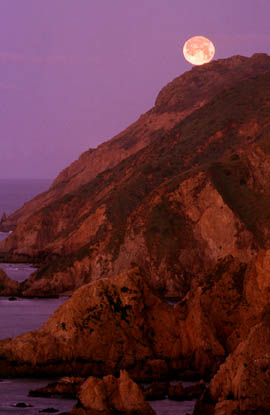 Moon over Drake’s Bay— Marin Headlands CA, 1997
I’d been shooting in the Marin County Headlands the day before and knew that the full moon was going to set just after sunrise. I knew from the I’d been shooting in the Marin County Headlands the day before and knew that the full moon was going to set just after sunrise. I knew from the Eye on Sunrise software the exact time but finding a good location proved challenging. With time running out I hiked and jogged several miles with my full kit to this spot and managed just one frame before the moon slid behind the cliffs. This isn’t one of my more satisfying images, but it took so much effort to get that it’s a worthwhile illustration of how to plan (or not) moon images in the landscape.
Taken with Mamiya 645 and 300mm f/5.6 lens
Depending on the time of year, my days can start as early as 4:30am, allowing for driving time to get to the desired location with lots of time for shooting in pre-dawn light. I usually shoot that location till mid-morning and then use the middle of the day for driving to that late-afternoon and evening’s sunset locale.
I buy breakfast food the night before and eat on location. Lunch is taken on the road (Pringles anyone?), and then a decent dinner at the evening’s final stop. These days are long, and frequently include hundreds of miles of driving, but always turn out to be well worth the effort.
Though mid-day is my driving time, and the light isn’t favourable for most shooting, I always am prepared for an unexpected opportunity. A few years ago on the way from Bryce Canyon NP to the North Rim of the Grand Canyon in late October we saw a sign for Pink Coral Sand Dunes State Park. Though we’d never heard of it and none of our guide books mentioned it, we decided to take a 30 mile detour. It was an overcast day, and as we drove it started to snow — almost white-out conditions for a while. But, when we reached the park the sky cleared and we found ourselves walking over sand dunes covered in snow. It was quite a magical find.
Clothing
Obviously this will be determined in large measure by locale and time of year. But, I’ve found some items to be necessary no matter where you’re going or when.
Two indispensable items are a hat and a photographer’s shooting vest. The hat not only will protect you from the sun, but becomes an indispensable "flag" or sunshade. Early and late-day shooting will frequently place the sun very close to the lens and a hat held out enough to block the sun creates a super-long lens shade. The vest and its multitude of pockets may make you look like a bit of a geek, but sure makes life simpler when hiking.
Another indispensable item are a pair of gloves. The desert and the high plains can be awfully cold early in the morning — even in summer. An old pair of unlined leather gloves will keep your hands warm yet still allow you to operate your equipment. They’re also handy (pardon the pun), when rock climbing or scrambling through thorny underbrush.
Finally, several pairs of jeans are indispensable. Unless you’re just going to be shooting from the side of the road you’ll be scratched and filthy by the end of the day. Levis didn’t become the pants of choice in the west for nothing.
As for other clothing, the best suggestion is to dress in layers. I’ve frequently started shooting at 5 am wearing a t-shirt, denim shirt, sweater and jacket, with the temperature below freezing, and then found myself at mid-day stripped to the waist in 90 degree heat.
Cleaning Up
When I freelanced and worked in the film industry I learned from the film crews the value of an evening equipment cleaning session. No matter how long or grueling the day’s shoot, when a film crew stops for the day the first order of business is to inspect and clean every piece of equipment.
After dinner in the motel room I lay everything out on the bed and do a thorough cleaning of all lenses and bodies. This is also a good opportunity to gather together and safely pack away the film shot that day, as well as to prepare film for the following day’s shoot.
Weather
Though as a consequence of my personality (I’m a typical Type-A), I try to anticipate and control things as much as possible, there’s nothing one can do about the weather. It will or it won’t rain; the wind will howl and blow up a dust storm — or it won’t. The one lesson that I’ve learned though is to press-on regardless. Even if it’s pouring rain at 5am, I’m up and out, heading for my sunrise location. Sure, a lot of the time I end up sitting in the car drinking coffee and imagining how good a few more hours in bed would have been. But, enough times I’ve gotten to the location and had the sun break through the clouds in a spectacular display. Moral — don’t stay in bed. Get out and start shooting. That’s what you came for — right?.
This of course begs the question of what to do about your gear in the rain. I travel with a quantity of large clear-plastic freezer bags and rubber bands. With a bag over the camera I cut a hole for the lens to peek through and secure it with a rubber band. A skylight filter is also a must to protect the front element from rain.
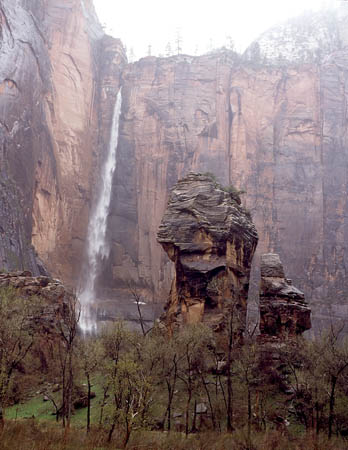 Cliff & Waterfall— Zion NP, 1997
Taken with Rollei 6008 and 180mm f/2.8 lens on Provia 100
In October of 1997 I spent an entire day shooting in heavy rain at Zion National Park. Though my equipment and I got completely soaked, I had a wonderful time. Even with as much protection as possible my Rollei 6008 stopped working after about 3 hours of constant exposure to rain. In the late morning we headed to town and spread our gear out on an empty table at a diner. A complete dry-out with paper towels and a little time under a forced-air hand dryer in the washroom brought everything back to life, and its worked fine ever since. Keep shooting!
May, 1999
You’ve likely noticed the perspective distortion in the photograph above, caused by tilting the camera upward. If I’d been using a view camera or a lens like one in theCanon T/Srange, I could have adjusted for it. But, there is also a way of doing it in Photoshop which is addressed in an article called, naturally enough,Perspective Control in PhotoShop. (Yes, I know it can also be done with an enlarger).

Elevate Your Vision


Read this story and all the best stories on The Luminous Landscape
The author has made this story available to Luminous Landscape members only. Upgrade to get instant access to this story and other benefits available only to members.
Why choose us?
Luminous-Landscape is a membership site. Our website contains over 5300 articles on almost every topic, camera, lens and printer you can imagine. Our membership model is simple, just $2 a month ($24.00 USD a year). This $24 gains you access to a wealth of information including all our past and future video tutorials on such topics as Lightroom, Capture One, Printing, file management and dozens of interviews and travel videos.
- New Articles every few days
- All original content found nowhere else on the web
- No Pop Up Google Sense ads – Our advertisers are photo related
- Download/stream video to any device
- NEW videos monthly
- Top well-known photographer contributors
- Posts from industry leaders
- Speciality Photography Workshops
- Mobile device scalable
- Exclusive video interviews
- Special vendor offers for members
- Hands On Product reviews
- FREE – User Forum. One of the most read user forums on the internet
- Access to our community Buy and Sell pages; for members only.
You may also like