


What Do All of These Letters Mean?
With just about every imaging device from Smartphones to DSLRs featuring the ability to shoot video, many still photographers come up against the video jargon wall. There are literally dozens of TLAs (Three Letter Acronyms) and foreign concepts involved in video, and to go from press the red button to producing something that others might be interested in watching involves not just an understanding of a new technical language, but also some mastery of it.
While shooting video may seem akin to still photography in many ways – since one still has to deal with F stops, shutter speeds, ISO, focal lengths and the rest, there is also a new set of rules and procedures to be followed. This brief tutorial is intended as a beginner’s guide to some of the jargon and concepts involved in using your camera to shoot video effectively.
This knowledge may not turn you into a film-maker, any more than understanding what a raw file is makes you a competent still photographer, but it should help you with some of the basic concepts.

FPS
Frames Per Second. Movies, whether on film or video, are created by continuously shooting a large number of images every second, and then playing them back (usually) at the same rate. The human eye and brain is able to integrate these separate images into a smooth illusion of motion as long as this rate is higher than about 19 FPS. The “normal” speed for shooting movies has been 24 FPS for the past hundred years or so.
There is nothing sacred though about 24 FPS. Some experts say that it was settled on by Hollywood in the early days of sound movies as the slowest frame rate that would produce smooth motion and was fast enough to play back sound properly. Some wanted a faster speed, but the money men said, “…film stock is expensive, so let’s run at the slowest speed that gets the job done“.
As it turns out, 24 FPS has become a norm simply because for the past century we have been conditioned that this is the way that movies look. The rule of thumb is that the shutter speed of film should be twice the frame rate, so a 24 FPS movie should be shot with a 1/48sec shutter speed. This combination produces image frames with a certain blur that we have come to regard as “movie-like“.
These are not the ideal frame rate and shutter speed though for shooting subjects with fast motion, such as sports, because there is too much blur.
TV, on the other hand is at 30 FPS or 60 FPS in North America. In countries with 50 cycle electricity, 25 FPS and 50 FPS are the norms.
So why will you see these expressed sometimes as 23.98, 29.97, and 59.95 and not simply 24, 30 and 60? This is a hold-over from the early days of the NTSC colour broadcast television standard. In the 1950’s with B&W broadcast TV the frame rate was exactly 30 frames per second. But when color information was added there was a problem. The colour carrier signal was phasing with the sound carrier signal because they were very close in the spectrum. The solution was to reduce the framerate by .03fps which moved the two signals out of phase. So much for the history lesson.
But be aware that the some cameras can also shoot at an exact 24FPS as well as at 23.98FPS. This will be discussed further-on under the topic of 4K vs. UHD.

Bit Rate, Bit Depth and Color Sampling
Unless a video camera shoots raw, (which very few cameras under about $10,000 do – except those from Blackmagic), there are two pieces of information to be considered. One is Bit Rate and the other is Color Sampling. Most cameras recording to a built-in memory card shoot in 8 bit mode. This is similar to a JPG image. It looks great, but just as with a stills JPG you can’t do a lot of luminance manipulation to the image before it starts to show artifacts such as banding. 8 bit just doesn’t have enough tonal samples for heavy manipulation.
The reason for this is that video (especially 4K) requires that a lot of data be processed quickly. This means fast processors, which means greater power needed, which means more heat and more cost.
An 8 bit image is described in video terms as having 4:2:0 colour sampling. This means that there is full luminance data (the first 4) but only one quarter of the possible colour data, (the 4:0 in the equation). A full luminance and full colour file would be 4:4:4.
4:2:0 is not as bad as it sounds though it has just 1/4 of the full colour information. It turns out that the human eye is most sensitive to luminance and detail, and less sensitive to colour deficiencies. A 4:2:0 image can produce a lovely richly coloured image, but it is fragile. Just as with an 8 bit JPG still image, too much manipulation in post processing and the image will suffer, showing posterization and worse. Get the exposure and white balance right in-camera in the first place and 4:2:0 will be OK.
When recording to an external recorder such the Atomos Shogun over HDMI, one can, with some cameras, record 10 bit 4:2:2 video. This will offer a considerably enhanced image in terms of one’s ability to colour correct and “grade” the image. Be aware that some cameras can output 4:2:2 over HDMI and some can’t. The Panasonic GH4 can, for example, while the Sony A7s and A7RII can’t.
Bit Rate is a measure of how much data is being recorded. The higher the bit rate, theoretically, the higher quality of the recording. But, you will find that actual bit rates are often not as high as speced, because the camera throttles back on its bit rate to save card memory if it’s not needed (ie: a scene with little motion).
[This paragraph has prompted an interesting discussion on the LuLa Forum]
CODECs
Codecs are the compression schemes that camera makers use to compress and decompress video images. This is a hugely complicated topic, where all is not what it seems. Some codecs are newer than other and are much more efficient that older versions, making comparisons of bit rates between different types of codecs difficult if not impossible. H264, H265, MPEG4, AVCHD, XDCAM, XAVC, XAVC S, XDCAM, XDCAM HD, XDCAM EX, DV, DVCPRO, DVCPRO50, DVCPRO HD, AVC-ULTRA are just some of the names associated with codecs from Sony and Panasonic, and others.
I-Frame and IPB
Video is highly compressed. Depending on the codec used one means of compression is Intraframe, in which each frame of video is individually compressed and is a stand-alone. The other means of compression is what is known as long-GOP (long Group Of Pictures) or IPB. In this form of compression there are three types of frames, ( I, P, and B). One has the whole image, and the other two have information looking backwards and forwards at the changes that are taking place between frames, and only records those changes. The popular but unloved AVCHD standard is a long-GOP. (By the way, Blu-Ray discs use AVCHD, so its quality can be quite good).
Note that while one would intuitively think that I-Frame is superior to IPB, it ain’t necessarily so. One of the top technical gurus at Panasonic reports that their tests show that IPB footage is every bit as robust as I-Frame. Also, be aware that once on your timeline in ProRes or a similar editing format, there’s no appreciable difference between them. It really pays to do your own testing with various formats and judge the results for yourself.
CLEAN HDMI
Most cameras have an HDMI port that takes the signal that the camera is recording and outputs it over a cable so that it can be viewed on a monitor. Some cameras (more and more, recently) produce a so-called clean HDMI signal. This means that there are no text overlays.
This is potentially valuable because the image stream coming over the HDMI cable has not been compressed by the camera’s codec. This means that one can choose to record it to an external portable recorder and thus record at a higher frame rate with a better codec than the camera uses. These codecs, such as Apple’s ProRes, are also much more editor-friendly, even if of higher data rate.
Note that you can also use the HDMI signal to feed an external monitor. These can make shooting much more enjoyable than with the camera’s tiny rear LCD or the EVF. Also, some monitors have excellent shooting assist features such as peaking, false colour, and loadable LUTS.
LOG files and LUTS
We are all familiar with the “looks” that still cameras allow when shooting JPGS, such as those that punch up the colour, or desaturate it, or turn it to monochrome.
When shooting video, similar looks are available, but are usually avoided because, as with shooting 8 bit JPG stills, these images are fully baked (brittle) and are therefore not very amenable to manipulation when editing.
But the better cameras supporting prosumer and pro video have something called a LOG file, which is worth your attention. LOG stands for logarithmic.
Sony calls it S-LOG, Panasonic V-LOG and Canon C-LOG, and sometimes there are different flavours of these as well. But essentially what this setting does is create a very flat looking image which is intended to maximize dynamic range even if the image does not look good as it should. While not as robust and malleable as a true raw file, it does help greatly in allowing adjustment of the file in ones editing software so as to obtain optimum dynamic range and colour, especially from a 4:2:0 file.
A LUT is a Look Up Table. This is conceptually similar to a printer “profile”. It is used in ones editing software to take a LOG file and then expend it to linear mode from logarithmic, and to something that looks more normal; or to a specific “look” that you have planned for your production.
A problem with shooting in LOG is that the image on the camera’s viewfinder and screen will also look very flat, making composition and framing difficult. Then, when you first load your LOG files into your NLE (Non Linear Editing program) they will similarly look flat and lifeless.
The solution is to “normalize” your files before editing them to a standard such as REC 709, which is a broadcast standard. The files will now look “normal(ish)” and can then be adjusted to taste or requirement. Or a creative LUT (which can be created with a program such as 3D LUT Creator can be used). Photoshop CC 2014 can also export 3D LUTS.
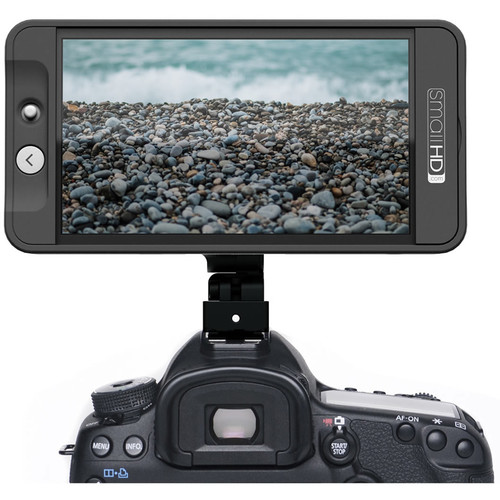
The in-camera flat image problem can be solved by using an external monitor that can take a LUT file so that the image displayed in real time appears as you wish it to, rather than flat and washed out. A very good and small monitor of this type is the new Small HD 501 with LUT support, seen below. The Atomos Shogun recorder / monitor also accepts LUTs.

To find out how to apply LUTs in the various popular NLE editing programs such as Final Cut X and Premier CC, this article from AbleCine has complete details. (By the way, I personally use and recommended the LUT Utility plug-in from the Color Grading Central website).
4K vs. UHD
What is now commonly called 4K video is in fact two different standards, and it causes no end of confusion among consumers. There is 4K and there is Ultra High Definition TV, called UHD. Cinema 4K is shot at exactly 24FPS with a resolution of 4096 X 2160. UHD is at 23.98FPS with a resolution of 3840X2160. Not a huge difference, but real. Some 4K cameras just do UHD, others do both.
In PAL countries UHD is shot at 3840 X 2160 and 25.00p. Cine 4K mode at 24 FPS is independent of AC line frequency and TV standards, and is therefore the same in both regions.
Unless you like the slightly wider aspect ratio of Cinema 4K, you’re likely to find that UHD is preferable. If you’re shooting a real theater-bound production rather than one destined for TV or the web, then Cinema 24K may be the way to go. Or, maybe just use it because the wider aspect ratio looks cooler.
NOTE: The SMPTE, the body that controls standards for the technical aspects of the motion picture and TV industry, says that we should not use the term UHD or Quad HD any more. Instead UHD-1 should be used for 3840×2160 pixel. True Cinema 4K remains unchanged. We’ll see if this catches on.
About Time Lines and Frame Rates
If you are using a contemporary pro-level video editing program, such as Adobe Premiere or Apple’s Final Cut X, then when you place a clip on the timeline the program will automatically play it back at the frame rate that you have set for the timeline.
Be aware that if it is the first clip placed, the settings for the Project may be set to match it when the default Project Settings are used . You therefore should manually set your desired image size and frame rate when creating a new project.
So, for example, if you have set up a 24 FPS timeline and put footage on it that was shot at 60 FPS, the program will simply play them both back at the “normal” speed. Playback is determined by the timeline, not by how the footage was shot. But you can easily tell the software to “retime” the clip and it will play back accordingly.
As an example, if you shoot 60P and put it on a 24P timeline with what is now called Automatic Speed in Final Cut X 10.1 (which is the NLE that I’m most familar with) then the 60P footage will play back in roughly 2X slow motion.
Shoot 4K – Deliver HD
There is no question that UHD-1 is the future. 4K TVs are dropping in price, and one only needs to watch something in 4K to see how stunningly beautiful it can be. Some pundits insist that unless one has a very large screen in a very large room there is no difference between 4K and HD, and to them I say –please visit an optometrist. The difference is visible to anyone.
But the open secret is that there is no readily available means for delivering 4K content at present. There is no 4K disc format (though apparently Sony and Panasonic agreed on a standard some time ago) and it’s impossible to broadcast 4K over the air. Too much bandwidth is required.
Cable operators could do it, but they are reluctant to give up their available bandwidth and reduce the number of channels available. YouTube has some 4K content, but well, it’s YouTube. Netflix has some 4K content, but again these are early days.
However, that does not mean that there is no point in shooting 4K today. Firstly, you will be creating an archive of material against the day when 4K does have distribution means. But much more importantly, by shooting 4K today you are able to output the highest quality HD footage you’ve ever seen.
All you need to do is create an UHD timeline and then drop your 4K footage onto it. When you finally output your edited project as HD, the results will have greater detail and greater colour depth than if you’d shot in HD. Remember, you are ressing down by 2X.
Believe it or not, 4K footage shot at 4:2:0 becomes 4:2:2 when downressed to Full HD. The downressing increases the colour sampling. Cool.
The other big advantage is that with a 4K clip on a 4K timeline you have an image which you can crop, and on which you can do Ken Burns style animation effects – without degrading image quality. You can even shoot a scene (say two people sitting side by side) and create two separate HD quality files to intercut, as if you had used two cameras.
So, even though 4K distribution is in its infancy, shooting and editing in 4K and then exporting in HD will produce the highest quality HD that you’ll ever see.
Michael Reichmann
July, 2015


Elevate Your Vision


Read this story and all the best stories on The Luminous Landscape
The author has made this story available to Luminous Landscape members only. Upgrade to get instant access to this story and other benefits available only to members.
Why choose us?
Luminous-Landscape is a membership site. Our website contains over 5300 articles on almost every topic, camera, lens and printer you can imagine. Our membership model is simple, just $2 a month ($24.00 USD a year). This $24 gains you access to a wealth of information including all our past and future video tutorials on such topics as Lightroom, Capture One, Printing, file management and dozens of interviews and travel videos.
- New Articles every few days
- All original content found nowhere else on the web
- No Pop Up Google Sense ads – Our advertisers are photo related
- Download/stream video to any device
- NEW videos monthly
- Top well-known photographer contributors
- Posts from industry leaders
- Speciality Photography Workshops
- Mobile device scalable
- Exclusive video interviews
- Special vendor offers for members
- Hands On Product reviews
- FREE – User Forum. One of the most read user forums on the internet
- Access to our community Buy and Sell pages; for members only.
You may also like


