Expose Right

July 31, 2003 ·

Michael Reichmann

On my recent workshop in Iceland (July, 2003) I had a fascinating chat with Thomas Knoll about signal to noise ratios in digital photography. You may recognize Thomas’s name — he is the original author of Adobe Photoshop, and also the author of Camera RAW. (A discussion with Thomas is featured in The Luminous Landscape Video Journal, Issue #6, from the Fall of 2002 when I was reviewing a pre-production Canon EOS-1Ds). But I digress.

We spent a lot of time chatting about digital topics during our 3,000 km drive around Iceland, and Thomas elaborated on one that had not occurred to me before, though once I started thinking about it makes perfect sense.


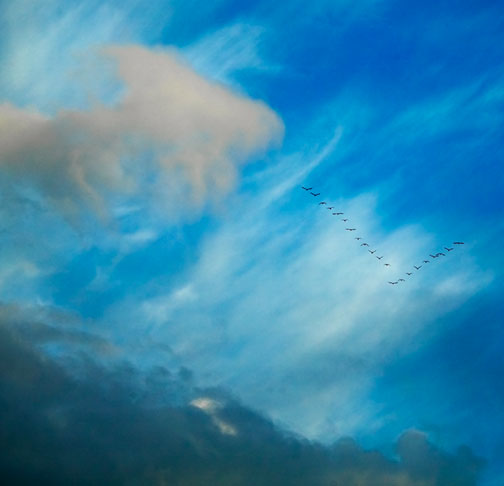
Clouds and V Formation. Iceland — July, 2003
Canon 1Ds with 70-200mm f/2/8L IS lens at ISO 400

Home on The Dynamic Range

Let’s assume for the purposes of illustration that a digital SLR has a dynamic range of 5 stops (it’s usually closer to 6 stops, but let’s not quibble). When working in RAW mode, which you should be, most cameras record a 12 bit image. (Yes, we say it’s in 16 bit mode, but the reality is that it\’s only recording 12 bits in a 16 bit space. Better than 8, but not as good as a real 16 bits would be).

A 12 bit image is capable of recording 4,096 (2^12) discrete tonal values. One would think that therefore each F/Stop of the 5 stop range would be able to record some 850 (4096 / 5) of these steps. But, alas, this is not the case. The way that it really works is that the first (brightest) stop’s worth of data contains 2048 of these steps — fully half of those available.

Why? Because CCD and CMOS chips are linear devices. And, of course, each F/Stop records half of the light of the previous one, and therefore half the remaining data space available. This little table tells the tale.

Within the first F/Stop, which contains the Brightest Tones
2048 levels available
Within the second F/Stop, which contains Bright Tones
1024 levels available
Within the third F/Stop, which contains the Mid-Tones
512 levels available
Within the fourth F/Stop, which contains Dark Tones
256 levels available
Within the fifth F/Stop, which contains the Darkest Tones
128 levels available

This realization carries with it a number of important lessons, the most important of them being that if you do not use the right-hand fifth of the histogram for recording some of your image you are in fact wasting fully half of the available encoding levels of your camera.

But, we all know (or at least should by now) that the worst sin in digital imaging is to blow out the highlights — just as it was when shooting slide film. Once they’re blown (past the right-hand edge of the histogram) it’s bye-bye data.


The Lesson

Normal Exposure
Centered Histogram
Histogram to the Right
For Maximim S/N Ratio

The simple lesson to be learned from this is to bias your exposures so that the histogram is snugged up to the right, but not to the point that the highlights are blown. This can usually be seen by the flashing alert on most camera review screens. Just back off so that the flashing stops.

Now of course when you look at the RAW file in your favourite RAW processing software, like Camera RAW, the image will likely appear to be too light. That\’s OK. Just use the available sliders to change the brightness level and contrast so that the data is spread out appropriately and the image looks “right”. This will accomplish a number of things. The first is that it will maximize the signal to noise ratio. The second is that it will minimize the posterization and noise that potentially occurs in the darker regions of the image.

Please be aware though that for proper results you need to make these corrections while working in 16 bit (12 bit) mode in a RAW converter. Unlike what some people think, in RAW mode the camera is not doing any non-linear processing. All non-linear processing is done in the RAW converter. This is why if you’re going to try this trick you must shoot in RAW and then manually readjust the image in the RAW converter before exporting the file into Photoshop. By doing this you’ll be maximizing the data bandwidth of your entire system. Another reason to be working in RAW mode whenever possible.

Also be aware though that by doing this you are in fact effectively lowering the ISO used to capture the image, requiring slower shutter speeds and/or larger apertures. If you are hand-holding the camera, or shooting moving objects, the tradeoff may not be worth the reduced noise level.

For a refresher on how to read a histogram, read my tutorial Understanding Histograms.


A Test

This technique isn’t necessarily something that you’ll use every day. It requires extra work when shooting and extra work and time when post-processing in the RAW converter. But, if you are interested in ensuring the utmost S/N ratio for a particular shot it can be worthwhile. If though you find this approach to be counterintuitive or somewhat dubious, here’s a novel idea — try it yourself.

Set up a tripod shot; say a typical summer scene with blue sky, while puffy clouds and green grass. Meter as usual and take a shot. Review the histogram. Now take another shot at +1 or so “overexposure”, but not so much as to overexposed the highlights (the clouds for example). Make sure that nothing in the frame is flashing overexposure, but that the histogram is skewed to the right as far as possible.

Now, load the “properly exposed” frame into a RAW converter, do your usual corrections and then send it into Photoshop. Next, load the “exposed-to-the-right” frame and do the same. But, make sure that you use the RAW converter’s gamma, brightness and contrast controls to normalize it first. Now load this frame into Photoshop.

Compare the two. Look at deep shadow areas for noise and posterization. See if you can see a difference. If not, no loss. Just continue as before. But if you do, you’ll have learned a new technique that may be of use down the road.


Further Thoughts

This article has generated quite a bit of discussion around the net, and on this site’s discussion forum. One issue that has come up is that with the possible exception of the Fuji S2 Pro all other current DSLRs only display overall luminosity histograms and not individual channel brightness. This means that it’s possible to blow out one of the R G or B channels without realizing it. Here\’s what Thomas Knoll has to say on the matter…

Only one or two of the channels being clipped is sometimes a problem. With raw capture it is not as bad as with JPEG capture, since with raw what you care about is clipping in the native camera color space, rather than in the working RGB space (since conversion to working space happens after the raw converter’s tone adjustments). Lots of colors clip in sRGB or even Adobe RGB that don’t clip in camera native space.

The ideal fix would be for the camera makers to change the overexposure clipping warning to flash based on the native color space channels, rather than on luminosity. This is one of reasons why Camera Raw’s histogram is an overlay of the color channel histograms, rather than a luminosity histogram.

In practice, this is usually not that big of an issue, since the brightest objects in a scene tend to be nearly neutral (often white clouds). When in doubt, you can always bracket and check the resulting color histograms to pick which frame to work with.

Digital guru Ian Lyons has some comments on this technique with some insights as to how digital compares to what we\’ve been used to with film…

Basically the ideal exposure is as Michael describes: get your histogram as close to the right side as possible but not so close as to cause the over exposure indicator to flash. The ideal exposure ensures that you have maximum number of levels describing your image without loosing important detail in the highlights. The closer you get to this ideal then the more of those levels are being used to describe your shadows. If you underexpose an image to the extent that the shadows block, which is often what folk do to protect their highlights; then you will need to open them again to ensure the final image is as you require. The problem with this approach is that we only have 128 levels available to the shadows. You start pulling curves, etc to open the shadows and you’ll get posterisation, etc.

We need to get away from the concepts of exposure that have served us well with film. The CCD/CMOS isn’t film and does not react like film in the highlight shadow regions. Exposure on film tends to roll-off smoothly in the shadows and highlights. With digital the capture is linear and there is no roll-off. Unfortunately (as Thomas has indicated) the behavior of these sensors isn’t perfect and we can (often do) get one or two channels going into saturation (blowing). This was a major problem with the Canon D30 and the current version of Adobe Camera Raw simply can\’t handle such images. Thomas knows my thoughts on this and I know his.

Its worth noting that I’ve not yet seen a “linear” raw image from a Canon EOS D30/60 or 10D that went full-scale, close but not all the way. This means that even though existing conversion apps might not meet your needs. So far as the raw conversion apps go I am confident that things will improve, but in the meantime I really do urge folk to look at this technique. Remember that you will likely still have the CRW file for a long time. It really is your equal of the negative; don’t trash it. Even if the current crop of conversion apps can’t handle the blown highlights future apps will. However, NOTHING will ever get you back the lost shadow detail.

You can see in the example shown on the following page how much info still exists in the highlights of an image that current raw convertors say is blown. This technique is virtually redundant now but should still give help you better understanding of just how much info exists in your highlights.

http://www.computer-darkroom.com/d30-profiling/d30_profile.htm

Some people think of digital imaging as solid state film. This isn\’t the case. The following explanation by Bruce Lindbloom may help you understand what’s going on with the above technique…

For film based photography, the highlight end of the scale is compressed by the shoulder portion of the D/log E curve. So as brighter and brighter objects are photographed, the highlight detail gets gradually compressed more and more until eventually the film saturates. But up until that point, the highlight compression progresses in a gradual fashion.

Solid state sensors in digital cameras behave very differently. As light falls on a sensor, a charge either accumulates or dissipates (depending on the sensor technology). Its response is well behaved right up until the point of saturation, at which time it abruptly stops. There is no forgiveness by gradually backing off, as was the case with film.

Because of this difference, setting up the exposure using an 18% gray card (as is typically done with film) does not work so well with a digital camera. You will get better results if you set your exposure such that the whitest white in the scene comes close to, but not quite reaching, the full digital scale (255 for 8-bit capture, 65535 for 16-bit capture). Base the exposure on the highlight for a digital camera, and a mid-tone (e.g. 18% gray card) for a film camera.


Update – August 2011

The above article first appeared in 2003. A new essay on this subject titled Optimizing Exposure was published in August, 2011. It covers much the same ground, but elaberates on some points.  It also takes the camera industry to task for sticking with 19th Century exposure techniques in the 21st Century


Updated: March 29, 2015

Lorem ipsum dolor sit amet, consectetur adipiscing elit, sed do eiusmod tempor incididunt ut labore et dolore magna aliqua. Ut enim ad minim veniam, quis nostrud exercitation ullamco laboris nisi ut aliquip ex ea commodo consequat. Duis aute irure dolor in reprehenderit in voluptate velit esse cillum dolore eu fugiat nulla pariatur. Excepteur sint occaecat cupidatat non proident, sunt in culpa qui officia deserunt mollit anim id est laborum.

Lorem ipsum dolor sit amet, consectetur adipiscing elit, sed do eiusmod tempor incididunt ut labore et dolore magna aliqua. Ut enim ad minim veniam, quis nostrud exercitation ullamco laboris nisi ut aliquip ex ea commodo consequat. Duis aute irure dolor in reprehenderit in voluptate velit esse cillum dolore eu fugiat nulla pariatur. Excepteur sint occaecat cupidatat non proident, sunt in culpa qui officia deserunt mollit anim id est laborum.

Avatar photo

Michael Reichmann is the founder of the Luminous Landscape. Michael passed away in May 2016. Since its inception in 1999 LuLa has become the world's largest site devoted to the art, craft, and technology of photography. Each month more than one million people from every country on the globe visit LuLa.

You May Also Enjoy...

January 13, 2009 ·

Michael Reichmann

Please use your browser'sBACKbutton to return to the page that brought you here.


Camera & Technology

Adobe, Why Have you Forsaken Us?

November 13, 2019 ·

Dan Wells

FacebookTweet This week is Adobe’s annual Adobe MAX conference, where they set the direction of their products for the upcoming year – and there’s not