


1 – Introduction
I have a confession to make: I use a Canon 1Ds Mark II. In fact I have been using it for some time already and have skillfully hidden this fact from most of you. As you may have noticed, if you have visited my website recently, no mention of what camera was used is made in the caption of recent images posted to my site’s home page (such as the current image for example). The image title doesn’t offer much of a clue either. I used “1D2” in the title of my first published 1DsMkII image, which was cryptic enough I thought, but quickly moved away from using any letters or numbers that are part of “1DsMk2” and instead used the description of the photograph subject as file name, in a departure from my usual naming practice which involves mentioning the film format in the file name.
So now that the secret is revealed and that I have come clean, the question comes up: why? You may also ask if there is more to this conceded approach to photography? Did I confess everything or is there more where this comes from?
Well, there is more. And the “more” is the subject of this article. Before I start I want to point out that this essay is not structured so as to bring forth the results of scientific testing, pixel counting and grain to pixel comparison. Rather, I chose to structure it as an artist’s account of a new tool and as a comparison of this new tool with my previous tools. If you approach this essay as such you will be reading it the way I intended it to be read.
Grand Canyon Sunset
Canon 1DsMkII in Ev mode, Gitzo 2228, 17-40 f4L at 21mm, f.11-1/2s, ISO 100
This photograph was created on the first day that I used the 1DsMkII in the field, during a three day photography expedition to Grand Canyon National Park. While this image can be taken with 4×5, I could not have done so on this day because I saw this composition at the very last minutes, with only seconds before the sun went down for the day. With the 1DsMkII I was able to work fast enough to capture the scene to perfection in the short amount of time I had available to work. I also captured my first photograph of Grand Canyon at sunset with open shadows without having to create multiple Photoshop layers to reveal details at the bottom of the mile-deep chasm.
2 – I need my photographs today, not in two weeks
So why did I start working with the 1Ds Mark II? Let me give you some answers right away while making comments on the nature of photography today, specifically about the transition from film to digital.
The switch from film to digital is farther reaching than it may seem at first. It isn’t just about using digital capture instead of film, it is also about how film in many ways no longer fits into our lives as neatly as it did only a few years ago. Take my situation for example: when I return from a photographic expedition or a workshop, I like to post new images to my site right away because it is a great way to bring fresh content, show that I am back and describe visually how the photo shoot went, what we photographed and which images we brought back.
Such an approach works only if I can post images within a short amount of time, usually a day or less. If I have to wait two weeks, which is about the time it takes me with film, then there is no purpose in doing so. By then the news value of this approach is gone.
You may say that two weeks is a long time and that there are ways to get film developed and scanned faster. Certainly. However this is the time it takes me with my current workflow. I send my films to a lab in Colorado –Photocraft– because I trust them to do the best developing job possible. This involves packing & shipping the films both ways and even withFedExthis means a week has gone by when I receive my films back. Then there’s filing, editing and scanning and finally image adjustments in Photoshop. Depending on the image this can take from a couple of days to a much longer time, based on how difficult or how much work the image requires in Photoshop. Two weeks is an average. The workflow with film is also not quite seamless as with digital capture. It takes many steps and between each step I conduct other business activities. Yes, I do get sidetracked.
Compare this with digital. I get home, download my captures to my computer, save them to DVD’s, launch my Raw converter of choice (Capture One 3.7) and start working on my images. Development is nearly instantaneous and after an hour or two of work I am making final images adjustments on my top image choices in Photoshop and saving them for web use. From there it is only a click away to GoLive, the software I use to publish my website, and to a web site update. I can usually publish a new image within hours of coming back and definitely the day after my return if pressing matters require my attention.
Monument Valley Flowers
Canon 1DsMkII in Ev mode, Gitzo 2228, 17-40 f4L at 17mm, f.22-1/4 th , ISO 100
This photograph, as well as several others in this essay, was created during my May 2005 Navajoland Workshop.
I wrote this essay immediately after coming back from the workshop and I would not have been able to use this image as illustration if it had been shot on film.
Why? Because my 4×5 films are still in the film holders as of now.
3 – I can’t live with the limitations of film in the face of the image quality offered by digital capture.
Michael Reichmann said several times that the advantage offered by digital capture is no longer about pixels. It’s about a whole lot more. Pixels i.e. resolution, is very important. Without it we cannot make large prints, which is what a lot of my work is about. But provided that we have enough pixels there’s a lot more to digital capture than pixel count.
What is that you may ask? Density range for one, I will answer.
In the photograph of the Grand Canyon above, created with the 1DsMark II on the first day I used this camera in the field, there are details everywhere. To some extent this may seem normal because we have become used to the huge dynamic range offered by digital capture. It isn’t. At least not with film. I have photographed the Grand Canyon for nearly 20 years and this is the first time I got details everywhere in the Canyon on a sunset image without having to do anything else past converting the image from Raw and making adjustment in the raw converter.
Note that this image is a single digital capture. I could, if necessary, have further extended the dynamic range by either combining two captures (one for the highlights and one for the shadows) or using CS2’s High Dynamic Range function (HDR) to merge multiple captures.
With 4×5 film I regularly have to create multiple adjustment levels to get some details in the shadows with sunset images of the Grand Canyon (or sunrises which have the same contrast level). This is because the Grand Canyon is a mile deep (precisely) and therefore shadowed areas at the bottom receive no light whatsoever while the tallest buttes are lit by direct light. On some occasions I have created up to 20 adjustment layers for a single 4×5 photograph, those being a mix of curves, saturation, selective color, sharpening layers and more. The problem is that as I slowly open the shadows the film grain is revealed, occasionally the color of the shadows takes on a green or magenta cast, or again the image breaks down because so little information is present on film to begin with. CCD scanners also have a tendency to darken shadows, and unless a custom scanner profile designed to scan shadows lighter than normal is used some information present on the film will be missing from the scan. At any rate, even if you can master both the scanning and Photoshop techniques involved in making the most out of a bad situation, the fact is that the results are often less than satisfying. Photoshop’s Shadow-highlight function helps but it can only do so much. Opening shadows that contain little or no information results in lighter blank areas, not in beautifully detailed information unfortunately. When working on such images I often have to darken the shadows again eventually, after making all the aforementioned adjustments, because this is the only way to have a presentable image. Eventually, and when working with film, it is preferable to loose detail in order to have an image that is both coherent and pleasurable to look at, instead of one in which shadows appear both artificial and overworked.
5 – Not everything can be photographed with 4×5.
No matter how much I admire how reporters used Speed Graphics to photograph boxing matches in the 40’s (as well as many other subjects) I know that this time is long gone and that it will not come back . For years I have been carrying a compact medium format camera along with my 4×5 to photograph subjects which elude 4×5. For a long time it was a Fuji 645zi to which I recently added a Fuji 645 WA. The medium format size gave me enough resolution to enlarge images to rather large sizes, provided that the scans were made on a drum scanner instead of on my Imacon scanner. While the Imacon has a maximum resolution of 3200 dpi, a drum scanner, such as the Heidelberg Tango can go as high as 7000 dpi, guaranteeing print sizes from medium format originals that are competitive with 4×5.
Yaateh
(Good Morning in Navajo)
Travis Terry playing Native American flute music at sunrise over Canyon de Chelly
Canon 1DsMkII in Ev mode handheld, 17-40 f4L at 17mm, f.9-1/500, ISO 400
Not everything can be photographed with 4×5. For this image I would previously have used my Fuji 645zi or Fuji 645WA medium format cameras. On that day I used the 1DsMkII and benefited from all the advantages I describe in this essay. This image was published on my web site’s home page the day I returned from the workshop as I felt it captured the spirit of our May 2005 Navajoland workshop .
6 – File Flexibility is very important
By file flexibility I refer to the capability of a digital file to allow for a number of image adjustments without degradation of image quality. 16 bit high resolution scans are quite flexible in this regards and I can make significant adjustments while maintaining a very high image quality. In my estimate 1DsMarkII files are even more flexible, in part, as I explained previously, because of the amazing level of information present in shadow areas. Furthermore, if one is careful to expose as far to the right as possible (something made easier by the tri-color histogram featured on this camera) one guarantees that each file will contain as much information as can be recorded for any given photograph.
As a comparison, I had many Kodak Photo CD scans made in the 90’s and I had to be very careful not to go too far with image manipulations otherwise the image would break apart. Kodak Photo CD files were quite challenging in terms of flexibility. The shadows would take a color cast that was nearly impossible to remove, posterization would occur in shadow or highlight areas, or pixelization would show in areas that had been greatly lightened.
7 – What about resolution and print size ?
For some time I have been using a Canon 300D (Digital Rebel) as a “sidekick” camera, so to speak. The problem is that on occasion at first, and more frequently recently, I got excellent photographs with the Rebel that I could not enlarge past 11×14 or so. The decision of working with the 1Ds Mark II was due, partly, to this situation. If I was to shoot digital 35mm regularly I needed a camera that could generate reasonably sized prints. Maybe not up to 40×50, the size I get from raw 4×5 scans, but at least 20×30 so that I could print exhibition size prints and not just small images.
I know what your next question is. How does the resolution of the 1DsMk2 compare with 4×5? Well, this is what we are going to address right away, looking both at native size and enlargements from both 4×5 and 1DsMkII files.
But first let’s look at the inherent capabilities of both. Without upresing the 1DsMkII generates a 95mb,11×15 photograph at 300 dpi. That’s 3350 x 5000 pixels. The 4×5 on the other hand generates a 1GB, 40×50 photograph at 300dpi when scanned on my Imacon at 3200 dpi. That’s 12,000×15,000 pixels. Clearly these two cameras have very different abilities and a direct comparison would not be fair. The original 4×5 scan is about 10 times the size of the original 1DsMk 2 raw-converted file so, obviously, much bigger enlargements can be made from the 4×5 and more detail should be expected to be present in 4×5 scans as well.
When photographs from both cameras are printed at 11×16 (11×14 for the 4×5 due to the difference in image format), sharpness and resolution are very similar. The 1DsMk 2 has nothing to envy to 4×5. Below are screen shots of 11×16 (11×14 for 4×5) photographs from both cameras. Here is the modus operanti I followed in creating these images:
– The 1DsMk2 file was converted from Raw in Capture One 3.7.
– The 4×5 transparency was scanned on my Imacon Flextight 3 at 3200 dpi.
– Both images were sized 11″ wide.
– The same color space was used for all : Ektaspace, J. Holmes (more on this colorspace later on).
– The images in this essay were saved as jpegs after being converted to srgb color space. The same exact jpeg settings were used for all images :jpeg high at quality 60 in Photoshop Save for Web
– The 4×5 file was down resed from it’s original 40×50 @300 dpi scan size in Photoshop using Bicubic Sharper.
– The 1DsMk2 file was not enlarged or reduced after RAW conversion.
– Unsharp masking was used on the 4×5 file (500%, 1 pixel radius, threshold of 3)
– PhotoKit Sharpener was used on the 1DsMk2 file (High Resolution digital capture sharpener + Inkjet glossy 300 dpi output sharpener)
– Each sample crop area shows an image area of 200×300 pixels at 100%.
– A Schneider 75mm f.5.6 at f45 on a Linhof Master Technika with Fuji Provia 100 was used to create the 4×5 photograph.
– A Canon 17-40 at 17mm at f22 was used on the 1DsMk2 at ISO 100.
– The 2 photographs show the same scene but were taken at different times. Although I did take side by side photographs on the same day with the 1DsMk2 and the 4×5, I did not get my films developed yet for the reasons stated above.
– Slight differences in the size of objects in the photographs are due to differences in focal lengths, not to cropping or enlarging of the photographs.
Spiderock Sunset 4×5 crop from 11×16 photograph
Spiderock Sunset 1DsMkII crop from 11×14 photograph
When images are printed at 30×40 things change of course since the 4×5 needs no upresing to deliver an image 40×50 at 300 dpi while a 1DsMk 2 file has to be upresed nearly 4 times it’s original size in order to get to this point.
In order to see how the two relate to each other in terms of print quality I decided to prepare 30×40 files from both originals and see what happened. The modus operanti for this test is the same as above plus the following details specific to sizing both images at 30×40:
– The 4×5 file was down resed from it’s original 40×50 @300 dpi scan size in Photoshop using Bicubic Sharper.
– Each sample crop area shows an image area of 350×500 pixels at 100%.
– The first 1DsMk2 file was up resed from it’s original 11×15 @ 300 dpi size to 30×40 @ 300 dpi using Genuine Fractals.
– The second 1DsMk2 example was up resed from it’s original 11×15 @ 300 dpi size to 30×40 @ 300 dpi using Photo Zoom Pro and the Alnicos algorithm
Spiderock Sunset 4×5 crop from 30×40 photograph
Spiderock Sunset 1DsMK2 crop from 30×40 photograph
Enlarged with Genuine Fractals.
Spiderock Sunset 1DsMK2 crop from 30×40 photographs
Enlarged with Photo Zoom Pro using the Alnicos algorithm.
Spiderock Sunset 4×5 full size
Spiderock Sunset 1DsMK2 full size
I have done the same comparative tests on several 4×5 and 1DsMk2 photographs of similar scenes with comparable results, so I feel that the results above demonstrate the performance of each camera. These are field tests, not resolution-charts tests. To me they are very valuable because in real life I will be comparing the performance of each camera in this type of situation, i.e. with photographs taken of different days with either camera, photographing a “live” subject in changing weather conditions, most likely at sunrise or at sunset. The inherent variations that are present from day to day, while they may slightly affect test results, are inherent to landscape photography.
As a final note it is important to remember that the cropped areas above show the file as it appears on screen when viewed at 100% magnification. When seen at print size (which is about 4 times smaller on screen) the difference are far less noticeable. The 4×5 is obviously more detailed while the 1DsMkII print is softer. Both prints have a different feel and both are acceptable in my opinion.
8 – Personal impressions and notes:
Battery life
The battery life is impressive. I got about 750 captures on my initial battery charge and would most likely have got 1000 if I had not done a large number of long exposures photographing the moon rising and setting in Monument Valley over a 3 day period. Long exposures (some up to 20 seconds in this instance) use a lot of battery power. I was surprised when the battery finally died as I had stopped thinking about it. Just to give you a sense of how long the battery lasts, I shot 7 full days with the same battery, reviewing images on the LCD screen on a regular basis. Note that I do not use IS lenses, which consume a lot of battery power. Based on my experience with long exposures severely limiting battery life I will be getting a second battery as a spare. Cold weather can also spell trouble so having a second battery is a good idea.
Fire wire Compact Card reader
I use an Epson 2200 digital wallet in the field and a Firewire compact card reader in the studio. If I can avoid too I prefer not to spend time downloading my flash cards in the field. This works great for short trips or when I photograph close to my studio. I previously used a USB compact card reader to transfer captures from flash card to my Macintosh G5. Recently I upgraded to a Lexar Firewire Compact Card reader which ismuchfaster than the USB reader. Recommended.
Weight, camera solidity and handling
I have to say that the weight of the 1DsMark II is competitive with the weight of the Linhof Master Technika, for both camera and lenses (no, I haven’t weighed both of them on a scale but itfeelsthat way). However, I have not found the weight to make the camera unpleasant to use. In fact, after a short while, I stopped thinking about it. The camera feels great and the weight is to some extent reassuring in the sense that it makes me feel I am using a solidly built, high quality instrument. All the camera controls are where I expect them to be. The ergonomics are first class.
Dust cleaning
The 1Ds Mark II sensor gathers a lot more dust than the sensor of the 300D, my previous digital camera. I did not clean the sensor of the 300 D for over one year and so far I only cleaned it twice after having the camera for over 2 and half years now. Yes, I was lucky. On the other hand I had to clean the 1 Ds Mark II sensor after a week of use because the dust was already a problem. The 1DsMark II sensor size, as well as the other technical aspects of this sensor, clearly make it much more prone to dust collecting.
This means you have to have a professional dust cleaning routine in regards to the 1DsMarkII. I have two routines personally, depending if I do the cleaning in my studio or in the field.
In the field I use theSensor Brush, a procedure which is described in detailhere.
In my studio I use an air compressor to which is attached a Kinetronics anti-static air gun. The air compressor has filters for water and oil removal guaranteeing a 100% liquid-free air flow. Although both expensive and space consuming this is the ideal studio sensor cleaning setup in my opinion. There’s no limit as to how much air you can use, it is totally free of static electricity, the air flow is powerful and it does a top quality job.
I do understand that it is not a very common setup. I happened to have all the components prior to getting the camera. I use the compressor with my computerized mat cutter . It is made by Silent Air and makes no more noise than a refrigerator. I use the Kinetronics anti-static air gun to clean my transparencies and negatives prior to scanning (dust sticks to surfaces essentially through static electricity).
I recommend avoiding canned air as a means to clean your sensor at all cost. Canned air can contain liquids (water, lubricants or other) which may be sprayed onto your sensor. I heard that Visible Dust may release a portable, battery operated compressor later this year to replace canned air containers.
I also recommend that when you clean your sensor you also clean the back of all your lenses since dust on the back of a lens will be brought into the camera when you mount the lens.
Focusing Screen
The 1DsMkII, being part of Canon’s professional SLR’s series, has interchangeable focusing screens. One of the first things I did after receiving the 1DsMkII was replace the standard focusing screen with the Ec-D focusing screen. This accessory only costs $40 or so (given the cost of the camera accessories almost seem “free”) and it is very easy to install. It has a major advantage for my work: the cropping lines in the Ec-D screen come very close to showing the 4×5 format. Using the two outside lines, at the extreme right and left of the screen, I can visualize quite precisely the cropping of a 4×5 format photograph. This is very useful to me since I very much like the 4×5 format but, without this screen , visualizing a 4×5 image is quite difficult since 35mm is a much wider format.
The Canon Ec-D Focusing Screen
Lenses
You may be curious to know what lenses I use with the 1DsMkII, so here is my current lineup. Because I do a fair amount of walking in the field I favor lightweight lenses over lenses that provide the brightest opening or over image stabilized lenses. While I admire the performance of the latest, it is important to me to get to the location I want to photograph without being exhausted from carrying heavy gear. Also, since I use the camera on a tripod most of the time my need for fast or IS lenses is minimized.
Currently I use the Canon 17-40L f4, Canon 70-200 L f4 and Canon 50mm 1.8. The two first lenses are top quality L lenses, Canon’s flagship series. The third lens is what I consider to be a must-have lens for the following reasons: at only $75 it is costs about the same as a good B&H filter and provides good protection for your camera should it fall. Plus, you can take photographs with it 😉 It is the most lightweight Canon lens and at f1.8 it is also one of the fastest. All in all, you’ll never know you have it in your bag so why pass up on it? Finally, you do need a lens from every lens family (see my article onLensesin thePhotography & Aestheticsseries) and the normal lens is usually the one missing from most photographer’s bag.
Cable release & Mirror Lockup
I use the RS 80-N3 cable release together with custom function 12: mirror lockup. This is the only custom function I use on a regular basis. After you use a custom function this function is pre-selected and the next time you go to the custom function menu the last function used will come up first. This minimizes how long it takes to turn mirror lockup on and off. Still, a mirror lockup button on the camera would make life easier. Once Mirror Lockup is set you need to press the cable release shutter button twice, once to lock the mirror and once to trigger the shutter. You can also close the eyepiece with the camera’s built in “curtain” when using long exposures if stray light is likely to shine into the viewfinder.
Color Space
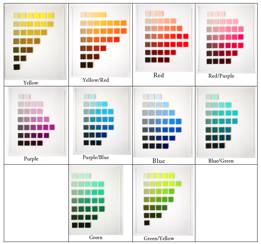
The use of a color space able to contain all the colors the 1DsMark II is able to reproduce is very important as Michael shows in his article onAdobe RGB vs. Pro Photo RGB. I personally use a wide color space and not Adobe RGB for the reasons Michael mentions in his essay. For years I have been usingEktachrome Space, J. Holmes, an RGB color space designed by Joseph Holmes and originally intended to hold the color gamut of Ektachrome transparencies. While I use almost exclusively Fuji Velvia when I shoot film it turns out that the color gamut of both Velvia and Ektachrome fit very nicely in this color space. When I started working with digital captures, first with the 300D and now with the 1DsMarkII, I decided to also use Ektachrome Space because it is a wide color space and because it made my workflow a lot simpler since I could use the same color space for all my images, film and digital.
Ektachrome Space, J. Holmeshas one additional advantage: it comes with a set of 16Chroma Variants which allow you to increase or decrease the saturation of an image anywhere from plus or minus 06 to plus or minus 50. This saturation increase or decrease is done by changing the colorspace, not by actually over saturating the colors. Each Chroma Variant is actually an individual color space which appear in Photoshop’s color space drop down list. This approach means that you do not loose any of the data in the image because you can return to a different saturation setting at any time. It is also much more effective, in my estimate, than using the saturation sliders in Photoshop . This feature makes Ektachrome Space unique.
Navajoland Commuting, Monument Valley.
Canon 1DsMkII, in manual mode. 70-200 f4L at 118mm, f.7-1/15th, ISO 100.
9 – Conclusion
When asked for his opinion while I considered purchasing the 1DsMarkII Michael Reichmann said “The 1DsMark II is a fabulous choice. You may never shoot film again.” The first part of Michael’s answer has proved to be right on. The 1DsMkII is a fabulous choice. It is a professional tool which is a pleasure to use, both in terms of ergonomics, construction and image quality. What about the second part? Will I ever shoot film again? Well, I probably will for a little while longer but it is certainly proving to be an increasingly problematic choice provided the quality of the images I am getting from the 1DsMark II. There is no doubt that for very big enlargements 4×5 retains an edge. But in every other respect digital captures makes a lot more sense. Furthermore, not all images need to be printed at 40×50. Some images call for smaller enlargements, and for those 4×5 is simply overkill.
Plus, although I have not experimented with either yet, there is the possibility of stitching 3 photographs taken with the 1DsMkII using Canon tilt shift lenses (2 photographs side by side and one overlapping), to get an image 5000×7000 pixels, twice the normal file size. Or again, I can stitch together multiple photographs to create panoramas and get an even larger file.
But there is another aspect of all this to consider, an aspect which goes way beyond practicality, resolution, maximum enlargement potential and so on. This aspect is creativity, inspiration and yes, art. To me photography is an art form, and as such I strive to remain inspired, keep my approach fresh and create new images. In this approach there is no doubt that the 1DsMkII provides me with a fascinating tool to reproduce the world as I see it. With it I get colors that are more vivid and “cleaner” in a way. More importantly, I get colors that are different from those I get with film. I also get lower contrast and the possibility of opening up shadows further than I have been able to so far.
The 1DsMkII also brings with it another very important aspect: spontaneity, something which is easily lost when using 4×5. Not only is the 1DsMkII much faster to operate than 4×5, it also provides a much more direct path from idea to print, without the delays inherent with using film. In short, I get to see on paper what I saw with my eyes much faster.
Finally, the 1DsMkII represents the state of the art right now. When superior quality and inspiration are there for the taking, why pass up on it?
So what shouldyoudo? Well, if you have $8k available, go for it. If you are not prepared to invest that much consider the other Canon digital cameras, such as the 20D. You will look at photography in a brand new way.
Alain Briot
Sonoran Desert, Arizona
May 2005
If you want to see how all this comes together in the field, as well as learn how to become a better photographer, consider attending one of our workshops.
We currently have a few seats left in our Navajoland-Antelope Canyon this fall, October 21 to 25. You will be glad you did.
http://www.beautiful-landscape.com
Text and photographs Copyright © Alain Briot 2005


Elevate Your Vision


Read this story and all the best stories on The Luminous Landscape
The author has made this story available to Luminous Landscape members only. Upgrade to get instant access to this story and other benefits available only to members.
Why choose us?
Luminous-Landscape is a membership site. Our website contains over 5300 articles on almost every topic, camera, lens and printer you can imagine. Our membership model is simple, just $2 a month ($24.00 USD a year). This $24 gains you access to a wealth of information including all our past and future video tutorials on such topics as Lightroom, Capture One, Printing, file management and dozens of interviews and travel videos.
- New Articles every few days
- All original content found nowhere else on the web
- No Pop Up Google Sense ads – Our advertisers are photo related
- Download/stream video to any device
- NEW videos monthly
- Top well-known photographer contributors
- Posts from industry leaders
- Speciality Photography Workshops
- Mobile device scalable
- Exclusive video interviews
- Special vendor offers for members
- Hands On Product reviews
- FREE – User Forum. One of the most read user forums on the internet
- Access to our community Buy and Sell pages; for members only.
You may also like


