


Introduction
Back in the days when I used an 8×10 inch camera for my landscape photographs I became quite disenchanted with photo backpacks. The reason for this was that I could not find a backpack with a good suspension, I could not find a backpack that was not excessively heavy and I constantly found basic flaws that made it hard and even painful to use these units in the field.
By comparison, technical backpacks were far superior in terms of body fit ergonomics, had much better belts and shoulder straps and were much lighter. Alas, most of them were top loaders not designed for photo gear. In spite of this, I decided to use a technical backpack with some foam inserts I cut myself for the equipment. I was much happier with my technical pack instead of using traditional photo backpacks. It was way easier to put up with the top loading issue versus suffering knee, shoulder and back pain combined with bruises and irritation from improperly designed and improperly padded straps, belts and buckles.
Fast forward a couple of decades. Has the situation changed? Not really. I still find current photo backpacks to be overly heavy, woefully inadequate in terms of body fit, and plagued with lots of basic flaws that become quite uncomfortable in the field. Some of these flaws can also lead to cosmetic damage to the equipment or worse. I basically find the standard crop of backpacks available today seriously uncomfortable when compared to technical backpacks and in many instances lacking in proper equipment protection.
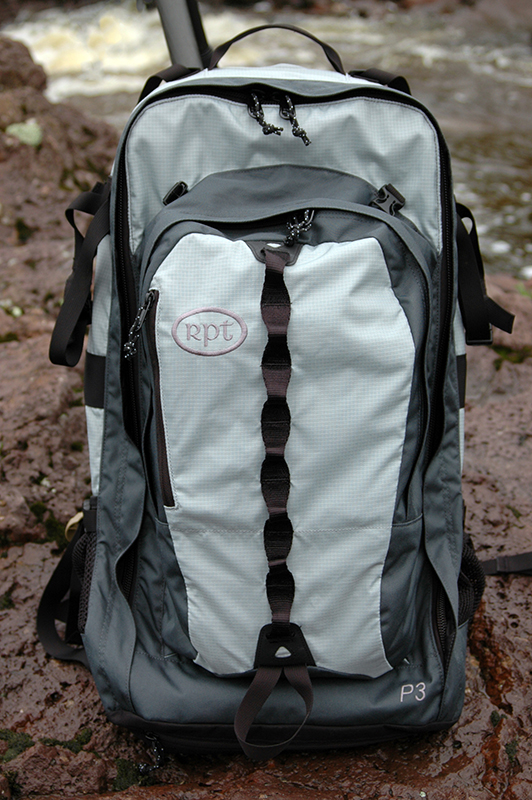
If you intend to carry a full system such as a couple of Pro 35 mm bodies and 4 or more lenses plus accessories, or a Medium Format system or other gear that requires a large backpack, there is a new option you may want to consider: The RPT P3 backpack which you can purchase directly from thePhotobackpackerstore.
Enter the RPT P3
Bruce Laughton, founder and president of RPT has been partnering with manufacturers of technical backpacks to incorporate their technical suspension system engineering with a bag of his design – namely a full front-panel opener with features designed for big kit photographers. He has also designed and manufactures a couple of different systems that allow you to customize the inside of these packs to protect your gear and to make it easy and safe to work with your equipment in the field.
His latest creation is the RPT P3. The pack uses the Granite Gear Air Current suspension system and the RPT bag that will be very familiar to owners of previous RPT backpacks. This suspension system was first introduced in 2011, so it is proven in the field. It has won multiple awards and gets high accolades from users as well as a number of backpacking publications. It is a good size backpack, the interior measures 24 x 10 x 9 inches.
Think of the P3 as a hybrid: The suspension, lightness and ergonomic body fit of a technical pack, combined with interior accessibility, configurability and equipment protection that is at least as good as any traditional photo backpack (the configurability and the level of equipment protection actually beats all the standard photo backpacks I have tested).
A few words about body fit
When one buys a photo backpack, they are “one size fits all”. At best, you might be able to get a larger belt for a bigger waist line (luckily not my problem!), but basically there are no options in terms of body fit.
By contrast, the RPT pack is adjustable for different torso lengths (from 14 to 22 inches), there are options for different shoulder strap lengths, gender and size specific belts, etc. All in all, including adjustments, there are well over 200 different configurations to make the pack fit your body as well as possible. This fact alone makes a big difference in terms of comfort and reduced fatigue versus any other photo backpack I am aware of.
While “over 200 different configurations” may sound a bit overwhelming, all it takes is giving the company some basic information such as gender, height, waist size and torso length. This allows them to put together the best combination of components. Then, the end user tries on the pack and worst case may need to perform a few easy adjustments for the best possible fit.
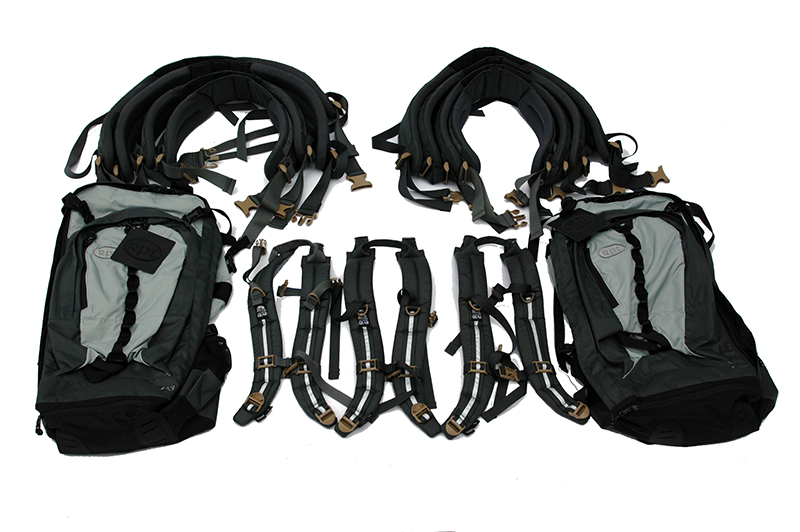
RPT P3 Basic Pack, Straps and Belts for Different Configurations
A “fully loaded” RP3 with all the partitions and padding required to carry a big photography kit will typically weigh around 5.8 lb. (the pack’s empty weight is 4.2 lb). By comparison, most photo backpacks I have tried that can carry this much gear tend to weigh a lot more, the “lighter ones” being usually in the range of 10-12.5 lb. There obviously is some variability here, but in general you can expect the RPT pack to weigh in at roughly half of the weight of other packs on the market. Again, this makes a big difference when using the pack in the field, particularly during long days of shooting, long hikes or working in uneven terrain.
The combination of reducing the actual weight of a backpack, using a much better suspension and being able to custom fit the pack to your body results in a pretty dramatic increase in comfort and endurance. It actually makes your photo gear feel lighter than it feels with other packs.
Examples of basic flaws in most photo backpacks
The following is just a small random sample of the many basic flaws I constantly find in photo backpacks. How manufacturers that should know better let these things go through in products that are sold to consumers is beyond my comprehension.
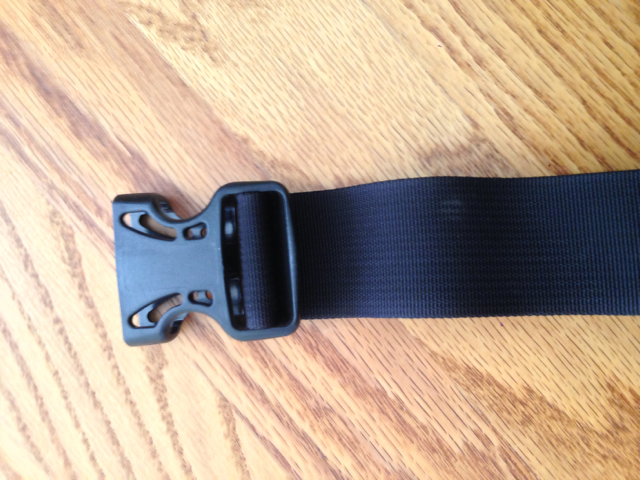
– The “dig into your body” buckle
The picture below shows a typical photo backpack shoulder strap buckle. Notice that there is no padding behind the buckle so the buckle is guaranteed to dig into you. This is not a cheap backpack, it is a very expensive backpack from one of the most respected major suppliers, but it suffers from a major flaw I find over and over again: T he padding stops before the buckle . These kinds of “bare buckles” are guaranteed to make you uncomfortable and during multi-day shoots I have seen them cause bruises and chaffing of the skin.
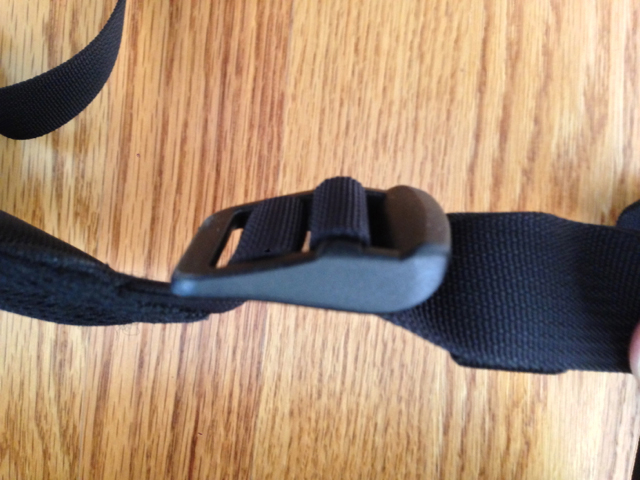
The “Dig Into Your Body ” Shoulde Strap Buckle
Compare the “bare buckle” above to the buckles in the properly padded shoulder straps of the RPT P3:
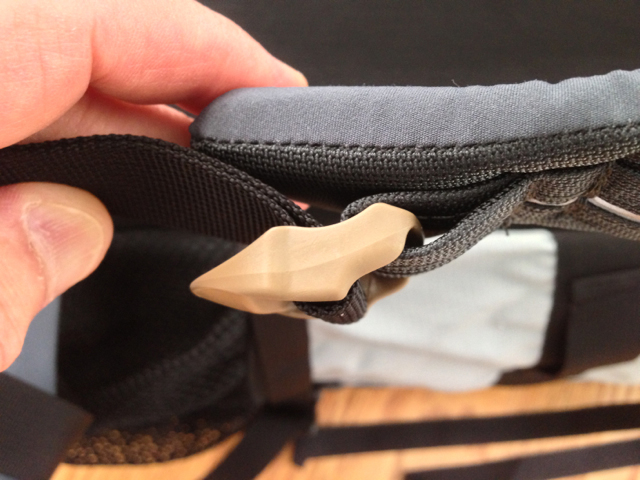
P3 Strap Buckle
Note The Padding To Protect Your Body From The Buckle
-The scratching zipper
Photo backpack manufacturers love to put zippered pockets on the inside of the front cover. This is a terrible idea. They will scratch your gear. Some of these zippers are very rough, some are less rough, some have hanging tabs, some have (mediocre) pockets for the tabs, but the result is always the same. Your equipment (particularly tall or heavy items) will get scratched.
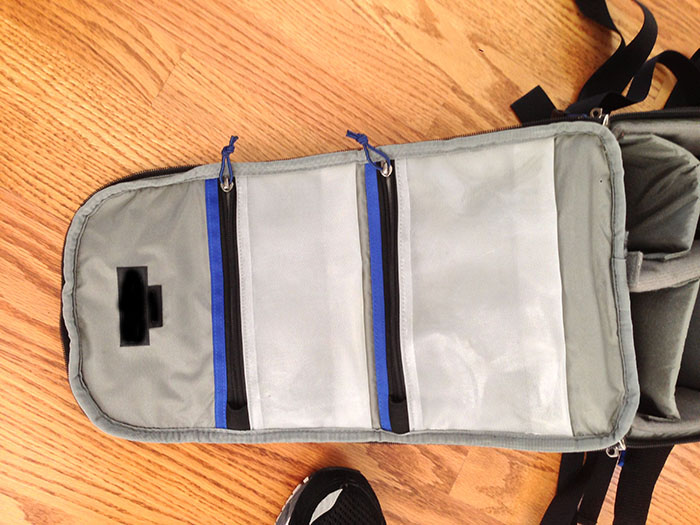
Typical Scratching Zippers
(I obscured the brand name to protect the guilty!)
-The “I forgot my padding” belt
Here is a picture of a belt from a very expensive Photo backpack. As we say in California: What the f__k? Did they just forget the padding? Were they trying to save a few cents worth of manufacturing cost? I am amazed at how many photo backpacks have insufficient padding for the belts or even no padding at all.
A Classic Bad Belt
Compare the above belt with the belts of the RPT P3:
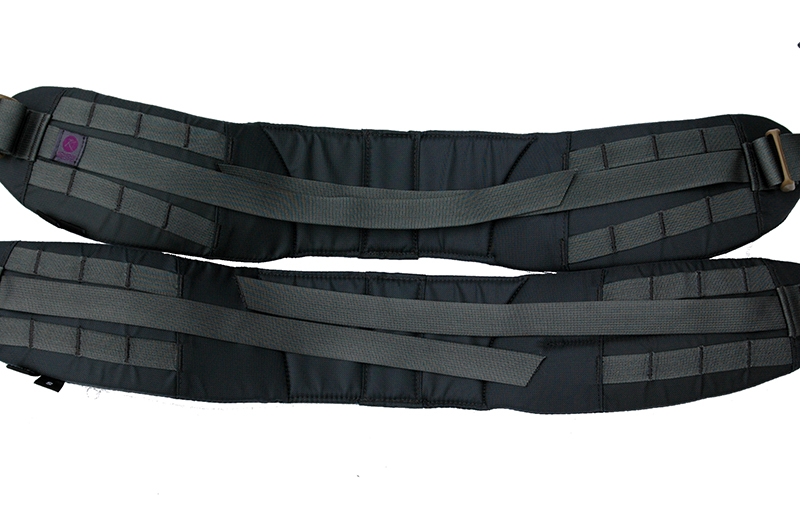
RPT P3 Male and Female Belts
Which one do you think is more comfortable? Enough said.
– Lousy interior materials
Endemic to the industry are materials that are too rough and scratchy andwill eventually scratch the finish of fine gear. This includes the materials for the walls of the pack and/or the partitions. The materials at the edges of partitions seem to be particularly big offenders. I have worked with very expensive packs (and bags) from the most reputable companies only to find out that over time they will either scratch or wear out the finish of fine cameras and lenses. Other lousy interior materials are plastics in transparent pockets that sometimes yellow and/or start decomposing very quickly. I have also found many transparent plastics that outgass or become sticky. While I have never experienced this, I was once told by a senior technical executive of a major camera company that certain outgassing plastics can actually damage sensors.
My advice when purchasing a backpack is to look for basic flaws. If you find bare buckles, unpadded or improperly padded straps or belt, rough materials, improper padding for your equipment, zippers or tabs that will scratch your gear or if you can smell the plastic pockets outgassing, move on and find something else. Do not compromise. You will be sorry later if you do.
Two systems of protection
There are two basic systems to protect your gear inside an RPT pack the first one is a set of inserts that are small “boxes” that are very well padded with high pressure compressed foam (which makes the walls thin while providing a very high level of protection) and very soft inside. They attach via hook and loop velcro type strips to a “backboard” on the pack. They also attach to adjacent inserts with hook and loop, so they will not fall out of the pack and they will not move. Most of the standard inserts were originally designed for large format equipment, but they will fit a large variety of MF and 35 mm equipment. RPT can also custom make these inserts to fit a specific camera, lens or other piece of gear. The inserts have their own zippers plus a velcro closure. This gives you double (or even triple) protection, as you can have the front of the pack open, take out what you need and the rest of the gear will not fall out and is fully protected even if the front zipper and the front of the pack are completely open and even if you turn the backpack upside down so all the gear faces the ground. This is a great feature! Another advantage of the inserts is that you can take one out individually and the piece of equipment inside remains fully protected. This allows you to quickly change configurations, store your equipment in a closet inside the inserts or easily transfer it to a hard shell case to check it for a flight for example.
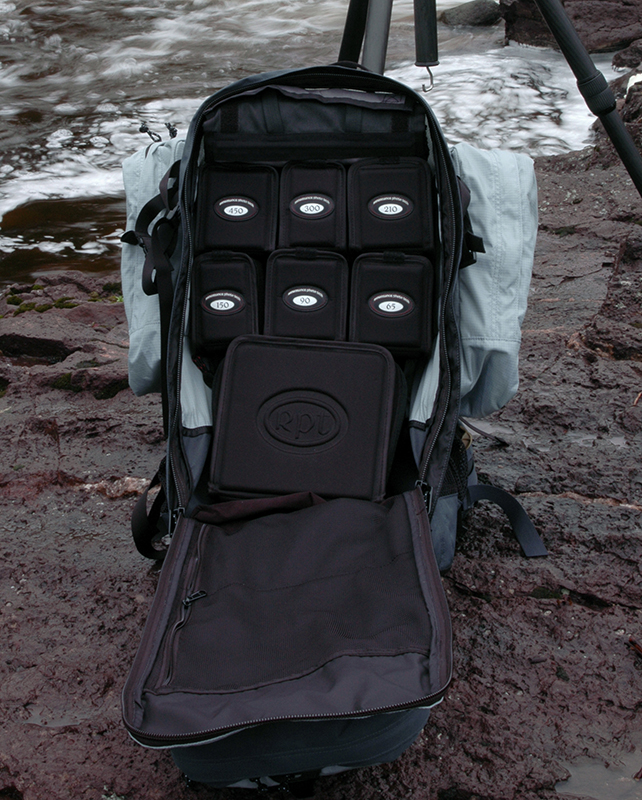
P3 Backpack with Individual Equipment Inserts
The main disadvantage of the inserts is the lack of flexibility in terms of changes of equipment to different sizes. For example, the ALPA FPS has a completely different form factor from my older ALPA SWA, so the RPT insert for my older ALPA body no longer fits my new camera. The only way to remedy this is to order a new custom insert for the FPS.
The second system of protection is somewhat more conventional, it is what the company calls an “SLR Enclosure”. It is an ultralight padded enclosure with its own zipper and a velcro flap so that you can close the front cover quickly and maintain equipment not in use protected. It comes with a partition kit that is quite easy to configure and the partitions attach to the inside with a clever hook and loop “wing” system. The advantage of this system is tremendous flexibility in terms of quickly changing the partitions. It also allows you to have a full system packed and if you have another camera system packed in another SLR Enclosure, you can swap SLR enclosures and use the same pack for two different camera systems. The main disadvantage is that you no longer have individual enclosures for each piece of gear.
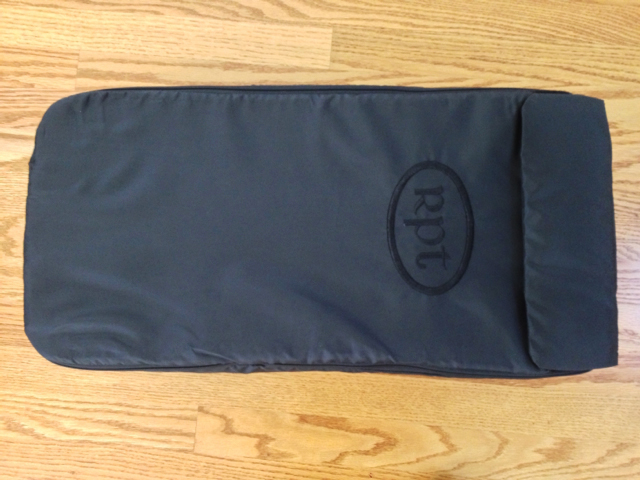
SLR Enclosure With Side Zippers and Velcro Flap Closed
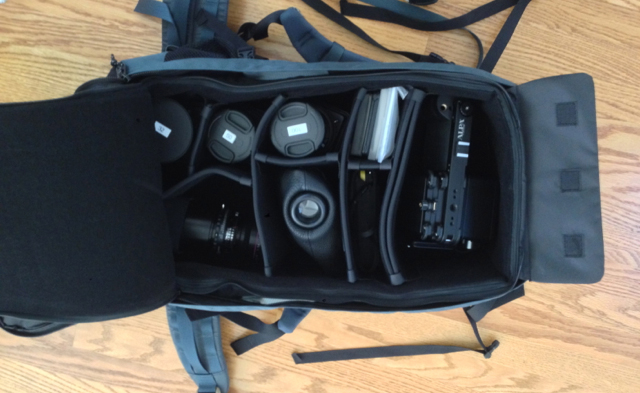
Open SLR Enclosure Inside Backpack
Is there anything not to like about the RPT P3?
Yes. No product is perfect and the RPT P3 has some issues. The three main ones for me are:
– The longest dimension is approximately 24 inches. Airplane carry on requirements are 22 inches. At first I had no idea why RPT would make a pack that exceeds carry on baggage requirements by such a small amount. Then, Bruce Laughton explained to me that the size of the pack was predicated on the size required by his customer base of 8×10 shooters, but that the stiff part of the pack is 22 inches long and with careful packing it will comply with airline carry on regulations. The pack is also a little too deep for most photo gear. I would have liked it much better if it was less deep and 22 inches for the longest dimension. If you intend to fly with this pack, leave some space empty near the top and squeeze it if asked to measure it. And then, hope you are dealing with a nice agent…
– There is only one handle on the top of the pack and it is not padded. Maybe this is acceptable for a technical pack, but for a photography pack there should be at least another handle on the side and both handles should be well padded.
– RPT made a bad choice by making the inserts and the SLR Enclosure black. Black is a bad color for photo backpacks. It is bad on the outside and bad on the inside. Bad on the outside because black absorbs heat, and the equipment gets unduly hot in the sun. Bad on the inside because lens caps, cable releases, flash connector covers, USB covers, the back side of most memory cards and a myriad of other small items are black and can become hard to find or temporarily lost inside a black interior. Black interiors can become incredibly frustrating at times!
(In my opinion, the outside of backpacks and carrying bags for photographic equipment should be a light color and the inside should be a color that heavily contrasts with black, for example yellow. The RPT P3 scores highly on the light gray outside color, but unfortunately the interior color is black).
Conclusion
The RPT P3 represents a great choice for those who need to carry a big kit. The suspension is light years ahead of conventional photo backpacks. It also offers equipment protection that is (in my opinion) better than traditional photo backpacks. It does have some flaws that seem to stem from the fact that it is a hybrid. After all, this pack starts out as a technical suspension and shell that were designed without any regard for photographic equipment.
Bottom line: If your focus is comfort and equipment protection, and you can live with its flaws (which are relatively minor when compared to other packs) , the RPT P3 is a great backpack. Highly recommended.
September, 2013


Elevate Your Vision


Read this story and all the best stories on The Luminous Landscape
The author has made this story available to Luminous Landscape members only. Upgrade to get instant access to this story and other benefits available only to members.
Why choose us?
Luminous-Landscape is a membership site. Our website contains over 5300 articles on almost every topic, camera, lens and printer you can imagine. Our membership model is simple, just $2 a month ($24.00 USD a year). This $24 gains you access to a wealth of information including all our past and future video tutorials on such topics as Lightroom, Capture One, Printing, file management and dozens of interviews and travel videos.
- New Articles every few days
- All original content found nowhere else on the web
- No Pop Up Google Sense ads – Our advertisers are photo related
- Download/stream video to any device
- NEW videos monthly
- Top well-known photographer contributors
- Posts from industry leaders
- Speciality Photography Workshops
- Mobile device scalable
- Exclusive video interviews
- Special vendor offers for members
- Hands On Product reviews
- FREE – User Forum. One of the most read user forums on the internet
- Access to our community Buy and Sell pages; for members only.
You may also like


