![]()
Out of The Wet Darkroom
The December, 2000 issue ofPCPhotomagazine had an article byRichard PahlcalledDigital Contrast Masking.It describes how to use a technique that experience darkroom workers have used for ages and has brought it into the Photoshop age. Thanks Richard.
I was excited to see this technique brought up-to-date because though its use in the wet darkroom was tedious at best, in the dry darkroom it’s simple, quick and even more effective. It now forms part of my Photoshop repertoire and I have adapted it to my own way of working.
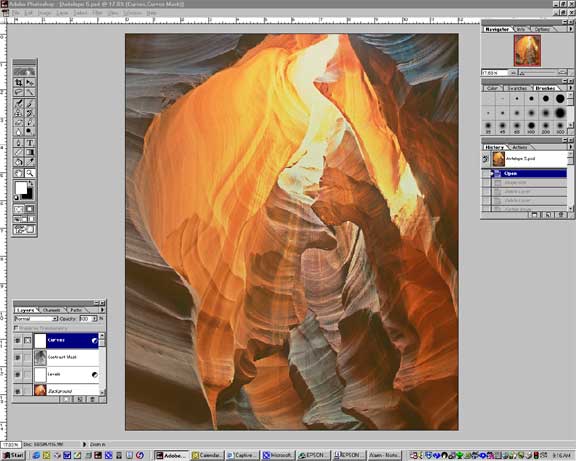 Figure 1
The screen shot above shows a photograph taken inAntelope Canyonin 1998. This photograph was part of myPhoto TechniquemagazineFeatured Portfolioin the Fall of 2000 and I sold a large number of prints of it. It also happens to be one of my most difficult to print images. While I have used numerous techniques to tame it, the masking technique detailed here is the one that produces the highest quality results.
The challenge of this photograph is the combination of a huge dynamic range together with ultra-saturated colour. Antelope Canyon is a place of extremes of light, and while capturing it on film is always a joy, it’s a real challenge as well.
Figure 2
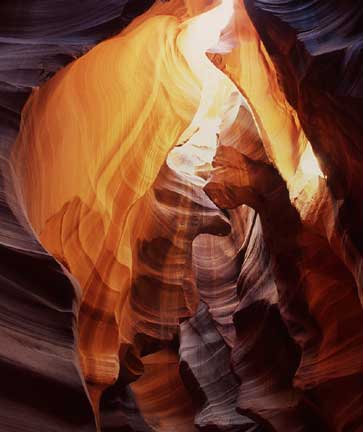
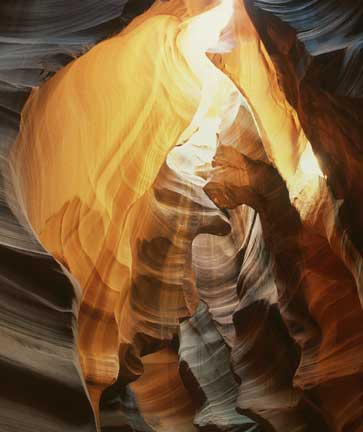
Original Scan Corrected with Levels and Curves
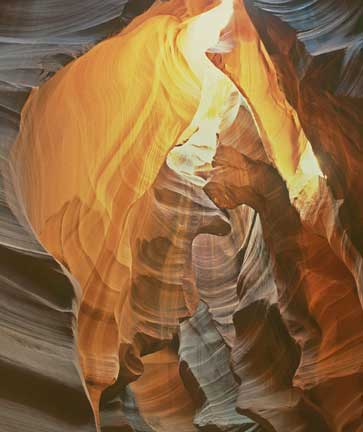
Final Image using Contrast Masking
These three shots tell the tale. The first is the raw scan (done with anImacon FleXtight). The second is with standard contrast, brightness and colour adjustments done using Photoshop’sLevelsandCurves. (Please see my tutorial calledInstant PhotoShopfor a photographer’s guide to Photoshop for beginners). The third image is the final one, corrected as well with aContrast Mask.
I was able to bring down the very hot sky portion at the top of the frame to a manageable degree and to also open up the shadow areas, while still retaining saturated colour. Let’s see how it’s done.
How To Make a Contrast Mask
Using a contrast mask is a lot like taken a patent cold medicine — it’s good for whatever ails you. It can be used to reign in burned-out highlights and also to open up shadows. It can also do both at once, (as illustrated in this example) or just one or the other.
Step 1
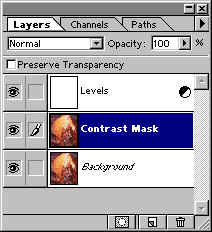
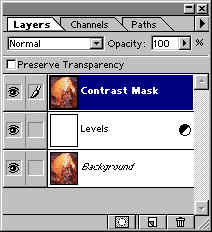
On theLayers Palettehighlight the background layer and then selectLayer / Duplicate Layer. Name itContrast Mask. If you have anyexistingAdjustment Layers(seeInstant PhotoShop)then move the newContrast Mask Layerabove them on theLayers Palette.Don’t worry if you lose your adjustments, they’ll come back soon.
Step 2
With theContrast Masklayer selected useImage / Adjust / Desaturate. The layer will now become monochrome, as will everything below it (for the moment).
Step 3
Now useImage / Adjust / Invert. This turns theContrast Masklater into a negative. Think about what’s about to happen. Everything that was dark in the original photograph is now light, and everything that was light is now dark. All that needs to happen is to apply this layer properly for it to be effective.
Step 4
Double-Click on theContrast Masklayer on theLayers Paletteand selectLayer Options.
In theModebox selectOverlay. Looks a bit ugly, but there’s one more step to go.
Step 5
We need to blur the mask layer so that it doesn’t fight with the detail of the original layer. This is accomplished withFilter / Blur / Gaussian Blurand usually a value of between10and30. You can see the changes that you make so as to be able to fine tune the amount of blur.
On a large file this can take quite some time so it’s always a good idea when experimenting to work with a 72 dpi version. When you’ve achieved the effect that you want you can reload the original file and repeat your steps, either with a PhotoshopActionor manually.
Lot’s More
Well, actually there’s a whole lot more. You can use theOpacitybox in the above window to reduce the effect. You can also now create additionalAdjustment Layersto further fine-tune what you need.
Here, I’ve created aCurves Adjustment Layerto open up the shadows a bit more.
An additional enhancement would be to use one of the available masking tools to isolate just one section or colour or brightness range within the image and then to apply theContrast Maskjust to it, rather than the entire image. This is what we used to do in the wet darkroom with Litho film masks.
As always with Photoshop there are endless opportunities for experimentation. I hope that this tutorial helps you discover this useful technique from the wet darkroom and apply it to your work in Photoshop.
![]() February, 2001
February, 2001
ReaderÃ…ke Vinberghas written a veryinformative reporton the effect of varying the amount ofGaussian Blurwhen using this technique.
Elevate Your Vision


Read this story and all the best stories on The Luminous Landscape
The author has made this story available to Luminous Landscape members only. Upgrade to get instant access to this story and other benefits available only to members.
Why choose us?
Luminous-Landscape is a membership site. Our website contains over 5300 articles on almost every topic, camera, lens and printer you can imagine. Our membership model is simple, just $2 a month ($24.00 USD a year). This $24 gains you access to a wealth of information including all our past and future video tutorials on such topics as Lightroom, Capture One, Printing, file management and dozens of interviews and travel videos.
- New Articles every few days
- All original content found nowhere else on the web
- No Pop Up Google Sense ads – Our advertisers are photo related
- Download/stream video to any device
- NEW videos monthly
- Top well-known photographer contributors
- Posts from industry leaders
- Speciality Photography Workshops
- Mobile device scalable
- Exclusive video interviews
- Special vendor offers for members
- Hands On Product reviews
- FREE – User Forum. One of the most read user forums on the internet
- Access to our community Buy and Sell pages; for members only.
You may also like