


There’s been much discussion of Black and White (B&W) conversion techniques on the Luminous-Landscape Forum and elsewhere – it’s a timeless and favorite topic for many, because B&W remains an important artistic medium.
There have been lively debates about the best techniques, and doubtless there will be more. Some approaches are more laborious than others, some provide more flexibility, more control and more reversibility than others, and some just seem to be able to produce better results. While techniques such as conversion to grayscale, conversion to L*a*b*, the Channel Mixer, the Channels to Layers technique and an old faithful plug-in “Convert to Black and White Pro” have been around quite a while, the Grayscale panel in Lightroom/Camera Raw and the B&W Adjustment Layer in Photoshop CS3/CS4 reallyupped-the-anteas very flexible, non-destructive and powerful B&W conversion tools. Then over a year and a half ago NIK introduced Silver Efex Pro – to my mind, the definitive application for easily creating stunning B&W photographs. Why? Ease of use, non-destructive editing, tremendous flexibility for crafting effects and tonal ranges and most important of all: just great results. Being in the USD 170~200 price range it’s not exactly inexpensive, but it offers a lot.
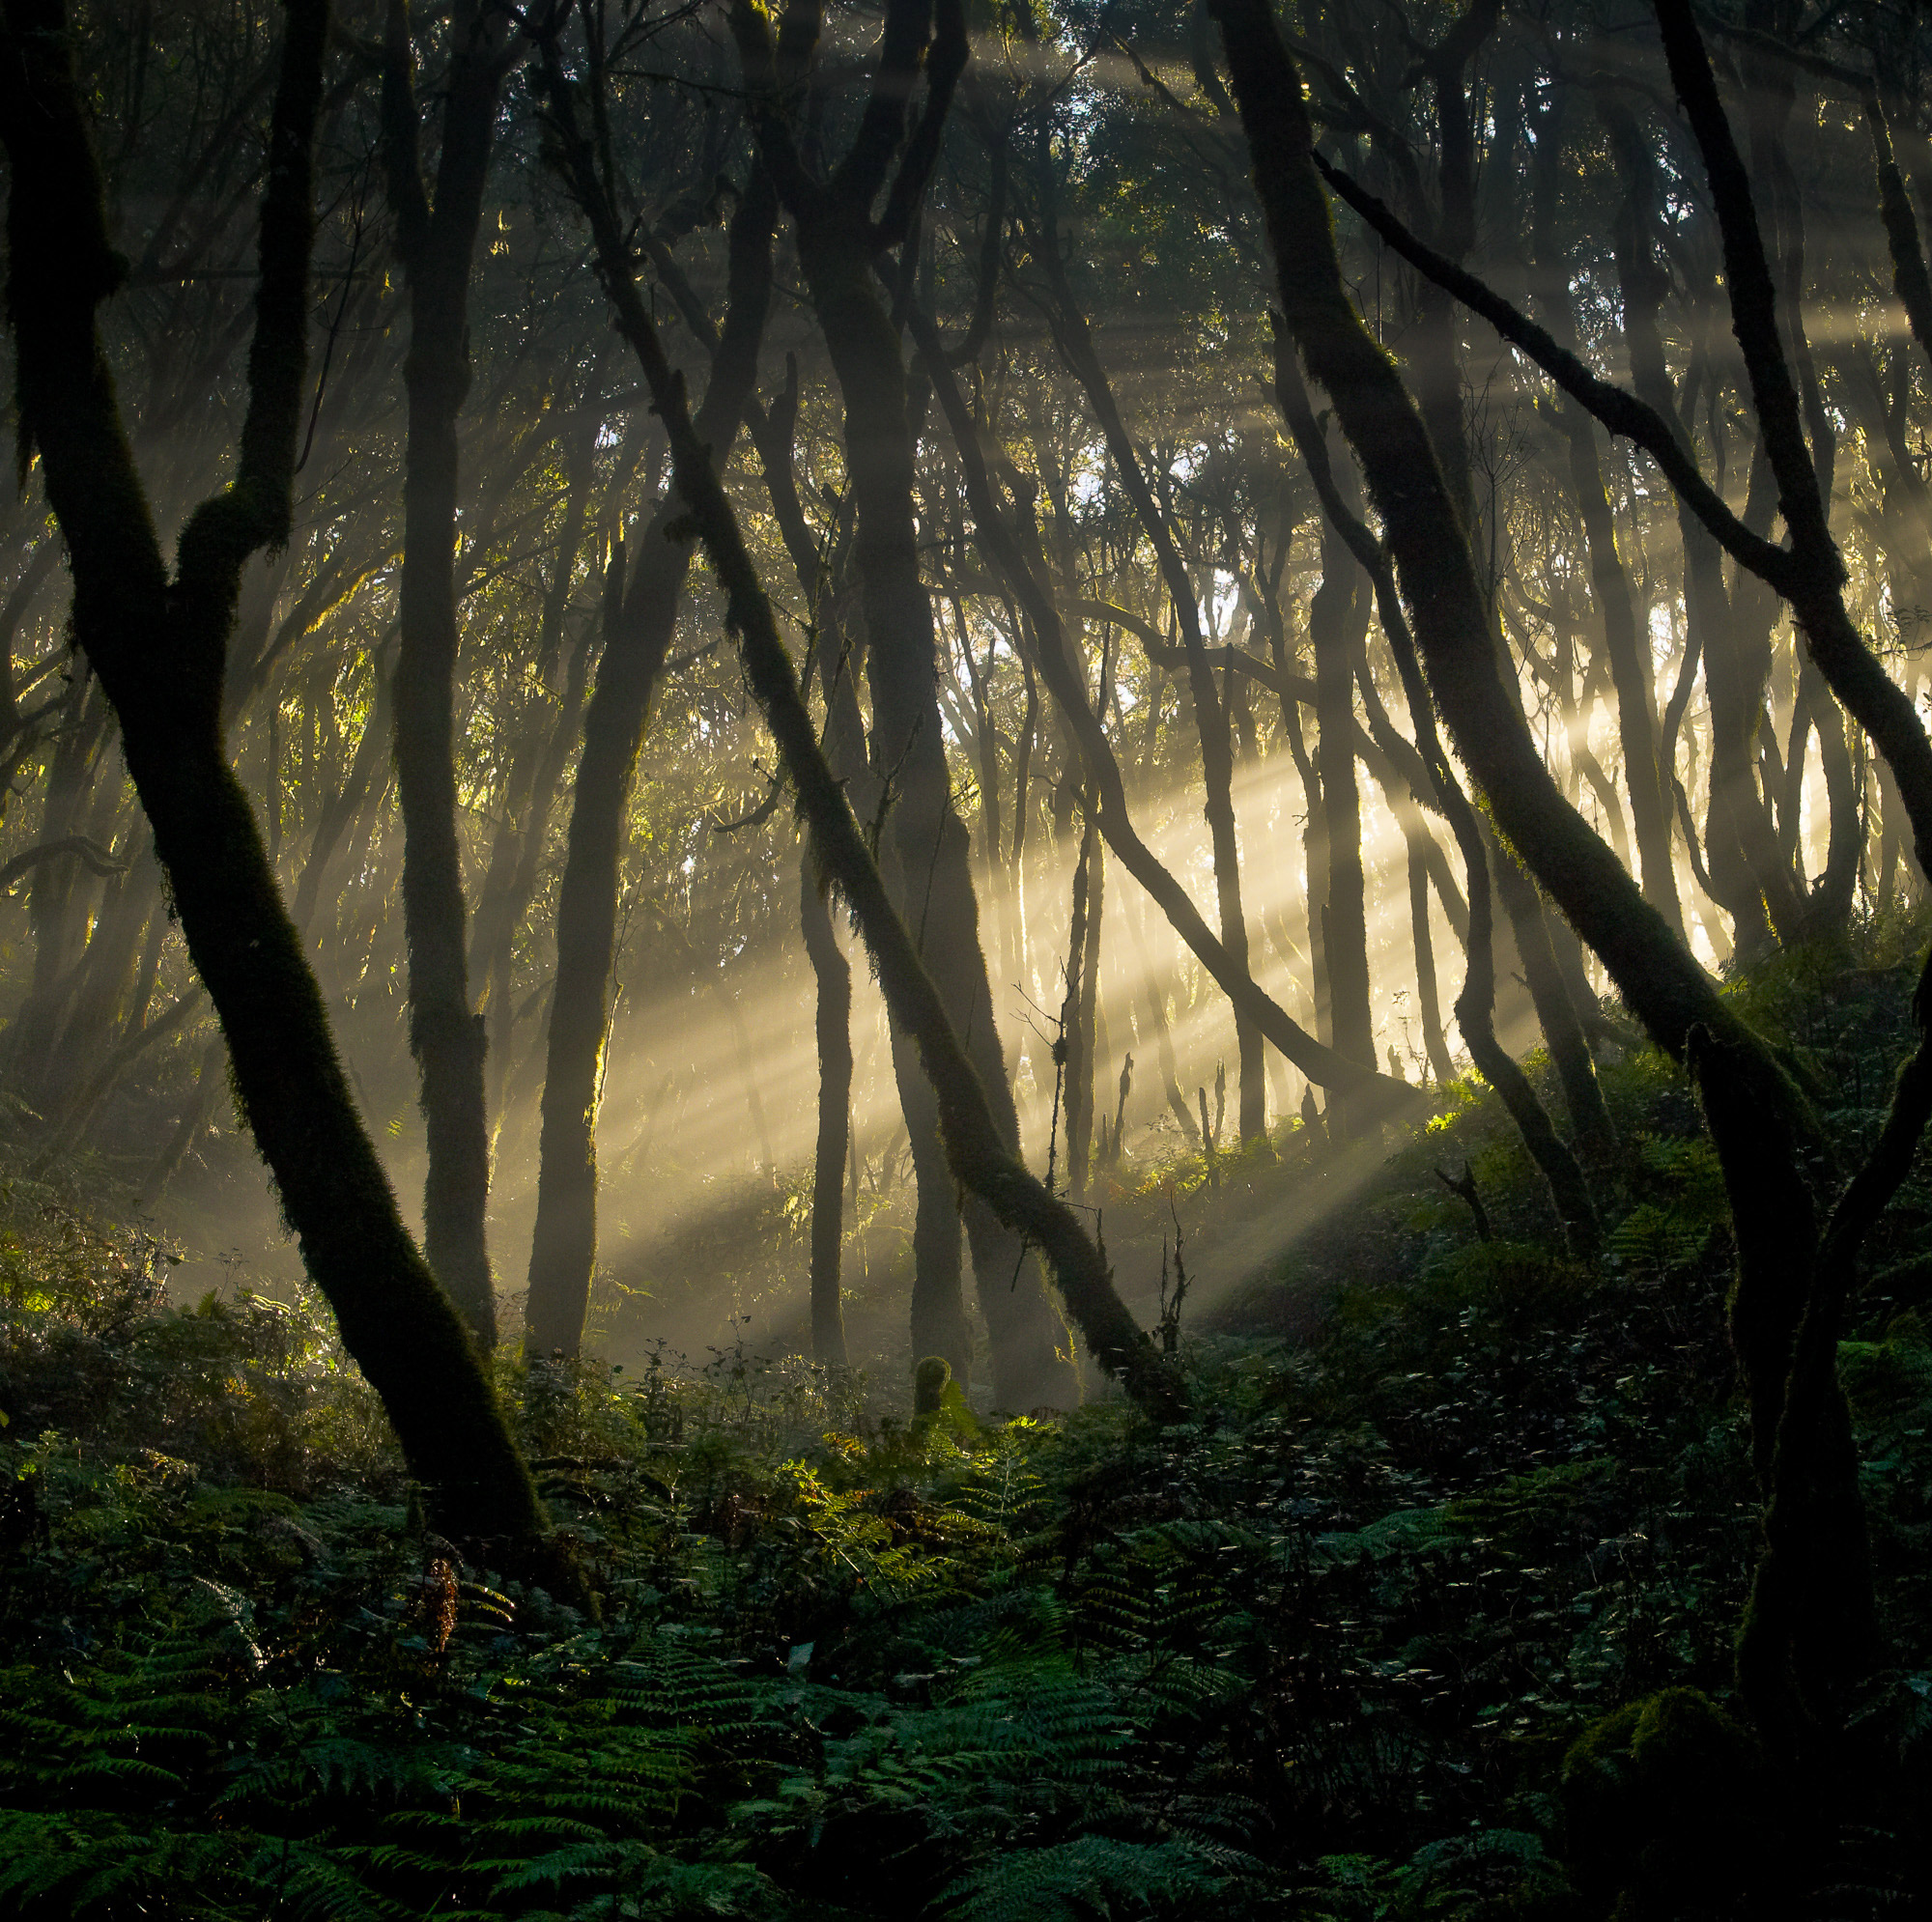
There are good reasons to like B&W: mood, atmosphere, but perhaps most essential, it abstracts from colour, which can be distracting, and focuses the mind’s eye on form, structure and luminosity in a photograph. The image I show here (viewed in the Silver Efex interface) is a case in point:

Figure One: Original Colour Photo
I made this photograph at a park near Emirgan on the Bosporus upstream from Istanbul. I love photographing trees and the twisted shape and texture of this one interested me. Much to the detriment of the photograph, it turned out to be a classic case of the mind and the camera seeing two different images. Yeah, the twisted tree is there, but so what – it’s tangled in a jumble of branches and competes for attention with the blueness of the sky. It seemed like a candidate for the Delete key; but wait I said to myself, perhaps the essential vision I was after could be rendered in B&W in order to focus on form over colour, with the jumbled stuff somehow faded away from the basic structure of the tree. But how to achieve this without going crazy or spending a huge amount of time on it?
I figured that with all its tools and options, and especially the way in which it provides very localized control over brightness, contrast and clarity (which they call “Structure”), Silver Efex Pro may be the ideal tool for the job.
First I optimized the image for colour. Then I commissioned Silver Efex Pro. NIK plug-ins come with their own panel which I keep on my second display along with Photoshop menus. One click on the Silver Efex Pro pane (Figure 2) opens the plug-in and displays the colour image as seen in Figure One above.

Figure 2. NIK Launch Panel
OK, so where do we begin? NIK provides 29 presets down the left side of the application window. Click on each one and it shows a preview of that effect on the big image. Figures 3 shows all twenty-nine presets. These presets are a great assist for tweaking one’s imagination about what basic type of B&W effect may best suit the subject. As I’ll show, having selected any one of them, they can be “tweaked” to satisfaction using the various controls down the right-hand side set of panels in the application window. For this particular image, I thought that “Antique Plate II” (second row from the bottom, fourth from the left) comes the closest to what was in my mind’s eye for this image: a primary focus on the structure of the tree and its largest branches. It provided the best starting point for further work. I wanted a bit more contrast, fading of the shrubbery between the upper branches and a less brown, more sepia tone.


Figure 3. Twenty-nine Style Presets
The full set of luminosity and toning controls are shown in Figure 4 below.


Figure 4. Luminosity and Tone Controls
For the tree image, I increased both brightness and contrast moderately by shifting the sliders for Brightness and Contrast (Figure 4, upper left), as well as by moderately pulling in the end points of the Tone Curve (Figure 4, upper right). Then I decided to lighten the tree bark a bit by increasing the yellow component in the Sensitivity panel. This panel’s sliders perform similarly to those in Lightroom’s Grayscale panel and Photoshop’s B&W Adjustment Layer: they alter tonality based on the original predominant colour.
That took care of the overall luminosity balance, but I wanted to fade the impact of the shrubbery between the large upper branches. To do this, I scrolled down to the Control Points panel (Figure 4, lower left) and added four control points as shown in Figure 5.

Figure 5. Control Points
The Control Points are the red dots (please look carefully, as they are a bit difficult to see in this image). Associated with each red dot are four controls: the size of the area to be affected, its brightness, contrast and “structure”. Each of the four variables is controlled by its own slider on the control tree attached to each red dot. Feedback is instantaneous. Figure 6 shows another way in which the program allows the coverage and impact of the control points to be seen.

Figure 6. Control Points Alternate View
For each point I selected the appropriate coverage (to prevent impact on the major branches) and then increased brightness and reduced contrast till the shrubbery competed much less with the large branches surrounding it.
Then I turned my attention to the specific toning I wanted. The program provides 18 presets shown in Figure 7.

Figure 7. Toning Presets
One can scroll down these effects, and as one scrolls, the image takes on the effect under the cursor. I used Sepia #16 for the trees image, and that completed my editing of this image. Reverting to the controls shown in Figure 4, I could have tweaked the Sepia preset had I wanted to, using the Color Filter controls (centre top) or the Split Toning controls under the Toning Preset pane. In Silver Efex, split toning is divided between “Silver” and “Paper” with a balancer between the two. It’s behaviour is similar but not identical to the split-toning in Lightroom which is allocated between Highlights and Shadows. I could also have tweaked the appearance of the Vignetting (Figure 4 lower right panel – amount, size and shape), but after a bit of experimentation decided that the preset was fine.
The result I kept is shown in Figure 8.

Figure 8. Completed Image
Silver Efex Pro has another major feature of special appeal to those who wish to replicate the “look” of specific B&W films. There is a group of Film Presets from which to choose as shown in Figure 9. Associated with the Film Presets, one may also adjust the extent and character of film grain (Figure 4, center panel). I did scroll through these presets and decided not to use them for this image, having crafted the appearance I considered appropriate.

Figure 9. Film Presets
These presets, like the others discussed above, can also be tweaked to taste using the other luminosity and toning controls shown in Figure 4.
Once the work in Silver Efex is done, there is a choice of three actions in the lower right corner of the application (Figure 10).

Figure 10. Completion Options
“Cancel” quits the plug-in and nothing changes. “OK” accepts the conversion as is and creates a Silver Efex B&W layer on top of the Photoshop layer stack; it contains the whole of the conversion, as shown in Figure 11.

Figure 11. Layer stack with Silver Efex B&W Layer
This is a pixel-based layer which one may adjust in the ways that Photoshop’s pixel-based layers can be adjusted. This of course almost infinitely expands the range of further editing one can do.
Back in the Silver Efex GUI, the second completion option (Figure 10) – “Brush” creates the same layer in Photoshop, but it remains a colour Silver Efex Layer, upon which one uses Photoshop’s Paint Brush (configured as one wishes) to brush-in the Silver Efex B&W effect to the strength and extent desired. This makes it easy to create, for example, mixed colour-B&W images, as shown in Figure 12, where B&W is brushed-in for all but the mosque.

Figure 12. Buyuk Mecidiye Mosque, Bosporus
To examine the neutrality of the results from using this plug-in, I tested this by selecting the “Neutral” style preset (the program default) and did a straight conversion with no custom tone or colour adjustments. I then read a range of pixel values in Photoshop using the eyedropper. The resulting a* and b* values (L*a*b* read-out) are zero throughout, showing that a conversion which is advertised to be neutral is indeed neutral. This also holds with non-colour luminosity adjustments made in Silver Efex. For example, bending the Silver Efex tone curve into a steep “S” shape does not affect neutrality, nor does doing the same in Photoshop with a Curves Adjustment Layer on top of the Silver Efex Layer. HOWEVER, worth noting as a workflow consideration, neutrality will NOT be preserved if you then move this Photoshop Curves Adjustment Layer BELOW the Silver Efex Layer so that it affects the tonality of the underlying colour data on which the original Silver Efex conversion was predicated. If you do that, all bets are off for neutrality of the Photoshop image.
This plug-in can be installed in Lightroom 2.3 and above, and in Aperture. It also has “Smart Filter” capability in Photoshop CS3 and CS4; hence the details of the conversion settings one used are preserved for future editing. The way to do this is to open the image in Photoshop, create a duplicate image layer (CTRL/CMD J), then go to Filter>Convert for Smart Filters and implement it. Photoshop converts the duplicate image layer into a smart filter layer. Then go back to the Photoshop Filter menu and select Silver Efex. A dialogue will come up with the following message:

Figure 13. Smart Filter Warning
Click OK. Silver Efex opens. Make the B&W conversion settings desired and Click OK. The resulting conversion appears in Photoshop’s Layer stack as shown in Figure 14.

Figure 14. Smart Filter Layer Stack
By double-clicking on the Silver Efex Smart Filter in the Layer stack (Figure 14), one is taken back into the Silver Efex plug-in, where the previous adjustments are retained and further work may be done. When working in Smart Filter mode, the Brush option is disabled.
The extent of global and localized control this plug-in provides is truly remarkable, which combined with its ease of use, reversibility and image quality, make it a “must have” application for those working extensively in B&W and needing complex effects.
Mark D Segal
Toronto
March 2010


Elevate Your Vision


Read this story and all the best stories on The Luminous Landscape
The author has made this story available to Luminous Landscape members only. Upgrade to get instant access to this story and other benefits available only to members.
Why choose us?
Luminous-Landscape is a membership site. Our website contains over 5300 articles on almost every topic, camera, lens and printer you can imagine. Our membership model is simple, just $2 a month ($24.00 USD a year). This $24 gains you access to a wealth of information including all our past and future video tutorials on such topics as Lightroom, Capture One, Printing, file management and dozens of interviews and travel videos.
- New Articles every few days
- All original content found nowhere else on the web
- No Pop Up Google Sense ads – Our advertisers are photo related
- Download/stream video to any device
- NEW videos monthly
- Top well-known photographer contributors
- Posts from industry leaders
- Speciality Photography Workshops
- Mobile device scalable
- Exclusive video interviews
- Special vendor offers for members
- Hands On Product reviews
- FREE – User Forum. One of the most read user forums on the internet
- Access to our community Buy and Sell pages; for members only.
You may also like


