Background
Last month, DxO HQ in France asked me to review the newest iteration of PhotoLab, PL9, for Luminous Landscape. I must admit to being a bit surprised, as I hadn’t found their PureRAW product (v.4 or 5) to be significantly better than Lightroom to denoise, demosaic, and sharpen raw files. However, with the amount of online chatter around Lightroom performance, the cost and value of Adobe’s subscription service, and other alternatives out there, I thought, why not? Let’s give it a whirl.
Just two days after DxO contacted me, I received an email from Topaz Labs informing me, as a ‘founding customer’, that Topaz is moving to a subscription service—Yikes! That announcement has put this review of PL9 into a stronger light for me, as PL9 is just about the ‘last man standing’ in the field of standalone full editing suites.
I applaud DxO for continuing a non-subscription-based software platform. When I asked directly, I was told by the official at DxO, “we have no plans to move to a subscription model”. Good to hear! Frankly, Adobe needs the competition, not just to keep them competitive on pricing, but also to urge them to innovate and improve.
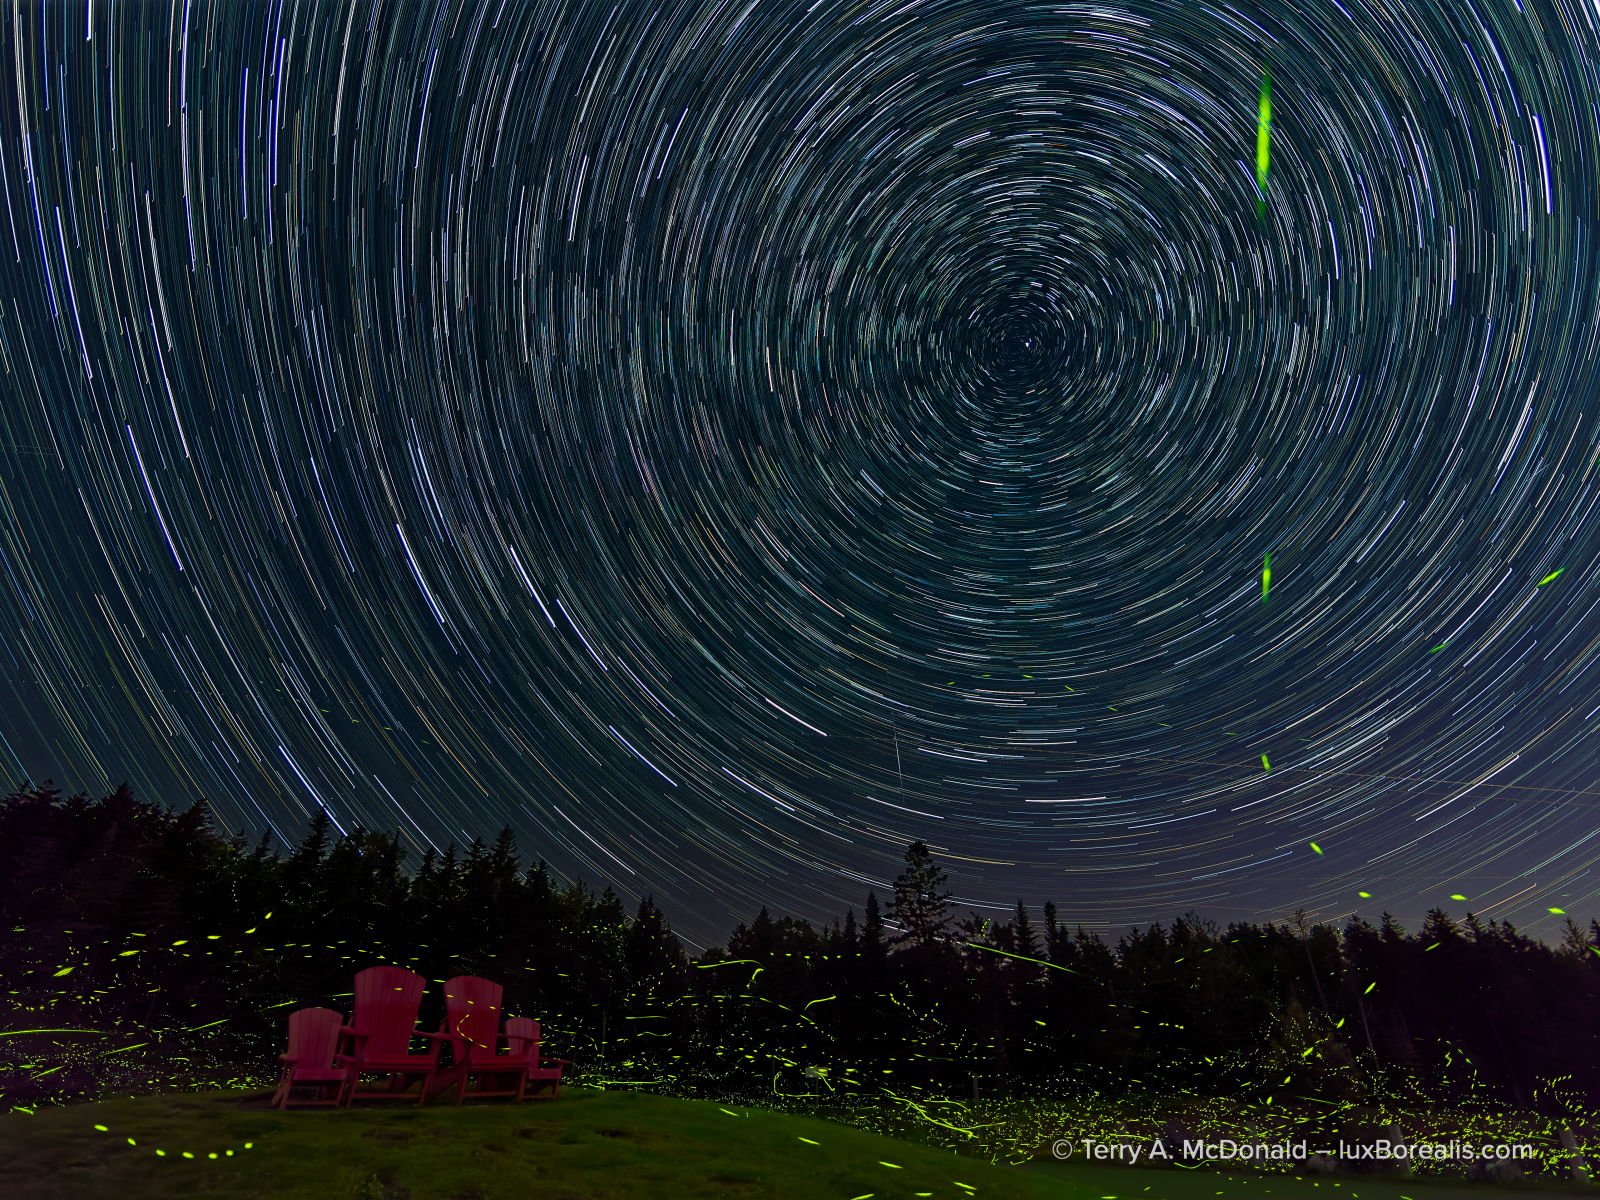

OM-1 | 9mm (18mm efov) | ƒ2 @ 40x1min. | LiveComp | ISO 400 | PhotoLab 9
I am very pleased with how well PL9 handled this image file, especially the tweaks to the green lights of the fireflies, and the sky mask and the masks needed for the grass and chairs in the foreground.
DxO has industry-leading demosaicing, denoising, and sharpening — that’s not in question here. It’s all the other aspects of photo management and editing that will be examined. To me, a ‘full editing suite’ is one that allows users to:
- input images, organize them in a library, and manage them, numbering in the tens of thousands, to create custom albums/collections/projects, with a robust search function;
- add metadata such as copyright, geo-tagging and keywords;
- process with nuanced exposure, colour, and monochrome controls using retouching and adjustment masks; then
- export files for a variety of uses including printing;
all with efficiency and speed through each stage. These are the functions I am used to with Lightroom; I would expect nothing less from PhotoLab 9.
Before we get too far, let’s clear up a few abbreviations and references; Lightroom (Lr), itself creates the confusion:
- PL9: DxO PhotoLab 9 Elite – the complete version of the app;
- LrC: Lightroom Classic – the original, full-featured version of Adobe Photoshop Lightroom (its full name), useable only on a desktop or laptop;
- LrCC: typically called just Lightroom, this version uses Adobe’s Creative Cloud to store images and refers to BOTH the MacOS/Windows version (commonly called the ‘desktop’ version, though it’s also compatible with laptops), the online version, AND the mobile version for tablets (iPad and Android);
- LrD: I’ll use this only when referring to the MacOS/Windows ‘desktop’ version of LrCC; the desktop version is close enough to the web version that I won’t make a distinction between the two;
- LrM: I’ll use this only when referring to the tablet version of LrCC for iPads and Android tablets, which is a paired down (some would say ‘handcuffed’) version of LrD.
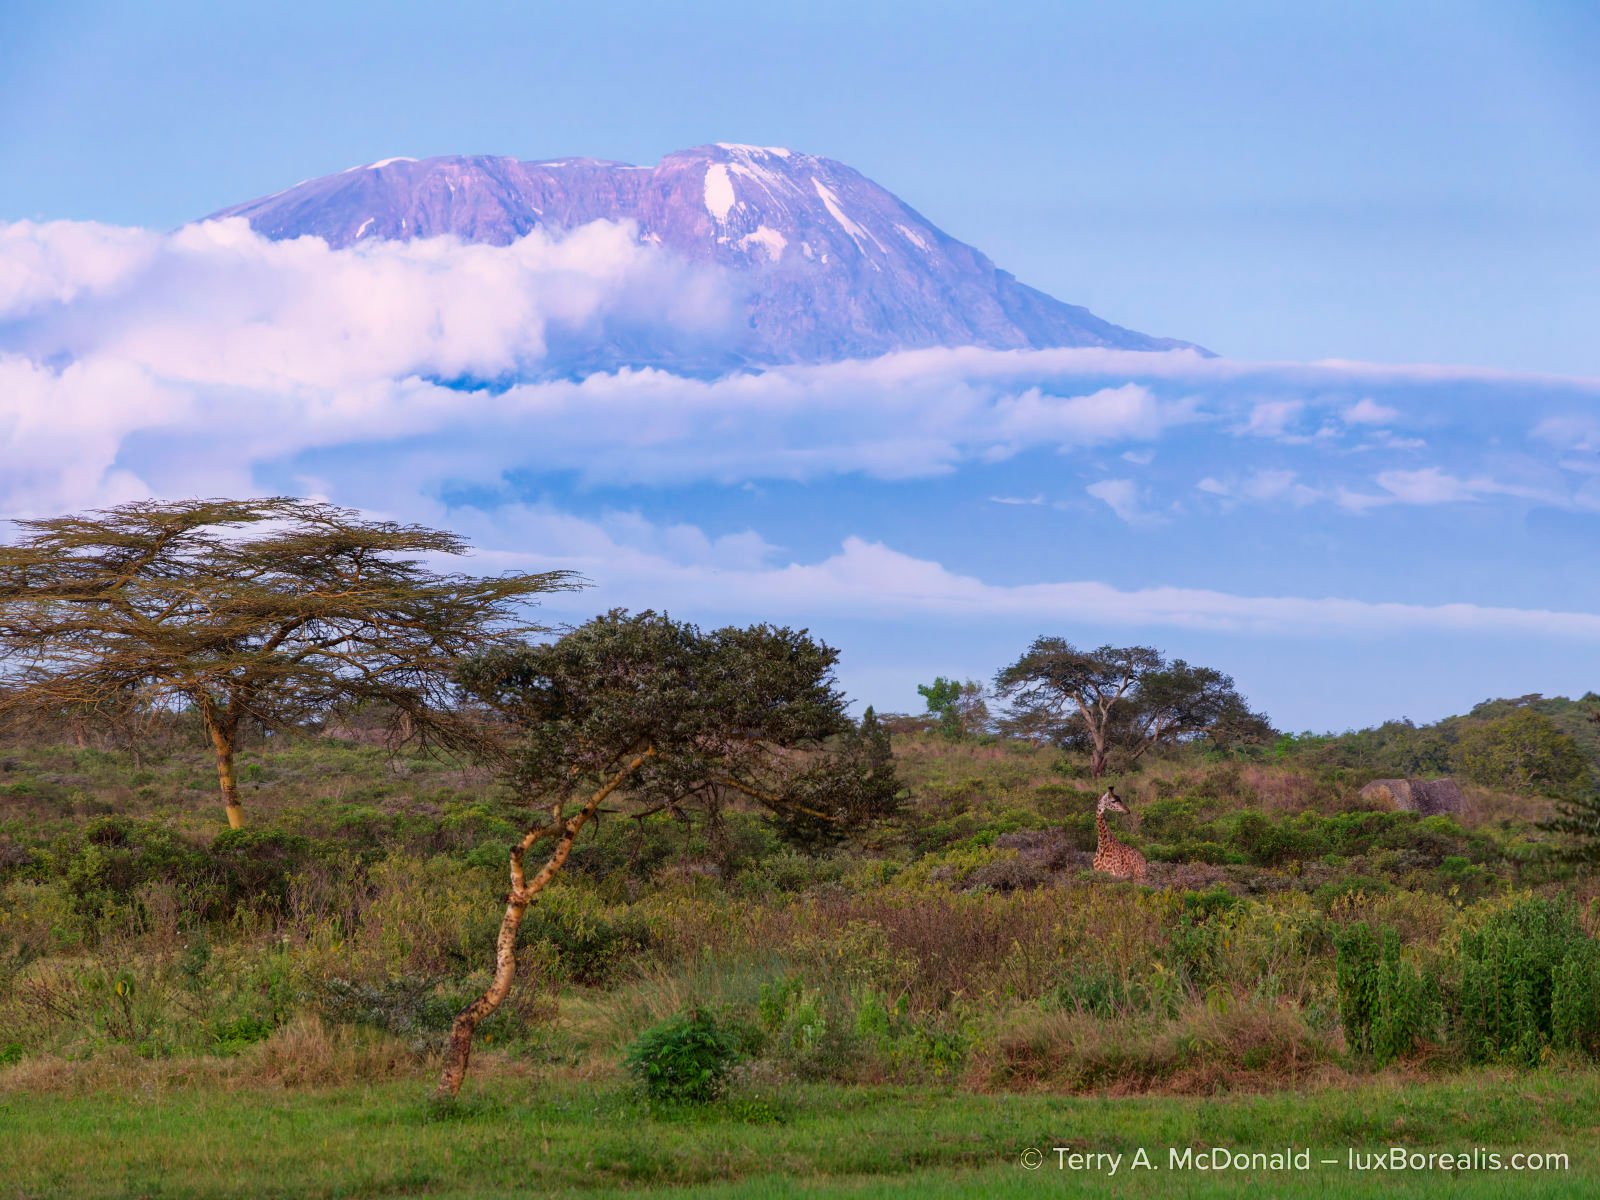

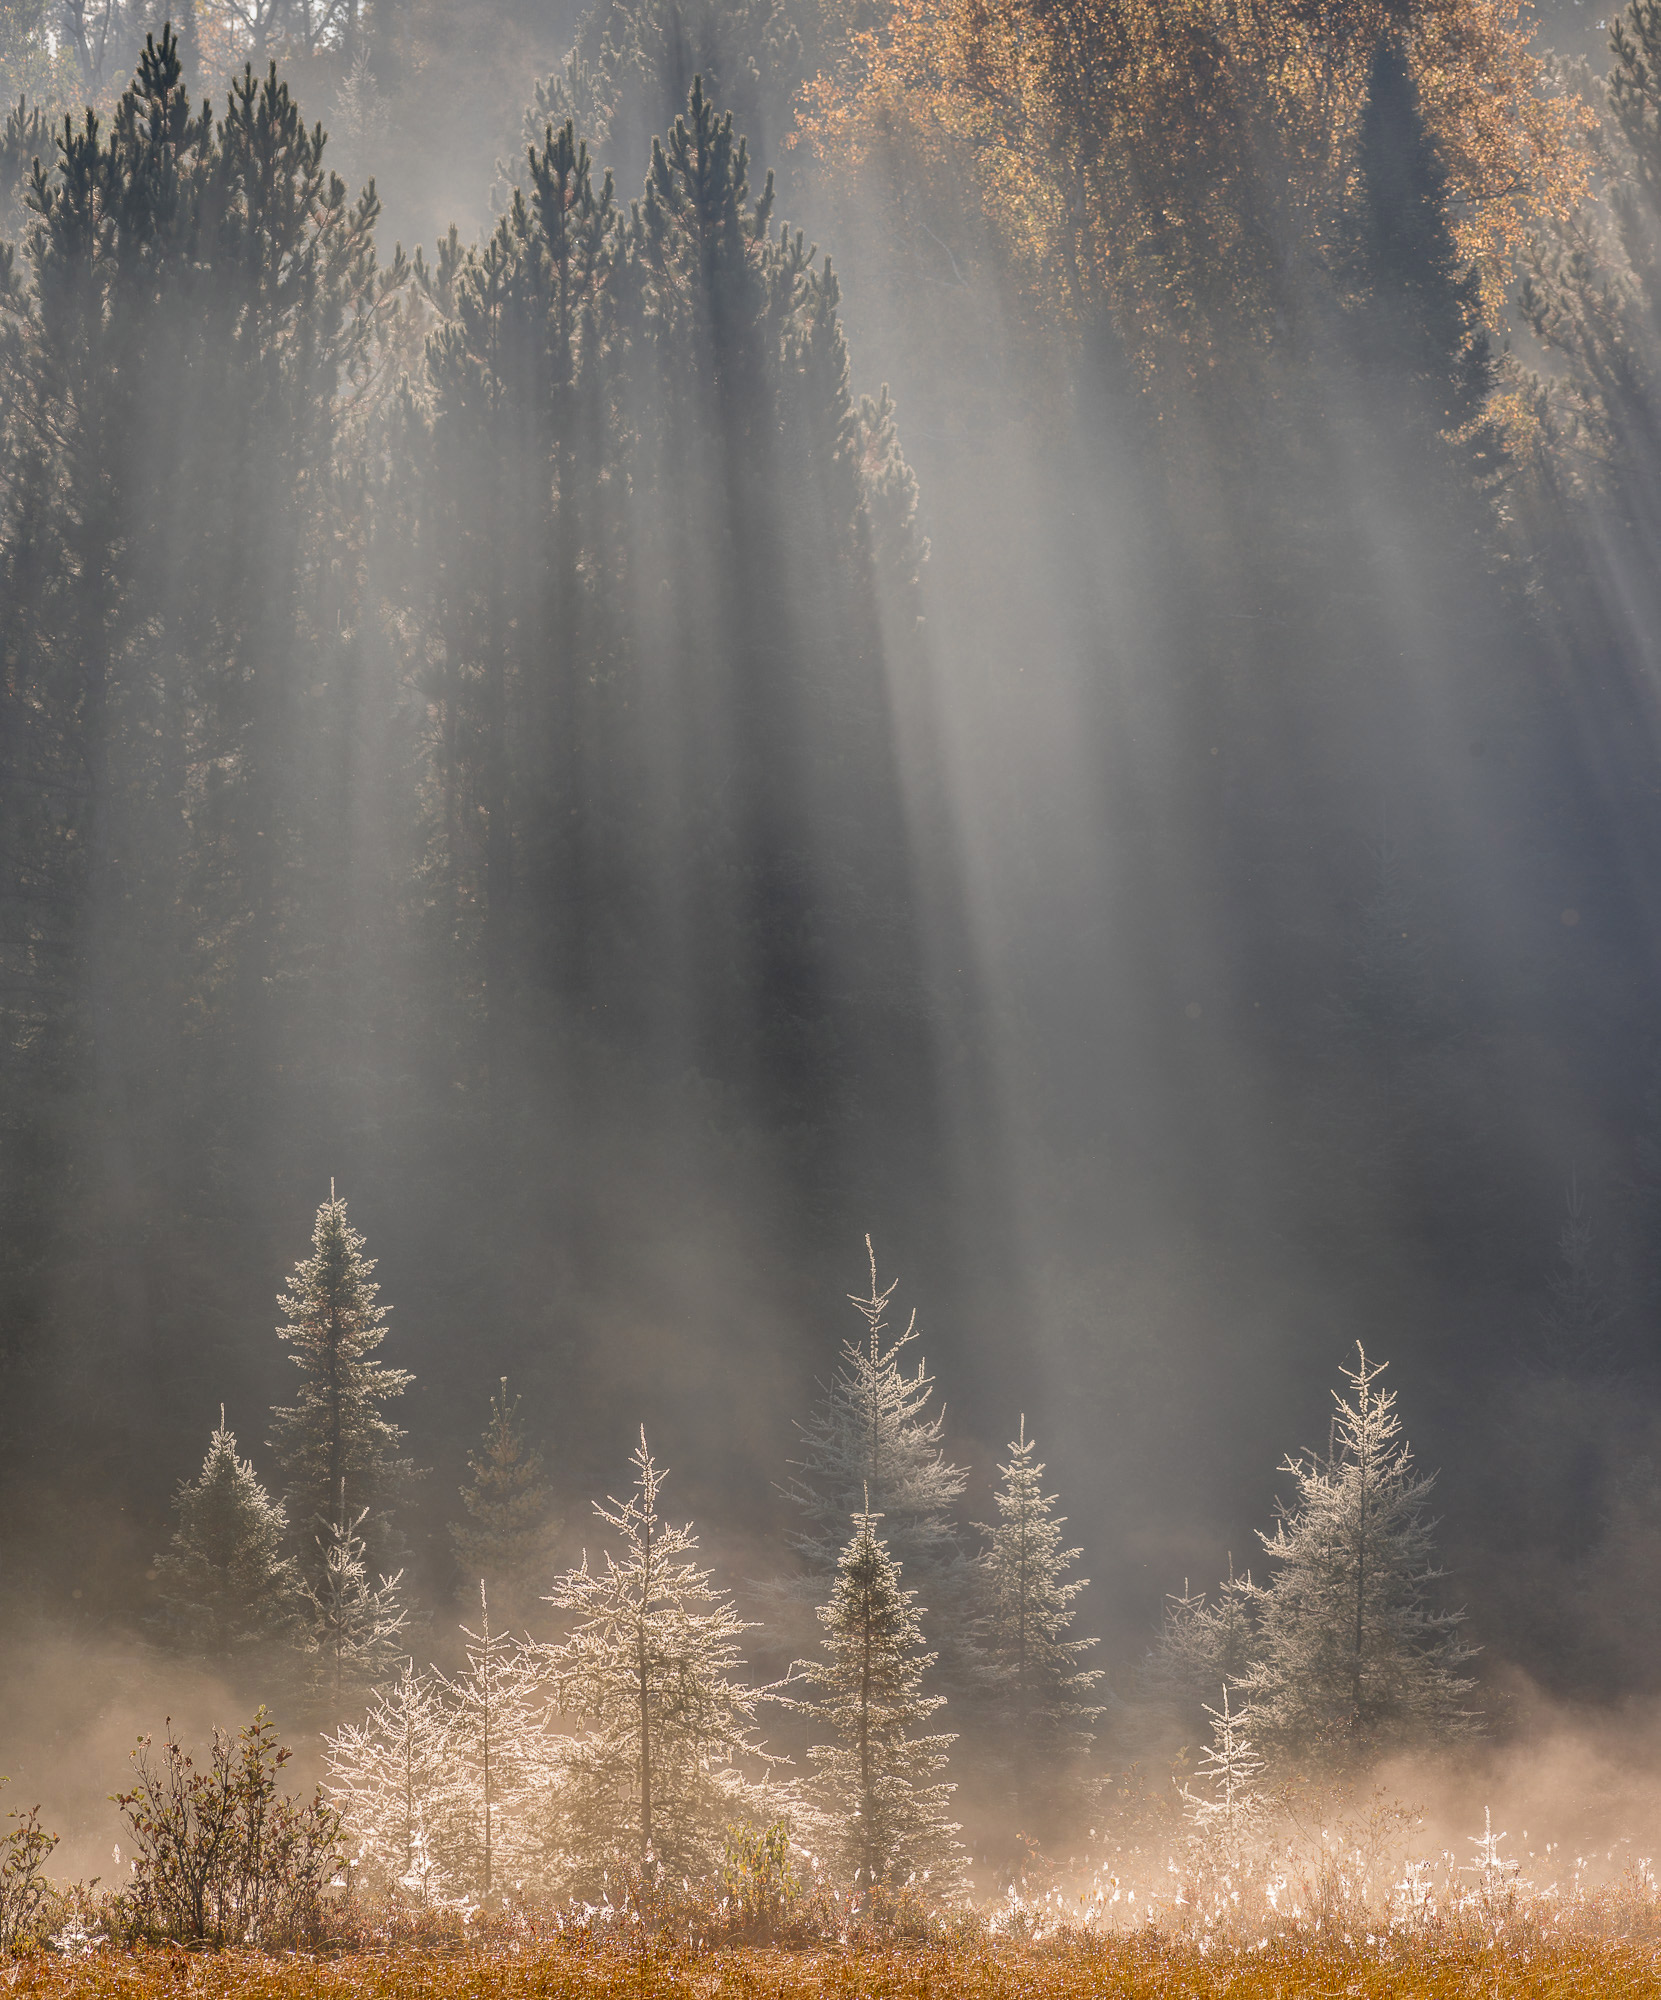
OM-1 | 100mm (200mm efov) | POL | ƒ5.6 @ ⅓ | ISO 800 | DxO PhotoLab 9
DxO’s excellent DeepPRIME XD/XD2s was supported by masking using a Grad ND sky mask with the foreground trees removed using the AI mask removal tool. I noticed that lens vignetting in the top left and right was not corrected despite using the correct lens module. They were subsequently removed with Grad ND masks.
As you may have guessed, this is not some promotional glimpse at all the wonderful features available in PL9. This is a deep dive into the app, and I’m approaching the review as a longtime user of Lightroom, both Classic and CC, since each was introduced. I want to know if PL9 can replace Lr as my go-to editing suite. My goal is get under the hood and down to specifics of how the app works, really pushing PL9 to do what has long since become intuitive to me with Lr.
Challenging me to do all of this with an app new to me may sound unfair, even unrealistic. How can I possibly know all the subtle and nuanced ins and outs of PL9 compared to Lr? And, what about my Lr-bias?
Regarding Lr-bias, I’ll be upfront: I recognize my bias, but I would love to find a standalone app that would replace the Adobe subscription model I’m shackled to. So I’m going to be thorough and nit-picky. Any aspect that is better than Lr I will herald; anything that’s not, I will point out, then go back to work to find a seamless solution within PL9. I really want PL9 to work for me. I want PL9 to shine.
As for my limited experience with PL9, I’m well used to working with a variety of editing apps — Topaz Photo AI, ON PhotoRAW, OM Workspace, Affinity Photo and Photoshop. I also use and have reviewed DxO PureRAW 4 and 5, so I’m not completely in the dark. But editing a photograph is far more complex and nuanced than simply applying denoise, demosaic and sharpening, so I have dug down to really learn the app over the last month. I have put to the test all aspects of editing: exposure and tone control, colour balance, retouching, making monochromes with toning, masks—the works—as well as the complete experience of using PL9: the GUI, the Photo Library, its speed, and the overall feel of the app experience.
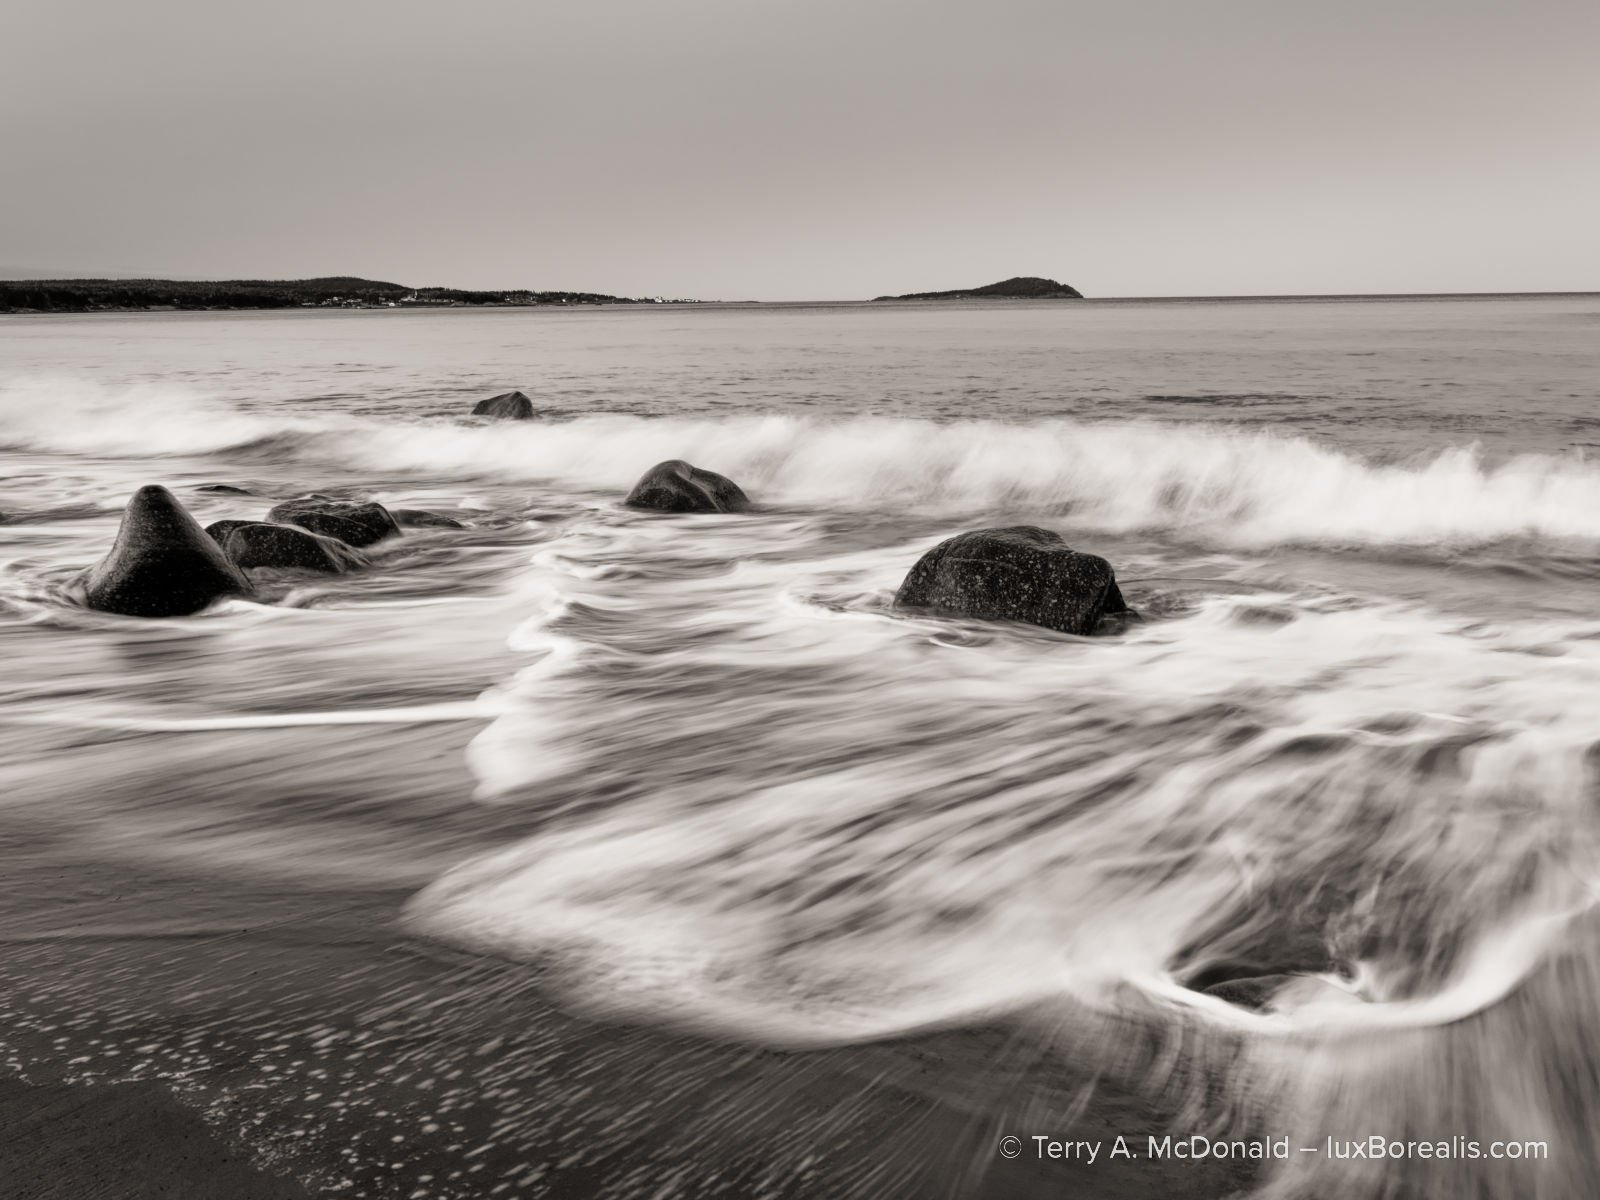

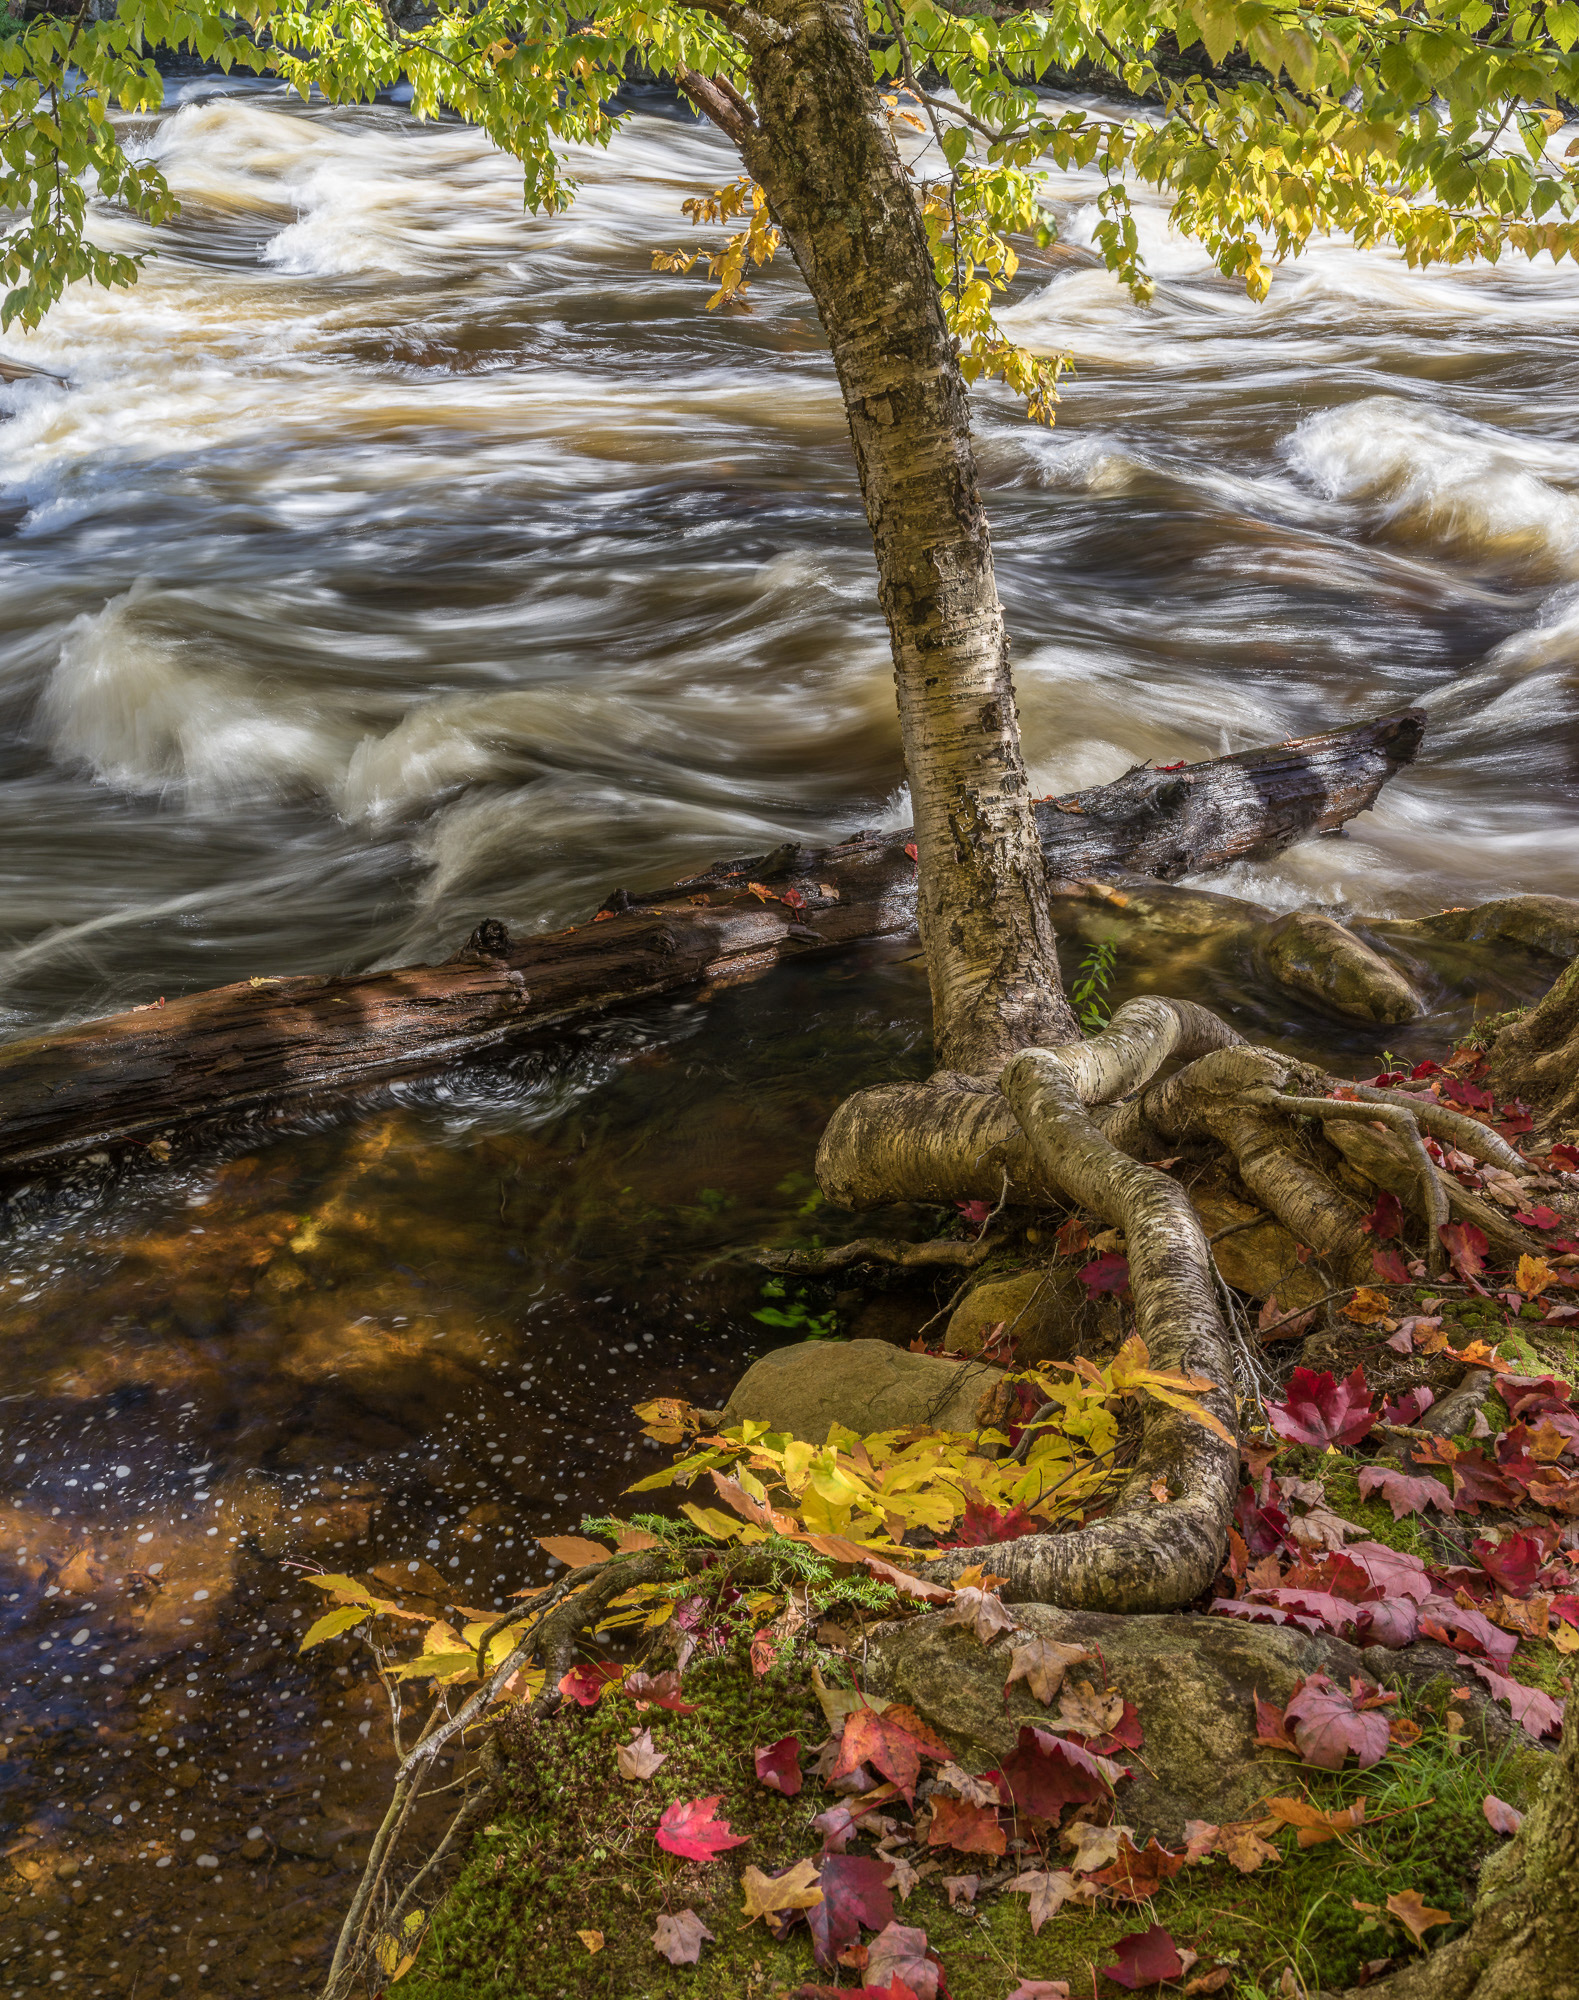
OM-1 | 16mm (32mm efov) | ƒ5.6 @ ⅗ | ISO 800 | LiveND 64 | PhotoLab 9
Although PL9’s black-and-white options are minimal, they are effective. Unfortunately, PL9 relies on purchasing add-on software (FilmPack and/or NIK Collection) to fully realize the potential of monochrome images.
Full disclosure: Although I received DxO PhotoLab 9 at no cost, I have reached my own conclusions by testing my own images, ones chosen for both my familiarity with them and for their complexity either with high ISO noise, masking needs, and/or tone/exposure balancing. While DxO requested the review, they have had no further input into the results of my review.
I’ll be honest. I have always been impressed with DxO, beginning with DxO Mark. Their testing of sensors and lenses over the years has always been refreshingly scientific in approach, creating confidence in the results. I hope I can do the same here. Another reason I’m interested in DxO PhotoLab 9 is because of the Library attached to it, its Photo Library.
Having access to all my photos at my fingertips is an essential efficiency. Any editing suite that does not have a Library feature is useless to me. With tens of thousands of images, I don’t have time to be flipping through folders and sub-folders. I must be able to find specific images within seconds. I can do this in both versions of Lr; can it be done in PL9?
Let’s set up PhotoLab 9 and the Photo Library . . .
Start up
Install was completely straightforward, with no issues. Before opening PL9, I selected a set of images from Lightroom and exported them as unmanipulated original raw files. They are a mix of 1” sensor, M43s, 35mm sensor, and camera phone photos. They may be familiar, but they are not without their complications as I chose both low and high ISO files and photos that demand the use of Local Adjustments (Masks). I want to confirm PL9’s top-rated raw file optimization, but more importantly, I need to test how capable and nuanced the library and editing are.
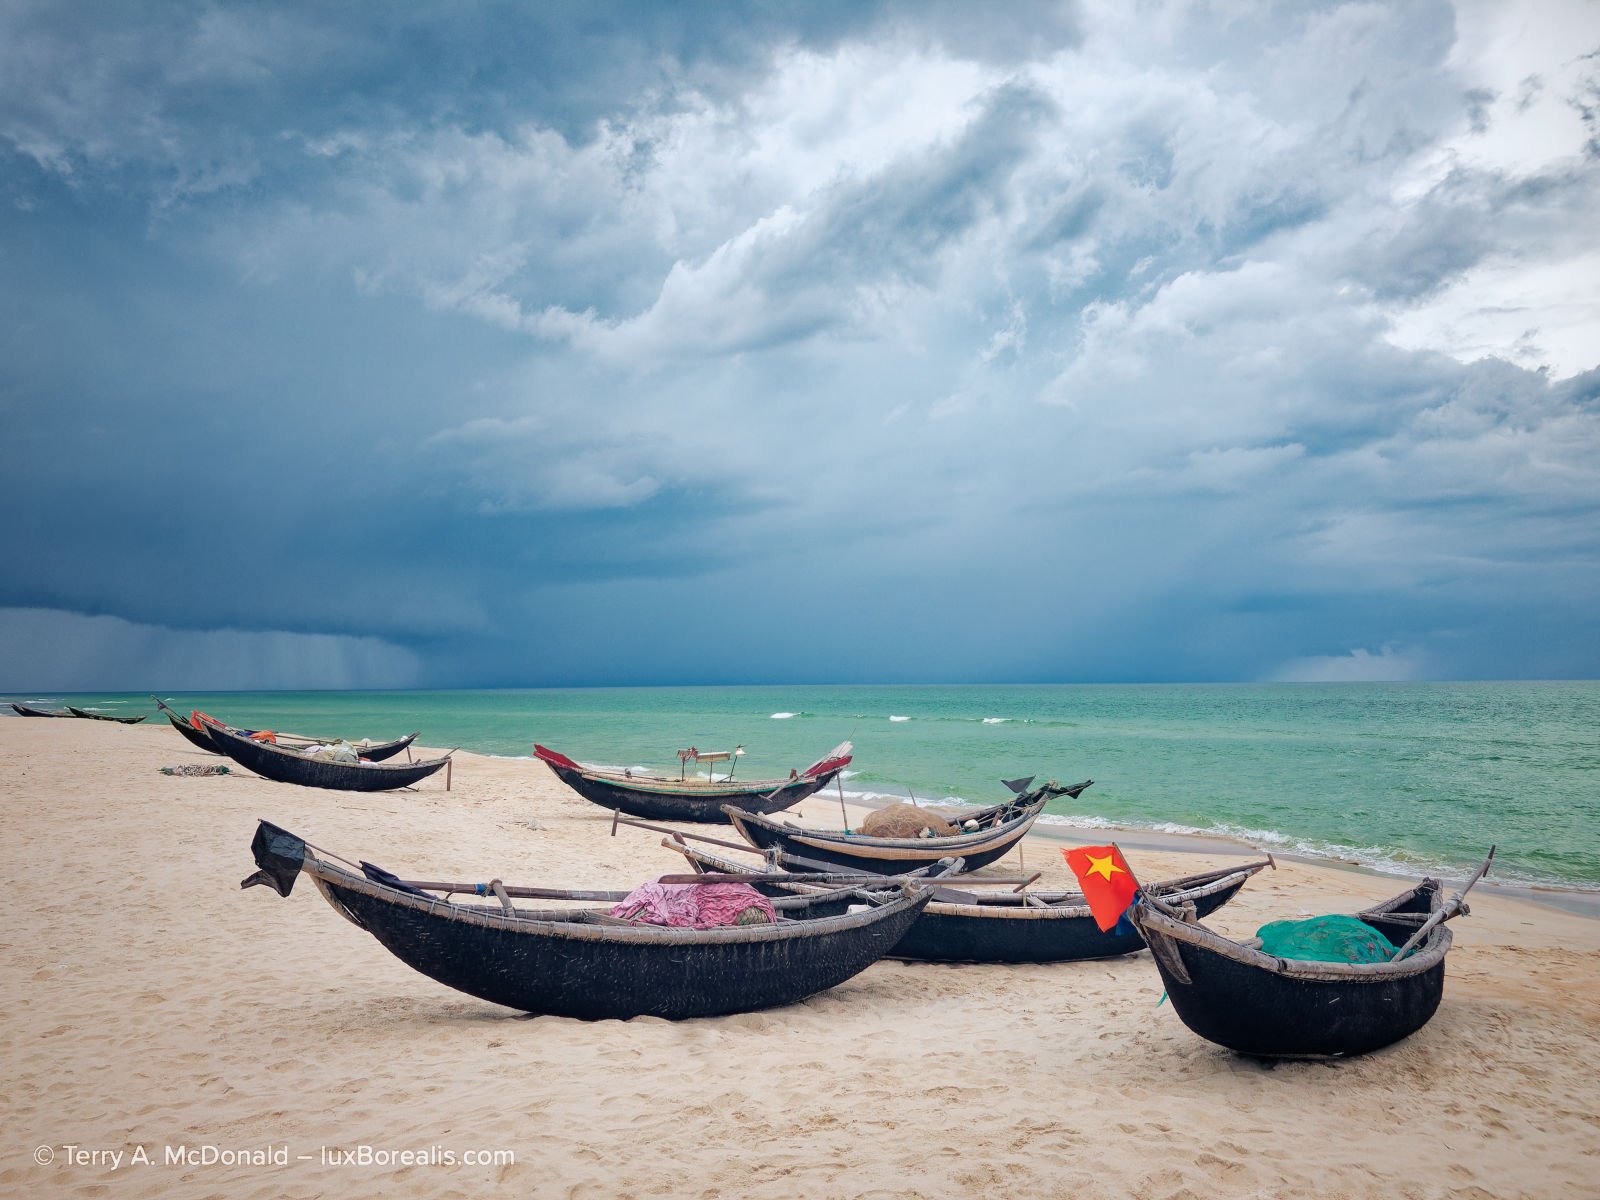

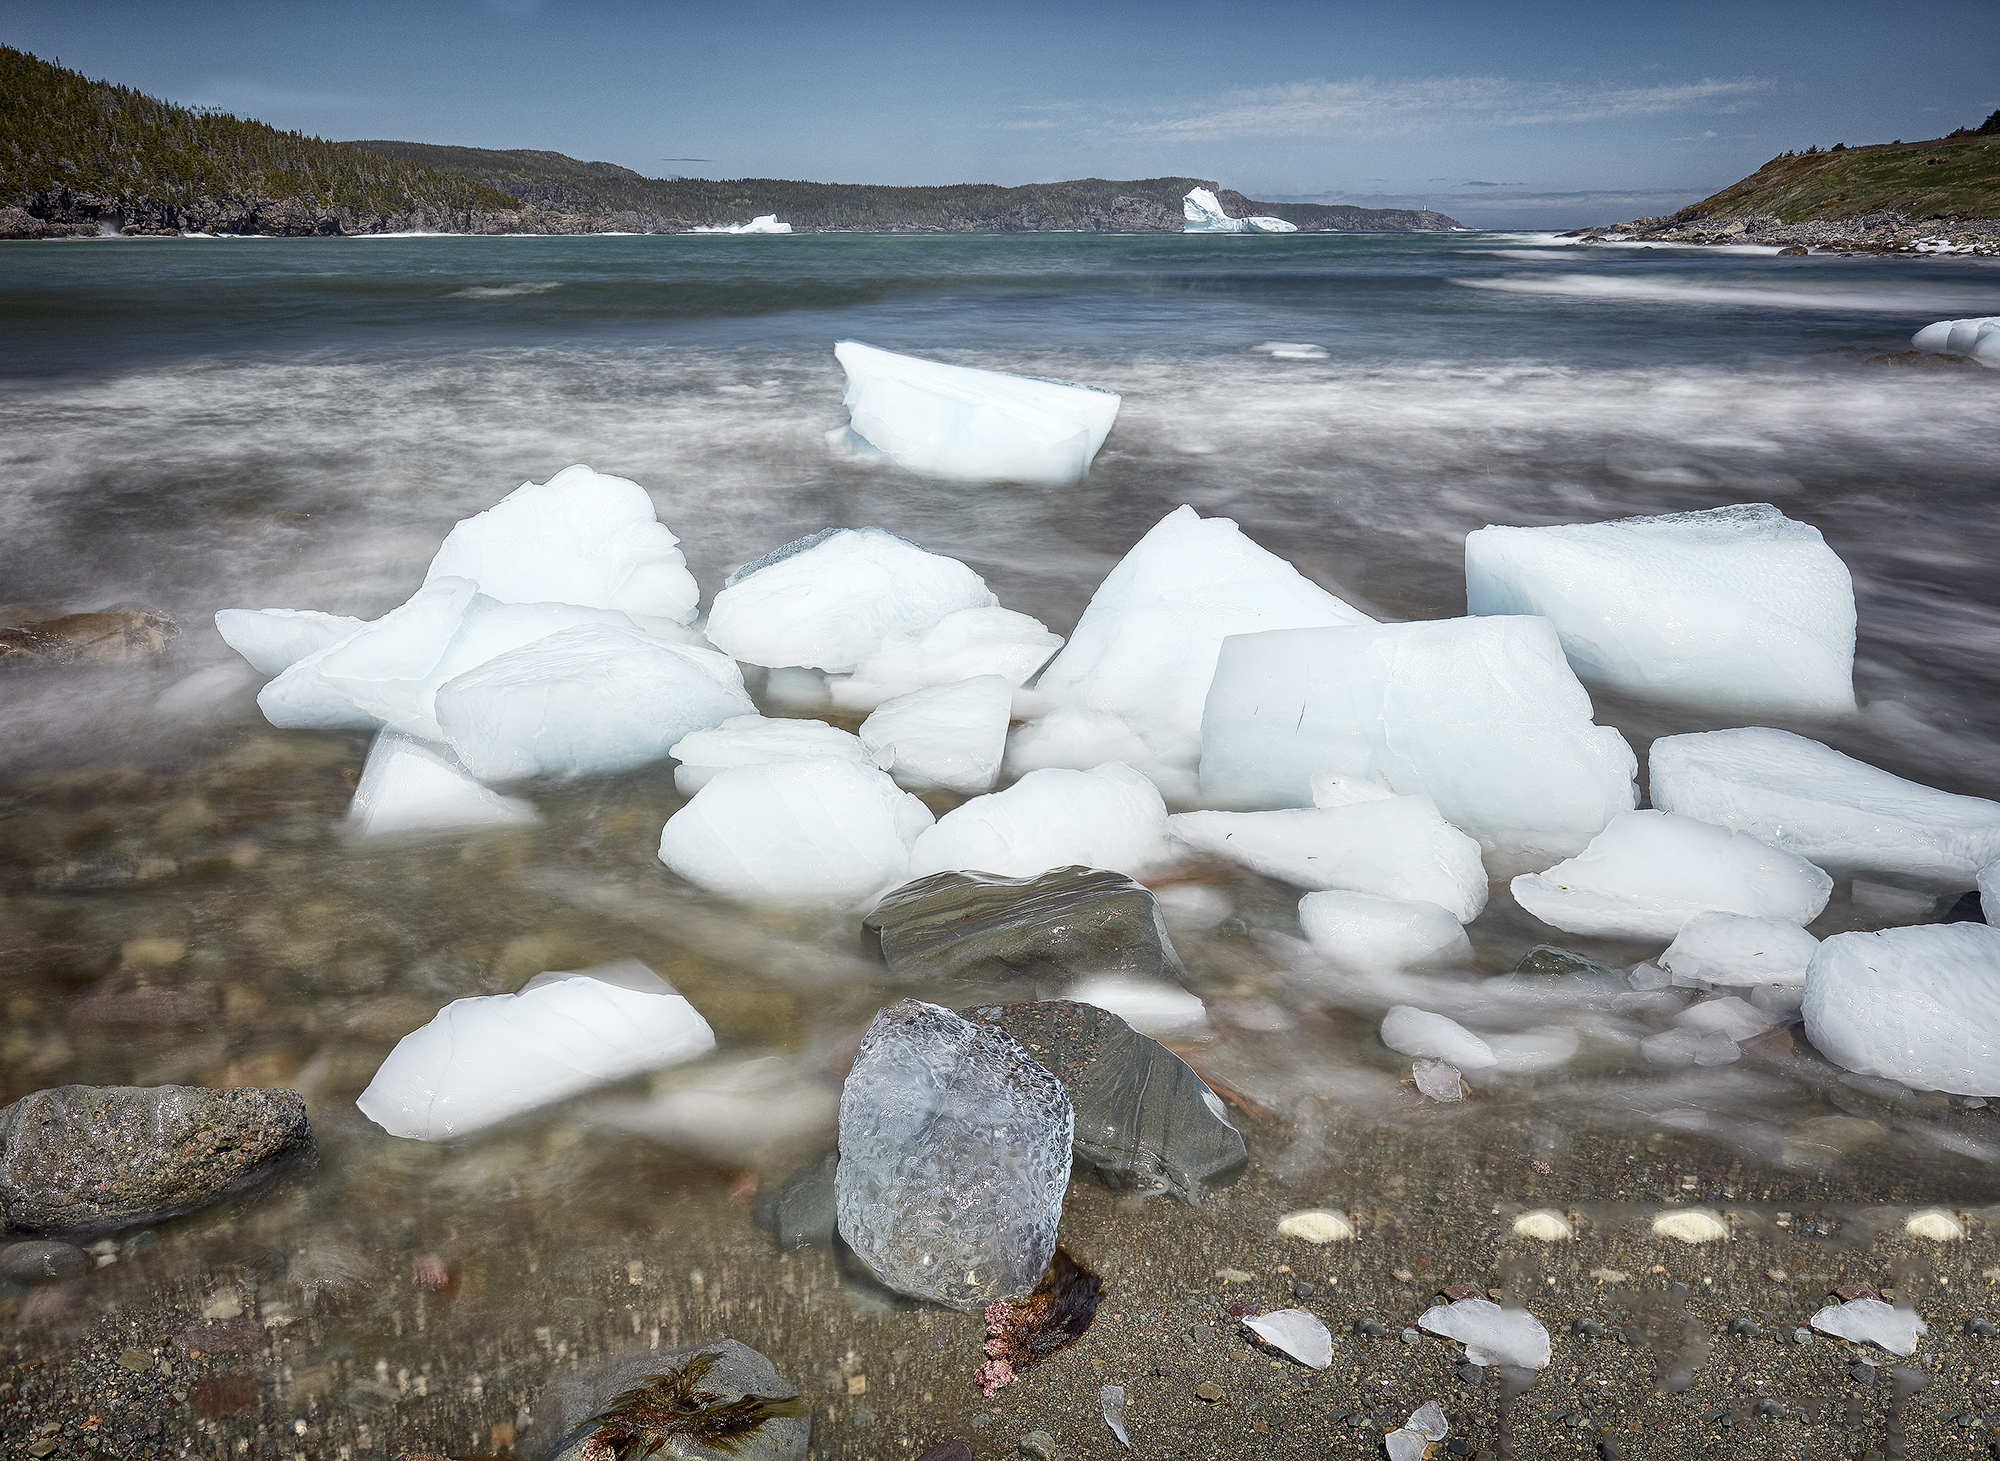
iPhone 8 Plus | 4mm (28mm efov) | ƒ1.8 @ 1/640 | ISO 20 | DxO PhotoLab 9
DeepPRIME XD/XD2s cleaned up the sensor noise. A Grad ND mask was used over the upper right of the sky plus an auto brush mask over the water.
Sadly, the first thing I learned was that PL9 cannot process my iPhone 11 Pro DNG (raw) files made with the Lightroom camera. While they are not ’true raw’ photos (even ProRAW files are processed in-camera before you see them) (DxO), it shouldn’t matter, especially since PL9 will process JPEGs. Interestingly, although PL9 can process DNGs from my older iPhone 8 Plus, it won’t play with HDR-raw DNGs. This is unfortunate, as serious iPhoneography is more common than many realize.
According to DxO, “DxO PhotoLab 9 now supports Apple’s HEIC/HEIF and ProRAW formats, letting you bring DxO’s processing power to images captured on your [newer] iOS devices.” which is a good thing. However, according to this DxO Forum post “There is no support for single-frame RAW DNGs from third-party apps like ProCamera or CameraPixels. Same for the DNGs produced by the Adobe Indigo Project camera app.” Too bad, as ProCamera is one of the leading professional phone camera apps.
GUI
An app’s interface is like your kitchen or workshop. To build a workflow that works for you, the tools you need most must be close to hand. PL9’s interface does this incredibly well, and has the added bonus of significant customization. But first . . .
Background Canvas
The first thing I changed was the background/canvas of the image view panel, from dark grey to white (Settings > Display). When making tonal adjustments to photos that will appear against a white background, which includes most online photos and prints—in books, calendars and as framed photographs—a white background calibrates both the image and your eye to the complete tonal spectrum, enabling more accurate tones and hues. Adjusting tones when an image is against a dark background often results in photos that appear slightly dim when presented against a white background.
Back to the GUI . . . Beginning in the top left, there are buttons to switch between the Photo Library and Customize, the processing/editing side of PL9. Thankfully, there are also keyboard shortcuts for each of these commands. I hate the seek-and-find scrolling and clicking of buttons; using keyboard shortcuts keeps my eyes on what I’m doing—typically, the image I’m working on.
Along the top of the Photo Library view are various buttons to compare images and zoom. The pre-set zoom percentages are restricted to 50%, 75%,100% and 200%, with no 25% or 300% or 400%. Of course, the user can pinch to zoom using a touchpad. One niggly is that when ’Fit’ is chosen, the image is zoomed until two sides of the image are right against the black frame, leaving no white space. Having a margin of a half centimetre/quarter inch of white (as Lr does with Fit) would be helpful for maintaining the aesthetic of the view and, more importantly, the eye-image tonal balance, the whole reason for having a white background to begin with.
In Customize, (just double-click on the preview image) a variety of buttons are added to this array, including Crop (R), Horizon (H), and Retouch (N), among others. I like the addition of a Loupe tool (S) to check details at 100% (or 200%) while viewing the whole image in Fit view. To reduce, even eliminate any processing lag, the Loupe can be used to preview DeepPRIME and DeepPRIME XD/XD2s denoise when they are turned off in Settings. More on this later.
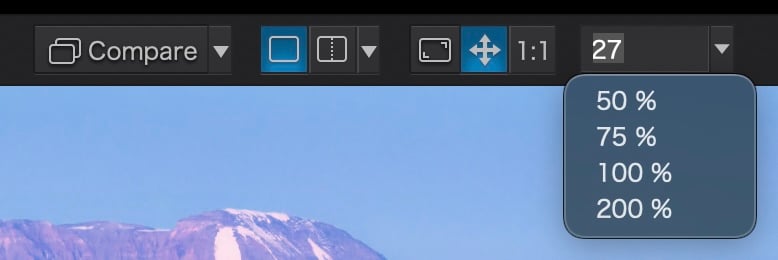


PL9 top buttons for Photo Library (left) and Customize (right)
Shifting Palettes
The most significant customization is the ability to shift palettes between the left and right panel, or set palettes to float over the image. This is handy, just like with Affinity Photo and Photoshop. Palettes can also be removed from a panel, yet are still retrievable via the Palettes menu in the menu bar. Lightroom allows similar customization of the Develop panel, shifting palettes up and down the order and toggling off those not used. But more on this in OoO under Customize.
It’s important to note that both PL9 and Lr suggest an order of operations through the default order of the palettes. While there is no right or wrong order with PL9, the more high-intensity processes, such as denoise and masks, should be done towards the end to avoid unnecessary lag times.
However, one palette I moved was the all-important Histogram. I prefer to edit with only the right panel open. This provides more screen real estate for the image being edited. Yet, upon opening, PL9 had the histogram in the left panel. Not any more. It’s now lives in the top right, above Light where I can see it as I adjust exposure and tone.
An advantage of the PL9 Histogram over Lr is its detail. Not only does it show Luminance and RGB values, the user can turn on the gamut warnings, then select each colour channel to, for example, determine more precisely which colour is triggering the warning. This can also be seen in RGB mode as well. The out-of-gamut warnings appear in a hue opposite of the colour going out-of-gamut. For example, when yellow is out of gamut, a cyan colour appears. How very helpful.
Unfortunately, the histogram is not ‘sticky’; it disappears when the ’Light’ icon is selected and when the Favourites are selected. Solution: I drag it out as a floating window then drag it back in when finished. I’m liking this!
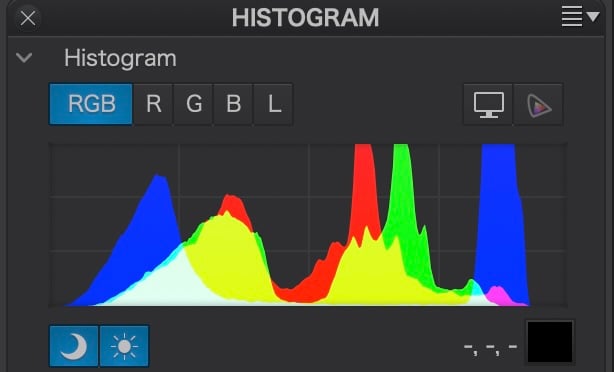

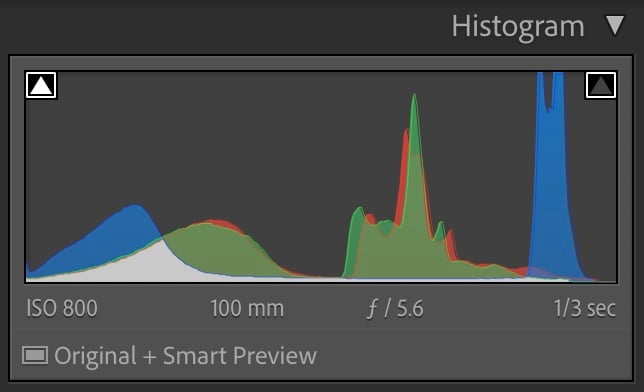

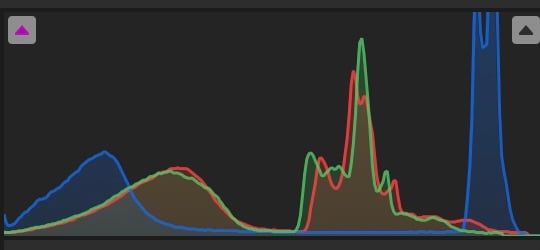

Histogram palettes from left to right: PL9, Lr Classic; LrCC Desktop
Two additional improvements DxO can make to the Histogram are (1) allow it to be favourited with the blue star to keep it always visible, if the user chooses; and (2) tone down the bright, saturated colours of the histogram as I find them distractingly enthusiastic.
I also removed the Tone Curves palette, as I did with Lr. I know, shocking, but despite many years of using Curves in Photoshop, since Lightroom adopted its White-Highlights-Exposure-Shadows-Blacks system of discrete tone controls, I’ve found little use for Curves. Frequently during workshops and courses I’ve conducted, I’ve seen users using Curves at cross-purposes with the various exposure sliders.
Taming the Palettes
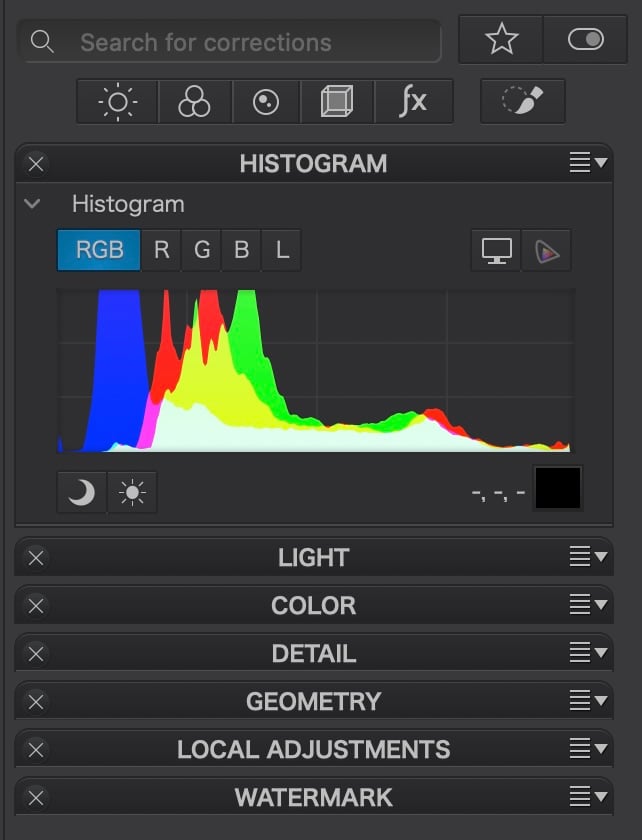

One area I would like to see improved is the overall ‘elegance’ of the app. Without some ‘tidying’, the right panel can look like an overstuffed toolbox or kitchen drawer, with dozens of lines of narrow processing functions close together. Within each palette, there are several options users need to click open/close as they make their way down the panel. Users can reduce the clutter by opening one palette at a time, making adjustments, then closing it. Adopting Lr’s ‘Solo Mode’ could further improve this by automatically closing an open panel when the next palette is selected.
Alternatively, users can simply use the buttons at the top to select which palette to work with. Just beware that the Histogram disappears when individual buttons are used. It would be helpful if DxO finds a way to keep the histogram visible if a user so chooses.
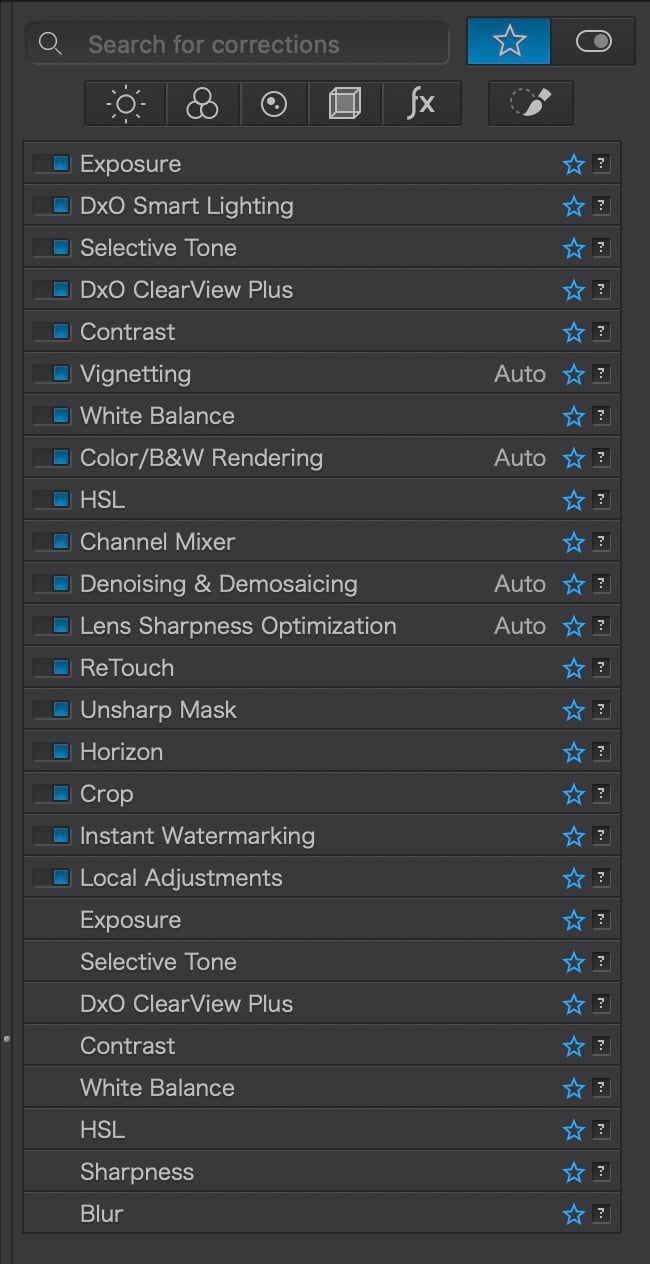


Another method of organization is with Favourites by selecting the blue star to the right of a process. Selecting the large star in the top right will reduce the toolbox to just those that have been favourited. With so many processing options, this is an ideal way of prioritizing the ones used most frequently. To clean up my workbench, I selected only those processes I regularly use, leaving out things like Working Colour Space (it’s always set to DxO Wide Gamut), LUT Grading, Style-Toning, and Soft Proofing, amongst others. It’s still quite full, but it helps.
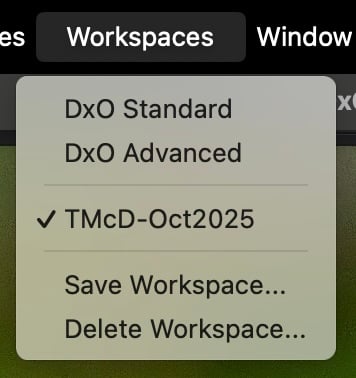
The best part of this customization is that once I have dragged and dropped palettes into a framework that is efficient for me and favourited chosen processes, I can Save my Workspace. Fantastic!
I must admit that, overall, I find LrCC to be the most elegant. The font and spacing between lines of text (the leading) in LrCC makes for easier reading. Sounds nit-picky, but when working with an app for hours on end, it becomes significant.
Adjustment slider behaviour
One hurdle I’ve found to distraction-free editing with PL9, is the behaviour of the adjustment sliders. I’m not one to drag sliders up and down looking for the right ’look’. For one thing, you can’t always do this with PL9 as there is often a lag time after every change (more on lag time below). But I also find slider-dragging too imprecise.
Typically, I use the cursor/arrow keys to increase and decrease values. With PL9, the cursor only changes values in small increments of 1 or 0.1. With Lr, I have the choice of holding Shift+Cursor up/down to make larger-increment jumps of 10 or 0.33. Typically, I increase/decrease a setting in jumps of 10 until I go past the ideal. Then, I’ll creep back to it using just the up/down cursor key. This is not possible with PL9. I find myself looking away from the image to the slider to make changes or I rapidly tap the cursor in bursts of 10 for larger-increment changes. This is not what I would call a smooth action.
Photo Library
You’re likely wondering, why am I writing about ”library” features when we’re talking about editing and processing?
A Photo Library is the organizational hub of your editing system and a highly under-rated key component. But when you have tens of thousands of image files spread over many years, it becomes your lifeline. When I have a call for photos, I don’t have time to flip through folders like shoeboxes of negatives; I need to access them without having to wonder where they are. And PL9 does it, mostly.
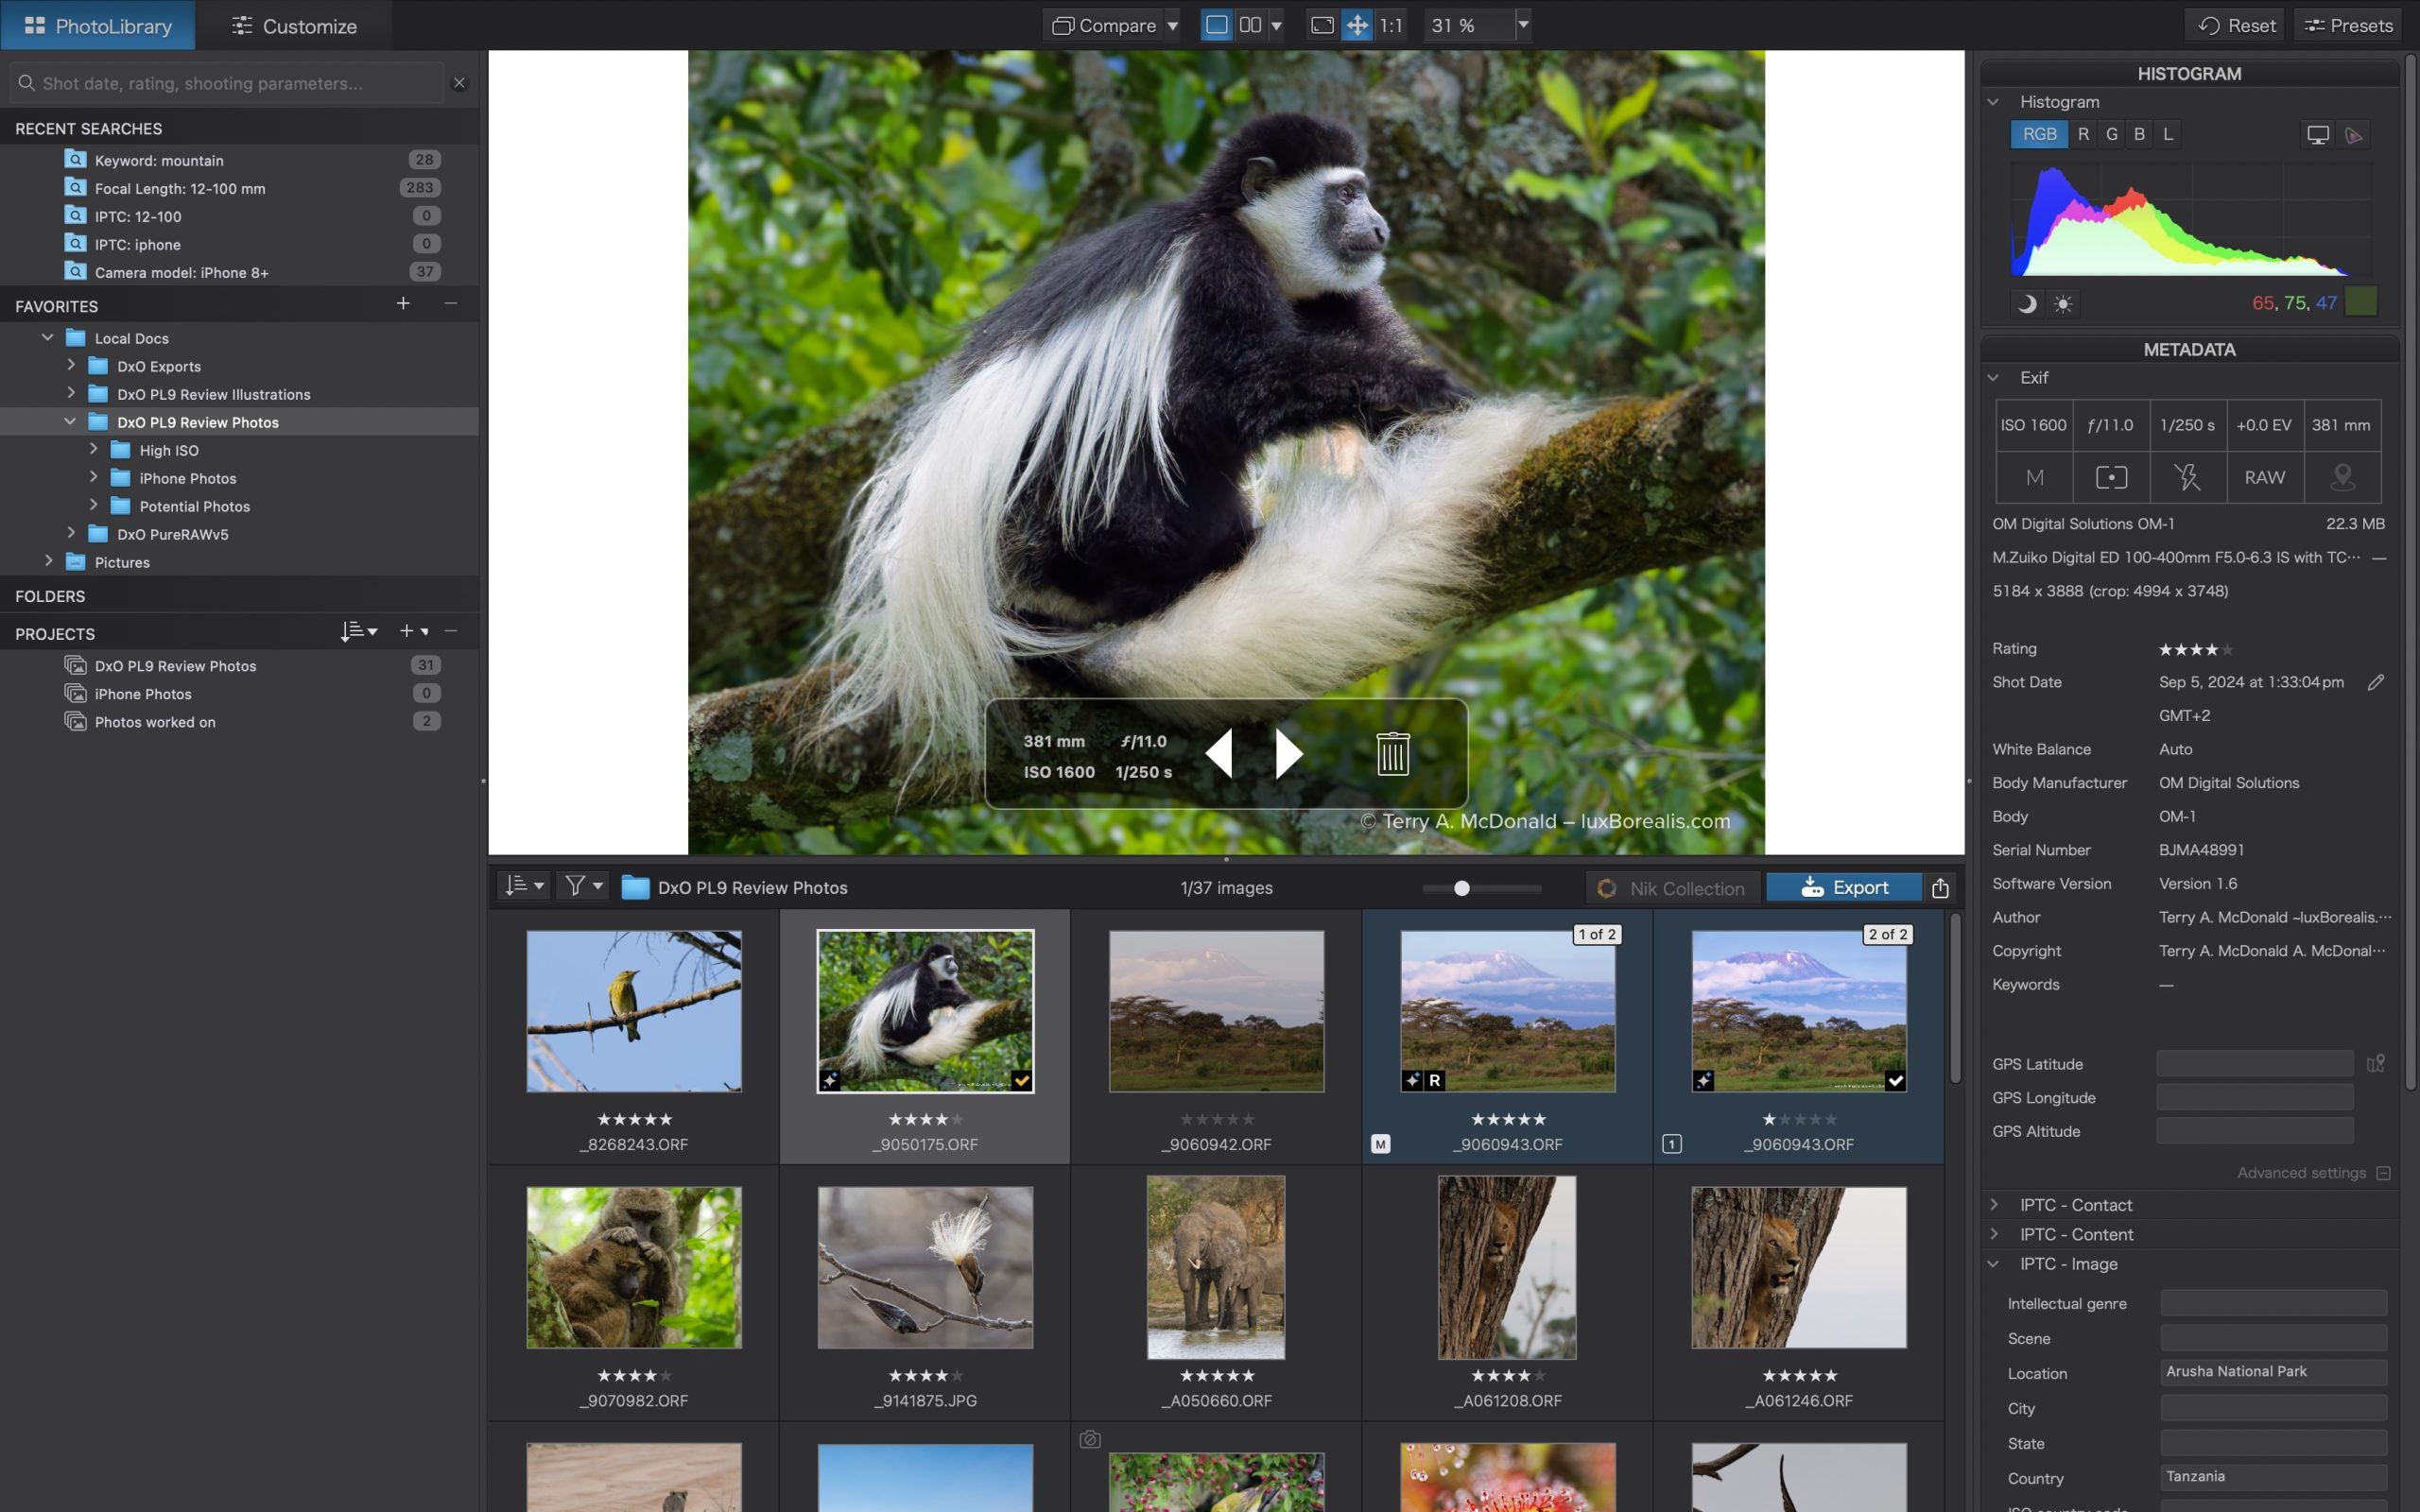

Photo Library has a left panel for navigation, a right panel for metadata, and a very helpful split screen in the middle, showing a selected image and a contact-sheet-like display of the images in the folder. This image browser section can be re-sized for multiple rows of images—how very helpful! Any image in the browser can be viewed in the viewer with a single-click or, with a double-click, can be opened directly in Customize. Brilliant! LrCC has only a single-row filmstrip at the bottom; LrC has neither, so PL9 is definitely ahead in this regard.
File System
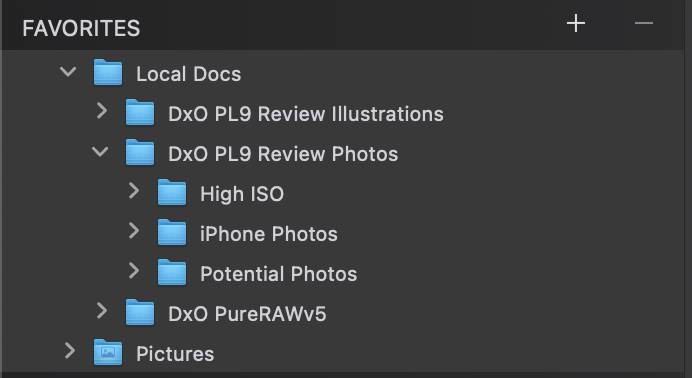

PhotoLab 9 uses an open file system, mirroring the computer’s file structure. This is unlike Lightroom, which is a self-contained photo database (photos are imported into the app and managed from within it). Basically, PL9’s Photo Library is a file browser, hierarchically listing folders and files as they appear on your drive, either internal or external. Unfortunately, it lists every folder in the hierarchy, starting with the root of whatever device you are accessing. Many of the folders listed are irrelevant to processing photos, so it is helpful that PL9 has a Favourites section. With Favourites showing the user-selected folders, the FOLDERS section can be left closed.
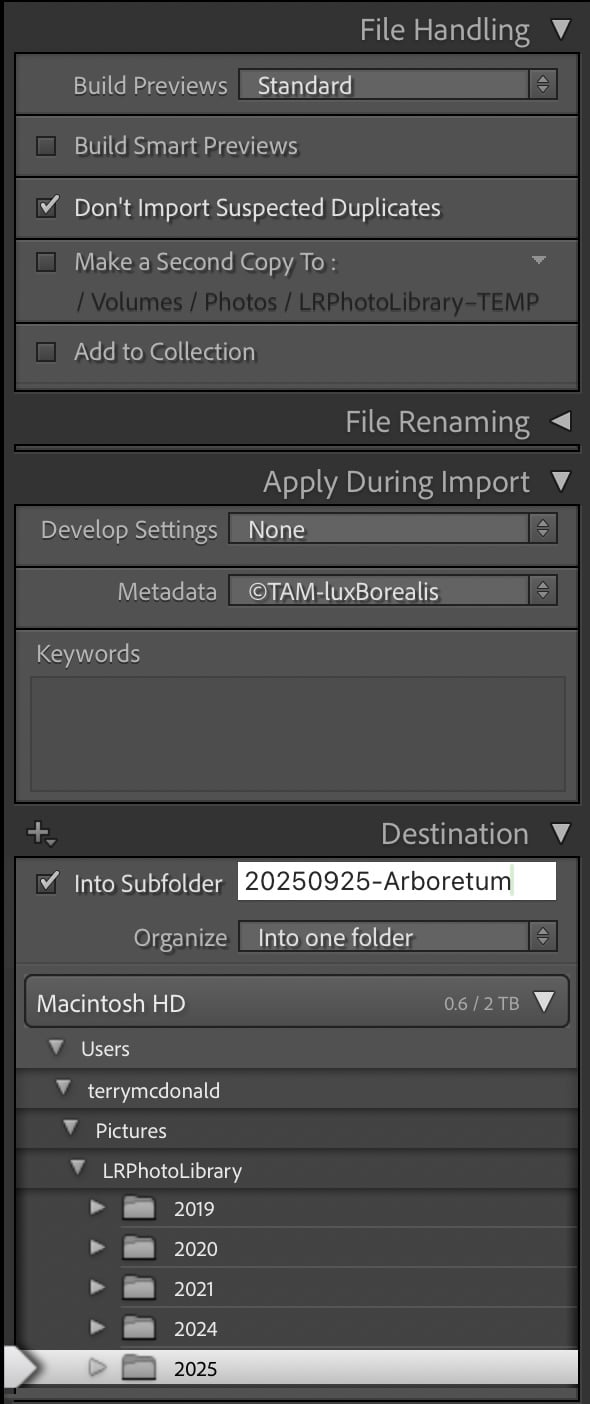

I’m fine with either an open or closed file structure, provided it is efficient and I can import images to folders and give them names significant to me; e.g. YYYYMMDD-DescriptiveTitle. Within the PL9 Photo Library, users can rename folders, but folders cannot be moved, as they can in a closed system. Moving folders must be done using the computer’s file structure; e.g. the Finder or File Browser. Easy enough. In a closed system (e.g. Lr), any changes made to folders or images in the Finder/File Browser breaks the link within Lr, which must be re-established within the app. So, there are pros and cons of each; it comes down to what you are used to.
However, one of the advantages of a closed system is the ability to apply a number of customizations during import including metadata and Develop presets. LrC allows this; PL9 does not. In PL, I must input metadata to an image then copy and paste the metadata to others. It’s an extra step. However, PL9 applies the Preset selected in Settings > General where you can save your own preset, once the nuances of imported images are known, based on lens and/or camera and/or genre of photography.
On the plus side, PL9 allows images to be moved from one folder to another as easily as dragging and dropping. Interestingly, in the DxO User Guide, which I now know inside-outside-upside-downside, it states that moving images on a Mac duplicates them (https://userguides.dxo.com/photolab/en/managing-images/). I’m pleased to see this is not the case.
Projects within PL9 are like LrCCs Albums and LrC’s Collections. Organization using Projects (or Albums / Collections) is an invaluable tool for making collections of photos drawn from across different folders; e.g. Bird Portraits; 2025-Best; or Tanzania Trip-Best. This can speed up the sometimes endless searching for specific sets of photos. Projects narrow down the starting point for selecting photos for a specific use.
Metadata
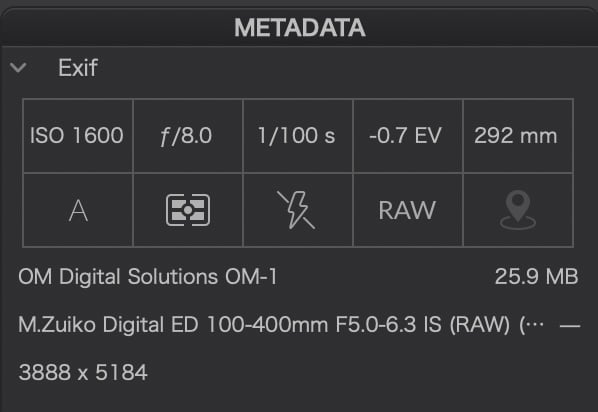

Managing the metadata associated with each image file is an essential component of any photo library/catalogue. For professionals and many serious photographers, metadata is critical for finding, keeping track of, and using images. When photos number in the tens of thousands, finding one or a small group within seconds is much easier with up-to-date metadata: keywords, star ratings, perhaps titles and captions, and GPS data.
I like the clean layout of the EXIF data found in the top right of the default panel. Using a combination of numbers and easy-to-understand icons, I can quickly glimpse the camera controls used to capture an image, which then drive some of my editing decisions.
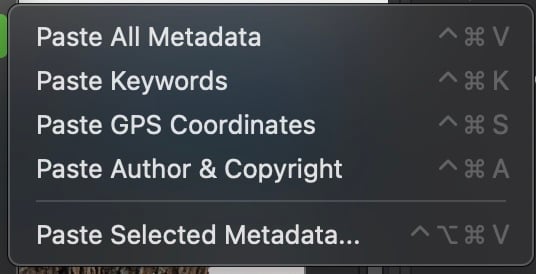

Furthermore, metadata is easily edited, copied and pasted to other photos and to batches of photos. Batch processing of metadata is an essential efficiency and DP9 handles it well, though not completely seamlessly. It’s easy enough to right-click on an image and select Copy Metadata then, select the batch of images you want it copied to, right-click and select the option you wish:
As with a number of PL9’s functions, metadata sits between the robust batch editing of Lr Classic and the clunkiness of LrCC.
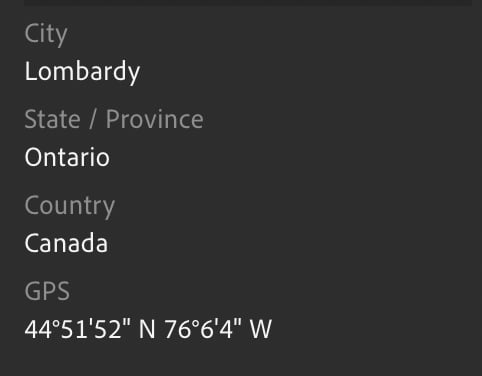


Adding location and GPS data is very helpful, especially for travel, nature and landscape photography. I don’t always publish the data, but it is also helpful for remembering locations. In PL9, holding the cursor over the map pin shows the lat & long, if entered for the file. Unless your camera writes GPS data to each file, you will need to input it. One way is to use Google Maps to pinpoint the location then copy and paste the lat & long. I do this with LrCC for individual and batch images. From there, LrCC populates other relevant locational data: city, province/state, and country.
With PL9, it’s not as straightforward. Since latitude and longitude are two separate fields, each must be copied and pasted separately. Huh? In Lr, it is one field, one copy and one paste. With Lr Classic, it’s even simpler. I use the powerful and under-utilised Map module and drag and drop batches of images to the precise location: voilà, they are geo-tagged.
Adding Keywords is another essential function of metadata. With PL9, one keyword at a time is entered, followed by a Return. To me, this is inefficient. With Lightroom, I can enter (type or paste) a string of comma-separated keywords, then tap Return. Lr converts the string to individual keywords. Definitely more efficient. Other than this, PL9 has a powerful keywording system that also accepts hierarchical keyword lists.
Search
I’m loving PL9’s Search. A solid search function is indispensable for efficiently wading through thousands of photos to gather a set of similar images or to help create a Project. I like the way PL9 creates a pre-search list using a combination of terms and easily-recognised icons: IPTC metadata, pictures, folders, keywords, date, lenses and camera bodies, even by phone type.
If I search ’10/2024’, I get all the images from 1 Oct. 2024 to 31 Oct. 2024. Brilliant! It just seems so much more intuitive, providing the user with choices as they work.
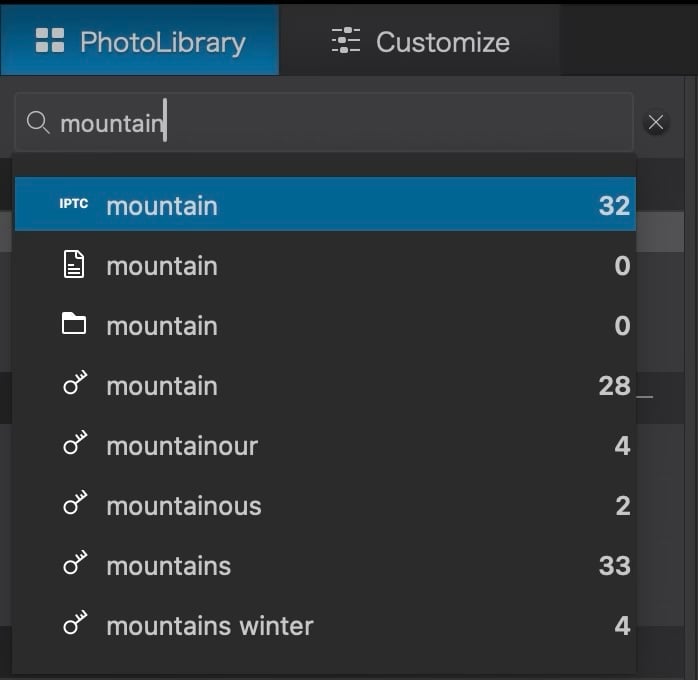

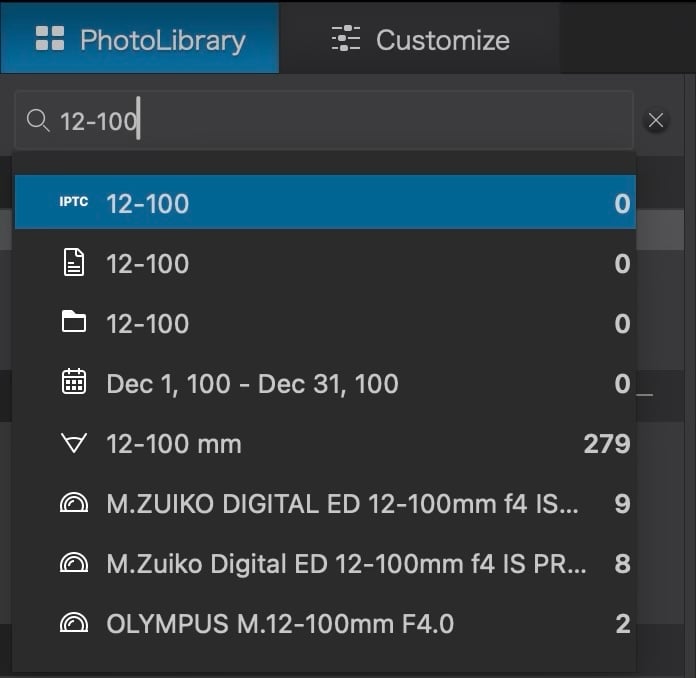

PL9: The incredibly helpful search previews of two different types of searches.
Even with Adobe Sensei in LrCC, results are often hit-and-miss; e.g. for 10/2024, I get images from the 10th day of any month plus those for October. The ’pre-search’ list is not as complete as the one provided by PL9’s search, unless you use the often hidden operative words such as ’lens’ or ’keyword’. Have a look at what ’12-100’ shows—what a great seelction! Plus, if anything comes up in the search for which the specific camera body or lens module is missing and needs to be downloaded, PL9 provides an alert. Now that’s proactive.
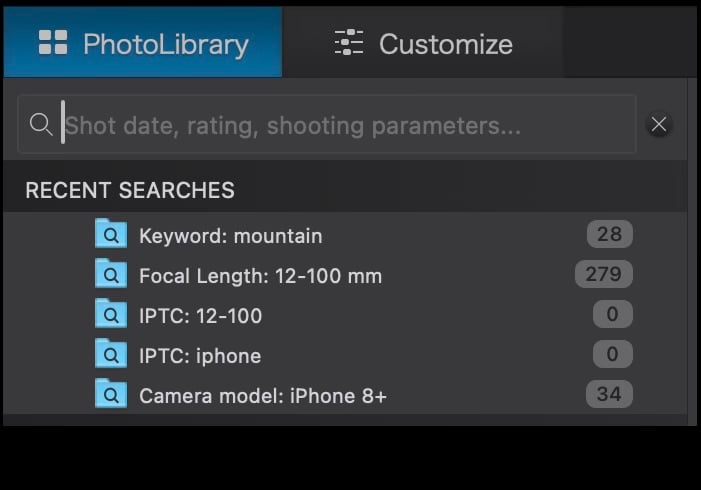

I’ll be honest, though. Lr Classic’s Library Filter takes the cake, with discrete sections for Text and/or Attribute and/or any number of Metadata entries. It’s the mark of a truly integrated database, rather than a file browser. That being said, PL9’s search is really no slouch and is made even better by keeping Recent Searches. Accruing a set of searches while building a Project of images is very helpful.
Sadly, PL9’s Search function does not work within a Project or within the Projects section like the Search/Filter does with LrC with its Collections Search. For instance, the group of photos I chose for the PL9 review included a mix of 35mm sensor, M43, iPhone, and 1” sensor photos. I wanted to select out just the iPhone photos, but the search function in the Photo Library only works on the folder hierarchy of the active drive. It can’t be directed to Projects or a Project within Projects. So, I had to go through the images manually and select them. Is this a deal-breaker? Probably not as the Search function is already excellent. Might there be a workaround? Perhaps, but, it points to another inefficiency of using an open system file browser method as opposed to a photo management database.
Photo Library Conclusion
In summary, the PhotoLab in PL9 is truly a file browser, rather than an image management system like Lr. There are pros and cons of both open and closed systems of file organization. In some ways, it’s whatever method you get used to. However, with Lr being a database, with user-customized import presets, a more powerful search function acting both within folders and within Collections, as well as easier batch metadata and geo-tagging, I’d say that PhotoLab’s Photo Library has come a long way, but is not yet as efficient or complete a tool as we have with either version of Lightroom.
Next up, I’ll take a look at processing order and masks.
Readers are sharing their thoughts on this review in our Forum, check out the conversation here.
Read this story and all the best stories on The Luminous Landscape
The author has made this story available to Luminous Landscape members only. Upgrade to get instant access to this story and other benefits available only to members.
Why choose us?
Luminous-Landscape is a membership site. Our website contains over 5300 articles on almost every topic, camera, lens and printer you can imagine. Our membership model is simple, just $2 a month ($24.00 USD a year). This $24 gains you access to a wealth of information including all our past and future video tutorials on such topics as Lightroom, Capture One, Printing, file management and dozens of interviews and travel videos.
- New Articles every few days
- All original content found nowhere else on the web
- No Pop Up Google Sense ads – Our advertisers are photo related
- Download/stream video to any device
- NEW videos monthly
- Top well-known photographer contributors
- Posts from industry leaders
- Speciality Photography Workshops
- Mobile device scalable
- Exclusive video interviews
- Special vendor offers for members
- Hands On Product reviews
- FREE – User Forum. One of the most read user forums on the internet
- Access to our community Buy and Sell pages; for members only.


