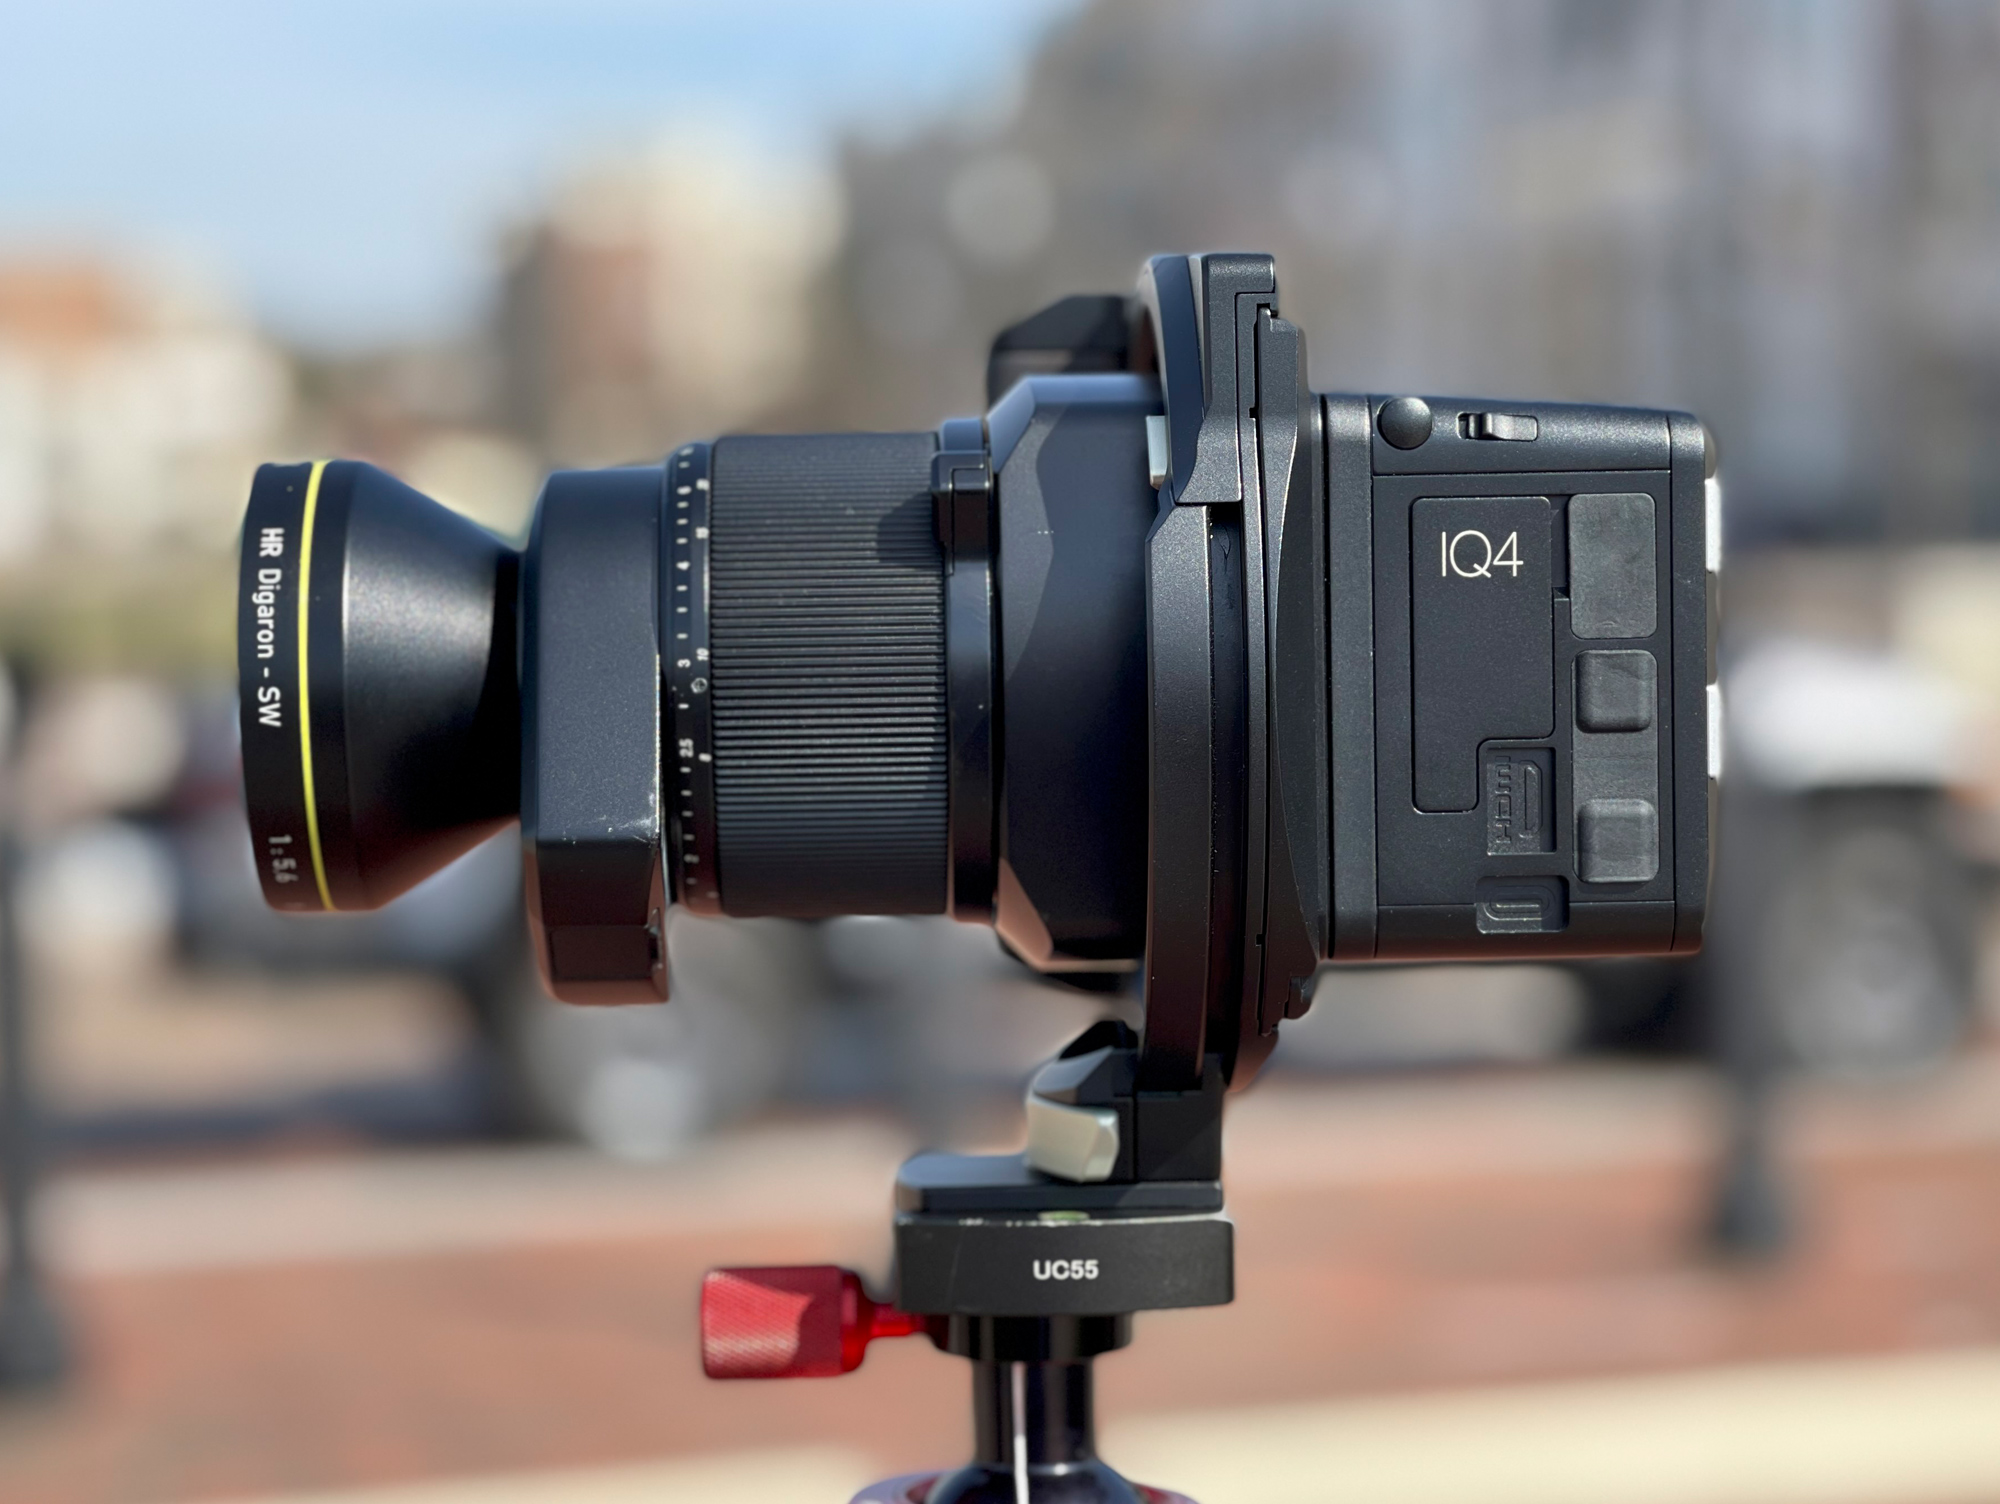
I have had the opportunity to use the Phase One XT camera with a 150 megapixel digital back for the last few months. This is an extraordinary camera and I’ll have a lot more to say about it in an upcoming article. Today I want to share what I consider magic and for some, it will be worth the price of admission into a Phase One camera.
Before I go too far let me say as a disclaimer that for 13 years I worked for Phase One and did many things. It was some of the best years of my career. I have been on my own for nearly 7 years now but I still feel very strongly about the Phase One camera systems as they set the bar high for all camera manufacturers.
 Phase One was kind enough to offer me an extended loan of the Phase One XT camera system with a number of lenses. Unfortunately, it was during the peak of the pandemic so I was unable to travel far with it, and things I would have like to photograph were not possible. But I did have fun with the system and especially one particular feature of the camera — Frame Averaging.
While Frame Averaging more or less explains what this feature does, Phase One should have been a lot more creative and called it Long Exposure Magic. What’s the magic, you ask? The magic is long exposure photography without the use of neutral density filters and all the hassles that come with them.
I have shared the filter system I use most of the time to do long-exposure photography. My kit is The Wine Country filter system and you can read my article about it, “Wine Country Filters And An Interview With Rod Clark,” by clicking HERE. It’s a great filter system and does a great job when I use it with some of my other camera systems.
Using a filter system to do long-exposure photography comes with risks and issues. Let’s say you want to capture moving clouds and have them blur out to show motion. To accomplish this you need to set your camera up and determine what your proper exposure would be. Then you must determine what exposure is needed to get the look you desire.
Three things come into play as they do with most exposure calculations. These would be ISO, Shutter Speed, and F-stop. For the sake of this example, you’d have to make some choices. How long does the exposure have to be to get the clouds to show the kind of movement you want? What ISO do you want to use (most likely a low ISO) and what f-stop do you want, and this would be based on the amount of depth of field you desire and the subject you are photographing.
Then you have to use a Neutral Density filter calculator (unless you are good with mental sums) and determine what filter you need to use to get close to the time you need. So, once you have figured this out, you need to work backward from the exposure you determined was the starting point and then select the ND filter or combination of ND filters of the ISO and exposure time needed.
While over the years I have kind of enjoyed this process (maybe it’s the geek in me), I have found it to be tricky with a few issues that can pop up. First, you obviously have to use a tripod to do these long exposures. Second, if you have any wind blowing, you risk the fact that the tripod may move or vibrate during the exposure and thus blur the final image. Also, most ND filters cause a color cast, even though some claim they don’t. And let’s not forget that after a few minutes of exposure your camera may have to do a black calibration exposure for the same length of exposure, double the overall exposure time. Then, finally, you had better hope that your calculations were correct, or you’ll need to start all over again. If your exposure was off by about a stop and your exposure was 2.5 minutes, you are going to have to do an exposure for 5 minutes to get the proper exposure. Of course, you could open up a stop or double your ISO to do the same thing. So the whole exercise is a bit of work, but when it works the results can be really beautiful.
Along Comes Frame Averaging

Leave it to Phase One to push the envelope as they have done with Frame Averaging. This feature is so brilliant that I found I wanted to use it on just about everything I was photographing. What is it, you ask? Simply put, it is long exposure without ND filters or long exposure. Oh, I know it sounds like I have been smoking something fine. But I assure you I dislike magic.
To use frame averaging, you set up your camera (in my case it was a Phase One XT with IQ 150 back) on a tripod and compose your shot. Determine your exposure using any one of the tools available on the camera back. In most cases, I use just the RAW histogram but you can use the highlight warning tool or even the color exposure map to get the exposure just the way you want it.
The next step is to determine how long of an exposure you would need to get cloud or water movement, or something else the way you want it. Say finding the proper exposure is 0.8sec at f/5.6 at ISO 800. I know because of how slow the clouds are moving in the shot, that I need 8 minutes to get the desired motion effect.
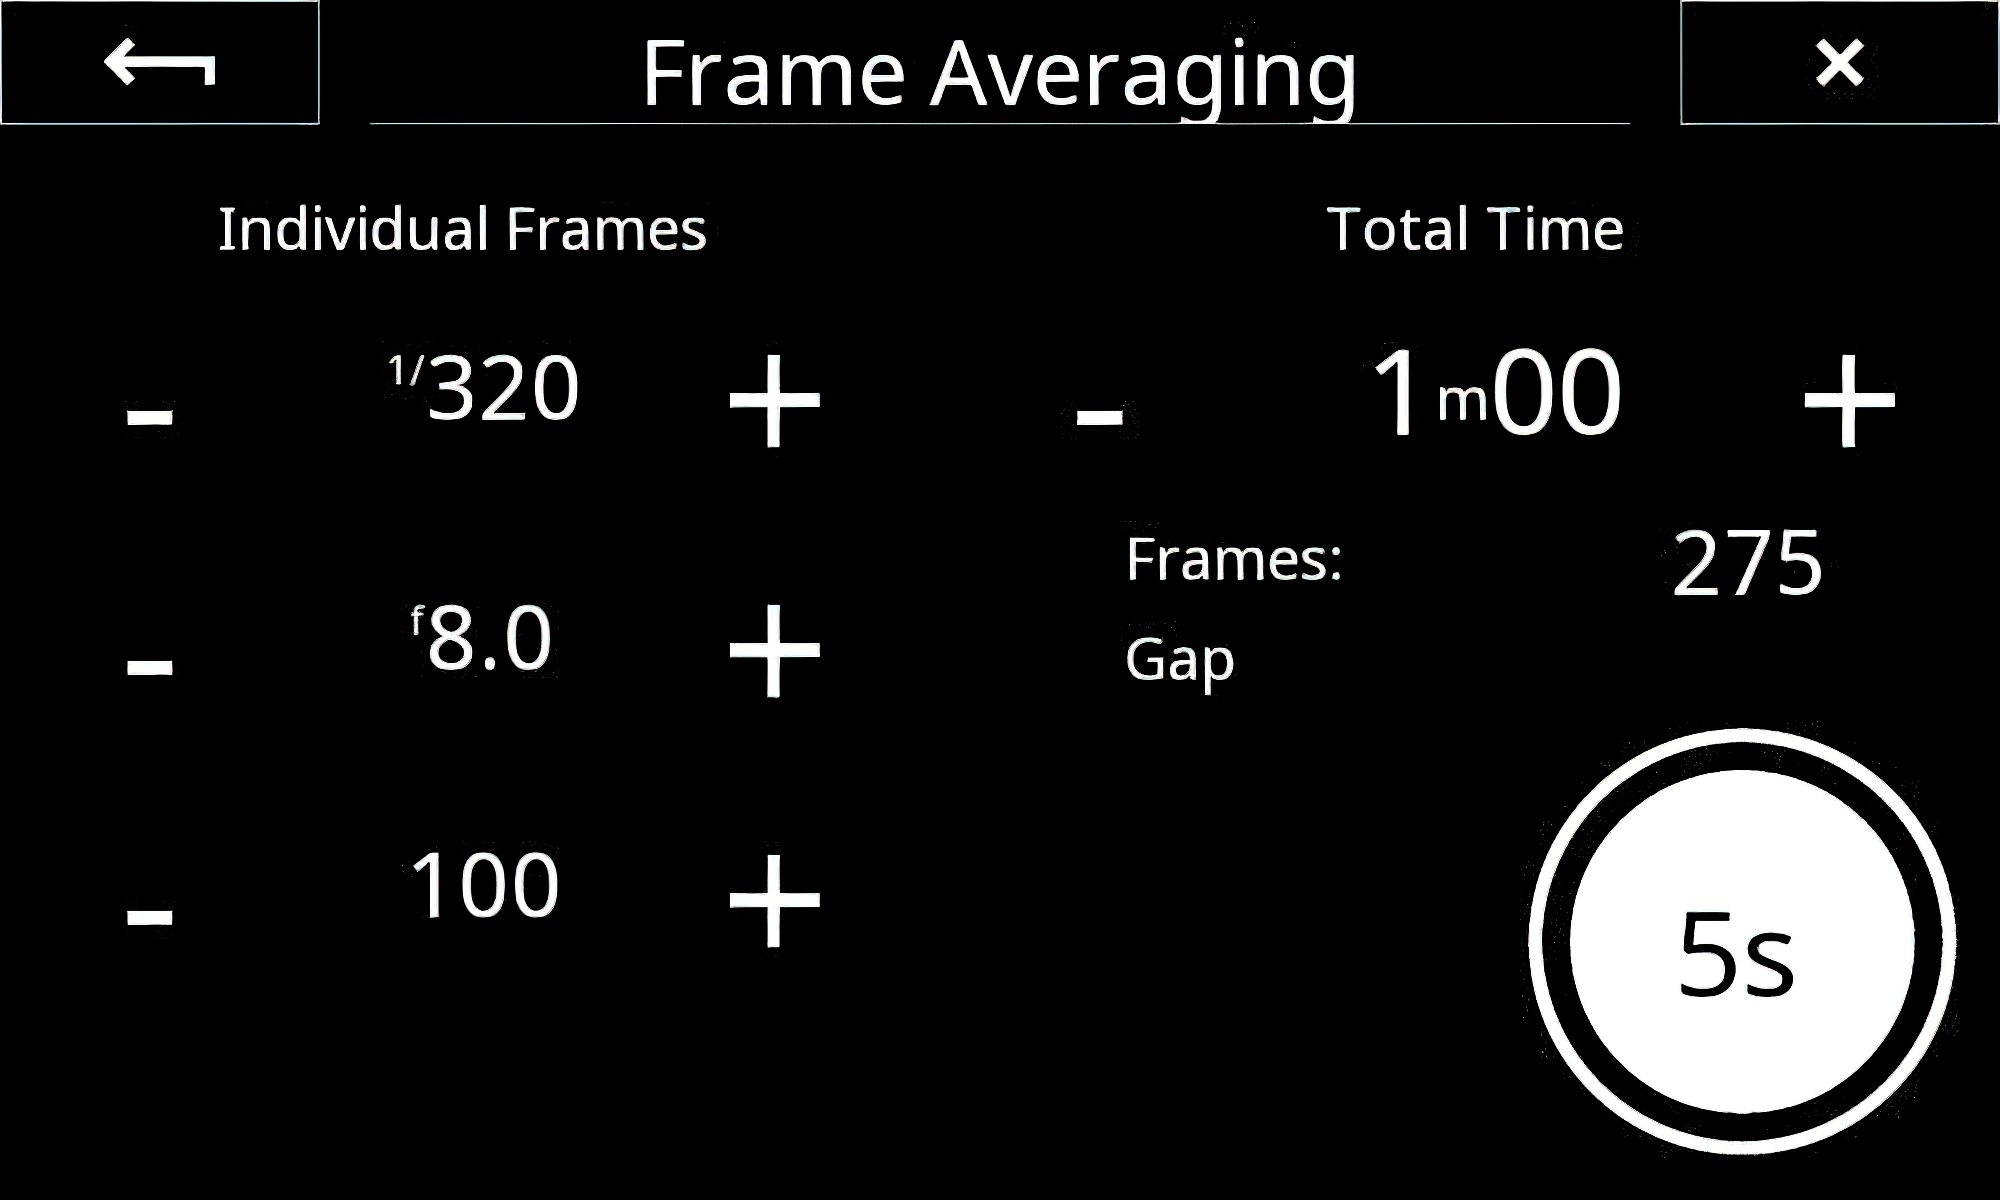
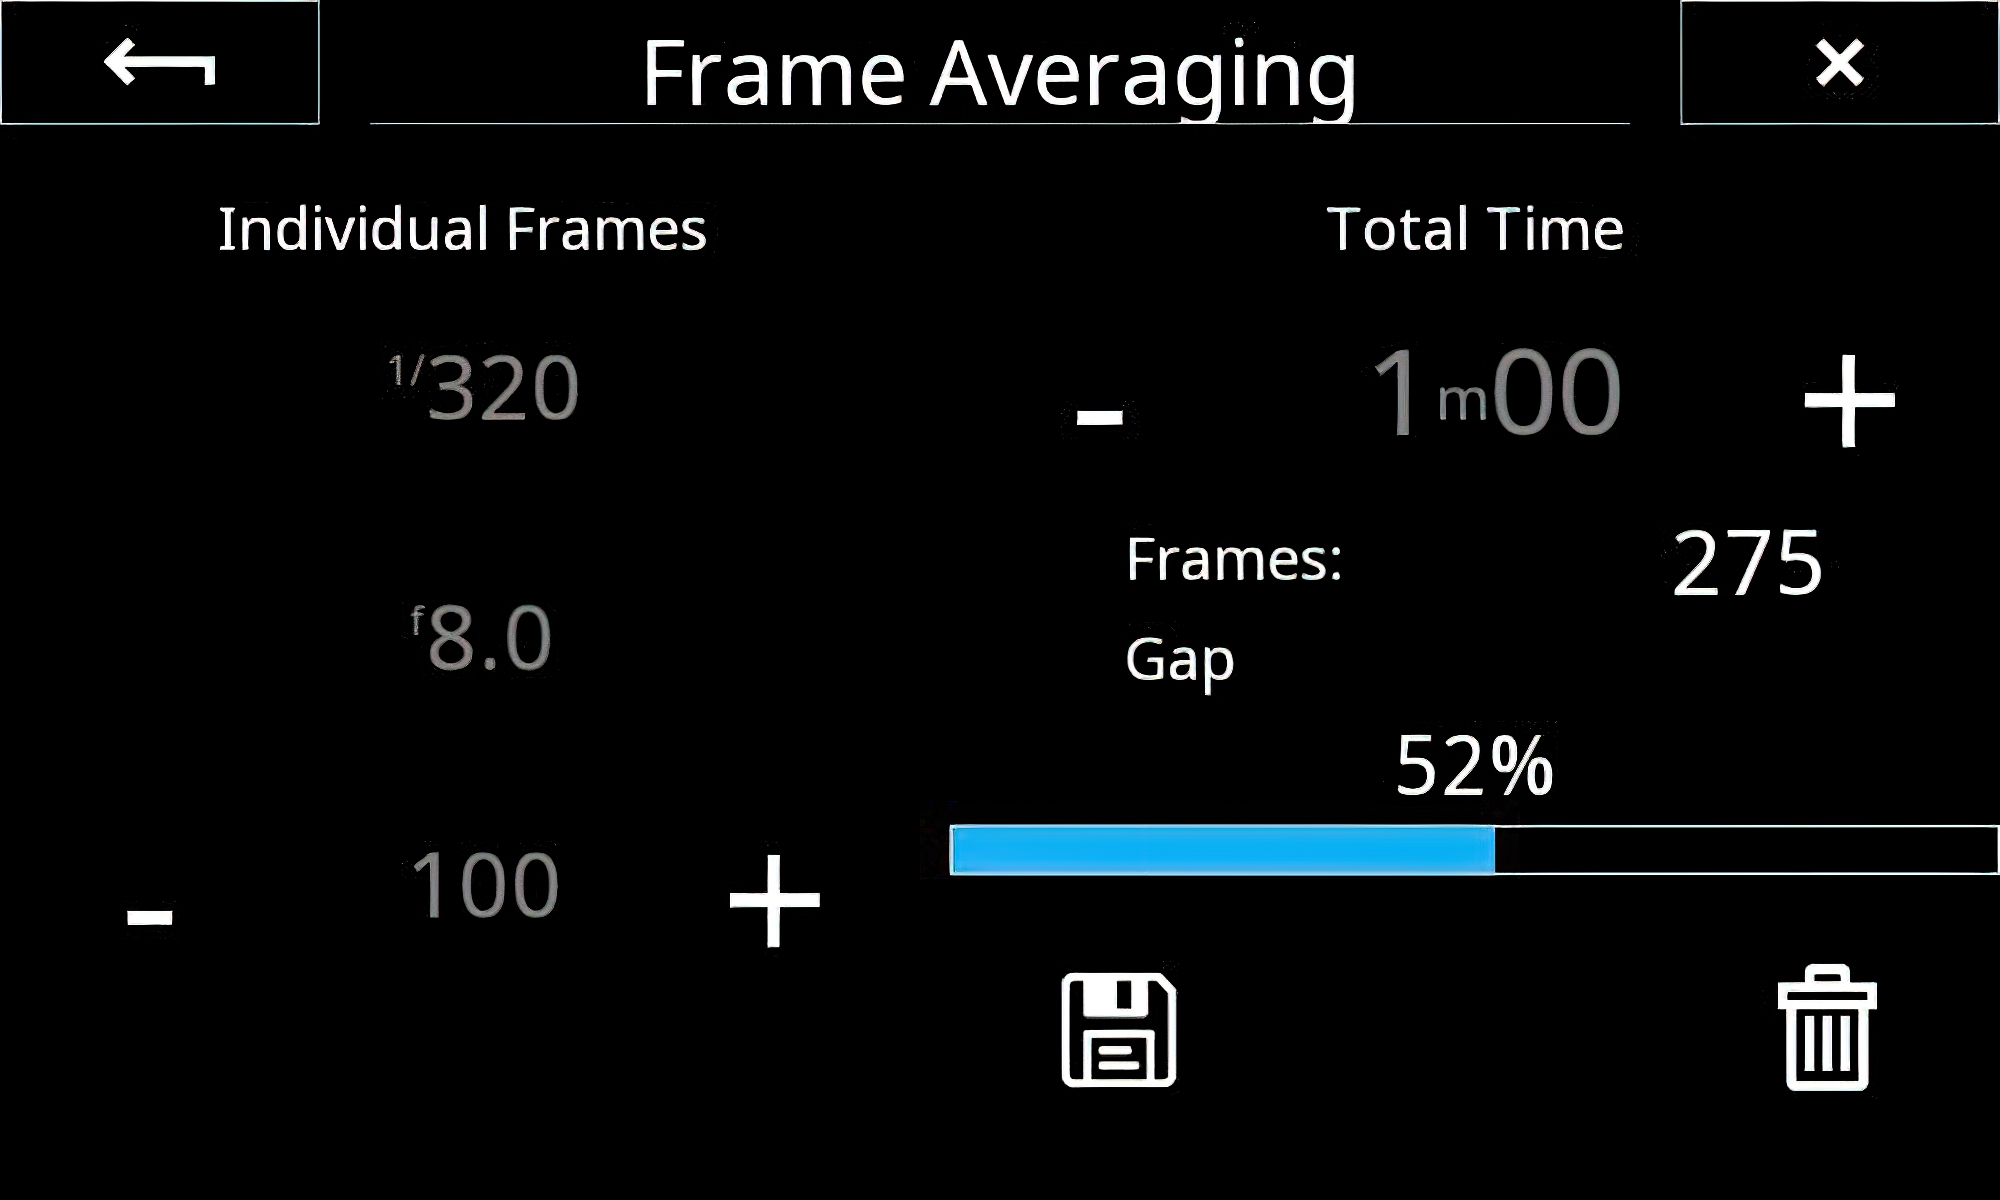
I set the Frame Averaging setting as shown above. It’s that simple. Once everything is all set, I tap the big white button and wait patiently. In this case, the camera is going to take 600 exposures at .8 sec, f/5.6 at ISO 800. Once the exposures are complete, the camera’s firmware looks at every exposure and combines the images together. The result is a long exposure image without the long exposure and use of filters. Once you try it, you get hooked.
Because there are no filters, it’s real easy to vary results just by changing the parameters of the single exposure setting. You can leave the exposure setting as it is and change the overall time to one minute, 30 seconds, or whatever you want and the image will come out correctly without you having to do any calculations. It’s pretty cool to see in action.
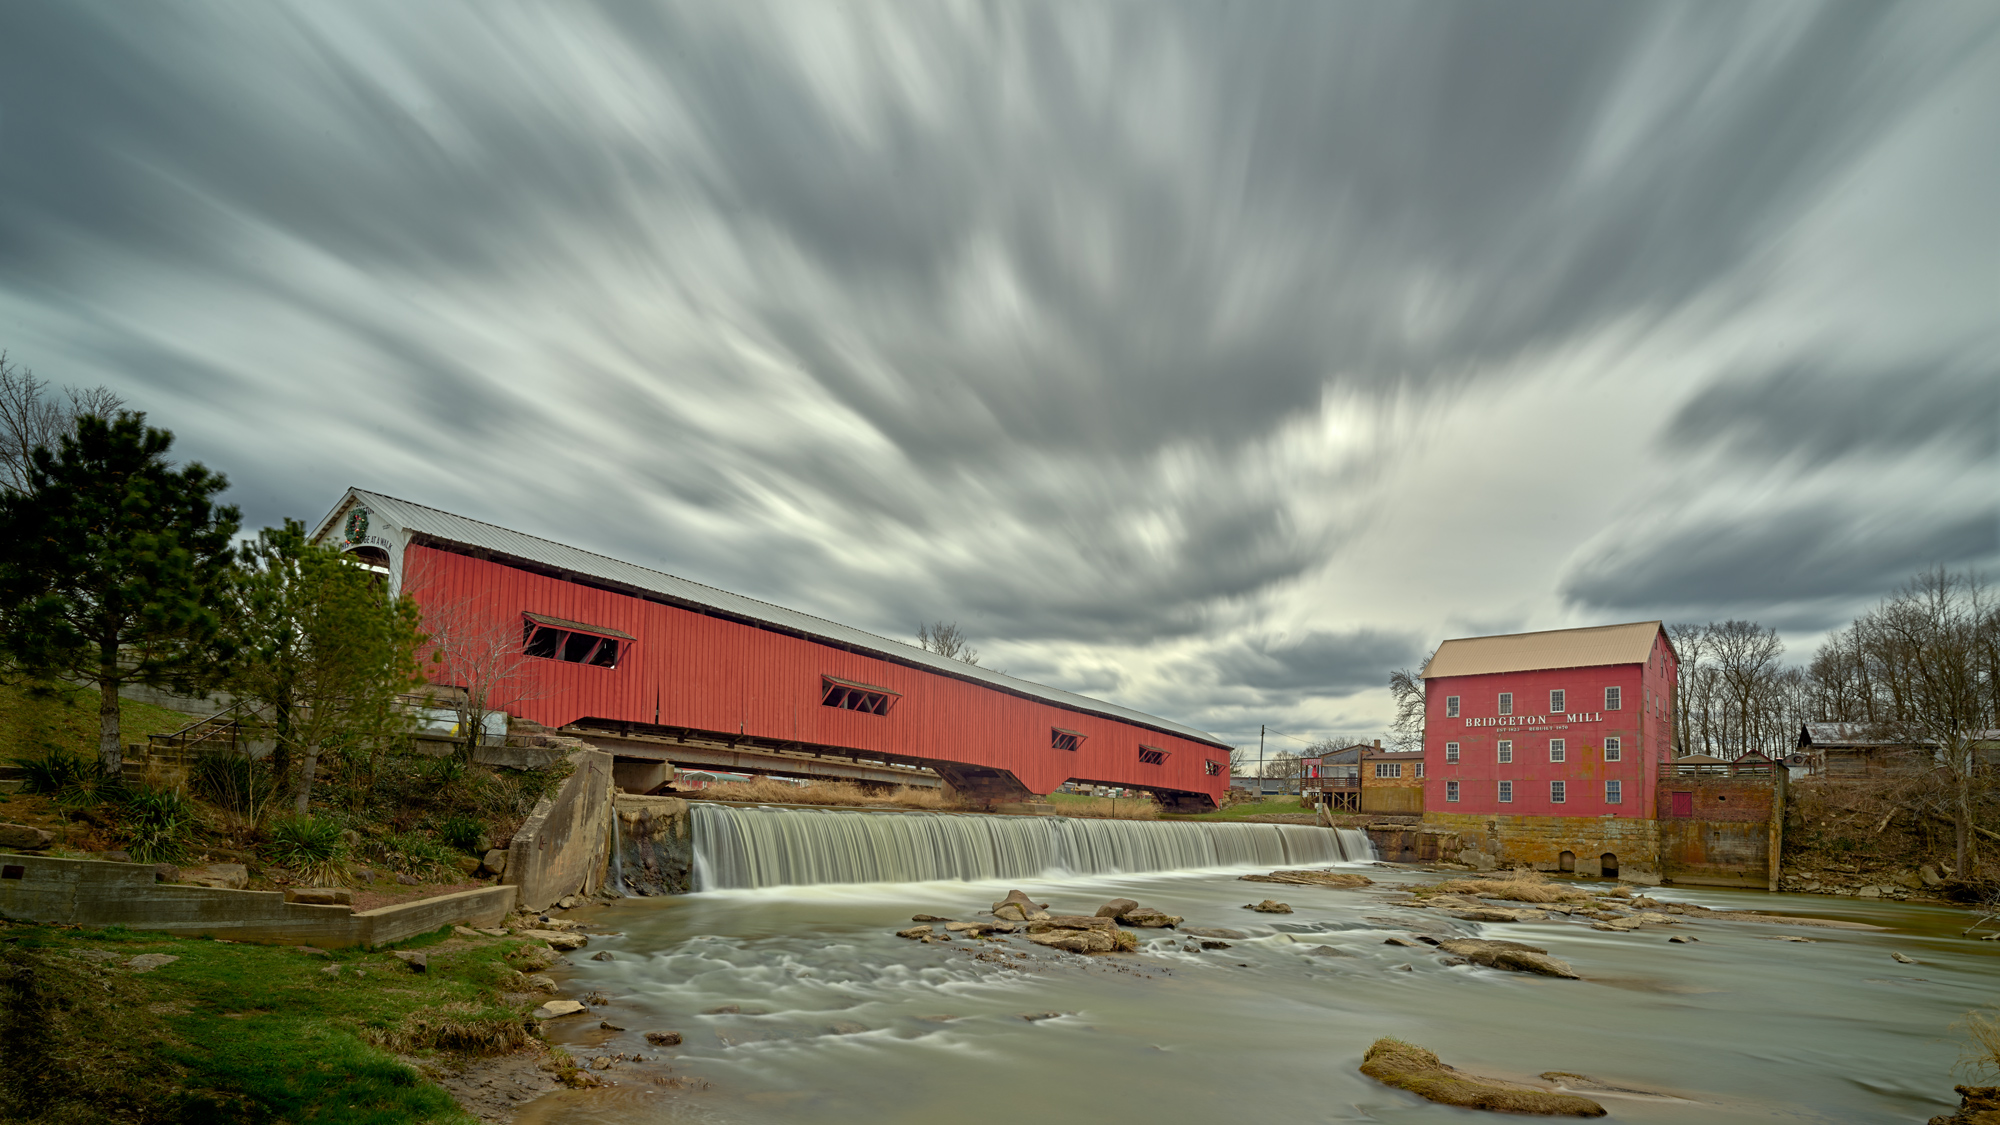
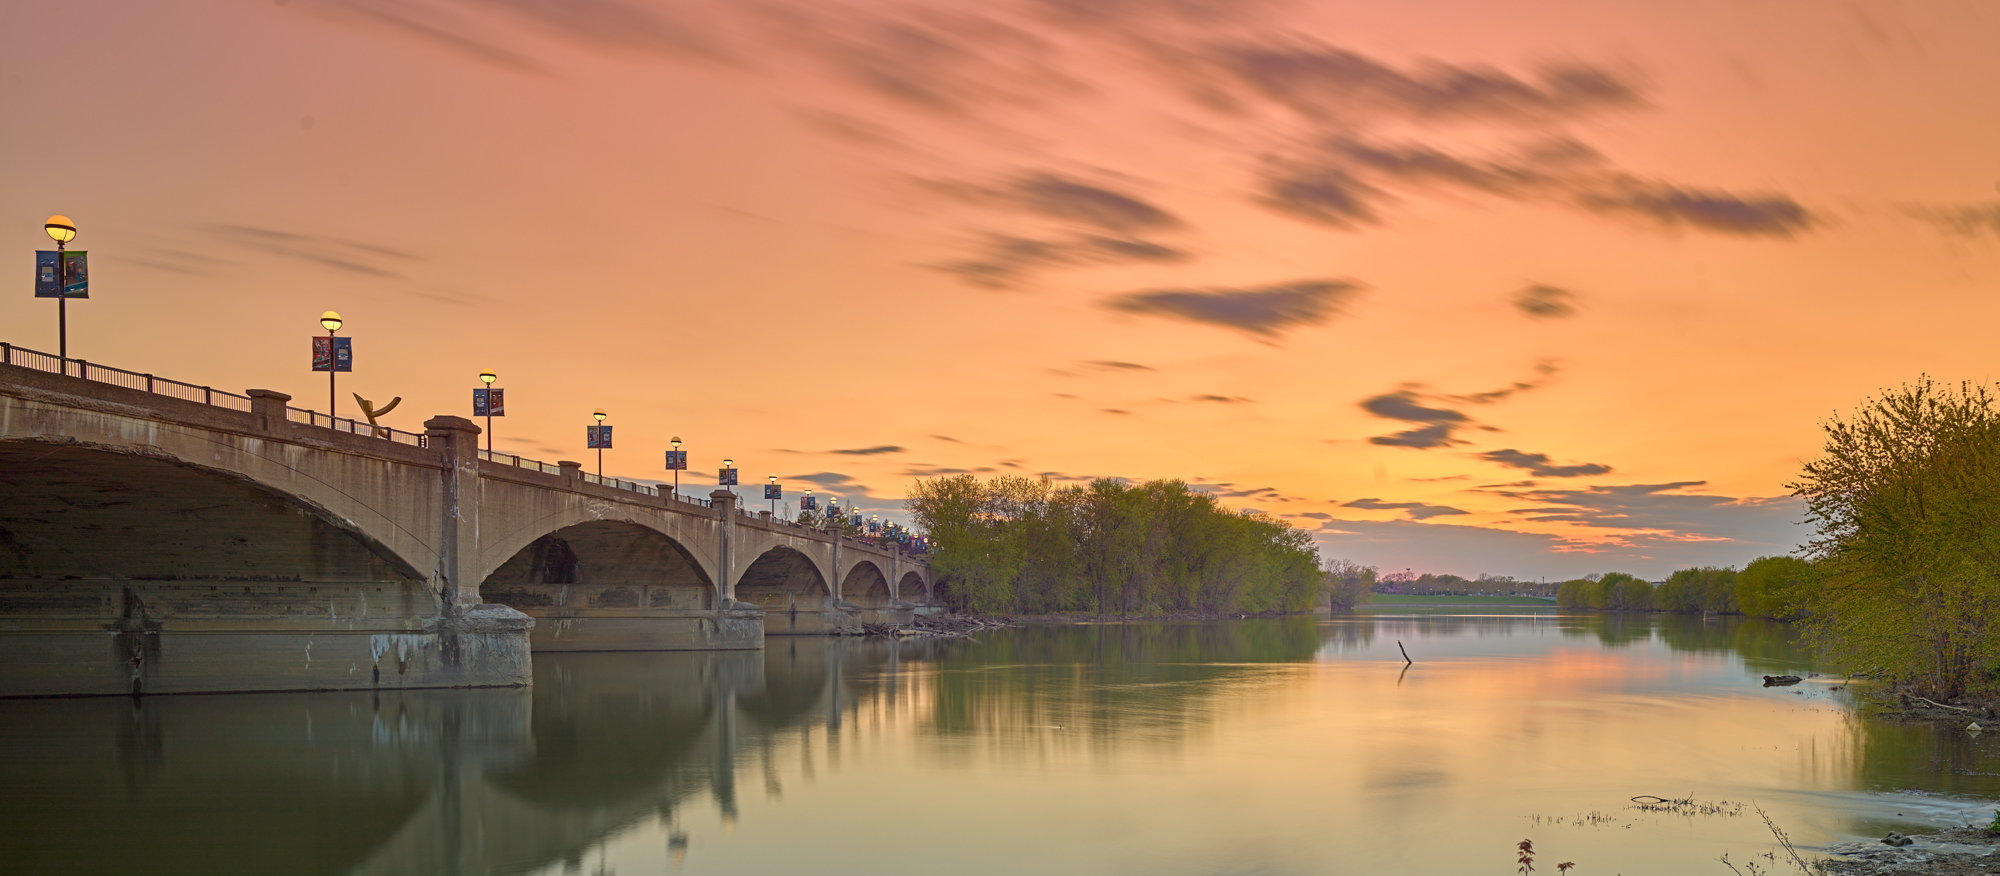
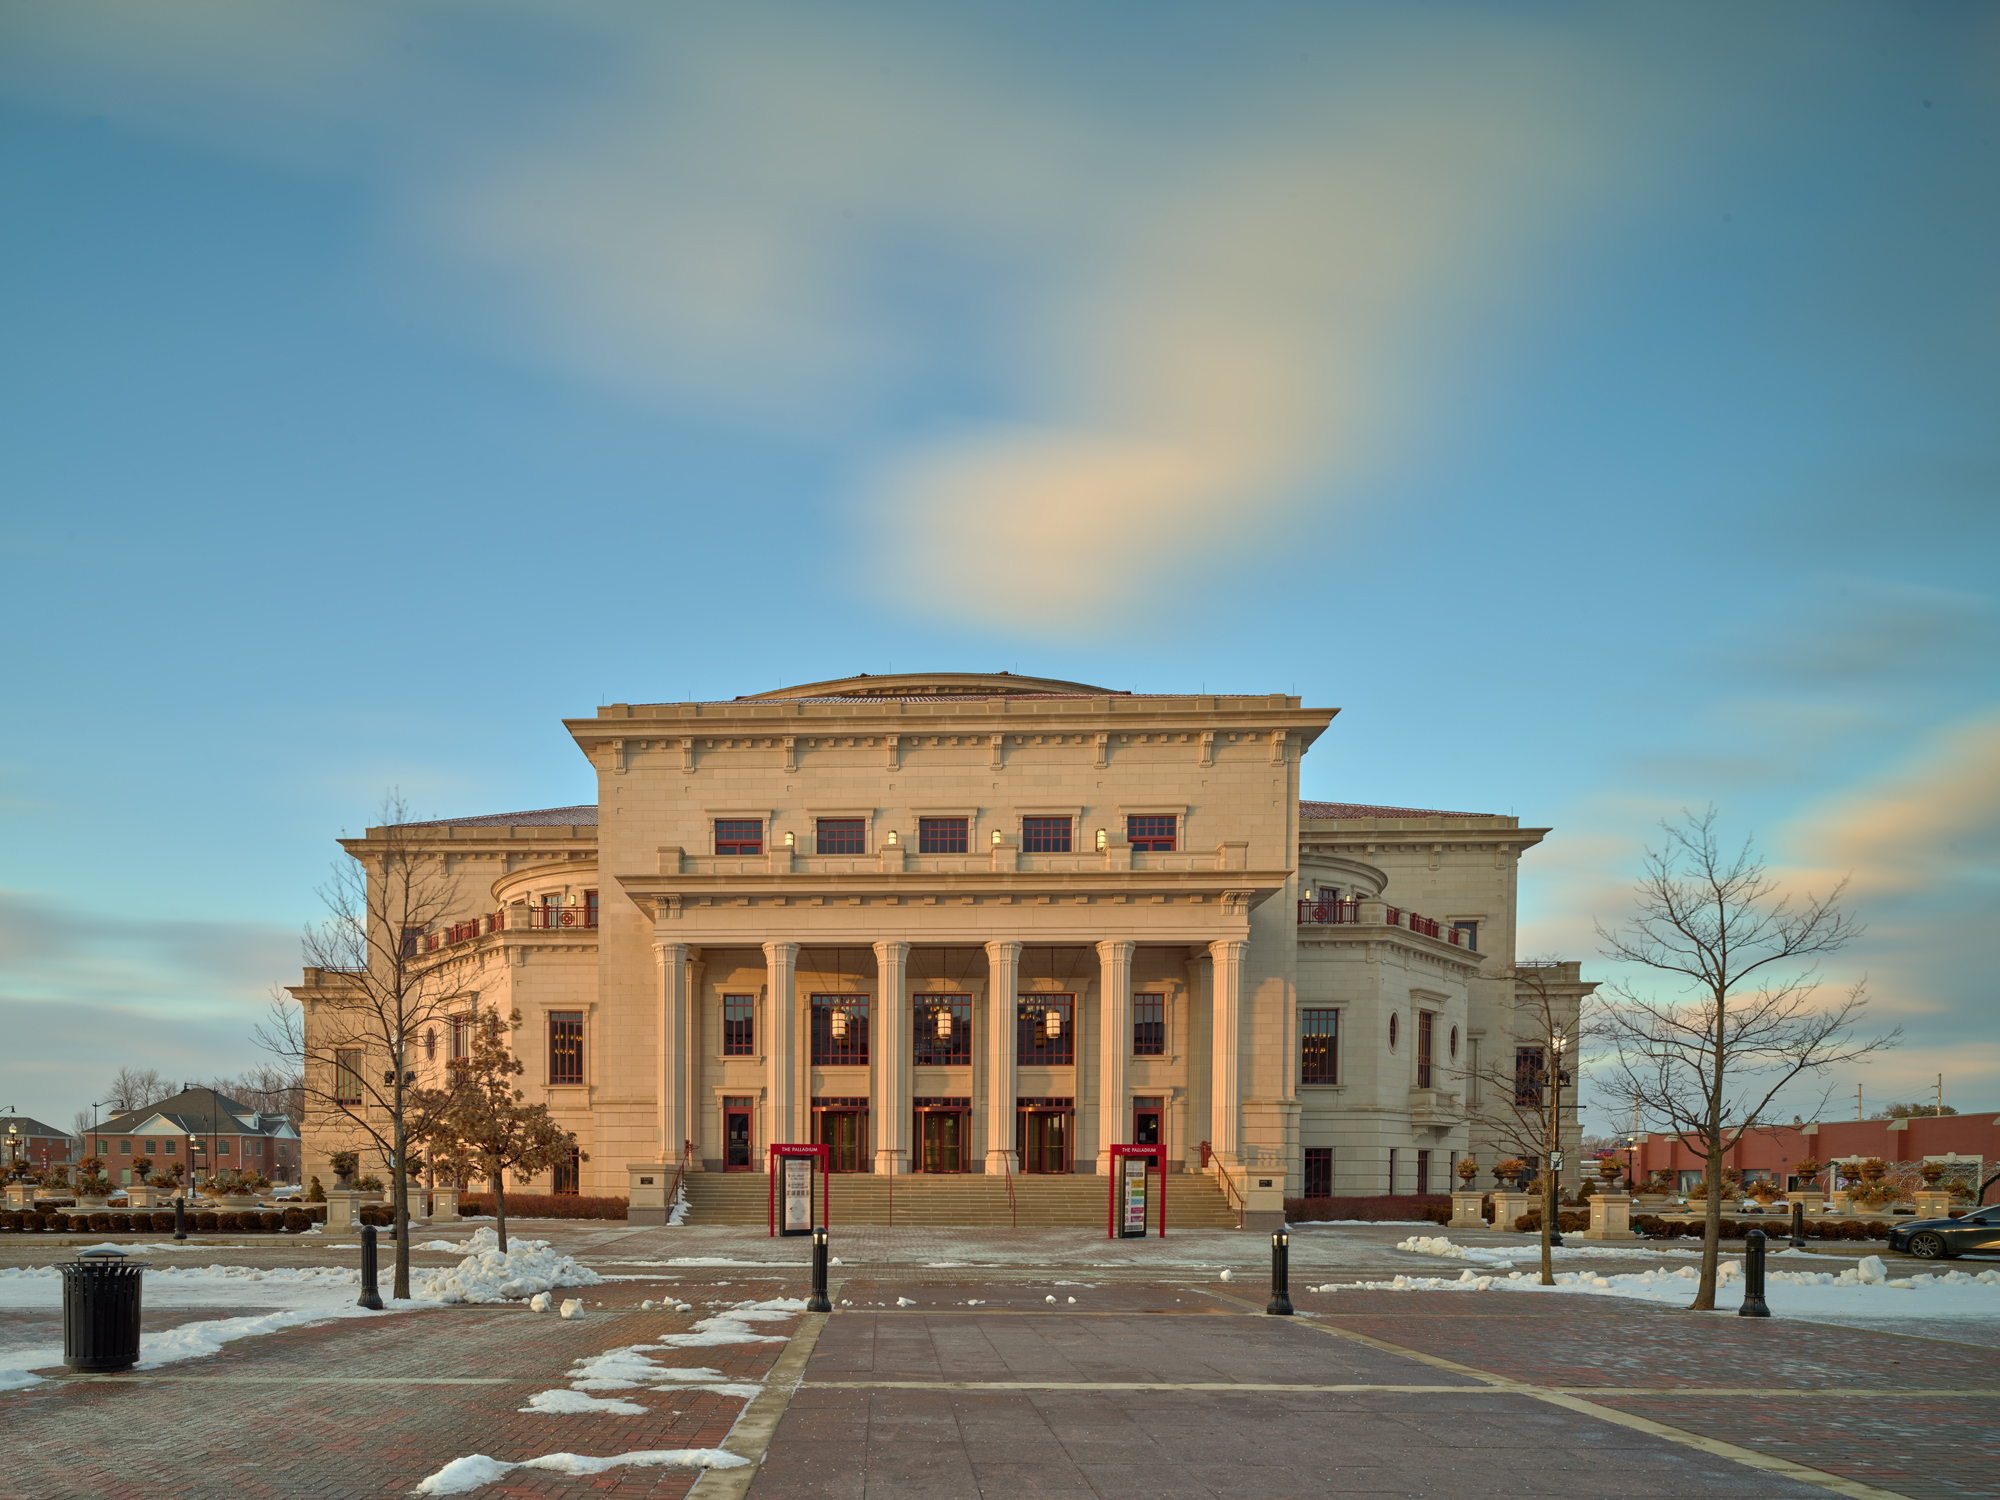
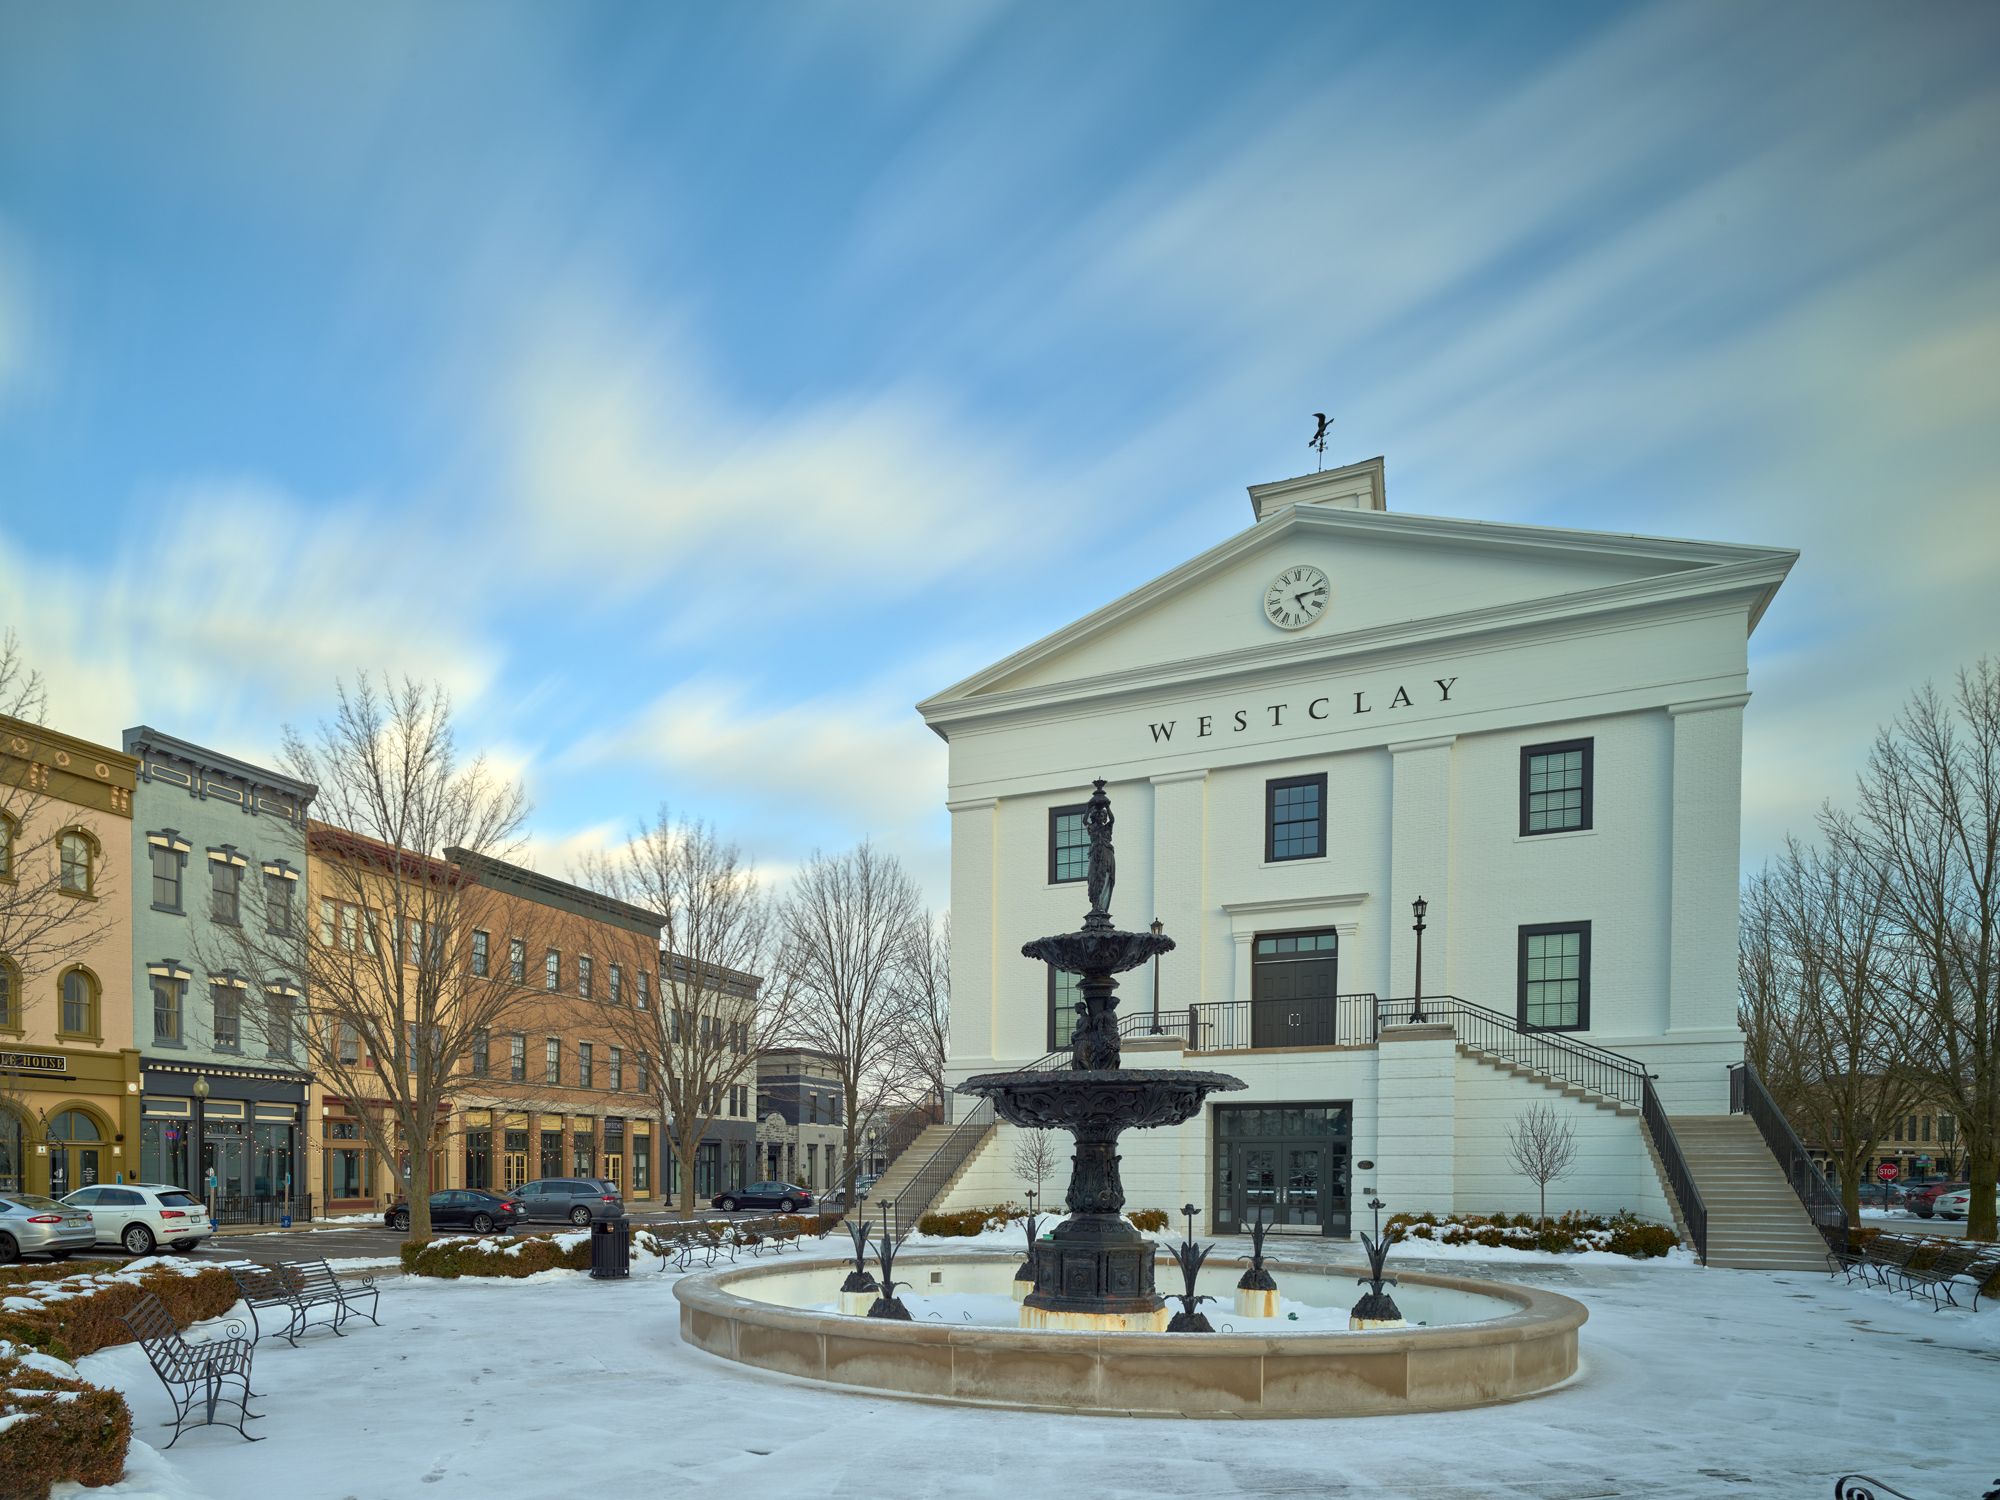
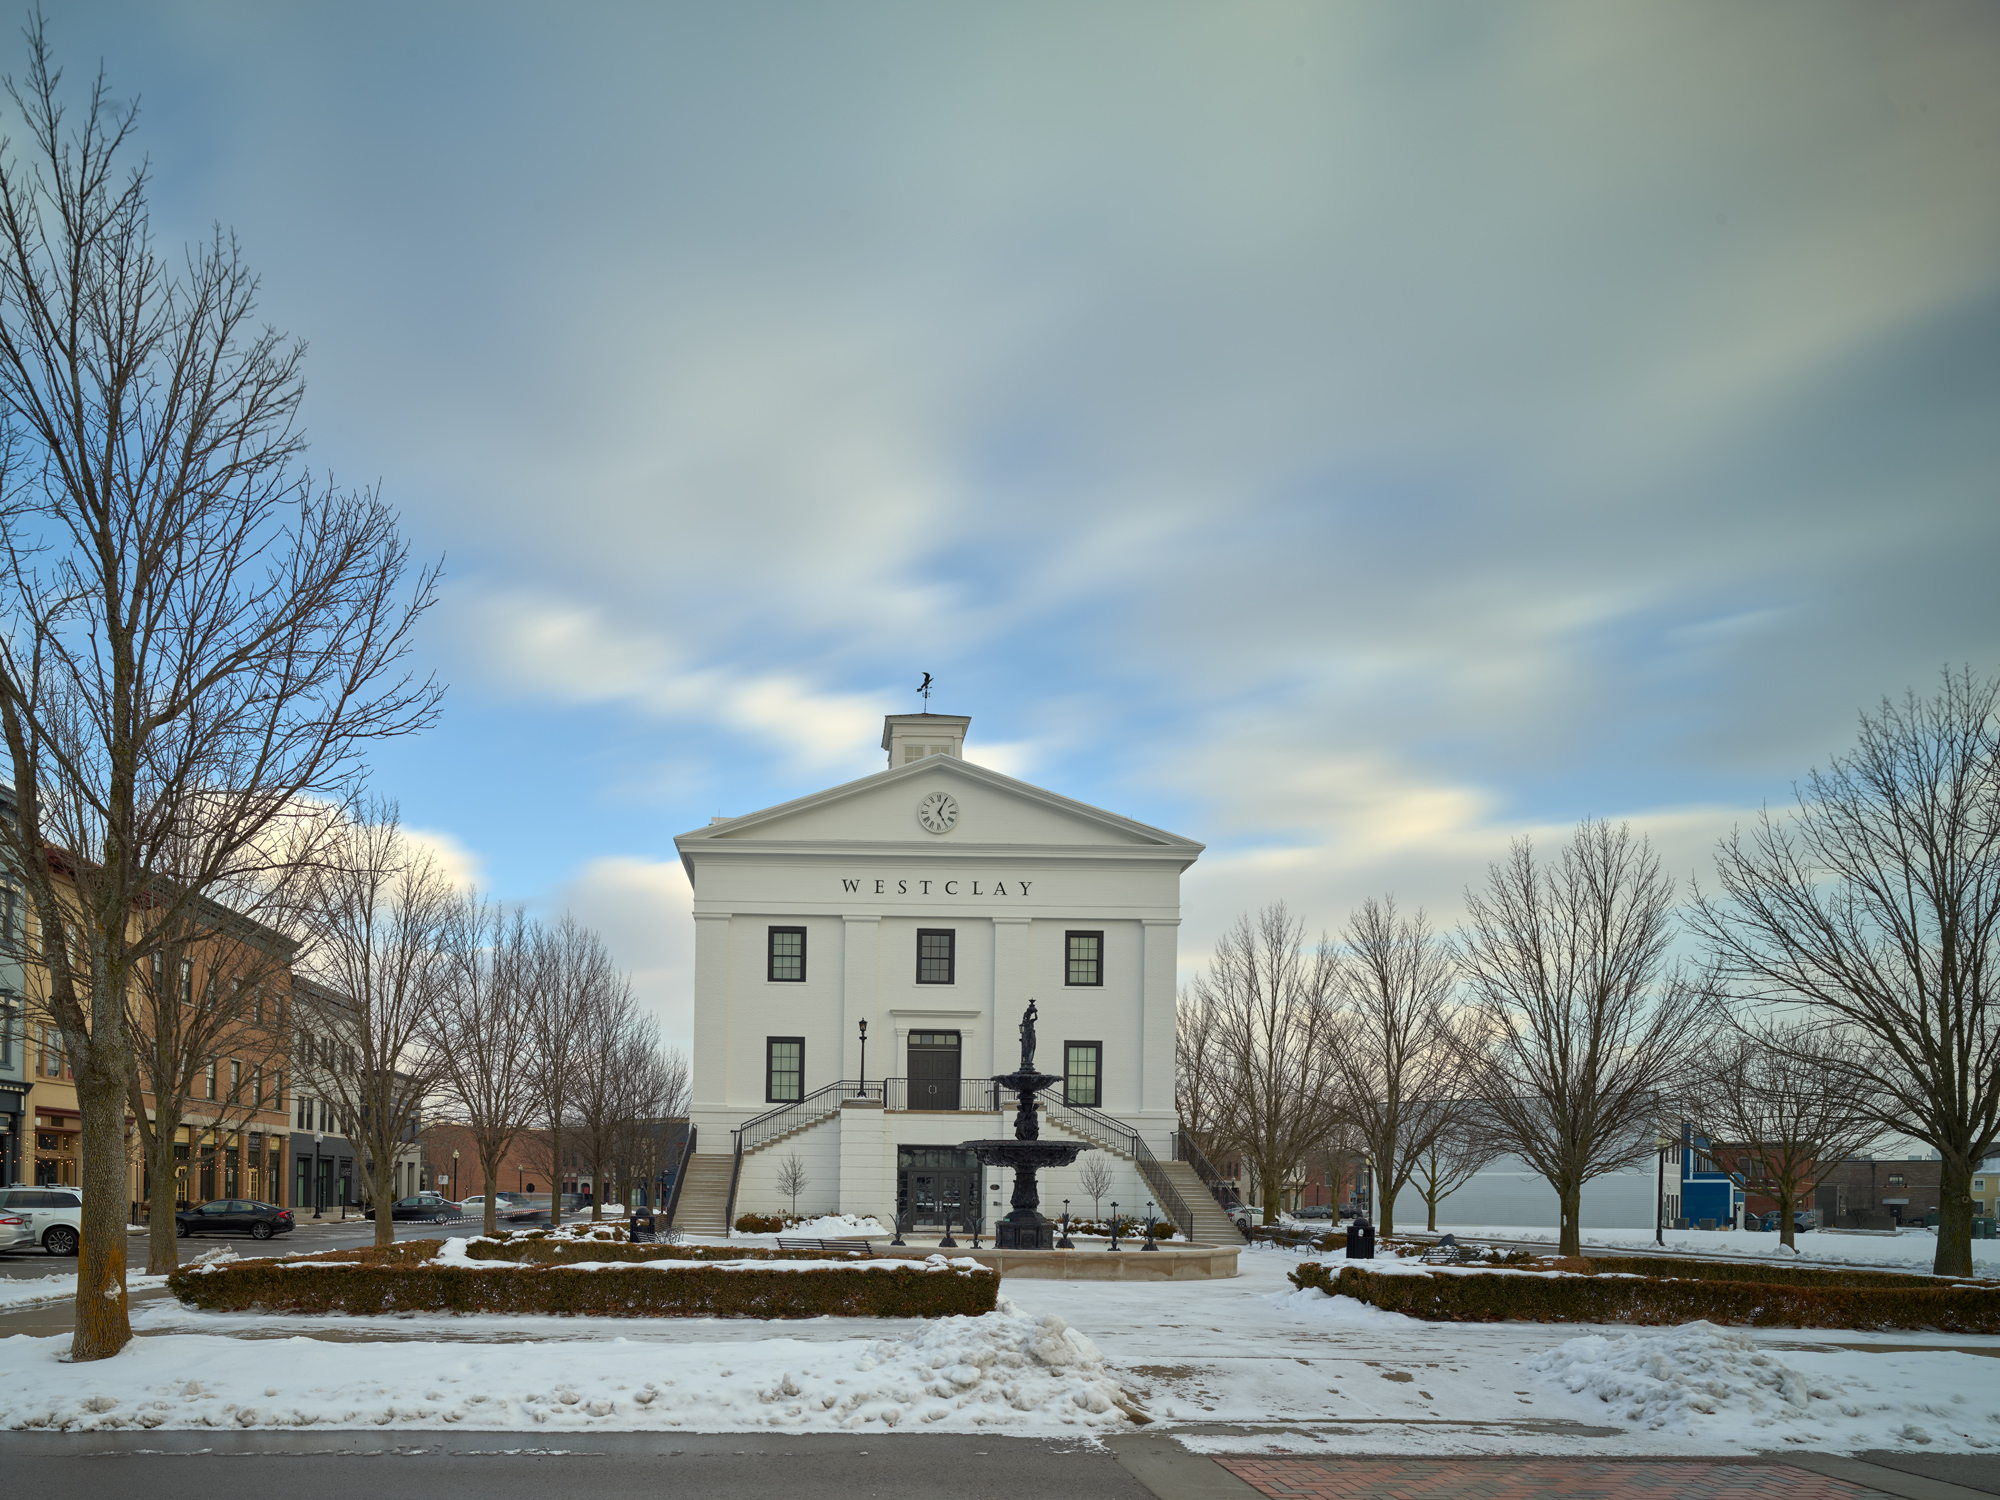
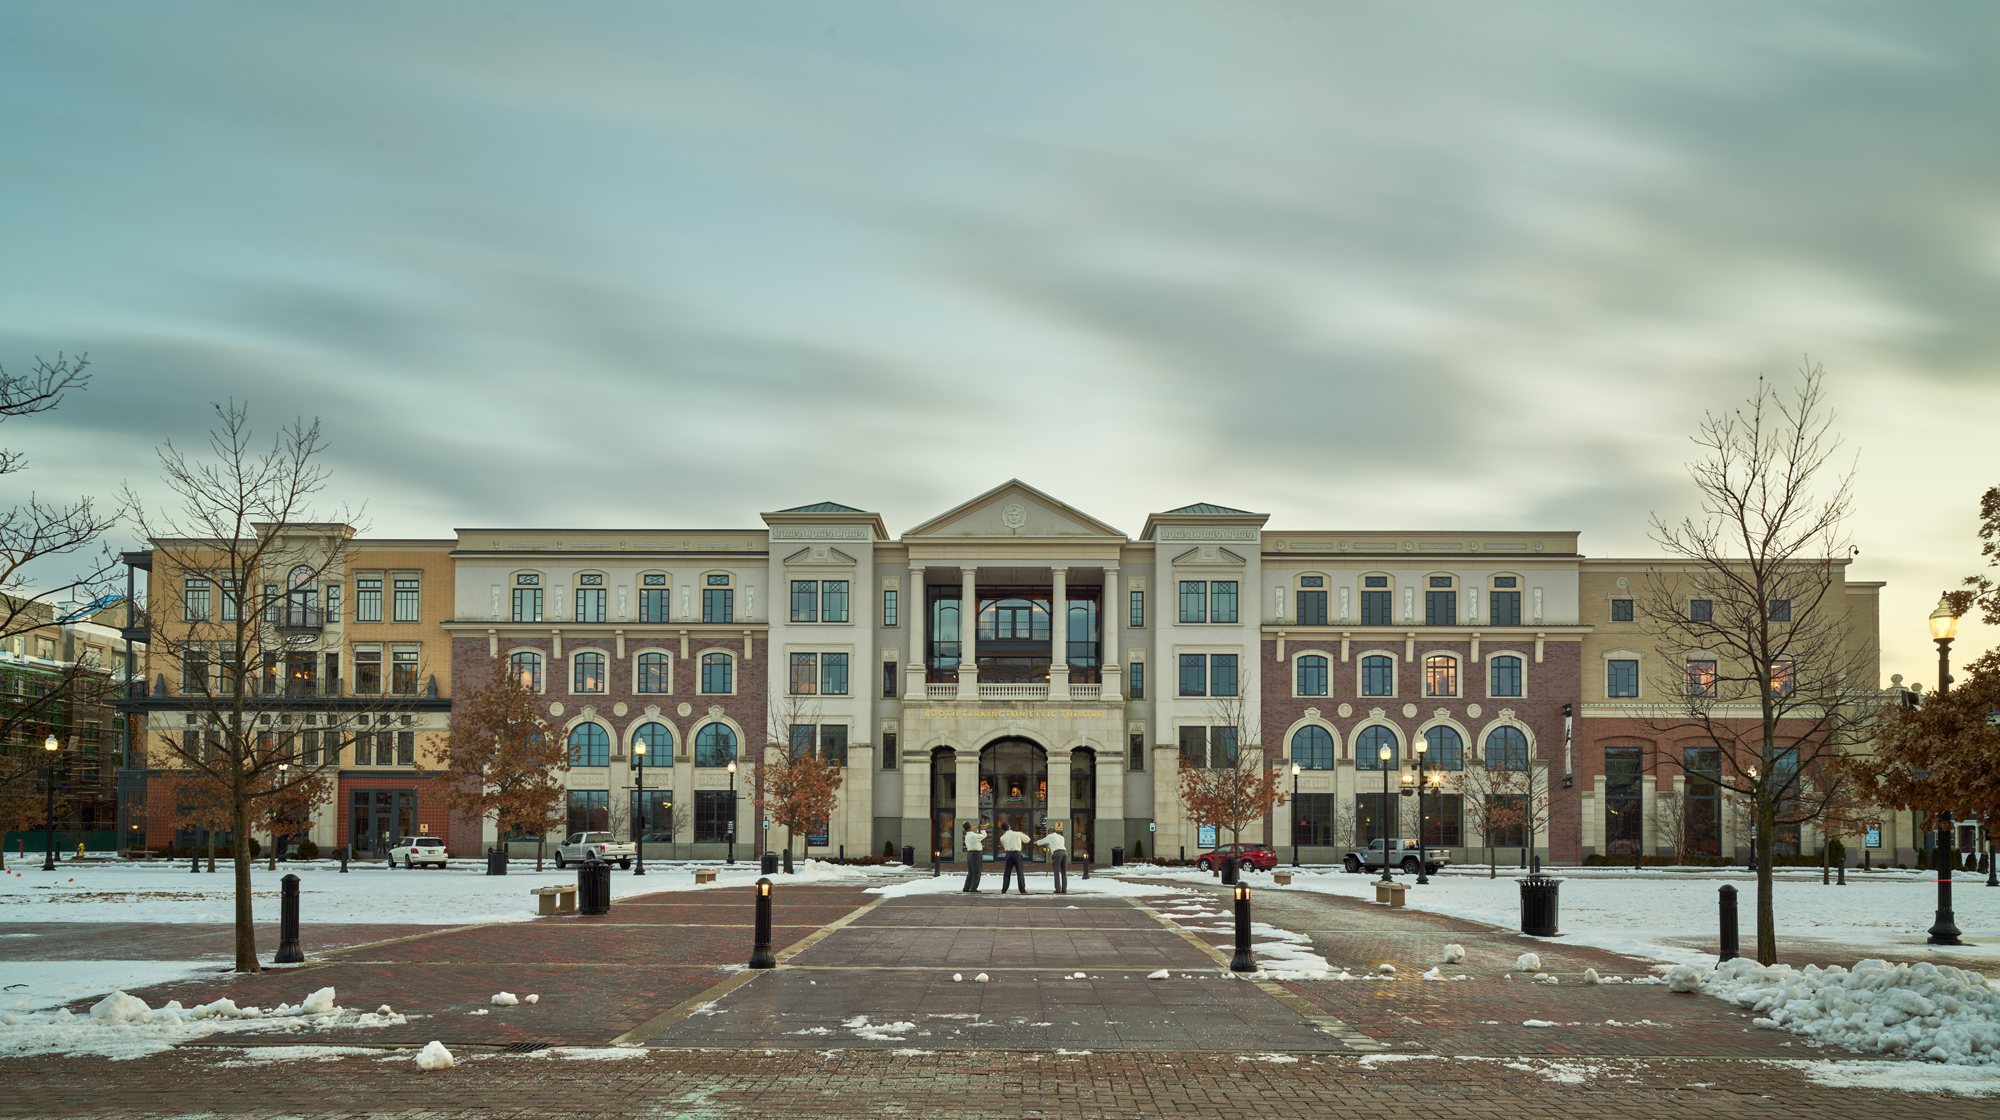
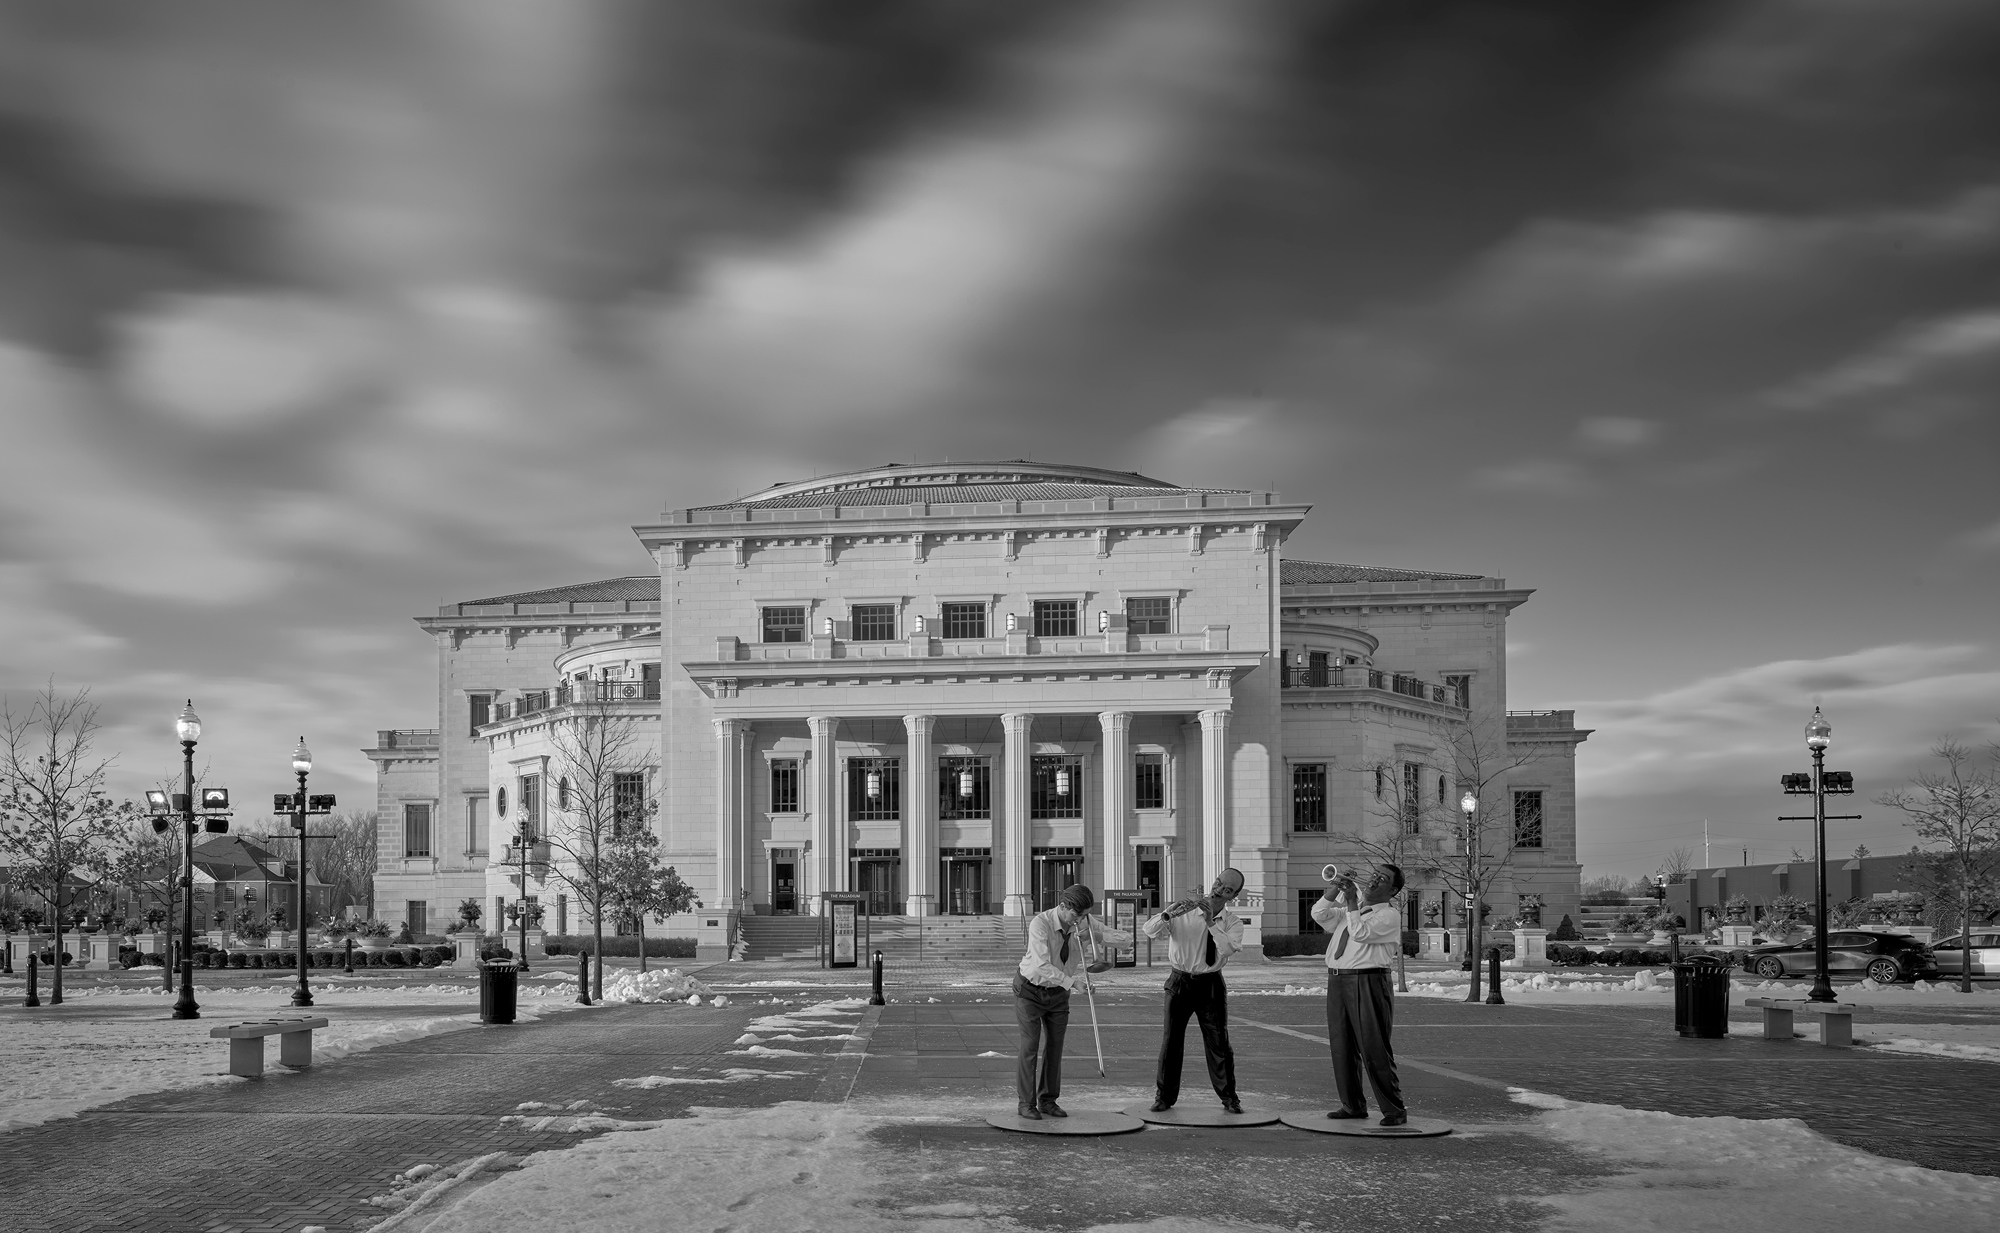
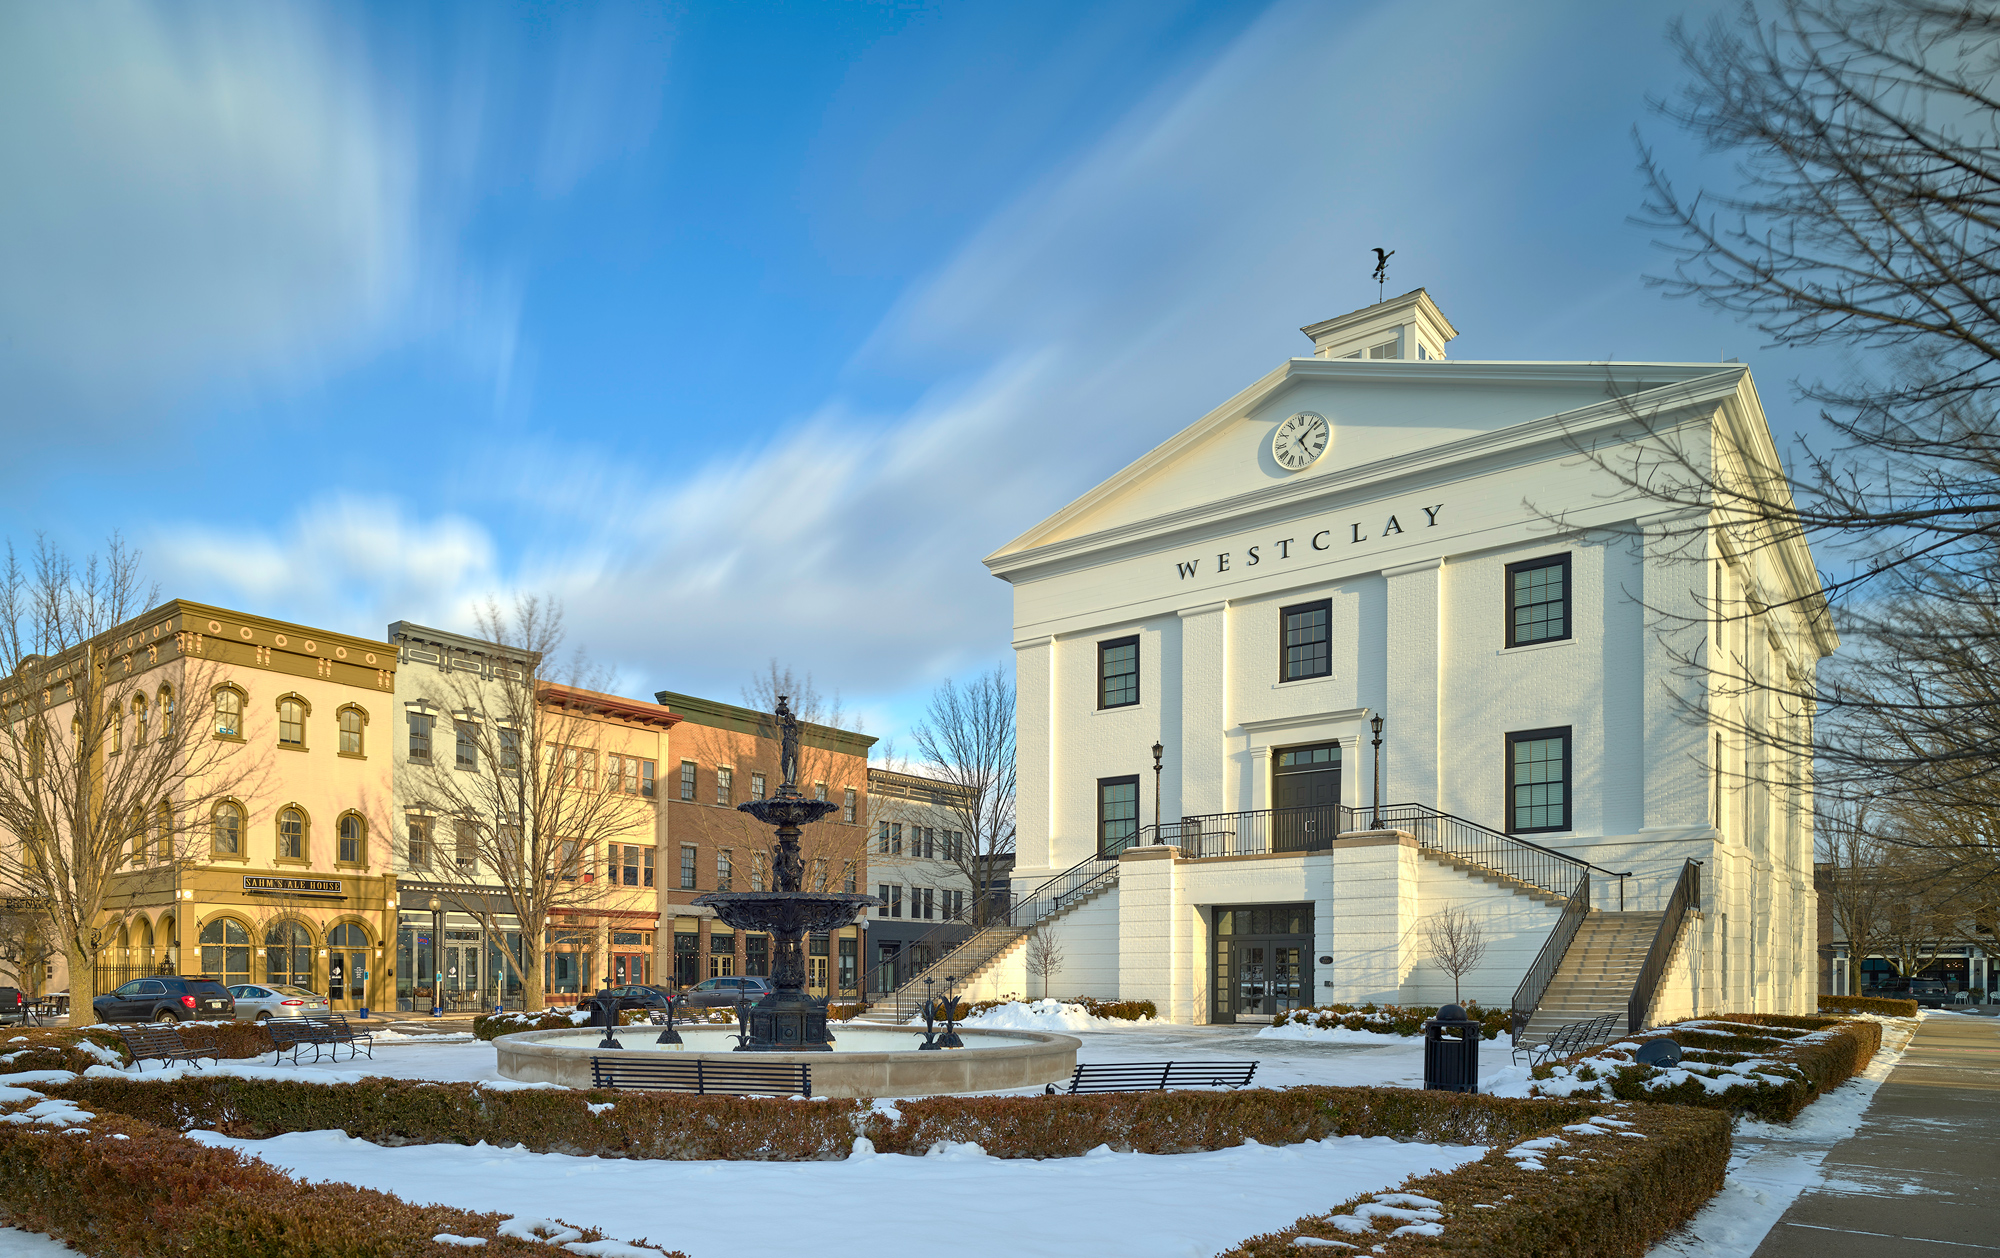
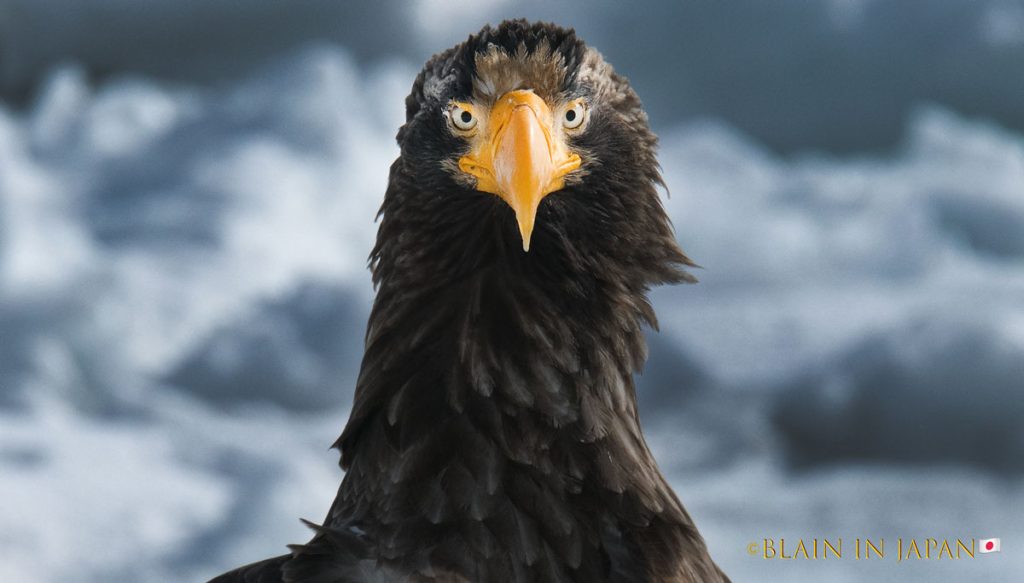
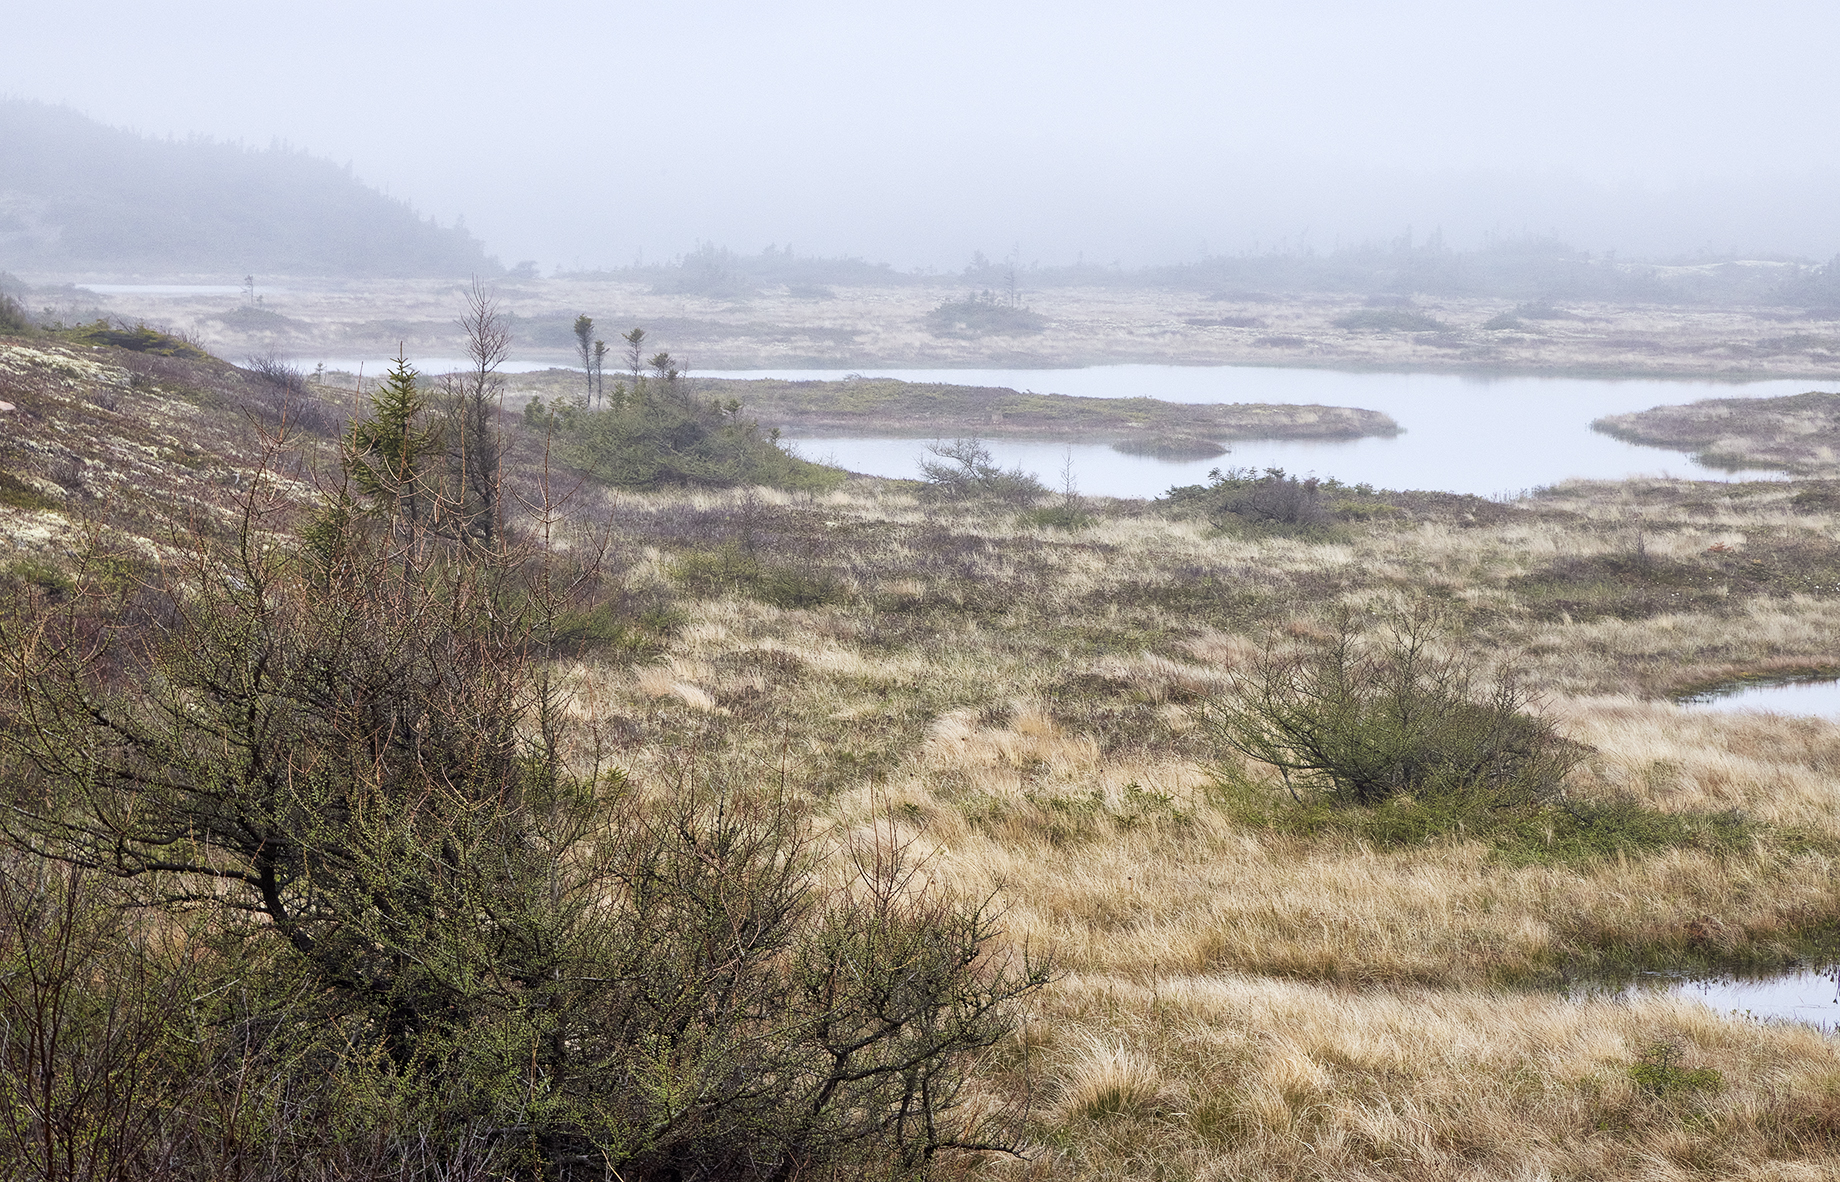
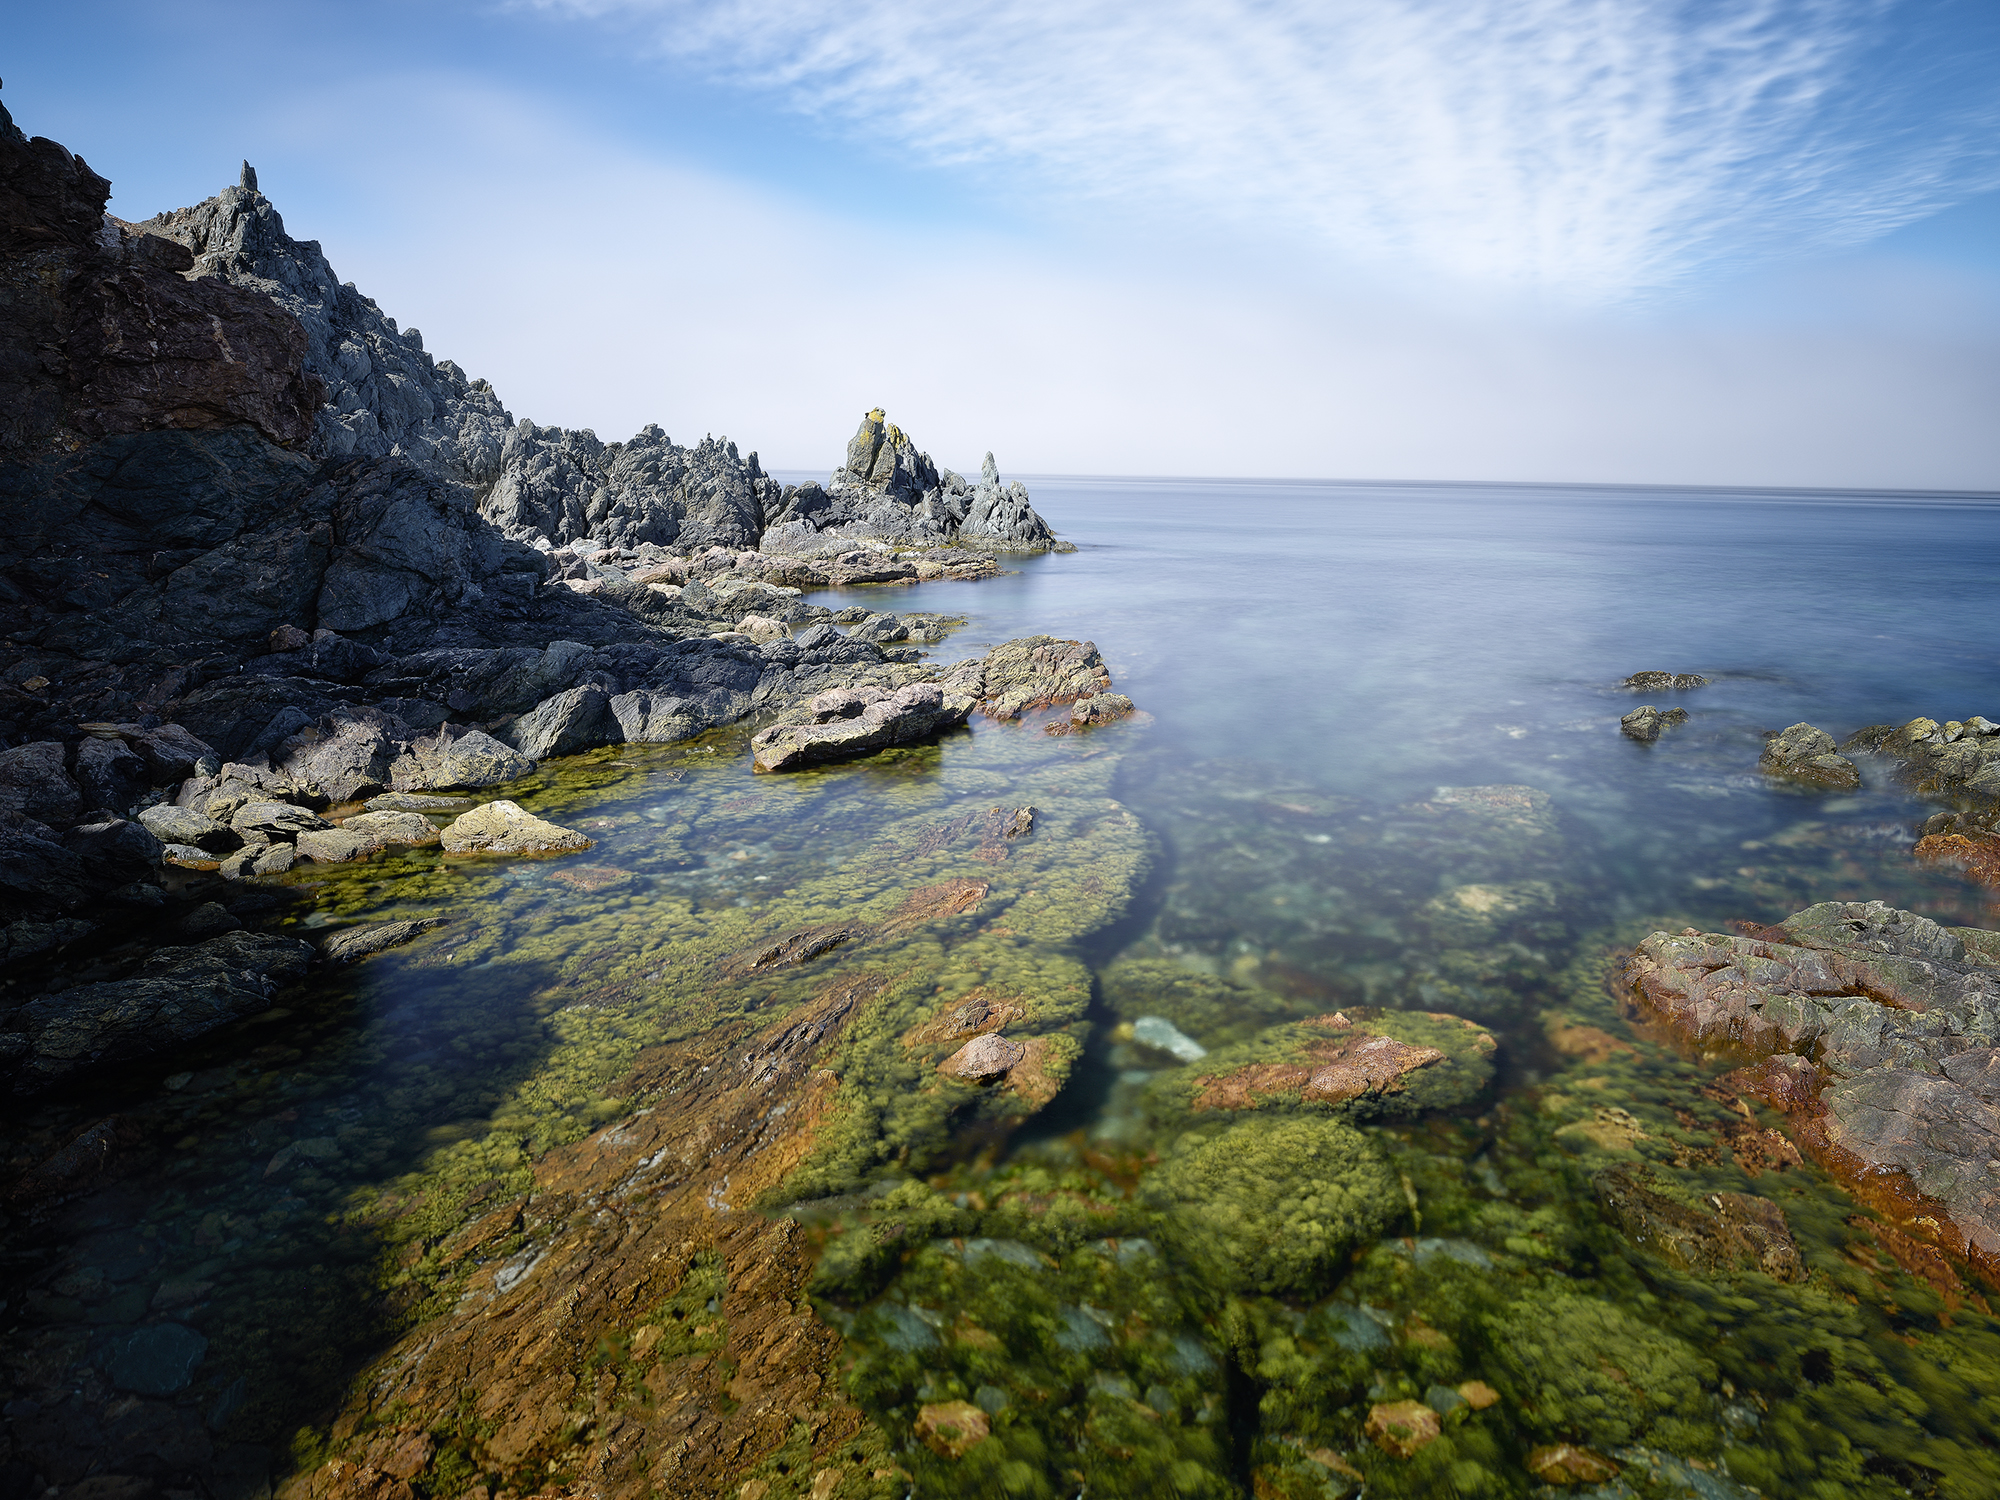
A Few Images That I Did
Don’t forget if you are a Silver or Gold member you can click on any image and see it fill your computer window.
Don’t forget if you are a Silver or Gold member you can click on any image and see it fill your computer window.


Final Word
For long-exposure photographers, this feature is a must-have. The cost of the Phase One system is not within everyone’s reach, unfortunately. Expect to be set back by at least $50,000 for a decent system.
There is no question that this feature is quite innovative and would certainly encourage more people like myself to do more long exposure photography. I used it as you have seen to blur water, skies and to make a very busy highway look deserted. Imagine that you are photographing a busy building with a lot of people coming and going. Using Frame Averaging and a long exposure time, you should be able to make exposures where there are no humans present.
While I explored this option with the Phase One XT system, I look forward to testing it again with the Phase One XF system. I also have a video in my upcoming XT Hands-On Report that shows how this feature is used.
What I hope is that Phase One considers licensing this technology to other camera manufacturers. Maybe we will see frame averaging appear in the near future on popular affordable DSLR cameras.
Frame averaging is a feature, like so many others, that Phase One developed. Phase One challenges their developers and these developers defy many times the specs of sensor makers and what one would think positive. There is no question they pushed the envelope with Frame Averaging and no doubt they will do it again with some other features that we will talk about in the XT Hands-On Article.
For more information and a lot more detailed explanation of how this feature works, I recommend you visit Paul Reiffer’s website and read his article Frame Averaging – A Complete Guide To The New Long Exposure Triangle.
Kevin Raber
August 2021

Elevate Your Vision


Read this story and all the best stories on The Luminous Landscape
The author has made this story available to Luminous Landscape members only. Upgrade to get instant access to this story and other benefits available only to members.
Why choose us?
Luminous-Landscape is a membership site. Our website contains over 5300 articles on almost every topic, camera, lens and printer you can imagine. Our membership model is simple, just $2 a month ($24.00 USD a year). This $24 gains you access to a wealth of information including all our past and future video tutorials on such topics as Lightroom, Capture One, Printing, file management and dozens of interviews and travel videos.
- New Articles every few days
- All original content found nowhere else on the web
- No Pop Up Google Sense ads – Our advertisers are photo related
- Download/stream video to any device
- NEW videos monthly
- Top well-known photographer contributors
- Posts from industry leaders
- Speciality Photography Workshops
- Mobile device scalable
- Exclusive video interviews
- Special vendor offers for members
- Hands On Product reviews
- FREE – User Forum. One of the most read user forums on the internet
- Access to our community Buy and Sell pages; for members only.
You may also like