


By Ben Hattenbach and Henry Throop
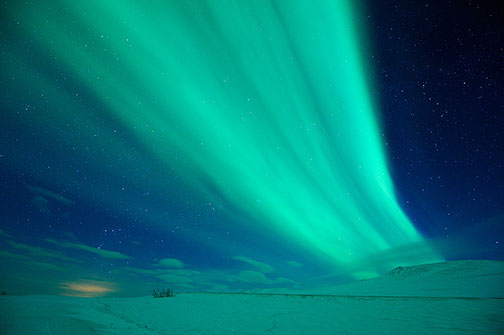
It is the middle of winter and you are in the middle of Alaska. You have traveled 100 miles into the wilderness on a road of ice, and are now squarely within a habitat patrolled by bears and wolves. The sun has set, the moon is away, and you are trapped in inky darkness. With no clouds to retain the heat of the day, the temperature quickly plummets below -30 o F (-34 o C). The stage is set for a perfect vacation. Perfect vacation? If you were looking for a lounge chair and fruity drinks with little umbrellas, this probably sounds like a nightmare. But if, like me, you wanted to photograph one of the world’s most impressive displays of the Aurora Borealis – literallytheluminous landscape – you would be hard-pressed to find a more appealing scenario.
For those interested in embarking on a similar adventure, below I offer some suggestions based on my nine chilly nights in the Alaskan bush. But first, what exactly is an aurora? For the answer to that question, I turned to my friend, fellow photographer, and (most importantly) astrophysicist, Dr. Henry Throop.
What Is An Aurora?
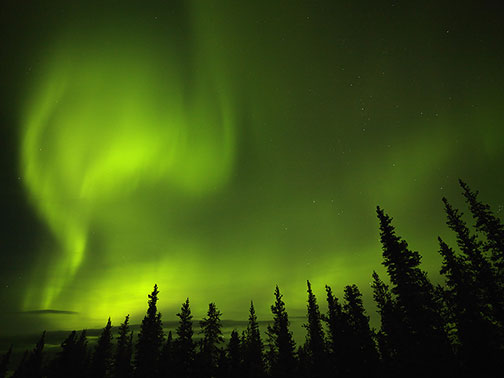
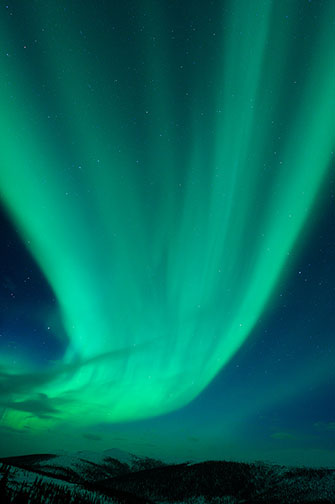
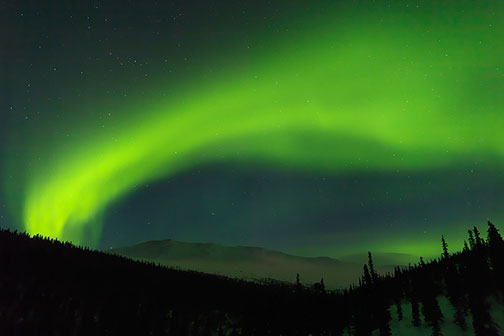
The aurora was thought at one time to be caused by ices suspended high above the Earth’s coldest, darkest regions. We now know that the aurora is instead an electrical phenomenon, caused by interactions between the solar wind and the Earth’s upper atmosphere. The sun emits massless photons we see as light, but also puts out a real, physical, tangible wind of particles, moving at several hundred kilometers per second. When this wind reaches the Earth, it begins a process that ends by exciting gasses in the Earth’s atmosphere, eventually leading to the emission of light. And just as a true neon light only comes in one color (red), the colors of the aurora are limited too: green and red caused by oxygen, with the fainter blue and purple caused by nitrogen. Unlike the wispy shapes of the aurora, its colors are narrow and precise.
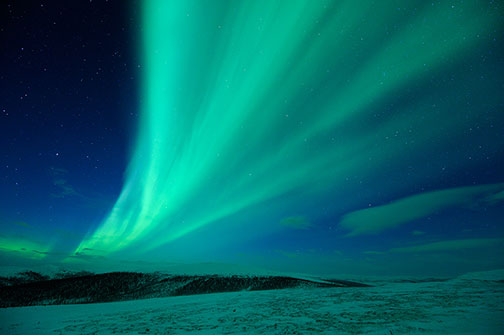
Just like stars, the aurora is present during the day and the night, though during the day it is overwhelmed by the brightness of the sky. As the sun sets, it starts to become visible, being brightest near midnight when the orientation of the Earth’s magnetic field and the solar wind cause it to be strongest. The aurora is seen mostly in a ring centered roughly around the poles, where the solar wind is focused most intensely by the Earth’s magnetic field.
If the Earth had no magnetic field, we’d have an aurora, but weaker and more flat across the sky: a dull glow seen in every direction. A planet like Jupiter with a stronger magnetic field has a comparably more intense aurora, while Mercury – having neither an atmosphere nor magnetic field – has no aurora at all.
The motion of the aurora is direct evidence of the Earth’s dynamic place in space. Space is not a vacuum, but is filled with ever-changing winds and fields, traveling from the sun past the Earth and the other planets. A terrestrial wind passing across the continents creates an unsettled display of turbulence and eddies, which we see in the form of dynamic cloud patterns, vortices, weather, and storms. In much the same way, the solar wind crossing the Earth’s magnetic field makes visible to us the turbulence of space: the vortices and eddies of magnetic fields peel off and pass rapidly overhead. Even though the magnetic fields themselves are invisible to us just as wind is invisible, we can see both through their tracers: charged particles on the one hand, and condensation of water on the other. As the aurora moves in the sky overhead, the ripples in it are like the wakes and eddies peeling off a boat as at travels up a rough river at night, working at times with, at time against, the current and forcing what’s there out of the way.
Where In Alaska Can One Find An Aurora?
Finding an Aurora in Alaska is not much of a problem, but you need more than any old aurora; you need an aurora suitable for framing, preferably a gargantuan aurora. In central Alaska, the aurora is typically most intense just above the Arctic Circle. Further south the aurora will still be visible, but will usually be fainter and lower on the horizon. Further north, beyond the interior of the auroral ring, the view will likewise become less desirable – even disregarding the many resident polar bears that might like to have you over for dinner.
The easiest access to this region is from Fairbanks, a good-sized town with an international airport. For those coming from warmer climates, Fairbanks features a Wal-Mart and several sporting goods warehouses with enough winter gear to outfit a small country. Better yet, tourism in Fairbanks dips precipitously with the temperature in winter months. The city has several enormous modern hotels built by the cruise lines to house the summer crowds, and there is considerable vacancy during the cold season. With just a few minutes of searching online, I found a 4×4 SUV and an excellent business class hotel, for nine days, for less than $800 total. The hotel allowed me to defrost and nap for a few hours before heading out every evening to hunt for the elusive aurora. Most of the other guests at my hotel had come for the world’s ice-carving championships, which is held in Fairbanks each March.
From Fairbanks there are three main roads into the outback that will get you away from the city lights, and which offer a slew of photogenic, mountainous foregrounds. My favorite is the Steese Highway (Hwy. 2), which was originally developed as a route for delivery of mail by dogsled. It runs 161 miles northwest out of Fairbanks, over three mountain passes, to the towns of Central and Circle. After the first 30 miles it becomes almost entirely deserted. Peak traffic out in the boonies seems to average about one car, two dozen moose, and a few arctic hare per night. The good news is that you don’t have to worry about your exposures being ruined by stray light from passing vehicles. The bad news is that if your car freezes up or gets stuck in the snow, you are in for a long and lonely night. Because the temperature during my stay was forecasted to drop below -40 o F (-40 o C), upon my arrival I purchased a low temperature rated sleeping bag and kept it in the car at all times, just in case.
The first peak along the Steese Highway, Cleary Summit, is only about 20 miles out of town and has a parking lot suitable for viewing the aurora. Although this seems to be a popular destination for the locals, there is some light pollution and the foregrounds are less than ideal. If you are comfortable with roads of ice in rather desolate areas, I recommend continuing to the next peak, Twelve Mile Summit, around mile marker 87. I found the best views of the aurora here along with the most dramatic foregrounds, at the cost of being exceedingly cold. There seems to be an ever-present wind here and at these temperatures even a slight breeze can be painful. The winds on the third peak, Eagle Summit, were so strong during my visit that large snowdrifts had nearly closed the road and photography was simply not in the cards.
The second best alternative is the Elliot Highway, which heads north and eventually turns into the Dalton Highway, the fabled 414 mile route to the oil fields on the north slope, the town of Deadhorse, and the Arctic Ocean. These highways are relatively busy, particularly with commercial trucking traffic. In the early evening about a dozen vehicles will pass each hour, meaning that if your car decides to hibernate until spring the prospects are reasonably strong that you will not end up a human popsicle. Unfortunately, most of the trucks on this road are equipped with massive banks of halogen lamps suitable for ruining aurora photos from miles away. After midnight the traffic drops to a car or two an hour, nearly every one of which kindly stopped to ensure that I was not having car trouble; evidently not many other photographers can be found walking around these highways on winter nights. Finally, although these routes offer several nice views, there are few turnouts and only a small fraction of them are in striking distance of desirable viewpoints. With large piles of plowed snow at the edge of the road, finding safe parking is often problematic. Note that many car rental contracts forbid travel on the Steese, Elliot and Dalton highways, so if your vehicle breaks down and you manage to survive you will likely need to foot the bill, at a minimum, for a very expensive tow.
The third route, which runs just 60 miles into the hills, is Chena Hot Springs Road. The terrain it crosses is less mountainous and, in my opinion, less interesting. Of the three main routes out of Fairbanks with even a slight northerly component to their direction, this is also the least northerly and thus, all else being equal, the least favorable for aurora viewing. The road has significantly less traffic than the Elliot and Dalton highways, but is more traveled than the Steese Highway. Although it offers fewer mountain vistas than the other roads, it does cross a number of frozen rivers that provide serviceable foregrounds for aurora photography. This trek ends at the Chena Hot Springs resort, which in addition to the hot springs offers aurora viewing tours and an indoor glass-enclosed aurora viewing platform. I stayed only long enough to observe that light pollution from the resort would make it challenging to take good photographs in the vicinity.
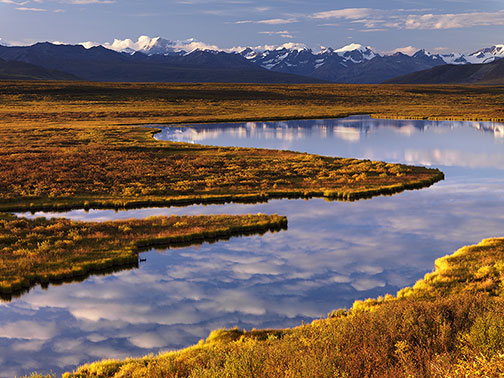
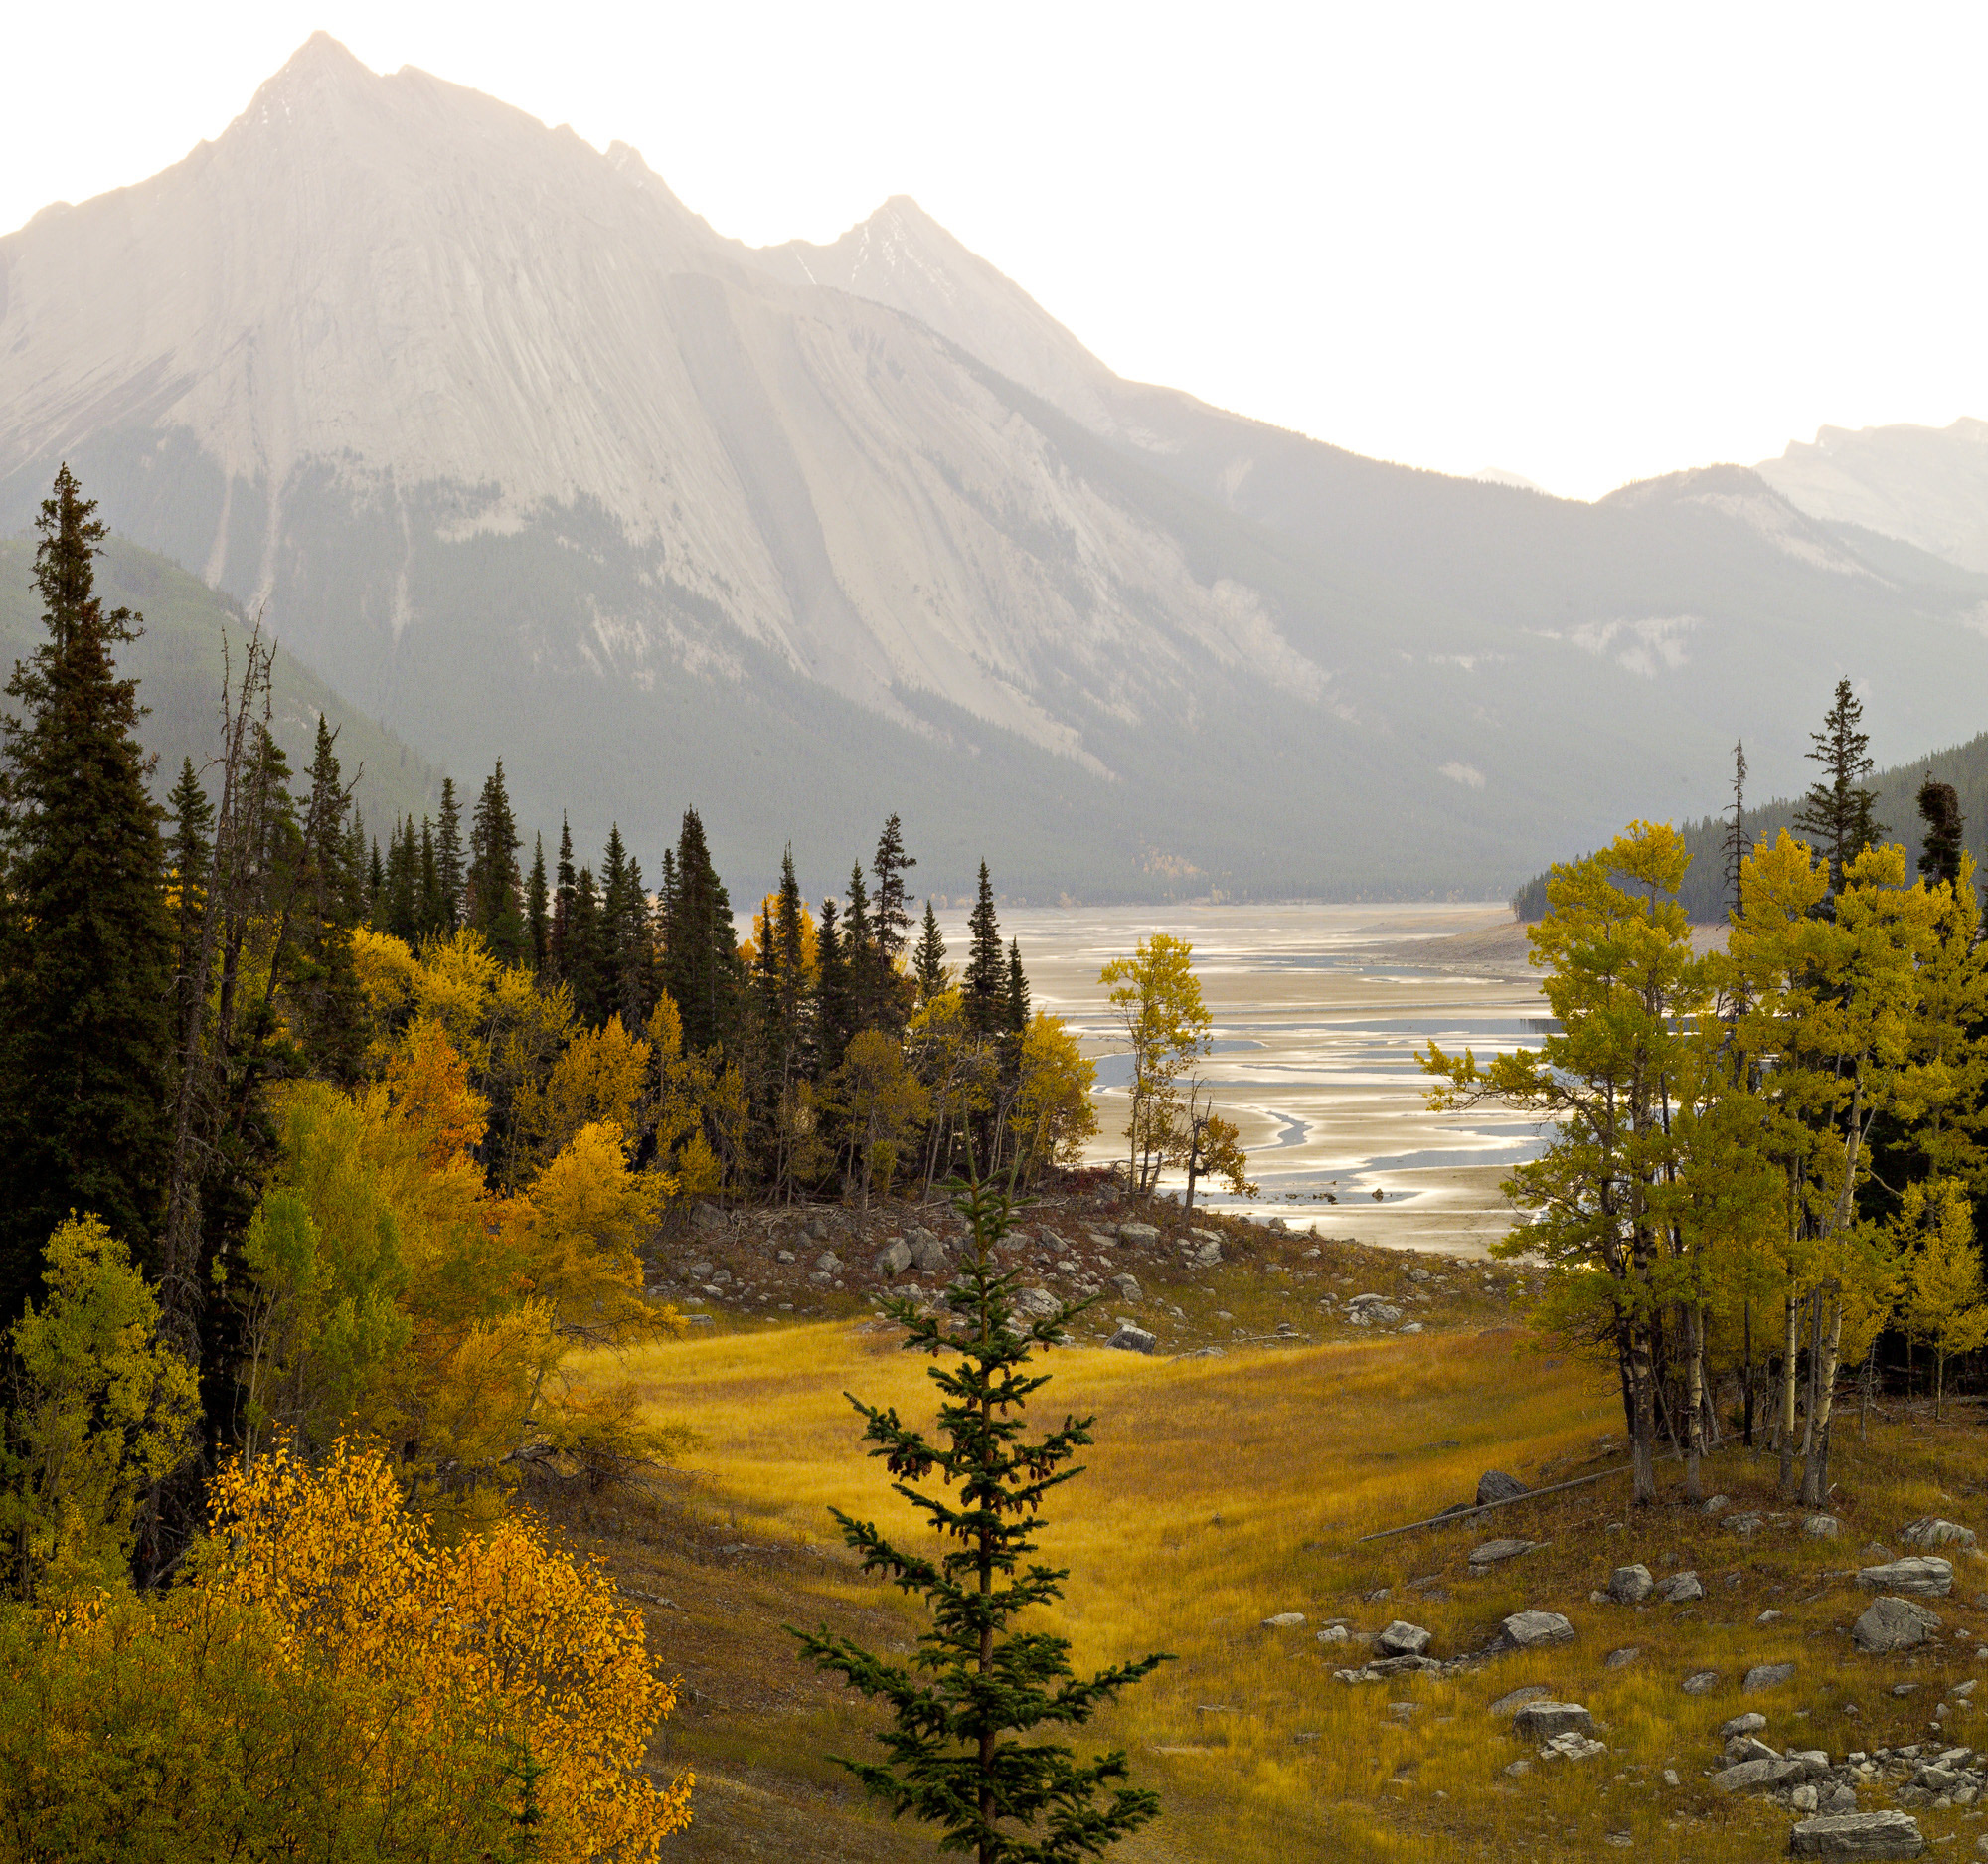
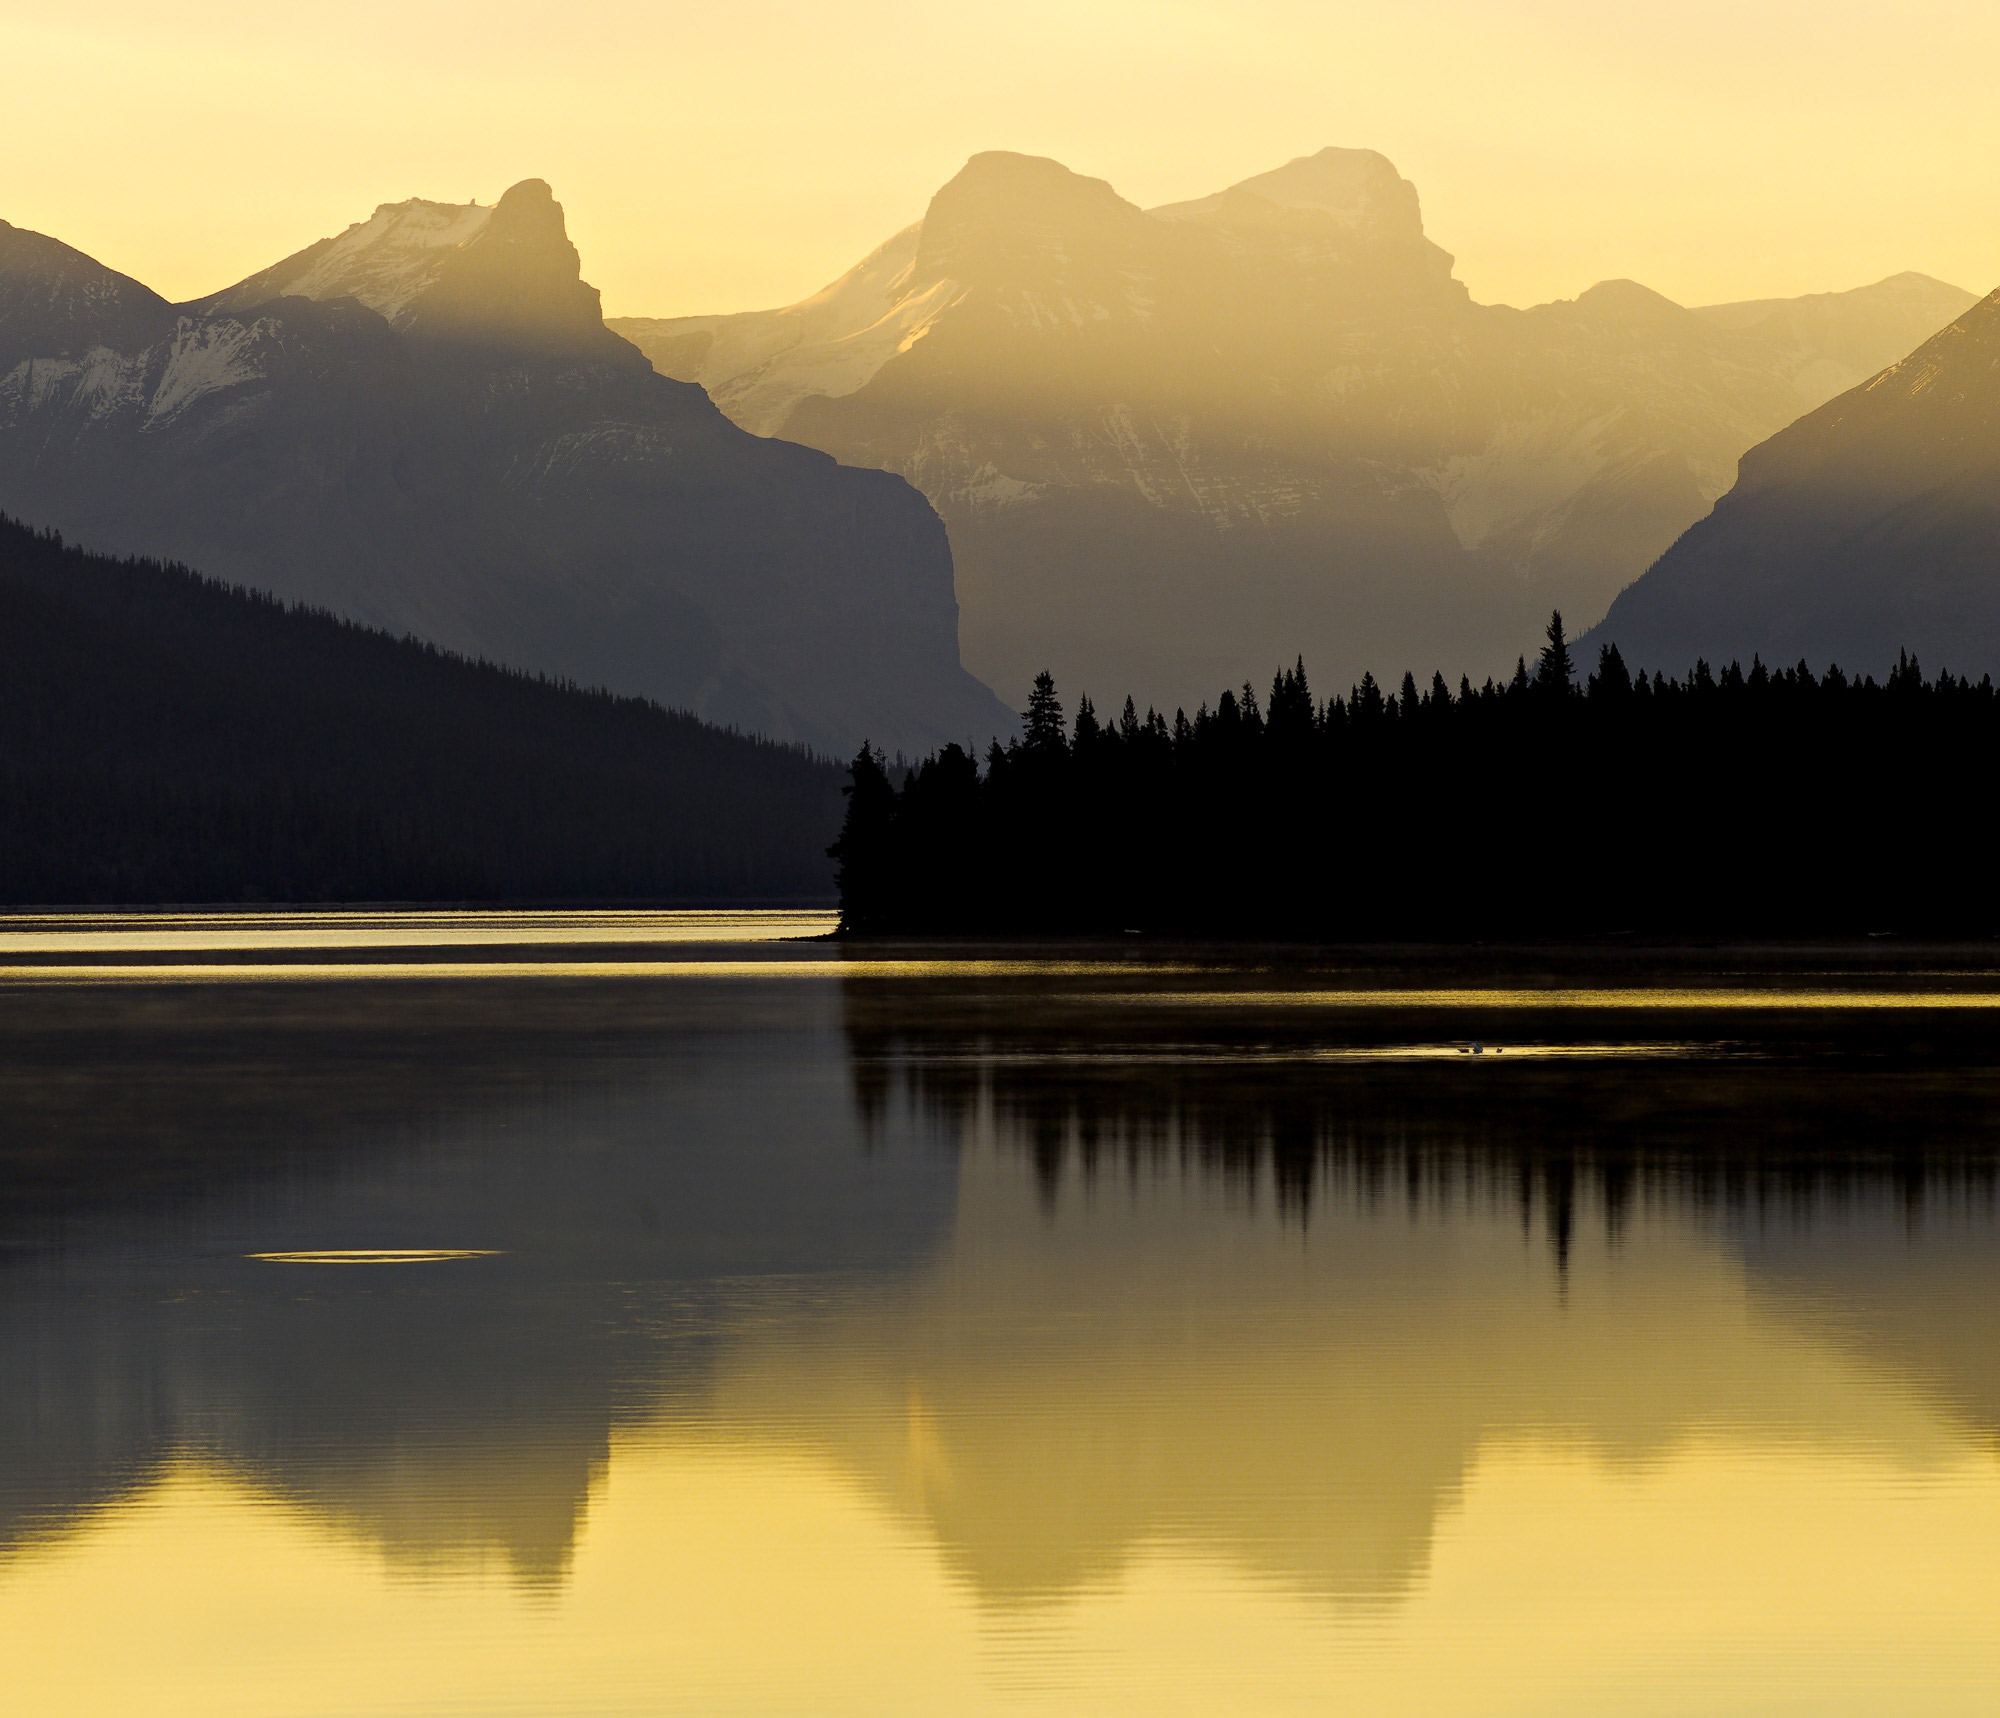
Other roads, including the Parks Highway (the main route from Anchorage, past Denali National Park, to Fairbanks) offer workable viewing spots as well. However, if you are single-mindedly hunting the great Alaskan aurora, you want to be as close as possible and these other roads send you in the wrong direction. If you are interested in a greater variety of landscapes, particularly during the fall, by all means spend some time down south as well.
When Is The Aurora Best Viewed?
Finding a memorable aurora requires more than simply driving into the mountains of Alaska. Timing is of paramount importance. Fortunately, for those seeking to avoid the embarrassment associated with traveling to Alaska only to be greeted by overcast or pitch black skies, there are tools available to help maximize your chances of encountering a massive auroral display.
To begin with the obvious, if the sky is cloudy you will be looking at clouds rather than whatever auroral activity might be occurring above them. The Alaskan skies are typically clearest in late February and March, when the weather is frigid. The sky in summer tends to remain too light for a good auroral display, even in the middle of the night. Aurorae do appear occasionally in the fall, although August is the cloudiest month of the year in the Alaskan interior. I monitor weather using the free‚ The Weather Channel application for my iPhone. It provides excellent forecasts with several levels of granularity and, most importantly, is regularly updated and easily accessible from the road. If the weather is poor in one location, I can quickly re-route to an alternate destination with better conditions.
Beyond the weather, one may wish to consider the phase and presence of the moon when planning an aurora photography expedition. A full moon will be visible most or all of the night and may add a haze to your photographs. A partial moon low on the horizon will provide foreground illumination without obscuring other important elements. I monitor the stage and presence of the moon using an inexpensive iPhone application called‚ Darkness, which provides extensive timing and phase data for both sun and moon, both for preset cities and via the integrated GPS.
Finally, the strength of the aurora varies from minute to minute, and from day to day. Several scientific organizations provide useful predictions about the magnitude of auroral activity as much as a few months in advance. If you are hunting for a monstrous aurora, careful attention to these predictions is imperative. One of the most useful sources of this information is the University of Alaska’s aurora forecast page http://www.gedds.alaska.edu/AuroraForecast/, which provides easy-to-understand predictions on a scale of 1 to 10 together with maps of probable activity zones. If you need to plan far in advance, the straightforward predictions there are probably the single best guide for improving your odds. A more comprehensive but less easily digested set of information is available from the National Weather Service’s Space Weather Prediction Center http://www.swpc.noaa.gov/index.html. For those interested in extreme long term planning, the sun runs through cycles of activity with a period of approximately eleven years. The next peak in solar activity, and thus in auroral activity, is projected to occur around 2011.
Photographing The Aurora
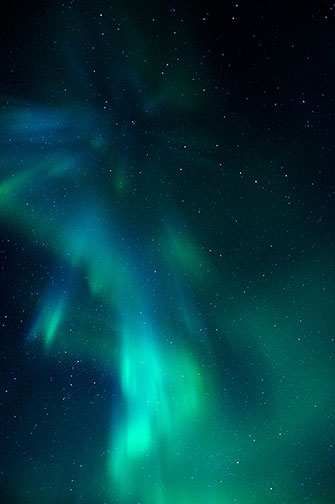
The aurora can move quickly across the sky, appearing and disappearing, twisting and turning like a cloud of neon smoke. Aurorae are often visible throughout the night, but in central Alaska tend to be most intense just after midnight, most frequently between midnight and 2:00 a.m. Once you are properly prepared and have found an aurora, photographing it is the easy part.
Photographers will usually want to capture the aurora’s lines and structure, together with some landscape for context. The optimal setup for this purpose is a fast wide angle lens on a body capable of clean high-ISO operation. There are a number of new bodies in recent years that meet these criteria well, and which have genuinely enabled a transformation in the field of aurora photography. My principal suggestions for camera settings are:
- Manually prefocus at infinity. Disable autofocus, as it is unlikely that your camera will automatically lock onto an aurora – it is more likely to focus on your breath. Consider taping your focusing ring so it does not inadvertently shift in the dark away from infinity.
- Select the largest lens aperture available (preferably f 2.8 or below). With a moving aurora, stopping down in an effort to improve sharpness is often counterproductive.
- Choose the highest ISO with which your camera will provide reasonably good quality output.
- Manually set your exposure time and keep it as short as possible, ideally well under 30 seconds.
Because the aurora is constantly in motion, longer exposures will capture more of a broad green mist than the details of the aurora at any particular point in time. Longer exposures will result in increasingly noticeable star trails as well, as the Earth is slowly rotating relative to the stars throughout your exposure. Shooting with an f 2.8 aperture at ISO 800, I typically use exposure times around 15 seconds, although the duration varies with the intensity of the aurora and artistic preferences.
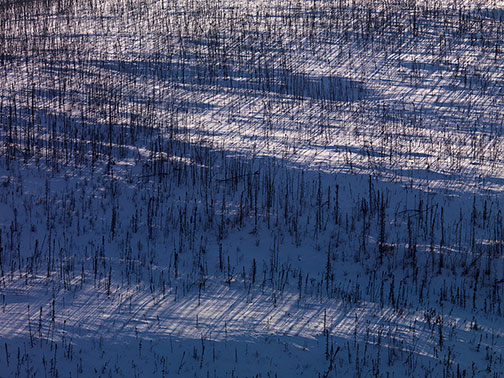
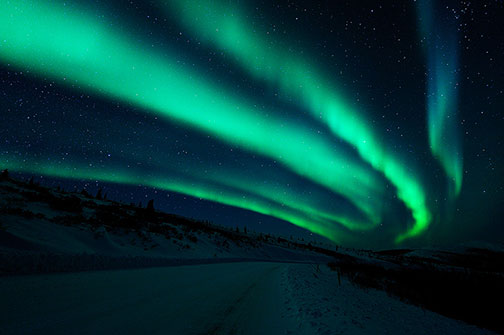
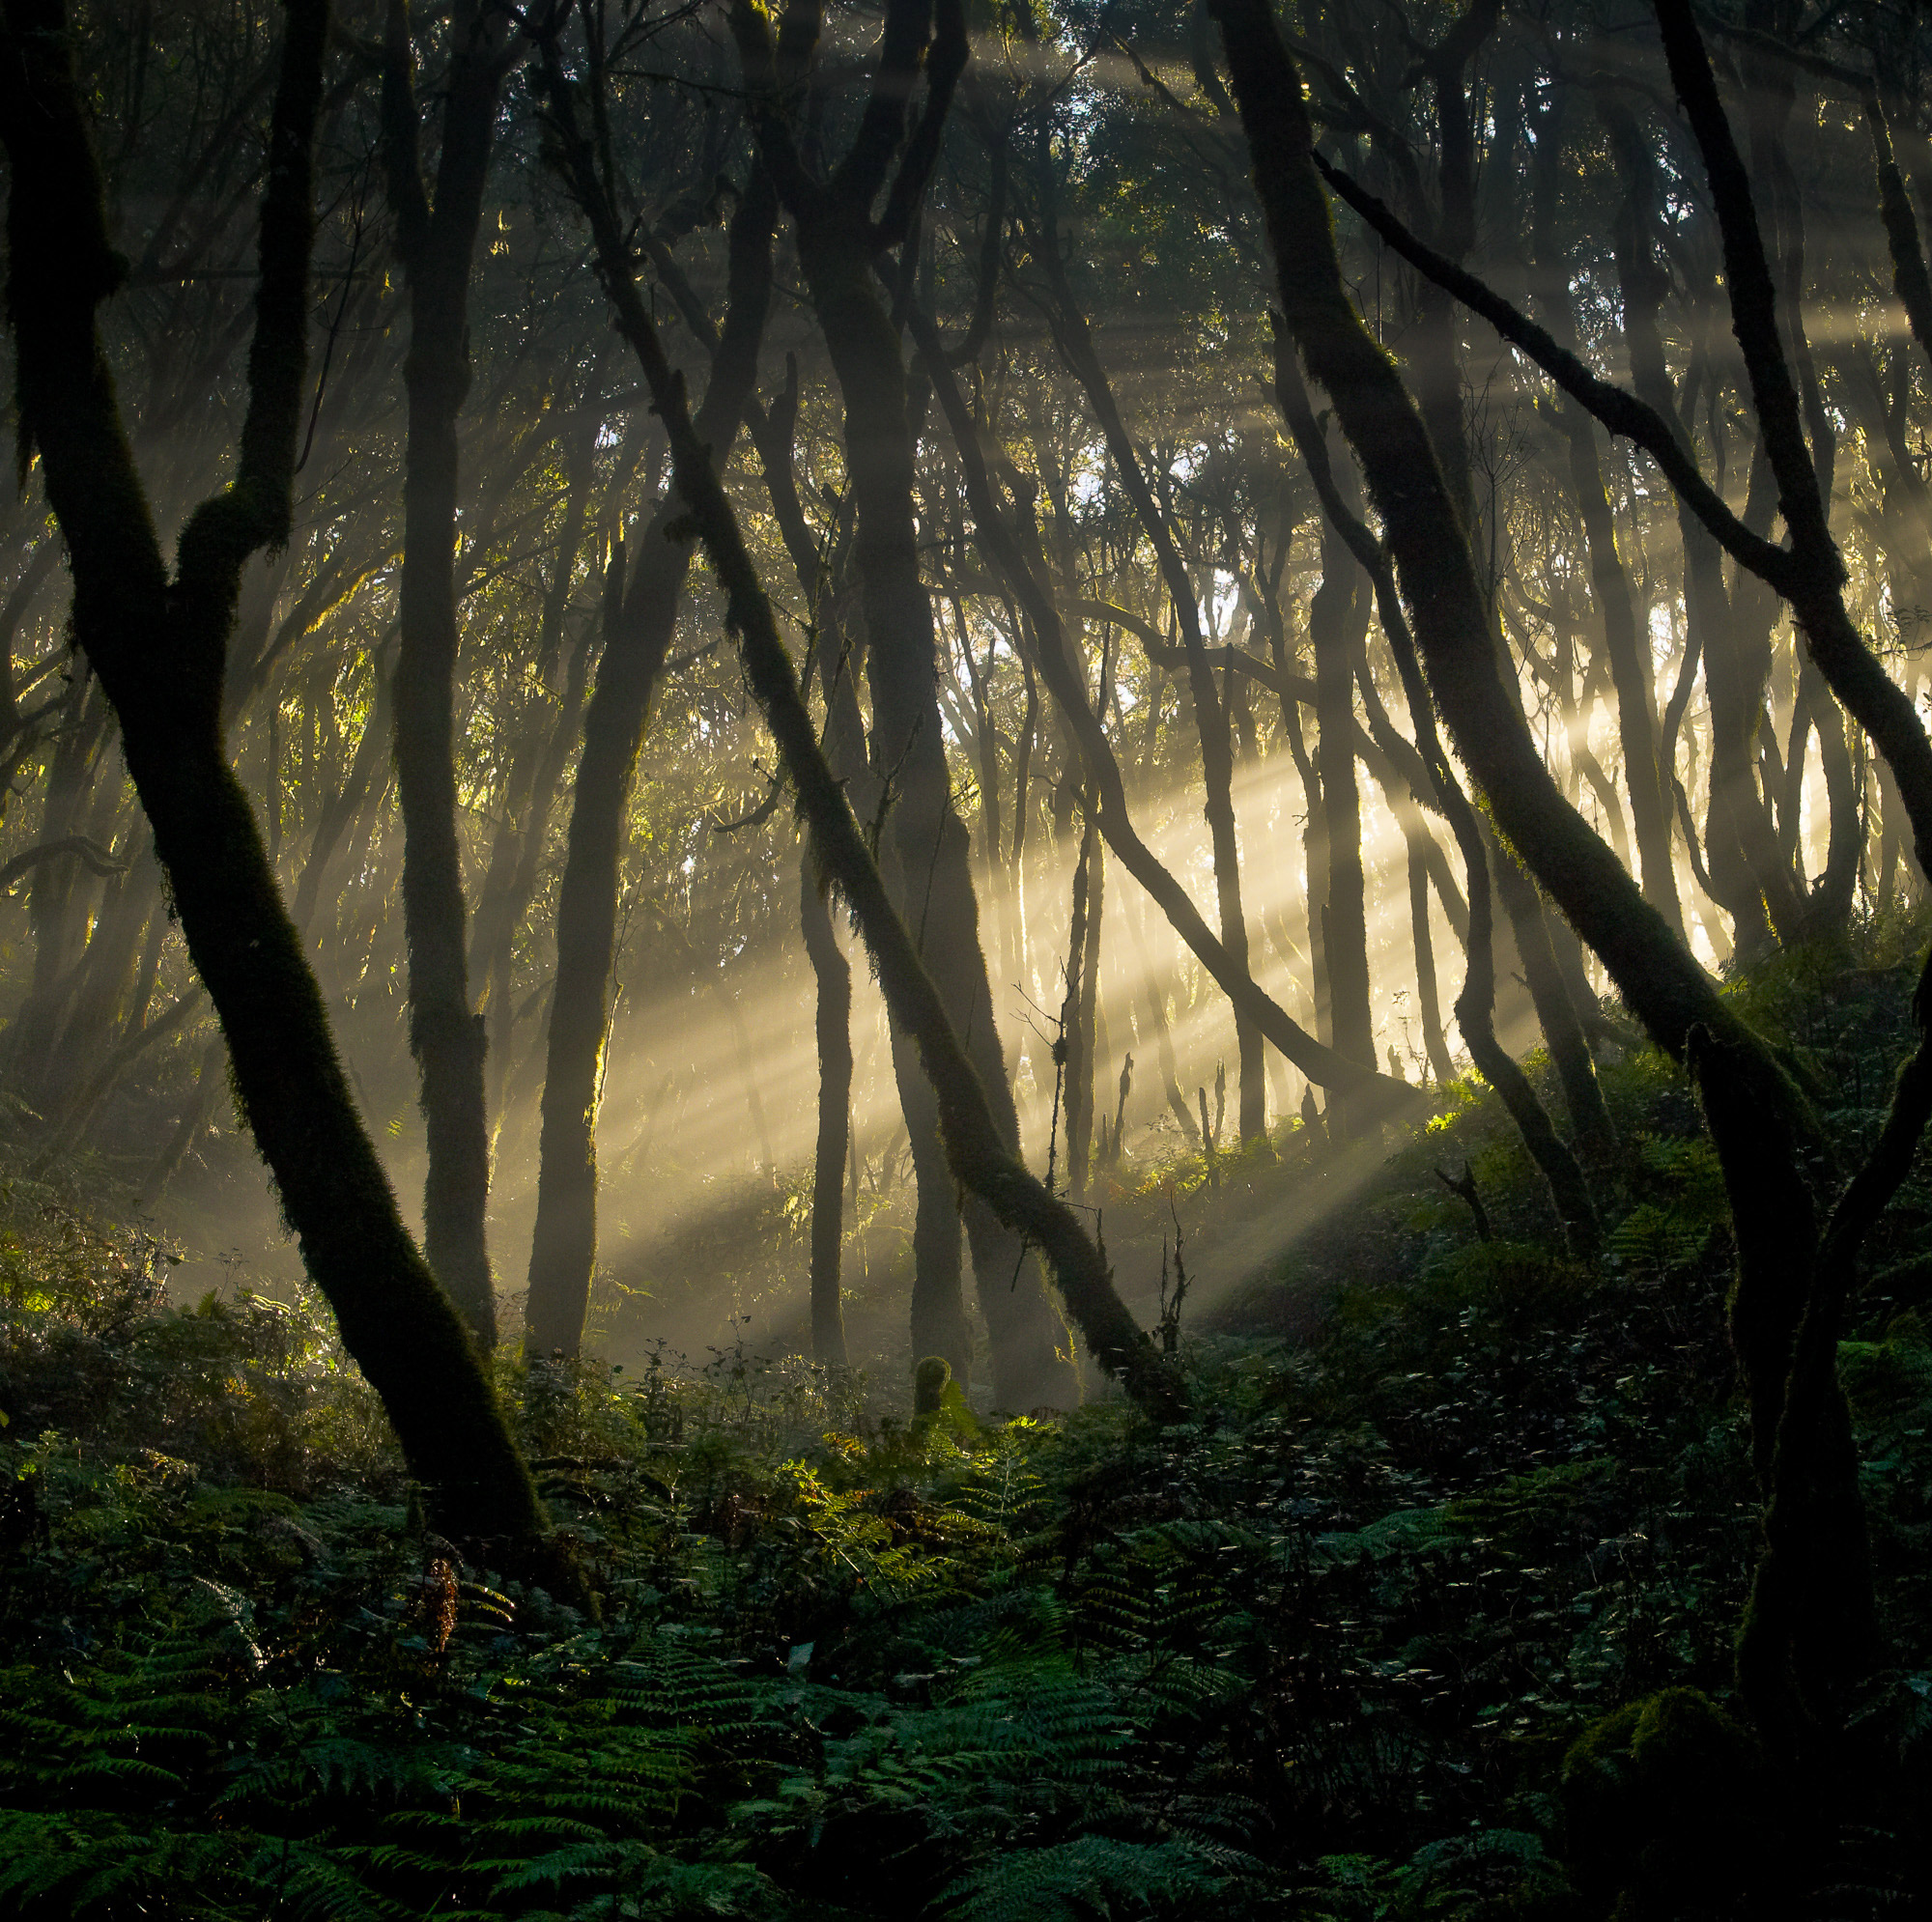
Finally, your camera will absolutely need to be mounted on a sturdy tripod. Don’t bother leaving home without one. Consider also bringing a light source and experiment with light painting in the foreground; otherwise, if the moon is not out, your foreground may be reduced to a silhouette, as shown below.
When amassing equipment for an aurora-centric expedition, keep in mind that Alaska also offers an array of magnificent mountain scenery and wildlife. March, for instance, is mating season for the local wolf population. When I mentioned to a salesman at a local sporting goods store that I was a photographer, he suggested that I purchase a device used by hunters to replicate the mating call of these wolves. He assured me that it would enable me to take many close-up photographs of the animals. As enticing as that sounded, I began to visualize that experiment going horribly wrong and elected to pass. Regardless of your particular photographic objectives, anyone venturing to Alaska – even those not interested in meeting a frustrated pack of wolves in heat – will almost certainly encounter a variety of wildlife and daytime landscapes that justify packing at least one telephoto lens.
Cryogenic Medium Format Digital Photography: The Wave Of The Future?
Most photographic equipment is rated for use at temperatures down to around the freezing point. So, what happens when it is subjected to temperatures 60 o F, or more, lower than that? Before my recent journey to Alaska I suspected the answer would lie somewhere between‚ nothing good and‚ something extraordinarily unfortunate, but beyond that had no firm expectations. Having lived in Southern California since birth, I frankly had no idea what would happen to me when I was exposed to such conditions.
My prior experiences with cold weather photography included more than a dozen trips to freezing locations, and occasional photography for extended periods at temperatures as low as 0 o F (-18 o C). At these temperatures my Hasselblad digital back would occasionally exhibit behavioral quirks but insurmountable problems had never arisen. Most of the major issues I have encountered in cold weather have, oddly, involved my support system. Most recently, a leg snapped off of my Gitzo 1325 carbon fiber tripod (supposedly rated to -22 o F (-30 o C)) at the balmy temperature of 0 o F (-18 o C), and my RRS-55 ballhead was rendered inoperable when my tripod blew over in a snowstorm at 10 o F (-12 o C). Based on these experiences, I traveled to Alaska with a backup tripod and ballhead as well as a second camera, my Nikon D700, whose weather sealing and excellent low light capabilities make it extraordinarily well suited for aurora photography.
On this trip to Alaska, the nighttime temperatures in the mountains I was exploring normally ranged between -20 o F (-29 o C) and -40 o F (-40 o C), conditions that the locals dismissed as mere‚ t-shirt weather. A cold snap arrived near the end of my visit, however, bringing an arctic breeze that the local forecasters described as‚ bitterly cold. Temperatures during that period dropped to as low as -65 o F (-54 o C) including the wind chill. This, I discovered, is around the point at which an idling car begins to freeze up. Seeking to avoid accidental cryogenic suspension, I quickly became very selective about what I photographed.
Most of my equipment performed better in these extremes than I had expected. Starting from the bottom, I had little trouble with either of my tripods (Gitzo carbon fiber models 1228 and 3530). The legs became more difficult to extend and open, but that was the extent of the issue. Particularly after the recent demise of the 3530’s predecessor in far warmer conditions, this was a pleasant surprise. Both of my ballheads (RRS-55 and Arca Swiss BH-1) performed acceptably as well, although both became noticeably more difficult to operate. The BH-1 locked up at one point, requiring me to obtain the desired framing by varying the length of each tripod leg in a coordinated fashion. This was probably a consequence of differential thermal contraction, meaning that the different materials in the ballhead contracted at different rates when exposed to the extreme cold, eventually resulting in a mechanical incompatibility. Once heated even moderately, normal operation returned.
The $20 cable release on the D700 (the MC-30) was less suited for the cold. Its cable froze solid at around -20 o F (-29 o C). The release continued to operate electronically, but the rigidly frozen cord compromised the mechanical isolation that the device was designed to provide. The rigid cord was also quite difficult to manage, particularly when attempting to return the camera and its frozen appendage to the car. In contrast, the remarkably similar $79 cable release on the Hasselblad remained flexible in the cold. This must have been what the Hasselblad dealer meant when they said‚ you get what you pay for.
The performance of the D700 was exemplary. I regularly worked with that camera for up to 20 minutes at a time, shorter in the most extreme conditions. With four layers of clothing including a full Gore-Tex outer shell, my own intolerance for the cold was always the limiting factor. The D700, together with Nikon’s phenomenal 14-24mm f 2.8 lens, performed flawlessly in every material respect. The only perceptible deviation from normal performance involved the D700’s battery system. Fully charged with five bars of power, the status indicator dropped to a single bar within just a few minutes of use. Although I initially expected this to evolve into a serious problem, I continued shooting and the indicator never dropped any farther. It turned out to be a non-issue.
The Hasselblad (an H3D-39) is a wonderful camera that offers mind-boggling image quality when used for conventional landscape photography. Even at temperatures significantly below freezing, the Hasselblad has consistently excelled. At night in the mountains of central Alaska, however, it was simply out of its element. To begin with, this camera tops out at ISO 400 and was accordingly suitable only for the brightest of aurorae.
Once the Hasselblad had been exposed to temperatures of -30 o F (-34 o C) for about five minutes, it began to exhibit signs of mild hypothermia. By then, camera’s internal organs had cooled to a point where the mirror became stuck – fortunately in the‚ up position so I could continue shooting, even though I was unable to check the framing through the viewfinder. For a few additional minutes, I was able to work around this obstacle by incrementally adjusting my framing using the image from the prior shot on the camera’s LCD monitor (no easy task, even in tropical conditions, on the H3D’s abysmal LCD).
But the situation shortly turned from bad to worse. A red LED lit up on the digital back and the H3D went catatonic. The camera would do nothing other than report that it was‚ starting up – perhaps a mistranslation of the Danish term for‚ warming up. The camera continued to‚ “start up for several minutes, at which point I moved it to the dashboard of the car, turned the defroster on full-blast, and reverted to the Nikon, wondering if my beloved Hasselblad had finally met its demise. After fifteen minutes of defrosting and repeated battery removals to reset the system, the Hasselblad finally finished starting up. It transitioned to a phase in which it operated erratically in several respects; of most immediate concern, the longest available exposure time had mysteriously dropped to one second, rendering the camera useless for aurora photography. After another fifteen minutes of heating and another battery removal reset, the H3D miraculously arose from the dead, returning as far as I could discern to completely normal operation.
On reviewing the Hasselblad captures on a large monitor, two further problems became apparent. Some corners of the images appeared to be fogged over (perhaps condensation on the sensor or an optical element) and noticeable blotches of purple were sprinkled across many of the frames, most heavily concentrated in the corners (perhaps an interaction between the unusual wavelengths emitted by the aurorae and the IR filter over the sensor). Although many of the Hasselblad photos were still useful, for future aurora photography I will definitely gravitate toward the high ISO superiority and temperature tolerance of the Nikon, foregoing the extra 27 megapixels offered by the Hasselblad.
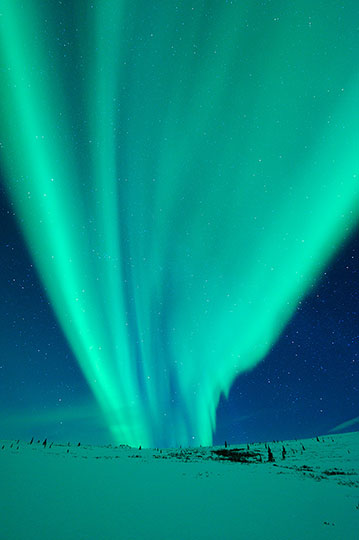
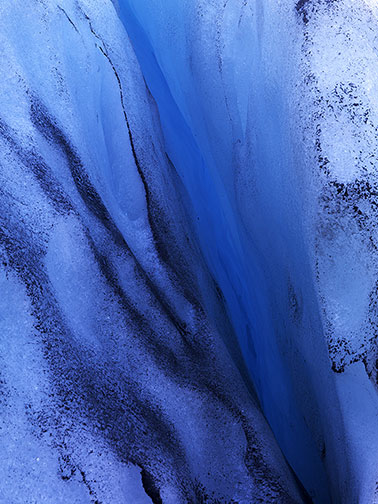
Notwithstanding a few hiccups along the way, my Alaskan hunting trip was a resounding success. I had scheduled my visit around a predicted peak in auroral activity and the prediction did not disappoint. Standing alone at the top of Twelve Mile Summit, 87 miles into the mountains outside of Fairbanks, a massive aurora materialized out of the midnight sky. Brilliant green and blue ribbons, twisting and turning from one horizon to the other, ran directly over my head while illuminating the snowy landscape below. Many of the photographs accompanying this article were made that evening. Finally, I am glad to report that both cameras survived the ordeal, despite having been designed for typical operation at temperatures more than one hundred degrees Fahrenheit higher than those on my‚ vacation.
May, 2009
When not photographing wild landscapes, Ben Hattenbach is a partner at a Los Angeles-based law firm where his practice focuses on the trial of complex intellectual property disputes. More of his images of Alaska, and other regions, can be seen at http://www.pbase.com/hattenbach and http://www.flickr.com/photos/benh1/.
Dr. Henry Throop is a Sr. Research Scientist at Southwest Research Institute in Boulder, Colorado, where he studies the formation of the solar system. He is currently working on NASA’s New Horizons mission to Pluto, which will photograph its landscape at roughly -370 o F, and was involved with New Horizons’ observation of aurorae on both Jupiter and Io.


Elevate Your Vision


Read this story and all the best stories on The Luminous Landscape
The author has made this story available to Luminous Landscape members only. Upgrade to get instant access to this story and other benefits available only to members.
Why choose us?
Luminous-Landscape is a membership site. Our website contains over 5300 articles on almost every topic, camera, lens and printer you can imagine. Our membership model is simple, just $2 a month ($24.00 USD a year). This $24 gains you access to a wealth of information including all our past and future video tutorials on such topics as Lightroom, Capture One, Printing, file management and dozens of interviews and travel videos.
- New Articles every few days
- All original content found nowhere else on the web
- No Pop Up Google Sense ads – Our advertisers are photo related
- Download/stream video to any device
- NEW videos monthly
- Top well-known photographer contributors
- Posts from industry leaders
- Speciality Photography Workshops
- Mobile device scalable
- Exclusive video interviews
- Special vendor offers for members
- Hands On Product reviews
- FREE – User Forum. One of the most read user forums on the internet
- Access to our community Buy and Sell pages; for members only.
You may also like


