Welcome Goldilocks


Some History
Regular readers will recall that since its inception I have not been much of a fan of the Four Thirds format. When I reviewed theOlympus E-1back in 2003 and insubsequent discussionsI wrote that I regarded the Four Thirds format as an evolutionary dead-end. The reason for this attitude was that the cameras themselves were not that much smaller than reduced frame (APS-C) sensor cameras and therefore having a 2X size reduction over the 1.5X and 1.6X of the other mainstream players would put Olympus (the primary Four Thirds player then) at a competitive disadvantage. Sensors would get less expensive over time (as they indeed have) and therefore any cost advantage that the smaller format’s sensors might have would be negated. With five years of hindsight this has proven to be correct.
The potential size advantage when it came to camera bodies was not well realized either. The first few offerings in Four Thirds were at best only slightly smaller than their APS-C competitors, and as the format’s two main backers, Olympus and Panasonic, made some models smaller and smaller, so too did Canon, Nikon and everyone else. So, now today, the smallest Four Thirds cameras are at best only slightly smaller than everyone else’s APS-C sized cameras.
Four Thirds lenses did prove to be somewhat smaller, but for reasons best known to Olympus the really good ones are usually pricier than comparable lenses from other marques. Olympus also seems to have initially misjudged the marketplace by initially targeting their cameras at the pro market just at a time when Full-Frame and higher pixel counts were what pros were after, and they subsequently had to turn their primary focus to the amateur market instead. This they have now done, and have carved out a nice niche for themselves, but have not positioned the new format in any convincing way.
Now – five years on, enterMicro Thirds Micro.
____________________________________________________________________________________
Micro Four Thirds
Announced in mid-year 2008, this offshoot of the original Four Thirds format appears intended to address the shortcomings of the original format by allowing camera makers toreallyreduce the size and weight of cameras and lenses. It accomplishes this by firstly retaining the sensor size with its 2X factor.Microin this instance does not mean that the sensor has shrunk. What has been size reduced is the camera body and especially the lenses, and this has been done through the elimination of the reflex mirror and prism assembly, replacing these with an electronic rather than an optical viewing system. Shorter back focus distance equals smaller lenses along with the ability to not have to use bulky retrofocus designs on wide angles lenses.
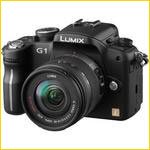
The first Micro Four Thirds camera out of the gate is the Panasonic G1, which started shipping in early November, 2008 and which is the subject of this review. Olympus is certain to follow in the months ahead.
As will be seen, MFT as we’ll call it, is able to use lenses from regular Four Thirds cameras, but only with an adaptor, and in some cases without proper autofocus and with the necessity of a lens firmware upgrade. Since size reduction is the name of the game, adding a bulky adaptor which allows using larger lenses seems counterproductive, except possibly for individuals with legacy Four Thirds lens collections.
Panasonic G1 at 45mm (90mm equiv) @ ISO 100
100% Crop
Not to get ahead of ourselves, but I’ll state here that the image quality possible from the Panasonic G1 is very high. This sensor and lens combination is able to produce detail, contrast and a delicacy of tonality and shading that is as good as anything else I seen recently, and the print size and quality possible from ISO’s under 800 are limited only by the camera’s 12 megapixel file size.
____________________________________________________________________________________
The G1 – Features and Functions
In Hand
Let’s address the issue of size first. The typical human hand is a gating mechanism for how small a camera can and should be made. Technology allows cameras to be made as small as one could wish (or not – if you’ve ever had a colonoscopy, you know what I mean). With MFT’s new-found freedom, brought about by eliminating the reflex viewing system, it appears that Panasonic could have made the G1 smaller than it is, but have been restrained in doing so by some basic human factors engineering – the need for a large enough rear LCD, physical controls, and all-around handholdability.
In this regard I think that Panasonic has hit the sweat spot. The G1 is a bit of aGoldilocks, at least for someone with small to medium-sized hands. It’s not too big, and not too small. Just about right. But, while I found that the camera handled very nicely, when used outdoors in the winter with gloves on, the grip was too shallow and I found the G1 somewhat awkward to handle.
Putting the electronic viewfinder aside for the moment (we’ll look at it in some depth further on) the G1 presents a sensible though somewhat atypical control layout. The shutter release is comfortably angled and positioned, and the main mode dial is found in the usual place. It contains thirteen (!) positions. Surrounding the mode dial are a power on / off switch with an LED to indicate when the camera is energized. Also surrounding the mode dial is a lever controlling frame rates, with positions for single frame, multi-frame, bracketing and self-timer.
As with many other cameras of late the main mode dial does not have firm enough detents. In a larger camera this isn’t much of a problem, but because the G1 is so small it finds itslef being handled in such a way that it’s all too easy to accidently move this dial.
On the top right section of the camera is a Quick Menu button that provides screen access to commonly used features. These are controlled by the camera’s single finger wheel which is found in the usual place just in front of the shutter release. Interestingly, its design includes a push-in feature, which allows selection of menu items, and it’s nicely implemented.
My only concern about it is that when wearing gloves, because of the camera’s small size, I often found myself squeezing the wheel and accidentally changing the exposure compensation. Not a big deal, but something to be aware of.
The Quick Menu function is nicely implemented, providing access to most major functions via on-screen selection items along the screen’s periphery.
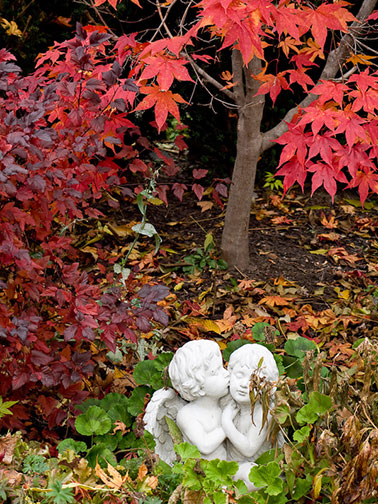
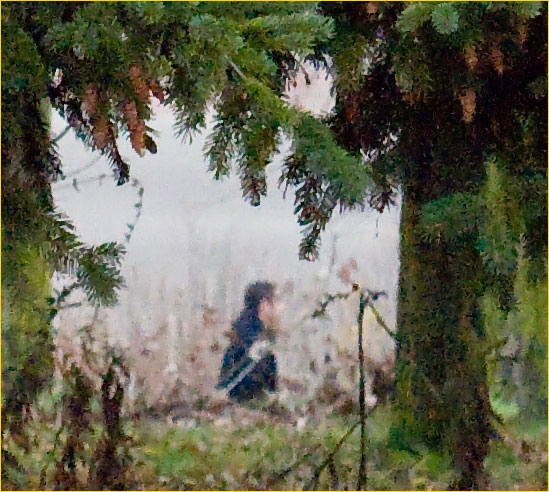
Love – Toronto, November, 2008
Panasonic G1 with 14-45mm @ ISO 100
Less to my liking is the camera’sMy Menufeature. As do most cameras these days there is a My Menu that allows for commonly accessed items. But unlike that from other camera makers this doesn’t allow you to select what items populate the menu, instead doing this automatically based on what items you access the most often. This means that if you happen to access some obscure menu items these will replace the ones that you really use often until the next time that you access them from the regular menu system. In my book, though seemingly clever, this turns out to be an almost useless function.
Film Mode
Completing the top right is a button marked Film Mode. This provides access to a range of luminance, tonality, colour and gimmick effects, with names such as Nature, Dynamic, Smooth and Nostalgic as well as several B&W modes and custom modes – all configurable for contrast, sharpening, saturation and noise reduction. I estimate that something in the order of 100,000 combinations are possible. This will be found to be either a joy or a joke, depending on ones perspective.
My first thought on seeing this control was that given the probable target market for the camera Panasonic might have misjudged. Many of them might not even know what "film" is – and I’m not kidding. Increasingly I am seeing people come to my workshops and seminars who have never shot film. They came to photography within the past ten years and a film-based camera has never been part of their lives. Of course calling this controlFilm Modeis just a naming convention for the place where one can alter the image’s look, but it still strikes me as a bit odd.
For people shooting JPGs who will rarely do any processing of their images on a computer I suppose this type of control (and its certainly not unique to the G1 – it’s just more accessiblethere) makes some sort of sense. Or maybe not. It seems to me that if you’re the sort of person who is interested in controlling the look of your images, rather than just shooting your kid’s birthday party and posting the shots to Flicker for grandma and grandpa to see, you’ll want to do it on the computer, rather than in camera, even if your working with JPGs. And if you’re any sort of serious photographer you’re going to be shooting raw in any event, and so the whole thing is redundant.
Maybe the marketing folks at Panasonic know something I don’t. In fact I’m sure they do, because features like this are the result of focus groups and lots of research and planning. I just don’t get it though.
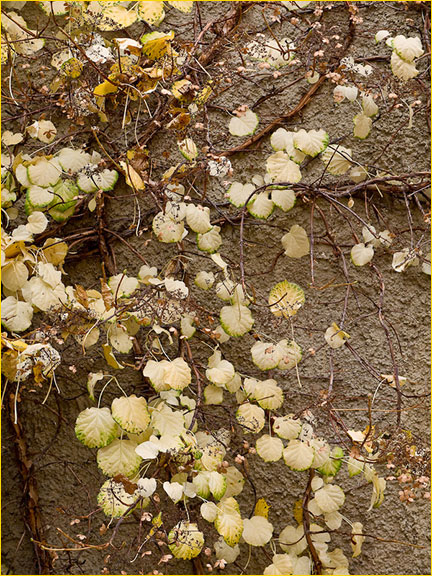
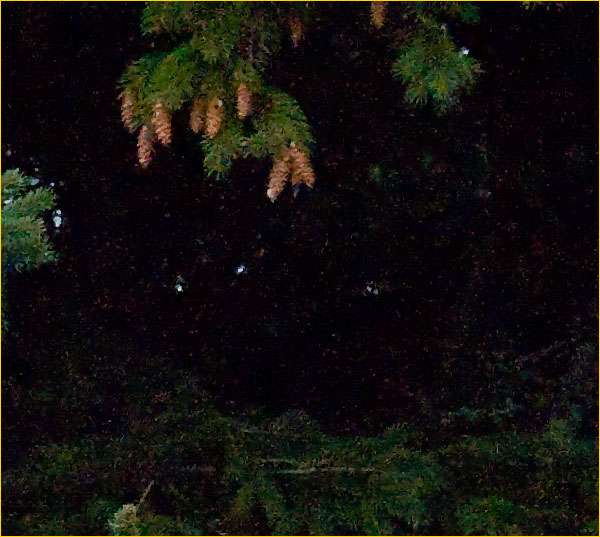
Rust -– Toronto, November, 2008ISO 100

The top left panel has a control for focus mode, with positions for single, continuous and manual focus modes. Manual focus is fly-by-wire, which means when you turn the focus ring you’re not directly moving lens elements but rather actuating them electronically. It turns out that this is nowhere near as unpleasant as one might think, and when combined with the fact that the rear LCD and EVF can produce a highly magnified image when the focus ring is being turned, this makes manual focusing not just usable, but highly controllable and as well as pleasant to use.
There is a pop-up flash in the usual place with a manual control, and on the top a hot shoe for Panasonic flash units.
The battery compartment is in the usual place underneath the camera, and the SD card slot is on the right with the cover for external connections on the left side.
The rear contains a 3" LCD along with the usual assortment of controls for viewing, setting menus, ISO, white balance and the like.
Size and Weight
The G1 is small – smaller than just about any DSLR on the market, at 124X84X45mm and a weight including battery of 360 grams (12.7oz). By comparison, my other small DSLR, the Canon XSI is a positively porky 502 grams (17.7 oz). Even my current favourite pocket camera, the Canon G10 weighs more at 390 grams.
Indeed the Panasonic G1 is considerably smaller and lighter than the only other camera with a large sensor and an electronic viewfinder, theSony R1, and the R1 didn’t have interchangeable lenses.
No Video
Another omission is video. It’s astonishing that in a high performance Live View camera video was omitted. Panasonic was called on the carpet about this by early observers, and they have promised that a model with video will be forthcoming in the first half of 2009. Oh goody. An opportunity to buy another body with what should have been included in the first place.
____________________________________________________________________________________
Cosmetics
One of the things that caught my eye the first time that I saw the G1 was the metallic stripe down the center of the hand grip,Ah ha, I thought, the camera has a touch sensor that turns it on and off when it is grasped.That – or it provides a heart rate monitor like the treadmill exercise machines at the gym. In fact it does neither. The stripe it turns out is purely cosmetic. Whether this was the original intent, or a sensor grip was planned and then abandoned is unknown.
When one picks up the G1 ones first impression – in addition to how small and light it is – is the very pleasant tactility of the camera’s surface. It appears to be some sort of rubberized plastic that somehow feels good to the hand, offering just the right amount of grip without being sticky.
The G1 is styled very much in the mold of a traditional DSLR even though there is no mirror box or prism. This might have been an opportunity for Panasonic to style something unique, but they took the safe path, and I can’t say that I blame them. They are going to have an uphill battle to position the G1 and its ilk among photographers and consumers, and making it too different might have complicated that challenge. Pity though, as this would have been a great opportunity for some new and creative thinking in camera design. But, Panasonic, as many in the industry know, is inherently a conservative company.
Finally on this topic, there’s the matter of the G1 coming in blue and red as well as traditional black finish. (Maybe not so conservative after all). I have no problem with this, and though I wouldn’t want to own or use one myself I can see that it might well appeal to some fashion conscious consumers. I hope that this doesn’t trivialize the G1 among more serious photographers, because, as will be seen, there’s a lot of goodness to the G1, and Panasonic’s fashion push should not in any way be allowed to detract from this.
____________________________________________________________________________________
The EVF
One of the big stories on the G1 is its electronic viewfinder. These have been around for a long time, but have generally been poor, and in no way comparable to a reflex optical viewfinder. The EVF on the G1 is better than anything yet available elsewhere, but it still not as good as an optical viewfinder. Using it is like looking at a TV rather than out of a window, but there are advantages.
Among these are the ability to have a live histogram superimposed on the screen, and located anywhere on the screen that you wish. For those working in raw and attempting critical exposure this is a real plus, which has only been available till now on a rear LCDs when in Live View mode. But since the G1 is always in Live View mode this becomes available on the EVF as well as the LCD.
The EVF is large enough as to be completely visible without glasses, but can be a bit cramped when glasses are worn and when one needs to also see the top and bottom data displays. The EVF can optionally be eye activated and it also has a diopter adjustment.
Like many other cameras with eye detection I found that its sensibility is set a bit too high, and the EVF can turn on accidentally (blanking the LCD) when the camera is held a bit too close to the body. It would be great if this could have a sensitivity control, but for the moment it needs to be disabled if it becomes bothersome.

Floating – Toronto, November, 2008
ISO 100
____________________________________________________________________________________
The LCD
The G1’s rear LCD is large, bright and clear. More importantly, it is articulated – one of the few interchangeable lens camera currently available to have a full articulated screen (Olympus and Sony on some models also do this). It’s the first one that I’ve used in a while, and it makes me wonder why all cameras aren’t made this way. Whether shooting low to the ground or over one’s head, it really increases a camera’s versatility. As someone who spent may years looking down onto the ground-glass of either a TLR or medium format camera I find the perspective appealing.
Being able to fold the LCD closed also has the benefit of protecting it when the going gets rough, and it also lowers power consumption. If you’re not into chimping this can really be an advantage when traveling and way from recharging opportunities.
____________________________________________________________________________________
Depth of Field Preview – Update
When this review first was published I wrote a paragraph criticizing it for not having depth of field preview capability. I was wrong, and was informed of this via email by several people. Since at the time I was traveling in Arizona, while the G1 and its manual were back in my Toronto studio, all I could do was delete the offending section.
Now that I’m back I realize that of course it has DOF preview, and I’ve even used it on occasion during the hundreds of frames of my initial testing.
My excuse? None. Just a call it a momentary lapse of sanity.
In any event, the DOF control works fine, and there’s even a unique mode which allows you to see what the effect of motion will look like at the shutter speed chosen.
____________________________________________________________________________________
Lenses
The G1 ships with a Panasonic 14~45mm f/3.5-5.6 zoom lens, which features built-in OIS (Optical IMage Stabilization). This lens is the first available in the Micro Four Thirds format. My impressions after several hundred frames is that there is little not to like about this lens. Images are contrasty and resolution is very high – certainly a match for the sensor itself. Little in the way of CA or vignetting are observed. A very decent performer.
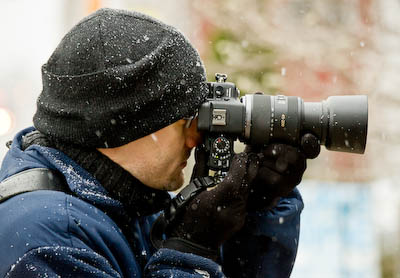
Nick with G1 + 40-200mm (90–400mm) and snowstorm
The second lens is the 45~200mm f/4-5.6 OIS lens. This lens arrived just a few days before this review was ready for publication. Rather than delay this, I’ll add my impressions as time passes. But, after just a couple of days of casual use the thing that stands out most is the incredibly small size of this lens. Reaching out to the equivalent of 400mm at f/5.6 at the long end, its hard to credit how tiny this stabilized lens is. For urban street shooting I can’t think of anything this side of a superzoom digicam that comes close in terms of size, and then certainly not with regard to potential image quality.
Panasonic has indicated that we will see at least three more lenses from them in 2009; a 14-140mm f/4-f.5.6 OIS, a 7-14mm f/4 and a 20mm f/1.7. Remember to multiply these focal lengths by 2X for 35mm full frame equivalent focal lengths.
Olympus will almost certainly be introducing their own Micro Four Thirds cameras and lenses, but as yet there are few details or timing available.
As has already been mentioned the G1 and any other Micro Four Thirds camera can also take any regular size Four Thirds lens through the use of the DMW-MA1APP adapter. Unfortunately a lot of automation functions will no longer work, and these lenses will be found to be considerably more massive than their new Micro Four Thirds versions. This is therefore not an option that many people will pursue, except maybe those with legacy lens collections.

Faces – Toronto. November, 2008
Panasonic G1 with 40-200mm @ ISO 250
____________________________________________________________________________________
Autofocus
One of the potentially most controversial aspects of the G1 is that it uses contrast detection autofocus rather than the phase detection system used in DSLRs. Anyone who has used a digicam knows how slow these can be to focus compared to DSLRs.
Fortunately there’s hardly any need for concern. I didn’t do any side-by-side comparisons, but just seat-of-the-pants use tells me that this G1 focuses with the alacrity of most comparably priced DSLRs. The camera features a wide variety of focusing modes, from a single flexible point to 23 point auto select, to focus tracking, to face detection. It’s all there and works well.
I did occasionally notice the camera momentarily try and find focus in the wrong direction, but this always was over in an instant.
____________________________________________________________________________________
Shooting Speed
The G1 claims 3 FPS shooting speed. I found that shooting raw and using a Class 6 SDHC card it could shoot 5 frames in rapid succession and then slowed to one frame every two seconds. Not sterling performance, but acceptable for most uses. This definitely isn’t a sports photographer’s camera though.
____________________________________________________________________________________
Stabilization
Whereas Olympus has taken the approach of building image stabilization into the camera body, Panasonic does so in the lens. I found the Panasonic system to be extremely effective – as good as anything from Canon or Nikon, gaining somewhere between two and three stops of additional handholdability.
____________________________________________________________________________________
Sensor Dust Shake
The camera has built-in dust removal through vibrating the sensor. This is performed each time the camera is turned on and can also be done manually from the menu system. It appears to be effective, and in many hundreds of frames I saw no evidence of dust motes on the sensor.
This is important because with the lens removed the sensor is completely exposed, as there is no mirror mechanism to protect it.
____________________________________________________________________________________
Raw Processing
Like theLX3reviewed here recently, the Panasonic G1 usesSilkypixraw software. Here’s what I wrote about it in my LX3 review. The same thoughts apply to the G1.
Which brings us to Silkypix, the raw processing software that Panasonic provides. While it does a fine job technically of processing files, compared to contemporary raw processing software like Lightroom, Camera Raw or Aperture, its user interface is awkward and unintuitive
Until the next versions of these more mature raw processing programs become available (likely before year’s end) we’re stuck with Panasonic’s choice of Silkypix, but you shouldn’t let this deter you from shooting raw.
Note to Panasonic: Why hobble a fine camera with such underperforming raw software? Here’s my suggestion. Stop spending money on trying to provide a proprietary solution. Instead, have your cameras produce universal DNG format files and let the user choose whichever raw processing program they prefer.
____________________________________________________________________________________
Shutter
I was surprised when I started using the G1 to hear an actual shutter mechanism rather than a synthesized version. Since the sensor is a continuous live view, such as found in digicams, I had assumed that it would utilize an electronic shutter rather than a mechanical one. I was wrong.
This is disappointing as I had hoped to have an essentially silent camera. The shutter sound of the G1 is very muted to be sure, but complete silence would have been attractive to film and TV set photographers and others working in otherwise silent or audio recording environments.
Why the G1 has a mechanical shutter is something which I don’t quite understand. Pity though.
____________________________________________________________________________________
Image Quality
I typically prefer to test new cameras on location, on an actual shoot. I found years ago that lab testing didn’t tell me what I really wanted to know, and that only real field use helped me understand what a camera was really capable of, because it combined handling issues with real-world image quality evaluation. A camera isn’t a Plasma TV or a stereo. Like an automobile it needs to be tested on the road, not just in the showroom or even the test track.
While I usually do at least six trips a year (personal, business and workshops) that allow me to do field testing in a stimulating environment, the G1 came out in early November, half way between two of my travels. There was nothing therefore but to do some local shooting here in Toronto as the fall weather came to a close and winter started to set in. So – just to indicate that if the subject matter of some of these images isn’t the most stimulating, now you know why.
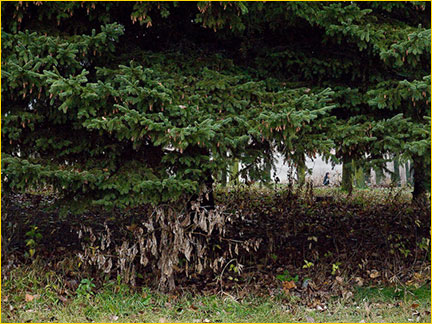
ISO 100-800
At low ISO’s the G1 provides exemplary performance. The 100% crop below gives some idea of the detail, dynamic range and overall goodness of the images produced. There is a gradual deterioration as one approaches ISO 800, but nothing that one needs to do anything about, and then only noticeable in 100% pixel-peeping, not in real-world prints even at the largest sizes.

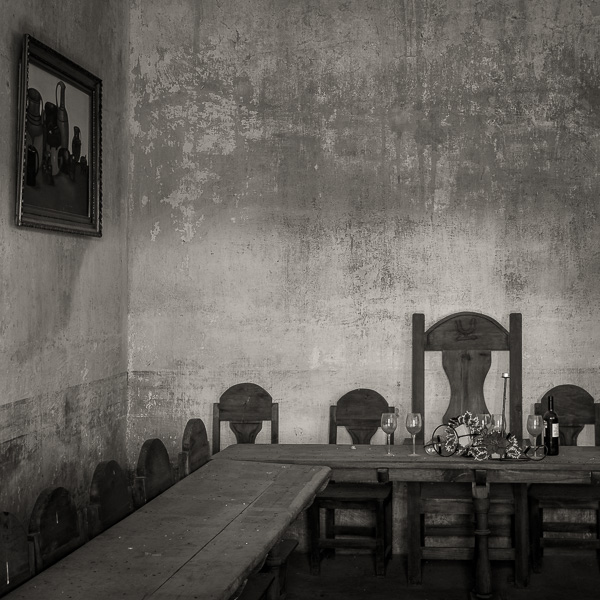
Hats – Toronto, November, 2008
ISO 125

ISO 1250
At ISO 1250 noise starts to become visible. The shot below is an example that shows the very high resolution that this lens / sensor combination can produce, but also the beginnings of noise. This is difficult to see on a 13X19" print, but is visible in a 100% on-screen enlargement. An appropriate amount of luminance noise reduction has been applied in the raw converter and the image has been sharpened in Lightroom.
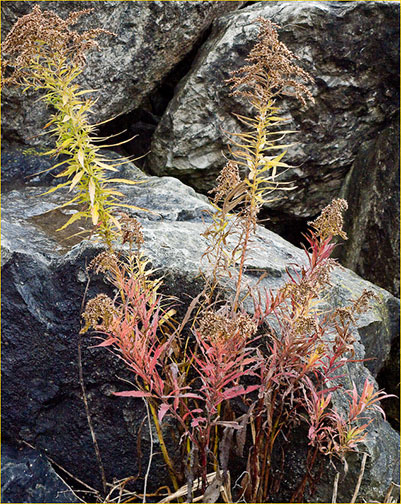
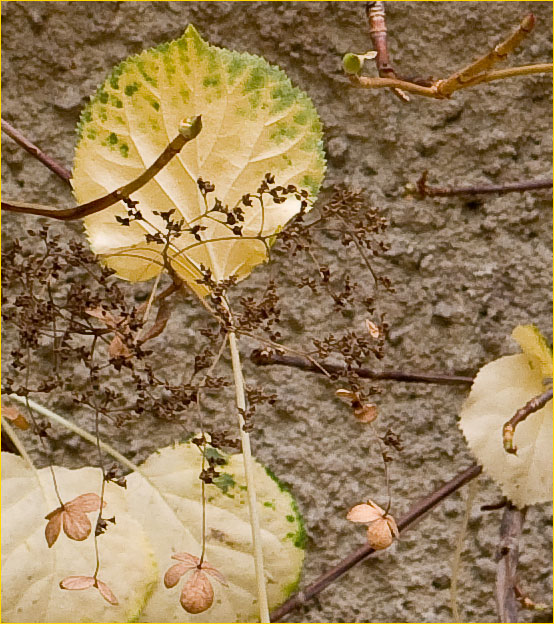
Textures – Toronto, November, 2008
ISO 1250
Some chrome noise is starting to appear in the deepest shadow areas but has not been removed here for the sake of showing what’s there. It could have easily been removed without resorting to a heavy duty noise reduction program such as Noise Ninja or Noiseware Pro.
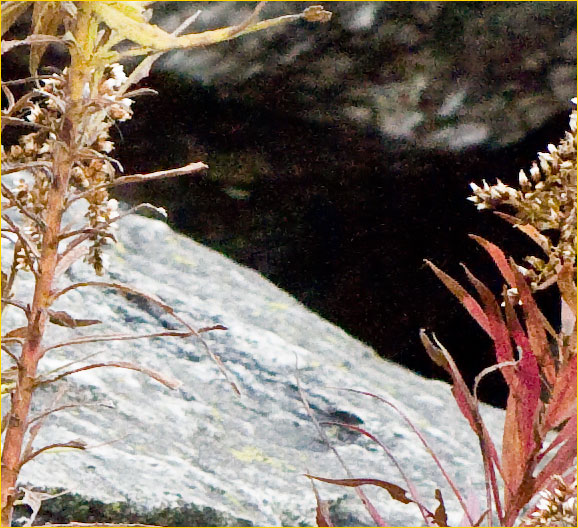
ISO 1250 – 100% crop
ISO 1600
At ISO 1600 the G1’s IQ starts to falter. The shot below is representative. Some noise reduction has been applied in the raw processor but no sharpening.
ISO 1600
As can be seen in the first 100% crop immediately below there is both luminance and chroma noise, even when some reduction has been applied in the raw processing program. This is a level of performance that seems somewhat below that of typical APS-C sized sensor cameras, and hugely below current full frame cameras such as the Nikon D700 and Canon 5D MKII. Panasonic has always been known for its noisy sensors at high ISO. It isn’t known if this camera indeed has a Panasonic sensor, or if its from Kodak, but the fact remains that above ISO 1250 noise starts to become an issue for critical workers. ISO 3200 is for emergencies only.
ISO 1600 – 100% crop
Of greater concern is the "edginess" that can be seen in the 100% crop below. Look particularly around the man’s head and body. This is the same image, with no sharpening applied. Once a typical amount of sharpening is applied this effect becomes even more noticeable.
ISO 1600 – 100% crop
It isn’t clear to me what this issue is, but it is only visible in images shot at about ISO 1600 and higher. As we’ve seen the G1 is competitive with other cameras in terms of noise up to about ISO 1250, so for most users this isn’t going to be much of an issue. At speeds up to ISO 800 there is nothing to really see in terms of degraded image quality, only the start of reduced dynamic range, which is common to all cameras.
____________________________________________________________________________________
Fringing
After many hundreds of frames I have yet to see any blooming or fringing on highlights or bright edges. The G1 seems to be very well controlled in this. Also, and as noted earlier, I find the combination of this sensor and lens to produce extremely sharp and contrasty images – as good as anything that I’ve seen from comparable cameras from other makers, and often for a lot more money.

Crane Worker – Toronto, November, 2008
ISO 100
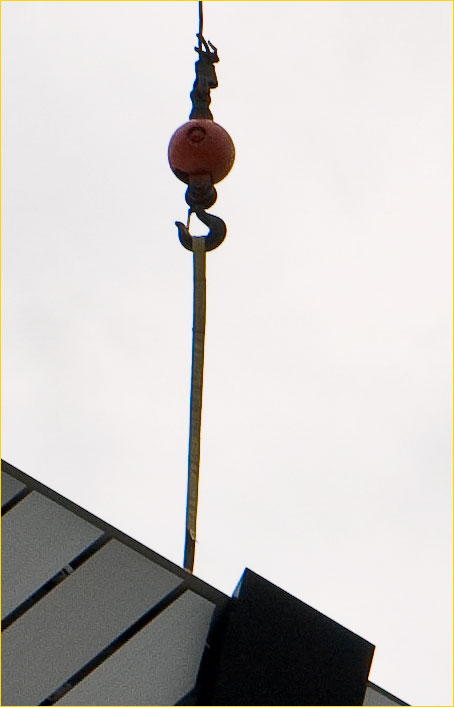
100% detail
____________________________________________________________________________________
Size Comparison
Godzilla was right – size does matter, and in the case of the Pansonic G1 smaller can be very appealing.

Click on the above image to play a short video showing the G1
compared in size to the Nikon D90 and Canon Rebel XSi
____________________________________________________________________________________
The Bottom Line
The Panasonic G1 is an appealing camera. It’s small size, light weight, and high image quality come together in a slightly pricey but basically affordable package. Though Lord knows I have enough cameras, I was so taken with the G1’s compactness, decent standard lens, and image quality that a body and two lenses are now part of my travel kit for when a regular sized DSLR is just a bit too much weight and bulk, and pocket camera doesn’t offer quite enough reach or high ISO sensitivity. There’s always room for aGoldilocks.
November, 2008


Elevate Your Vision


Read this story and all the best stories on The Luminous Landscape
The author has made this story available to Luminous Landscape members only. Upgrade to get instant access to this story and other benefits available only to members.
Why choose us?
Luminous-Landscape is a membership site. Our website contains over 5300 articles on almost every topic, camera, lens and printer you can imagine. Our membership model is simple, just $2 a month ($24.00 USD a year). This $24 gains you access to a wealth of information including all our past and future video tutorials on such topics as Lightroom, Capture One, Printing, file management and dozens of interviews and travel videos.
- New Articles every few days
- All original content found nowhere else on the web
- No Pop Up Google Sense ads – Our advertisers are photo related
- Download/stream video to any device
- NEW videos monthly
- Top well-known photographer contributors
- Posts from industry leaders
- Speciality Photography Workshops
- Mobile device scalable
- Exclusive video interviews
- Special vendor offers for members
- Hands On Product reviews
- FREE – User Forum. One of the most read user forums on the internet
- Access to our community Buy and Sell pages; for members only.
You may also like