


One of the most valuable changes to my printing workflow in the past few years is that I now run all my printing through ImagePrint (Highly Recommended). Every time a photographer says ImagePrint, there are two immediate criticisms… First, “isn’t that really expensive?”. Second, “isn’t that the program with the copy-protection dongle?” Both are true – ImagePrint is almost certainly the most expensive single piece of software the average independent photographer will own (it ranges from $399 for the most basic installation up to $2495 for full-featured ImagePrint Black for a 44-inch printer). These are one-time prices, not annual subscriptions, although there are paid upgrades. The upgrades are notably inexpensive compared to most software – a major version comes out every few years, and upgrade pricing is about 35% of the initial investment. All intermediate versions are free, and technical support is free and excellent. Perhaps the most important feature that comes with an ImagePrint Black license is the extensive profile library, including the ability to have ColorByte generate a profile for any paper you use free of charge.
ImagePrint is not especially expensive compared to other professional, limited-market software. Outside of photography, AutoCAD starts at $1700 per user per year and goes up rapidly from there with add-ons. If you don’t qualify for one of the (many) personal and non-profit use exemptions, ArcGIS can easily run into many thousands of dollars per user per year, depending on features. It wasn’t all that long ago that a $100,000 ArcGIS annual license was possible, although it’s now closer to $10,000-$20,000.
Essentially all RIP software, programs that package images for printing (other than drivers included with the printer, which are technically RIPs with very limited functionality) is relatively expensive and many RIPs use hardware copy protection. ImagePrint is a RIP optimized for photography (most of them are optimized for signs or CAD images like blueprints), and it is priced and copy-protected like a RIP, although it is one of the less expensive ones. ImagePrint is almost certainly less expensive than the printer it runs with, or than most of our camera systems, and it is generally less expensive than most annual cable TV bills (depending on ImagePrint features, printer size and cable packages). If you make money from photography, or if you love printing and want the best tools, it’s likely to make sense.
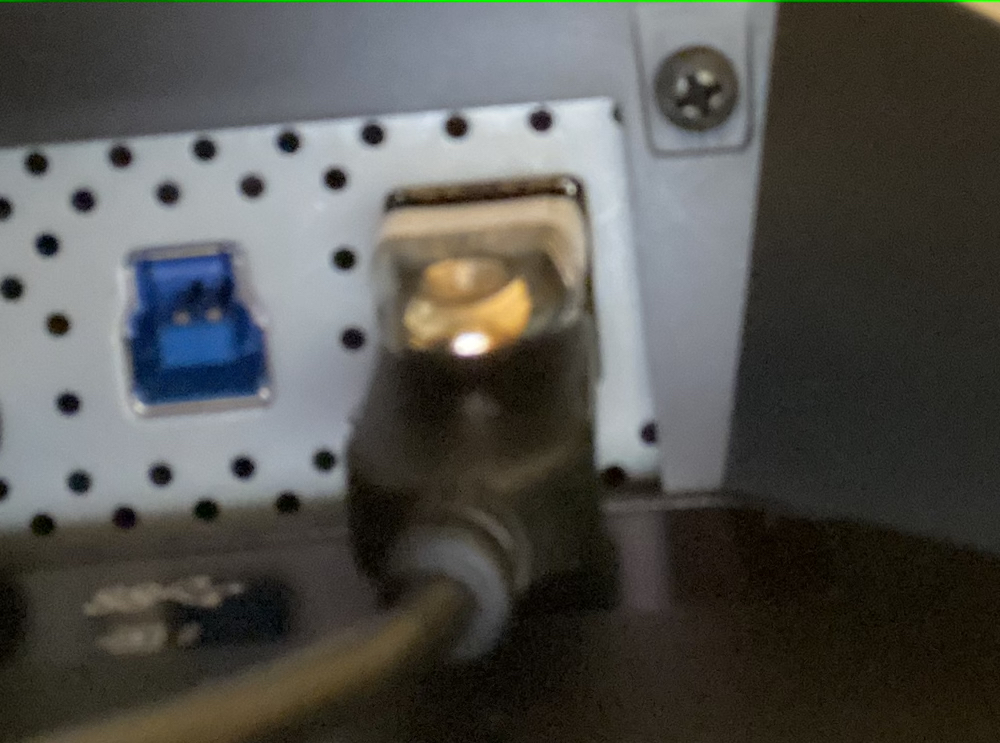
As for the dongle, it exists, and it’s not ideal, but it’s barely an annoyance in most circumstances. First of all, the only part of the full-featured ImagePrint Black that is affected by the copy protection is SpoolFace, the spooler that actually interacts with the printer. If you work in a studio with multiple computers, only one will manage print jobs, while all of them (including laptops) can send jobs to the printer through that host computer. This is perfectly in compliance, in fact encouraged, by the ImagePrint license. The host will almost certainly be a desktop machine on which you can install the dongle once and forget about it. The other computers can run the ImagePrint interface and layout engine without ever worrying about dongles. If you have a single desktop computer connected to the printer, that’s also quite trouble-free – just plug the dongle into a USB port on the back of or even inside the computer (some PCs actually have an internal USB port for just this purpose) and forget about it. So far, every desktop computer I’m aware of (including semi-desktop and all-in-one devices like iMacs and Mac Minis) has conventional USB ports that will work with the dongle. Even an all USB-C desktop wouldn’t be a big deal – adapters are cheap and easy to come by.
The one possible more annoying situation is if you print from a laptop – the dongle is both tiny and valuable, so you’d rather not be plugging and unplugging it all the time. It’s tiny enough that it could even stay attached to a USB port on a laptop that has conventional USB ports. The worst case is a USB-C only MacBook Pro (or one of the few USB-C only PCs), where the dongle has to be plugged into an adapter as well. In that situation, you almost certainly want to leave the dongle plugged into some stationary powered device that will connect to the laptop, since the adapter will make the combination large enough that you probably don’t want to leave it plugged in to the computer. Any powered hub or dock should work, although some non-powered adapters won’t (Apple’s single-port USB-A to USB-C adapter works perfectly, but an unpowered OWC portable multi-port adapter is unreliable). The ideal location is a USB port on your monitor – you’ll probably be seated at your external monitor when printing, and monitor hubs have power. After experimenting with three or four ways of connecting the dongle, I have it on an inaccessible USB port on the bottom of my EIZO monitor, and I forget it’s there.
Why would you want to print with a RIP? Your printer came with a driver, and that’s free. There are three basic reasons, and all of them apply to pretty much every photographer who has followed this deeply into a series of printing articles! The first is that a RIP is a scaler, the second is that a RIP is a layout engine, and the third is that many RIPs (including ImagePrint Black) handle color profiling and driver functions much better than drivers included with the printer. Other software (including ImagePrint R.E.D) that has many of the scaling and layout functions of a RIP actually uses the manufacturer’s drivers and color profiles, so it does not gain some of the benefits in color management or print quality of a true RIP – but it brings the scaling and layout benefit to any printer, while the true, driver-replacing RIP only works with a smaller number of printers that the RIP manufacturer has done extensive research on and written software specifically for.
Every print we make is scaled somewhere along the line, except in the unlikely situation that the native dimensions of the image file are exactly the height and width of the print at 300 or 360 dpi (depending on the printer). Maybe you’re in the habit of making prints 27.52 inches in the long dimension (Nikon Z7/D850 on a 300 DPI Canon printer), or maybe you have an A7r IV with even more resolution, but a 360 dpi Epson printer, and you usually print 26.4 inches across. If you aren’t using those odd sizes or the equivalent for your camera and printer combination, you are scaling – the question is simply where the scaling is taking place.
Photoshop has a pretty good scaler in its image size function, but not in its print command, and Lightroom Classic has a good one in its print module. If you print from Photoshop, you need to use the image size command before printing, setting the final size to the size of your print at the printer’s native resolution. Printing from Lightroom Classic, it’ll take care of the scaling as long as you have the “print resolution” box checked and set correctly to your printer’s native resolution. If you are printing directly from effectively any raw converter other than jack-of-all-trades Lightroom Classic, you are probably scaling in the print driver, unless you are exporting the image at print size and the correct resolution for your printer (in that case, you are using your raw converter’s scaler, the quality of which varies by converter).
Unless you are actively scaling someplace else in your workflow to exactly the dimensions of the final image at the printer’s native resolution, the print driver is performing the final scaling – and it is generally using a simple nearest-neighbor interpolation, the worst possible choice for photography. Lightroom Classic has a good automatic scaler in the print module that avoids the terrible driver-based scaling, but I am not aware of any other widely used photo editor that has this capability (and Lightroom Classic has other problems, including an unenthusiastic manufacturer, that I have covered earlier).
An important note about printer native resolution is that the very high, asymmetrical native resolutions you sometimes see specified (2400×1200 dpi, 2880 or even 5760×1440 dpi, etc.) are NOT your printer’s native resolution for photography. Those high numbers are the maximum resolution at which the printer can lay down a line of dots in a single color. Since photographs need millions of tones achieved by blending dots of different colors (even black and white prints get their many grays that way), the maximum effective resolution in color is much lower. Fortunately, the human eye can pick out very thin lines, but is much less good at spotting tiny details in continuous-tone images. 300 and 360 dpi color resolutions look very, very good, and are rarely the limit in the acutance of a print – something else like the sensor, the lens, the resizing or the precision of the focus gets in the way first. All Canon printers I know of are 300 dpi, while many Epsons are 360 dpi. The newest Epsons, interestingly, are 300 dpi. Some printers allow a double resolution (600/720 dpi), which is achieved by running the printhead over the same area twice, slightly offset. If it makes any difference at all, it is only apparent in very specific circumstances, primarily portfolio prints meant to be viewed at very close differences. It is invisible in prints hung on a wall, books, greeting cards or any other use.
If you want to avoid driver scaling, which you do if you care about your prints, there are two choices. First, you can manually scale each print to the size you want at your printer’s output resolution, using Photoshop, Perfect Resize, Topaz or any other tool of your choice (I’ll take a look at scaling tools soon). Using one of the sophisticated, dedicated scaling tools, this is probably the highest quality method. The problem is that it leaves you with a plethora of print-ready files at multiple sizes – if you print the same image at five sizes, you need five files.
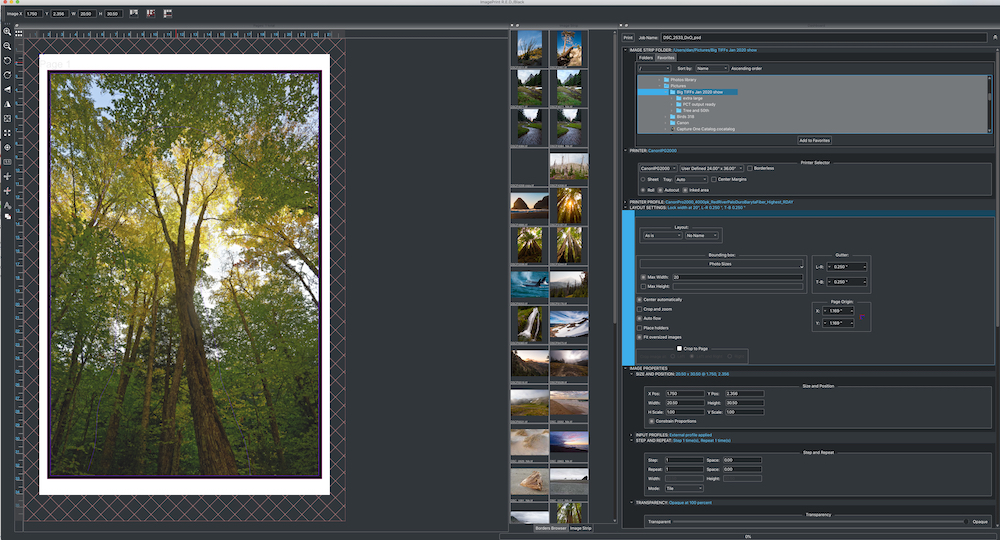
The second is to use a printing package like ImagePrint that takes care of the scaling for you. If you’re printing with ImagePrint, you simply need to edit your file to taste at camera resolution, never resizing up or down for printing. Use any editor you want – DxO, Capture One, LR Classic, On1, etc. When you get the file into ImagePrint, choose your print size and ImagePrint will resize it to the appropriate resolution for your printer. ImagePrint handles this on the fly, without ever needing to save multiple resolutions. ImagePrint’s scaler is a sophisticated variation on a bicubic algorithm – the same basic technology used by Photoshop’s Image Size at its highest quality settings, but probably a better interpretation of the technology.
The most sophisticated fractal and AI-based scalers (Topaz Gigapixel AI, Perfect Resize) might produce slightly better results at ultra-high magnifications – I haven’t tested them against each other and ImagePrint yet. Unlike Topaz or Perfect Resize, ImagePrint automatically applies its scaler at print time – you can make everything from 4×6” to 40×60” prints from one file, since ImagePrint scales when it prints. If the fractal or AI scalers have a role, it is for single, very large prints (or large-ish prints from lower-resolution files), where the absolute ultimate in resizing could make a difference.
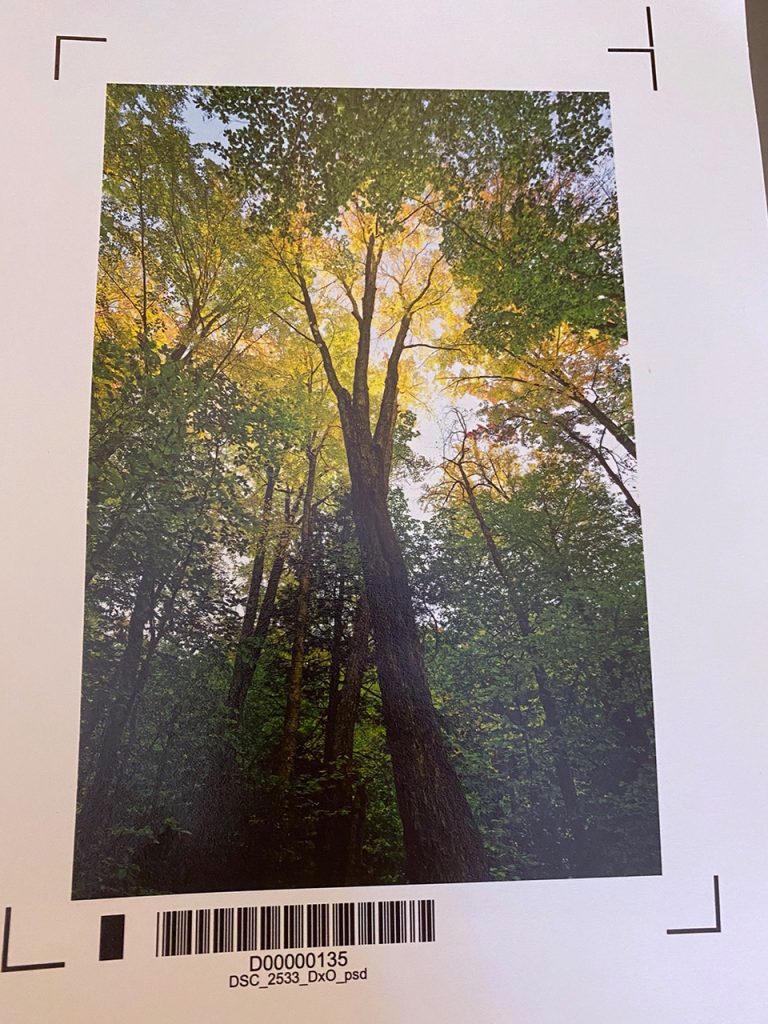
For multiple print sizes, ImagePrint’s excellent scaling saves an enormous amount of time and eliminates one of the most common sources of printing error. It is all too easy to send a file to the printer at, say, 16×24”, not realizing that it’s below printer resolution at something like 187 dpi, or even above printer resolution, say at 409 dpi. In either case, the print driver will happily accept it and perform a poor-quality nearest-neighbor resize to 16×24” at 300 or 360 dpi. The print would have looked better if resized any other way – even the lower-resolution example would have been fine for most uses and viewing conditions, but needed a decent resize. Since ImagePrint always scales to printer native resolution (unless explicitly told not to – an option in place for things like blueprints that should never be scaled automatically), it eliminates the error of forgetting to resize elsewhere and forcing the driver to take over.
Related to the scaler, ImagePrint (both R.E.D. and Black) has an excellent automatic layout engine. Especially with large, roll-fed printers, which are by far the most cost-effective way to do any significant quantity of photographic printing, most of us often end up printing more than one image (or multiple copies of the same image, often in different sizes) on a page. If we’re not doing that, it’s because it’s too much of a pain. How many 24” printer owners want to be confined only to ~16×24” (across the roll) and ~24×36” (down the roll) prints? Those sizes are approximate due to printer margins, but they are the only ones that fit directly on the roll, assuming you don’t want a big border because you’re matting. If you’re not using an overmat, or want a significant amount of border showing beneath the mat, 20×30” does pretty well with a nice border, and 13×19” or 14×20” fit pretty well going across with a border. With a decent Rotatrim and some patience with layout, some smaller sizes work as well.
With a 44” printer, the situation is even worse – 24×36” works quite well across the roll with a border, especially on canvas prints where a significant border is needed for the gallery wrap, and 40×60” is perfect if going down the roll (the 2” border is essential for handling prints that size!). Those are very large print sizes, useful to be able to make, but not most photographers’ everyday sizes. There is no longer any real economy advantage to 44” printers over 24” printers – some years ago, Canon’s 24” models were limited to much smaller ink cartridges than the 44” machines could handle, and if you printed enough, the ink cost difference was substantial.
Current Canon and Epson models both use the same ink cartridges, and the paper cost is generally proportional to the area (17” and smaller printers use smaller ink cartridges that cost more per ml, and the smaller paper IS often more expensive per unit area). Canon does supply much more starter ink with a 44” printer than a 24” printer, which brings the cost differential down. Epson supplies the same cartridges with both printers. At this point, the reason to choose 24” or 44” is whether you want to make very large prints (and have the 40+ MP camera files to handle them), and whether you print canvas, where 24” can be small for gallery wraps, since it limits you to about a 20×30” print face area.
With a 24” printer, and especially with a 44” printer, you will almost certainly want the ability to gang prints on the roll. Either a 24” or 44” printer does a nice job making 8×10” prints (two across on 24”, four on 44”), and the paper math isn’t bad at all. A 44” printer also does well on 8×12” prints three across, although a 24” printer invariably ends up with huge borders unless you fill in with smaller prints. 5×7” prints work well on either machine, and 16×24” prints are a pain on both (unless you’re willing to accept slightly undersized 16×24” prints on 24” paper, which is what I used prior to ImagePrint).
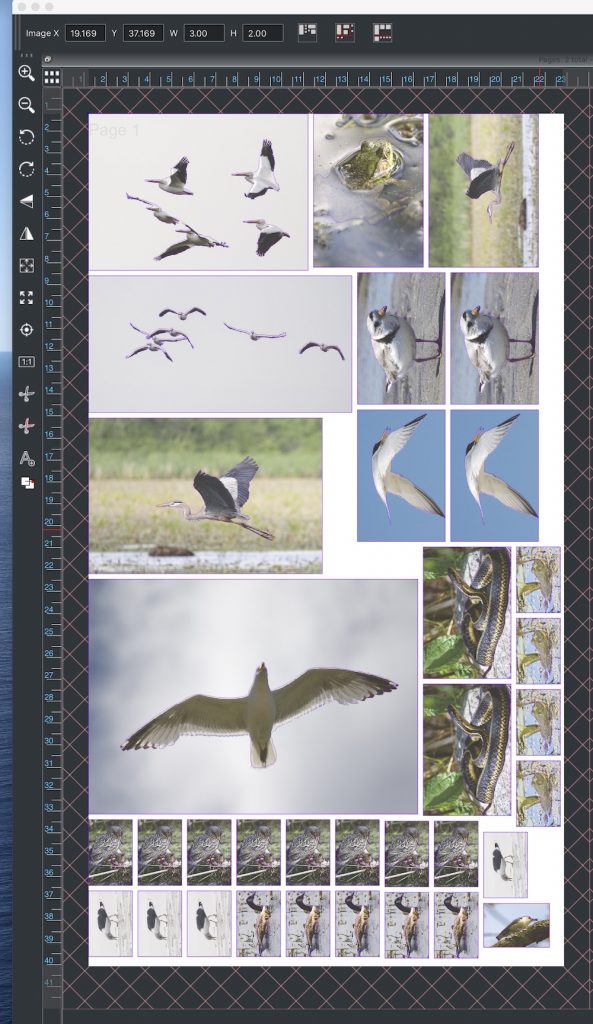
Where ImagePrint is very useful to large-format printer owners is that it automatically gangs prints on the roll for you, including different sizes. Lightroom Classic has a manual layout engine that makes multiple prints of the same size relatively easy – and, with some patience, you can manually create layouts with different sizes. Most other software, including Photoshop, DxO and Capture One, only prints one document at a time, so the only way to gang prints is to make a single “print” that contains all of the images. With ImagePrint, you simply tell it what you want to print, and what sizes each needs to be, and it figures out how to fit them on the paper. It will even account for a layout that doesn’t use the full length of the selected paper size, and cut it off the roll early instead of wasting paper. You can set the minimum distance between images and add borders of your choice, and all of this works seamlessly with TIFF,JPEG and PSD files. ImagePrint will also handle PDFs, with some minor restrictions (including that their Narrow Gamut technology for producing toned black and white images doesn’t work with PDFs).
If you are producing 16×24” prints that are wasteful on both 24” and 44” printers, for example, you can gang 5×7” prints next to them on a 24” printer. On a 44” printer, there are even more options, including putting 16×24” prints alongside each other (with one print going across the roll while its neighbor goes down the roll). This is all theoretically possible in Lightroom Classic, in a desktop publishing package like InDesign, or even in Photoshop – but ImagePrint makes it much easier. ImagePrint is capable of figuring all of this out without photographer intervention, and it offers three different options for how tightly to pack prints, trading off difficulty of cutting for paper efficiency. At the loosest setting, the images are very easily cut apart by hand with a Rotatrim (or even a scissors if the edges are going to be behind a gallery wrap or under a mat anyway), while at the tightest setting, an automatic cutter is about the only practical way of cutting them. ImagePrint has an optional (and still complex, the way inkjet printing itself was a decade ago) feature called Cut-it-Out that allows it to drive automatic cutters, also known as cutting plotters, a longtime tool in the sign industry that have barely begun to make it into photographers’ studios. Much more on Cut-it-Out later, but automatic cutting now is where inkjet printing was in the late 1990s or early 2000s –amazing, but still requiring a substantial amount of fine tuning to work properly.
ImagePrint will add borders, backgrounds, frames and other elements to your images – maybe not as useful for landscape photographers, but extremely useful for wedding photographers, portrait studios and others who sell “decorated” versions of images. Frames are simple colored lines that can be any thickness, and placed either immediately adjacent to the image or separated by a distance that ImagePrint refers to as the “matte”. The matte can be white, filled with a color, or transparent. A transparent matte will behave exactly like a white matte, except if there is a second image underneath the main image. If there is a second image underneath, it will show through in a transparent matte. This could be useful with, for example, an image of textured rocks or an interesting sky that can frame another, more narrative image.
A border is somewhat like a frame, except that it is not restricted to a solid line. Any Photoshop file with a transparent section can serve as a border – the image will show through the transparent area. That could be a simple gradient, it could be line art, or it could be one image showing through another. An example of a file that uses a sophisticated border is your average baseball card. Create the art around the photo, leaving a transparent (not white) space for the player’s picture or download it (baseball card templates are readily available online), then place the psd file into ImagePrint’s border folder. Drag the border over the image in ImagePrint and the image will resize to fit the border. ImagePrint has smart crop and zoom tools to position the player correctly in the “image hole”, and a text tool to add the player’s name. In a similar manner, borders can create products like holiday cards, business cards and the like, although a border only supports one image.

There are various other layout features in ImagePrint – one that will be of interest to many LuLa readers is a painless way of doing gallery wraps. If you’re printing on canvas and need to mirror the edges of the image to go over the stretcher bars, ImagePrint can literally do that in one click. ImagePrint can also use one image as a background to various other images (think wedding album or yearbook page where there is a relatively transparent image in the background with several full-strength images on top of it). Essentially any form of image layout you might want is available in ImagePrint. Whether you are printing a single large image, possibly with some sort of border or gallery wrap, multiple images on a roll to be cut apart, or a complex layout of images and graphics, ImagePrint is capable of the layout you need.
If you can’t lay it out in ImagePrint, the next step up in layout flexibility is full-fledged desktop publishing software like Adobe InDesign, which offers nowhere near the photography-specific printing feature set of ImagePrint. Photographers who do a lot of work with text and images together will probably want both ImagePrint and InDesign, because their strengths are complementary. Before I started with ImagePrint, I often used InDesign to lay out print jobs, especially in cases like greeting cards or business cards, where multiple items fit on a page and they are designed to be cut apart. Now, there is no question that I would do that job in ImagePrint, which would fit the cards on the page automatically and do a much better job with scaling, as well as driving the cutting plotter to cut them apart automatically. I’d still use InDesign to lay out an article with photographs (that’s theoretically possible in ImagePrint, but the text functions are intended for writing a few words of captions, not for long body text).
ImagePrint Black also has a feature (available at extra cost for the less expensive ImagePrint R.E.D.) that will appeal to portrait studios and others who often print packages of images for a single client. The ImagePrint Template feature allows the photographer to quickly print, for example, an 8×10” image, 2 5×7” images and 8 wallets, all from the same file, with automatic layout. Some templates come with ImagePrint, and it is easy to create your own. Templates can contain features like frames, borders and background images, making it easy to print a sheet of baseball cards for each member of the team. The template can also contain a spot for a different image – the team photo, plus a 5×7” photo of a specific player, plus a bunch of cards, could all be a template – running off a bunch of them is as simple as changing the individual image, player name and stats.
Of course, the challenge is the economics and quality of doing this kind of printing oneself versus sending it off to an online lab. Even though ImagePrint makes it easy, the online services are priced very aggressively and there is still some labor savings. The big advantage to ImagePrint and printing it yourself is quality. Most online print services use four-color inkjet printing, while the Epson or Canon in your studio is an eight or even twelve-color machine. With well-chosen papers (no need to print baseball cards on Platine), the cost per square foot is comparable or even cheaper to print yourself – and clients will notice the higher quality. Six-color online printing, while available, is considerably more expensive than four-color, and six-color printing carefully done is more expensive still.
Really good eight and twelve-color printing on superb papers is available from some online labs, but it is expensive ($50 or more even for modest-sized prints, going up well over $100 for large prints). A good printmaker can easily beat the quality of anything available online, including high-end eight and twelve color prints, and ImagePrint’s efficient layout tools can make doing your own printing cost-effective, especially if you are enough of an early adopter to be happy fooling with a cutting plotter and Cut-it-Out. The other advantage to having a significant in-house printing capability is that you can also sell higher-end prints on beautiful paper – they aren’t terribly expensive to produce, and they can add a lot to an order. It costs about $30 to produce a 24×36” print on the finest papers in the world, even accounting for my usual wasted print rate, and such a print sells for $500 or more.
ImagePrint R.E.D., the “economy” version of ImagePrint, is basically an extremely capable layout and scaling package – it packs all the tools mentioned above (although templates and Cut-it-Out are add-ons). ImagePrint R.E.D. stands for “runs every device”, and it works with the manufacturer driver to print to every printer. They really do mean every printer – sending a photograph to the random $99 Epson WorkPlace color multifunction printer I use to print papers and scan receipts worked just fine (and it looked better than I’ve ever seen that printer look, although not nearly as good as even an inexpensive real photo printer). Of course, nobody is going to buy ImagePrint to drive a random multifunction printer that doesn’t even support profiles – but it’s interesting proof that it really does run everything – I doubt John Pannozzo at ColorByte has ever put a moment of thought into that particular Epson WorkPlace multifunction printer! There is no limit to the number of printers you can use with an ImagePrint R.E.D. license, although it will only print to one at a time, and you need to buy a version of R.E.D. sized for the widest printer you’ll use it with.
Even if you have ImagePrint Black for your main printer, it may be worth adding R.E.D to your license if you have other printers around. R.E.D.’s ability to significantly improve both image quality and workflow with odd printers could help in several situations. Do you have a portable printer you take to events? Do you end up being the “designated photographer” at holidays, and get asked to make prints on some friend or relative’s printer? Perhaps most creatively, Epson has released the F570, a relatively compact and affordable dye-sublimation printer that will produce images for transfer to metal, t-shirts, mugs and many other surfaces. ImagePrint R.E.D. will run the Epson F570, and I am trying to get a F570 and the associated heat press in for review in a future installment of our printing series. The ability to print on that wide range of surfaces with the familiar and convenient ImagePrint will add a tremendous amount to a photographer’s repertoire.
Moving up to the full-featured ImagePrint Black adds an important additional tool – the best color profiles and drivers in the business, optimized for a relatively small number of higher-end printers. ImagePrint Black supports the Canon Pro Series printers, from the 17” Pro-1000 on up to the 60” Pro 6000/6100 (but not the older iPF series or the older and lower-end Pro-1, Pro-10 and Pro-100), and the last several generations of Epson’s photo printers, from the 13” P600 (and predecessors) on up to the 64” P20000. Support for older Epson printers runs all the way back to the venerable Stylus Pro 7600/9600, released in 2002. ColorByte is working on support for the newest Epson models – the P7570/9570 (P7500/9500 in some regions), P700 and P900 The support list is limited – no HP printers, no older Canons, and slight delays with brand-new models, but that allows ColorByte to really optimize their software for each individual machine.
ColorByte has written their own drivers and dithering algorithms for ImagePrint Black, and they are significantly better than what the manufacturers have done. Our photo printers are really versions of printers originally made for the sign and banner industry. The photo versions use heads with a greater number of channels than similar sign and banner printers, but much else is shared, and the manufacturer drivers are at least closely related. Even among photo printers, many are sold to Costcos, UPS Stores and other businesses that use them to print photo posters on inexpensive luster and gloss paper. The market of photographers and independent high-end print shops printing art is vanishingly small, compared to the graphic arts, sign and poster market – of course the manufacturers are going to focus their energy on the big market.
ColorByte is a tiny company that can focus its efforts on the niche market of fine photography, and it shows. There is a noticeable difference (impossible to show in a 1000 pixel web jpeg) between an image sent through ImagePrint Black and the same image through manufacturer drivers. ImagePrint’s version is less grainy and has more color depth, even with every precaution taken to avoid the detrimental effects of the manufacturer driver (sending the image carefully resized to the correct size at printer resolution with the profile applied prior to the driver). If the driver has to resize the image, add a border or otherwise change the image in any way, the difference becomes much greater.
In addition to the greater maximum quality, ImagePrint Black eliminates a number of pain points where it is easy to set the driver incorrectly. Printing through ImagePrint Black, there is no way to double-profile, or to fail to use a profile at all (there is a special unprofiled setting for test targets, but you have to work to find it). ImagePrint automatically sets printer quality settings to optimized values for the paper in question – often somewhat higher quality than the driver will allow. There is no way to have a wrong media type compromising the results.
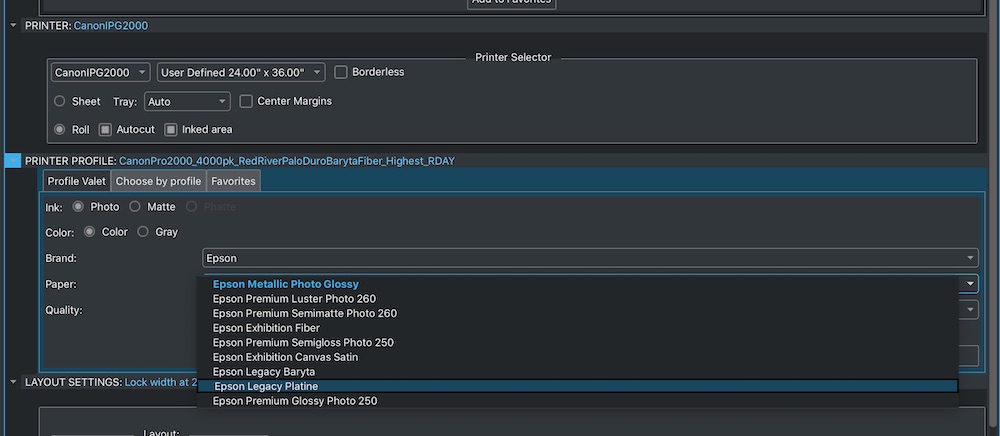
ImagePrint Black uses custom ICC profiles made by ColorByte, rather than profiles made by the paper manufacturer. It comes with a huge selection of profiles, and ColorByte will gladly make a profile for your favorite paper and printer combination – the service is included in the cost of ImagePrint. These are very high-quality profiles, which not every paper manufacturer bothers with, and they even provide versions for various types of illumination, which no paper manufacturer bothers with. Since ColorByte is using their own quality and dithering settings, the ImagePrint profiles only work through ImagePrint Black – the manufacturer driver is laying down the ink somewhat differently, and it would require a different profile.
There are profiles in ImagePrint Black for combinations for which manufacturer profiles simply don’t exist. One prominent example is Epson paper on a Canon printer. Epson doesn’t want to encourage the use of Canon printers, so they don’t provide the cross-brand profile. Canon, conversely, would prefer photographers not use Epson paper, so they don’t provide that profile either. Canon paper on an Epson printer has a similar problem, but Canon doesn’t distribute as many high-end papers that are really tempting.
There are certain cases where Epson rebates make their paper quite a bit cheaper than the competition. As of July 2020, Epson has a promotion running that rebates the cost of a third roll of many of their highest-end papers. Epson Legacy Platine is about 10% more expensive than the very similar Canson Infinity Platine before the rebate, but ends up being 70-75% of the cost if you buy three rolls. This is a common promotion that Epson seems to have running at least half the time. The two papers are actually similar enough that it is possible to print the Epson paper using a Canson Infinity profile on a Canon printer (especially because Canson Infinity provides a custom media type for Platine) – but it is not ideal. The ideal solution is to have a cross-brand profile, and that means either ImagePrint Black or building a profile yourself.
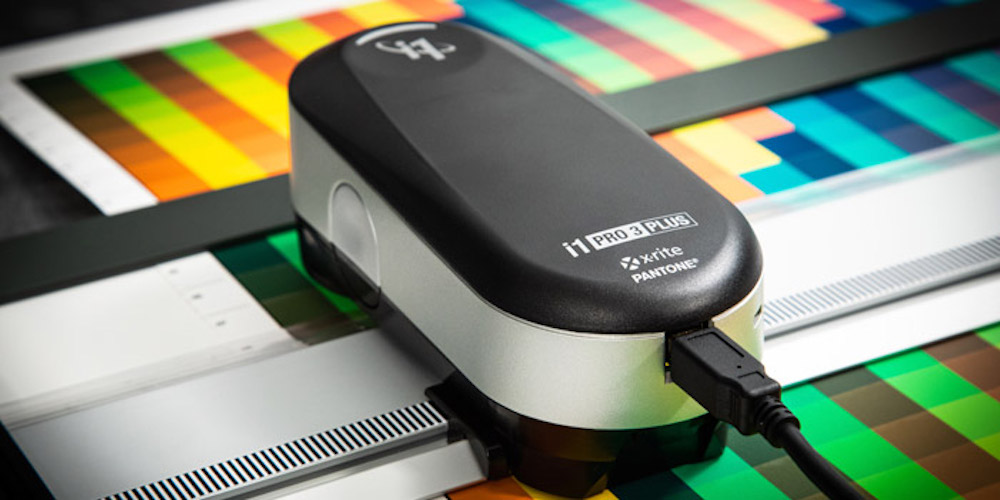
Compared to a quality profiling solution, ImagePrint Black is not especially expensive. There are less expensive printer profiling tools on the market in the $400-$500 range, such as the i1Studio (formerly the ColorMunki) and the SpyderX Studio. These packages are using less accurate measuring instruments and limited to smaller targets than the truly professional gear uses. A professional-grade profiling tool like the market-leading i1 Pro3+ and the software to use it will be at least as expensive as ImagePrint Black (around $1500-2000 compared to IP Black at $895 for a 17-inch printer, $1495 for 24” and $2495 for 44”), and there is quite a bit of labor and some skill involved in making profiles. An automated profiling system like the i1iO or the i1iSis eliminates much of the manual labor, but is in the $5000 range. Getting into building profiles in any serious way is expensive, and it takes both skill and time. The exception is the HP printers with built-in profiling capability – with those, it is easy to profile your own odd papers (and run the printer with ImagePrint R.E.D.) I’ve never used one, but they’re definitely on my “I’d love to review this” list.
If you only use a couple of papers, you can have profiles made for you – but part of the fun of printing is trying new papers. Colorbyte’s profile library is a MAJOR win for ImagePrint, and their offer to profile anything they don’t have is significant as well. Few if any profiling services bother to make different profiles for prints viewed under different illumination, and very few of us go to that level of detail when making our own. Can other means of acquiring profiles work? Sure… Do I know of anything that works as well, that gets that last little bit out of a print quite like ImagePrint Black? No. Between the profiles, the driver algorithms and the scaling engine, ImagePrint Black is quite simply the highest-quality printing engine I have had the pleasure of using.
In over 20 years of color printing, I have never seen results as good as my present combination – the Canon Pro-2000, Canson Infinity Platine (and other papers when the situation calls for it – I’ve been doing some fun prints on Canon Adhesive Vinyl lately, of all things!) and ImagePrint Black – all (very) Highly Recommended. I’ve used many of the best printing technologies, and had prints made using others, from Ilfochrome to dye sublimation, LightJet and many makes and models of inkjet (I’ve never used dye-transfer, but I’ve read quite a bit saying that really good inkjet has finally reached that level). No color printing technology has ever been as good as what the best printers, papers and software can do today – and the existence of color printing technology at this level allows more artistic expression in our prints than we’ve ever had before.
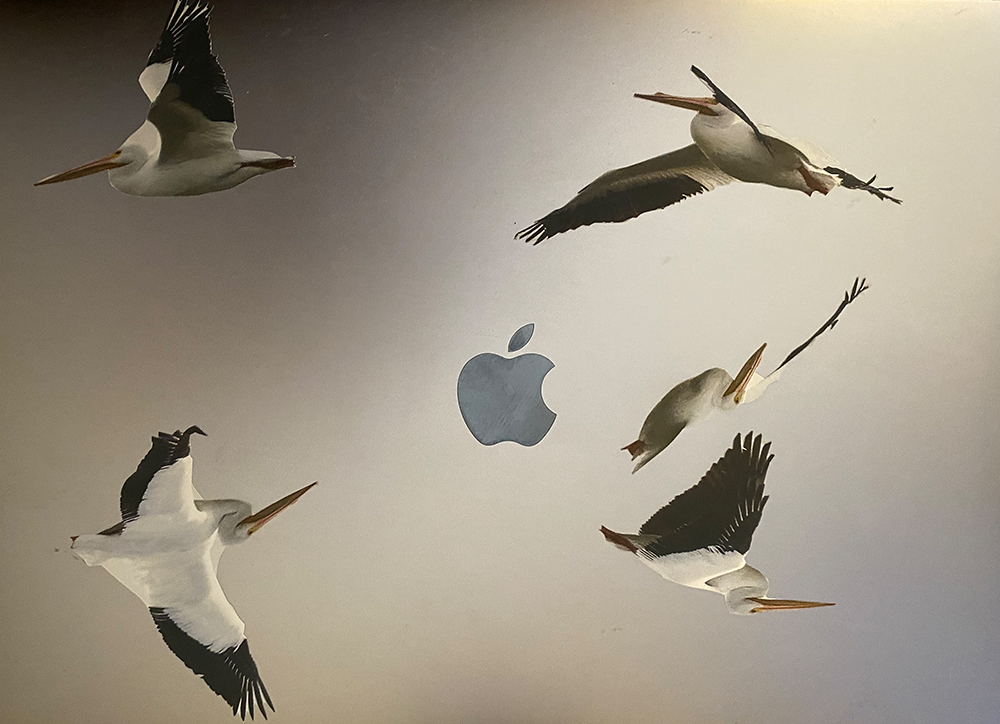
The next installment of Printing will look at two additional features of ImagePrint beyond basic printing, and at the EIZO CS2740, a reference-quality 4K monitor that also makes life easy for users of newer Macs. Cut-it-Out is the addition to ImagePrint that allows very precise control of cutting plotters. With Cut-it-Out, a cutting plotter and some patience, the photographer can not only cut their own business cards, fine art cards and other simple cut products, but offer these items to customers as well. Beyond the basic squares and rectangles, Cut-it-Out can cut complex contours – it has been a lot of fun to experiment with some wildlife photography.
Narrow Gamut is a black and white toning feature that allows precise control over the addition of color inks to black and white prints. If you’ve ever wanted to selenium tone an inkjet print, Narrow Gamut is a beautiful and easy way to do it (and today’s baryta-type papers are VERY close in surface to Oriental Seagull fiber-base of old). These technologies are there to help us experiment creatively. Ansel Adams, in late editions of The Print, commented that “I am sure the next step will be the electronic image, and I hope I shall live to see it. I trust that the creative eye will continue to function, whatever technological innovations may develop”.
Dan Wells
August 2020


Elevate Your Vision


Read this story and all the best stories on The Luminous Landscape
The author has made this story available to Luminous Landscape members only. Upgrade to get instant access to this story and other benefits available only to members.
Why choose us?
Luminous-Landscape is a membership site. Our website contains over 5300 articles on almost every topic, camera, lens and printer you can imagine. Our membership model is simple, just $2 a month ($24.00 USD a year). This $24 gains you access to a wealth of information including all our past and future video tutorials on such topics as Lightroom, Capture One, Printing, file management and dozens of interviews and travel videos.
- New Articles every few days
- All original content found nowhere else on the web
- No Pop Up Google Sense ads – Our advertisers are photo related
- Download/stream video to any device
- NEW videos monthly
- Top well-known photographer contributors
- Posts from industry leaders
- Speciality Photography Workshops
- Mobile device scalable
- Exclusive video interviews
- Special vendor offers for members
- Hands On Product reviews
- FREE – User Forum. One of the most read user forums on the internet
- Access to our community Buy and Sell pages; for members only.
You may also like


