Using Bokeh and Natural Lighting For A “Rembrandt” Like Complexion
As we continue to marvel at the amazing clarity digital photography has bestowed upon us, today I want to discuss how to make digital photography, well, a little less digital. There are many different methods to take the crispness out of a digital photo, many include using post-production software that use layers to transform the “look” of a digital photograph. But, in this discussion, we will create soft-focus like compositions the old fashion way, by using a variety of camera dynamics and natural lighting.
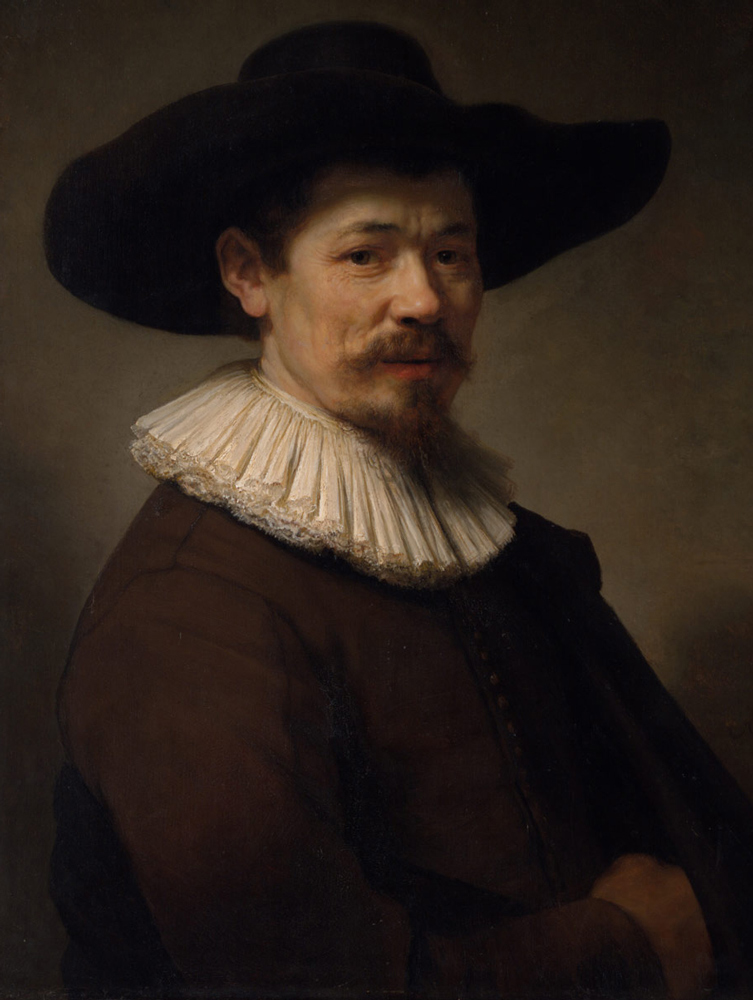
Natural lighting is a great tool in creating wonderfully soft and emotional interpretations no matter what genre of photography you are practicing, but surely, close up portraits of people and flora are two perfect examples to explore this with. Some of my perspectives from behind the viewfinder has been shaped by many variables including the study of the magnificent oils of Rembrandt, especially his portrait compositions. Like this example shown in Fig 1. The amazing glow that brings depth to many of Rembrandt’s portraits, is to me, breathtaking – and something I strive for when composing photographic portraits.
I find a bright, but grey overcast sky gives the best results for illuminating facial and flowering petals resulting in a “Rembrandt” like appearance. Alternatively, shooting early in the morning at sunrise, and again just before the sun sinks below the horizon, are also satisfactory in capturing this type of look for your subjects.
There is one caveat worth noting: in many situations, especially indoors, illumination will be low, so one needs a steady hand or if applicable, a tripod, which goes without saying, indeed.

Another means in softening any type of photograph, whether digital or film-based exposures, is opening up the lens aperture, thus putting more bokeh (or blur) surrounding the point of focus into a composition. While you read this, begin studying Figure-2 a portrait captured on film and compare it to Figure-3, a 2016 portrait of my other grandchild, Shiloh, captured on a Canon 5D Mark II. In both photos I am using 50mm lenses (film-based photo was captured using a Minolta F/1.7 50mm Rokkor-X lens, and the digital exposure using one of Canons L-series lenses, an F/1.4 50mm lens – two beautiful pieces of glass which are my go-to-lenses for a lot of close up work). As I always tell students of photography, be sure to focus on the eyes – if the eyes of your subject are in focus, it is likely a successful photograph will result, and this is especially true when using large-sized apertures that create a shallow depth of field. Similarly, when photographing a group of flowers, be sure to catch at least one flowering bud or leaf as a focal point, and be sure focus is crystal clear. More about focusing, shortly.

As you may imagine, capturing both these child portraits was a bit challenging. In Figure-2, using one of my last rolls of K-64 (as Kodak announced they ending its production) I dialed in the slide films native ISO. Natural lighting was good, as light was pouring in through a large glass sliding door to the sitters right. Though Alana really liked me pointing the lens at her, she was always moving, and using a film camera without the 2.5 fps motor attached, I was triggering single frame exposures: I think I triggered 3 to get this one (in focus) composition. Post-production included increasing the overall exposure by just a bit and to remove dust specs before converting to black and white (BW) via NIK Silver Efex Pro-2 software.
In Figure-3, Shiloh did not want to look at me too often, so I had to settle on this perspective on this day. But, thankfully, Shiloh was much more still than Alana in Figure-2, as the lighting was terrible: the wood-framed windows at this location allowed only a minimum of the daylight to enter the room, making capturing this portrait as challenging as the first example.
Reiterating my opening remarks, in many situations, you will need to be very patient when using natural lighting, as slower speeds will ensue and you need to have a steady hand. If the situation allows, by all means, place the camera on a tripod and trigger the shutter remotely. However, in both these portrait examples, I was holding the cameras.

Figure-4 is a portrait of our third grandchild, Isla Marie. For this shot I dialed to ISO-1000 because Isla was some distance from the natural outdoor lighting, the addition of 3 incandescent bulbs (in a ceiling fan) added a little more (and warmer) illumination. Isla was occupied opening another Christmas gift and paid little attention to me: a perfect time to crawl up next to her – I lay on my stomach getting really up close and personal – I focused on Isla’s right eye: Canon F/1.4 50mm lens was set wide open at F/1.4 for maximum bokeh and to eliminate the background. I braced the camera and captured this at 1/30sec.
Post-production was limited to fix a red color cast caused by the 3 incandescent bulbs, thus revealing more neutral colors I was hoping for. Also, it is worth noting, I did not try to correct the minimum of “digital noise” (from shooting at ISO-1000) because it added to soften the composition. The results were a 3-D like and the melting of colors that resemble a watercolor painting – I was truly excited with the results!

Figure-5 is a Morning Rose portrait captured in 2016: overcast sky allowed for very even lighting and a minimum of shadows. 5D Mark II was set on a Manfrotto Tripod & Head – and again, my go-to-lens the Canon F/1.4 50mm. Set wide open at F/1.4 for maximum bokeh and to eliminate the background, I remotely triggered at 1/40 sec. The resulting image is another 3-D like presentation, where you can almost reach out and feel the texture of the petals. Post-production included adding exposure to the entire image file. The resulting details in the petals are from careful focusing and using a tripod and a remote triggering device to eliminate as much camera shake as possible.
Figure-6 Angel Trumpet was shot using an ISO-640 setting on the Canon 5D Mark II and of course, the Canon F/1.4 50mm lens. Set wide open to allow as much light as possible through the glass and onto the digital sensor – the balance of high ISO and wide-open aperture allowed me to hold the camera for this shot. The shot was captured at 1/500 sec. The extremely shallow depth of field and higher ISO resulted in another image full of depth and texture and without extended post-production, except to adjust the exposure a bit higher than what the camera settings revealed. Natural backlighting from a 6:30 to 6:45 am sunrise in Demopolis, Georgia really helped capture the depth in this composition.
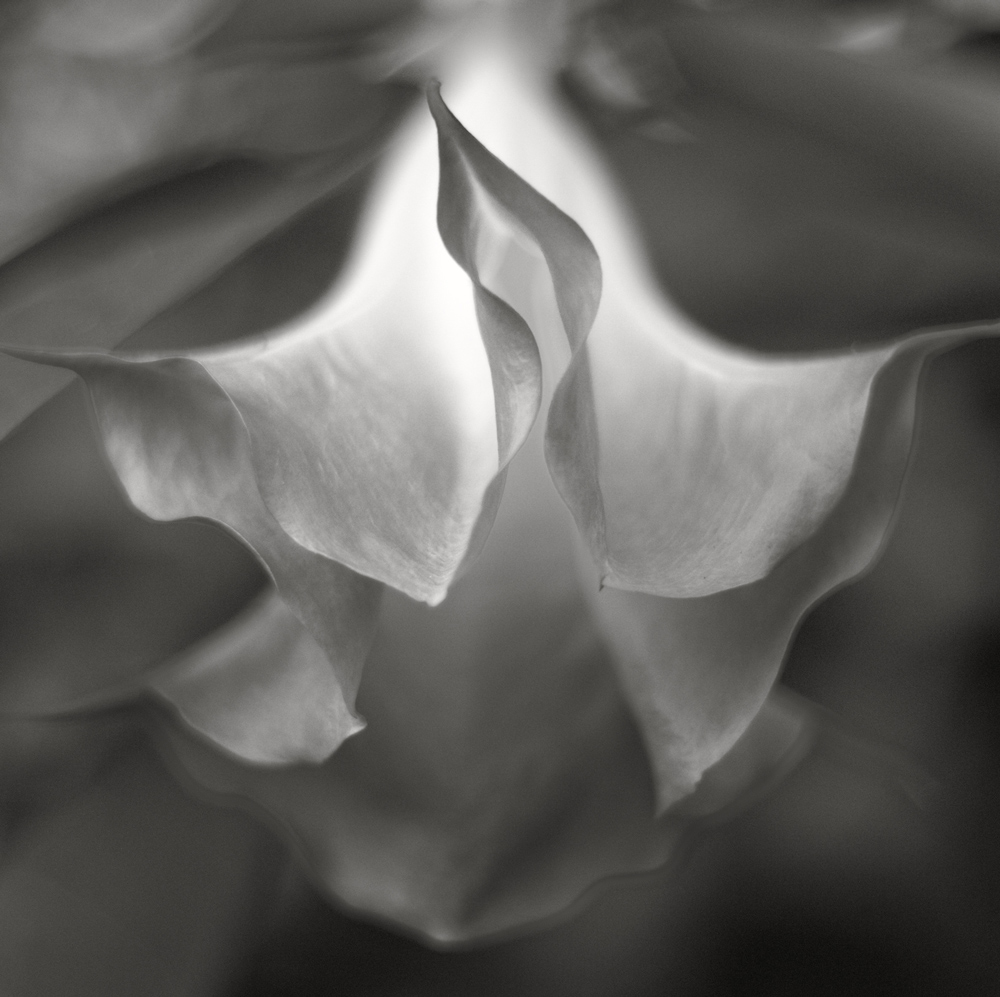
Focusing: the two flower photographs are good examples on how manual focus is very important in producing these types of photographic compositions. I always have students in my workshops turn off the auto-focus on their lenses and practice using manual focus. In the case for photographing flowers, honestly, manual focus is the only sure way to achieve positive results. Here is the way:
In both Figure-5 and 6 notice the different layers of petals: each lay claim to a different plane (and depth) in the frame. When shooting with a very large aperture, always be aware you are dealing with a very shallow depth of field. As a consequence, and in these examples, we can focus on two or three different individual parts of the Rose or Angel Trumpet and get extremely different results, some of which would be unsuccessful as a powerful image. Using auto focus is just not a viable option here, as the camera will decide the point of focus, and unless you use a few other focus-lock options (which take extra time) manual focus represents the fastest and best option (and on some cameras, the only option) for optimum results. Similarly, when photographing children or adult portraits, and especially if you plan to try the lessons discussed in this article, bracketing 3 or 4 exposures is vital in capturing a successful photograph.
Authors Comments:
Capturing great photographs may not always be easy. In many cases, you need to come back another day to get the composition you envisioned. In other situations, waiting for just the right sunlight, or trying to time rolling fog as it makes its way across a beach or through a valley takes patience and perseverance if you hope to achieve capturing that one great photograph.
In my opinion, too many emerging, as well as more experienced (and older) photographers are looking past the picture-taking process and thinking ahead to what they need to do in post-production to create the look they want. Some photographers have told me they sometimes do not know what they want at the time of capture, or not worry about perfect conditions, and will wait until they get to post-production to begin their creative process.
I am hoping more photographers try taking a step back, placing digital software to one side and allow a majority of the creative process to begin behind the viewfinder: created using the camera and what the environment is offering at the time of capture. Later, the photographic artist can make adjustments to both luminance and chromatic variables in post-production, as they continue the process towards creating a final piece of fine art photography.
And finally, Visualization is the key to “seeing”: elaborating on the old trope, “Stop and smell the roses”, reminds us to be cognizant of our surroundings by slowing down to experience the sensations that infiltrate our space we do not notice in our hurried pace. Experience more from our environment by opening all our senses to see, hear, smell and taste a wider sampling; stoop low and see what the insects see, or pull back and glee at the grandeur of a majestic landscape. A stronger awareness of the world around us helps expose the hidden nuances in helping to create dynamic compositions.
“The term visualization refers to the entire emotional-mental process of creating a photograph, and as such, it is of the most important concepts in photography.” – Ansel Adams
Lance A. Lewin
November 2019

Elevate Your Vision


Read this story and all the best stories on The Luminous Landscape
The author has made this story available to Luminous Landscape members only. Upgrade to get instant access to this story and other benefits available only to members.
Why choose us?
Luminous-Landscape is a membership site. Our website contains over 5300 articles on almost every topic, camera, lens and printer you can imagine. Our membership model is simple, just $2 a month ($24.00 USD a year). This $24 gains you access to a wealth of information including all our past and future video tutorials on such topics as Lightroom, Capture One, Printing, file management and dozens of interviews and travel videos.
- New Articles every few days
- All original content found nowhere else on the web
- No Pop Up Google Sense ads – Our advertisers are photo related
- Download/stream video to any device
- NEW videos monthly
- Top well-known photographer contributors
- Posts from industry leaders
- Speciality Photography Workshops
- Mobile device scalable
- Exclusive video interviews
- Special vendor offers for members
- Hands On Product reviews
- FREE – User Forum. One of the most read user forums on the internet
- Access to our community Buy and Sell pages; for members only.
You may also like