Adobe’sCamera Rawhas become for many photographers thelingua francaof raw file processing. It comes included withPhotoshop CS2andPhotoshop Elements, and is updated frequently with support for new cameras, almost as soon as they appear.
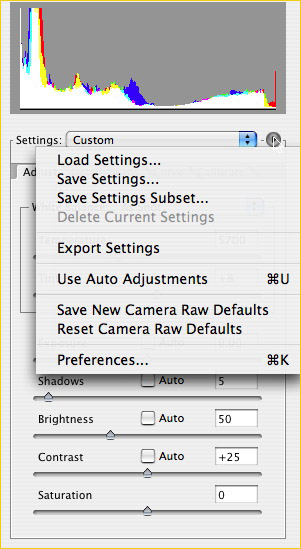
There are also few who doubt that from an image quality perspective, Camera Raw is right up there with the best of the competition. But there is one thing that has bugged me about CR and that’s the fact that its default configuration is such that theExposure,Shadows,BrightnessandContrastsettings default toAuto. This means that when an image is brought into Camera Raw from previewing in Adobe Bridge, each of these adjustments are preselected to their automatic setting.
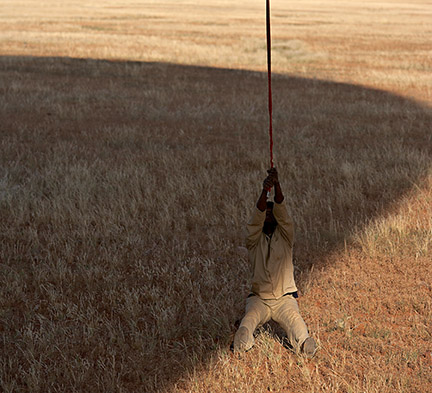
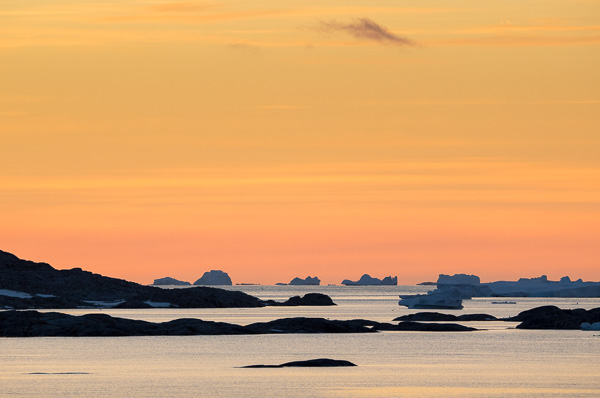
Hang On. Namibia – April, 2006
Canon 1Ds MKII with 70-200mm f/2.8L IS lens @ ISO 200
For many photographers this is not a bad thing. It makes processing images quicker, without the need to tweak each one. Sometimes the Auto settings are very good, and sometimes not so good, but they rarely are really bad.
It also isn’t that difficult to turn off the four Auto check boxes. But it can be tedious to have to do this each time an image is imported for processing.
Of course Camera Raw provides a solution; several in fact. The first is that you can press CMD/CTRL – U to turn them all ON or OFF. But if it’s your preference to always have them OFF, then all you need do is click on the small right-facing triangle next to theSettingswindow at the top-right of the screen. One of these isSave New Camera Raw Defaults. When you have the four offending check boxes the way you want them, such as all OFF, or with any other settings adjusted as well to the way you like them whenever Camera Raw loads, just selectSave New Camera Raw Defaults.
The thing that you must do next though is press DONE at the bottom right of screen. This makes these new settings permanent. The next time Camera Raw is loaded it will come up set the way you’d like it. Of course you can always go back to the way things were withReset Camera Raw Defaults, under the same menu.
________________________________________________________________
The Good News
This turns out to be a handier trick than it first appears. Whatever your default settings for Camera Raw may be, these are also used by Adobe Bridge when thumbnail previews are being displayed. So, if the default Auto-On is the way things are, every thumbnail in Bridge will be as good as the auto function can make it.
Again, for some users that may bea good thing. But for others, me included, this isnot a good thing. The reason why is that shots taken with different exposures are all made to look almost alike. Even shots a couple of stops over or under exposed look much like a properly exposed one. This makes selecting the best one problematic, but can also be very confusing when one has deliberately bracketed exposures for effect.
________________________________________________________________
The Gottcha
Thegottchais thatSave New Camera Raw Defaultsonly applies to the camera model that was being used when this menu item was selected. So, if you shoot with a Canon 5D and a 1DsMKII, for example, and you turned each of the Auto check boxes off, and saved that configuration as your default while a 5D file was displayed, it only applies to 5D files. Your 1Ds MKII files will still be displayed as thumbnails within Bridge with the Auto settings active, and when loaded into Camera Raw will appear that way as well.
The solution? Simple, Just turn them off (CMD/CTRL-U) and thenSave New Camera Raw Defaultsagain, followed by Done. Do the same thing for any other cameras that you may want to load raw files from. A little tedious if you use a great many cameras, but otherwise not a big deal.
Thought you’d like to know.
June 2006


Elevate Your Vision


Read this story and all the best stories on The Luminous Landscape
The author has made this story available to Luminous Landscape members only. Upgrade to get instant access to this story and other benefits available only to members.
Why choose us?
Luminous-Landscape is a membership site. Our website contains over 5300 articles on almost every topic, camera, lens and printer you can imagine. Our membership model is simple, just $2 a month ($24.00 USD a year). This $24 gains you access to a wealth of information including all our past and future video tutorials on such topics as Lightroom, Capture One, Printing, file management and dozens of interviews and travel videos.
- New Articles every few days
- All original content found nowhere else on the web
- No Pop Up Google Sense ads – Our advertisers are photo related
- Download/stream video to any device
- NEW videos monthly
- Top well-known photographer contributors
- Posts from industry leaders
- Speciality Photography Workshops
- Mobile device scalable
- Exclusive video interviews
- Special vendor offers for members
- Hands On Product reviews
- FREE – User Forum. One of the most read user forums on the internet
- Access to our community Buy and Sell pages; for members only.
You may also like