


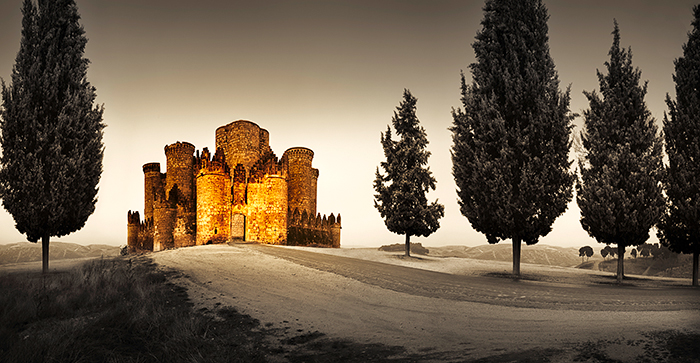
Phase One P45+ digital back on a Mamiya 645 AFD II with a 28mm Mamiya D lens,
f8, 1/125 second, tripod mounted, six images stitched together.
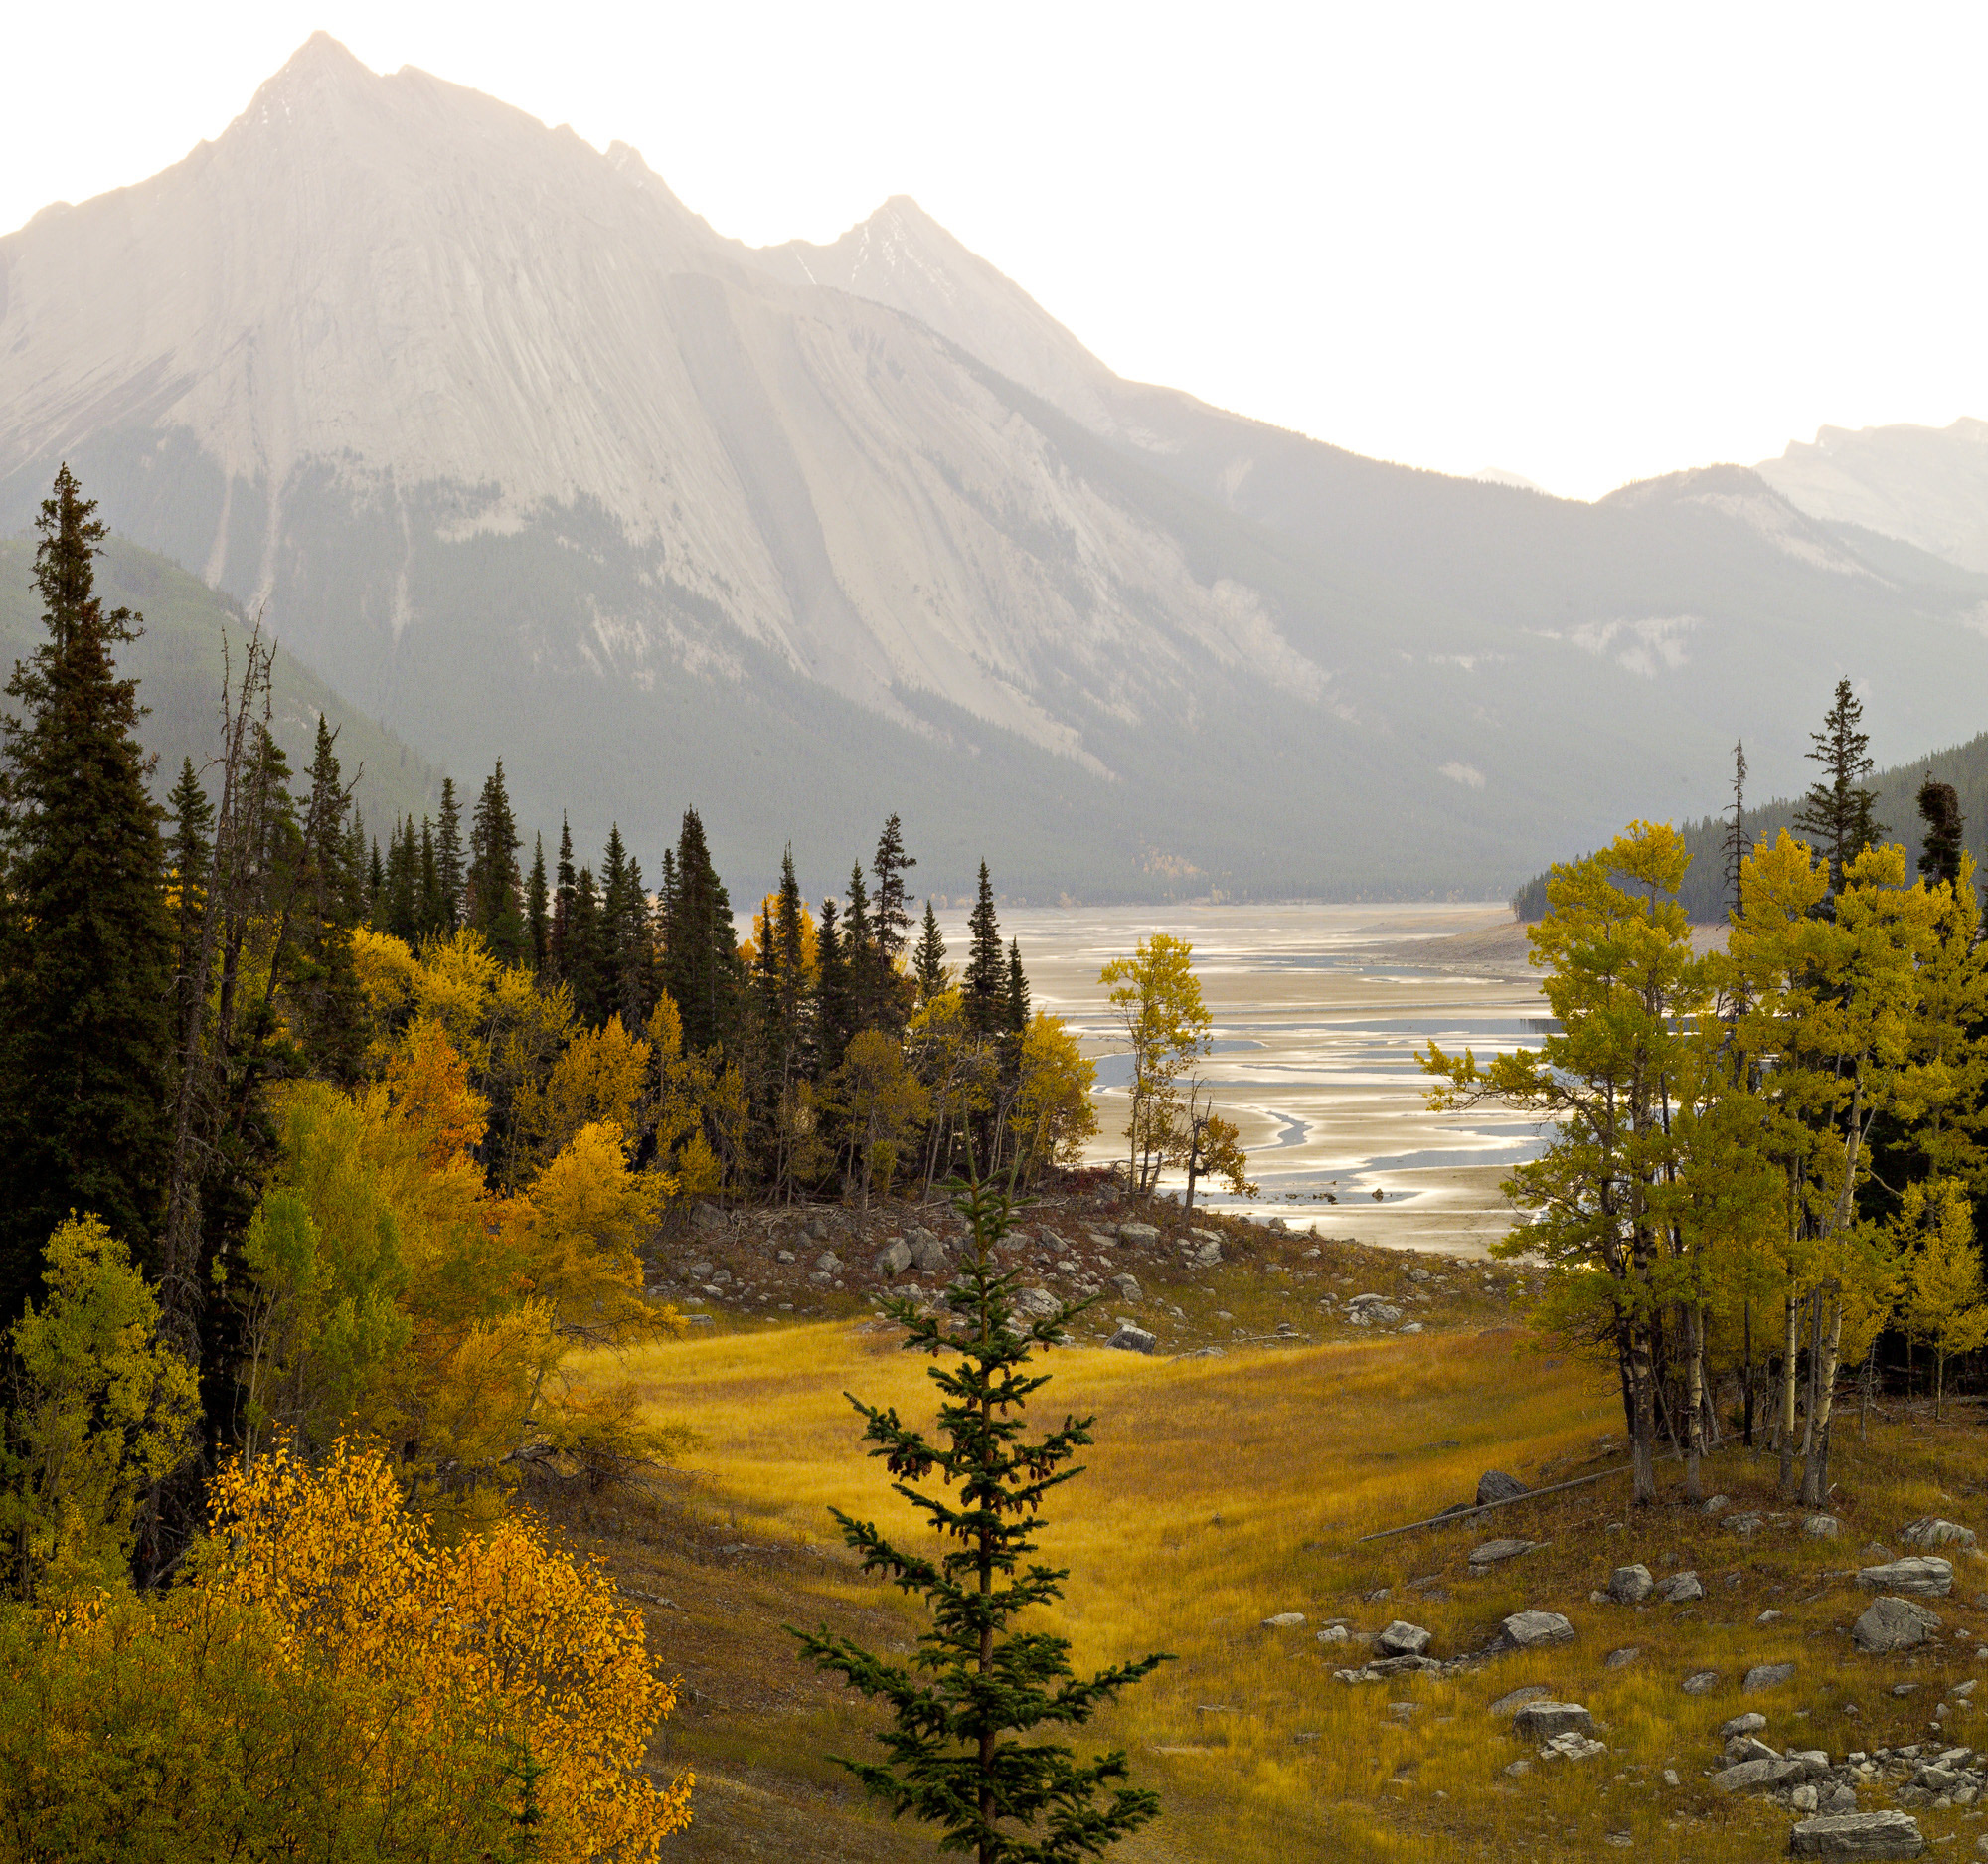
Travelling overseas, there are many subjects which are ‘exotic’ and therefore ‘photogenic’.
Years ago I produced an audio visual featuring hill towns in France and Italy. It was a big success in America and Australia, but received a lukewarm reception in Italy. As an Italian friend gently remarked, every hill has a town on top of it.
And a castle.
But this is the beauty of travel photography – we can choose to take photographs that only impress our friends and countrymen, not the world at large.
Spanish Itinerary
Belmonte is a forgotten Spanish village, down the hill and out of sight. Behind the camera a rash of modern retirement homes is being constructed. Yet the scene you see is what I remember.
Camera angles for travel photography are paramount and excluding things is just as important as including others. Camera angle gives you the ability to create an image of what you experience, not necessarily of what is actually there. Some people might call this ‘lying’, but I prefer to think of it as selective truth.
Everything in the scene is real, well, almost. I have taken the liberty of adding in a tree that I’m sure the retirement home developers had removed a few weeks before I arrived.
This is also a classic case of returning to a good subject and shooting it again. I was so impressed with Belmonte that I took my family back the next day and was treated to a beautiful misty morning. This shot was taken as the mist was rising, revealing the surrounding hills, but keeping the sky detailless and flat.
Step 1
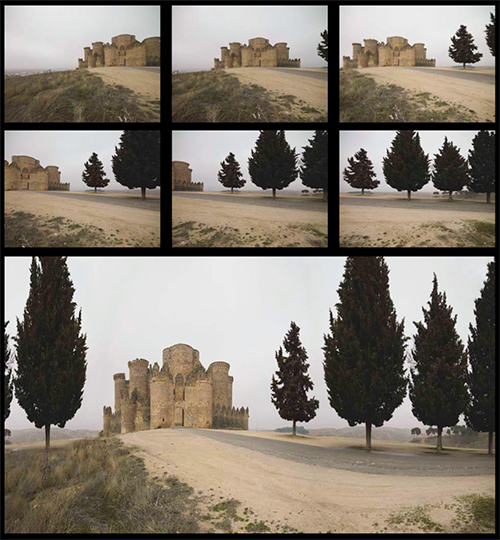
I have many images inside and outside Belmonte Castle. Although not in a good state of repair, access is open to all areas including some wonderful old ballrooms, small bedrooms and en-suites in the towers, and the tops of the towers themselves. It was a refreshing change to the clinically restored monuments found throughout most of Western Europe.
However, what I needed was an overview image to put the castle into perspective, but I wasn’t able to get far enough back to include the full sweep of the road and the trees in a single capture. The solution was to take a series of images and stitch them together afterwards.
Stitching for a distortion-free result is best done with a moderate wide-angle or telephoto, but this was taken with an ultra-wide angle. The result is some distortion in the road leading up to the castle keep, but I was quite happy with the look.
The camera was set to manual exposure and focus, and tripod mounted. Six frames were taken as shown above, then imported into Photoshop using Photomerge. It really wasn’t any harder than that.
After trimming the image to a rectangular frame, I selected the entire image (Ctrl/Cmd + A), then selected Free Transform (Ctrl/Cmd + T) and squeezed the image together from the sides. This made the trees and the castle ‘taller’.
Finally, you’ll note that there are no trees on the left of the castle in the stitch frames. I copied the large tree on the right of the castle, flipped it, squeezed it and positioned it on the left. Easy!
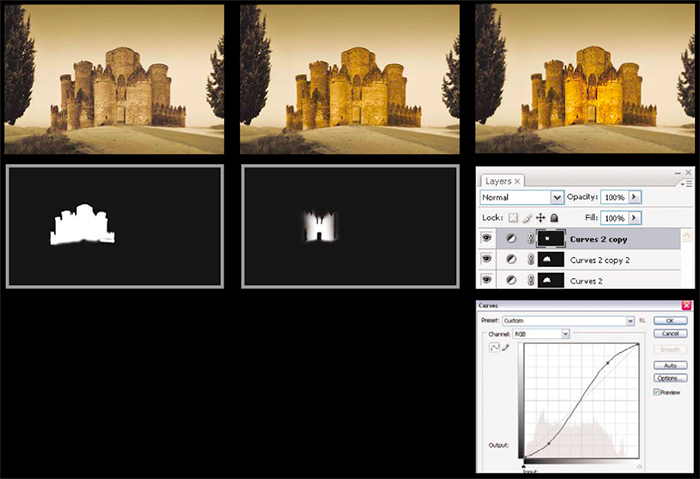
Step 2
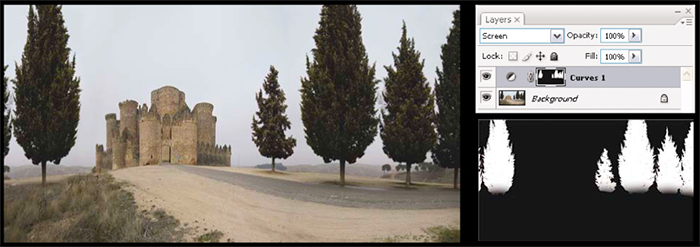
Because the trees are so dark, I knew that unless attended to early in the process, they would end up as black silhouettes. I switched to the Channel palette and selected the Blue channel because I could see that the shape of the trees was already an excellent mask. I clicked the Create Selection icon at the bottom of the Channel palette to create a selection, switched to Quick Mask mode and brushed out the castle and foreground, with a feather over the bottom of the tree trunks. Leaving Quick Mask mode and reverting to a selection, I returned to the RGB image, added a Curves adjustment layer and lightened up just the trees.
Step 3
The sky is too light and is distracting. I added a curves adjustment layer and dragged the highlight point down to darken the image overall. Then I selected the Gradient tool and, working on the adjustment layer’s mask, dragged the gradient down from the top of the image to around the bottom of the castle. Ensure the gradient tool is set to go from transparent to black.
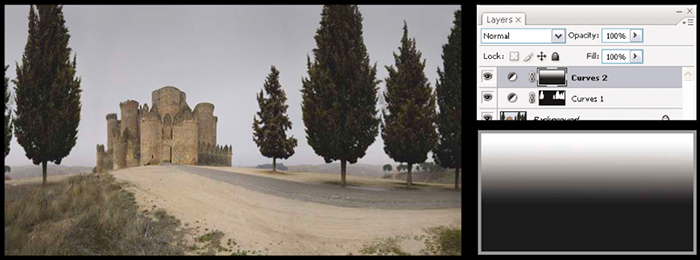
Step 4
The process is repeated, but this time the gradient tool is dragged from the top of the frame to the top of the castle, darkening just the top part of the sky. Experiment with this tool a few times and you’ll soon work it out. Also, note that I haven’t hidden the gradient behind the trees, although I will do this in later steps. The gradient darkens both sky and trees together.
Step 5
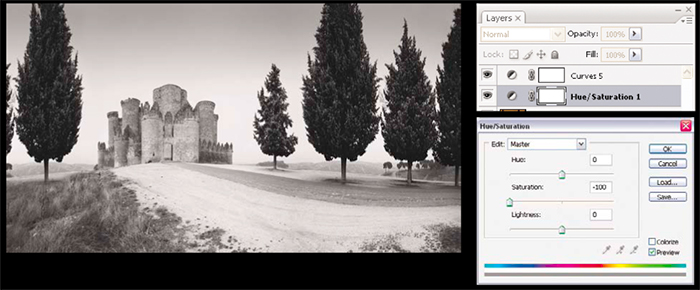
The image is now taking shape, but before adding some drama, I converted it into black and white – monochrome. I experimented with several methods before settling on a Hue/Saturation adjustment layer, reducing the saturation to -100. I also added another Curves adjustment layer to lighten the image overall. The castle is looking good, but I need to control the foreground and how the eye moves within the frame.
Step 6
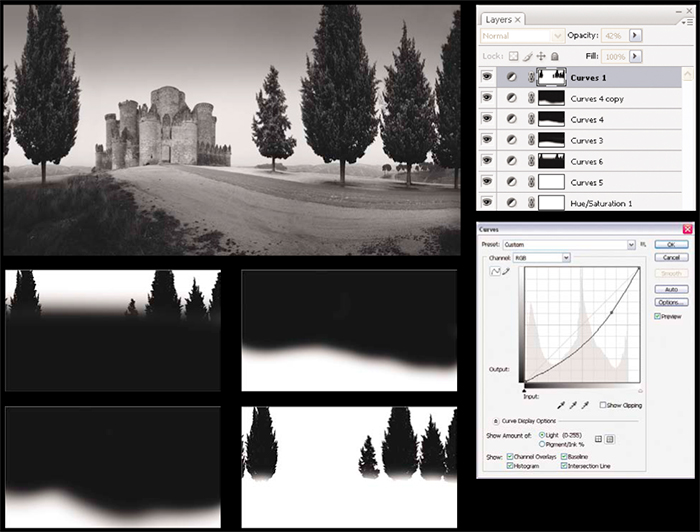
To get to the result above, I have added five Curves adjustment layers. I could have possibly got to a similar position with fewer steps, but working in Photoshop is as much art as science and until you’ve taken one step, you don’t necessarily know what the next step should be. Note how the trees feature in the masks. Having lightened the trees earlier on, I now want to retain their detail. By saving your selections as you go (Select > Save Selection), you can recall them for use later on. They are great for creating masks, and then the masks in turn can be modified with a brush. All five adjustment layers darken different areas of the image.
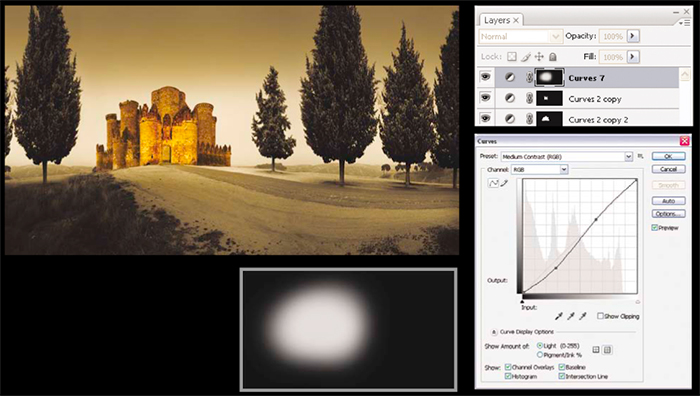
Step 7
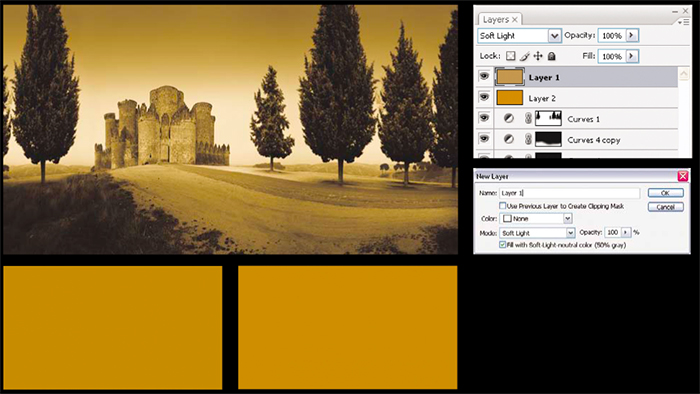
I struggled to get exactly the color tone I wanted. In the end, I added a new layer filled with 50% grey, set to Soft Light blend mode (see dialog above – Layer > New > Layer… or Shift + Ctrl/Cmd + N). I then colored the layer. You can also create these colors with Curves or Color Balance, or you could use a Photo Filter adjustment layer. As I said, I was struggling! Basically, what I did with these convoluted steps was to add a color tone to the image. Any way you can achieve what you want is a good way!
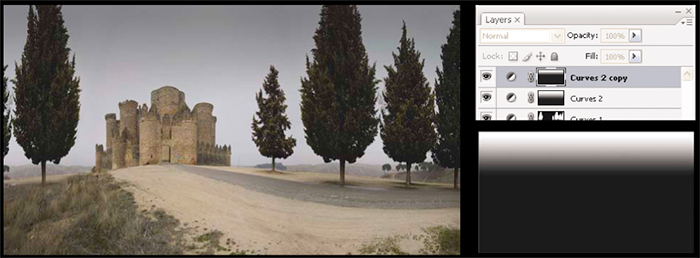
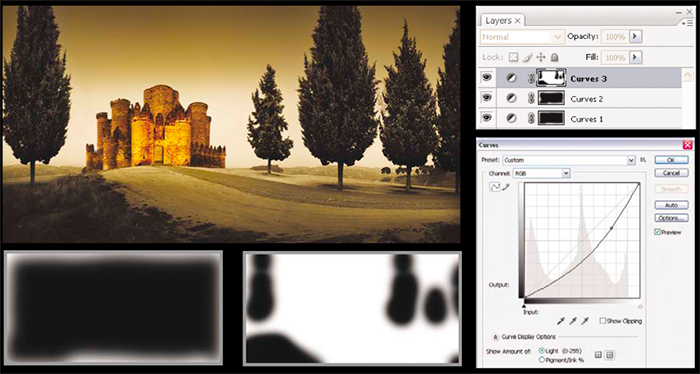
Step 8
With the background tone settled, I then focused attention on the castle, adding masked Curves adjustment layers so only the castle, or only the front archway of the castle, was affected. By increasing the contrast of the image using a Curves dialog, I was able to highlight the castle relative to its surrounds.
Often, increasing contrast will attract the viewer’s eye, especially if the contrast is lower elsewhere in the scene.
You’ll also notice that while the castle mask is quite sharply delineated, the mask for the castle archway has been feathered. It’s important that the effect doesn’t look too contrived, although obviously the entire image is!
A later refinement to these steps was to darken the left side of the castle, giving a little more direction to the lighting, even though in reality the light was perfectly directionless!
Step 9
I still wasn’t completely happy with the strength of the castle within the frame, so I added a bit more contrast to the castle. As you can see from the curve dialog, the highlights haven’t been touched, but the shadows have been dropped a touch and the curve line steepened to add contrast.
Step 10
At this stage, the image just needs to have the edges darkened. Three subtle curves adjustment layers are added in, darkening the image edges and containing the composition. The image was complete. However, there are always opportunities for refinement. This print won a Gold Award at the 2008 Canon AIPP Australian Professional Photography Awards, but even so, a couple of friends pointed out some shortcomings within the image. Can you see them?
There were two issues I took on board. Tony Hewitt observed that the tree on the left was obviously cloned because it had the same branches hanging off the bottom, and the same gaps in the branches. Compare the image above with the opening photo and you can see how I have now changed these.
The second issue was noted by David Oliver, saying the light on the castle was too flat. Although the light in reality was flat, I have taken this on board, darkening the left side of the castle slightly and adding subtle modelling to the turrets. I have also desaturated the image a little more.
October, 2011
Peter Eastway has won the AIPP Australian Professional Photographer of the Year twice, and has been Australian Landscape Photographer of the Year three times. You may also have seen him on the Phase One website and working with Capture One software. Peter also publishes a number of photography magazines in Australia. You can see more of his work atwww.petereastway.com, and more of his tutorials and articles (including his Landscape Photography MasterClass) atwww.betterphotography.com.


Elevate Your Vision


Read this story and all the best stories on The Luminous Landscape
The author has made this story available to Luminous Landscape members only. Upgrade to get instant access to this story and other benefits available only to members.
Why choose us?
Luminous-Landscape is a membership site. Our website contains over 5300 articles on almost every topic, camera, lens and printer you can imagine. Our membership model is simple, just $2 a month ($24.00 USD a year). This $24 gains you access to a wealth of information including all our past and future video tutorials on such topics as Lightroom, Capture One, Printing, file management and dozens of interviews and travel videos.
- New Articles every few days
- All original content found nowhere else on the web
- No Pop Up Google Sense ads – Our advertisers are photo related
- Download/stream video to any device
- NEW videos monthly
- Top well-known photographer contributors
- Posts from industry leaders
- Speciality Photography Workshops
- Mobile device scalable
- Exclusive video interviews
- Special vendor offers for members
- Hands On Product reviews
- FREE – User Forum. One of the most read user forums on the internet
- Access to our community Buy and Sell pages; for members only.
You may also like


