Today launches something new. I’d like to call it Behind The Shot series. I thought it would be fun to share with you how I made some of my favorite images. I’ll on a regular basis take some of the images I have made through the years and recreate them using the latest version of Capture One and show where I started and where I needed and what was done along the way.
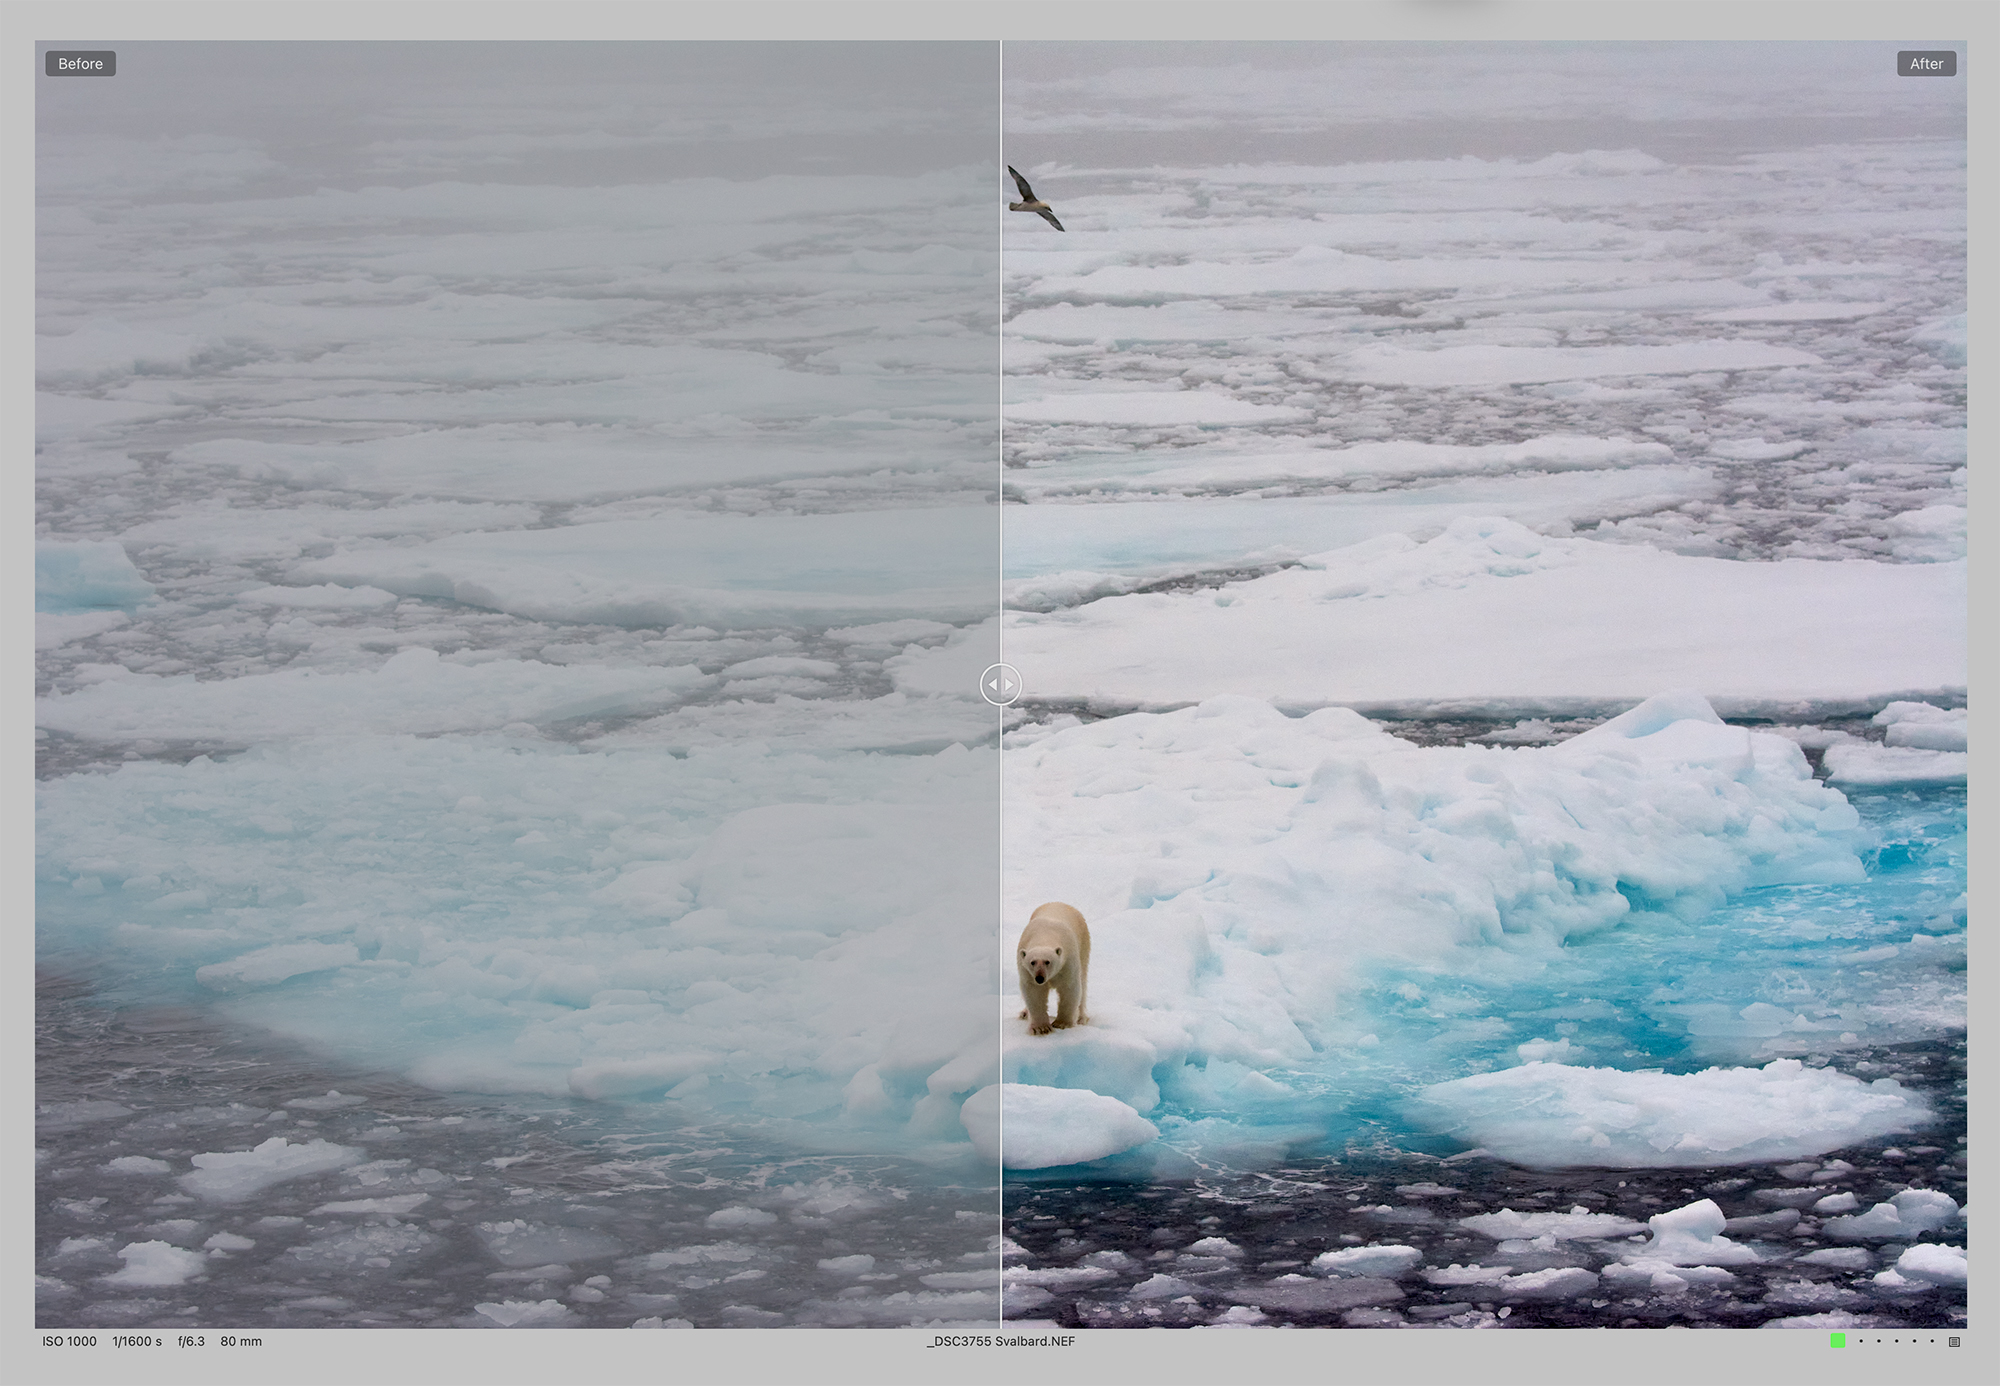
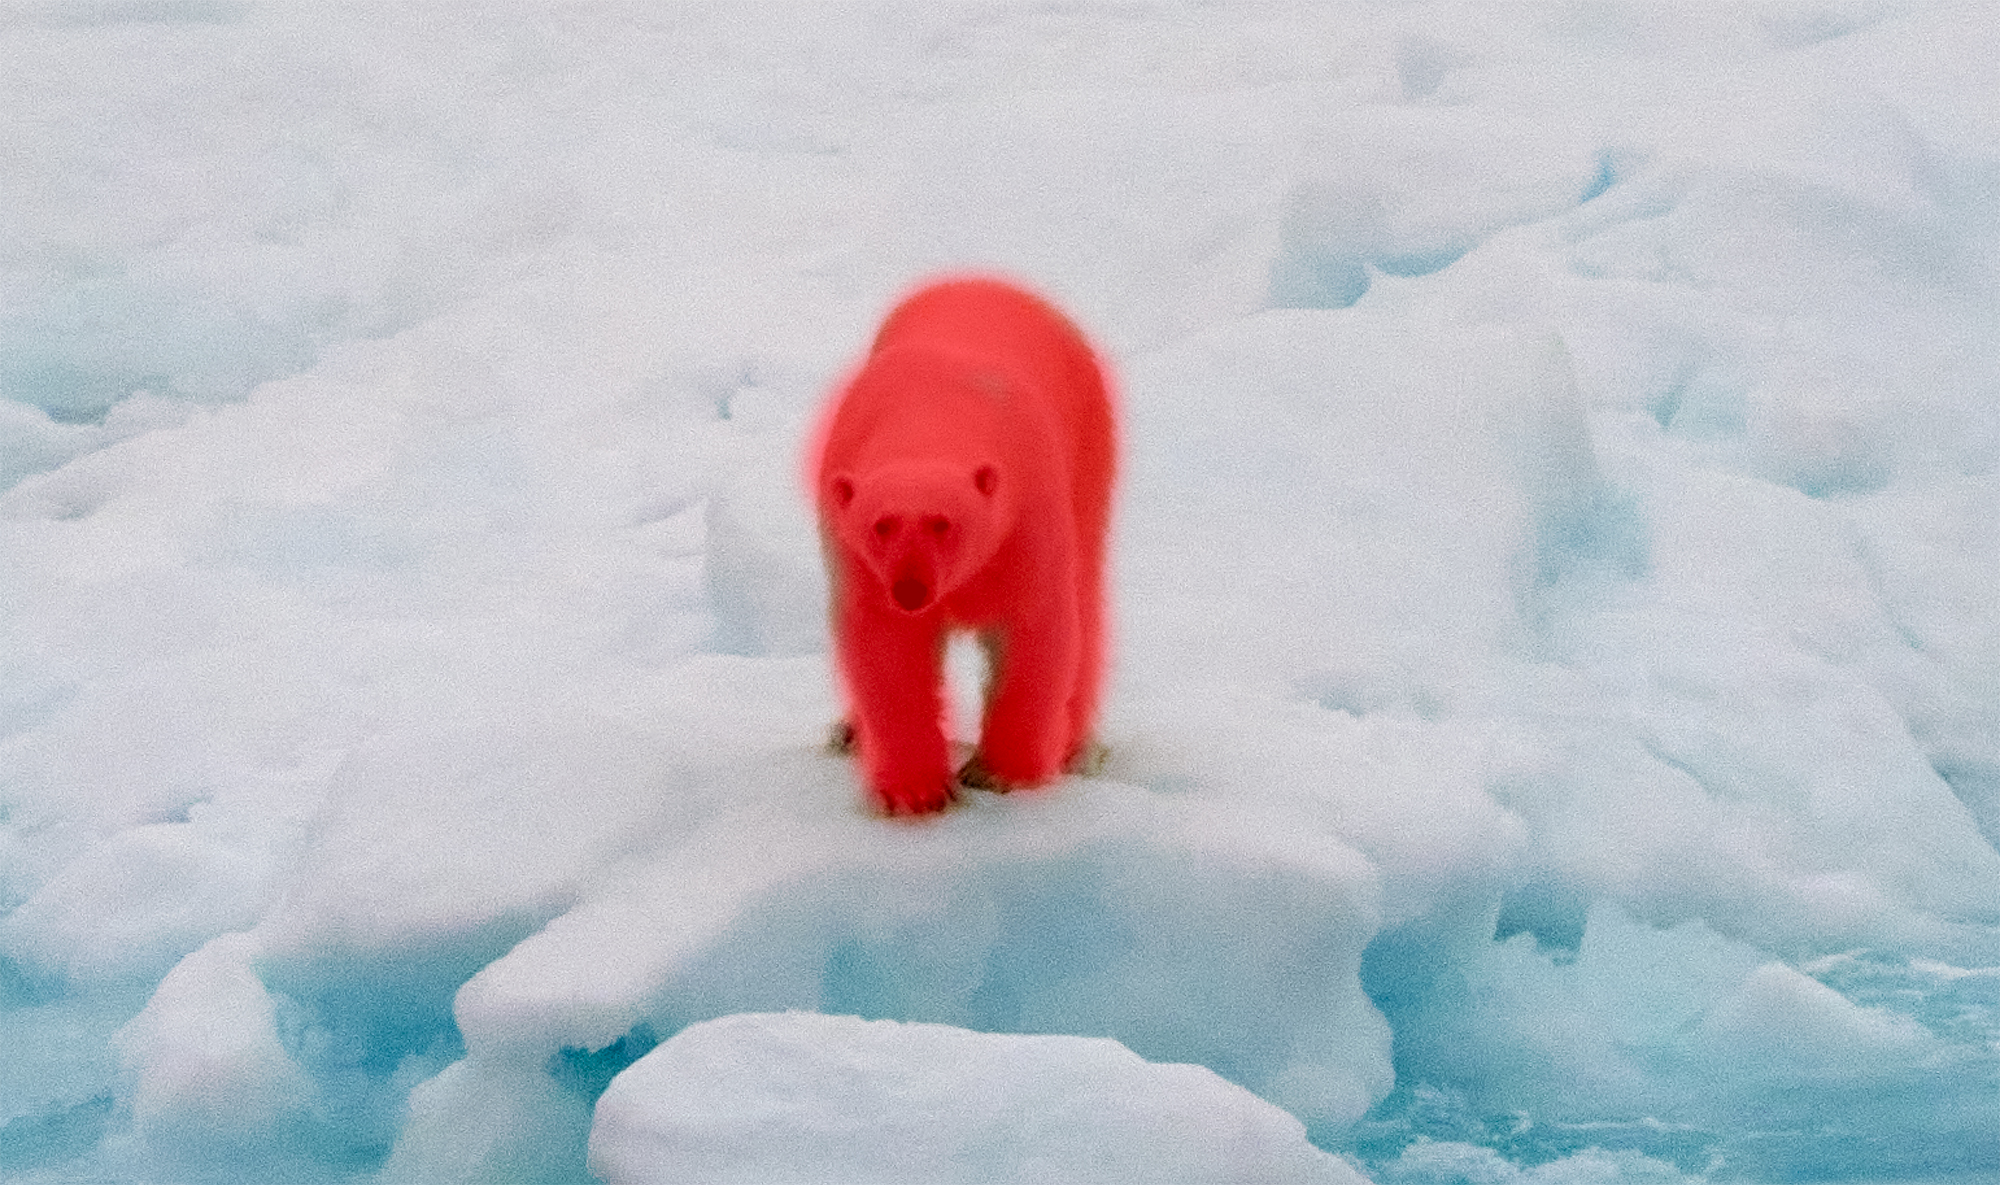
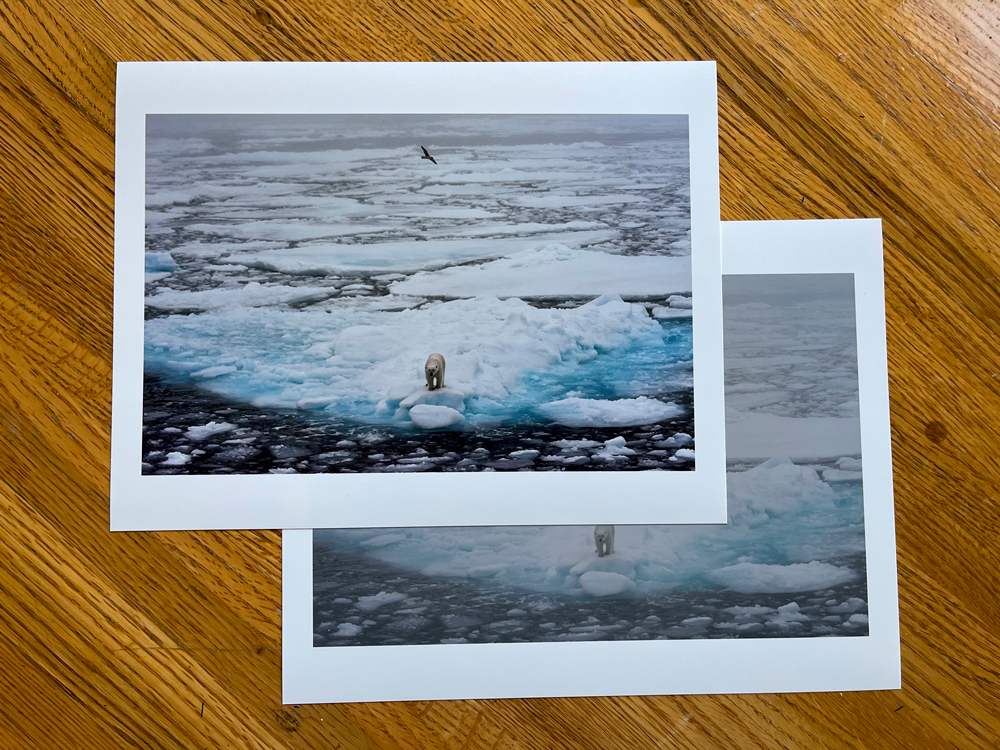
I’ll start with one of my favorite images made all the way back in 2013 of a polar bear on the edge of an ice sheet and a bird flying directly over its head. This to me is very symbolic of what is going on in the polar regions right now and especially the Svalbard area. As the ice vanished and recedes more quickly and farther each year it puts the polar bear in distress. Polar bears depend on the ice to hunt and sustain themselves. Because the ice melts faster each year many bears don’t make it to the ice and thus are landlocked and have a difficult time finding food.
The bear here is looking out to sea standing on the edge of an icepack (ice flow) looking to the horizon, like “where am I supposed to go?” I like the bird over him saying the same thing. Birds follow the bears and sustain themselves on the leftovers after a kill.
The Image
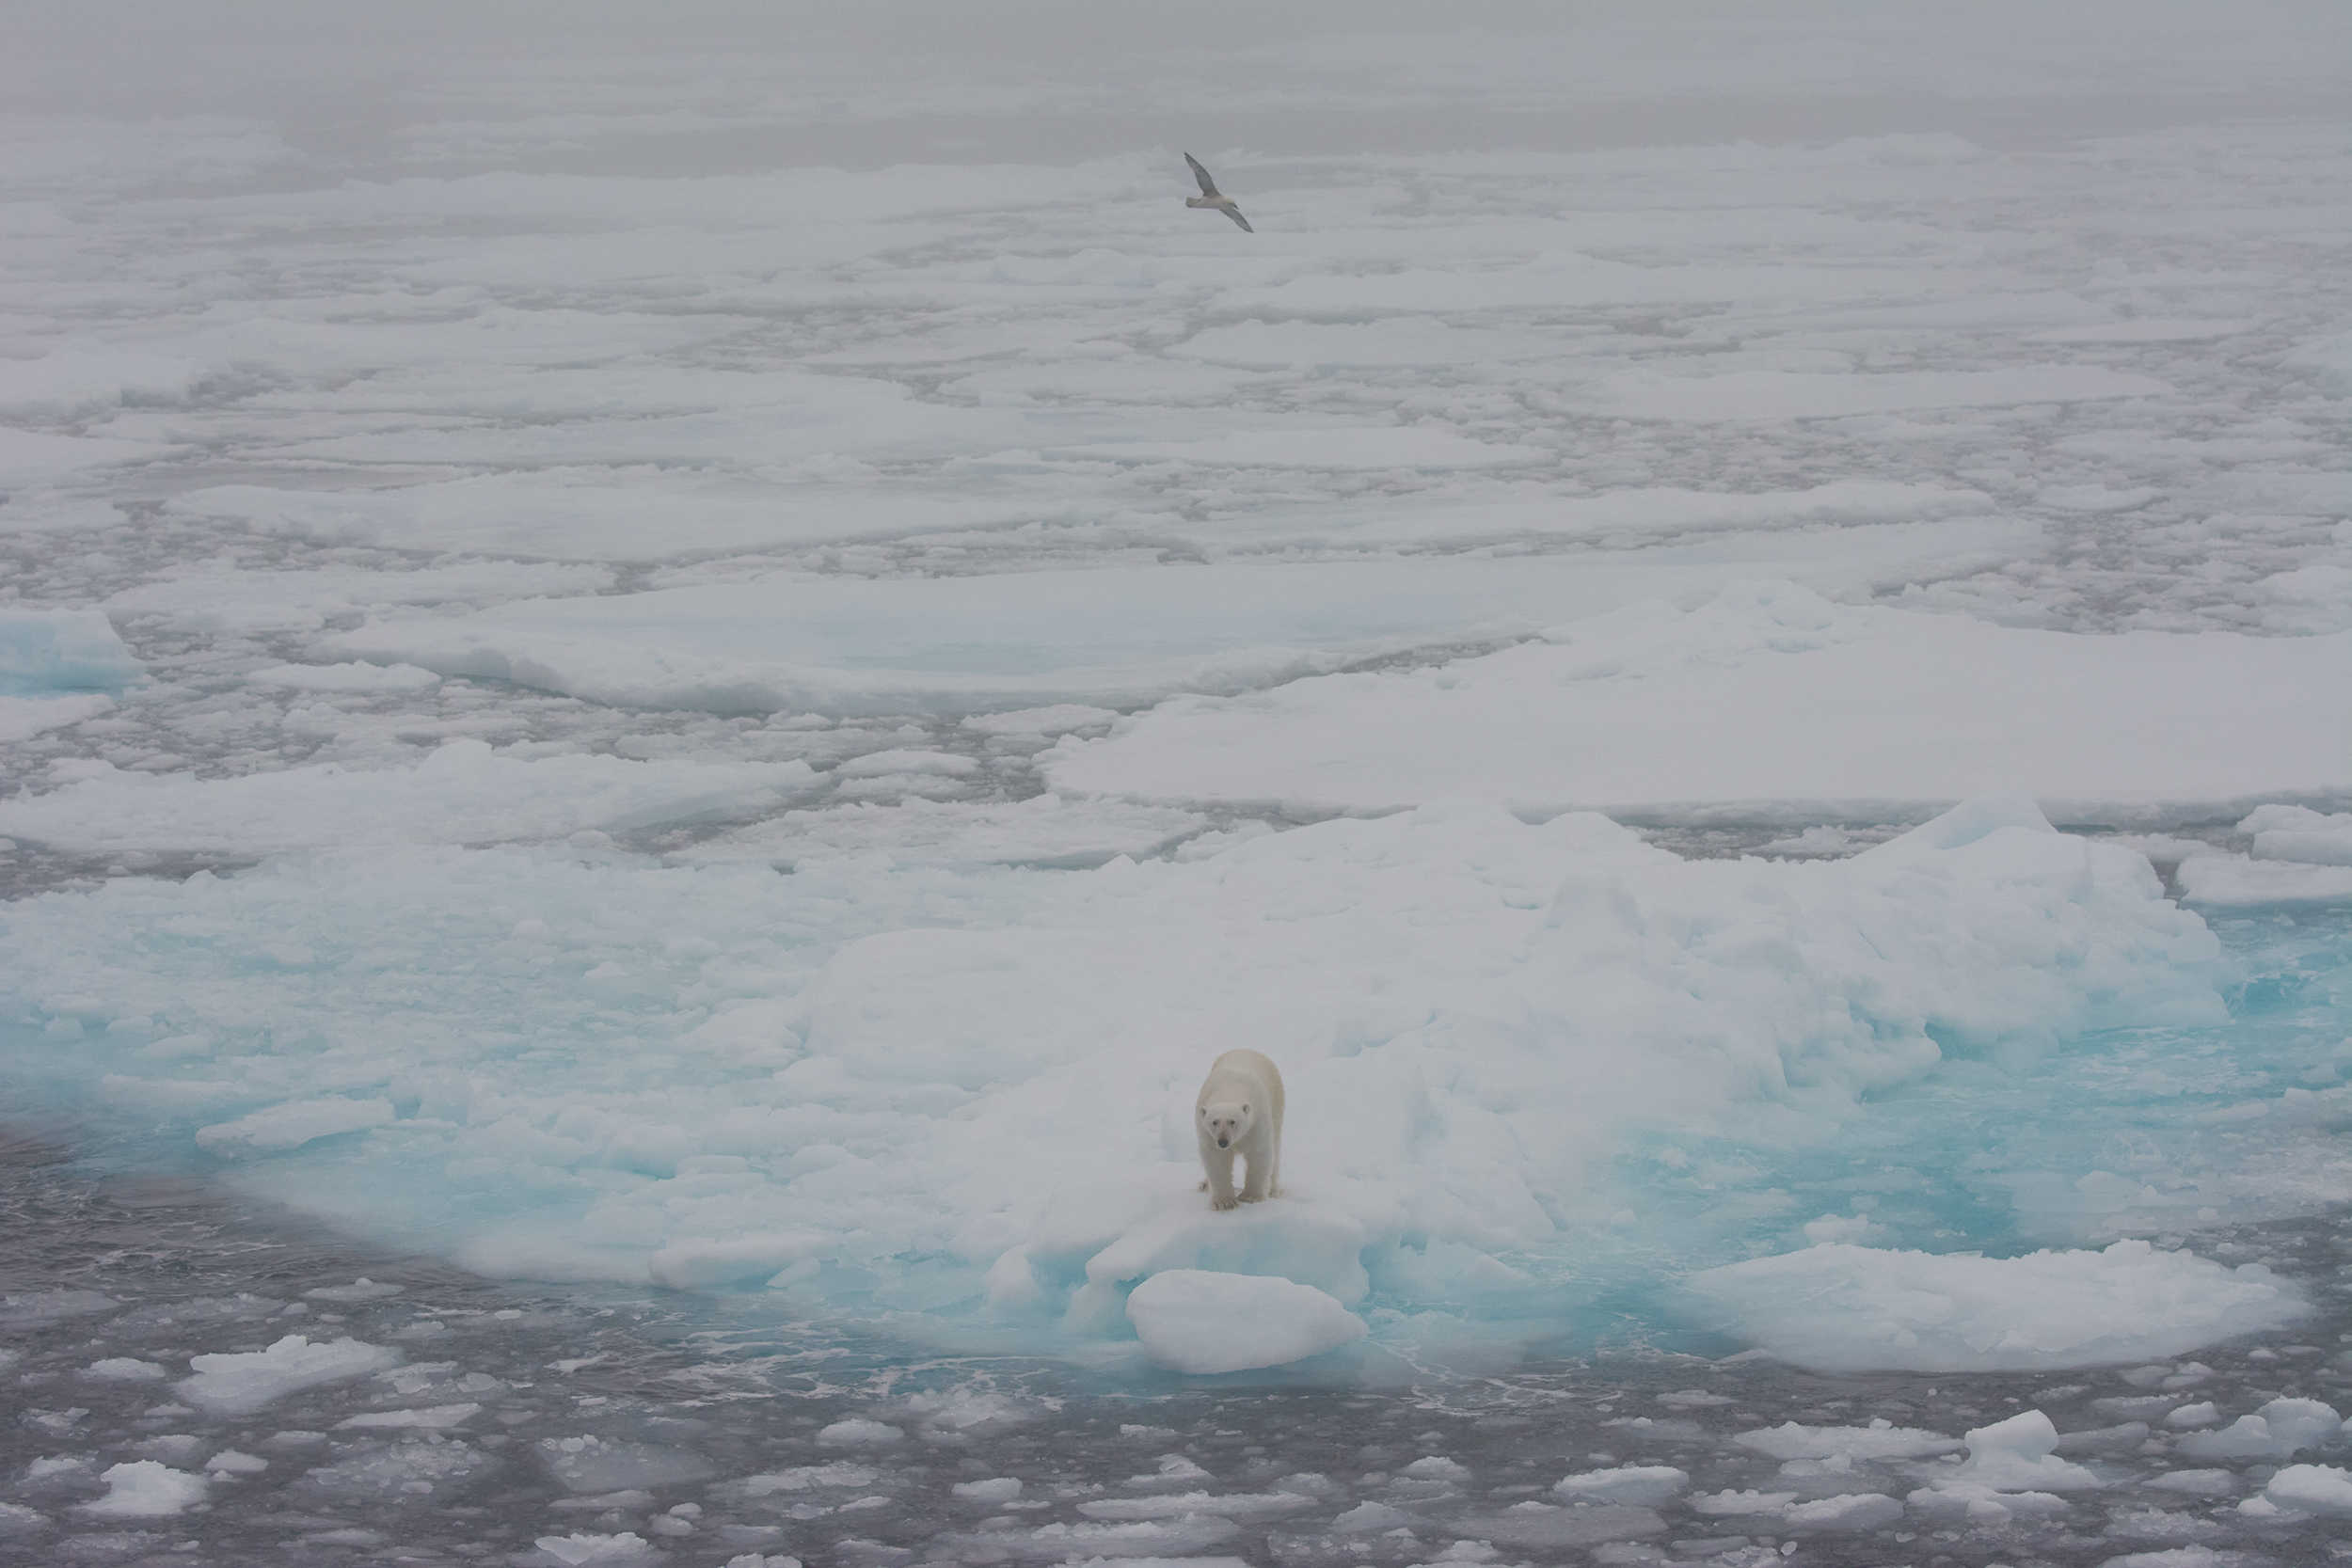
I shot this image on a rather warm and thus foggy day. The ship we were on was just driving with the ice and the polar bears would come and go emerging from the fog. It was an incredible day of photographing bears but this one image out of the thousand I too really stood out to me.
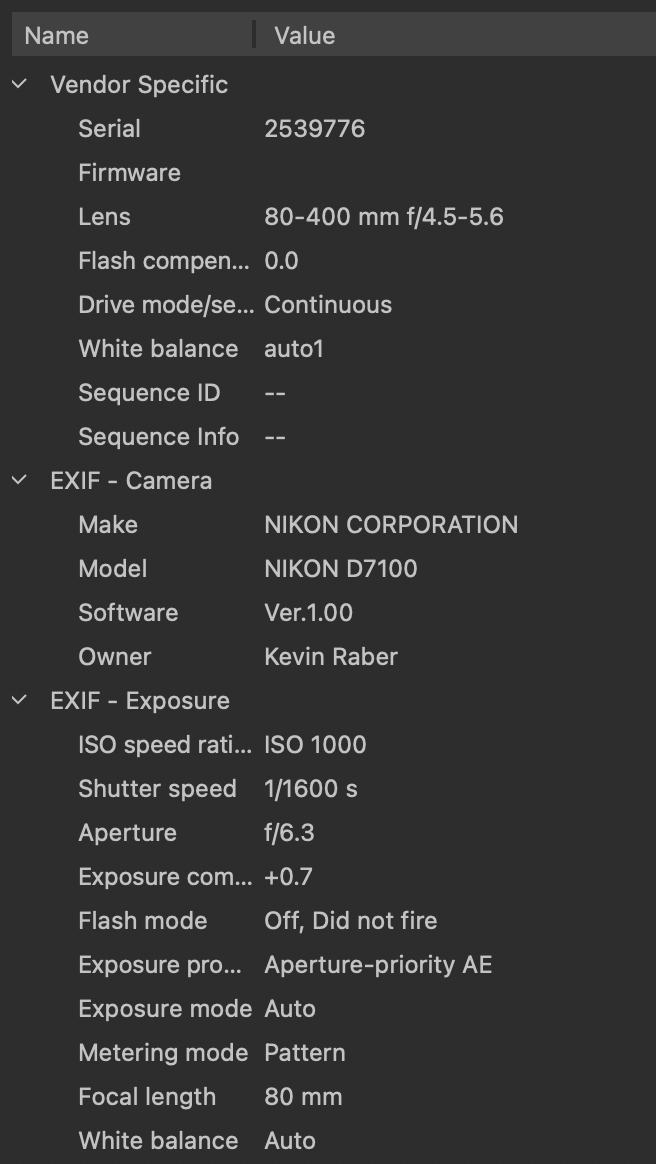
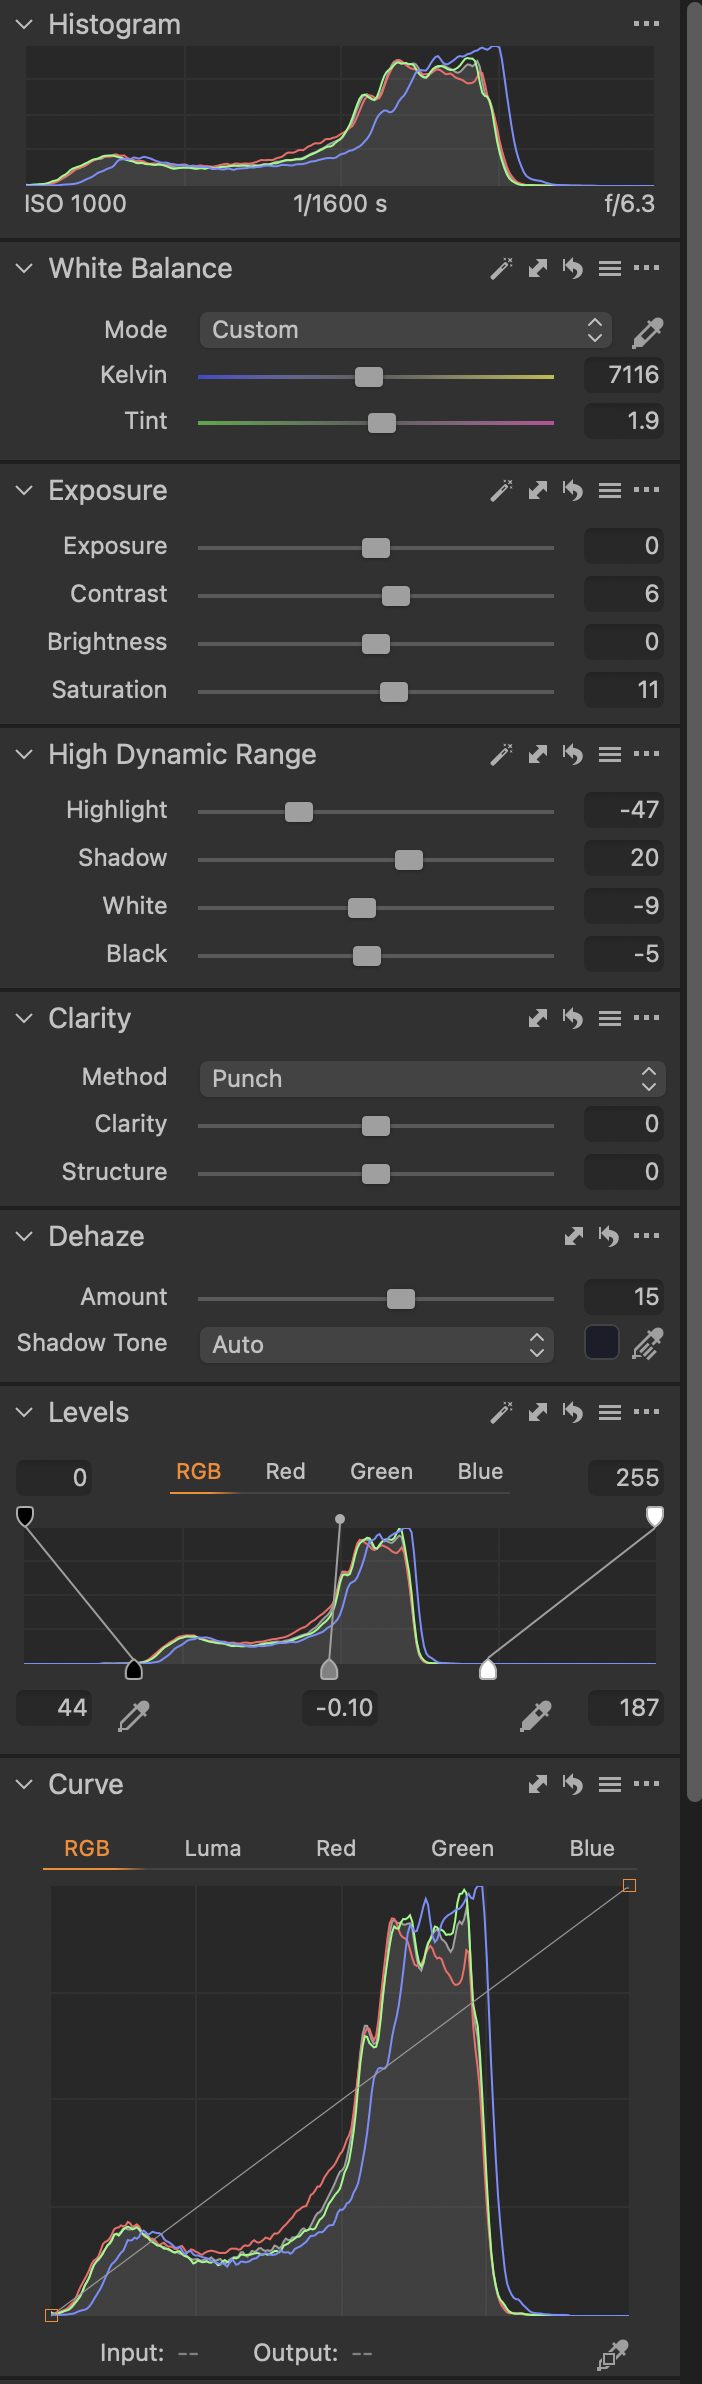
I was shooting that day with a Nikon D7100 with an 80-400mm lens. You can see the metadata below. I had an exposure compensation of +.7 activated to compensate for the bright scenes (see below).
I took the image into Capture One and worked my way through the various steps.
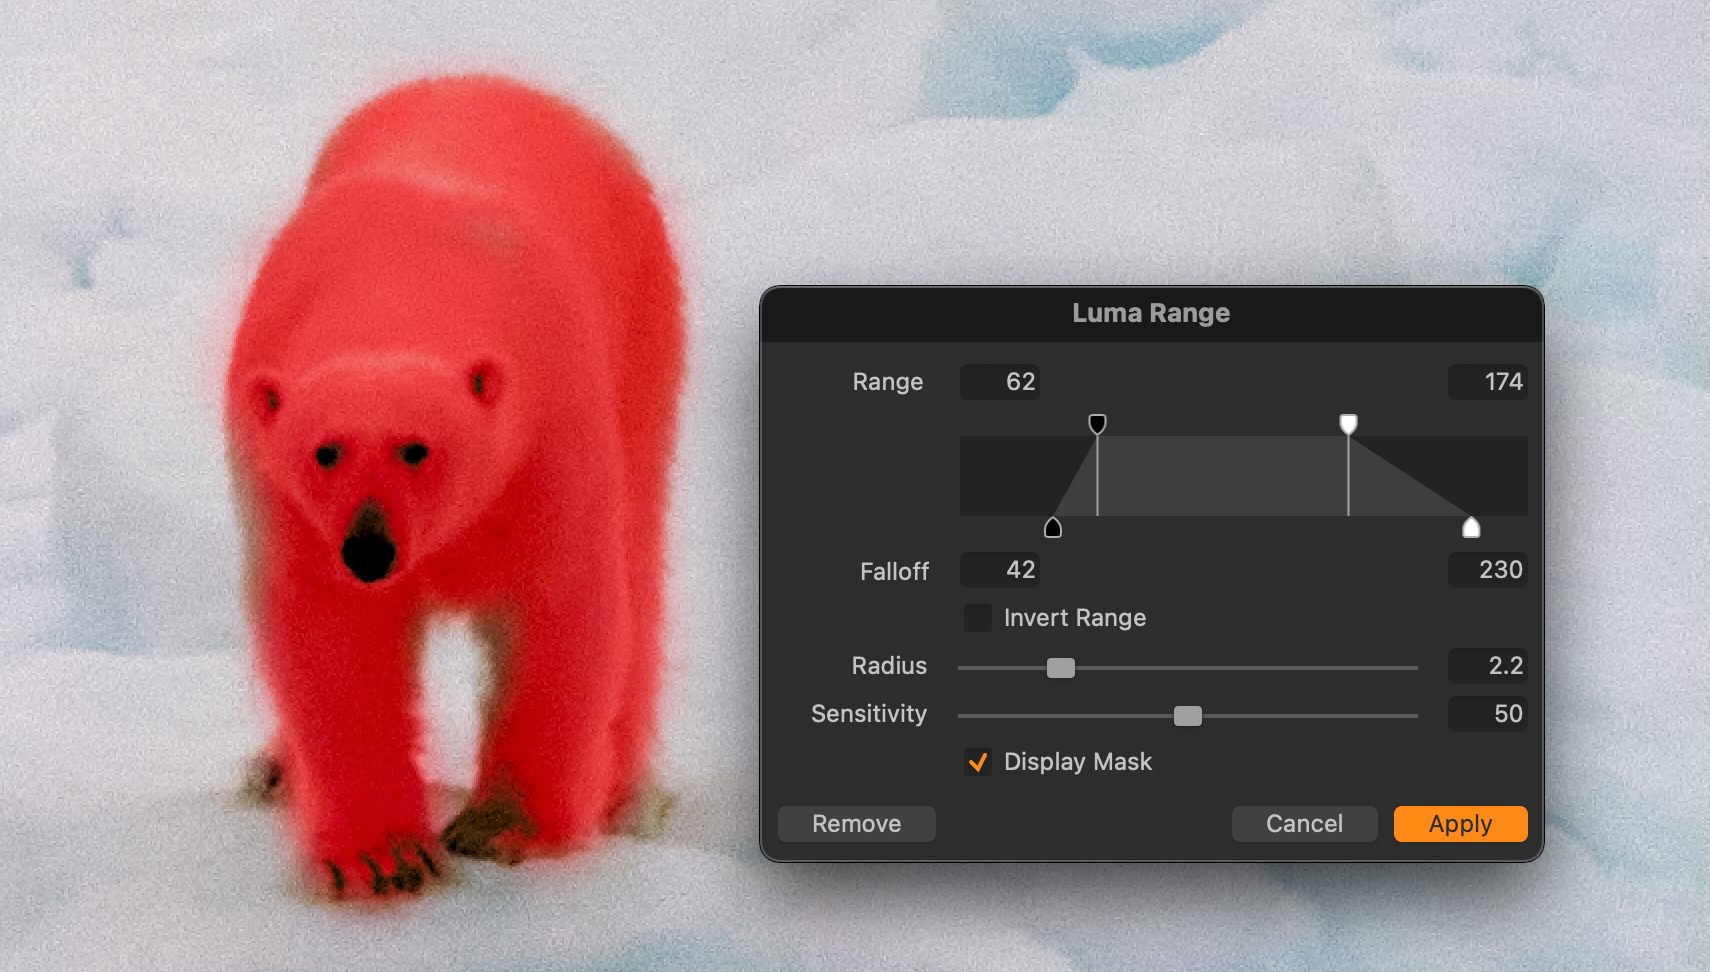
Step 1 – Levels
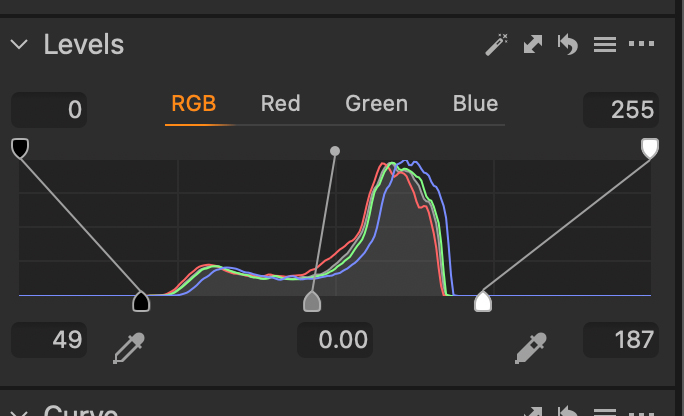
The first thing I did was to remap the levels of the image. This helped bring out the tones in the image. As you can see the Histogram was centered so the was no real white or black in the image. By remapping the levels I was able to bring the image around to a point where I could start my adjustments. The results are obvious below as shown in the before and after screen capture from Capture One.
2- Adjustments
Typically at this point, I would crop the image for the subject. I left this image uncrossed as the whole image was telling the story of not only the bird and her but of the environment. All were essential to tell a story.
I adjusted the White Balance to make the image slightly warmer. Then I added just a touch of contrast and saturation. Using the high dynamic range tool I recovered a bit in the highlight by pushing the slider to the left and lighter some shadow areas by pushing the shadow slider to the right. This helped open up the water just a bit. I didn’t use the clarity slider and instead relied on the new NEW Dehaze tool to help cut through the fog like atmosphere that we were experiencing. I had one last step that needed to be done and that was lightening the bear and bird.
3 – Layers
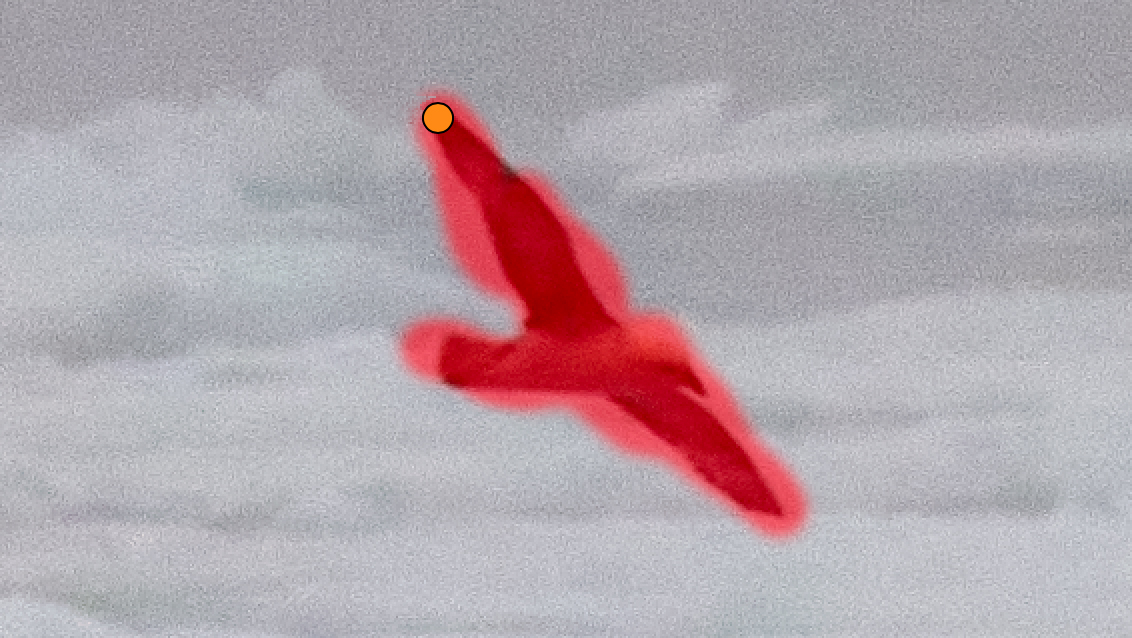
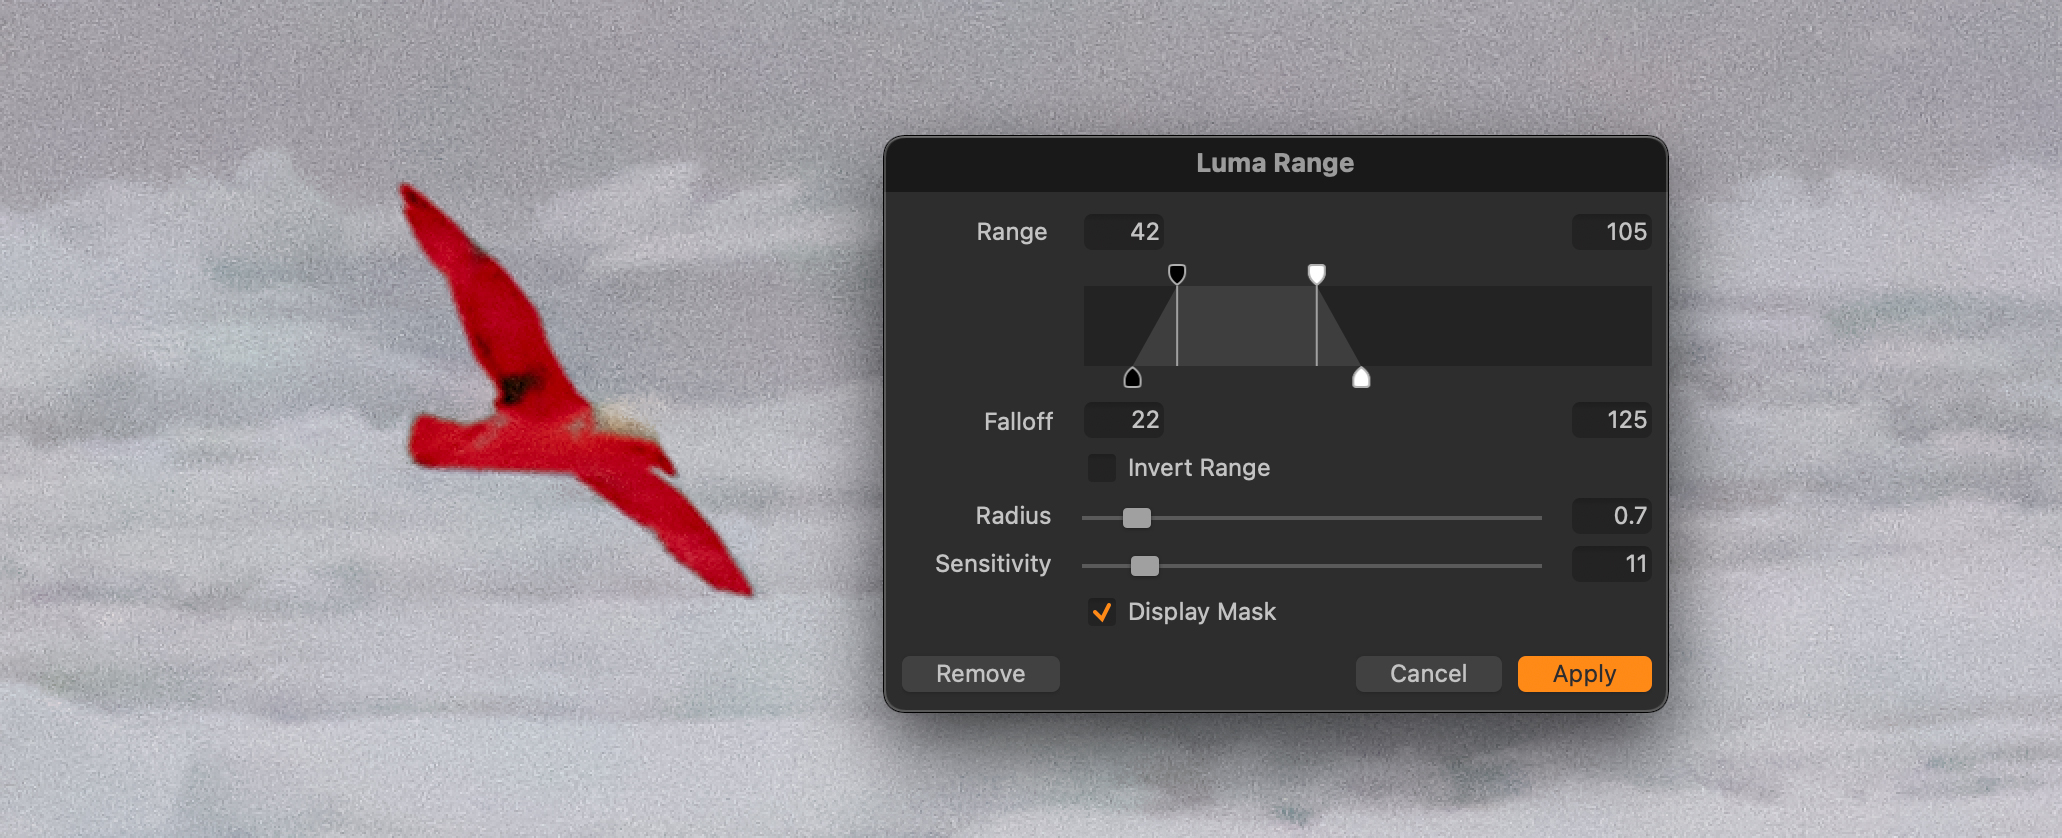
The image was improving but I wanted to adjust the bird and bear to stand out more. So I used 2 different layers.
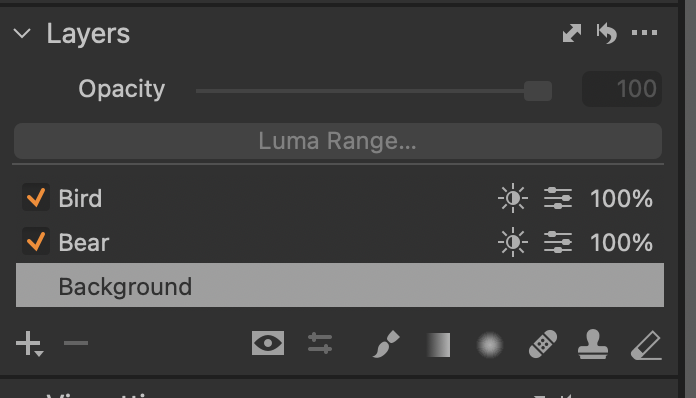
A layer for the bear and a layer for the bird. I created and named a layer for each. Then I took a brush and created a mask for the bear. Once that was done I activated the Luma Mask and created a mask that outlined the bear and bird based on the luminosity differences between the subject and background.
I then did the same thing for the bird.
Many times depending on the image I may add a bit of vignetting. I opted not to on this image. I will now process this image out at full size, ProPhoto color space 16bit. After the image is processed it opens up in Photoshop where I do a final inspection. I could now take it into Topaz DeNoise or Sharpen if I desired to. It’s now ready to be printed. Remember, I am a believer in prints. Since I am doing this image at home and not at the gallery I’ll print it out on my P700 Epson printer to evaluate. I’ll make a larger print later this week when I go downtown.
Look for more Behind The Shot articles coming soon.
Kevin Raber
January 2021
Elevate Your Vision


Read this story and all the best stories on The Luminous Landscape
The author has made this story available to Luminous Landscape members only. Upgrade to get instant access to this story and other benefits available only to members.
Why choose us?
Luminous-Landscape is a membership site. Our website contains over 5300 articles on almost every topic, camera, lens and printer you can imagine. Our membership model is simple, just $2 a month ($24.00 USD a year). This $24 gains you access to a wealth of information including all our past and future video tutorials on such topics as Lightroom, Capture One, Printing, file management and dozens of interviews and travel videos.
- New Articles every few days
- All original content found nowhere else on the web
- No Pop Up Google Sense ads – Our advertisers are photo related
- Download/stream video to any device
- NEW videos monthly
- Top well-known photographer contributors
- Posts from industry leaders
- Speciality Photography Workshops
- Mobile device scalable
- Exclusive video interviews
- Special vendor offers for members
- Hands On Product reviews
- FREE – User Forum. One of the most read user forums on the internet
- Access to our community Buy and Sell pages; for members only.
You may also like