


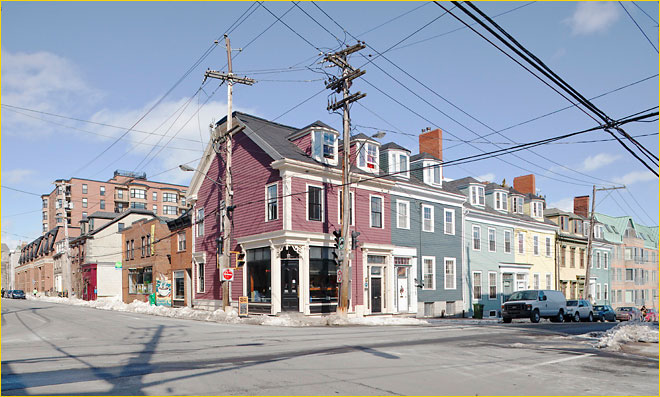
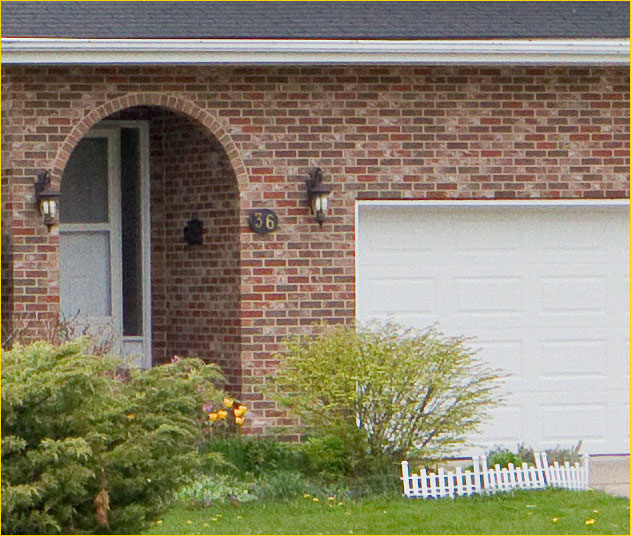
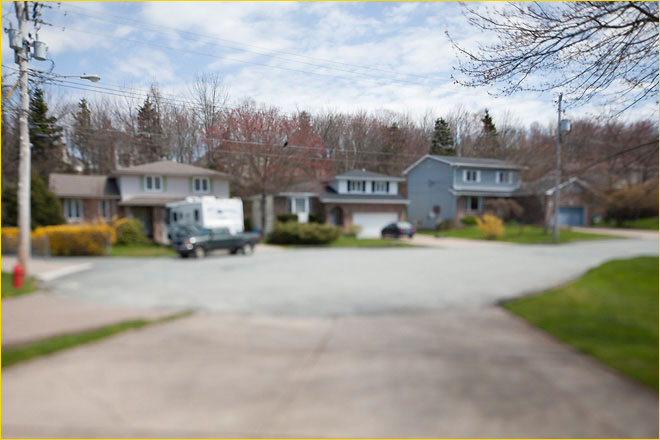
This opening photo was taken with the Canon
TS-E 24/3.5L, the original version,
on a 5D Mk II at f/8. I have made prints of this image up to about 20 by 30
inches, and I think it holds up well. What I remember most about producing
this image is just how much work it took in Photoshop to get it where it is.
The original Canon 24 mm TS lens is reasonably sharp in the center, but contrast
gradually decreases as we look farther off-axis, that is, towards the corners
of the image. The image remains well formed in most respects; there are no
streaks or obvious coma. There is, however, lots of colour fringing. Using
Adobe Camera Raw or Photoshop to “fix” the fringing in one part of
the image makes it worse in another. For the above image I spent hours first
working out compromise settings and then de-saturating and cloning selected
areas to get rid of the remaining colour fringing. Then sharpening took another
hour or so. The best setting for the center was nowhere near enough for the
edges, and what was right for the edges was way too much for the center. After
initial sharpening appropriate for the center, additional sharpening was “painted” in,
working from the center and gradually increasing the amount of sharpening.
The sky and roadway received only the initial amount of sharpening.
Had I been using Version II of the lens, I could have taken the photo at f/5.6
or f/8, applied no corrections, and the result would, I believe, have been
superior
I will presume here that readers have already seen the review done by Andy
Westlake at Digital
Photography Review.
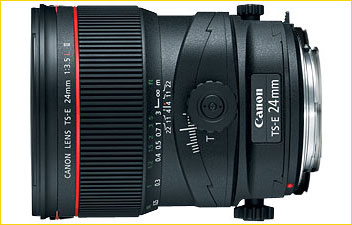
I won\’t repeat a general description of the lens and its controls. I will add
a minor detail, however, in that the lens comes with an optional larger knob
for the shift control. The larger knob can be used, apparently, only with cameras
that do not have built-in flash. My overall conclusions about this lens will
differ somewhat: This is a very fine lens, perhaps better than any other 24
mm you will encounter. This lens is fully useable wide open, that is at f/3.5.
I found central sharpness and contrast to be at its best at f/3.5 and even
the corners are better at f/3.5 than some 24 mm lenses will be at any aperture.
There is some colour fringing, but your inkjet colour printer probably gives
you some too if you look closely. I did get a surprise, though, and there are
some things about tilt-shift lenses the designers don\’t seem to have figured
out yet.
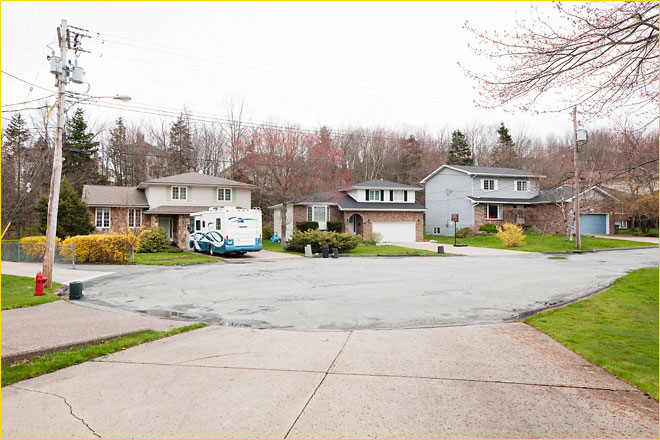
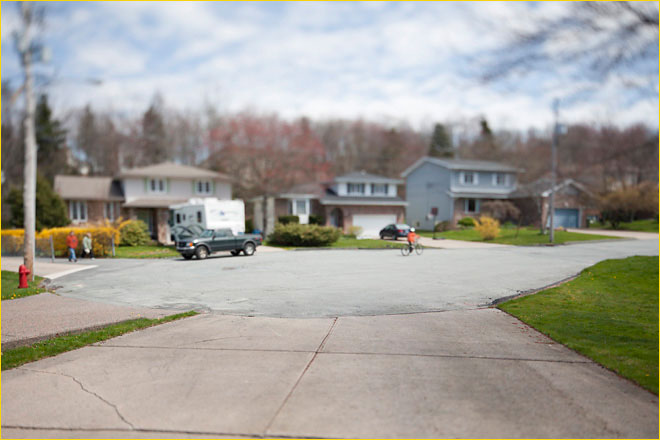
Typically, the first thing I do when I get a new lens is to step into the
doorway of my garage and take a few shots of the houses across the street.
Then I look at the images in Photoshop. That\’s what I did with this lens. I
mounted it on a 5D MkII. I took a few shots with the lens wide open, then at
f/8, then with the lens tilted down by 0.8 degrees to sharpen the foreground.
Here\’s one of the initial images. It was raining a bit, that\’s why I sometimes
need to be in the garage.
At this stage, let me admit that most of the time I shoot without a tripod,
even with a tilt-shift lens. Often my preferred vantage point is in the middle
of a road, just over the brow of a hill. There just isn\’t time to set up a
tripod, take the shot and jump out of the way of the approaching truck. I don\’t
always get things lined up just right, but with minor correction in Photoshop,
I get what I want. And its still worthwhile using a tilt-shift lens.
This time the results I was getting were obviously very good but I could see
shot to shot variation in the details. I needed to use a tripod. And a good
thing too, because I discovered something about Canon wide angle tilt-shift
lenses that I didn\’t know before. It will affect all who use such lenses on
a tripod! But we\’ll come back to that bit later. First the basics.
Here\’s a pixel-for-pixel crop of the central part of the image at f/3.5 taken
the next day after the sun had come out.
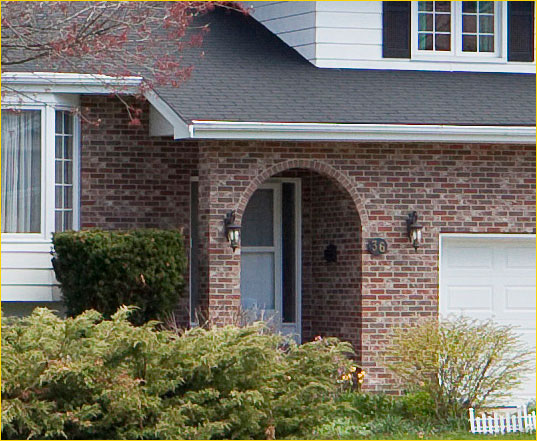
The brick-to-mortar contrast is as good as I have seen, even with longer lenses
at their best apertures! There was no improvement in central image quality
on stopping down. By f/9 contrast was starting to decrease just perceptably,
and the trend continued to f/16 and presumably beyond. I found it hard to believe
that this lens was really at its best wide open, so later I thought I\’d try
using the higher resolution sensor of a 7D. This would be equivalent to a 45
megapixel full-frame sensor. It was overcast again, but the results were confirmed.
If I were to show a group of people samples for f/3.5, f/5.6 and f/8 without
any annotation and asked them to vote which was best, I believe each sample
would receive 1/3 of the votes. Here\’s the result for f/3.5. I won\’t bore you
with the others; they look just the same.
But what of the edges and corners. Well. Back to the sunny day, here\’s a comparison
of the bottom right corner with the lens tilted forward 0.8 degrees (or as
best I could estimate that), and with 10 mm of downwards lens shift. Since
the driveway is in shadow, I have brightened the image and increased the contrast
a bit. Sharpening is the same for all the images I\’m showing you, except, of
course for that first image taken with the older lens. On the left is the result
at f/3.5; on the right is the image for f/8. I should also note that I have
applied no correction for vignetting in any of these images!
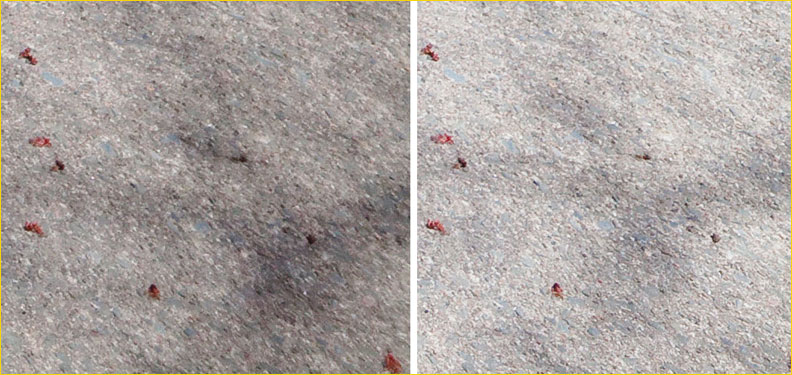
I\’d have to admit that here f/8 is noticeably better than f/3.5. Certainly
it is brighter. But even f/3.5 is good enough for most work, or would be with
a little more brightness, contrast and sharpening. This lens really can be
used wide open, and even when shifted.
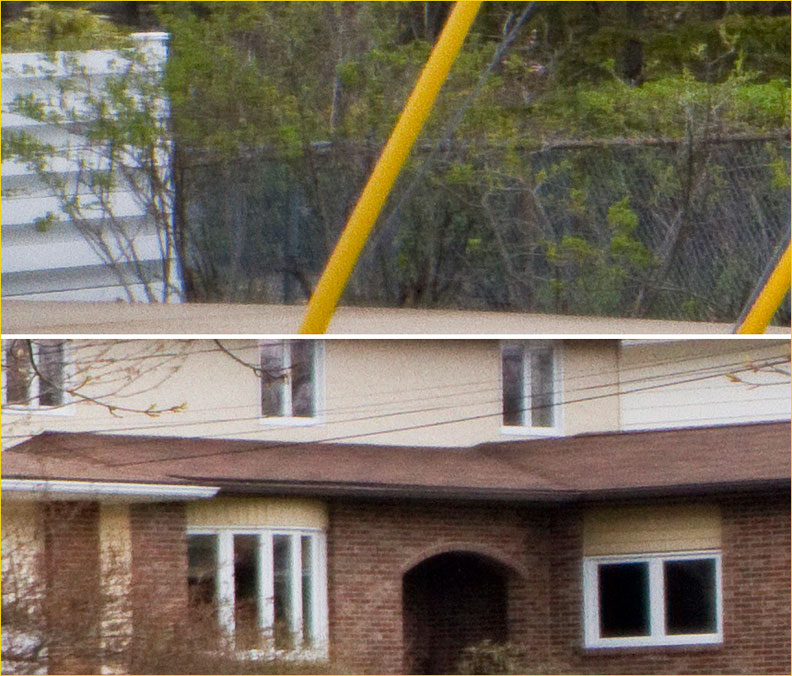
For the next example, we\’ll shift ahead to the cloudy day with the 7D. Here
are f/3.5 sections for the left and right edges with the lens shifted fully
to the left and right respectively. You\’ll note that this shows portions beyond
the normal edges for a full-frame photo taken with no shift. Remember, this
is equivalent to using a full-frame 45 megapixel camera: you are looking at
the edges of an image that is about 8 feet wide overall. Yes, the results at
this scale are a bit soft. But the image quality improves on both side of these
images; you are essentially looking at a worst case for this lens! Extreme
left image is on top, right side is below.
For some time now I have wanted to comment on how designers just haven\’t yet “got
it” with tilt-shift lenses. Once a lens is tilted, the optical world you
thought you knew changes. The rules are different. We all know, for example,
that it makes no photographic sense to focus “beyond infinity”. Well,
not true once a lens is tilted! Once a lens is tilted, all lens to sensor/film
distances have a valid photographic use, even distances shorter than one focal
length. Here\’s a demonstration of how being limited to infinity focus limits
our image making.
Now I realize this is not something you are going to do very often, but you
might. We apply full forward lens tilt. This brings the plane of sharp focus
up just under the camera just six inches below the lens in fact. The angle
the plane of sharp focus takes with respect to the film/sensor plane is now
controlled by where the lens is focused. With the lens focused at infinity,
and with the film/sensor plane vertical, the plane of sharp focus will angle
slightly downward away from the camera, just at bit below the horizontal plane.
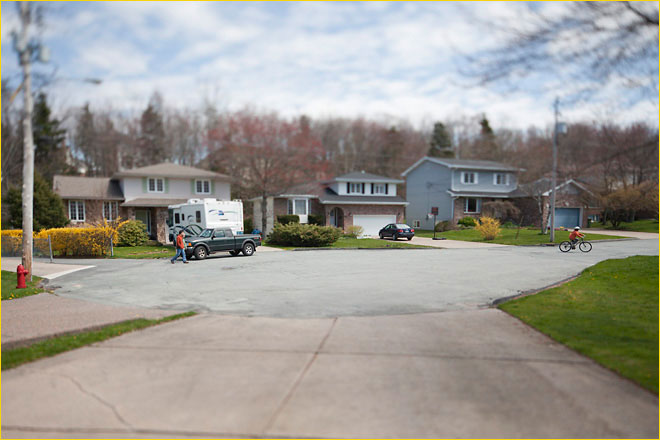
And below is the image one gets. The plane of sharp focus extends from 6 inches
below my lens to approximately the curb on the other side of the street. The
plane of sharp focus passes through the yellow bushes on the left and the bicycle
wheels on the right.
If the lens is focused at about 2 feet, the plane of sharp focus angles upwards,
in this case roughly to the top wires above the central house on the other
side of the street.
OK, so what do we do if we want the plane of sharp focus to angle more downwards,
such as to some point in my driveway? Well, we have to focus “beyond infinity” to
do that! This lens does do that a bit. But we still can\’t move the zone of
sharp focus into my driveway proper; the best we can do is to reach the junction
of my driveway with the road.
Lesson to designers of Tilt-Shift lenses: Let the lens focus substantially
beyond infinity!
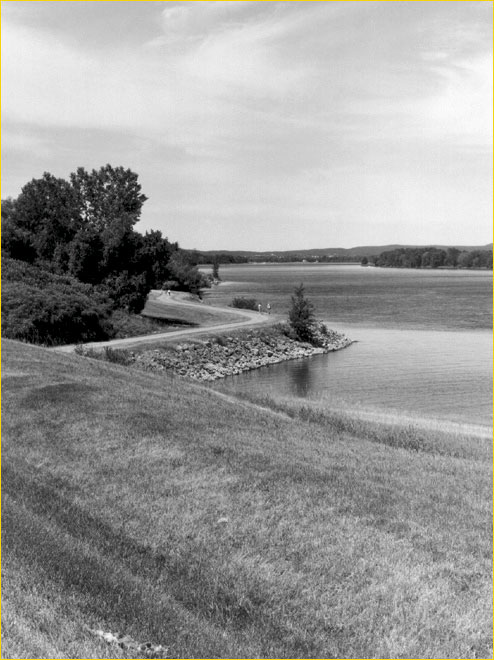
Here\’s a real example where, using a 5 by 7 inch view camera, I focused “beyond
infinity” to good effect.
Now for the surprise I mentioned. Look at those maximum-tilt neighbourhood
photos again: any one of them or all three. Look at the verticals. They splay
slightly outwards at the top, as if the camera itself were angled downwards.
That telephone pole at the left is not really vertical; it truth it angles
inwards. For some reason unknown to me, the Canon Tilt-Shift lenses effectively
tilt the film/sensor plane as the lens is tilted. Traditional view camera lenses
do not do this. I tried using a 90/4.5 Grandagon: no change in verticals as
the lens is tilted. I tried a 180/5.5 Telomar telephoto: no change in verticals
as the lens is tilted. I tried Version I of the 24 mm Canon tilt-shift: yes
it changes the verticals. I tried the old Canon 35/2.8 TS lens: yes, it changes
the verticals as the lens is tilted. Maybe it\’s something to do with retro-focus
lenses in general. I don\’t understand it. But there\’s a lesson here, for tripod
users especially:
Lesson for tripod users: If you are using lens tilt in a photo where verticals
are important, reset the angle of the camera back to correct the verticals
AFTER the lens tilt is set!
In past view camera practice I have normally set the camera back to vertical
using a level or whatever and assumed verticals were looked after. It always
worked for view cameras. It doesn\’t work for Canon\’s 24 and 35 mm tilt-shift
lenses at least, and perhaps for others\’ too.
Another lesson for the lens designers. Look again at that photo where the
wires are just about all that\’s in focus. Look towards the edges of the image:
nothing is in focus. When the lens was focused at or near infinity the sharp
portion of the image stretches from edge to edge. My best guess is that the
lens is correcting itself for close focus (floating elements and all that).
Good for a normal lens, yes. But for a Tilt lens, “focusing” the
lens at 2 feet may really be trying to render an object at 50 feet away or
even beyond.
Lesson for T-S Lens designers #2: If the lens needs close-up correction, that
correction needs to be able to be set independently of the lens extension (which
in the case of a tilted lens, sets the angle of the plane of sharp focus, not
the actual working distance.)
I have a couple of lesser suggestions for designers of Tilt-Shift lenses as
well. The amount of tilt one needs to apply in a given photographic situation
scales with lens focal length. Shorter lenses need less tilt; longer lenses
need more tilt. Most users of a 24 mm Tilt-Shift lens will seldom need more
than 2 degrees of tilt. The 8.5 degrees available for the 24 mm Canon lens
is more than enough, as is the 6.5 degrees of tilt available for the 17 mm
lens. What I would really like to have, however, is a way to set small amounts
of tilt – say 0.35 degrees – accurately. Then, if 8 degrees of tilt is good
for a 24 mm lens, the 90 mm lens should have about 30 degrees of tilt available.
It doesn\’t.
Many photographers like to use shift lenses to produce panorama
images, stitching together shots taken with different amounts of left and right
shift. For such purposes, it would be better to mount the lens directly on
the tripod (keeping the lens fixed in space) and shift the camera body, rather
than hold the body fixed and shift the lens.
Now here finally is a \’real\’ image taken with the new Canon TS-E 24/3.5L II:
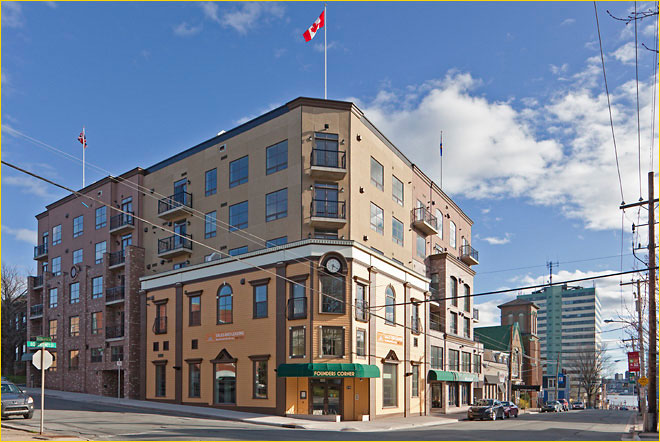
This photo has had a bit of overall sharpening applied, and a little bit of
colour fringing correction. In a 14 by 21 inch print of this image, a magnifier
will show some colour fringing, but most of it was produced by the printer,
not the lens. And, yes, you do need a magnifier to see the fringing. I had
tried this image earlier using the older version of the lens. It just didn\’t “work”.
This new Canon lens is a winner; in my books well worth the (substantial)
price. It is one of those rare lenses that is fully usable wide open. Depth
of field considerations may dictate stopping down, however, even when lens
tilt is used to best advantage. But, take special care if you use a tripod!
May, 2010
___________________________________________________________________________________
Harold Merklinger
Harold Merklinger is a retired scientist living in Dartmouth, Nova Scotia.
As a teenager he considered photography as a career, but after talking to a
few professional photographers, he decided that there were probably other careers
that would afford a better chance to appreciate photography as a hobby. His
interests tend to be somewhat technical. In 1990 he wrote a book on photographic
depth of field and followed that with a second one in 1993 on view camera focus
and depth of field. Both books are currently available for download from his
web site: http://www.trenholm.org/hmmerk/download.html
For users of the Canon tilt-shift lenses he has prepared
tables for estimating required tilt and the resulting depth of field (http://www.trenholm.org/hmmerk/Canon24TSEReview/CANON_TS_TABLES.pdf).
How to use these tables may not be obvious; it might help to read his View
Camera Focus page (http://www.trenholm.org/hmmerk/HMbook18.html).
He promises to include better
instructions in a later version of these tables.


Elevate Your Vision


Read this story and all the best stories on The Luminous Landscape
The author has made this story available to Luminous Landscape members only. Upgrade to get instant access to this story and other benefits available only to members.
Why choose us?
Luminous-Landscape is a membership site. Our website contains over 5300 articles on almost every topic, camera, lens and printer you can imagine. Our membership model is simple, just $2 a month ($24.00 USD a year). This $24 gains you access to a wealth of information including all our past and future video tutorials on such topics as Lightroom, Capture One, Printing, file management and dozens of interviews and travel videos.
- New Articles every few days
- All original content found nowhere else on the web
- No Pop Up Google Sense ads – Our advertisers are photo related
- Download/stream video to any device
- NEW videos monthly
- Top well-known photographer contributors
- Posts from industry leaders
- Speciality Photography Workshops
- Mobile device scalable
- Exclusive video interviews
- Special vendor offers for members
- Hands On Product reviews
- FREE – User Forum. One of the most read user forums on the internet
- Access to our community Buy and Sell pages; for members only.
You may also like


