Dye transfer printing stands as photography’s most exquisite lost art—a process of unparalleled beauty, remarkable complexity, and extreme rarity. With its 500:1 brightness range, extraordinary color fidelity, and unmatched tonal depth, these prints represent the pinnacle of photographic reproduction. Once the choice of museums and serious collectors, this labor-intensive craft now survives through just a handful of artisans working with hoarded supplies. Ctein, a longtime friend of Luminous Landscape and master of this technique, has generously shared his expertise with us and the photography world, creating prints with a richness and tactile quality that digital processes can admire but never truly replicate. Each dye transfer print exists as both historical artifact and artistic marvel—born through meticulous craftsmanship and offering viewers a visual experience unlike any other in photography.
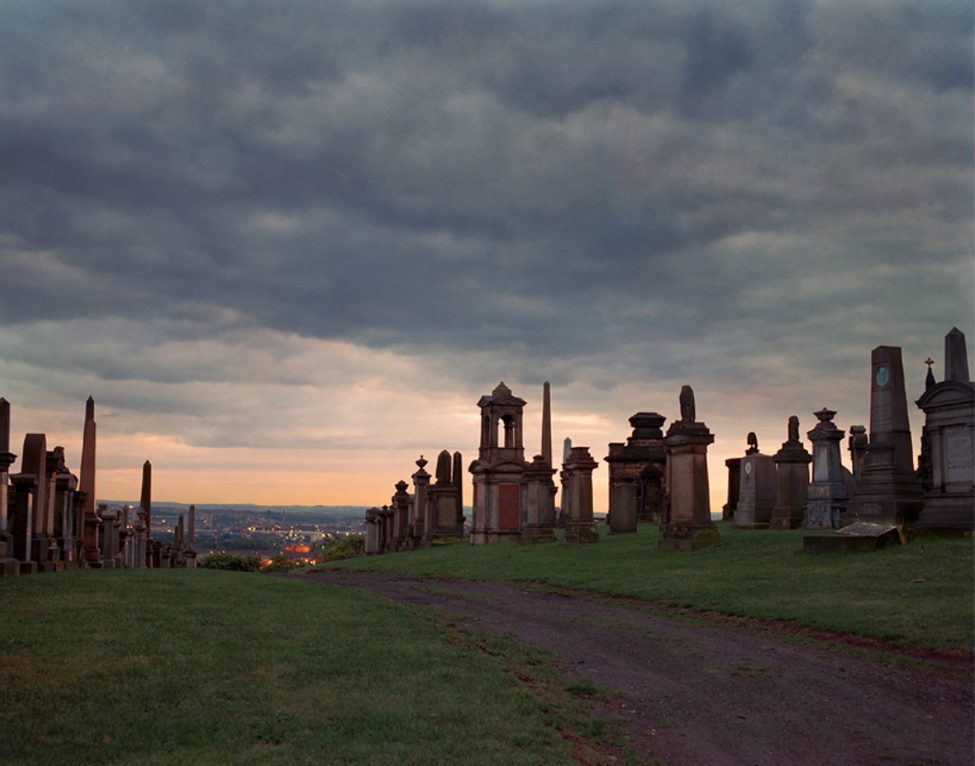
Dye transfer prints are simply without peer. They have a richness and depth unmatched by any other kind of photographic print. They can show extraordinary subtlety of tone and hue, combined with a brightness range of 500:1 from blackest black to whitest white. Nothing else comes close to the magnificence of a dye transfer print.
Dye transfers are to ordinary darkroom color prints as, well, a fine stereo system is to a $10 transistor radio. Dye transfer prints have incomparable beauty, extraordinary fidelity, and unusual longevity. They offer the artist an exceptional degree of aesthetic control. They offer the viewer a visual richness and depth which cannot be found in ordinary prints.
When museums and collectors wanted the absolute finest in color printing, they called for dye transfer. Dye transfer printing’s always been a very exclusive club, but today only a handful of people in the entire world still make dye transfer prints. After 70 years, dye transfer printing has become a nearly-lost art
Why? First, dye transfer printing is very time-consuming and expensive. Making the first 16″ x 20″ dye print from a negative would cost me over $100 in materials and several days’ time, even more when printing from slides or digital files. Dye transfer printing also demands extraordinary skill, understanding, and good artistic judgement. Almost anyone could learn it; terribly few became any good at it.
Second, dye transfer printing required special materials which were made only by the Eastman Kodak Company. In 1991 Kodak discontinued a special film called Pan Matrix Film which I needed to make prints directly from color negatives. In 1994 Kodak abruptly and without warning ceased production of Matrix Film (used for printing from separations) and all other dye transfer materials.
How is it that I still made dye transfer prints up until 2014? When Kodak stopped making Pan Matrix Film I faced with the possibility of never making another color-negative dye transfer print. As an artist, I couldn’t stand the idea of spending the rest of my life thinking, “Gee that’s a pretty nice print… it would have been so much lovelier as a dye transfer.” (Remember, digital printing was only “okay” back then, not anything like a possible alternative.) I mortgaged myself to the hilt and packed a large amount of this unique film in a deep freeze. When Kodak ended all production, I stockpiled enough chemicals, dye and paper to allow me to continue printing. I went deeply in debt from this, but I was able to continue creating my art for twenty more years.
Those few still making dye transfer prints survive on such hoarded supplies and materials they fabricate themselves. Kodak’s decision to kill dye transfer constituted an artistic loss of the highest order.
WHAT IS DYE TRANSFER PRINTING?
Dye transfer is very different from other modern color print processes. No other process gives you so many ways to control the look of the final print. I’ve described it to people as being, “like having Photoshop on the darkroom.” That is what makes dye transfer so hard, and it is also what makes dye transfer print so magnificent. Dye transfer provides the photographic artist with the tools to express extraordinary subtleties and nuances. Color prints can be fine-tuned to convey exactly what the artist intended. In dye transfer printing, rarely is the printer limited by the process; dye transfer allows so much control that it is impossible to completely master all its possibilities.
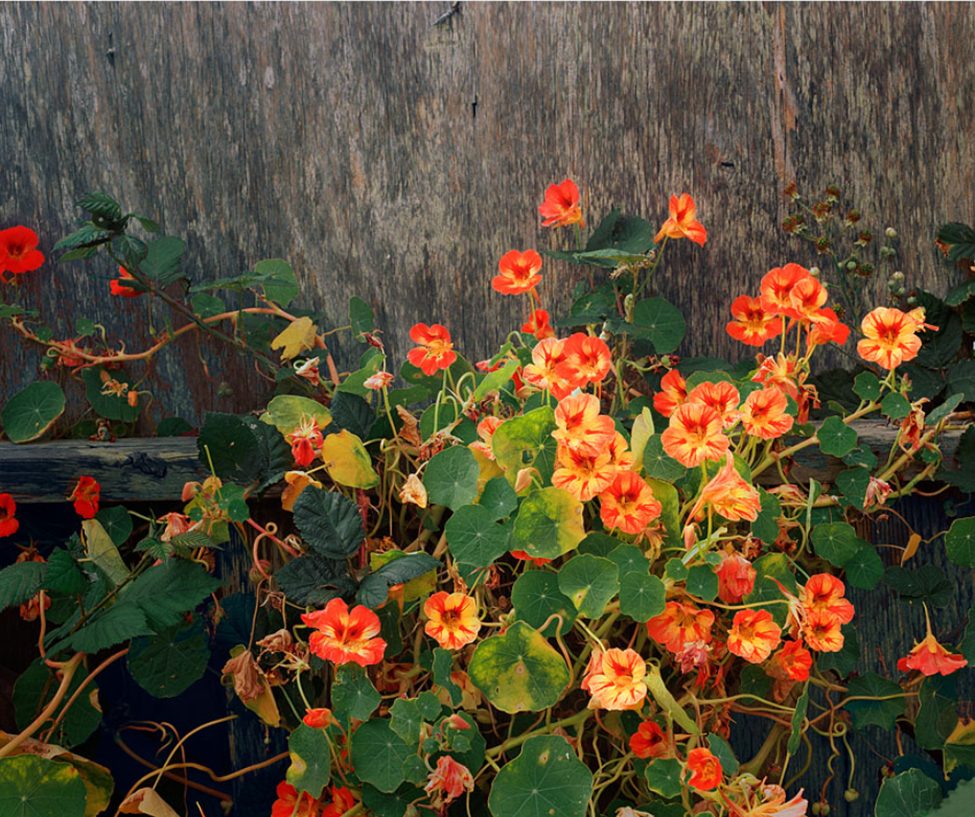
Dye transfer dyes are much closer to ‘ideal’ than other photographic dyes. The colors are purer. For example, the yellow dye in a dye transfer print is very clean, while ordinary color prints have an orangish yellow (“Kodak” yellow) which muddies greens and masks subtle variations in reds and oranges. That gives a dye transfer print much better and more accurate color. A dye print can have a brightness range of 500:1 or more; no other print, black-and-white or color, matches that.
The dyes in a dye transfer print are very stable. Some conventional color prints now have a light stability better than dye transfer, but they also deteriorate in the dark. Unless you keep the majority of your work on lighted display at all times, dark fading or staining will prove more damaging than light fading. A dye transfer print has a dark-life expectancy, at room temperature and humidity, of over 300 years– much better than even Ilfochrome. Dye transfers are printed on a double-weight fibre-base paper stock which is known to be stable and archival.
HOW I (used to) MAKE DYE TRANSFER PRINTS
Dye transfer printing resembles the mechanical printing process that magazines use to make color pictures. A color printing press uses four separate printing plates, one each for the three primaries (magenta, yellow, cyan) and one for black. Each plate is engraved with a halftone image for one of the colors, which is coated with a thin layer of oil-based ink. The four plates then transfer their ink to the surface of a sheet of blank white paper to make the color pictures. The final picture is not ‘created’ chemically in the paper; it is assembled on its surface from four separate screened color images.
Dye transfer uses three continuous-tone sheet film plates called matrices. The matrices are soaked in water-based cyan, magenta and yellow dyes. The matrices are rinsed clean of excess dye and squeegeed against a sheet of gelatin-coated paper, much like regular photographic paper but without the silver compounds. The gelatin absorbs the dye from the matrix. The result is a continuous-tone dye image on paper.
The details are a bit more involved…
First, I need to separate out each of the individual color images that comprise a color negative. I use red, green, and blue filters to enlarge the individual color negative images onto three sheets of Pan Matrix Film.
Pan Matrix Film is a special film that I can process to produce a “relief image”: after I develop and wash the film, the thickness of gelatin left on the film base is proportional to the amount of light that hit the film.
From here on, I can work by ordinary room light. I soak the matrices in “acid-fixing” dyes. A given thickness of matrix gelatin emulsion will absorb just so much acid-fixing dye out of the dye bath. That’s what makes dye transfer possible. The thickness of the matrix relief image is proportional to the original exposure, so the amount of dye carried by the matrix is also proportional. More light means more gelatin, which means more dye in the print.
The red-, green-, and blue-exposed matrices go into cyan, magenta, and yellow dye baths, respectively. I can adjust the contrast of each dye image by changing the acidity of that dye bath. I have sets of different contrast dyes, much as black-and-white printers have different grades of paper. Sometimes, I even use different contrasts for the different matrices to correct for some unusual color balance problem, like aerial photographs that are too blue in the shadows.
The matrices absorb all the dye they can after soaking for 5 to 10 minutes. I rinse each matrix in 1% acetic acid to remove the excess dye from the surface; because the dyes are fixed (held in place) by acid, they don’t wash out. Incidentally, the large amounts of dilute acetic acid used in the process leave the prints smelling faintly of vinegar for months-to-years after printing. Don’t worry—that’s normal!
Now the matrix is ready for printing. I take the first dyed matrix and squeegee it emulsion-down onto a sheet of the dye transfer receiving paper. The dye molecules migrate from the matrix to the paper. After five minutes, I peel off the matrix, which leaves a primary color dye image on the receiving paper (there will be almost no dye left in the matrix). I wash the matrix in hot water, after which I can either hang it up to dry or redye it for another print. I repeat the transfer process for each of the three matrices. When I am all done I have a full color dye transfer print.
But it probably won’t be right. That first print will be too light or dark, too contrasty or flat, and/or off-color. The shadows may not have the right amount of detail, or the highlights may need a little more sparkle. Or etc., etc.
Dye transfer printing provides me with a daunting number of ways to control the appearance of the print. I can use masks when making the matrices to adjust the color balance, color rendition and tone scale of the print. I can control the density and contrast of each matrix individually during exposure and processing. I can adjust the acidity of the dye baths to change the image contrast and density, and that looks different from changing the matrix contrast.
I can lighten or darken an image by changing the composition of the acid rinse baths, and I can add dye selectively to shadows or remove it from only the highlights. I can make additional transfers from each matrix to fine-tune the image. I can adjust each primary color image completely independently of the others, and I can use any combination of these effects. Learning how to judge what corrections will take me from a first print to that perfect final one is what being a master printer is all about.
Finally, I must do all of this with meticulous technique:
If I don’t process the matrices with perfect uniformity and consistency, I will get unwanted (and possibly uncontrollable) color shifts or blotches in my prints. Freshly processed matrices are fragile beyond belief; I must work very carefully if I want useable matrices.
I must carefully register the three color images. Before squeegeeing down a matrix, I press punched holes in the film over pins set in one end of the transfer easel and then roll the matrix onto the paper starting at the pinned end.
I use a roller to press the dye-laden matrix into close contact with the paper. If I roll too lightly, I’ll get dye bleeding into the liquid trapped between the film and the paper giving me blotchy, unsharp prints. If I roll the matrix down too hard, I’ll warp it slightly and get color fringes in the print. Any air bubbles or dust between the matrix and paper prevent the dye from transferring at those spots, making for much retouching and spotting later. I must do everything right while handling large sheets of wet, floppy film and paper.
It’s no wonder that few printers ever made dye transfer prints. But the results are worth all the effort and years of acquired skills.
Ctein is a fine printmaker and author. His book on advanced darkroom techniques, “Post Exposure” (Focal Press), is available as a free download from his website (ctein.com). “DIGITAL RESTORATION From Start to Finish ~ 3rd Edition” is available from fine booksellers everywhere. He is also the co-author, with John Sanford, of the New York Times Best Seller, “Saturn Run,” a science fiction thriller. You can email Ctein at [email protected]


Elevate Your Vision


Read this story and all the best stories on The Luminous Landscape
The author has made this story available to Luminous Landscape members only. Upgrade to get instant access to this story and other benefits available only to members.
Why choose us?
Luminous-Landscape is a membership site. Our website contains over 5300 articles on almost every topic, camera, lens and printer you can imagine. Our membership model is simple, just $2 a month ($24.00 USD a year). This $24 gains you access to a wealth of information including all our past and future video tutorials on such topics as Lightroom, Capture One, Printing, file management and dozens of interviews and travel videos.
- New Articles every few days
- All original content found nowhere else on the web
- No Pop Up Google Sense ads – Our advertisers are photo related
- Download/stream video to any device
- NEW videos monthly
- Top well-known photographer contributors
- Posts from industry leaders
- Speciality Photography Workshops
- Mobile device scalable
- Exclusive video interviews
- Special vendor offers for members
- Hands On Product reviews
- FREE – User Forum. One of the most read user forums on the internet
- Access to our community Buy and Sell pages; for members only.
You may also like