One of the aspects of digital image processing that causes a great deal of confusion is the many different ways that are available to sharpen digital files. I have written a description of how most pros do sharpening using LAB mode, in my tutorialInstant Photoshop.
A popular program for doing a better job of sharpening isnik Sharpener Pro. Then there is a novel technique that I recently published that usesHigh Pass Sharpening.
Now,John Brownlowprovides us with a fascinating though somewhat complex new technique for accomplishing "intelligent" sharpening.
INTRODUCTION
Sharpening is a fact of life for photographers who output digitally. Both digital cameras and film scanners produce digital images which are subtly (or not!) softer than the optical images they are derived from. The answer to this softening is sharpening, and most digital images receive at least some sharpening at some point in the work flow. In particular, it’s important to realize that having to sharpen an image is NOT a sign of failure. Even the sharpest image, once scanned, may need a little sharpening to return a real impression of biting sharpness.
Sharpening is actually a very straightforward process, and simply involves exaggerating the contrast between neighboring pixels in an image. Most photographers are familiar with Photoshop’s Unsharp Mask filter, and typically use values of 50-100% and 0.5-1.5 pixels to sharpen up their images. This works fine in many cases, but some images need more aggressive treatment. Unfortunately, instead of improving matters, increasing the amount of sharpening further tends to degrade the image rather than improving it.
One way round this is to avoid unsharp mask and use more exotic forms of sharpening such as the so-calledHard Light, High Passmethod Michael has described elsewhere on this site. However most of these methods still struggle when extreme sharpening is required.
Figure 1 shows an example of what goes wrong. The available-light portrait below was shot handheld with a Rollei SL66 using 400 ISO film, using f/2.8 on an 80mm Rollei Planar lens and a shutter speed of 1/30th. Somewhat surprisingly the original image is quite sharp. However it was then scanned on a relatively cheap Epson 1640 SU flatbed scanner, which is well known for producing somewhat soft images.

Figure 1.
While the softness may not be apparent in the full-size image, a close up of the right eye (Figure 2) shows the problem more clearly. In an image of this kind I would expect the eyelashes to be rendered crisply, but in the scan below they are anything but. (They are pretty crisp on the negative).
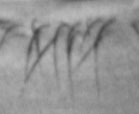
Figure 2.
THE STANDARD APPROACH
There are quite a few steps necessary to execute this technique. APhotoshop Actionis available to automate the process.
Applying a fairly standard amount of sharpening using Photoshop’s Unsharp Mask filter with settings of100% and 1 pixeldoesn’t really improve matters much, as you can seehere.
Increasing the amount of sharpening to300%results inugly artifacts and a nasty pseudo-grainwhich clearly degrade the image rather than improving it.
By the time we are sharpening by500%, the image looks more like 35mm film than Medium Format, and the artifacts arecompletely unacceptable.
And the advanced Hard Light, High Pass method of sharpening lookspretty uglyto these eyes.
So it looks like we’re out of luck. But are we?
AN ALTERNATIVE APPROACH: SMART SHARPENING
The biggest problem with Unsharp Mask in this context is that it’s totally dumb. It tries to sharpen everything, even big blank areas that have no detail and don’t need sharpening at all. The result is the hideous grain in the above images.
But what is it in an image that really needs sharpening? Answer: the edges.
Hang on… doesn’t Photoshop have a ‘Find Edges’ filter?
What if you could use ‘Find Edges’ to somehow only apply Unsharp Mask to the edges of an image‚ the parts that actually NEED sharpening‚ and leave the rest alone?
It turns out this is not only possible, but it’s relatively straightforward, and it works beautifully. And that’s what I mean by ‘smart’ sharpening, since we are now only sharpening the parts of the image that actually need it.
Here’s how you do it. In this example I use a monochrome image. To do the same thing on a color image I suggest you convert it to LAB color mode and apply this process to the L (Lightness) channel, which will sharpen the image without introducing color aberrations.
At the end of this article are links to Photoshop Actions which automate this process. Each takes a slightly different approach but they all work in essentially the same way. I suggest you walk through the process first to get a feel for how it works before trying to use the actions. Better still, write your own action!
Here isa link to the original image(a detail of the above portrait) which I used: you can download it yourself if you want to follow the process below exactly. Load the image into Photoshop, and here goes.
1) Click on the ‘Channels’ palette andcreate a new channel. This is going to be a mask channel which defines which parts of the image we are going to sharpen. 2)Give it the name ‘Sharpen Mask’and set color to indicate masked areas (the default).
Now we copy the image into the mask channel as follows.
3) Click on the ‘Gray’ channel
4) Select -> Select All
5) Edit -> Copy
6) Click on the ‘Sharpen Mask’ channel and choose Edit -> Paste. Your screen should now look something likethis.
7) The next step is to use the ‘Find Edges’ command to isolate the edges of the image, which we will use as a basis for deciding what needs sharpening and what doesn’t. To do thisselect Filter -> Stylize -> Find Edges.
The result should look likethis.
It is important to understand exactly what this image represents. This isn’t anything anyone is ever going to see, and the original image remains intact. What this is, in fact, is a map of how Unsharp Mask will be applied to the image. Areas in black are going to have sharpening applied to them. Areas in white will be left alone. Areas that are gray will have more or less sharpening applied to them depending on how dark or light the gray is.
The next step is to adjust the tonality a little so that areas that need sharpening are *really* black and anything that doesn’t need sharpening at all is *really* white. To do this…
8) …use the Image -> Adjust -> Levels command tobring up the black point and bring down the white point.
9) We nowapply a Gaussian blurto the image to make sure the transitions between areas that are sharpened and areas that aren’t is nice and smooth. How much you apply is up to you, but between 3 and 10 pixels should be enough. I used 3 pixels, as you can seehere.
10) If you wish you can nowuse the Levels command againas in step 8 to fine tune the mask.
Okay, now we’re ready to rock and roll. Just to recap, we now have a channel in which the black areas represent parts of the image we want sharpened, and white areas are the bits we want left alone.
We now have to turn this into a selection of the original image where the black bits are selected and the white bits aren’t.
11) ChooseSelect -> Load Selectionand make sure the ‘Channel’ is set to ‘Sharpen Mask’ and the ‘Invert’ tickbox is checked, as shownhere.
12) Click on the Layers tab and make sure the original image is visible. You should see a selection outline over the original unsharpened image, as shownhere.
13) This step is optional, but if you wish you can use the View -> Hide Extras command (or Cmd/Ctrl-H) to hide the selection edges. I find this makes it easier to judge the preview.
14) Okay, this is it. Choose Filter -> Sharpen -> Unsharp Mask andstart dialing in some figures. You will find that you can use *much* higher amounts of sharpening, even up to 300 -400%, without significantly degrading the image. When you are happy with the preview, hit Okay, and you’re done.
That’s it. You’re done!
THE RESULTS
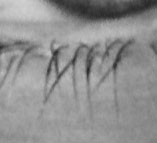
Here’s how my final image looked, with300% of smart sharpening. Compare it to theoriginal image, or take a look at the details below.

CONCLUSION
Smart sharpening offers a way of applying aggressive sharpening to digitized images without introducing the artifacts normally associated with large amounts of Unsharp Mask.
While the method may initially appear complex, the individual steps are relatively simple. Best of all, it can easily be automated using a Photoshop Action. You candownloadone I wrote and which automates the whole process, pausing to allow you to enter your own parameters,here.
This package also includes a ‘custom’ smart sharpen which uses Photoshop’s custom filter feature, and an algorithm I developed myself, to find the edges. Some people feel this results in a smoother image, though personally I use them interchangeably.
John Brownlow, Toronto, September 2001.
John Brownlowis a British-born writer and filmmaker who has made many films for British television but now works as a movie screenwriter.
You can visit John’s web sitehere.
Read this story and all the best stories on The Luminous Landscape
The author has made this story available to Luminous Landscape members only. Upgrade to get instant access to this story and other benefits available only to members.
Why choose us?
Luminous-Landscape is a membership site. Our website contains over 5300 articles on almost every topic, camera, lens and printer you can imagine. Our membership model is simple, just $2 a month ($24.00 USD a year). This $24 gains you access to a wealth of information including all our past and future video tutorials on such topics as Lightroom, Capture One, Printing, file management and dozens of interviews and travel videos.
- New Articles every few days
- All original content found nowhere else on the web
- No Pop Up Google Sense ads – Our advertisers are photo related
- Download/stream video to any device
- NEW videos monthly
- Top well-known photographer contributors
- Posts from industry leaders
- Speciality Photography Workshops
- Mobile device scalable
- Exclusive video interviews
- Special vendor offers for members
- Hands On Product reviews
- FREE – User Forum. One of the most read user forums on the internet
- Access to our community Buy and Sell pages; for members only.


