A Digital Printing Class
Authors Note:
This article was originally written forPhoto TechniquesMagazinein1997to illustrate some basic image processing techniques available with PhotoShop.
A quick-start tutorial onPhotoShopfor beginners will also be found helpful.
Please see the articleDigital Processingfor up-to-date thoughts on the latest in digital imaging equipment and techniques.
A Digital Printing Class
The range of controls available in the digital darkroom far exceeds those found by users of traditional photographic media. But, this can be as much of a disadvantage as a boon to the serious printer. The richness and complexity of PhotoShop, the predominant image processing program, can be daunting. For those just becoming interested in the topic, here is a brief insight into generating images ready for printing, either with ones own ink-jet or at a service bureau. The same techniques apply to producing images for conversion back into a negative or transparency for subsequent traditional printing.
Just as it has been said that one can never be too rich or too handsome, so to it is true that in the electronic darkroom a computer with the fastest processor, the most RAM and the biggest hard disk is the most desirable. High-resolution scans of 35mm slides are about 25MB in size and medium and large format scans can run between 50MB and 100MB. Fortunately RAM is very inexpensive these days, and machine of 266Mz and faster are available at consumer level pricing.
Tools of the Trade
My current tools are a Dell Pentium II 300Mz computer with 256MB of RAM and a 9GB hard disk. I have a 19" monitor and a Nikon LS-1000 scanner for 35mm and an Agfa Duoscan for medium and large format. 35mm transparencies and negatives are scanned at 2700 PPI while medium and larger format films are scanned at 2000 PPI. Processing software is Adobe PhotoShop 4.0 — the industry standard. While the processes described in this tutorial are specific to PhotoShop, they have analogues in almost every competent image-processing package, many in the $100 price range.
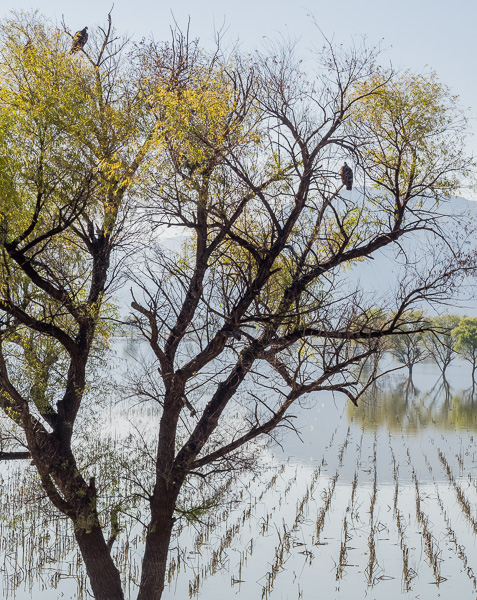
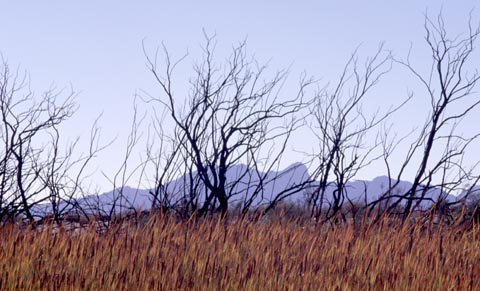 Fig:1 — Raw unprocessed scan
This picture was taken in October ’97 at Ash Meadows State Park in Nevada, not far from Death Valley. The camera used was a Rollei 6008 with 90mm Schneider APO Macro. Film was my standard for a number of years now, Provia 100. The photo was taken in mid-afternoon, though early morning light would have been far preferable. But, there I was, and the recently burned trees, warm coloured bull rushes and mountain range silhouette had the makings of a strong image. Here then are the steps taken to produce the final image seen in Figure 4.
Figure 1 shows a raw unprocessed scan. The original slide looks much better than this, but the idea in scanning is to gather as much image data as you can, and so I don’t do much if any manipulation with the scanning software. The scan was approximately 30Mb in size because I’d cropped the image somewhat from square to horizontal prior to scanning. A file of this size is able to comfortably produce an 11" X 14" print with outstanding visual resolution. A printer such as an Epson Photo or 1520 will do an excellent job at home, and an Iris print from a service bureau would be superb. Even if you have no experience with a program like PhotoShop or the commands used, the ones described below are no different in principle to those in a Mac or PC word processing package, and are analogous to the manual controls of an enlarger’s colour head.
The first steps are to adjust brightness, contrast and sharpness — just have darkroom workers have done for more than a century. Using Image/Adjust/Levels — Auto produces a decent image as a starting point, and a slight tweak with the centre Input slider increases contrast slightly. With Preview mode on you can play with the image on-screen until it looks right. Here in a microcosm is why digital image processing is so compelling. While an experienced printer can achieve comparable adjustments after several test prints, a few minutes with a well-calibrated screen can produce a first print with characteristics almost exactly as displayed on the monitor.
 Fig:2 — Basic Image Corrections
Stay Sharp
The next step is sharpening — a necessary process with all image scans. The right settings are as much art as science, but again it is easy to see on-screen the effect being created. I used the Unsharp Mask tool with a setting of 250/2.5/3. Colour balance and saturation also needed a bit of work. With Image/Adjust/Color Balance I increased Red by about +30, and with the Hue/Saturation tool increased saturation by +10.
These steps are typical of the basic manipulations needed to produce an acceptable image from a scan, similar to the selection of paper grade, exposure setting. Total time for these steps — a couple of minutes. But, I was not satisfied with the image because the purple mountains were too light and the sky also too pale and lacking in colour definition. To correct this I used the Magic Wand to select one of the purple mountain segments and then used Select Similar to encompass all of the mountain range — including all of the small segments bisected by the tree branches.
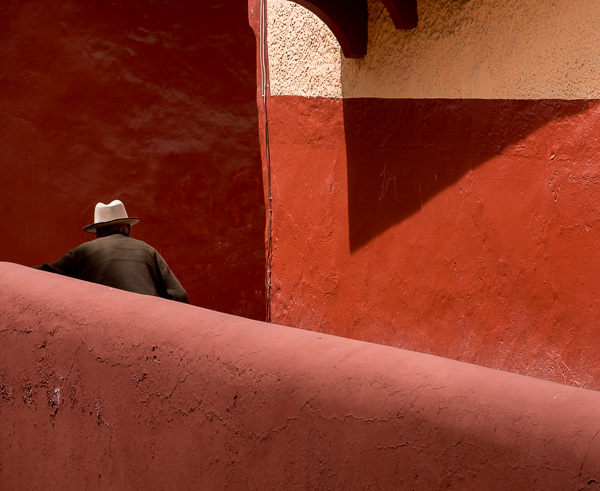
 Fig:3 — With Mountains Darkened
The Eye Dropper tool was then used to load the present colour of the mountain into the Color Picker. Using an Opacity of 50% the Darken command was applied. It’s worth observing that no amount of selective burning with a different filter pack in a traditional darkroom could have preserved the delicate horizon line. See Fig 3. above.
The final correction, which I felt that the image needed, was to slightly increase the color and saturation of the lower sky. The top is fine, but it fades to a boring white near the mountains. The solution is to add a bit of pale yellow light near the horizon. To do this I used the Magic Wand again, this time with a Tolerance of 20. The Select/Similar command produced a Selection than includes roughly the lower half of the sky.
With this Selection live, I used the colour picker to choose a very pale shade of yellow, and using the Gradient Tool with the setting Foreground to Transparent I drew a short line upward, from bottom to the top of the Selected sky area. Instant sunrise. The final result is seen in Fig 4.
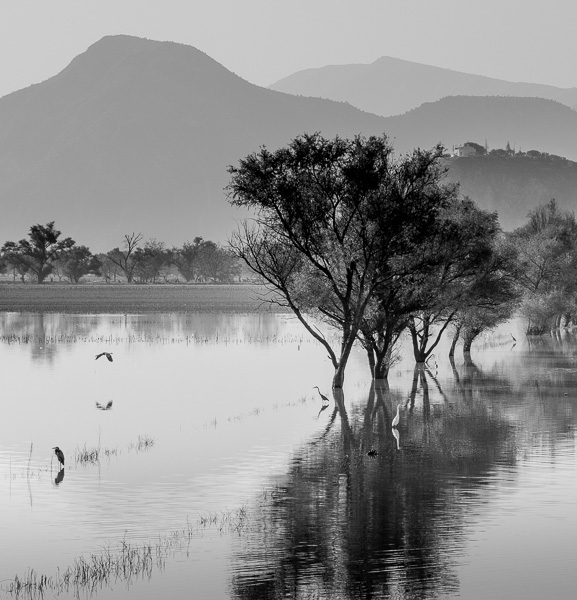
 Fig:4 — With Yellow Sky
The effects as shown in Figures 3 and 4 are subtle. If you overdo them, even a little, they can be glaring.
Elevate Your Vision


Read this story and all the best stories on The Luminous Landscape
The author has made this story available to Luminous Landscape members only. Upgrade to get instant access to this story and other benefits available only to members.
Why choose us?
Luminous-Landscape is a membership site. Our website contains over 5300 articles on almost every topic, camera, lens and printer you can imagine. Our membership model is simple, just $2 a month ($24.00 USD a year). This $24 gains you access to a wealth of information including all our past and future video tutorials on such topics as Lightroom, Capture One, Printing, file management and dozens of interviews and travel videos.
- New Articles every few days
- All original content found nowhere else on the web
- No Pop Up Google Sense ads – Our advertisers are photo related
- Download/stream video to any device
- NEW videos monthly
- Top well-known photographer contributors
- Posts from industry leaders
- Speciality Photography Workshops
- Mobile device scalable
- Exclusive video interviews
- Special vendor offers for members
- Hands On Product reviews
- FREE – User Forum. One of the most read user forums on the internet
- Access to our community Buy and Sell pages; for members only.
You may also like