All Text and Photos Copyright
Torontowide.com
Doug Brown
Used to be if you wanted to produce a panoramic format image you had either hardware-based choices – cameras with revolving lenses, specialised wide format cameras, removable wide angle backs etc. – or you could crop a standard image to panoramic proportions in the manner APS cameras offered. The later wasn’t a true wider panoramic image but the aspect ratio was similar.
With the introduction of dedicated stitching software the possibility of adapting any lens to a wide angle role via post processing the image from multiple segments was opened up to photographers.
Having used everything from 16mm to just short of 300mm to create panoramic images in software, I can attest to the usefulness of these programs that ensure you’re never caught short in a wide-angle situation.
Stitching programs also open up compositional possibilities unavailable in a single shot, even with dedicated panoramic cameras, as they don’t require that the whole shot be in front of the photographer. With software you can ‘wrap’ the coverage around YOU as opposed to stepping back to include everything in the photo.
Of course, as is to be expected, there are trade-offs.
The impossibly wider angle of view comes with noticeably more distortion, and because the images are overlapping and shot sequentially the stitched panorama doesn’t handle action or movement very well.
It’s for this last reason that stitched panoramas tend to be used in static circumstances – scenics or architecture being the preferred areas of pursuit for this type of imagery – or low res web applications such as QTVR.
Onour sitewe were sticking to the safe and comfortable path, supplementing listings for the city’s performing arts and cultural communities with panoramic imagery of the city in all seasons. Most of our images were static streetscapes.
We try to blend listings of the city’s inner life with images depicting it’s outer self as an attempt to give the visitor a more complete, nuanced impression of the city of Toronto.
Nearly a year ago it was decided that we would shift our photographic coverage to concentrate more on the cultural and event side of things AND continue using the panoramic format for these photos as a way of giving people a sense of actually being part of the event.
Yikes!
As far as I know we are the only site to use panoramic technique week in and week out in a largely photo-documentary style.
Since that decision we have successfully honed techniques that have allowed us to capture high speed sporting events, chaotic on-the-fly event coverage, concerts, fashion shows, multi segment portraiture, and many other assignments. We’ve even done macro panoramas of spring blooms!
We have literally applied this technique to every shoot (regardless of whether anyone in his or her right mind would choose to shoot this way) week in and week out.
And in the process have discovered that the boundaries of stitched photography are lot wider, and this methodology a lot more flexible, than I ever would have guessed possible.
In this article I’d like to share with you some of the assignments, circumstances and techniques applied over the last couple of months.
The imagery you’ll see was, with a few exceptions, all shot on the Olympus E10 4 megapixel SLR camera.
This is nearly a prehistoric camera by modern SLR standards but the E10 is very well suited in significant ways for what we do on a weekly basis.
Because it has no mirror the E10 is remarkably quiet.
While shooting a dress rehearsal for instance, the clattering of other photographer’s SLR mirrors can be heard up in the balcony seats, but the E10 is inaudible to people sitting just a few seats away.
This is very important for us as we often shoot live performances.
Its high-speed apochromatic lens counterbalances to a degree the lack of a high ISO capability (320 max) and gives outstanding colour rendition right out of the camera.
However the E10 also has agonisingly slow write times, and a very small buffer that limits how many frames you can get off quickly.
Also, its images are somewhat noisy at all ISO’s, although with a decent noise reduction program this is largely irrelevant for web use.
To sum up, this would not be your first choice of a camera for the type of photographic coverage we are attempting, but by playing to it’s strengths and working around it’s faults the E10 becomes a useable, and every so often an outstanding, photographic tool.
We have since supplemented the E10 with another ‘classic’ of the digital age, the Canon D60 which brings a wider range of focal lengths, faster frame rates and buffer clearing for live event coverage, higher ISO’s and quicker focussing to the party. We use both interchangeably depending on the circumstance.
____________________________________________________________
Single Image Crops
The easiest, and in some circumstances the only way to get to the panoramic format, is to crop the image in post.
Sounds easy, so why I have so much trouble with this.
You don’t realise how wide panoramic is until you’ve tried cropping a ‘normal’ image down to suit.
I don’t know how many times we’ve had to digitally add to each end on shots that I was certain had enough room to crop at the session.
Personally I don’t like to leave a lot of empty space around subjects when shooting – I think it takes all the energy out of the photo – and have often had my knuckles rapped by AD’s for cropping too tight in-camera.
Perhaps that explains it.
____________________________________________________________
Carmen Complex
An image of Spain’s master of Flamenco dance Domingo Ortega with one of North America’s premiere Flamenco dancers, Toronto’s own Carmen Romero, in a dance interpretation of the famous opera Carmen.
The location was a practice studio in a basement, so I had to be prepared for anything with lots of studio lighting. However after a brief practice run through, the best choice seemed to be a straight forward setup of medium silver umbrella overhead (a slightly harder light for detail on the dress and hair) and medium soft box camera left, down one stop to act as fill. Background was usable, but busy, so it was knocked out in PhotoShop.
The strange crop on her fingers was necessitated by the panorama format of the home page photo.
____________________________________________________________
Cirque Du Soleil
Another single image crop, this is a photo from a Cirque du Soleil press conference in downtown Toronto at which a major bank (CIBC) announced sponsorship of the Cirque Canadian tour.
In addition to the usual senior management types from both parties, there was a ‘belligerent’ clown from the circus present and the media spent a lot of time photographing the bank’s Marketing Vice-pres and Cirque’s Marketing Vice-pres with the clown performer in front of a wall filled with CIBC logos.
There was a bit of a feeding frenzy going on.
It was all very familiar. I took a few shots and then sat back and watched the action. For twenty-three years this has been a familiar scene for me. Shooting business guys against corporate logos. And it definitely was not what we wanted for the site.
Wandered outside while they were still at it.
To me, as much as it is very generous and commendable for the bank to underwrite an artistic venture like Cirque, and we gave that fact prominent mention in the caption, the story we wanted to tell with the photo was about bringing this wonderful troupe to the city.
I was looking for a background that would tie the performers more to the city, as opposed to the corporate entity.
Found my location and went back in to run my idea past the PR Director. She said we could have a few minutes with the performer, and we all went outside to the spot I’d chosen.
The clown never broke character. Explaining the idea of the shot and posing him was like channeling to an adult through a daffy 5-yr. old mentality. It was a lot of fun.
Zipped off about ten frames (considering the E10’s well documented slow buffer problems, I use the term ‘zipped’ loosely) of the shivering performer.
E10 w/ WCON, fill flash courtesy of that prehistoric workhouse of on-camera flashes, the Vivitar 283 w/ Lumiquest Omni-bounce style diffuser attached, minus half stop.
____________________________________________________________
Oscar Peterson
Now this looks like the same single image crop but is actually a portion of a three image panorama that originally included the other members of Oscar Peterson’s quartet. The seam runs right through the middle of the piano. The image was cropped down to give greater emphasis to the jazz great, Mr. Peterson was getting a little lost amongst the other figures and onstage equipment, and to also show the reflection in the highly polished lid of the piano’s interior. The man, his instrument. Nice and simple and direct.
____________________________________________________________
Jiang Jie Sculpture LOMO-ized
Here you see a 5 vertical exposure panorama of a surreal sculpture by Chinese artist Jiang Jie.
A mid-career artist from Beijing, where she is an associate professor at the Central Academy of Fine Art, Jiang Jie has exhibited all over the world and this installation was located at the Toronto Sculpture Garden.
The piece shown here is a giant sculpture of a child’s face with a disconcertingly adult expression. It is meant to be a statement on China’s official one child policy.
The original panorama was in colour but for the calendar image I wanted to try something a little more experimental.
What I had in mind was LOMO-izing a B&W copy of the image so it looked like it was produced by the toy camera so beloved by artists around the world.
First it was converted to Grayscale, and then Diffuse Glow was applied to the image. I played around with the settings but no matter which combination was tried the sculpture itself ended up a blown out blob in the center of the page (the white colour goes out of control easily).
The only way to control the flaring on the sculpture was to use two different copies with varying amounts of glow. So the sculpture was cut out and a heavy amount of Diffuse Glow was applied to the background image, going for a near infrared effect.
Then on another copy converted to grayscale, just enough Diffuse Glow to keep it from looking too much like a cut out (light on the glow, heavy on the clear settings) was added. The sculpture was then cut and pasted into original image.
I think it has some of that toy camera look, particularly the "lens flare" around the trees on the left, but gives a clear view of the sculpture’s strange presence.
While I was shooting this several bystanders made comments along the lines of how the sculpture ‘creeped them out’. It does have a subtle, eerie effect that, frankly, I don’t think is very well captured in the colour version. Black and white comes closer.
____________________________________________________________
Mooredale Concerts
A multi-segment panorama of star French violinist Raphael Oleg, first place winner at 27 of the International Tchaikovsky Competition, in rehearsal with Mooredale Chamber Orchestra. He was the guest soloist at their concert.
The rehearsal took place at a Community Centre housed in an older Rosedale neighbourhood building. While the room was visually interesting, the lighting was abysmal. Industrial grade overhead fluorescent. Since it was in the evening I had come prepared to light the scene but had been hoping to use some of the existing light. However it was so bad I just used a high shutter speed to eliminate it altogether.
The concept was to give the intimate feeling of being right within the group using the panoramic format with an emphasis on Mr. Oleg, so the photo would be executed in a sequence of shots from a single viewpoint of being a member of the group.
Years ago, when I did more celebrity-based work, I did stills for a few Entertainment Tonight features. Always liked the economical lighting they would set for interviews. Medium soft boxes facing each other positioned behind each of the subjects. One subject’s key light becomes the other’s hair light and vice versa.
Decided to do this for the Mooredale shoot using opposing white shoot-thru umbrellas (better throw, less fall-off, crisper detail and contrast then softboxes) repositioned the lights for each segment of the panorama. For this technique the light sources can be positioned within the frame of the overall photo, but because you are only shooting one segment at a time they remain hidden in the final stitched output.
Sounds good in theory, but this was a working rehearsal and no concessions were made for the photo. Shooting this way required repositioning of the lights for every frame while they were in performance. It was quite a hairy experience.
(I’ll definitely use an assistant next time I try this) The strong overhead existing light made it very difficult to pre-visualize what every change of lighting angle would look like.
In the end, five frames stitched together were used to give nearly a 180-degree view of the rehearsal.
If you look at the shot you will notice that there are several areas where the light source seems to come from nowhere (particularly the hairlights on the brass/woodwinds on the right side of the photo) Invisible light sources are a hallmark of this kind of structured shooting. The hair light on the guys was repositioned just out of frame for each player. You can see how the angle changes subtlety
To do this scene as a straight single exposure photo you’d need many more lights and some of the lighting angles couldn’t be duplicated as the lights would show (You’d also have to remove the wall I was backed against to get everything in!)
Two heads w/ white 48" shoot-thru umbrellas, 1200 WS Speedotron pack with optical slave synced via Vivitar 283 w/Stofen diffuser dialed back 1.5 stops as fill and held overhead at arms length. E10 w/WCON.
Raphael Oleg is on the far left of the photo.
____________________________________________________________
World Cycling Championships
World Championships in Hamilton, what an interesting experience.
This is a panning shot of one of the time trials cyclists going like a bat out of hell. Absolutely amazing speeds these guys, and woman, get up to.
In this event size matters. No one seemed to have a lens less than 3 ft. Long. (You can imagine what they thought of my E10) But despite the smirks my venerable Olympus was working surprisingly well for the panoramic format I had to shoot in.
The panorama above was taken handheld with a longish shutter speed, fill flash at minus one stop, panning with the motion of the rider.
After the rider was by, I did the pan again (with fill flash) so I’d have some of the background to add to the width of the shot.
This really impressed the press corp. Not only do I show up with the weeniest, most under-powered camera in the group, but also now I’m shooting phantom cyclists! In the final composition the original frame has been supplemented with sections on both ends.
Interesting to note how many of the riders will take time out in the middle of a high-speed corner to smile at the camera as they buzz past. Some even lean right down into the camera for their close-up!
I guess it takes the monotony out of pushing your body way past the threshold of pain to play chicken with the photographers. (The German rider who won the time trials was so beat up he had to be lifted off his bike and set down gently on the ground, then lifted up again to go accept his medal )
Here’s an example of the smile thing as a Canadian team member whizzes past with a big grin on his face. (Doesn’t look so close because of the wide-angle distortion of distance but I could feel the wake of the bike in the air as he went by).
This is at the end of an S curve section of the course. Behind the trees in the background is a sheer drop of several hundred feet at the edge of the Niagara Escarpment which all of the cyclist had just finished climbing.
For this shot I pre-focused on something very close by (using an aperture setting of f8 on a camera with a small sensor I knew everything I wanted would be in focus) then turn the AF right off. Metered off the pavement, which looked like a perfect 18 percent gray to me. Locked exposure.
Tuck in loose clothing, check camera straps are not hanging out – because every rider’s definition of near miss is different, and some of them are truly scary.
The camera to subject distance is really close so I’m confident the flash will expose correctly on every frame. Wait for the rider to swoop in… turning into the corner… let them come in until they fill the frame then … then release on full burst mode while panning with the cyclist.
Now the key is to hold absolutely still after you’ve filled the buffer (even if you swear that was a handle bar that just whistled past your ear) let the support vehicle with the coach screaming into a megaphone go past, let the CBC scooter with cameraman precariously balanced on the back buzz past, and when the scene is clear, and the buffer is empty again pan backwards in an arc against the motion of the rider to do the remaining frames of the panorama.
The background scenes in this shot were completed half a minute after the initial ‘action ‘ shot of the cyclist. If you look at the shot closely you’ll notice the motion blur on the left side of the photo from panning with the rider (action shot) and the sharpness of the rest of the shot as your eyes moves to the right half of the photo. I’ve left one of the seams unmatched behind the rear wheel to show you the dividing line between the action pan, and the panning shots after everyone had gone by.
Piece of cake. Who says you need eight frames a second and a great big white howitzer lens!
____________________________________________________________
Toronto Symphony Orchestra
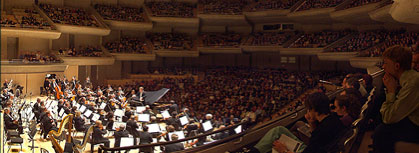
A multi-segment panoramic image of International piano virtuoso Yefim Bronfman as the guest artist with the Toronto Symphony Orchestra.
Originally I contacted the publicist for the Symphony with the idea of tying to portray the effect of being on stage through a panoramic image. From previous shoots I’d done with the Symphony I’d noticed a spot in deep shadow in the center of the choir loft that wraps around behind the orchestra. If I set up there, dressed all in black, we could shoot out at the audience giving the viewer the perspective of an orchestra member.
She liked the idea and made the arrangements to do the shoot.
Unfortunately, when we actually set up in the designated spot, both of us dressed like a couple of Ninjas, it quickly became apparent that from the position I had imagined to be best most of the rear half of the orchestra was hidden from view. So a small change in plan and we came around, still in the choir loft but closer to the audience, and tried to get the same effect shooting more to the side. ri
Complicating things during the actual shooting was the fact that we were directly in the view of everyone in the audience at that performance.
In fact it’s a very intimate venue. The distortion of the wide-angle attachment doesn’t make it readily apparent but I could clearly see several audience members were intently watching everything I did during the entire shoot. I suppose it looks strange when the camera starts by facing the back wall and ends up pointed sideways at the people next to us panning through more than 180 degrees. Some of them looked quite puzzled!
This also meant that during several quiet and intense passages I was literally frozen in position not even daring to swing the camera a few degrees to the next detent on the VR rig lest I become a distraction. My right arm ached afterwards. You have to remember this is a highly unionized environment. A big part of getting the union’s permission to shoot was not making a distraction for the audience. One complaint from an audience member is all it would have taken to be unceremoniously turfed out.
As for the image itself, I like the little time warp captured in this photo.
The audience are in fact watching the number before Yefim Bronfman even took the stage, the orchestra are playing along with him a half hour later!
____________________________________________________________
Fashion Cares
A few shots from the massive Fashion Cares Gala for AIDS research.
To call this merely a fashion show is an understatement in the extreme. This was an entertainment spectacle played out in front of about 5,000 people (at ticket prices ranging from $150 – $500 per seat, you do the math as to how much money the event raised for AIDS research)
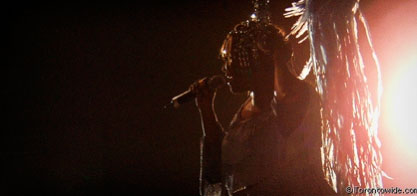
Part fashion industry party/ part surreal theatre, and definitely the gay community laying it’s soul bare, this is a two and a half hour non-stop ride into a bizarre, sensual, whimsical, whacked out world that sure ‘isn’t in Kansas anymore’.
The show featured 4 incredible singers (including the woman who does the Queer Eye for the Straight Guy theme song – which obviously was a big hit with the crowd) aerialists, dozens of seriously under-dressed body-perfect models of both sexes, scores of gymnasts and dancers, and one incredible electric violinist who brought the show to an intense climatic finale.
Then, just when you thought they’d stopped just short of inciting a riot, Patti LaBelle strides out onto the stage on the arms of two muscular hunks who are dressed in nothing but G-Strings and bow ties, and she proceeds to rip the roof right off the place with a scorching version of Lady Marmalade.
I look around and lot of media photographers have put down their cameras and are dancing! Never saw that before.
Of course everyone came to their senses eventually and went back to work, but what a bizarre little moment. Lady Marmalade. Who knew!
For most of the night we were all tightly packed three and four deep the length of one side of the runway into the media area- so tightly there were a few shoving matches (my favourite was the feisty little woman who threatened to rearrange a wire service guy’s face with a 300D if he shoved her one more time)
I was stuck with a TV Betacam beside me. Got whacked in the back of the head four or five times with it’s battery module as he turned around to shoot down the end of the runway before we finally sorted out the personal space issue with a little light pressure applied to his instep semi-on-purpose.
You had to lean out past the other photographers to shoot down the runway always remembering to look both ways before doing so or you could get a stiletto in the head from models coming up from behind.
All night long I was shooting as fast as the E10’s buffer would give me another frame, reviewing shots constantly as the show swirled around us, and deleting on the fly. The whole camera was red hot, particularly the handgrip and baseplate. When I swapped batteries they were so hot I could hardly handle them by hand. The CF cards were very, very hot as well. I think I may have found the outer limits of this camera’s performance envelope this evening.
The runway shot is three stitched exposures, aerialist one shot, and the Patti LaBelle photo is one exposure cropped down to suit our aspect ratio.
____________________________________________________________
Damien Atkins

Actor/writer Damien Atkins on location at Buddies in Bad Times Theatre.
Since Damien’s show revolves around a guy singing show tunes made famous by woman performers, and it’s running at a gay theatre, I leap to the assumption that it must be a drag show with lots of gowns, wigs, make-up etc. involved.
Thusly misguided, the publicist and I set it up for a shoot in his dressing room.
Arriving at the theatre I discover there are about half a dozen bare hangers hanging on a rack in his dressing room and that’s it! Barren.
So I’m there five minutes and already treading water.
We have one hour of his time and now I have to find a location elsewhere in theatre.
There’s a spot with a nice mix of primary colours in an area upstairs and I decide to go with the moodiness of the location and just put a hint of lighting into it to supplement the existing light exposure by using a medium striplight, camera left, feathered away from the subject and further feathering with black card scrims on top and on the side to keep spill off the red wall behind. This exposure is plus half stop, existing lighting level is set at minus 1/2 stop.
Then to keep the background red, and to minimize colour pollution from the track lights on the wall, there is one head, shot through a white umbrella to maintain saturation, aimed at the wall and also acting as a rim light on Damien’s right side. It was flagged with a card on top to keep the ceiling from giving away the light source placement.
I toyed with the idea of using a collapsible white reflector on his shadow side to both mask off the lighting element that’s out of frame giving the green cast to the shadow side of his face, and to provide fill for the shadow side. But I went with the colour shift of the out of frame practical. It seemed to fit in with all the colour elements in the composition. With more time I would have done both versions.
Damien arrived just in time for completion of the setup. Really nice guy. Do a digital Polaroid, show him on the LCD and he likes the effect. Ten minutes of shooting and we’re done in the prescribed hour, he’s off to rehearsal, and I’m packed up 15 minutes later and out the door.
Because of the width required of the home page image, I shot another frame of the room (left side of the pano) after Damien left to give it the necessary sizing.
____________________________________________________________
Climbing Pano
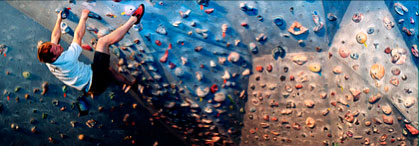
I spent a long time halfway up a wall with a climbing harness cinching a non-cinchable part of my anatomy for this shoot, and in the end we wind up using this photo which was done standing comfortably on the ground.
Similar technique to the Damien Atkins shot above in that I concentrated on the subject climbing an indoor practise wall for most of the frames, and then when he was finished panned right to add three more vertical frames to complete the composition and get the necessary width to the shot.
Flash on camera blended with existing light.
____________________________________________________________
Lamborghini
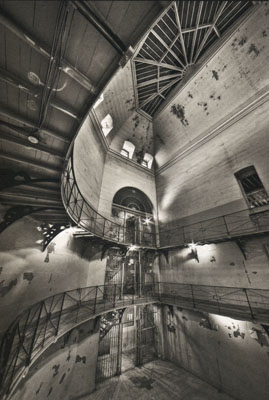
This was done for the home page shot for the Toronto International Auto Show week and as such presented several interesting challenges.
Owing to the fact that Lamborghini were very concerned about us taking a lot of time to do the shot, I promised them we’d be out of there within 30 – 40 minutes. So there is a tight time factor involved.
As a result I decided to do the shot using a digital muti-pop approach. This basically entails one pass of the scene with a mix of ambient and fill light, and then many individual frames of specific areas to highlight things or fix exposure errors. Bits and pieces of these individual frames get blended into the original in the final result. This is the first time I’d tried this technique on this scale.
Also challenging is the requirement that the home page shot be a panorama. So the composition to some extent is dictated by the known parameters of the distortion that the stitching program will introduce. For instance I would have preferred to shoot the orange car more from the side to show more of the cockpit, but I know that when I swing the lens around to include the red car, in the final result the orange car will be bent like a pretzel. I am also hamstrung with horizontal orientation for the shots for the same reasons of eliminating as much distortion as possible.
The shot also has to give a sense of location; it can’t be a straightforward car shot or product shot.
I brought just one 1200 WS Profoto Acute pack and one head. I only used a medium softbox as a modifier.
This was done on film, so no digital preview was possible, and I left the Hasselblad at home because with the tight time factor I didn’t want to waste time waiting for polaroids to ‘cook’. I relied entirely on my meter for exposure and experience for light positioning.
The first sequence of shots cover all three of the original exposures (it’s been cropped to about 2 1/2 frames) with a soft box over the camera for fill and blended existing light exposure. This sets the ambient light level.
The next exposure was from the area around the post on the left of the shot, aimed at the hood and windshield of the orange car. I then moved the light behind the vehicle, on the floor, aimed up at inside of the passenger door. Next exposure was aimed through the cockpit at the leather interior and driver’s seat. Then around to the back of the car aimed at the front passenger fender of the red car. Another exposure, moved back a bit and up, for the passenger door and side mirror. And done.
I wish I’d had some kind of preview ability because the black door material and the leather interior both absorbed more light than I counted on. To do it over I would switch to a grid for more direct light and increase exposure half a stop in both these areas.
All in all I’m fairly pleased with the end result. It’s much more detailed and evenly exposed than a straight panorama could ever have been. Considering it’s the equivalent of a 6 light set-up, no polaroids or preview, and the fact that it was setup, shot, and packed away in 35 minutes, I think it’s okay.
This is becoming an increasingly common technique for interiors photography. With this method you are no longer restricted to hiding lights within a shot or having the composition dictate lighting placement. You can literally place a light anywhere in the frame, as long as it doesn’t produce flare, and since you will be cutting just the specific area out of the scene to paste it into the ‘master’ image the source and light stands are invisible.
For instance, the light box and stand were right in the frame for the windshield shots and one of the exposures for the red car’s door in the originals. Doesn’t matter. They’re cropped out as only a small area of the total photo is used in the master image.
You can do a whole interior scene this way, and some Toronto interior shooters already are doing very elaborate set-ups of this nature. Myself, I only use the technique for adding accents to specific areas of interior photos.
Info on the cars: The orange one is the Lamborghini Diablo, the red is the brand new Murcielago. They both will do in the area of 330-km/hr top speed. Cost: $414,000 CDN (And no, even purchasers don’t get a test ride!)
____________________________________________________________
Mobile Fun: Aerial SAAB test ride

Finally a traditional panorama…. with a twist!
As part of The Power Plant Gallery’s presentation of Dutch artist John Kormeling’s exhibit, the artist set up a 100-ft. Ferris wheel/art-piece. In place of the normal seats Mr. Kormeling attached four 2004 SAAB 9-2X vehicles directly to the Ferris wheel.
This means you slide into the familiar territory of an automotive interior, only to be taken on a decidedly unfamiliar ride as you are zoomed ten stories above the Toronto waterfront.
The only test ride where you’ll be more concerned about bird hits than potholes!
Three publicists and I meet up. Originally the artist is to be included in the shoot, but he is unable to be there. I have ten minutes at the top inside one of the cars.
They are very small vehicles (it’s a new compact model) so I opt for the back seat with the front headrests removed and the passenger seat reclined back. I was worried that 28mm equivalent focal length wouldn’t give me the width even in vertical orientation to show much of the interior of the car and provide the photo with context. I don’t just want a ‘view shot’ of the waterfront; it has to be an unexpected view clearly taken from within a car.
The troika of publicists stays on the ground and I’m swung aloft stopping at the very top of the arc.
Very quickly I discover that every move I make sets up a lot of yawing up and down as the platform the car rests on has a central pivot, so I switch to using the LCD monitor to frame the shots (another E10 advantage) which allows me to keep relatively still. The camera is mounted on a monopod resting atop the central console with bubble level in the hot shoe to keep things level.
My plan is to do this like a studio shoot with separate exposures for inside and out.
I shoot one round of exposures for the exterior, one round for the interior by natural light. Then I set up a Vivitar 283 w/Stofen on the lying on it’s side on the front passenger seat to light the driver’s side interior exposure, move it to the driver’s seat to do the passenger side interior exposure, bring it through to the back seat for rear windows. It’s like light painting in segments.
My thinking is that there is probably going to be flare off the windows at some point and I’ll end up cutting out some of the exterior exposures and pasting them into the interior pano.
Swinging around ten stories up in the air there is no time to test or check histograms, or zoom into the LCD display to check for flare.
No sooner is the last interior flash exposure done then the Ferris wheel lurches into action and I’m back down on the ground. I talked them into taking me around one more time as I hardly noticed the view while I was up there what with being absorbed in all the shooting activity.
When I put this all together later I’m amazed to find out that all I needed were the interior flash exposures to do the final panorama. No flare from the flash on the windows or from the sun hitting the WCON. In fact I’m amazed at how reflection free the images are. I wore black, and the interior was mostly black, but I really expected reflections from the interior to be a problem. (Don’t have a polarizer in the WCON’s filter size)
____________________________________________________________
Icy View
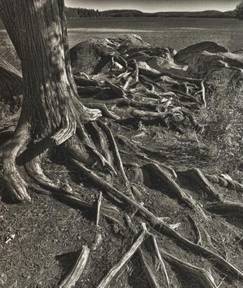
Here’s a cropped down two horizontal exposure panorama of another photographer weighing up the compositional possibilities on the edge of the ice shelf that had formed around the shores of Lake Ontario after several frigid weeks of arctic weather. We were standing about 50 ft. out from shore in this particular spot where the ice had formed a surreal sculpted landscape and dazzling clear sheet ice extended right to the horizon.
Two horizontal exposures blended in PhotoShop.
Canon D60 w/ Sigma 18-50mm f2.8 lens
____________________________________________________________
Opera Atelier- Don Giovanni
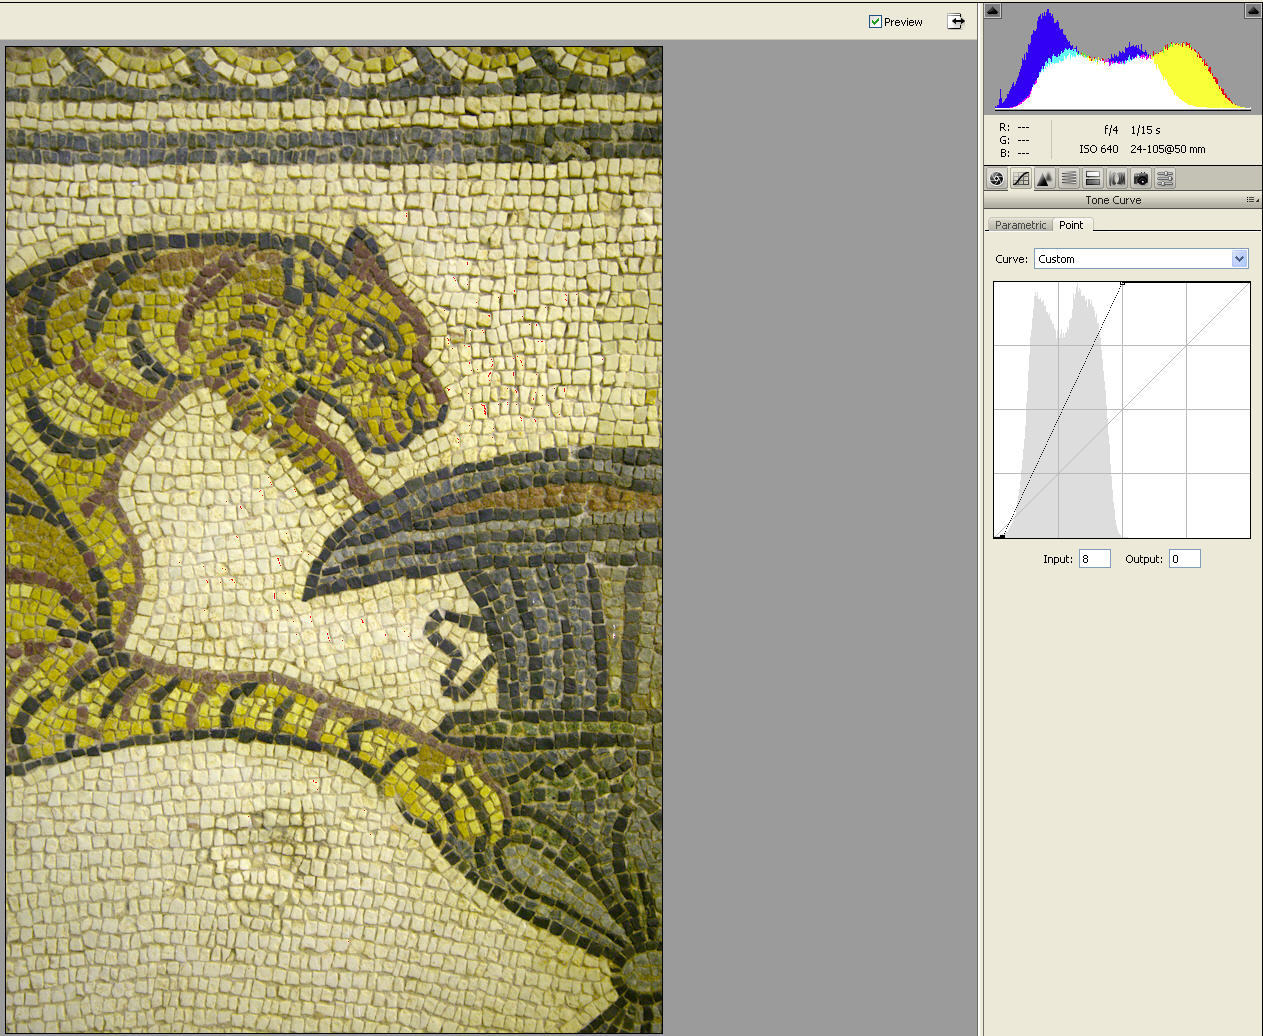
I’ve always wanted to do this shot- although I really was looking to do it from within the actual orchestra pit.
It was taken during a dress rehearsal when photographers have complete freedom of movement in the roped off section for the first 10 rows at the front of stage. You can wander around at will taking shots from any angle throughout the production.
The thing is, a couple thousand opera fanatics also attend these rehearsals. In fact with some productions the hall’s nearly sold out! So it’s a little disconcerting to walk right up to the stage, shoot away, then turn around and see a full of audience staring back at you, best ‘down in front’ expressions frozen on their faces! Lowers the temperature of the room a few degrees if you know what I mean.
A sequence of shots and a split exposure, this panorama is composed of 4 longish vertical exposures for Tafelmusik Baroque Orchestra, and 4 exposures of shorter duration for the onstage acting. The two were stitched as separate panos, then blended in post.
The photo has a very warm tone because the lighting design was focused on capturing the feel of the Baroque period when the stage would have been lit by candles and torches. Every light had a warming gel over it creating a beautiful warm ambience in the opulent Winter Garden Theatre.
Canon D60 w/ EF 50mm f1.8 lens
____________________________________________________________
DanceMakers
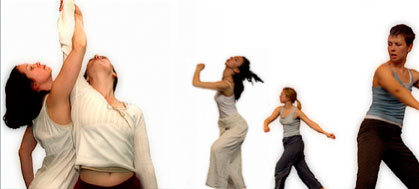
A merge of two separate exposures taken during rehearsal, the background has been knocked out to white in post. The exposure is a blend of ambient light mixed with fill flash on-camera.
____________________________________________________________
Dealing with Motion
Panoramas are done in sections. At first glance that would seem to be their weakness when dealing with motion. Combining frames done sequentially of a moving object is often fraught with problems. Missing body parts, repeating subjects throughout the pano.
But in some cases this sequential ordering of images can work to your advantage. An example is the shot you’ve already seen of the cyclist coming around the corner at the World Championships. By simply reversing the panning direction when busy elements are finally out of the frame you can ‘paint in’ the rest of the image almost at your leisure.
I deal with motion in a potential photo in several different ways, and when it presents itself will usually try all methods as none is a one shot cure-all solution.
____________________________________________________________
CIBC Run For The Cure
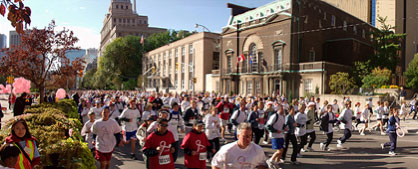
Live coverage of thirty thousand runners at a charity event done in multi segment panoramic style. What was I thinking!?
As soon as this mob rounded the corner and heading up University Avenue I knew I was in trouble. Very quickly I fired of a sequence of horizontal frames as they surged towards me that could be cropped to the proper aspect ratio, then switched to doing sequences.
From my World Cycling experience I knew that the only hope was to pan quickly against the motion of the runners on full burst, shoot a lot of frames, cross your fingers.
Amazingly this sequence, and two others from approximately 30 frames shot this way, worked out.
Although a few figures in the foreground were missing limbs, (cloned them in from other runners), and the gentleman closest to the camera appeared twice, (cloned out in the final image), the stitching software did an amazing job of sorting it all out. Even enlarged to 100 percent there is very little overlap or missing body parts on this massive crowd.
____________________________________________________________
High Speed Cornering
This is actually two exposures of a three shot horizontal sequence at the World Cycling Championships. Panning against the motion of the racers as they round the highest speed corner of the entire course, right at the bottom of a long downhill from the top of the Niagara Escarpment, I basically fired away on continuous and hoped for the best. I’m not even entirely certain that the rider in the lead was actually being pursued this exact group of riders as the speed they were moving at, and the slow frame rate of the E10, could have easily caused me to jump a few riders in between exposures.
Once again I was amazed that several of the sequences actually worked out. And although nobody would make this their first choice of methodologies to shoot sports, it was interesting to note that it is possible to apply panoramic technique to even this kind of high-speed action.
____________________________________________________________
Rexall Tennis Masters Tournament

This image comes taken at the opening night of the new Rexall Centre, which was hosting the Tennis Masters Canada Tournament, a tournament featuring all of the top twenty mens players in the world.
The opening match, shown here, featured Andre Agassi vs Jurgen Haas.
We were looking for an action shot right down at court level – putting the viewer right courtside in the photographer’s pit. A view the public never gets of these stars.
The pit is basically a nicely finished trench with wooden benches the length of it. There are shelves for laptops, camera bags and loose lenses. Sitting in it allows you to unobtrusively shoot away a few feet above ground level. Amazing view of the action. The wide angle distortion makes the court seem further away in the photo than it is, but sitting here you’re close enough to hear players swearing under their breathe or giving themselves pep talks on court.
The fellow beside me is using a Nikon D2H and is with The Globe and Mail. Others were using Canon 1D’s with long lenses attached. Every time either player raised their racket there’d be a whir of cameras firing off at 8 frames a second … followed by my E10 going kerplunk!
You really can’t do this kind of shooting without long telephoto lenses and high frame rates, but I tried my hand at doing the action/sport pic thing for awhile before settling in to do the panorama I came for. The only tip I can offer for tennis shooting when saddled with a really slow camera is to listen for the sound of the ball striking the court on your side as a cue to let loose on full burst rate (which I swear on the E10 is measured in frames per hour!)
You truly need NHL goalie reflexes if you’re going to catch the peak action moment on a single frame at the speed the pros play the game.
After finishing all my pano exposures I sat back for a while and enjoyed the match before doing more shots from the stands. It was amazing to see up close the speed of the serves, some of which hit 196 Km/Hour, and the athleticism of both players.
This was a relatively easy action picture to do in panoramic format as the areas of movement are well separated. You just have to work out where the stitches are going to be beforehand to place the movement within a safe area of the panorama, and then shoot enough exposures of each figure that you can match them later in a cohesive whole.
Each of the players and the photographer come from different frames in this image. I probably did two dozen shots of each player and just a couple of the photographer. They are grouped together in this panorama but were separated from each other by several minutes in real time.
Olympus sponsored the event … but I was the only one there using one.
Six vertical frames, E10 w /WCON showing a 180 degree view
____________________________________________________________
Summary
So there are several strategies for dealing with less than ideal conditions for your own panoramic adventures and coping with non-traditional subjects.
á Pan quickly against the direction of the motion on continuous burst mode as with the Cyclists and Run For A Cure joggers.
á Pan with the action section on full burst, then fill in the remaining static frames afterwards, as in the Canadian cyclist photo by panning backwards against the grain.
á Shoot each action moment as it’s own little vignette then merge the results together as with the Dancemakers pano.
á Or concentrate on the main subject from one static viewpoint as you might with any photo and then shoot sections later to add the necessary width- wall climbing photo, Damien Atkens shot.
á You can expand dynamic range and capture elements within the pano that are at opposite ends of the exposure spectrum by blending panoramic exposures eg. TSO pano and Opera Atelier
á And because panoramas are shot a section at a time you can shift light sources in between frames to better capture each individual frame that is to be stitched – Mooredale pano, interior of the Mobile Fun photo.
á You can even have the light sources right in the frame (watch carefully for flare) if you are only going to use a small cropped segment of that photo to paste into the overall panorama as an accent – Lamborghinni pano.
á And the impossibly wide angle of view panoramic imagery allows you to tell a story with visuals that have a different impact than a single frame, as illustrated by the Tennis shot or the Mobile Fun photo.
We have done plenty of traditional panoramas with the VR rig and a tripod as well. But the majority over the past year, especially the performance ones, were done either with monopod or handheld with a bubble level in the hotshoe.
Although it sometimes leads to more post-process retouching, the handheld method promotes spontaneity and increased compositional creativity.
I haven’t been handcuffed to a tripod for a long time.
All Photos Copyright Torontowide.com
May not be used without the written permission of the photographer.
Read this story and all the best stories on The Luminous Landscape
The author has made this story available to Luminous Landscape members only. Upgrade to get instant access to this story and other benefits available only to members.
Why choose us?
Luminous-Landscape is a membership site. Our website contains over 5300 articles on almost every topic, camera, lens and printer you can imagine. Our membership model is simple, just $2 a month ($24.00 USD a year). This $24 gains you access to a wealth of information including all our past and future video tutorials on such topics as Lightroom, Capture One, Printing, file management and dozens of interviews and travel videos.
- New Articles every few days
- All original content found nowhere else on the web
- No Pop Up Google Sense ads – Our advertisers are photo related
- Download/stream video to any device
- NEW videos monthly
- Top well-known photographer contributors
- Posts from industry leaders
- Speciality Photography Workshops
- Mobile device scalable
- Exclusive video interviews
- Special vendor offers for members
- Hands On Product reviews
- FREE – User Forum. One of the most read user forums on the internet
- Access to our community Buy and Sell pages; for members only.


