____________________________________________________________________________________
To begin with a personal note, I extend my best wishes to Debra Fadely and the whole Raber family at this difficult time.
In the hope that PhotoPXL.com will live on, I present this article as a tribute to Kevin and a contribution to that objective.
____________________________________________________________________________________
There’s a lot of interest in B&W photography for its graphic qualities. Many of us have colour photos (from negatives) that may look good in B&W. We digitize and convert the negatives to positive using a digital camera, Adobe Lightroom (Lr) and the Negative Lab Pro (NLP) plugin. These conversions of course start life as colour photos, unless……., and that is the subject of this article.
Firstly, I shall review with some fresh insights the previously discussed technique lodged within NLP for converting colour negatives into Black and White photos, and then move on to document another approach for doing the same thing, but all within Lightroom. I conclude that it is largely a matter of personal preference which to use. Both can produce fine results.
One of my objectives in doing this work is to remain in a raw workflow as much as optimal in order to save on storage.
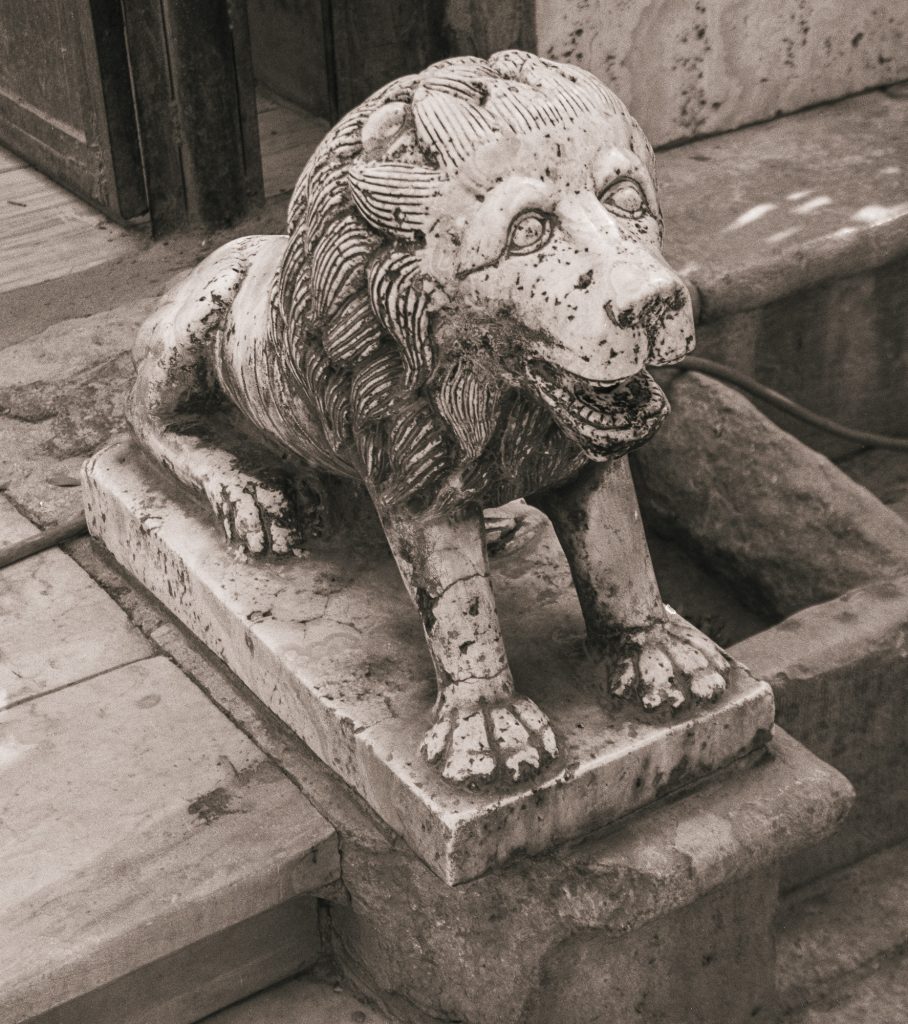
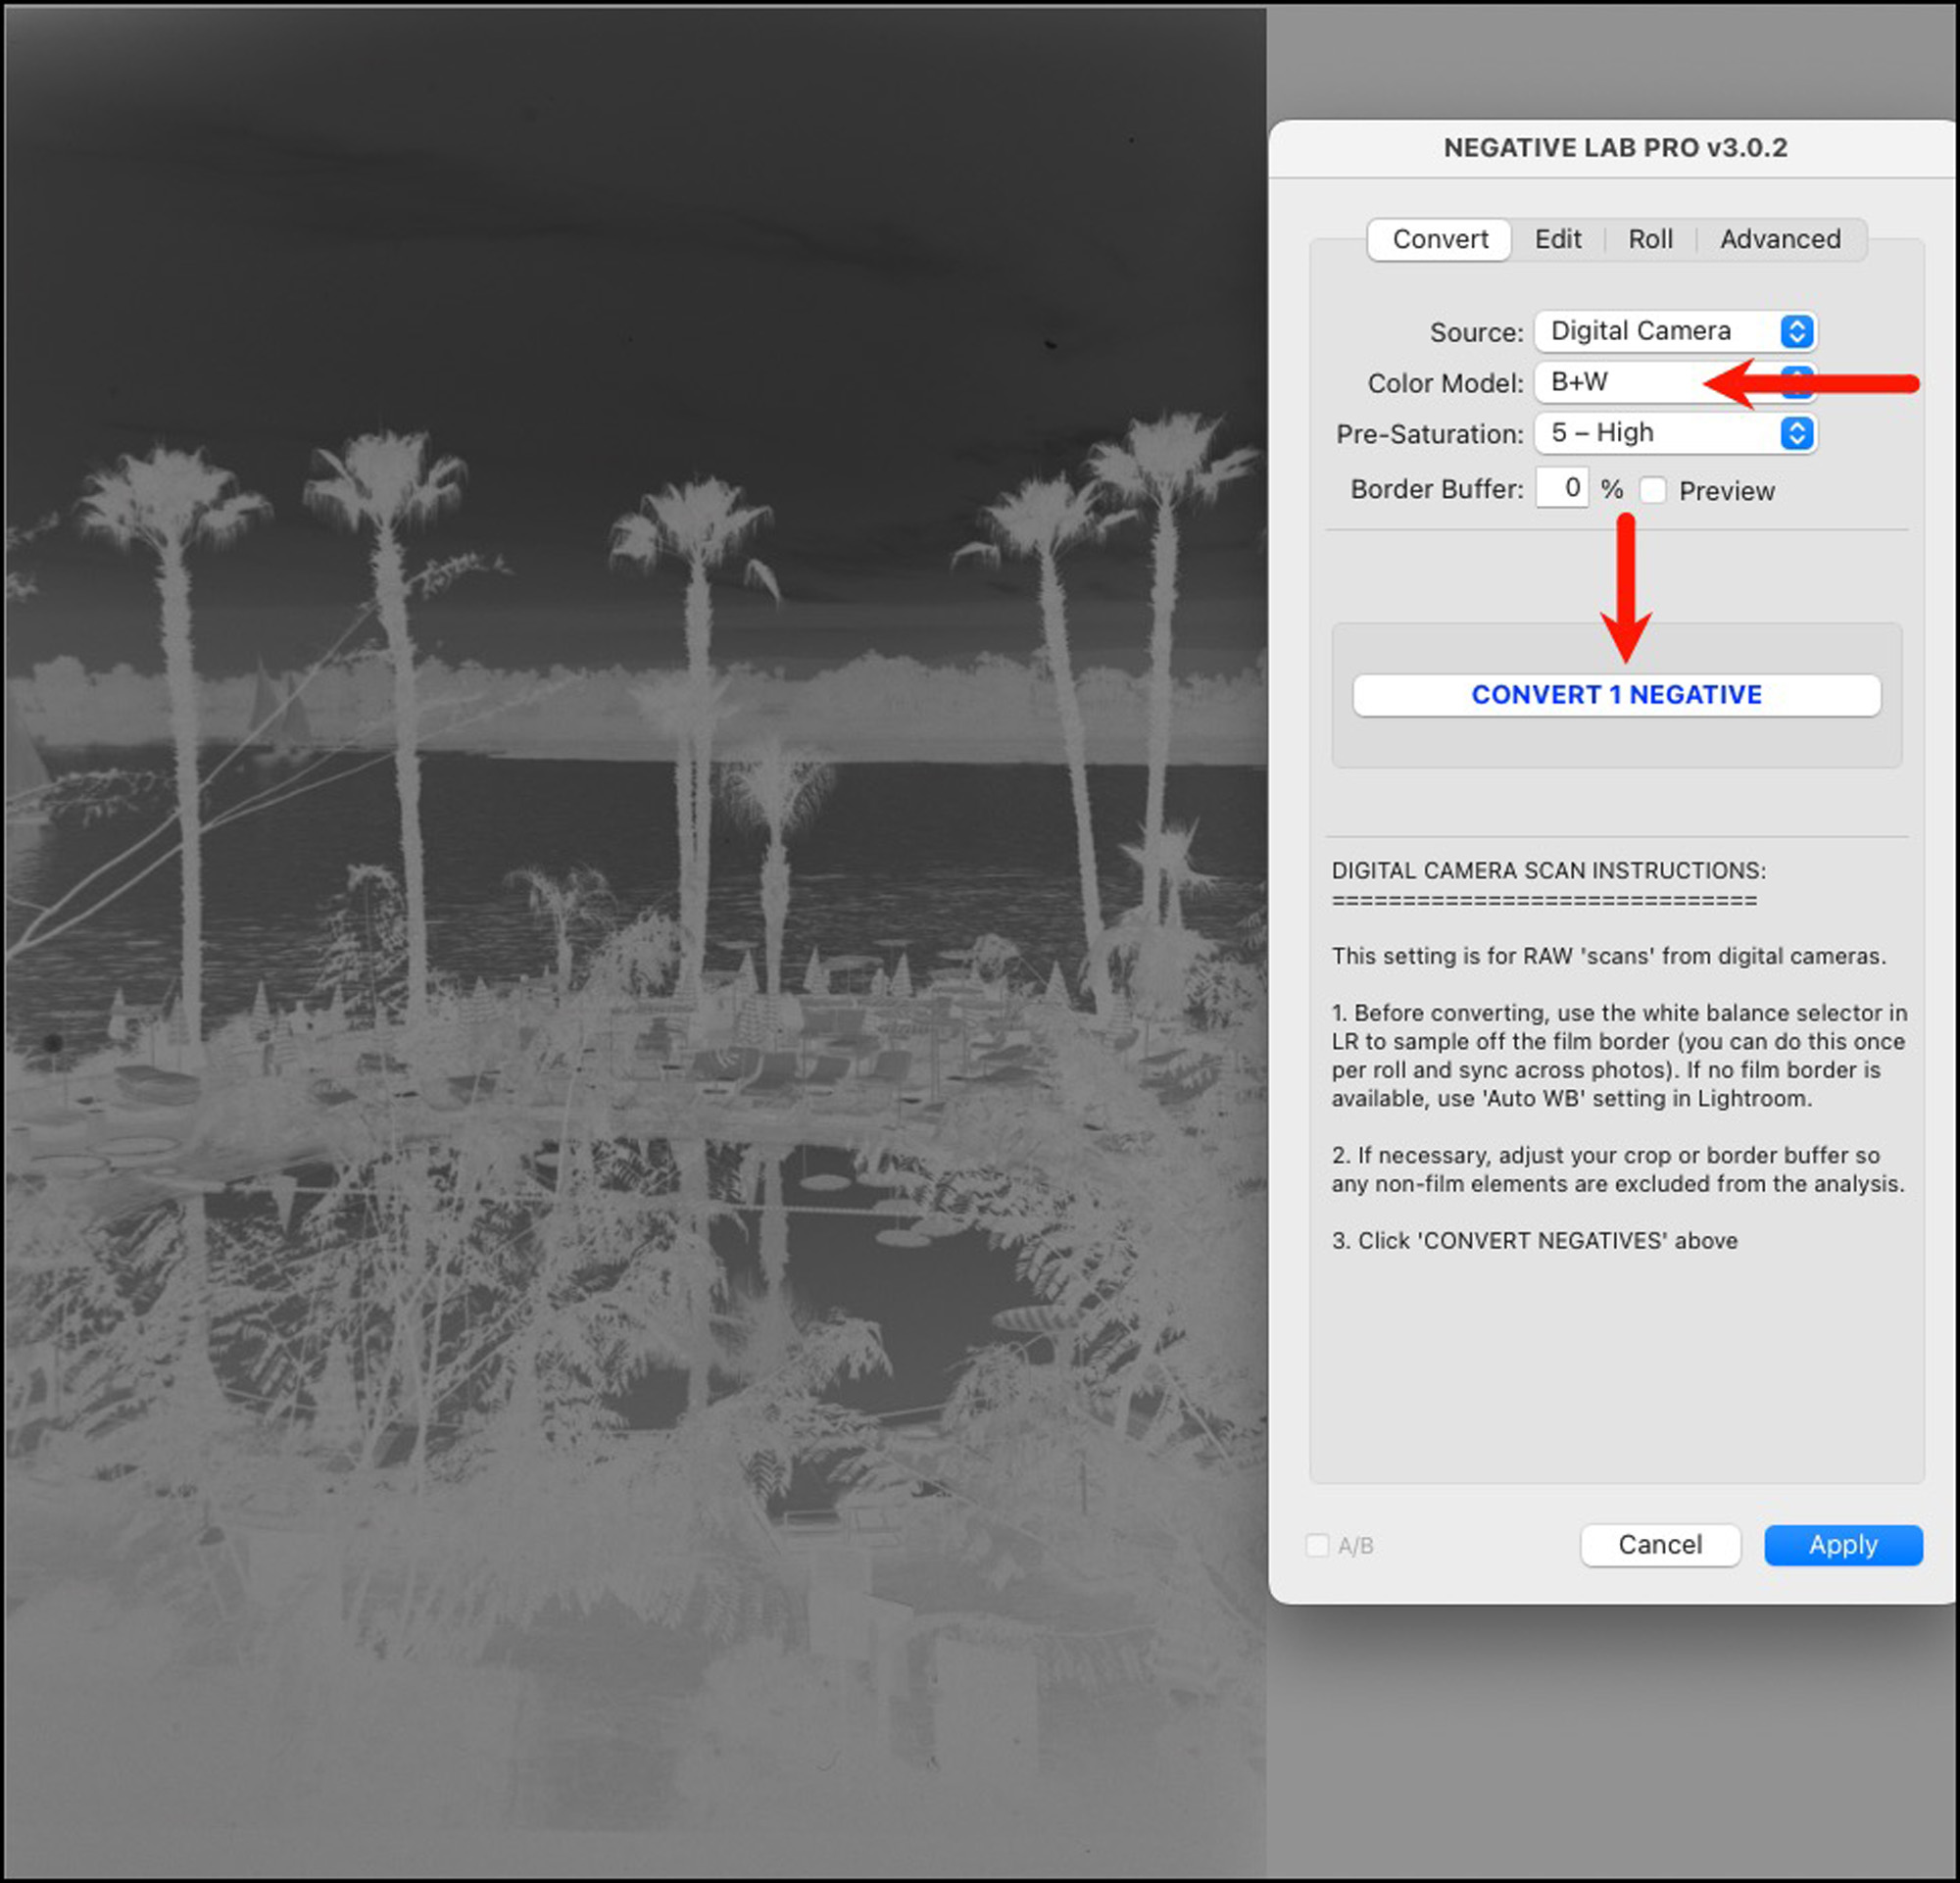
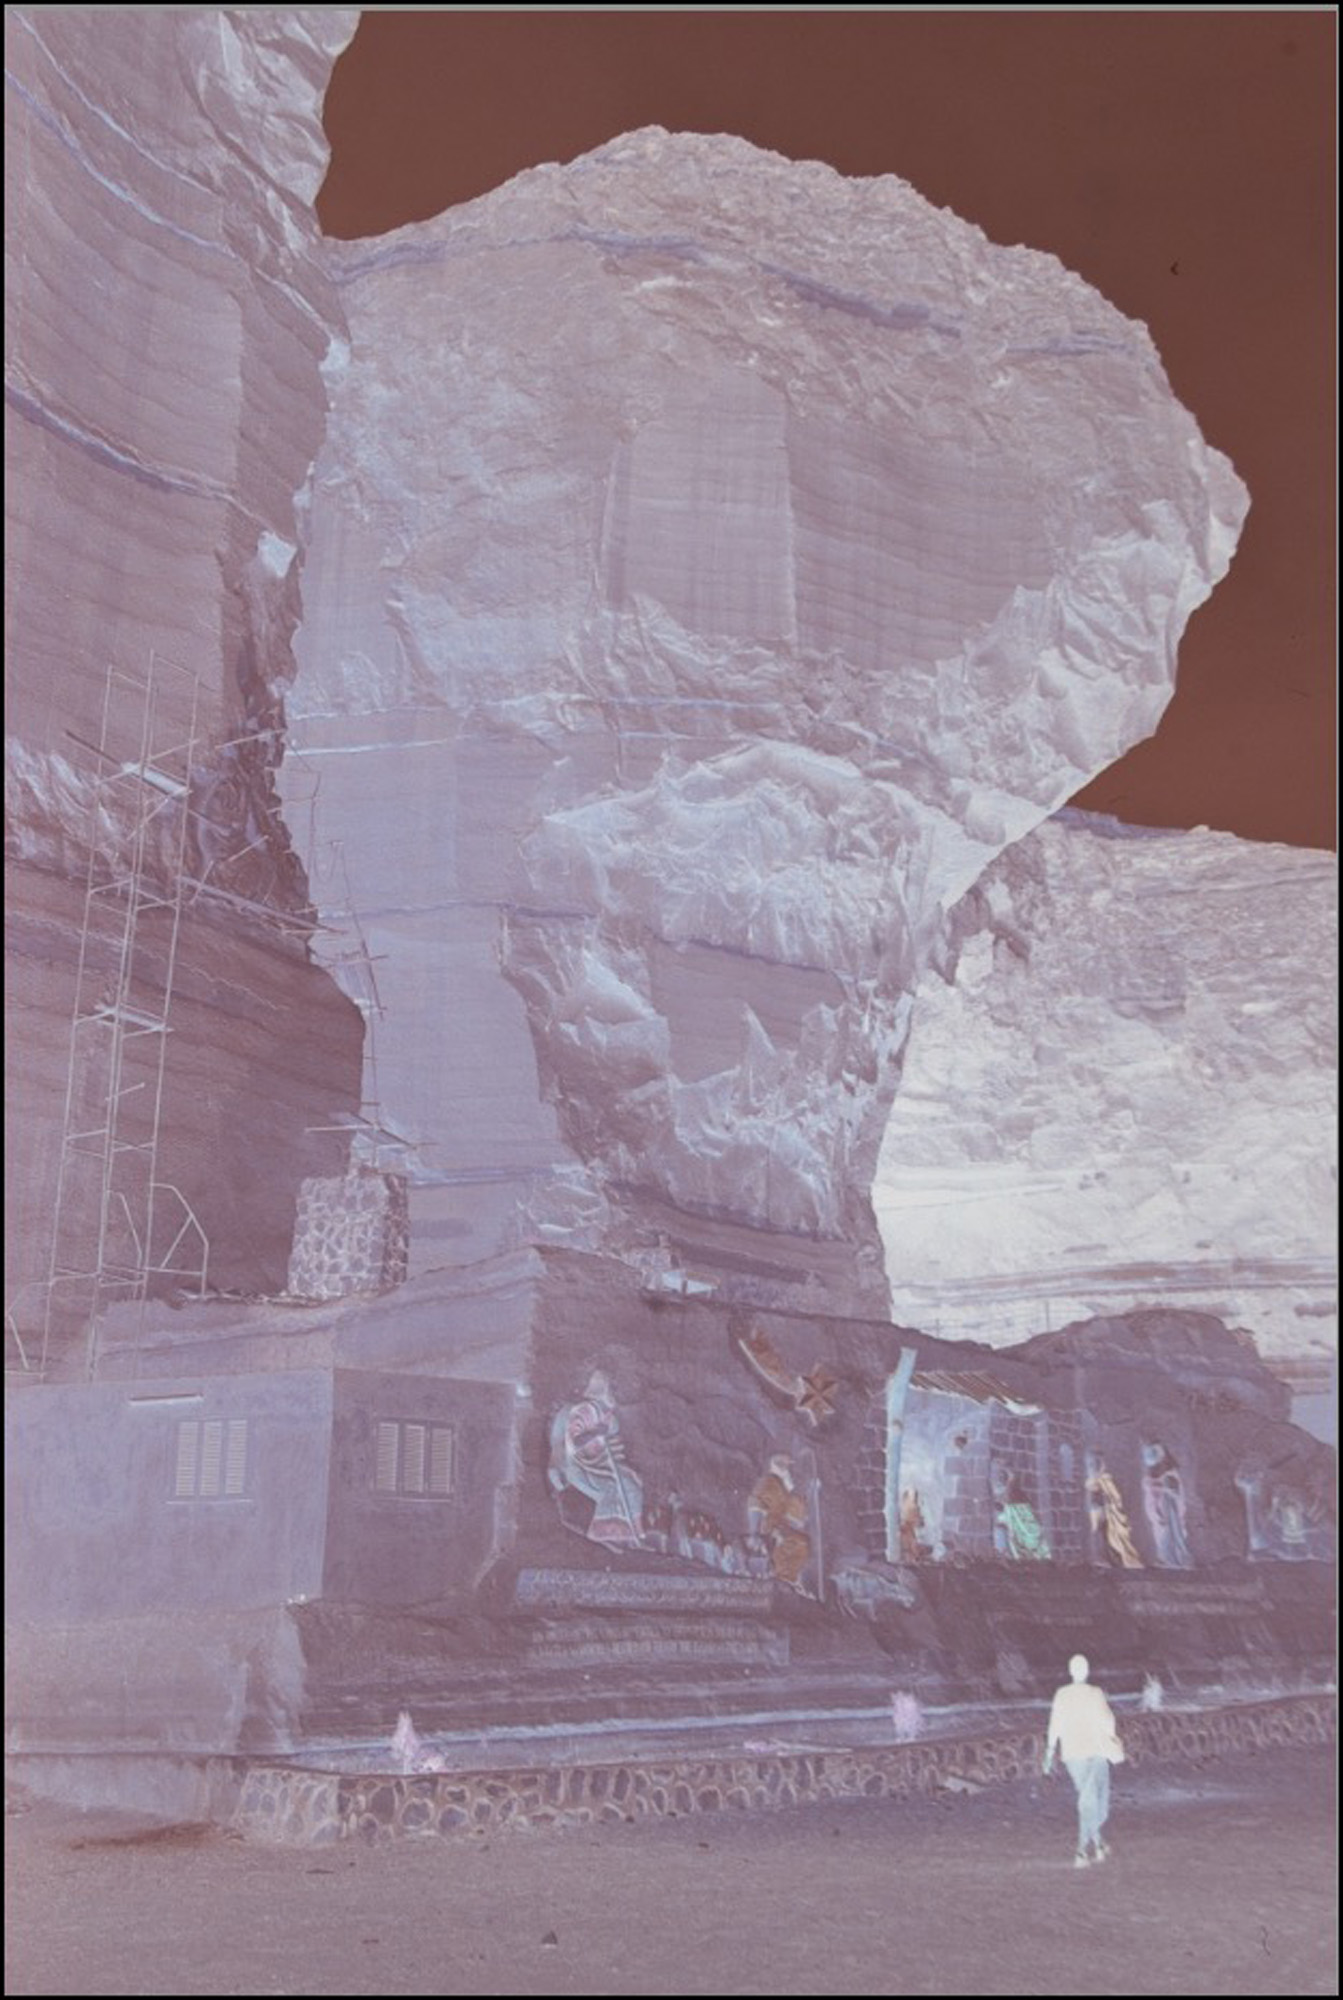
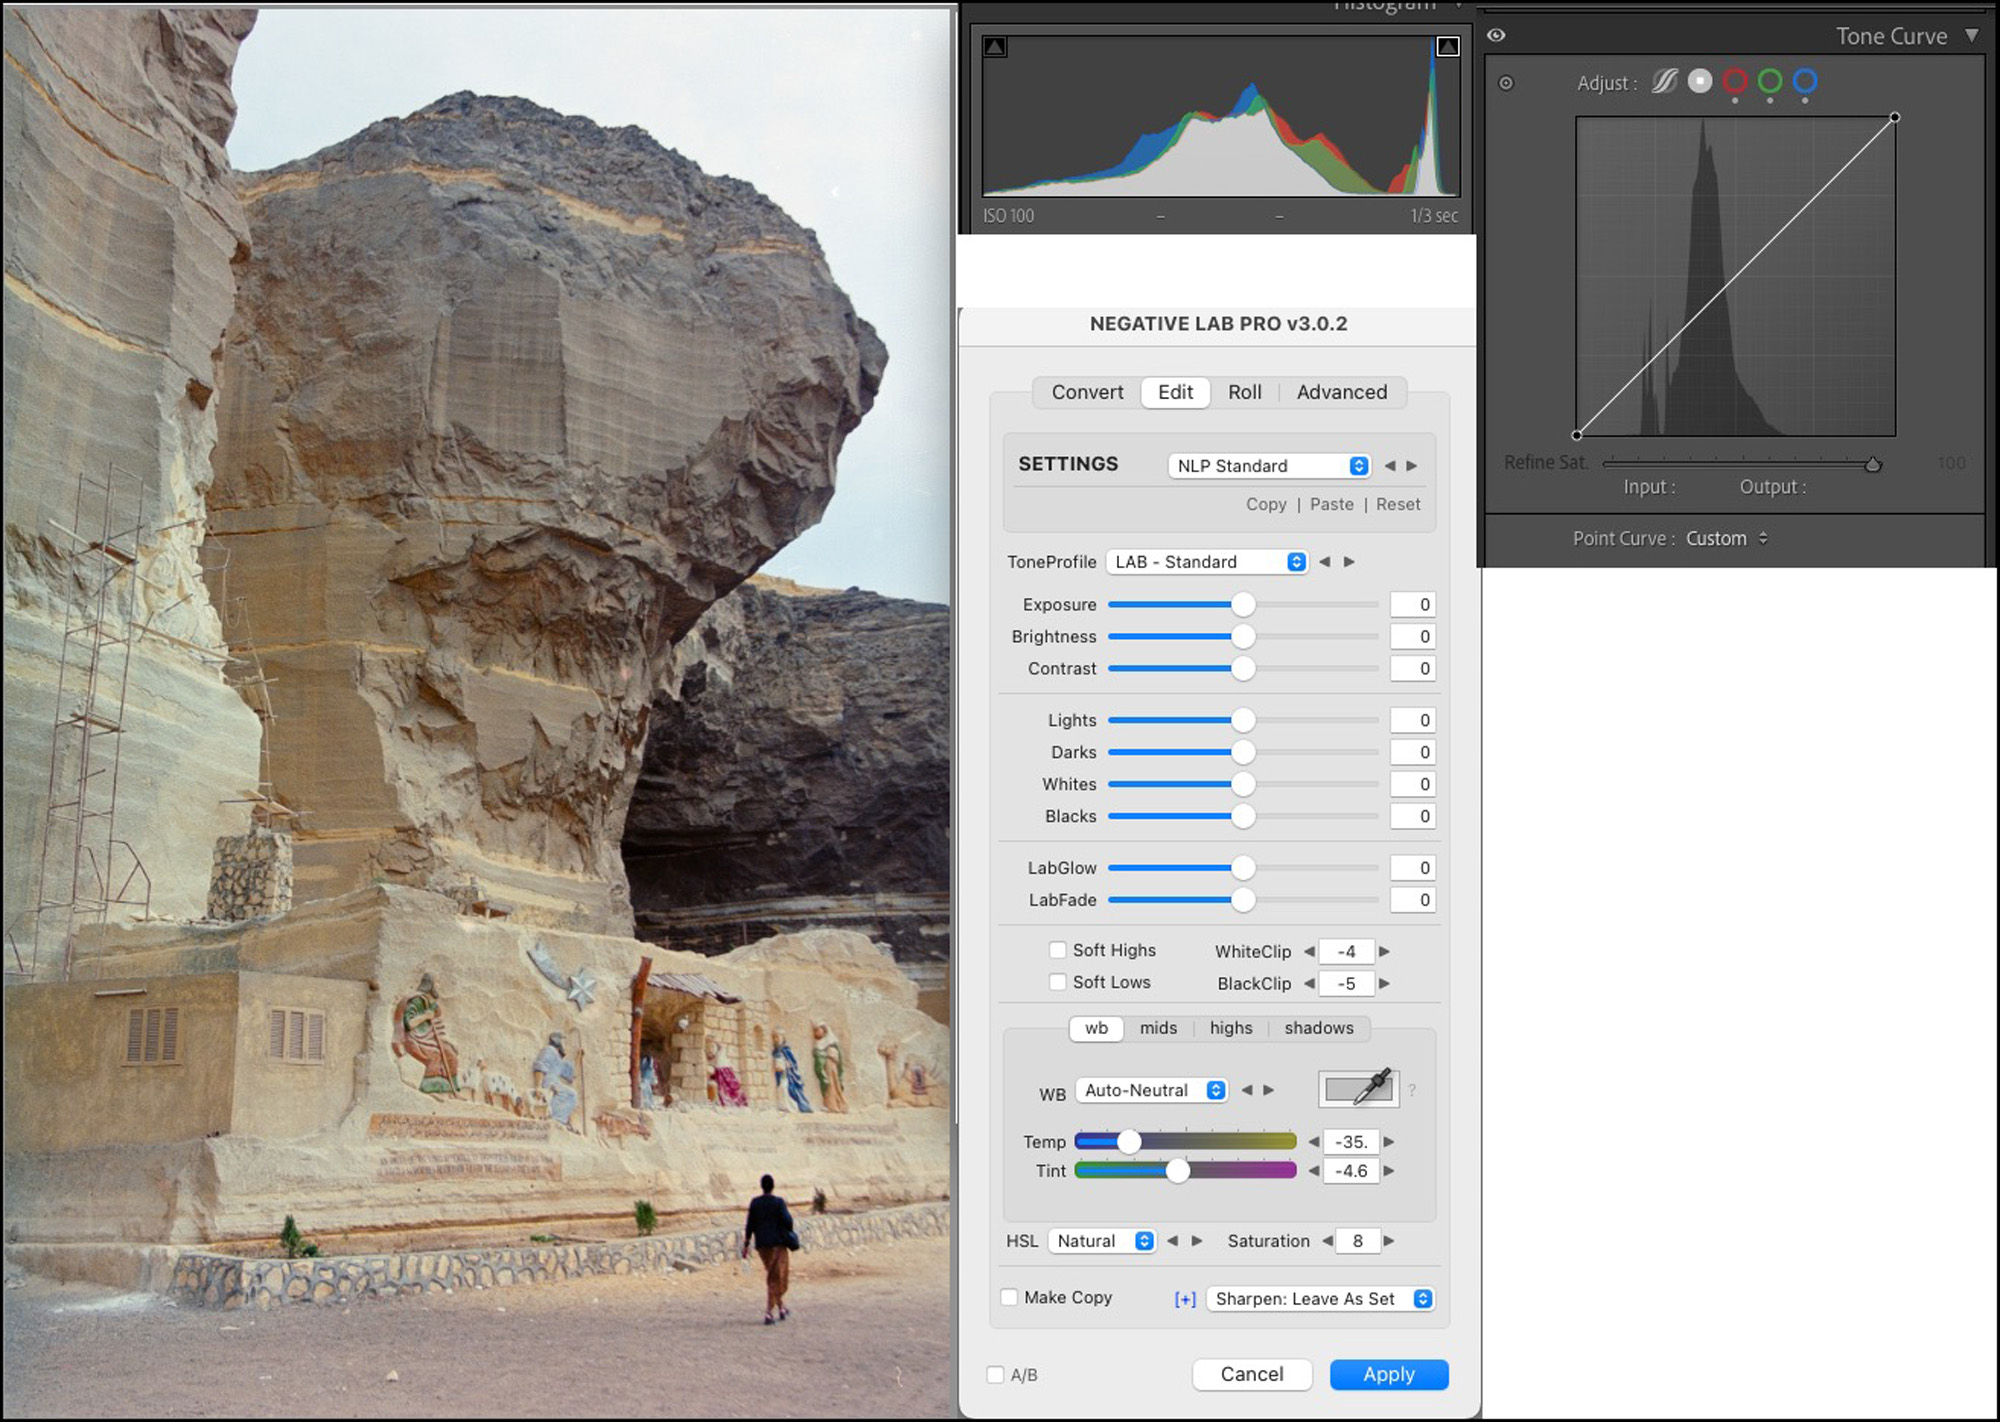
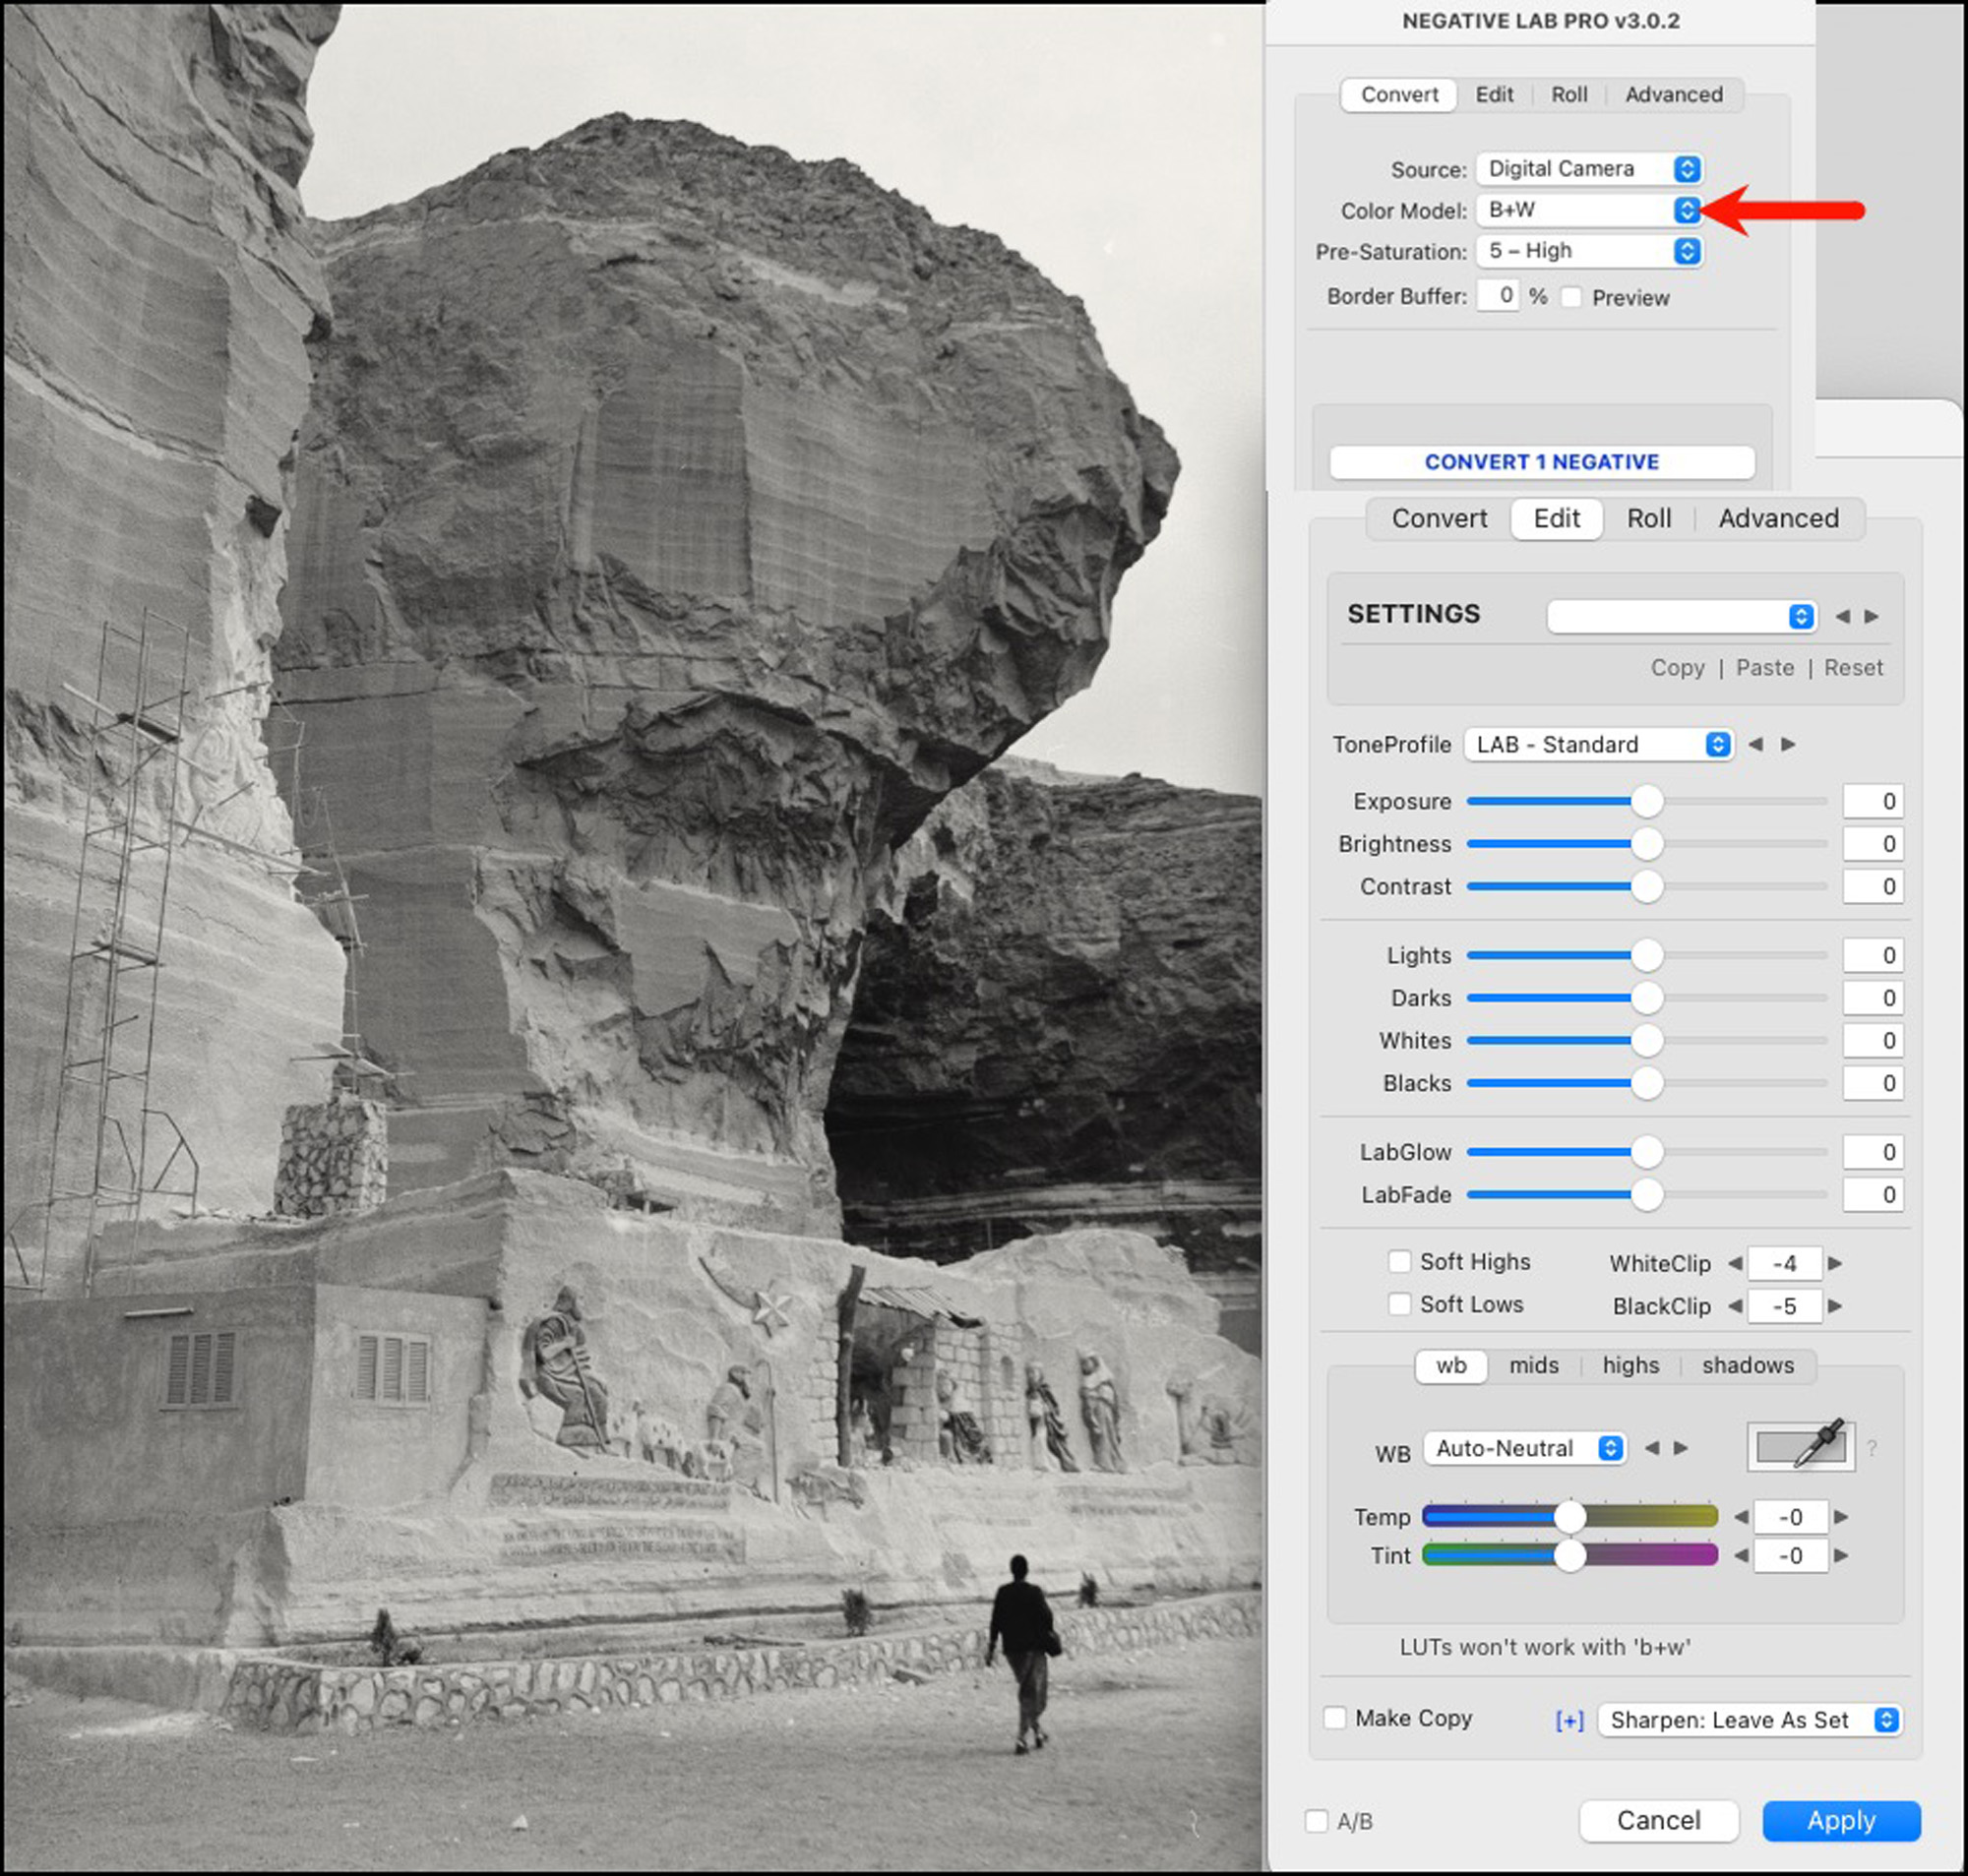
Within a raw workflow using NLP in Lr, the simplest approach, which I presented in more detail previously and more briefly review here, is to select B&W as the Color Model in NLP’s< Convert> tab (Figures 1, 2 and 3). Not the greatest photo, but I present it because the sky and foreground are “challenging” for B&W.

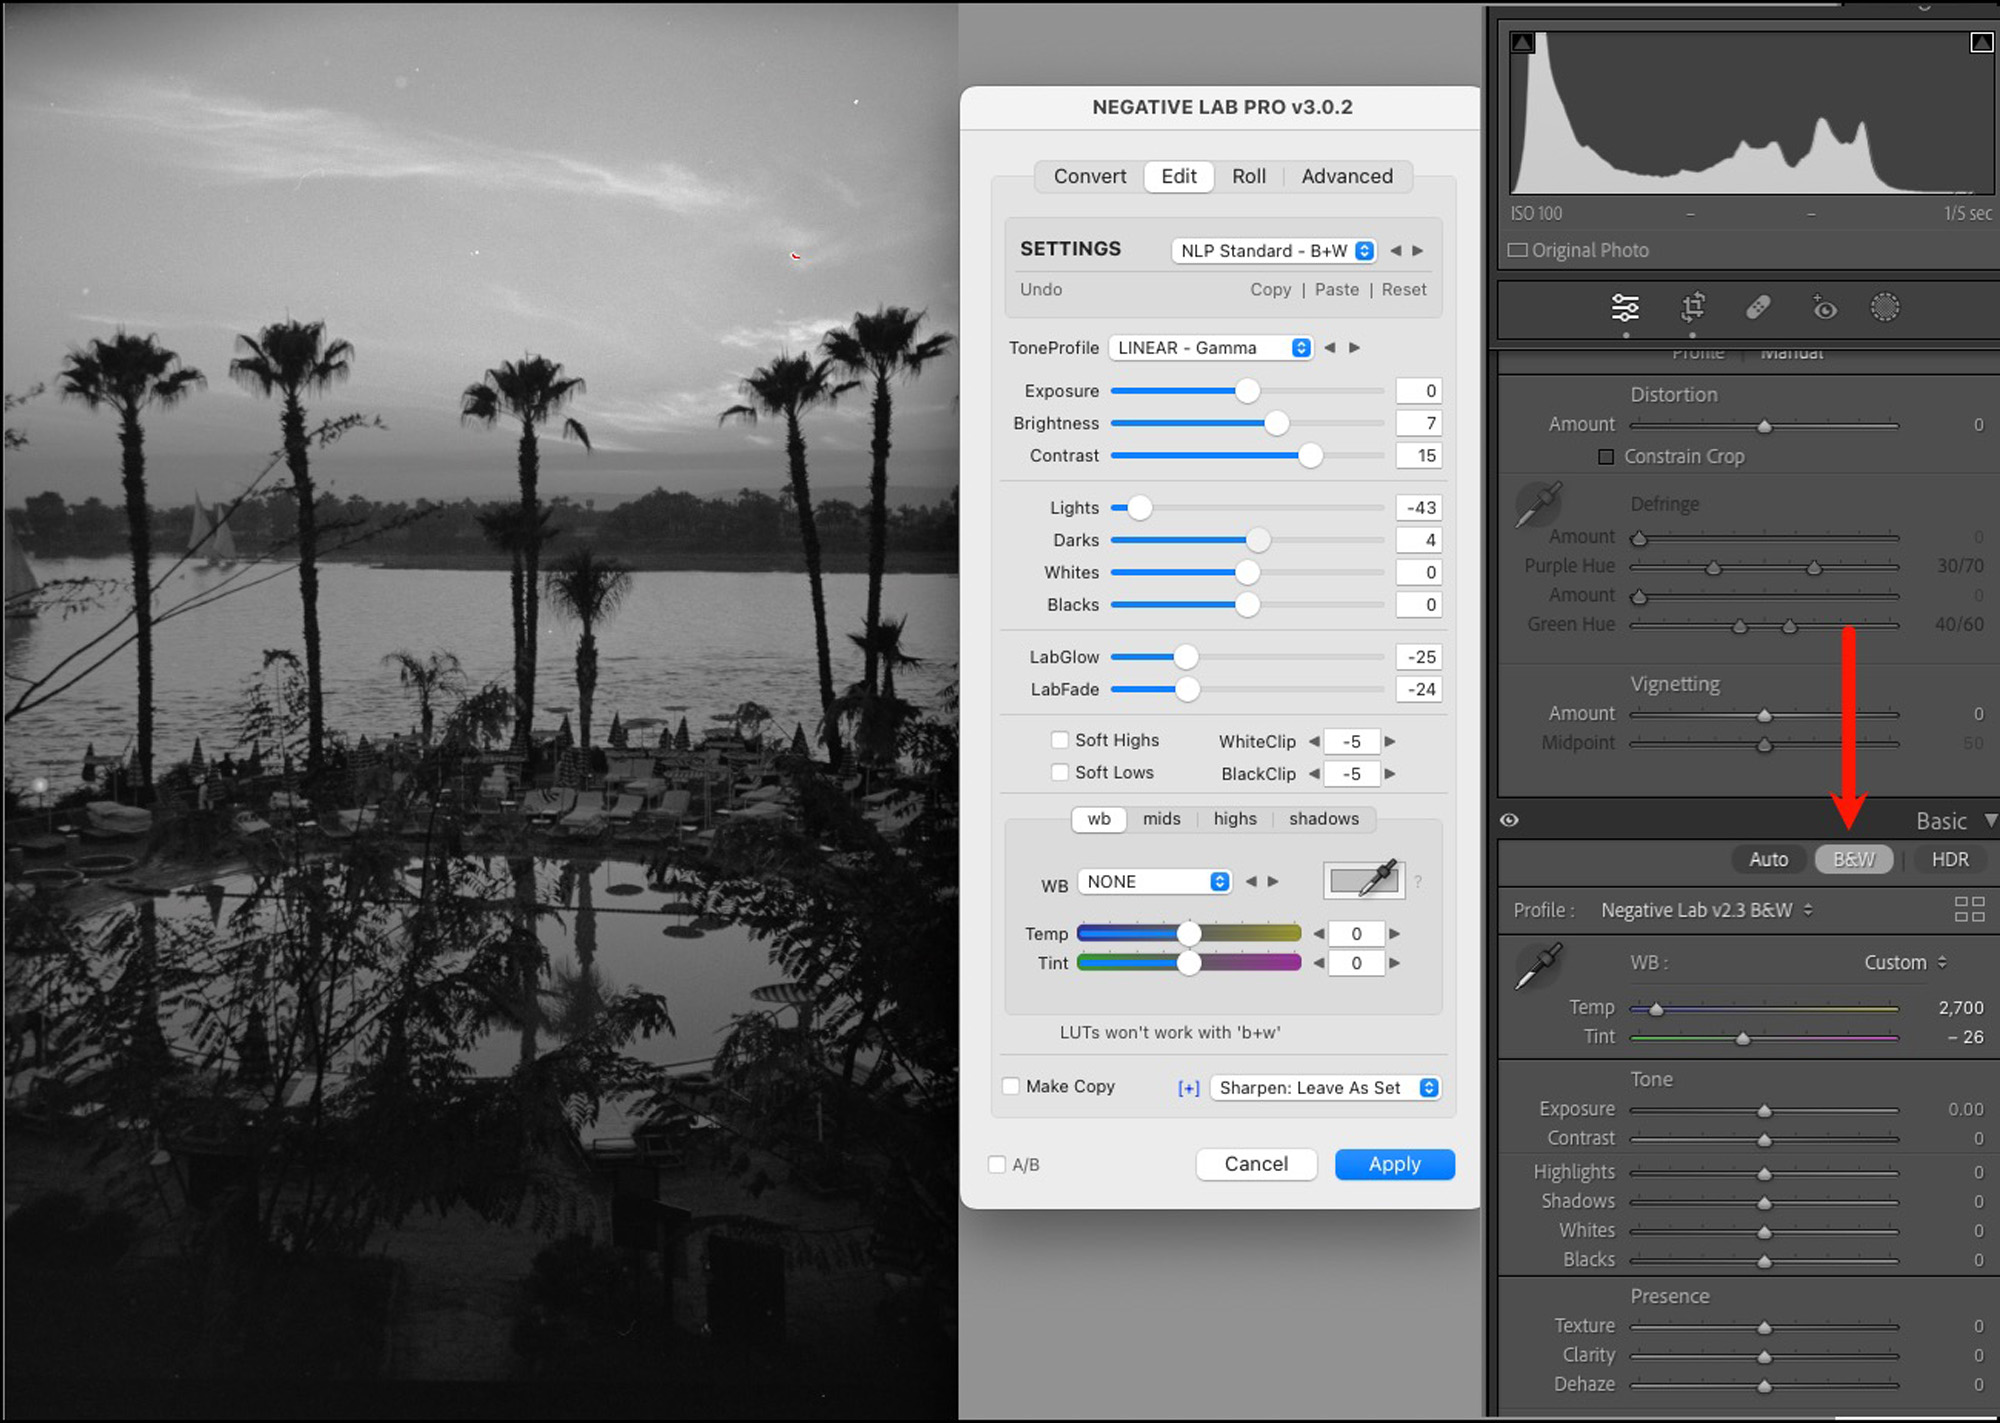
Having done this, we have access to tone and toning adjustments in the Lr Basic, B&W Mix and Color Grading tabs (Figure 4), and masking, as we do for normal digital images, except that the controls for both tone and colour operate obversely because the base photo is a negative. I have found one needs to be careful adjusting the B&W Mix sliders, because with this media, depending on the image content being targeted (especially brighter areas), too much adjustment can over-exaggerate the appearance of the image’s dye-cloud structure (a.k.a. “grain”).
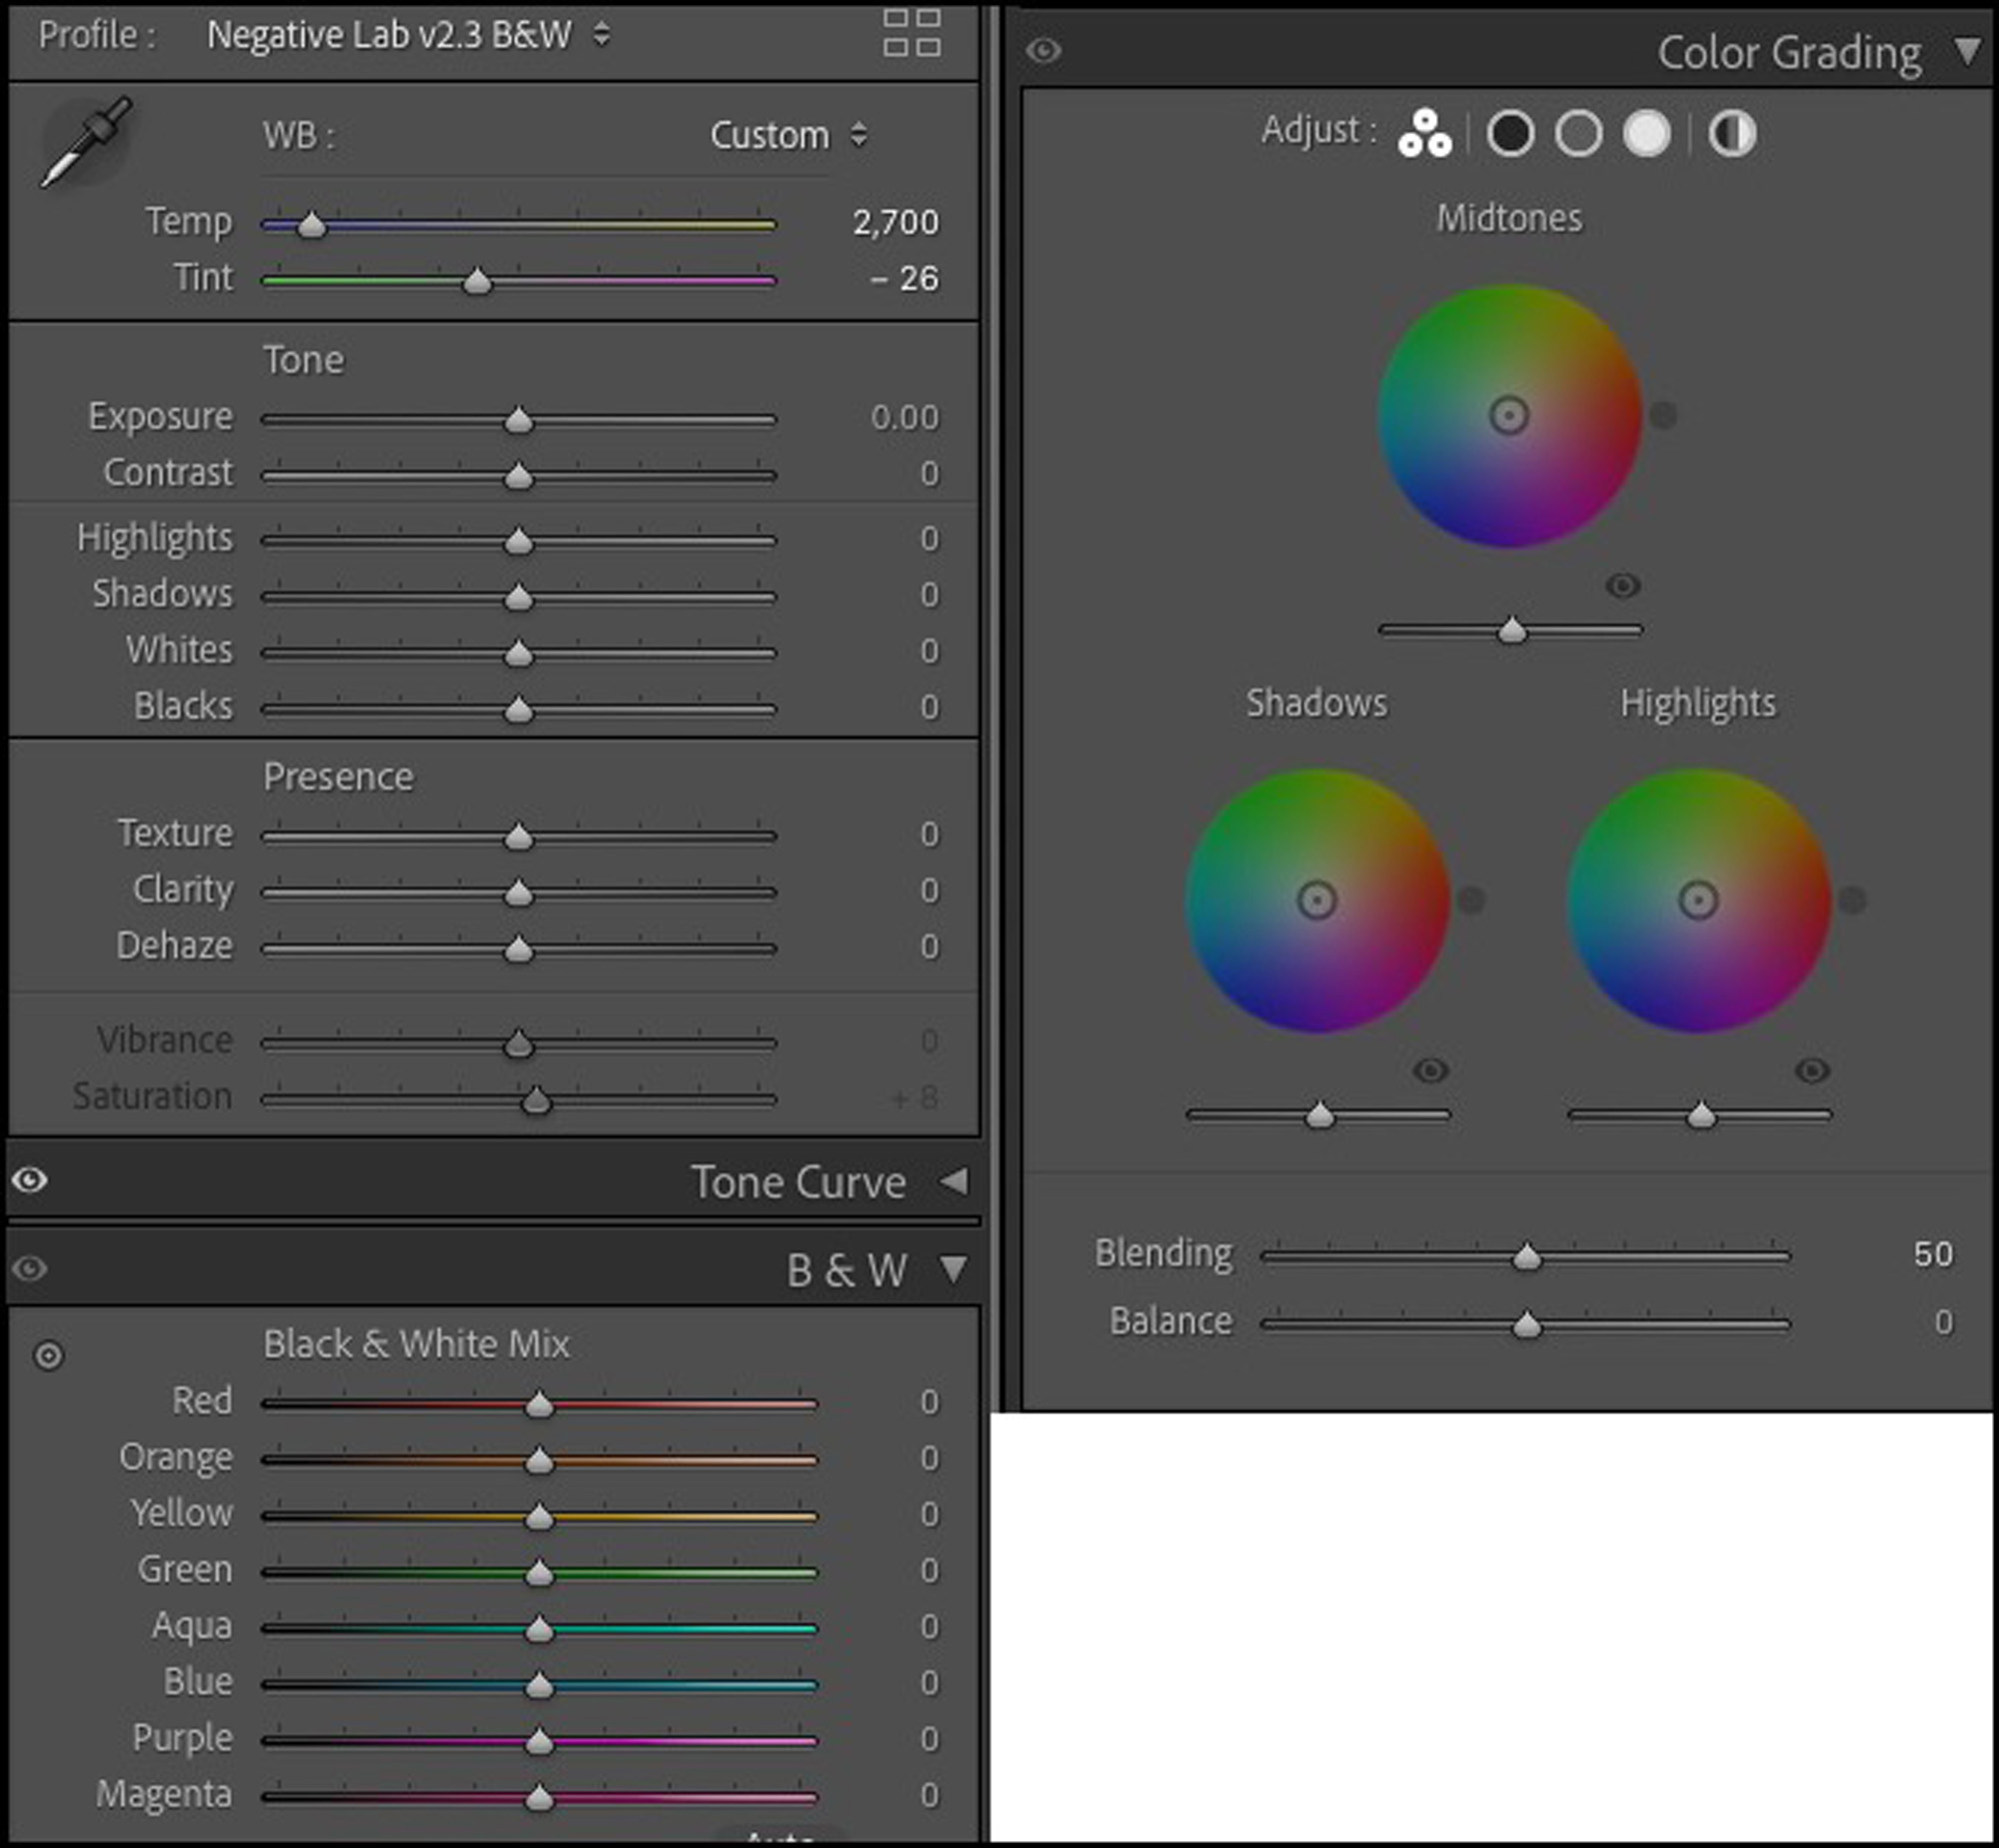
The Luminance tone curve is usable for tone adjustments (controls operate obversely); however, I don’t advise playing with the individual R, G or B channels as that will mess-up the NLP conversion. Open any one of them and you will see how NLP has already adjusted them. Play at your peril – any movement can create large unwanted impacts on results.
The Color Grading controls are useful for changing the hue of the converted photo, for example to make Sepia or Platinum versions (more on this below).
Figure 5 shows my conversion results with some adjustments, before any sharpening, smoothing or toning. As shown, I made most of my adjustments within NLP, the easiest and recommended approach, with some fine-tuning using the Lr B&W Color Mixer. (Nate has worked very hard on optimizing NLP’s controls for working with reversed negatives.)
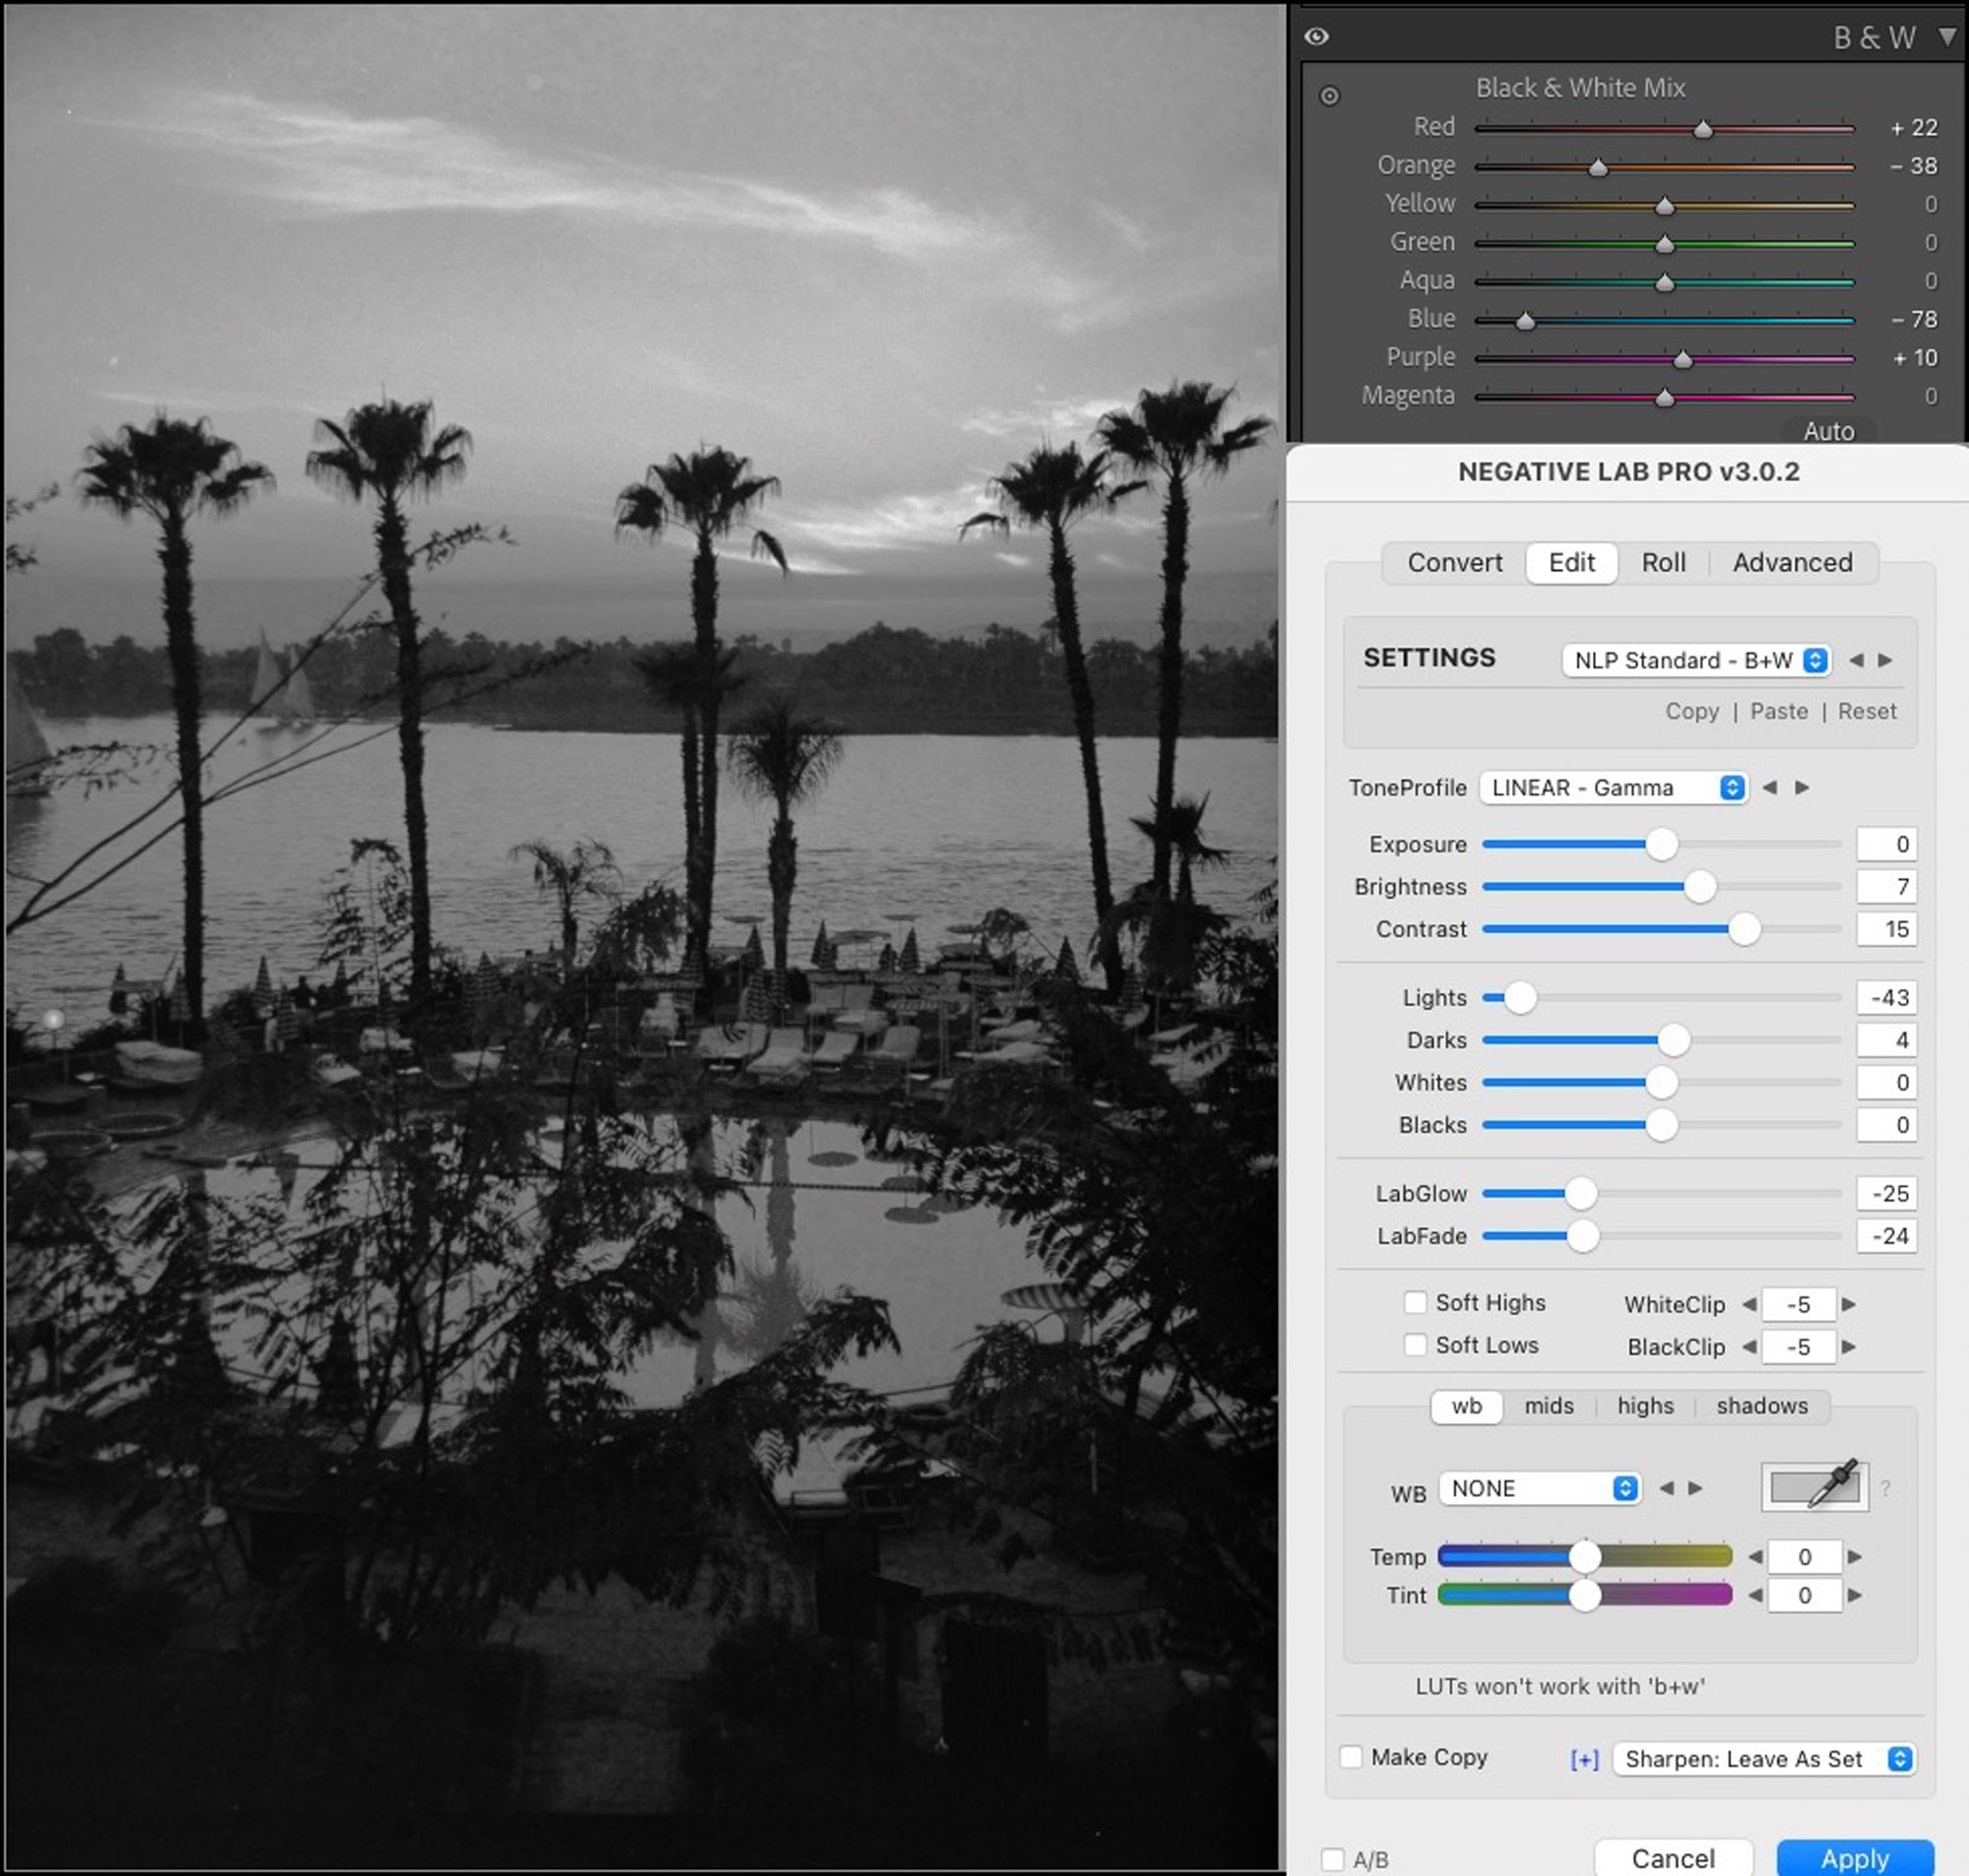
Having made this conversion, the file is no longer usable as a colour image unless you take it back to its import stage of Figure 1, make a virtual copy and use the virtual copy as the one for the B&W conversion.
Another Approach
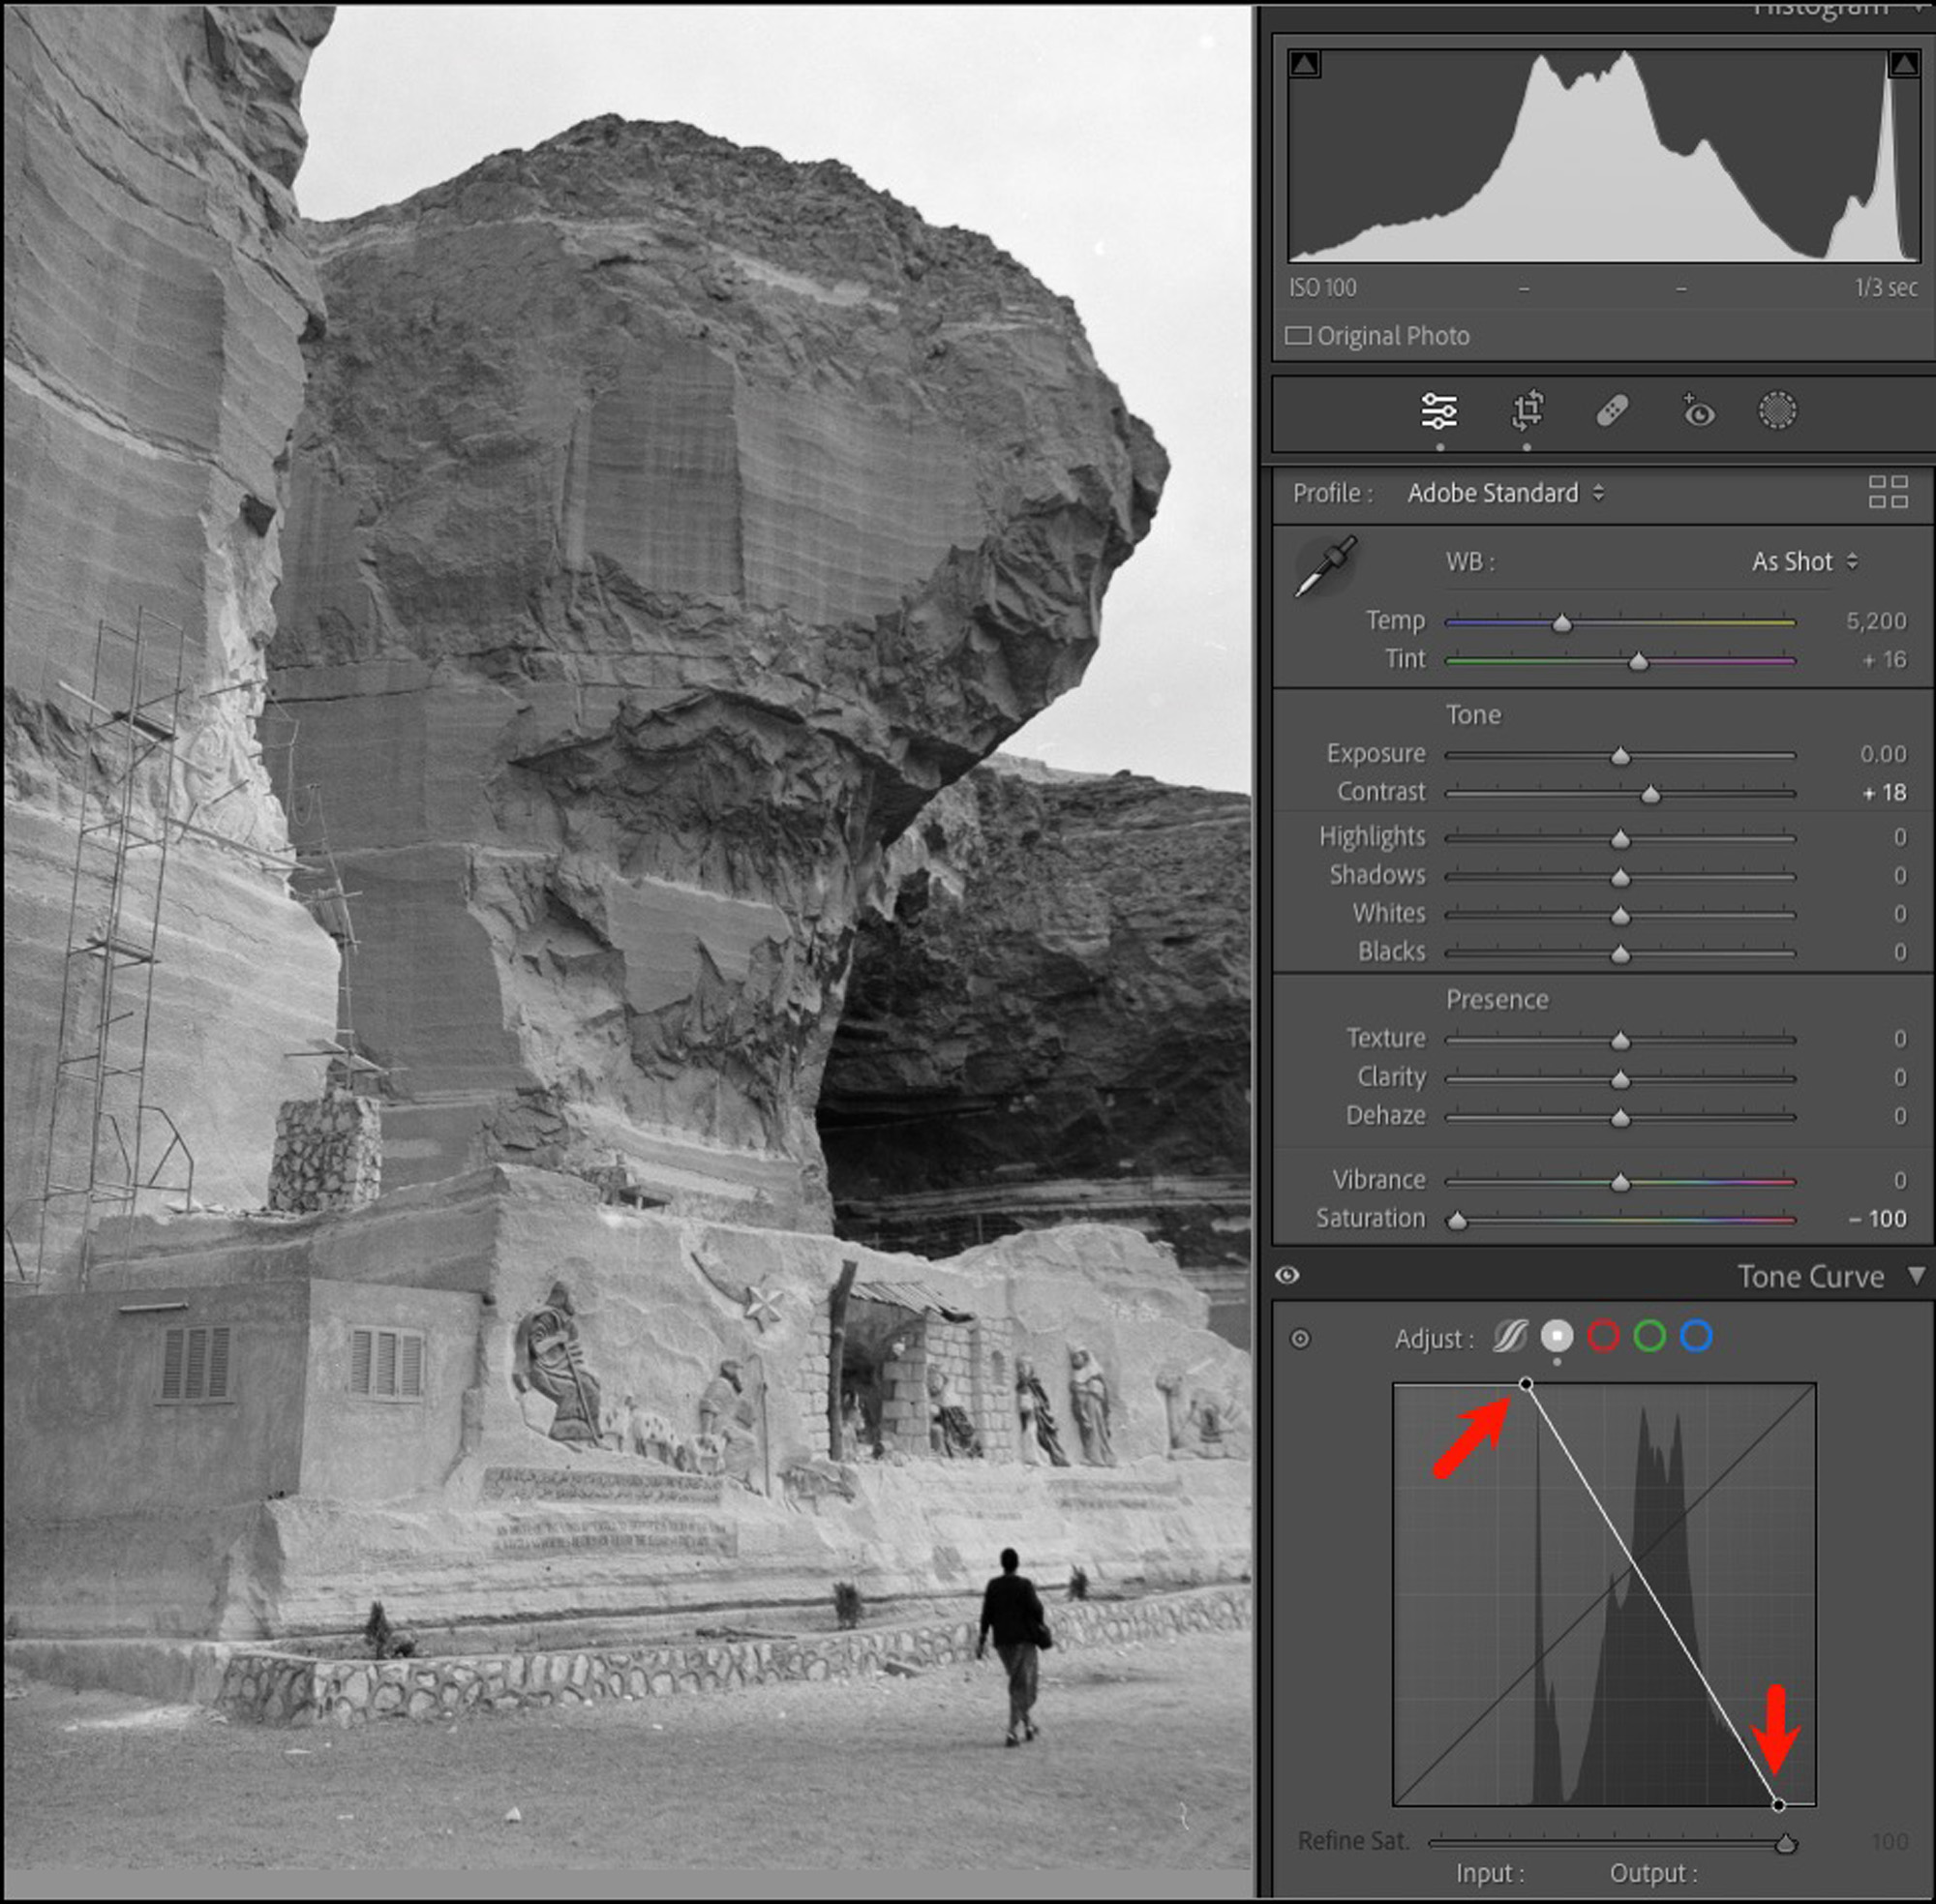
There is an alternative approach to making B&W photos from colour negatives allowing one, as an option, to keep both colour and B&W versions of the photo within one Lr workflow and providing for more creative use of the tone curves to do image toning. Figure 8 is optional only if you wish to preserve a positive colour version in the workflow. Figures 7 and 9 are necessary for the B&W rendition. Here are the steps, Figures 7, 9, 10 and 11 being done within Lr:
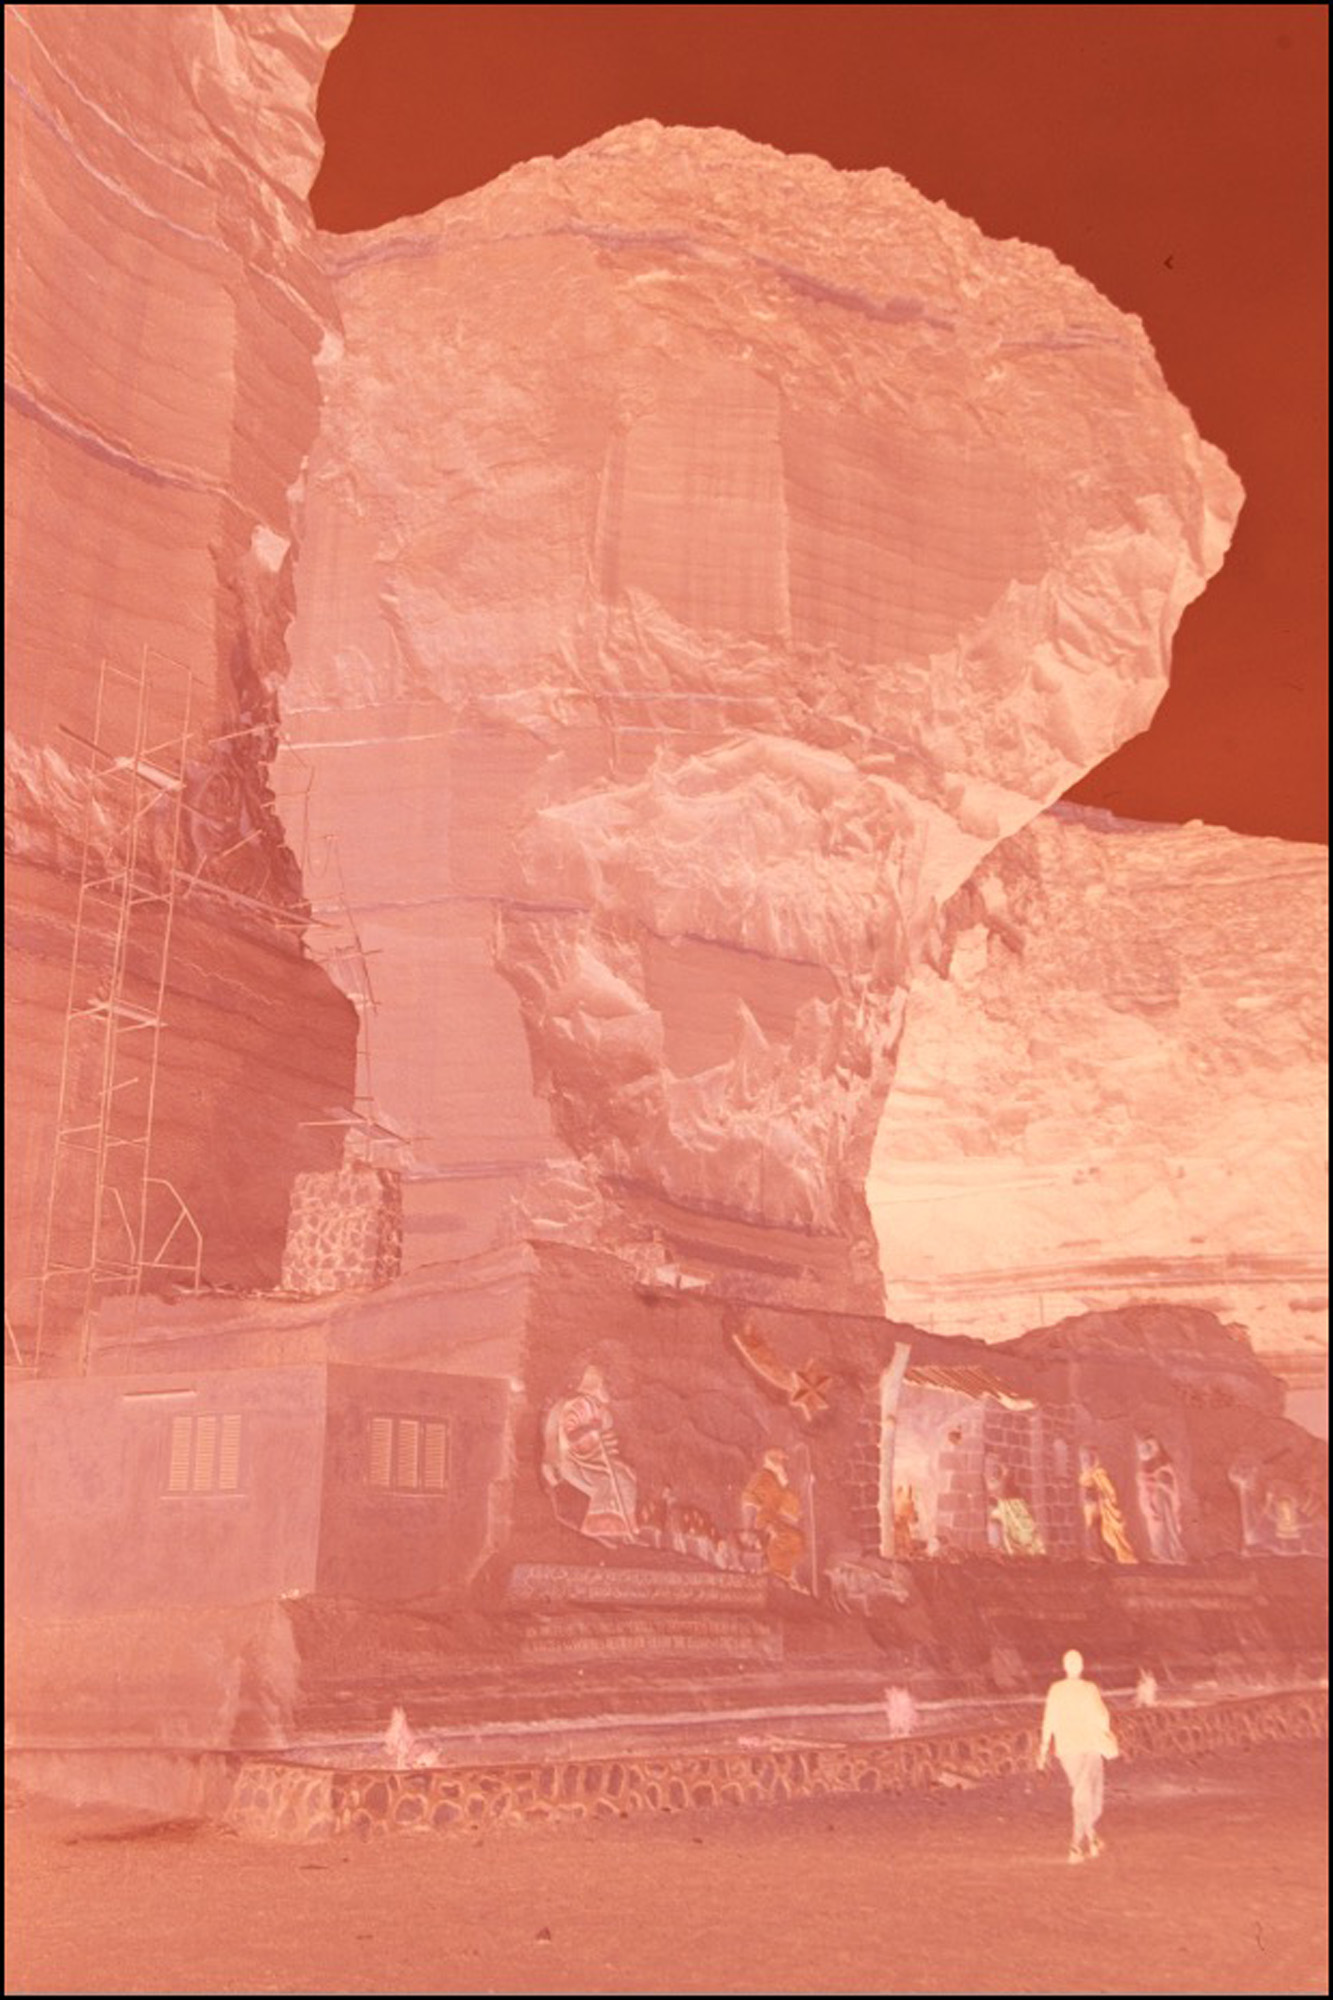
Original Negative
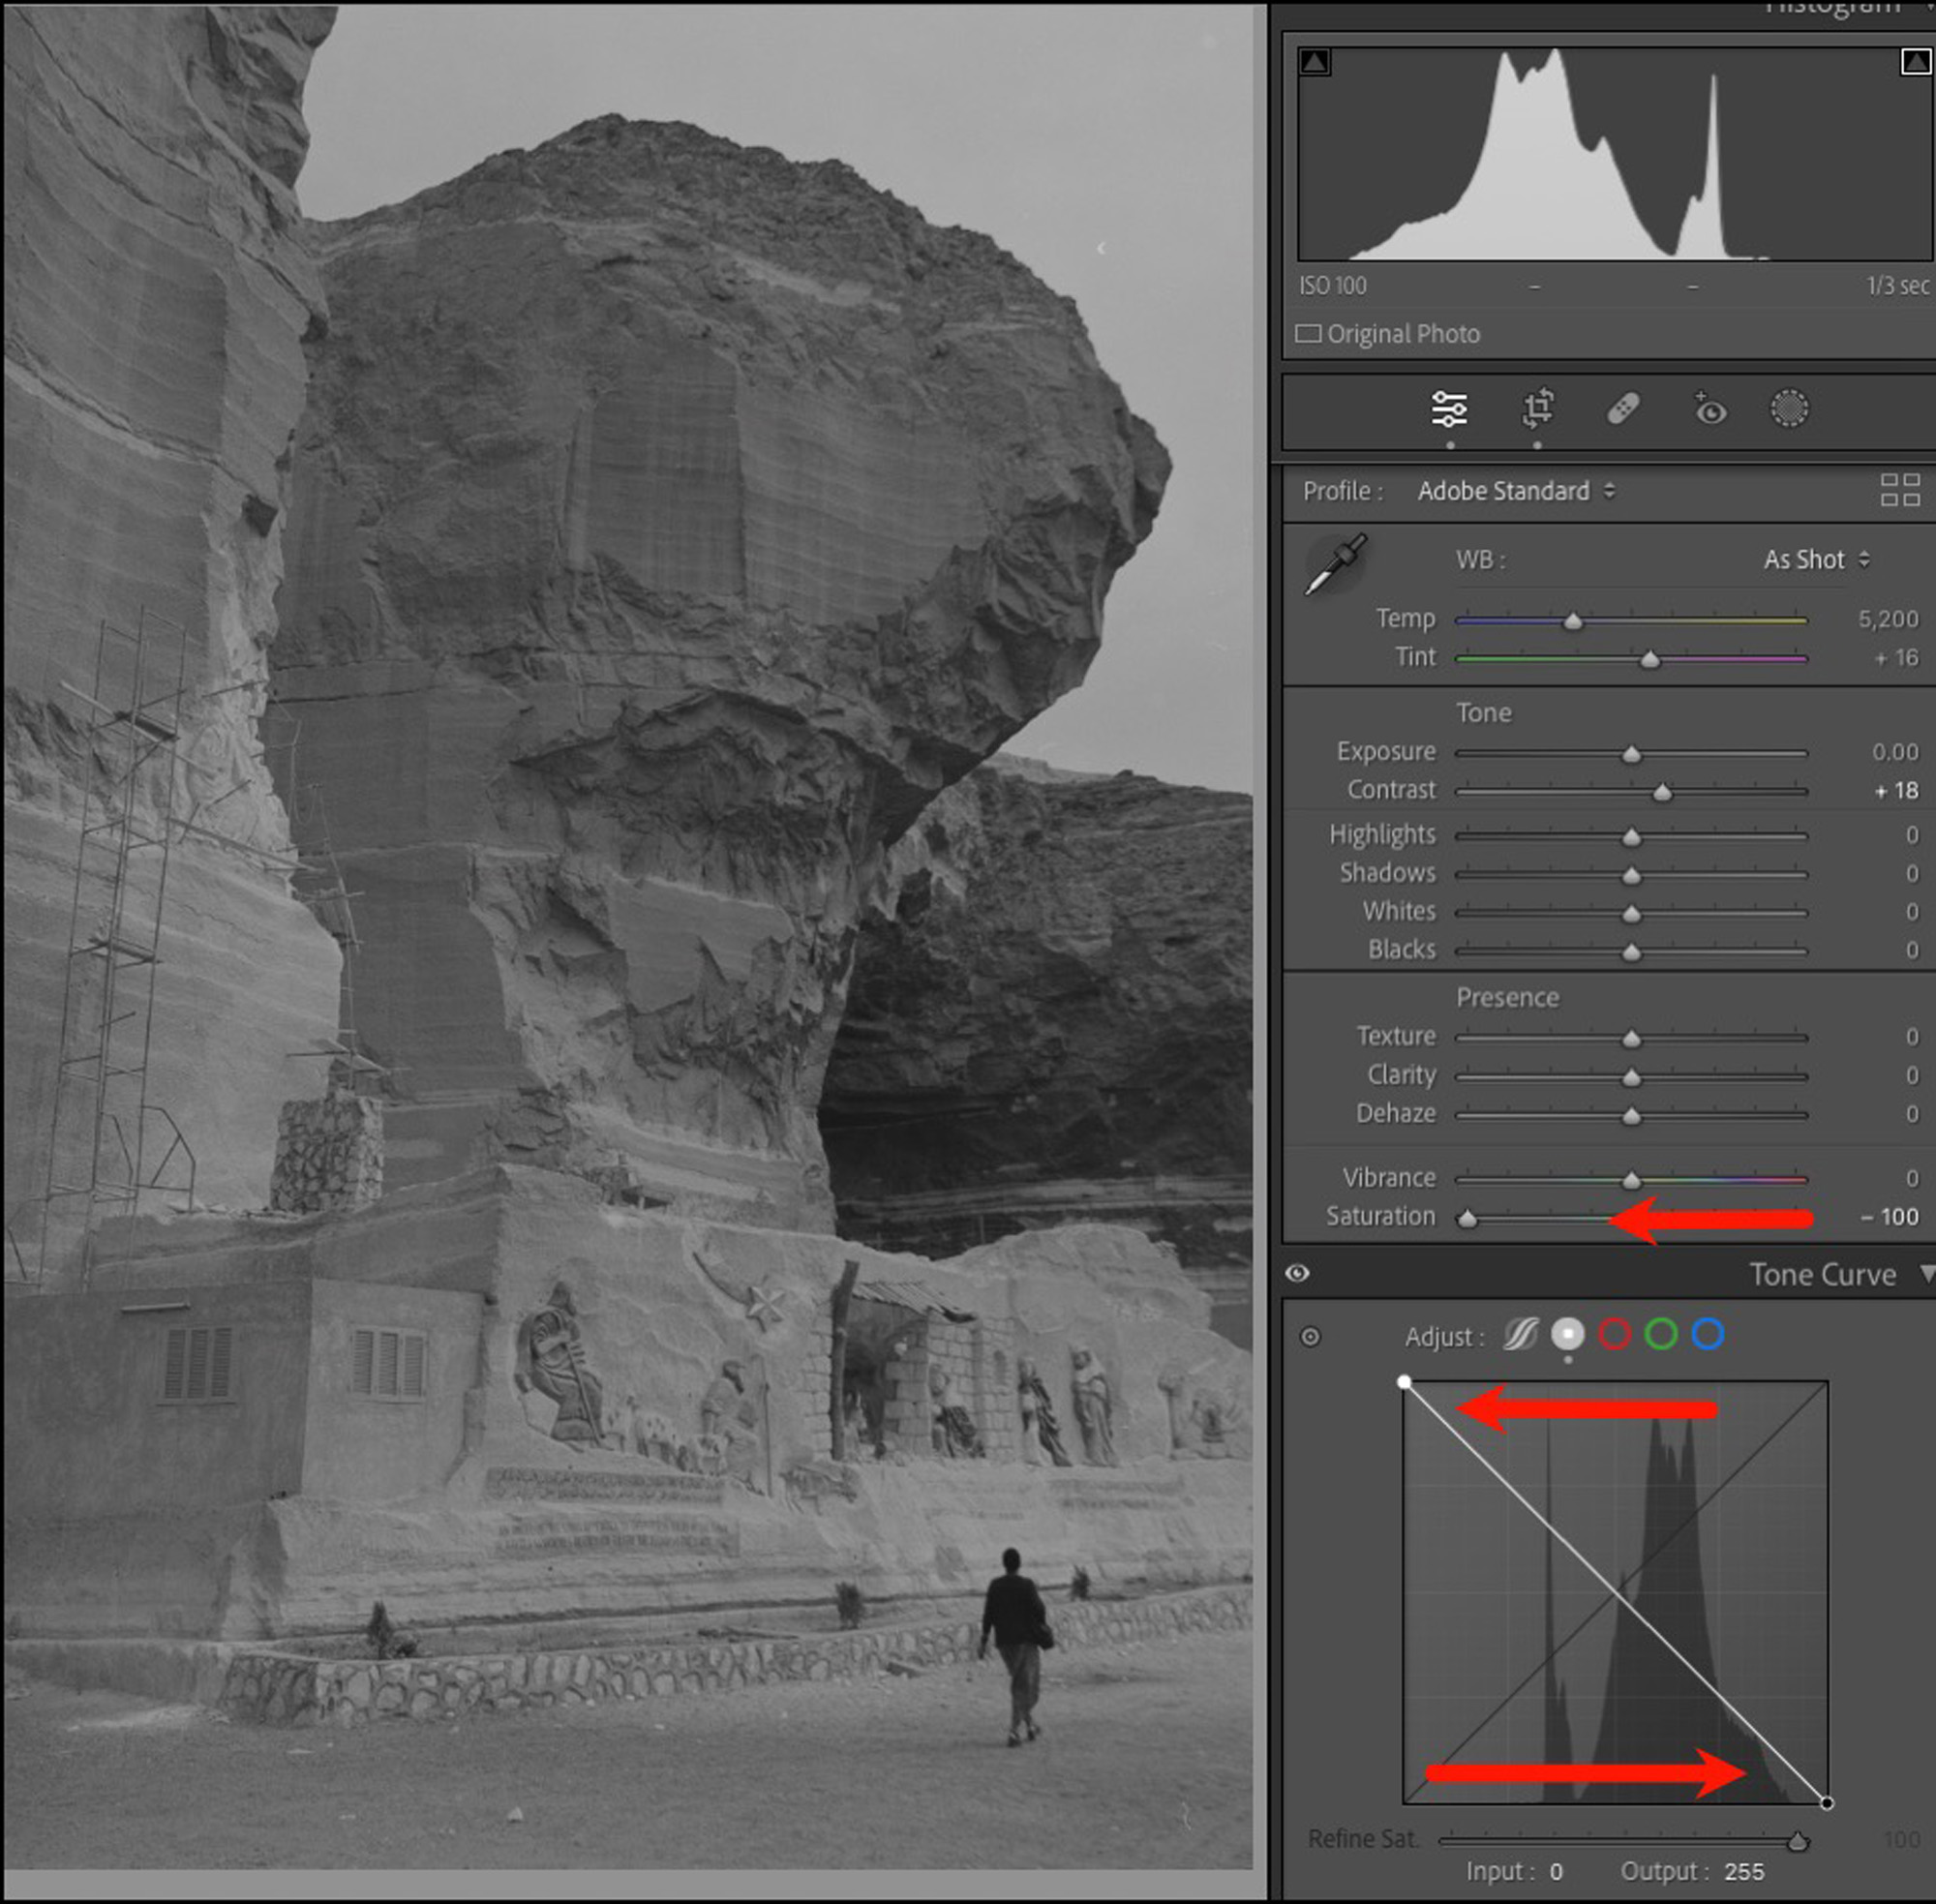
(1st step: Pull in Black and White to near clipping points – watch histogram)

Once you implement the Figure 9 instruction, it is no longer possible to adjust the image in NLP, and the Color Mixer in Lr becomes unusable. However, the tone and toning controls available in Lr, including Color Grading, are usable and effective for editing image appearance to taste.
Figure 12 shows the result using the NLP B&W conversion approach with its B&W Color Model, for comparison with that in Figures 9 and 10 which were done in Lr. With a bit of adjusting in either route they can be made to look the same. Tonal range and neutrality can be fine with either approach.
The edits I performed for this article are minimal, intended to demonstrate the methods.
In a future article for this website, I intend to explore numerous other inter-active image editing options between Lr and NLP. Stay tuned.
Mark D Segal
Toronto, April 8, 2025

Elevate Your Vision


Read this story and all the best stories on The Luminous Landscape
The author has made this story available to Luminous Landscape members only. Upgrade to get instant access to this story and other benefits available only to members.
Why choose us?
Luminous-Landscape is a membership site. Our website contains over 5300 articles on almost every topic, camera, lens and printer you can imagine. Our membership model is simple, just $2 a month ($24.00 USD a year). This $24 gains you access to a wealth of information including all our past and future video tutorials on such topics as Lightroom, Capture One, Printing, file management and dozens of interviews and travel videos.
- New Articles every few days
- All original content found nowhere else on the web
- No Pop Up Google Sense ads – Our advertisers are photo related
- Download/stream video to any device
- NEW videos monthly
- Top well-known photographer contributors
- Posts from industry leaders
- Speciality Photography Workshops
- Mobile device scalable
- Exclusive video interviews
- Special vendor offers for members
- Hands On Product reviews
- FREE – User Forum. One of the most read user forums on the internet
- Access to our community Buy and Sell pages; for members only.
You may also like