This article is an excerpt from Mark Segals original article and review on the Epson SC P5370 that can be hour HERE.
Everyone who’s heard of this application, please raise your hands. No-one? Oh, OK, well let’s go to it. This application was designed to manage and coordinate fleets of printers in places like service bureaux, etc., but you and I can still find it useful for retrieving a wealth of useful information about our P5370’s performance, so we’ll spend a bit of time on it.
Epson Cloud Solution PORT (EP) is a cloud-based printer management service that’s free of charge to users of the supported Epson professional printers, including the P5370. To use it, you need to make sure the printer accesses the internet (WiFI or Ethernet). If you don’t have one already, you need to create an account with Epson (free) and have the serial number of your printer handy. You sign in with Epson HERE

If you haven’t registered a supported printer with Epson Cloud Solution PORT yet, the next screens will guide you through that procedure, which is not difficult. There is a one-time process whereby you sign-in to another Epson Cloud Solution PORT page by giving them your email address and the serial number of your printer. You will be offered a string of code for your printer which you paste into a printer registration window when asked. It could take anywhere from a few minutes to overnight until Epson’s system registers your printer and you are good to go using the software. There are some permissions you need to give them which may feel like Big Brother watching over you, but I am assured that Big Brother is only seeing into your printer and it’s totally harmless. OK. You want the service, just go along for the ride.
Once you are “in”, you’ll get the personalized Cloud Solution PORT welcome screen (Figure 88).
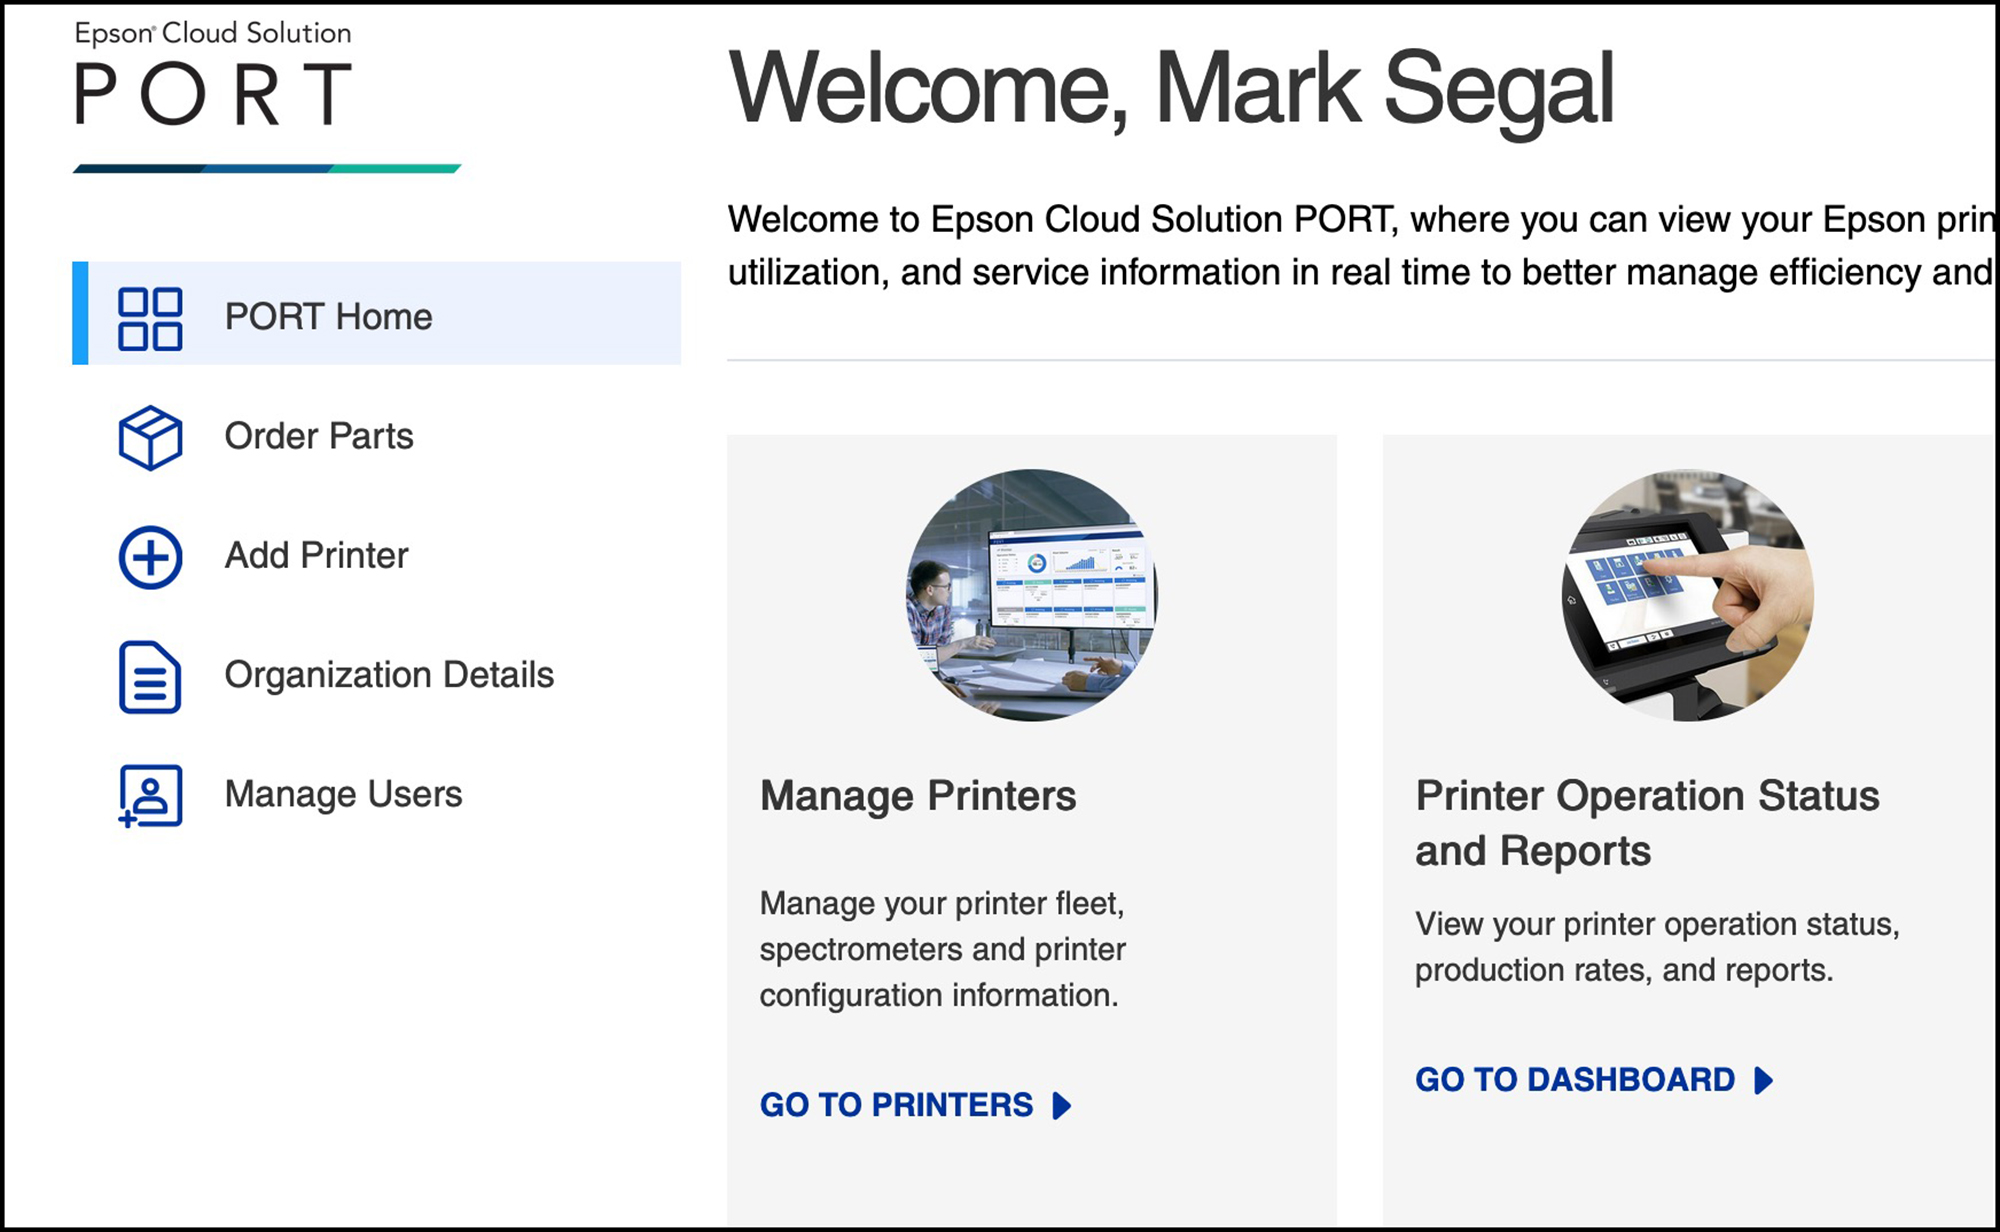
If you don’t have a fleet of printers to manage and/or don’t need to manage your P5370 (most likely the case), your primary interest in using this application is to click on the “Go to Dashboard” option. When you do that, you’ll be presented with a menu of reports you can view (Figure 89).
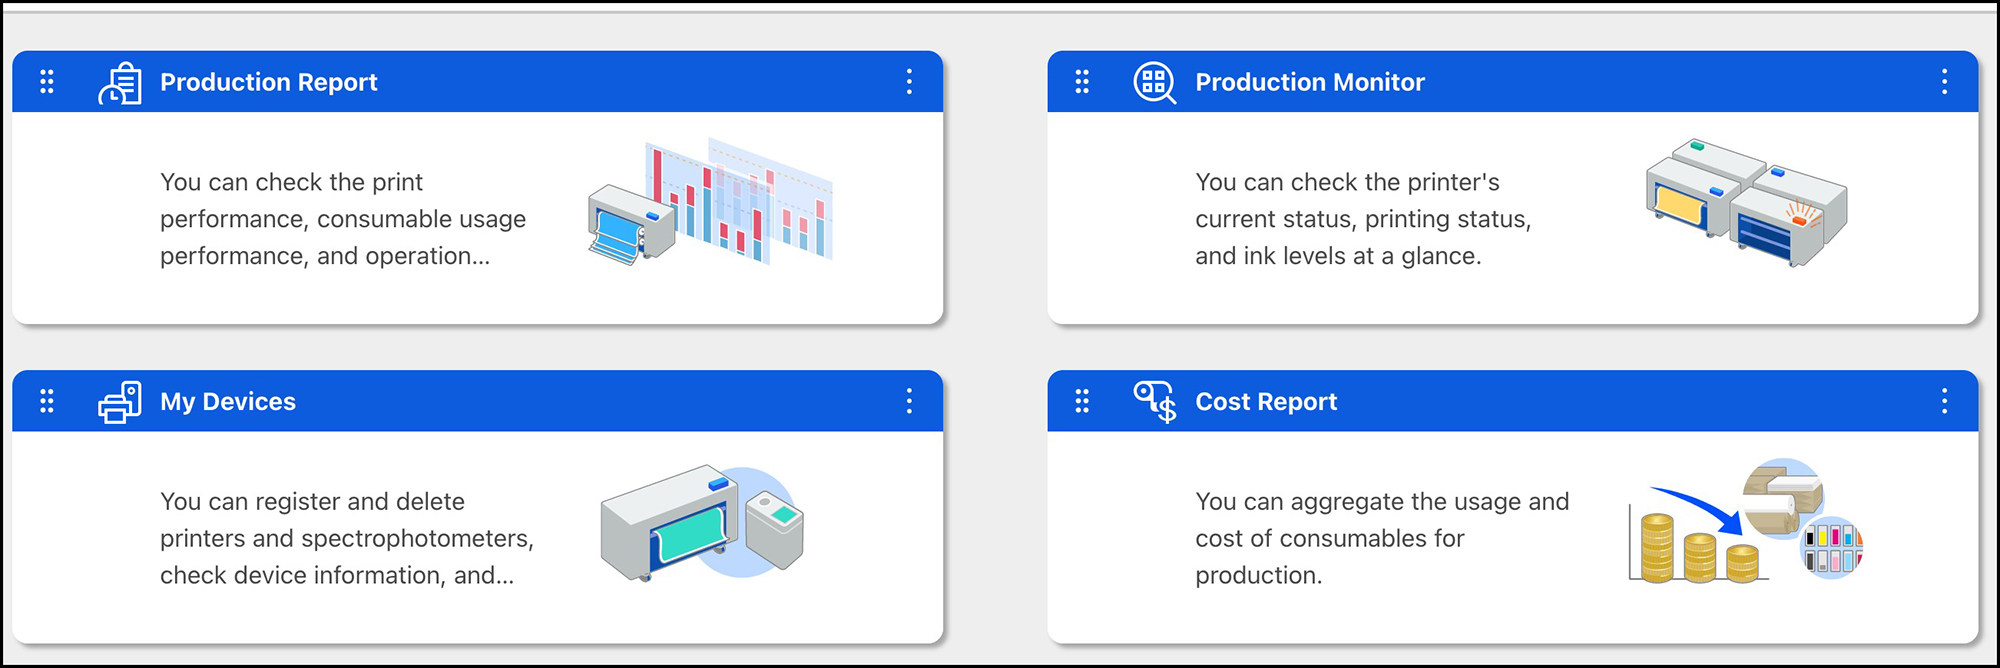
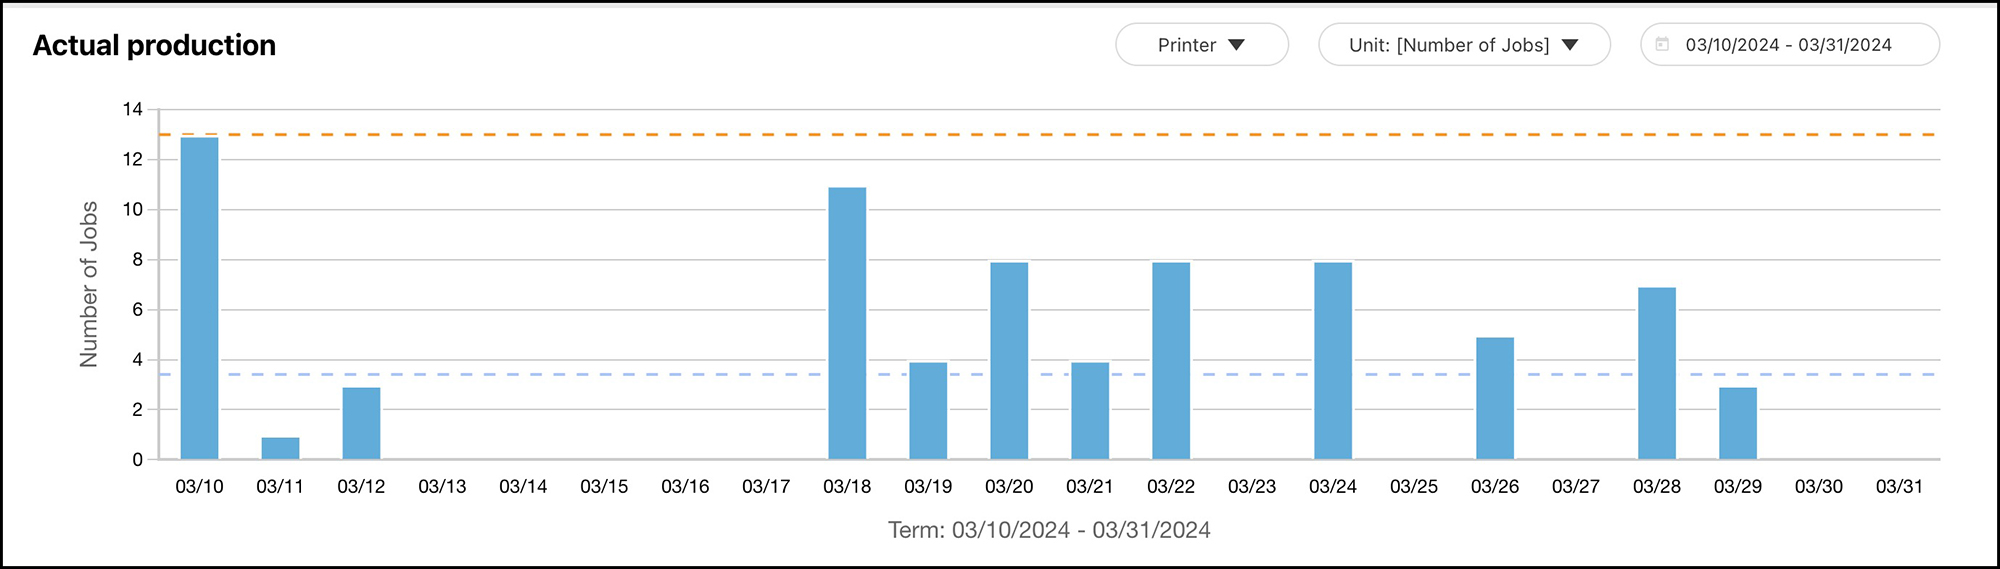
In order to populate these reports you need to provide the names of the media types, their sizes and their costs and the costs of ink you are using. You do this once, unless this information changes, in which case you can edit it. The reports indicated in Figure 89 are available as graphics within the application (following Figures) or downloadable as “.csv” files which can then be converted to Excel or Numbers spreadsheets. Examples of the available information at varying levels of granularity are from my usage covering the period of March 10 to March 31 2024.
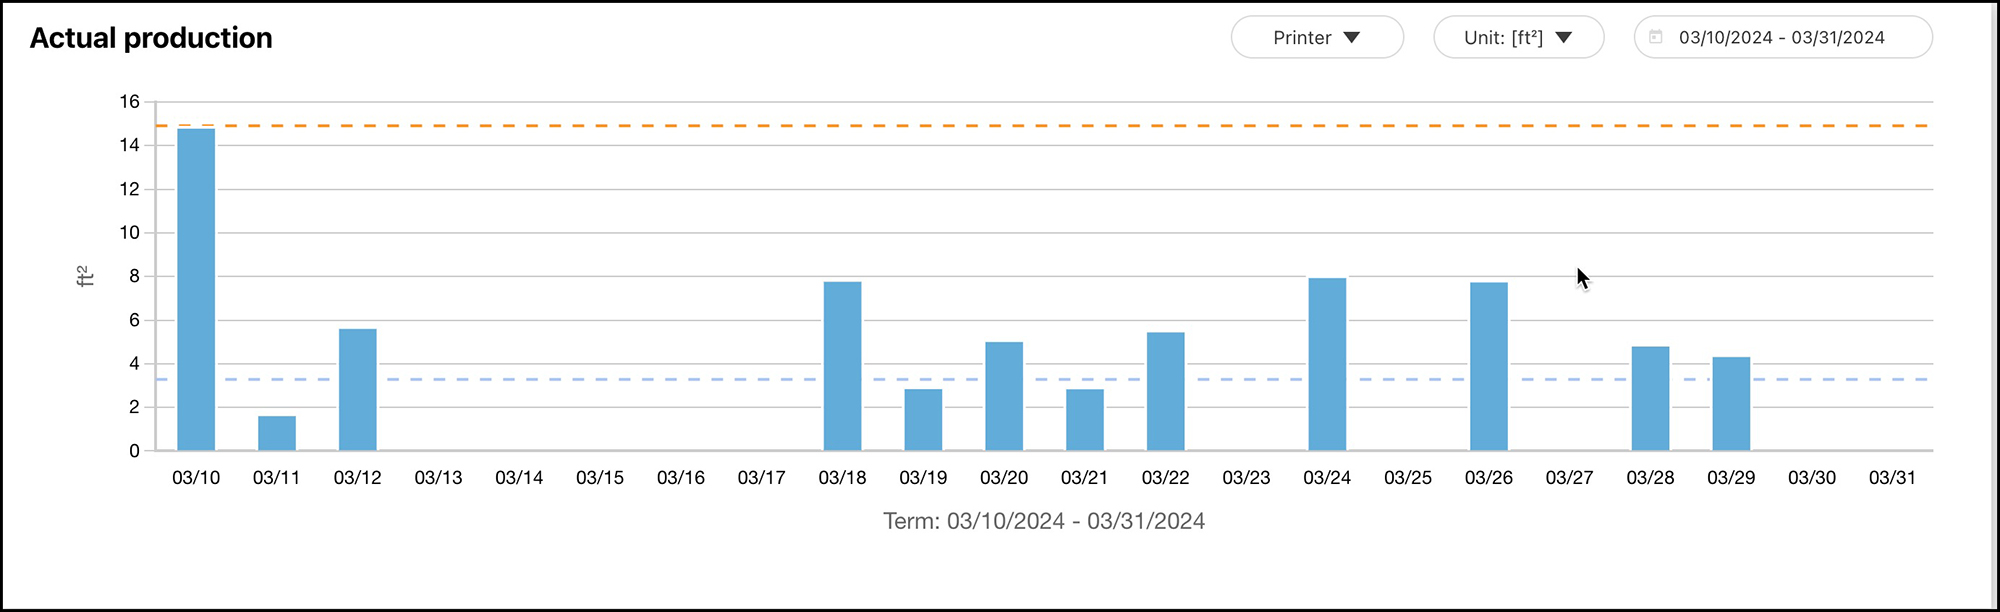
The media consumption report is in square feet of paper used, not square feet of ink coverage on the paper, so you cannot correctly derive ink use per square foot of coverage unless you manually adjust the paper consumption to exclude un-inked square inches.

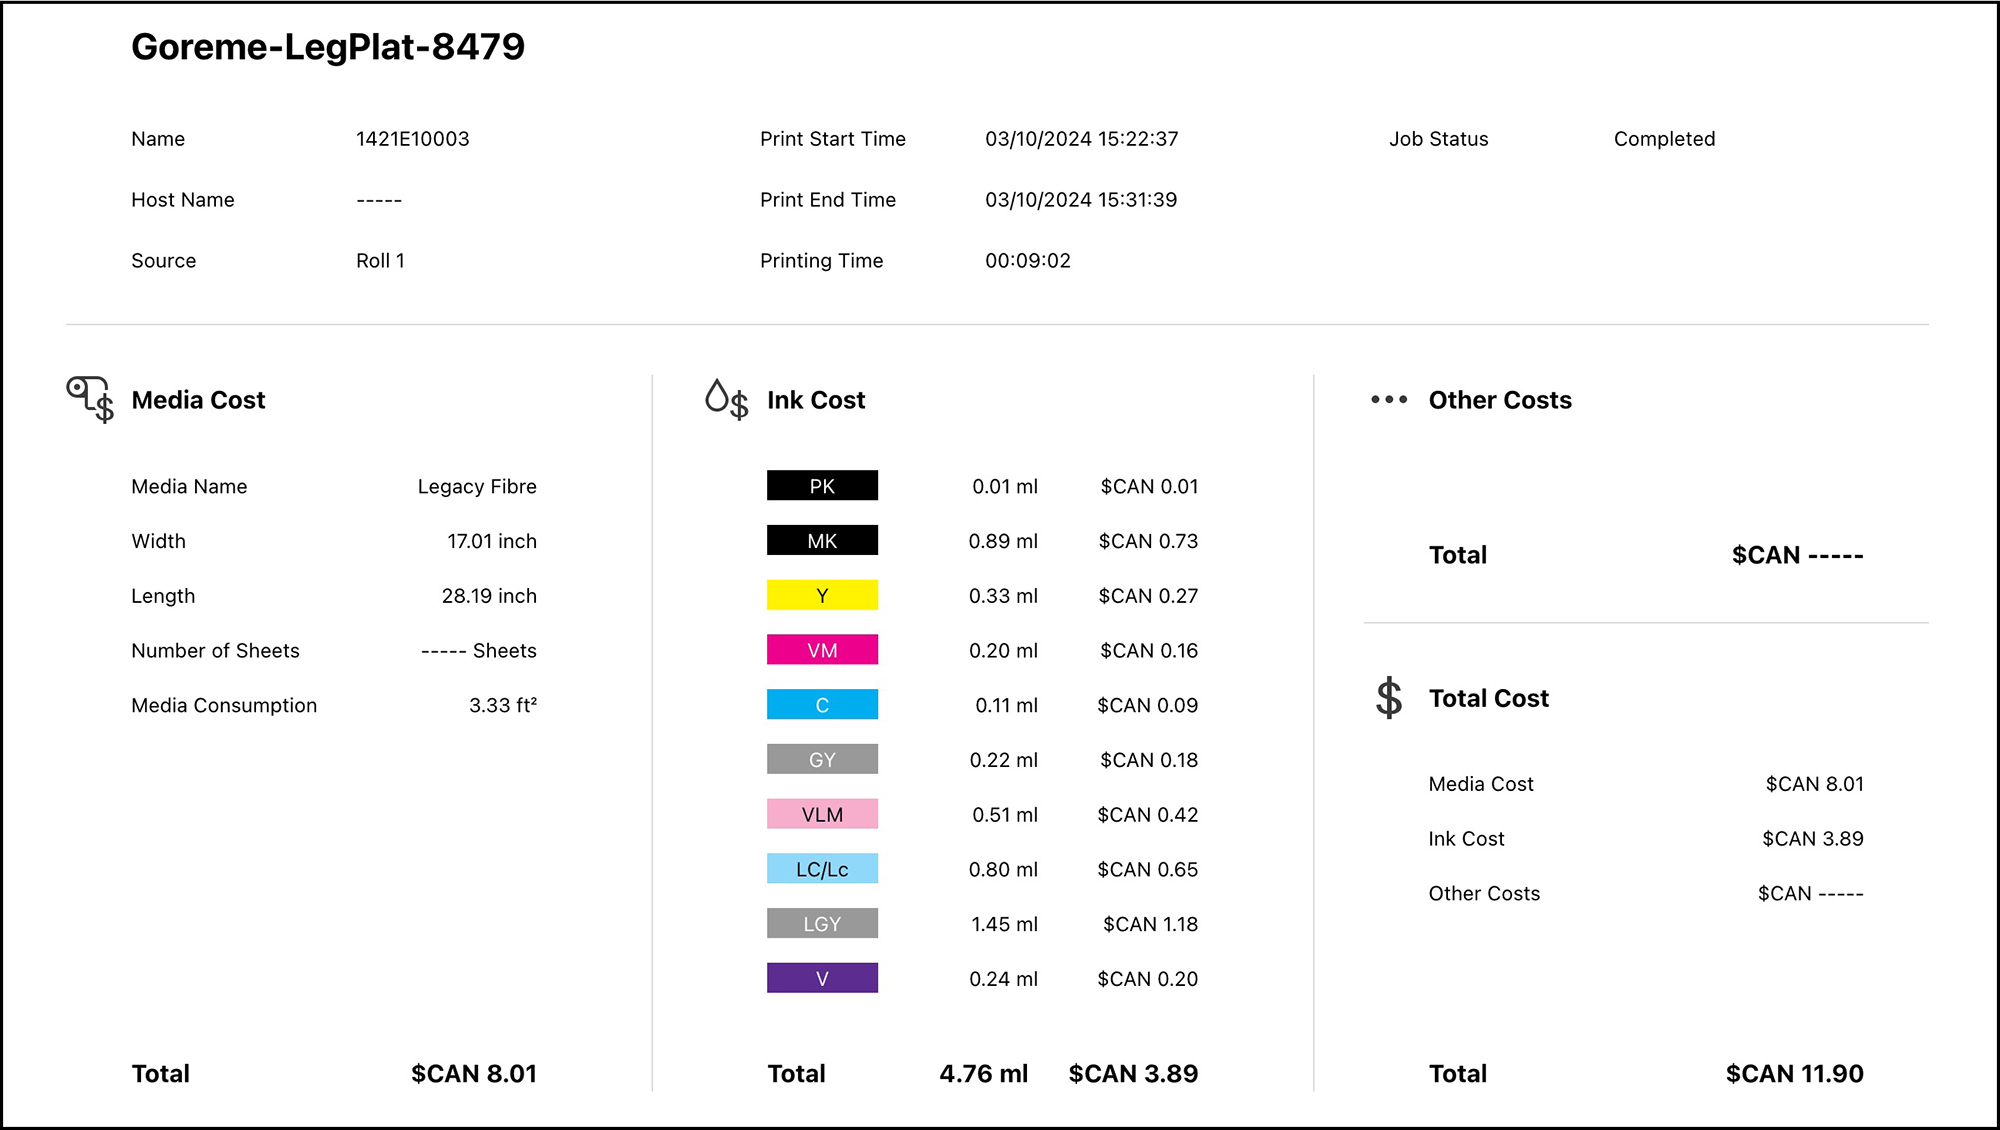
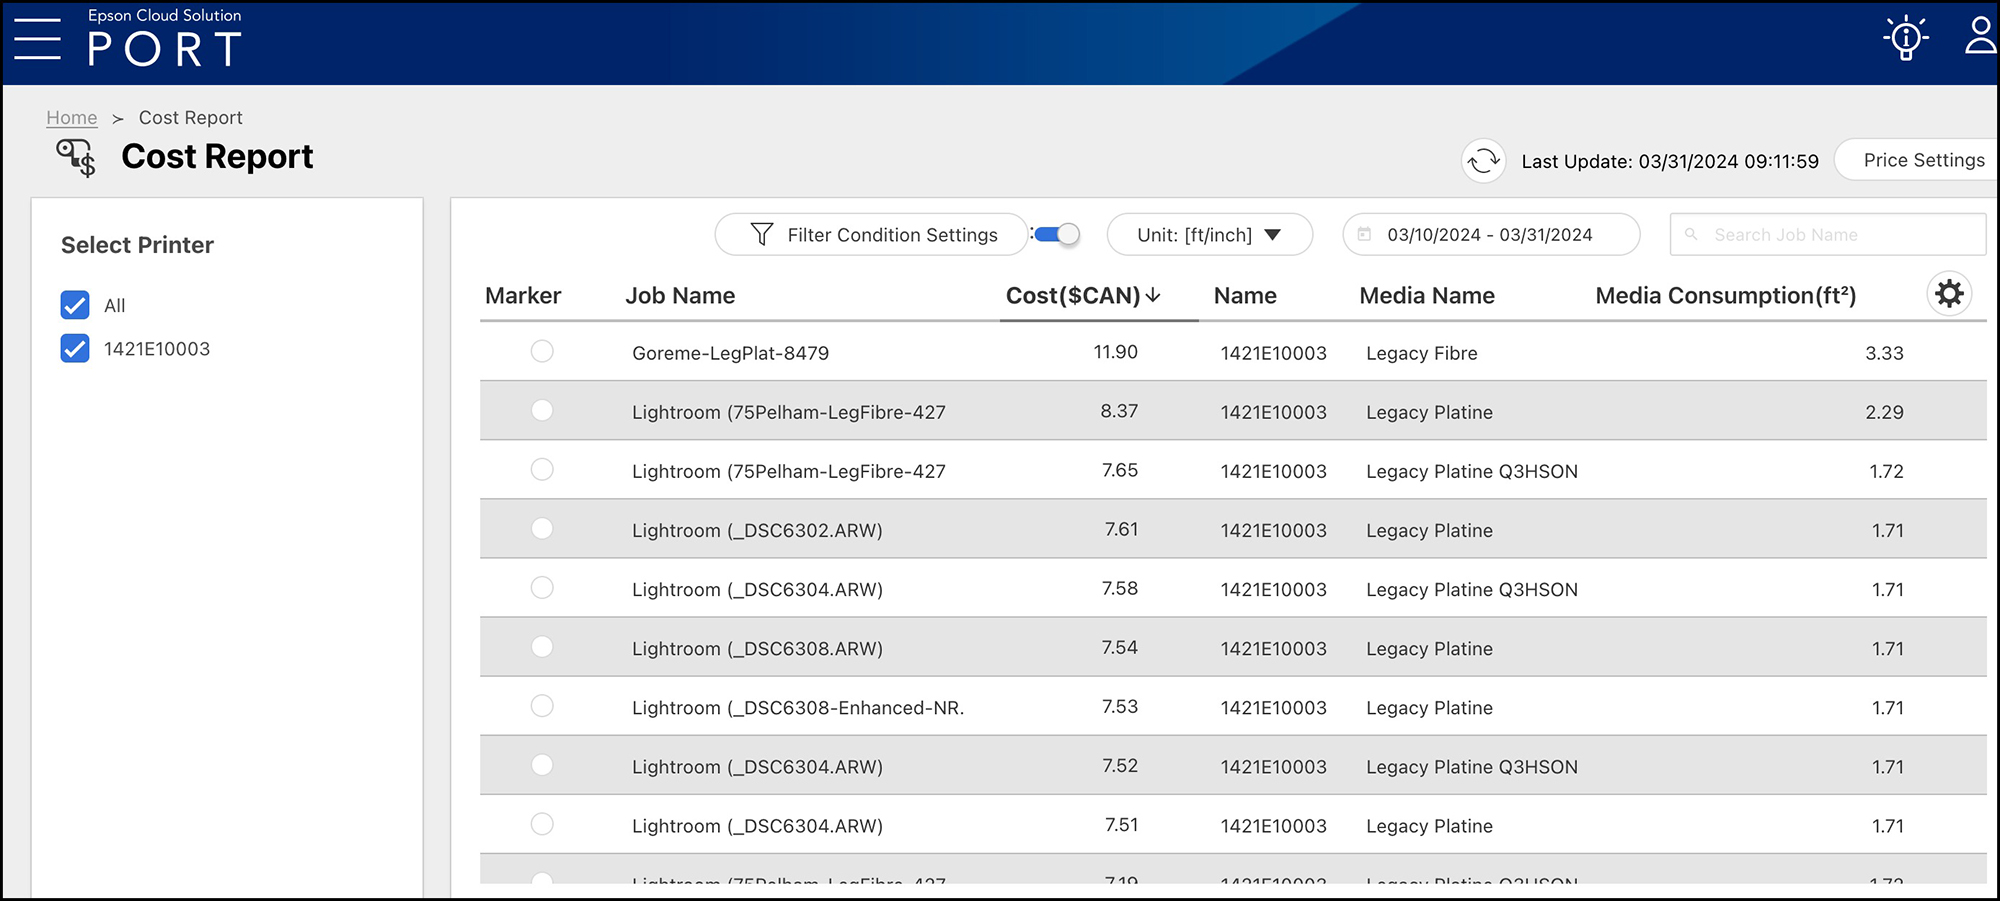
An interesting and realistic point about the information shown in Figure 95 is that of the total CAD 11.90 this big print costed me to make, 8.01 dollars of that is paper and 3.89 dollars is ink – the paper is by far the more expensive ingredient, notwithstanding that most of the complaining we hear is about the cost of ink. Ya, it’s not cheap, but little ink is used to make a print, as shown in the coloured list down the middle of the information layout – only 4.76 ml for a 17”x28” print.
As you can see, this is a useful application for those curious or needing to know the amounts and costs of materials for printing. Epson provides additional instruction on-line.
Concluding comment: I’ll end where I began, this is an excellent printer capable of producing stunning output. What you get from it of course heavily depends on what you put into it. Having a properly calibrated and profiled monitor, knowing how to edit your photos under soft-proof, and paying attention to your print settings on the printer LCD and in the printing application(s) are the keys to the results you’ll be happy with.
Mark Segal
April 2024


Elevate Your Vision


Read this story and all the best stories on The Luminous Landscape
The author has made this story available to Luminous Landscape members only. Upgrade to get instant access to this story and other benefits available only to members.
Why choose us?
Luminous-Landscape is a membership site. Our website contains over 5300 articles on almost every topic, camera, lens and printer you can imagine. Our membership model is simple, just $2 a month ($24.00 USD a year). This $24 gains you access to a wealth of information including all our past and future video tutorials on such topics as Lightroom, Capture One, Printing, file management and dozens of interviews and travel videos.
- New Articles every few days
- All original content found nowhere else on the web
- No Pop Up Google Sense ads – Our advertisers are photo related
- Download/stream video to any device
- NEW videos monthly
- Top well-known photographer contributors
- Posts from industry leaders
- Speciality Photography Workshops
- Mobile device scalable
- Exclusive video interviews
- Special vendor offers for members
- Hands On Product reviews
- FREE – User Forum. One of the most read user forums on the internet
- Access to our community Buy and Sell pages; for members only.
You may also like