Epson Print Layout

Please note: This is an excerpt from the Epson P5370 by Mark Segal that can be found HERE.
Despite the fact that we’ve never had it so good in terms of the ease and efficiency of producing highest quality prints, printing industry growth became lackluster within the past decade; the explanation was that “printing is too hard”, especially compared with loading photos onto the Internet. Actually it isn’t, but the approaches through conventional applications and printer drivers do have a learning curve. So the players worked on how to make printing easier, hoping to attract more photographers into printing. One of the best products from that effort is EPL. It can be mastered in a few minutes and produces the same fine quality we’ve seen above.
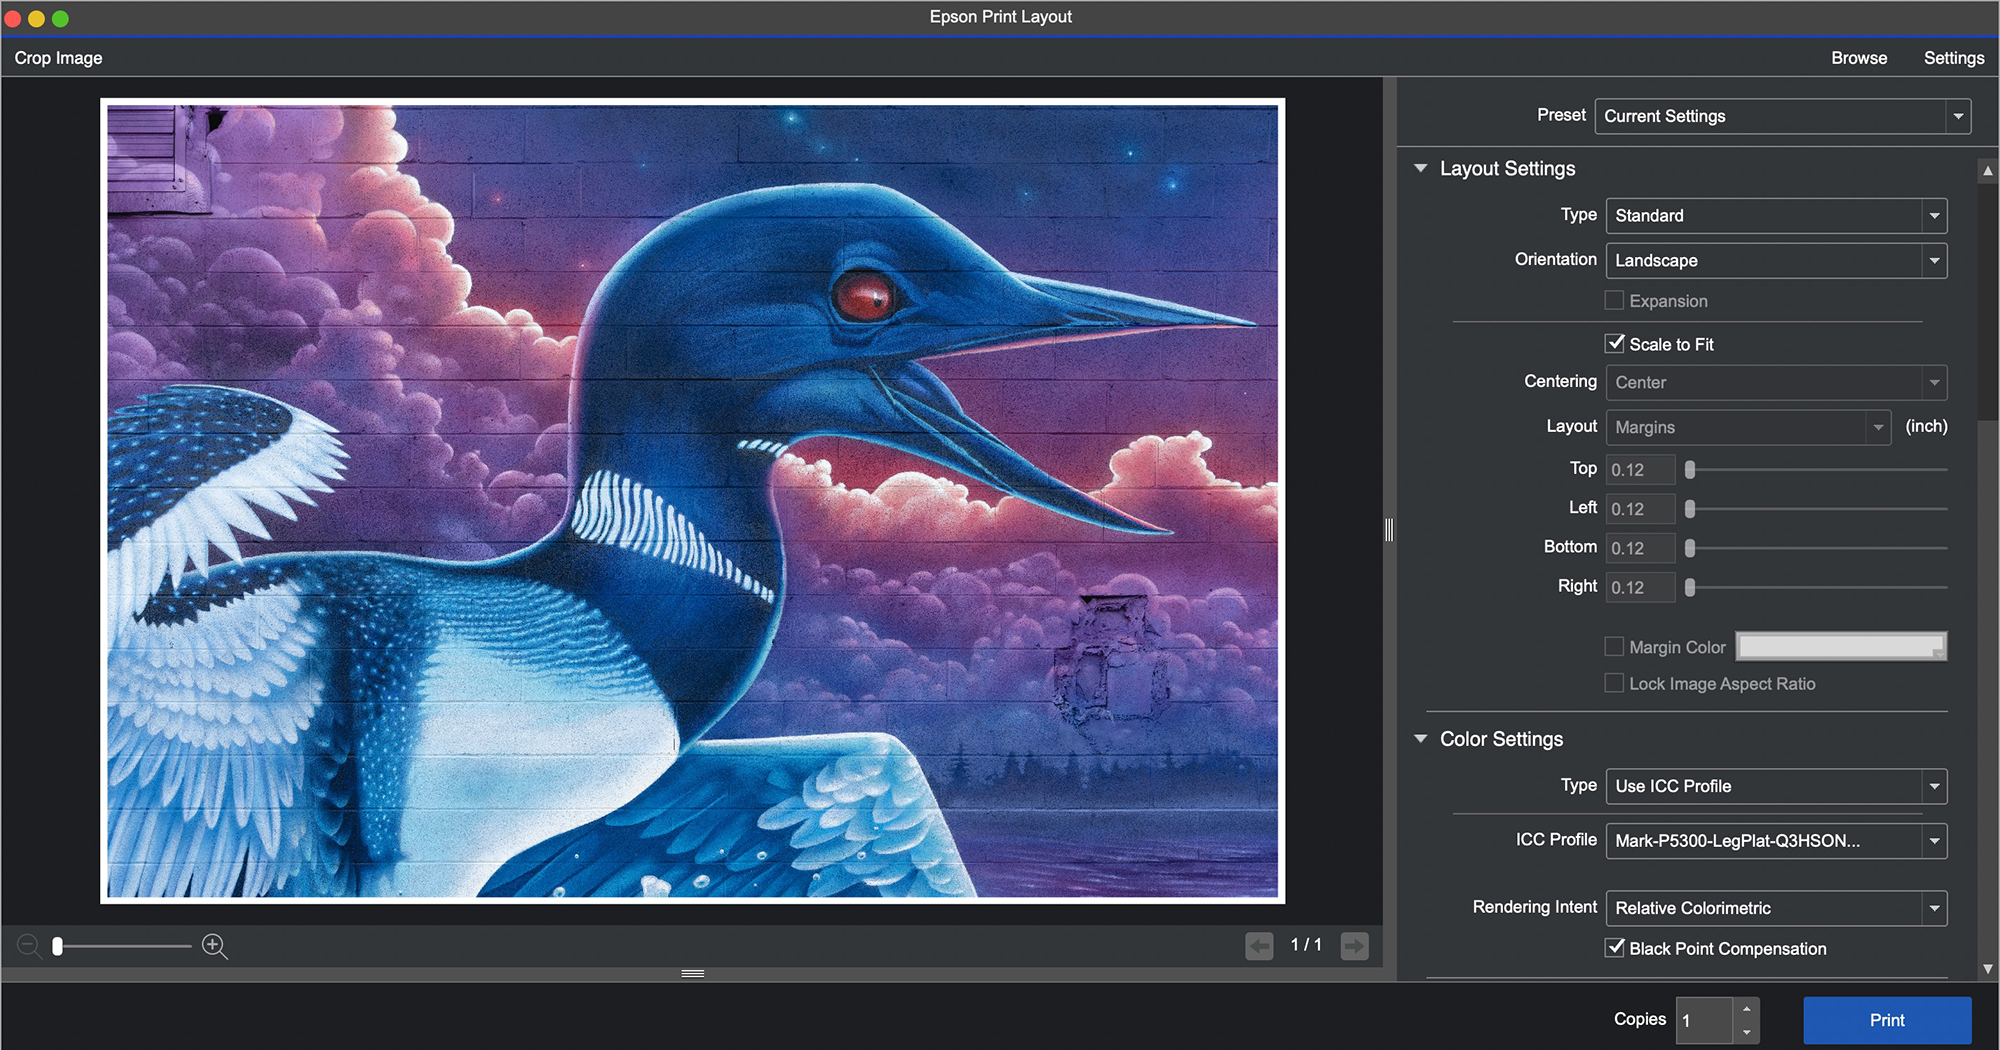
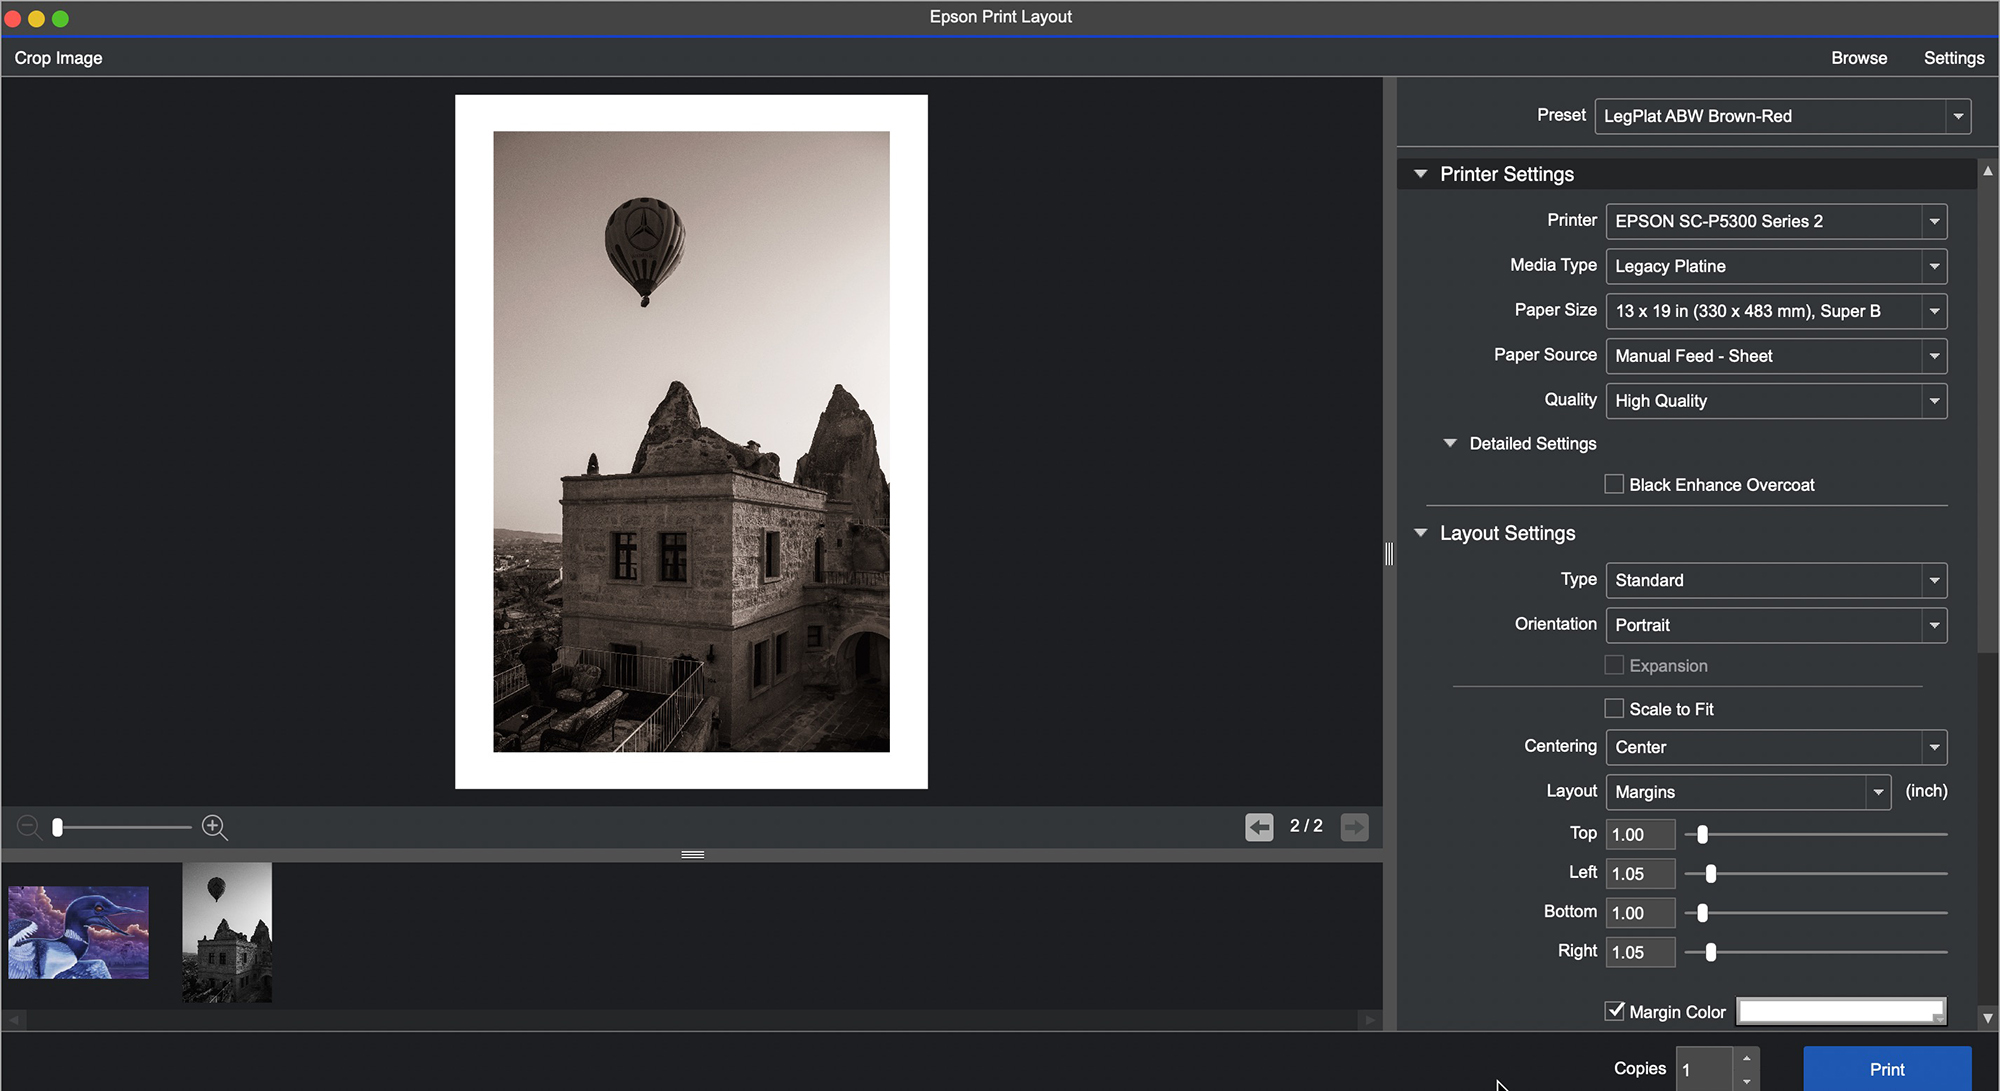
How so? Well, it doesn’t have ALL the bells and whistles you’ll find in the printer driver, but it has everything that most photographers would need 99% of the time, all arrayed in one column in one application on the right side of the image window. All you need to do is select the correct Media Type and paper size in the printer LCD, then proceed down the column of EPL settings, making all the selections you want for the print, click on “Print”, and you’re done. It’s “revolutionary easy”. So let’s have a look.
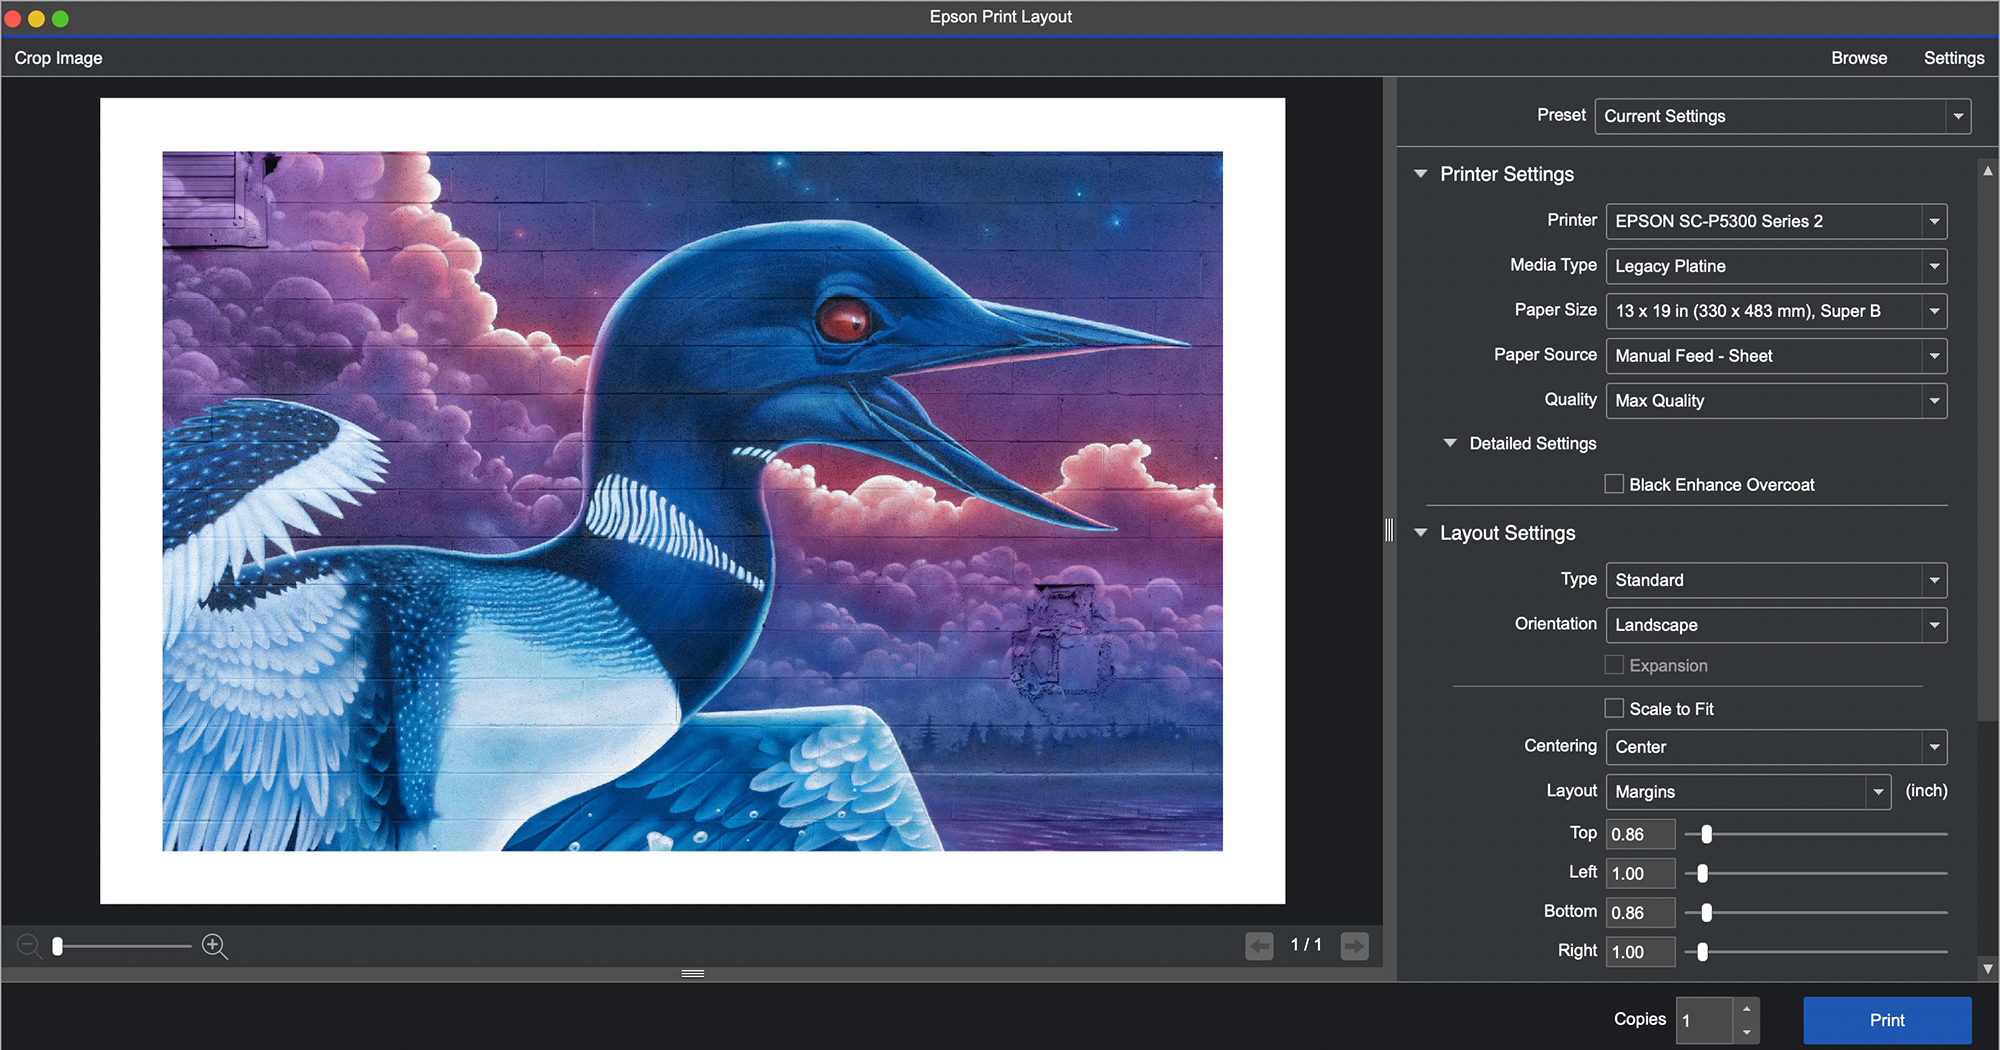
Upon opening the application, it loads the printer. If you have more than one printer networked to the same computer, select the appropriate printer.
You can drag a file into the open application, or use “File>Open” (in the Application bar not shown above) to load photos from your hard drive. EPL handles TIFF, JPEG and PSD files; unlike Lightroom, it does not correctly print proprietary raw files or DNG files, because it ignores all the photo edit settings.
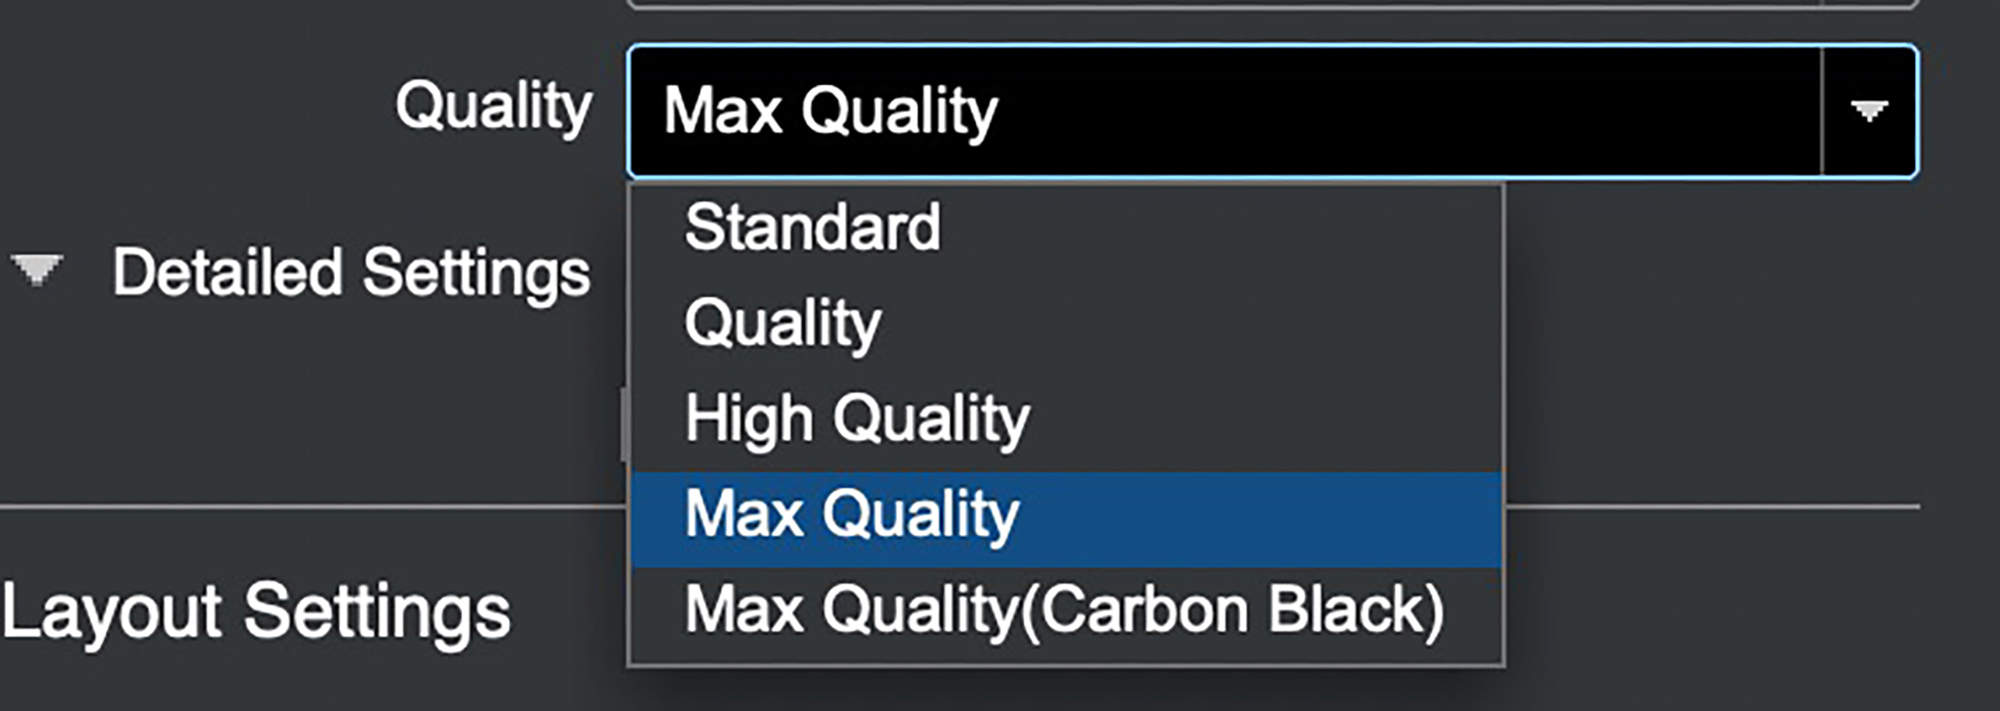
Go down the list of Printer Settings, making the necessary choices from the drop-down menus in each pane: Media Type, Paper Size, Paper Source and Quality. Media Type and Paper Source should cohere with what you selected in the printer LCD. Under Quality, there is no choice of High Speed On or Off, but I determined that it prints with High Speed On (i.e. bi-directional); as amply tested above, this is fine.
The labeling of the Quality settings (Figure 62) corresponds with how I numbered them in Figure 10, where I dispensed with the labels and numbered them.
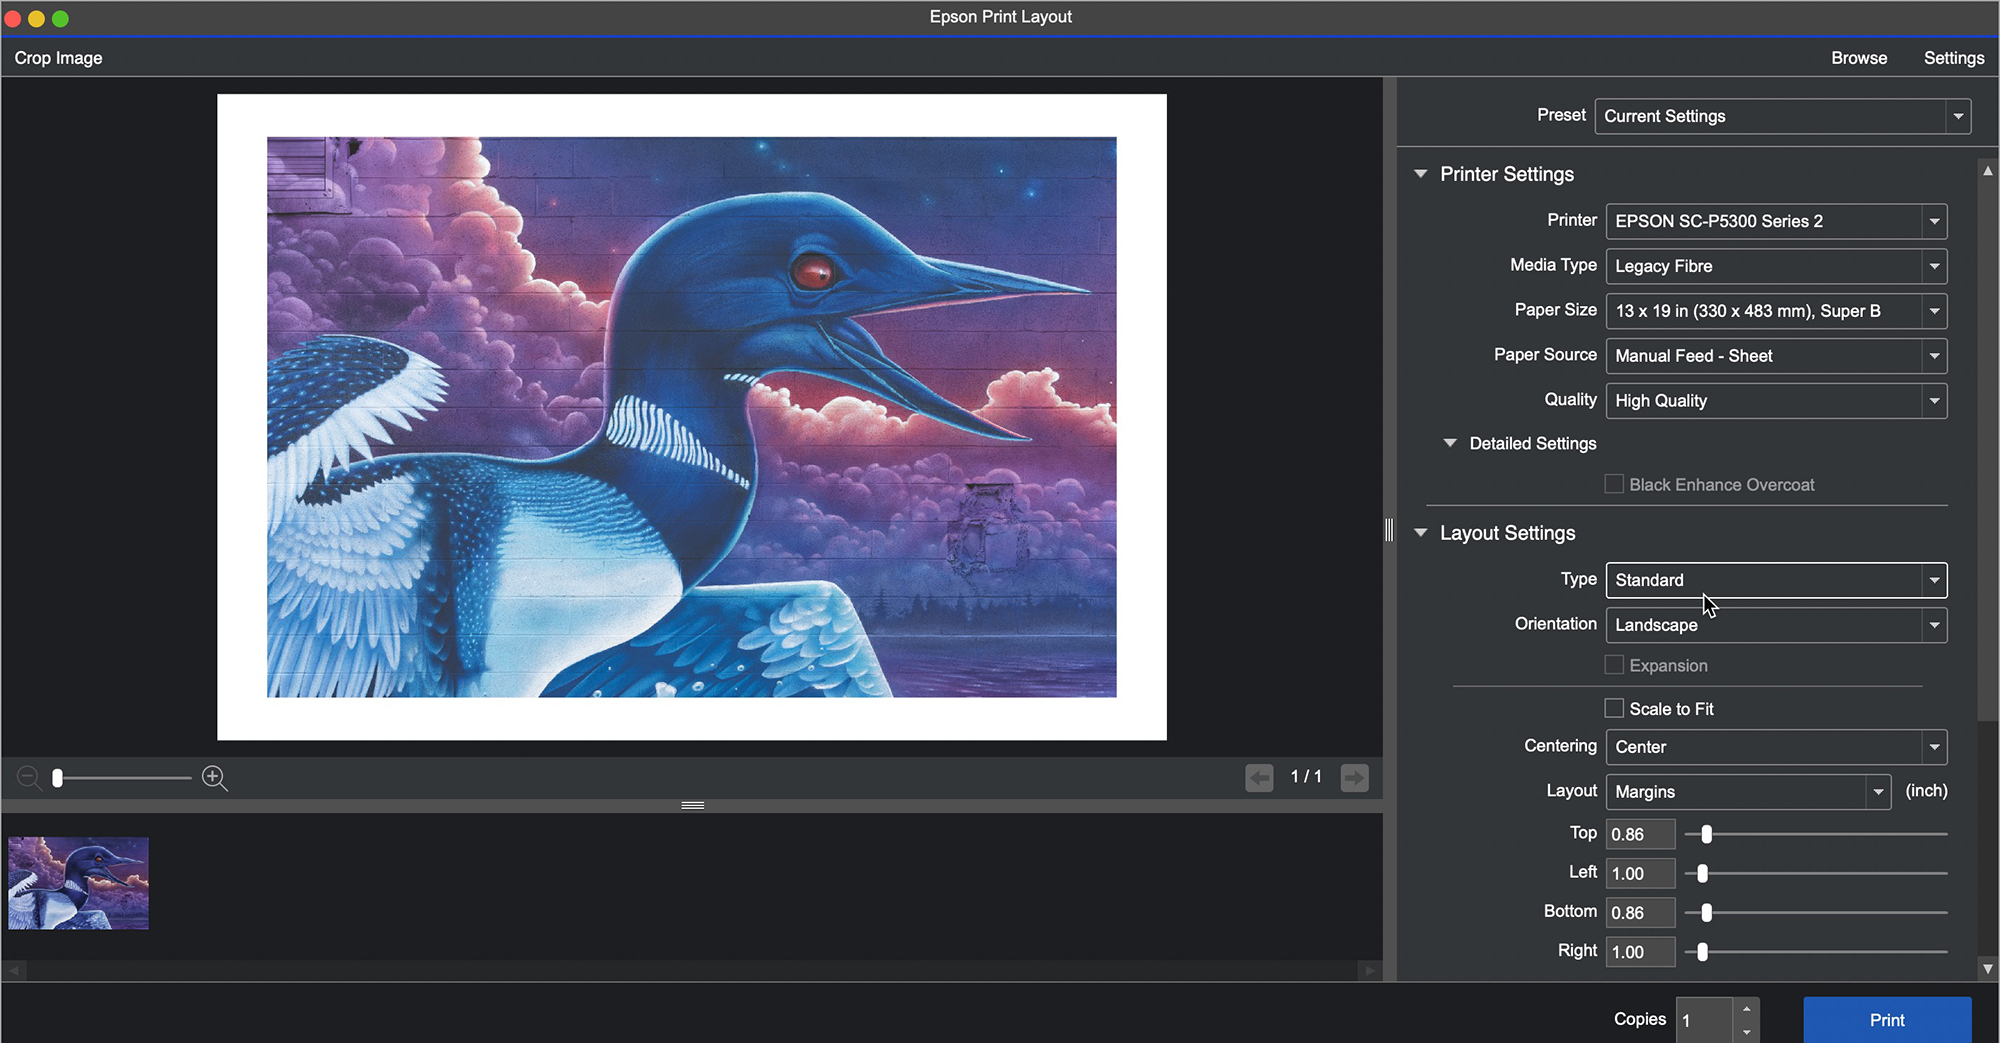
Once you’ve selected the Media Type, in ICC mode the application automatically selects the corresponding Epson profile in the Color Settings section below (unless you create a preset to select another profile) AND it softproofs the photo in the image window accordingly. For example, take a look at the difference of appearance between the rendition of the photo in Figures 61 and 63, where the former is for Legacy Platine and the latter Legacy Fibre.
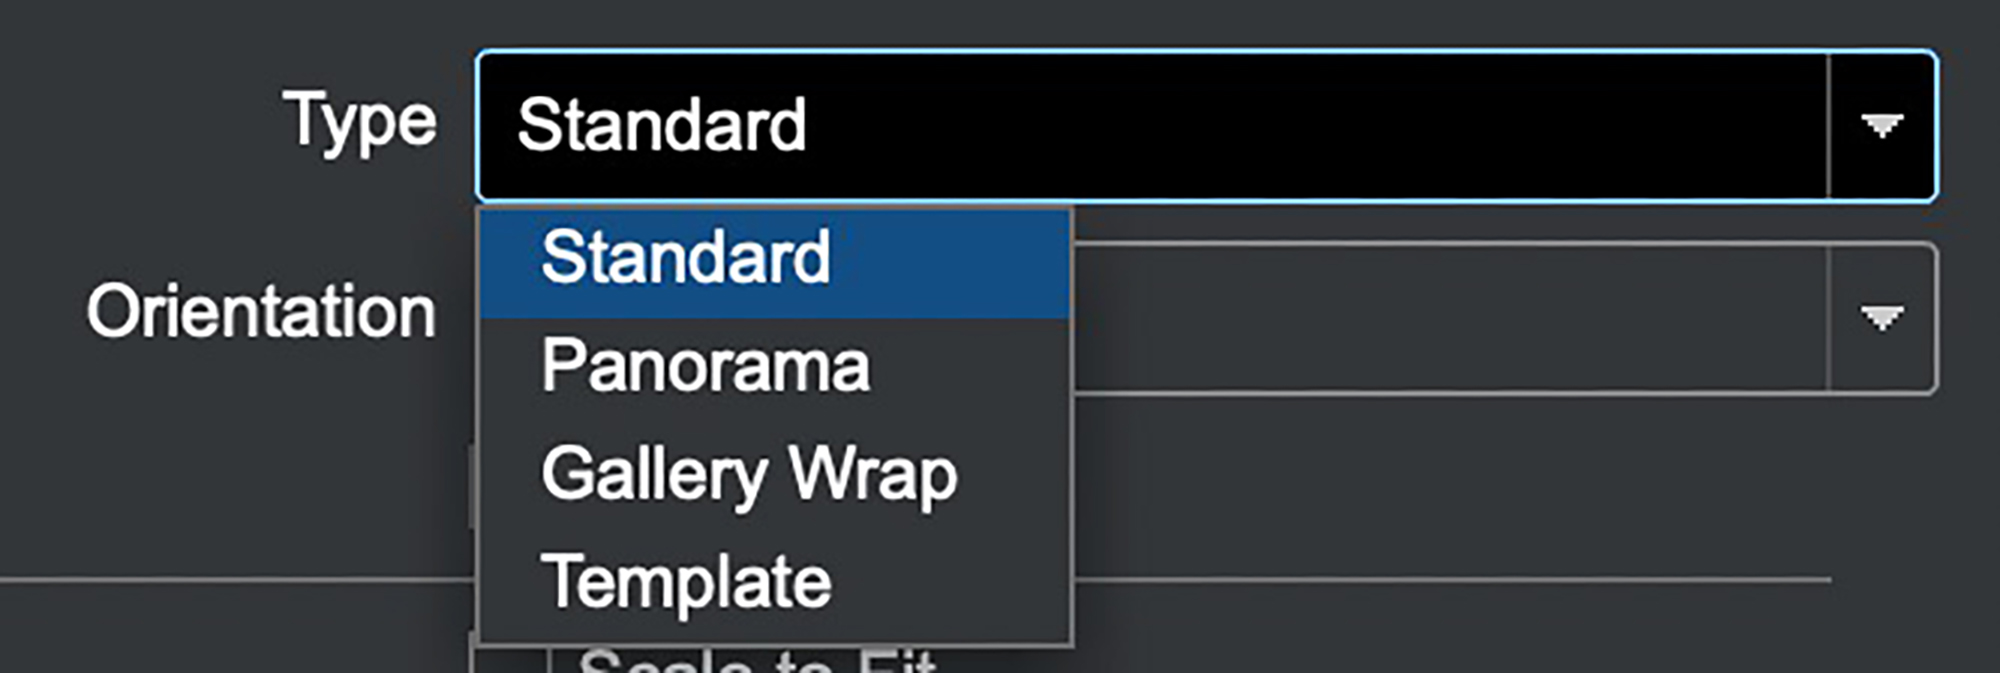
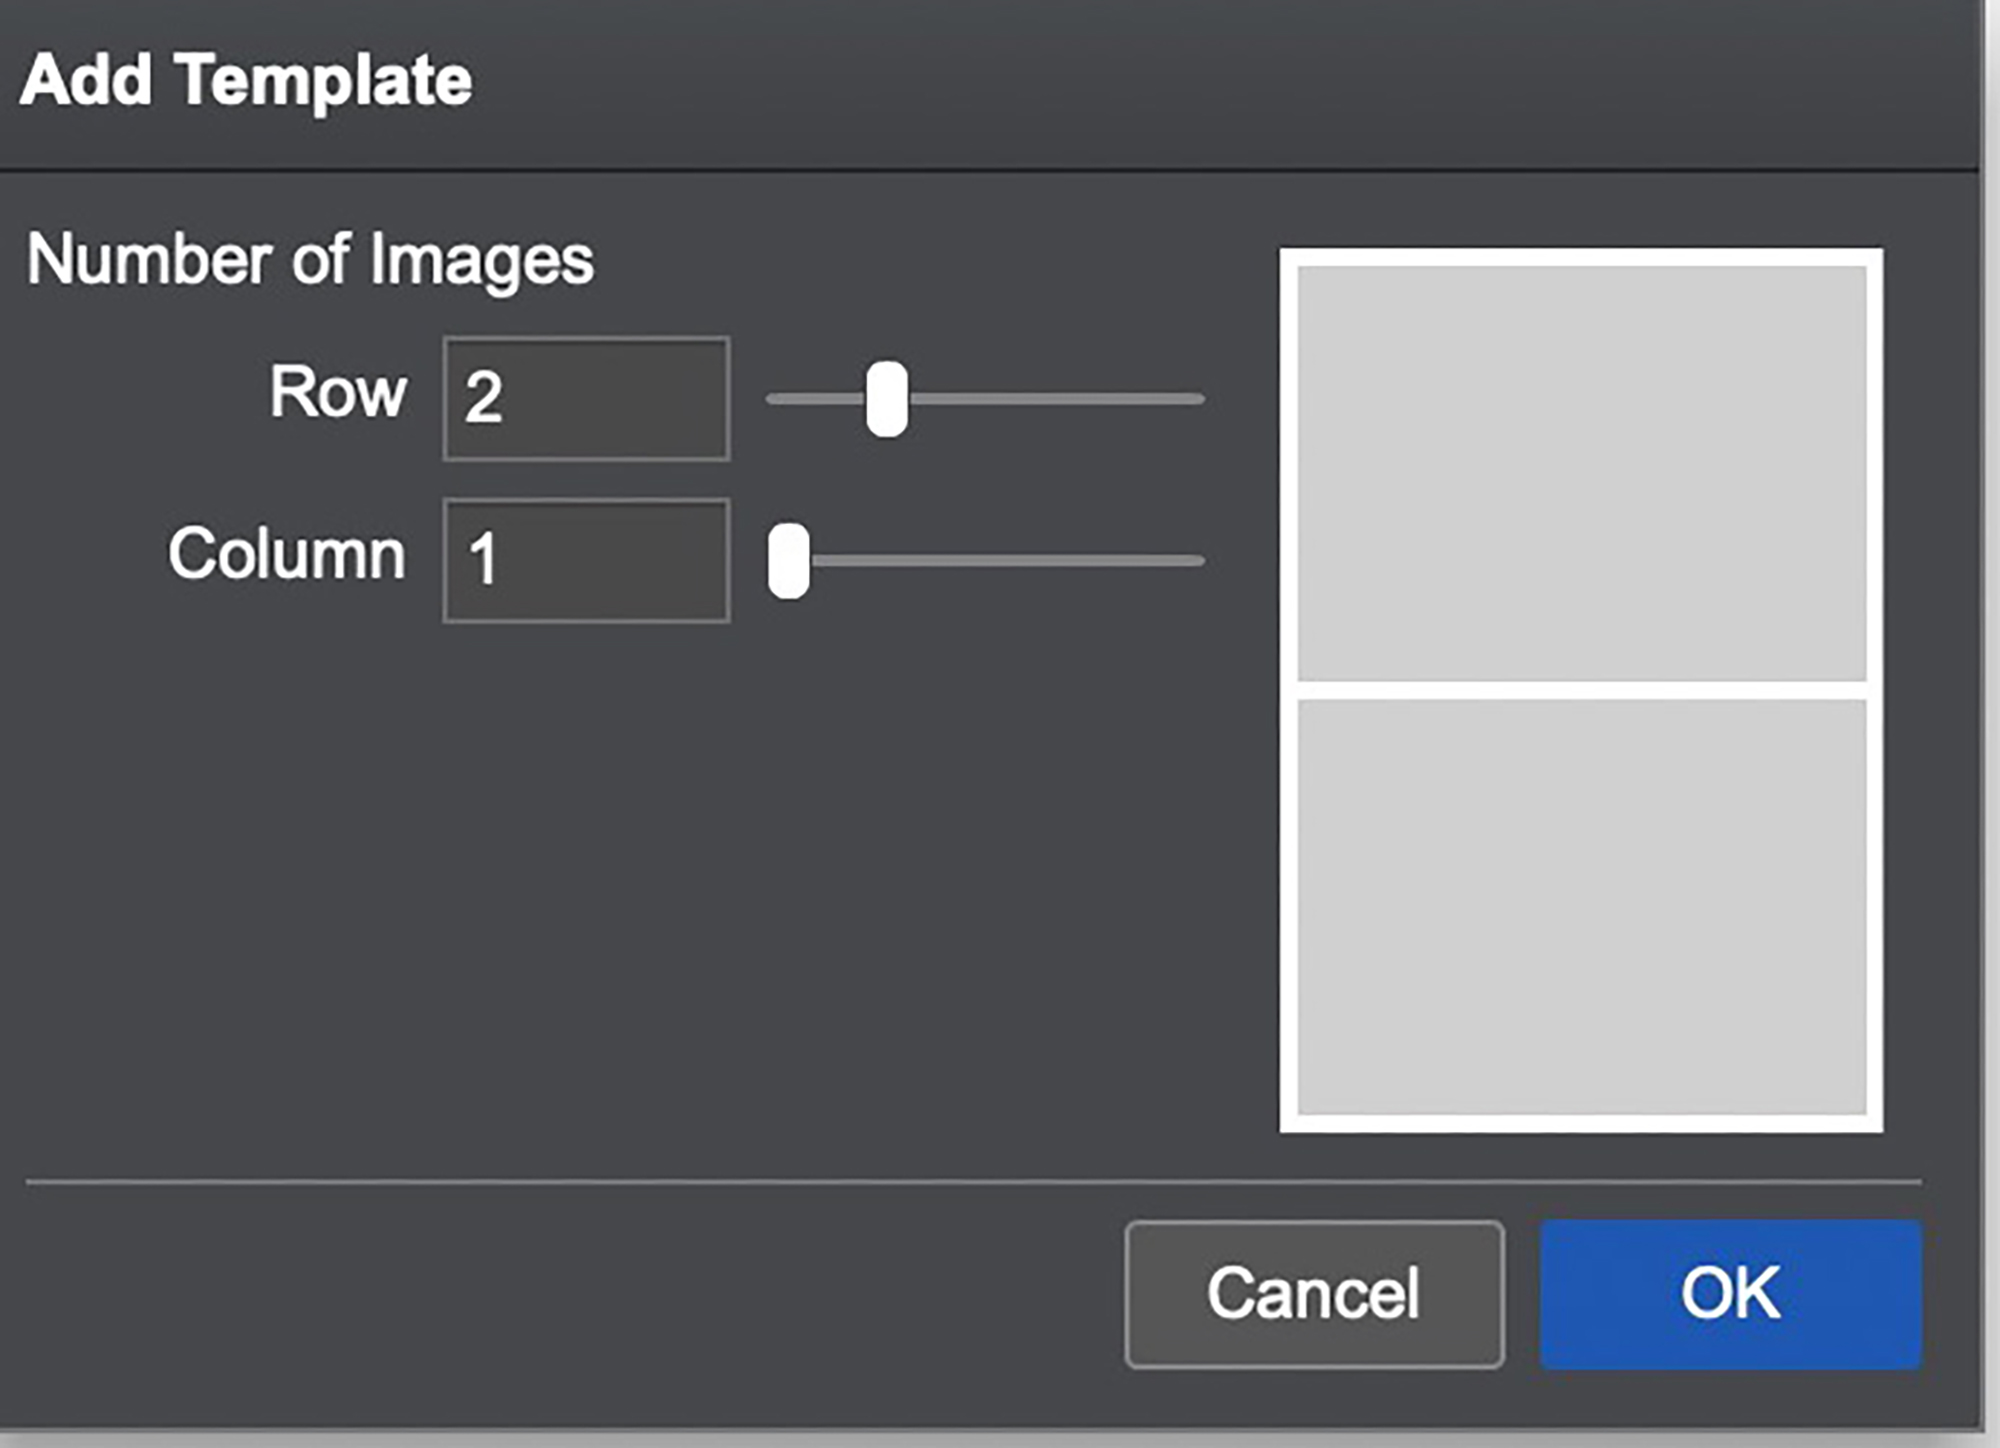
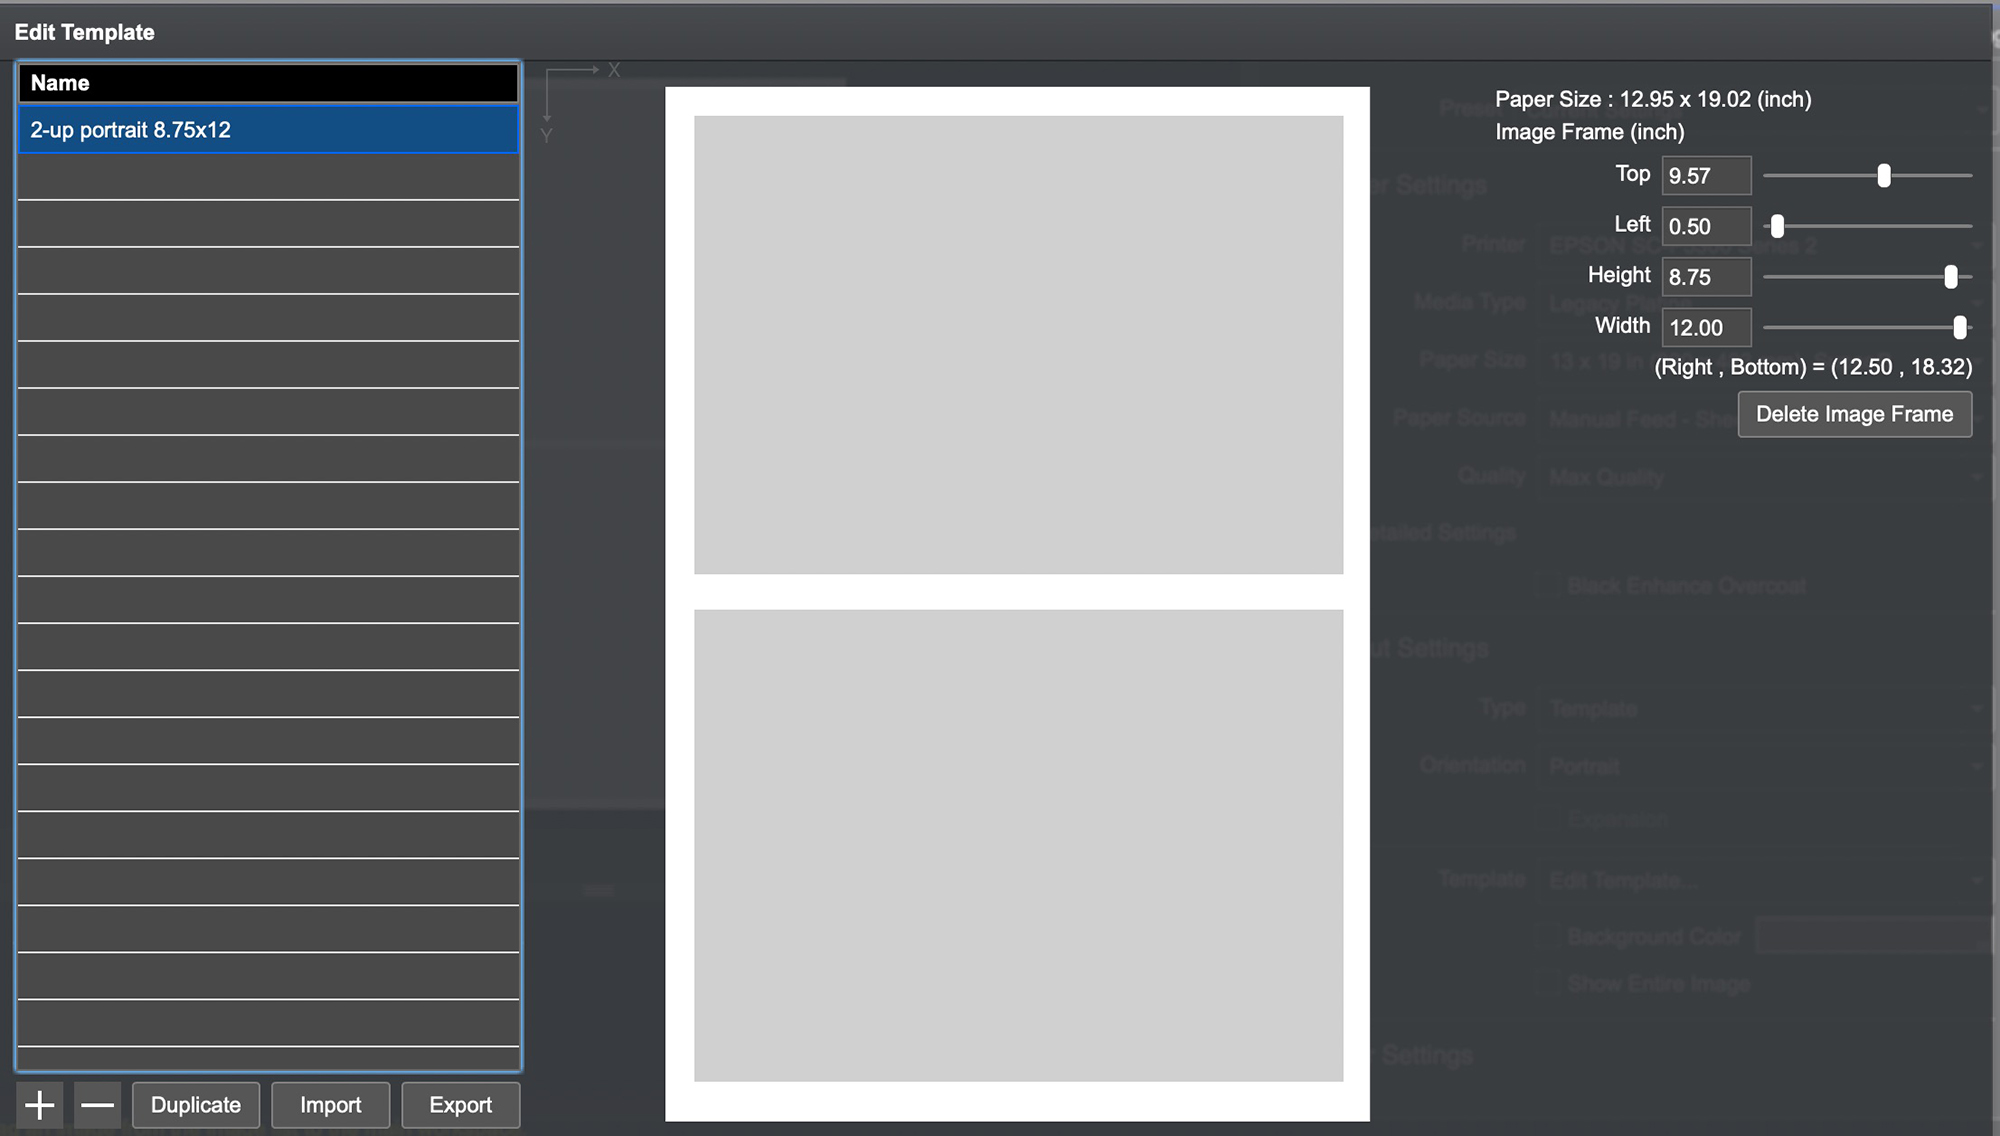
Carrying on to the Layout Settings, for “Type” of layout, we have the options shown in Figure 64. This is self-explanatory. “Template” is interesting – it provides some OEM layout templates (Figure 65) and allows us to create custom templates by clicking on “Edit Template” (Figures 66 and 67). “Standard” is for printing one photo per sheet.

So, just a bit more imaginative, given the ease of using roll paper in this printer, let’s say we want to create a 17×54 inch custom paper size for roll paper and then create a triptych of photos on it. Both can be done in EPL, by creating the custom paper size from the Paper Size drop-down, and then the layout template in the Layout Settings Section (Figures 68 and 69).
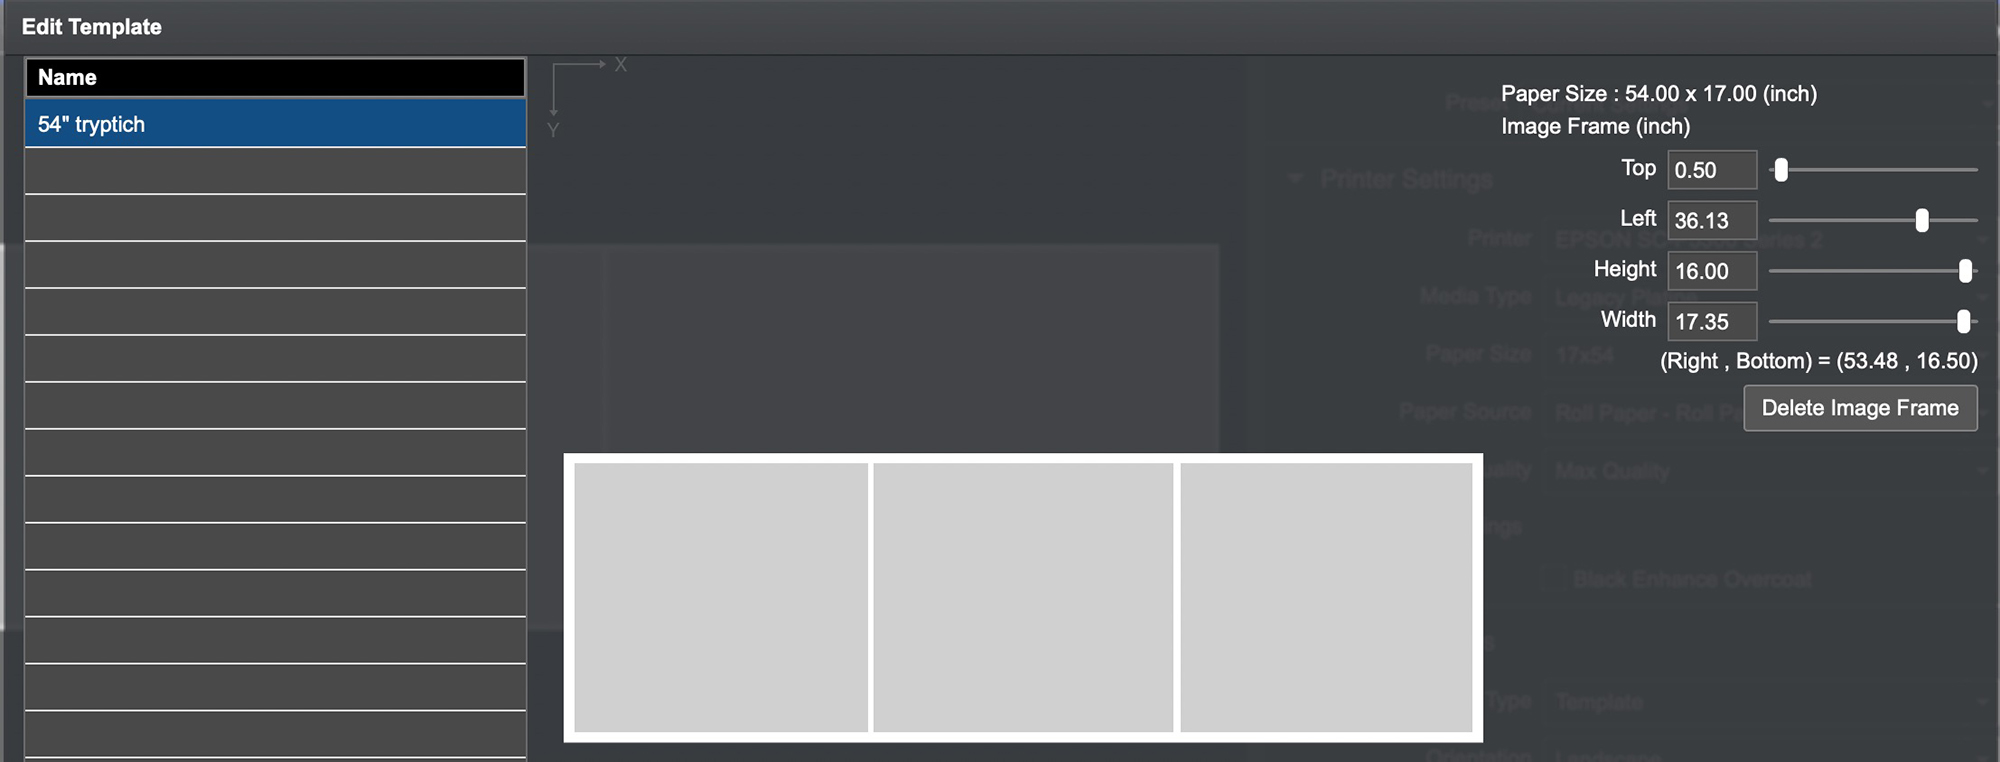
This is a brand-new custom template of my own creation – it wasn’t driven off of any existing Epson Template.

Back to sheets for single photos, if you check Scale to Fit (Figure 70), EPL will fill the page with the photo, leaving the smallest margins the printer makes, but if the aspect ratio of the photo differs from the aspect ratio of the sheet, the representation of the photo cannot be totally accurate. Normally one would leave “Scale to Fit” unchecked, preferring to respect the aspect ratio of the photo even though margins may differ between left/right versus top/bottom.
If you don’t use Scale to Fit, then “Centering” will be of interest (Figure 71).
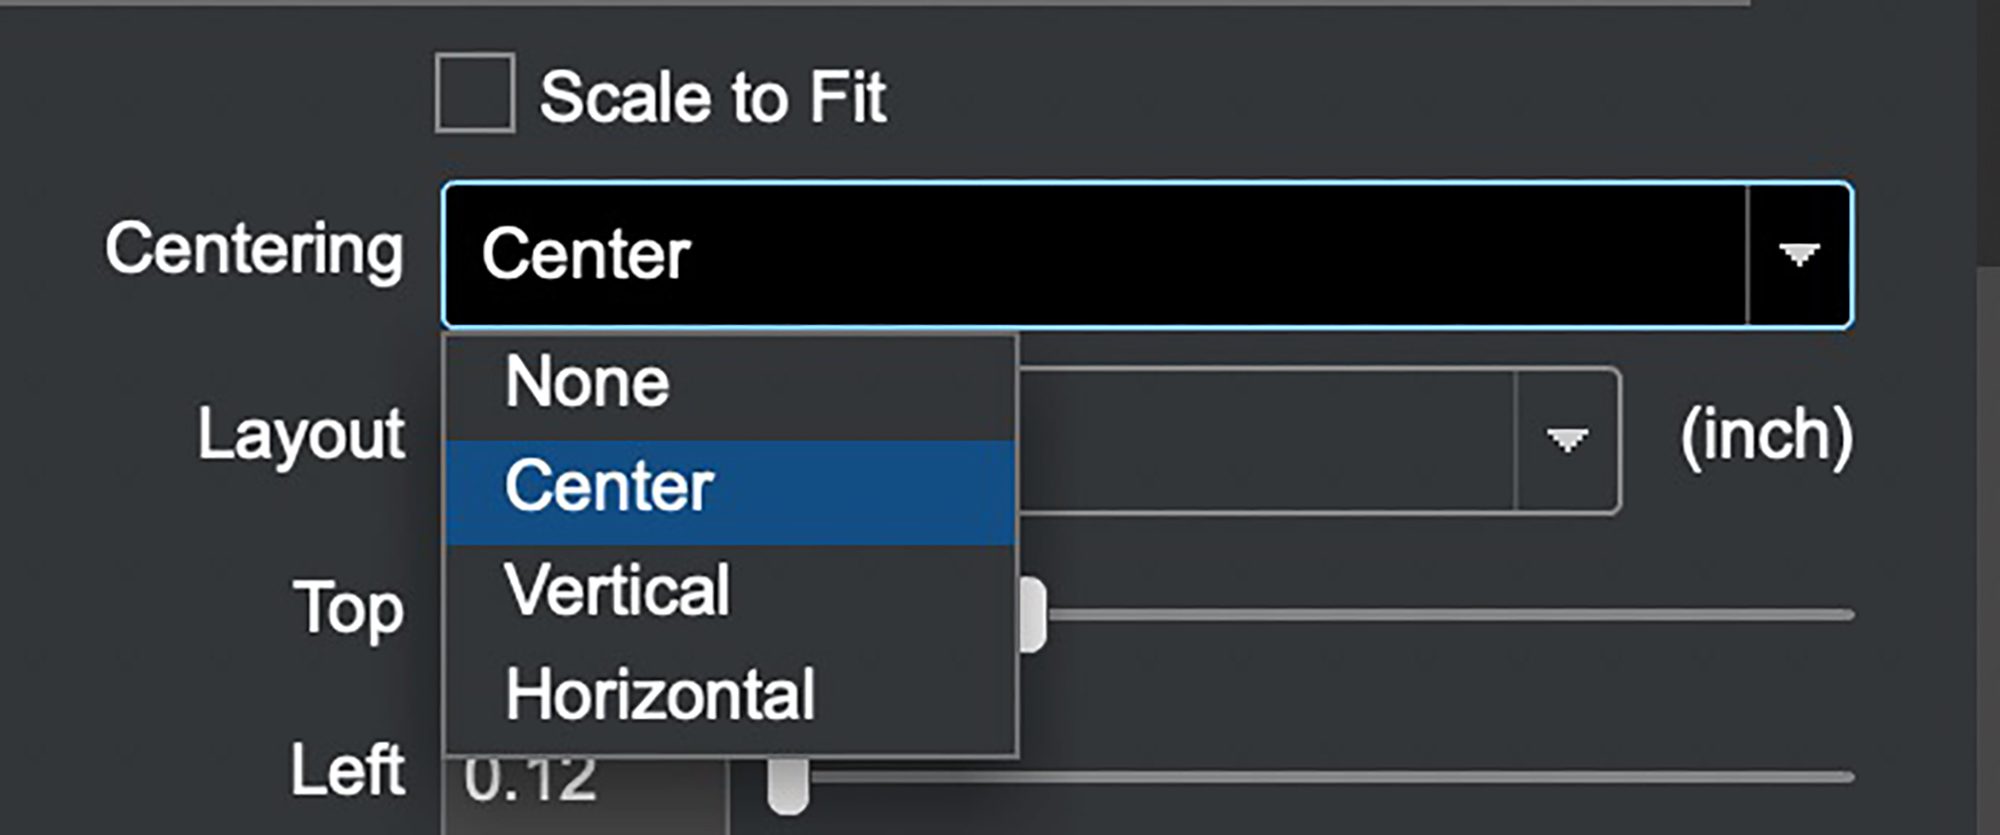
Unless we need more space on one of the dimensions, normally we would center the photo on the paper, so the usual selection would be “Center”, in which case EPL will keep the photo centered on the page as we play with image and margin sizes either numerically, or by grabbing image corners and adjusting visually. It’s very handy.
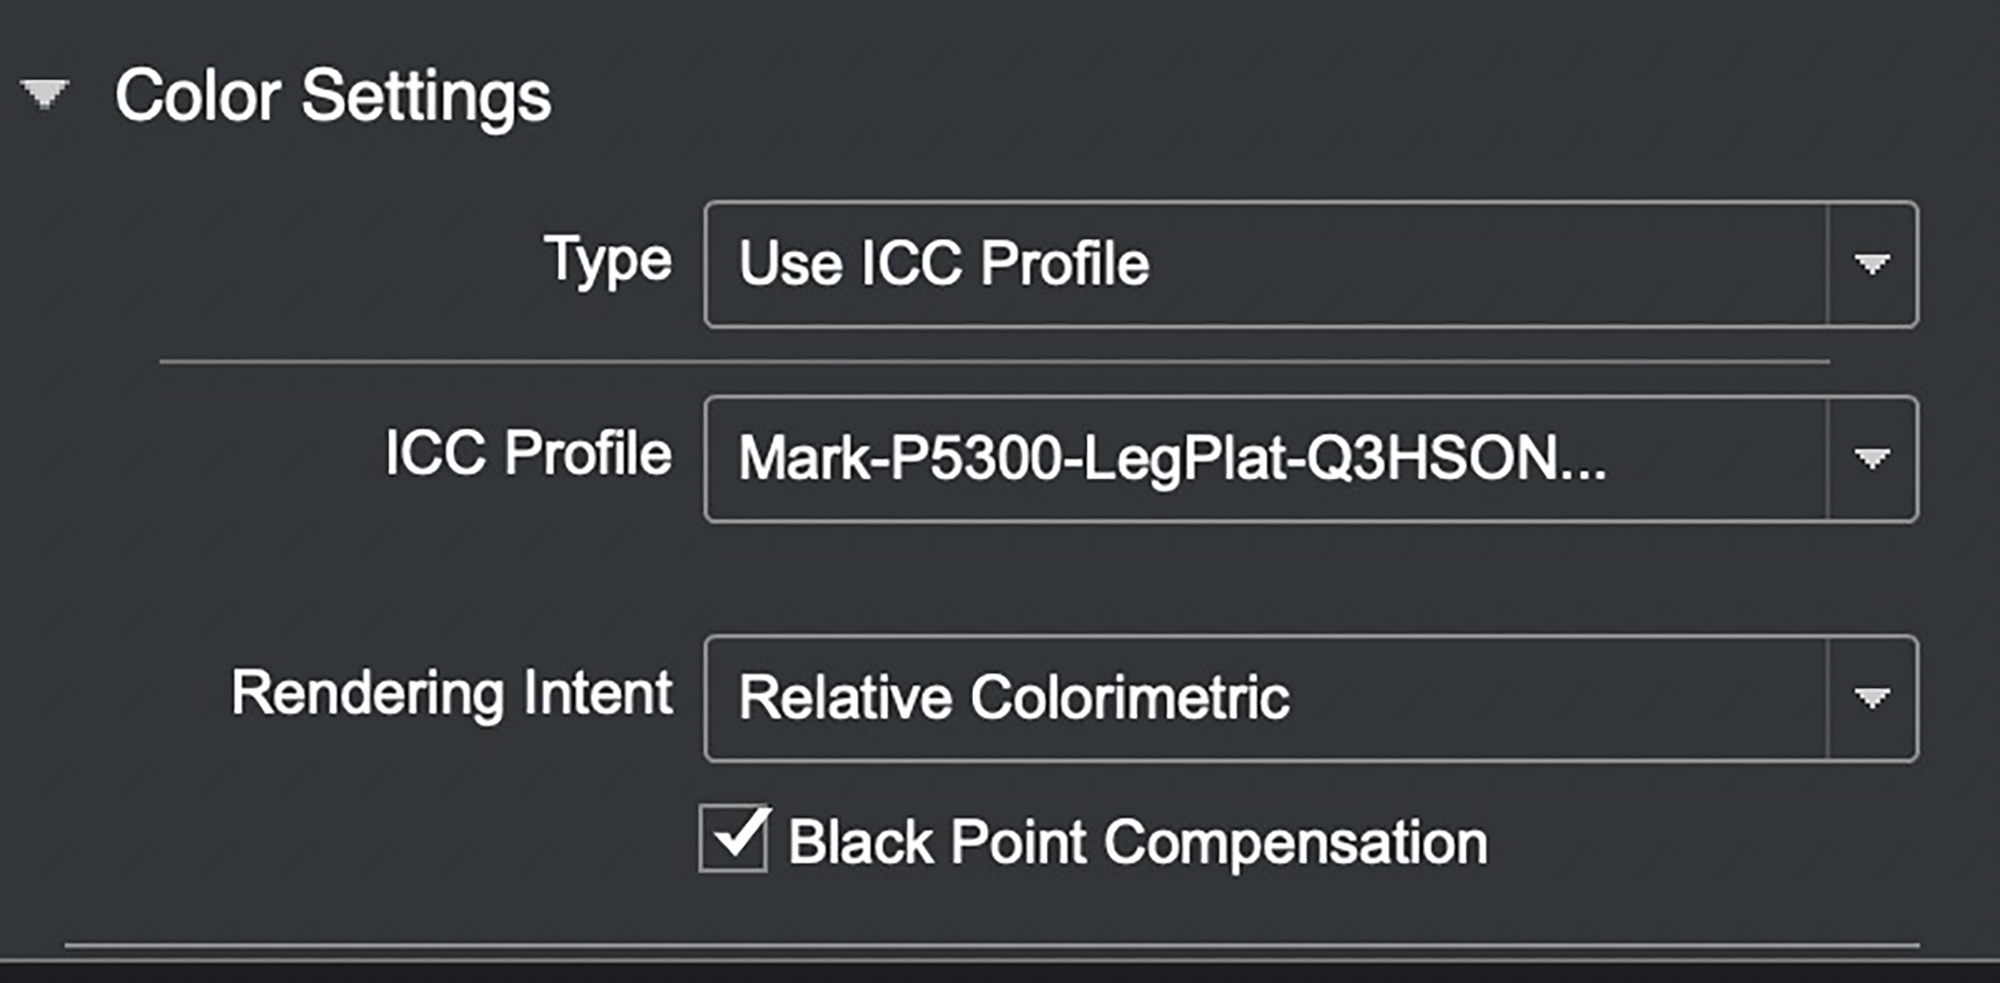
Continuing downward to Color Settings (Figures 72 and 73), it’s really nice to see how boiled-down and simple this has become. You don’t need to be a colour management expert to get your colours right.
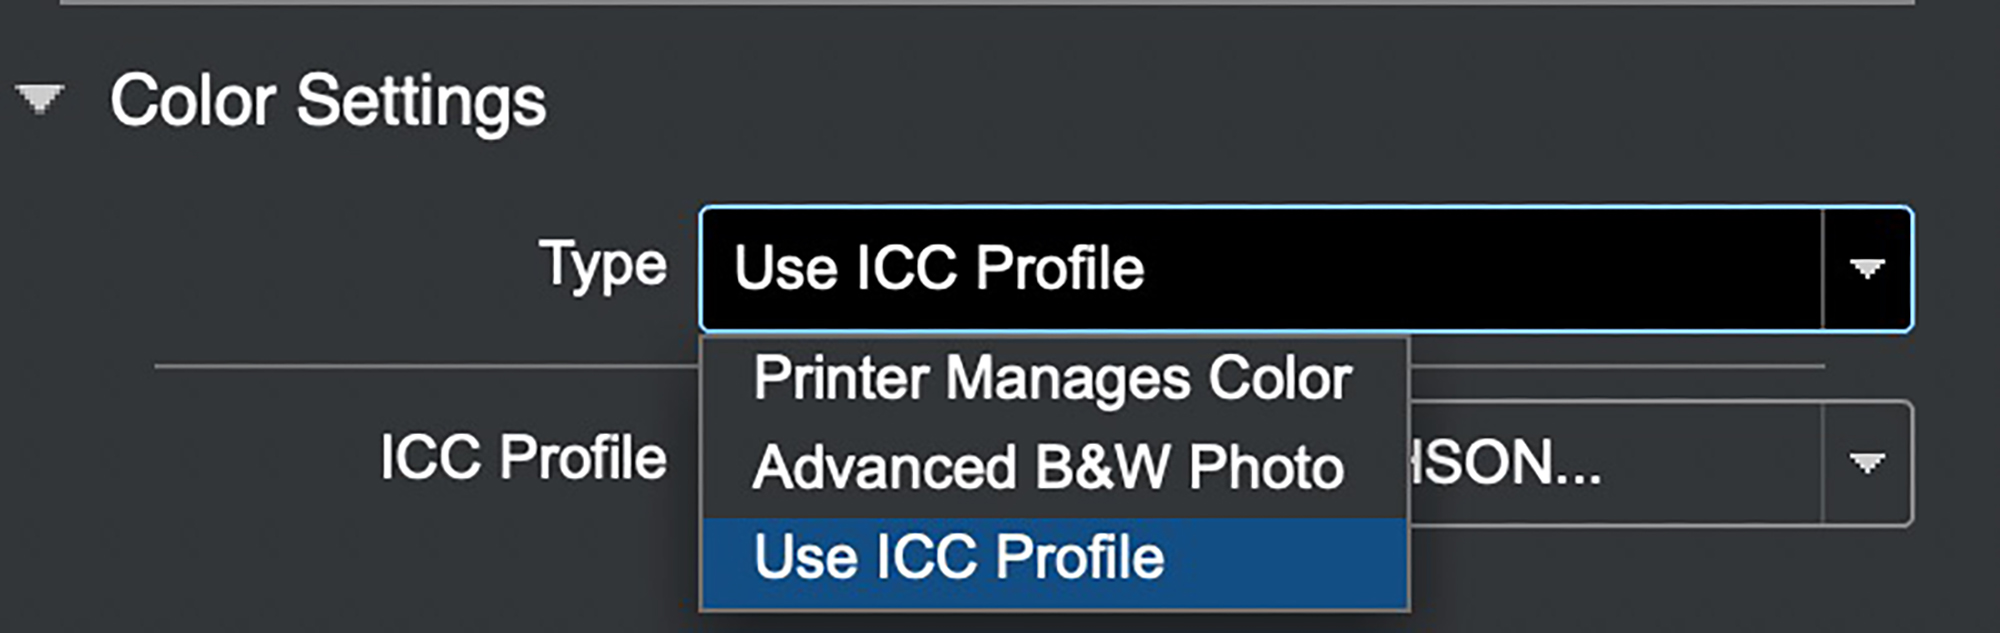
For the Type of color, there are three options: Printer Manages Color (you don’t think of profiles and just let the printer do its thing), or you may wish to make a B&W print using Advanced B&W Photo (ABW), or you may use an ICC profile (normally preferred over Printer Manages Color, especially these days that Epson’s profiles, and those of some paper manufacturers, are pretty darn good).
If you select “Use ICC Profile”, EPL will default to the profile associated with the Media Type, unless you use the pull-down menu to select another profile, and if you wished to save this choice for future printing sessions, you would include it in a custom preset discussed below.
When using an ICC profile, you should consciously choose the Rendering Intent that in your judgment makes the photo look best. With Relative Colorimetric make sure Black Point Compensation is checked; for Perceptual it doesn’t matter, so just leave BPC checked all the time. EPL does not provide two Rendering Intents available in Photoshop: Absolute and Saturation. Absolute is only useful for people doing formal colour management analysis of printing system performance and Saturation may be useful for printing highly saturated posters. Most people never need either of these Rendering Intents, so EPL does not provide them.
If we select “Advanced B&W Photo”, a group of settings opens up (Figure 74) that allows us to express our creativity in B&W photography – for example, toning (Figure 75).
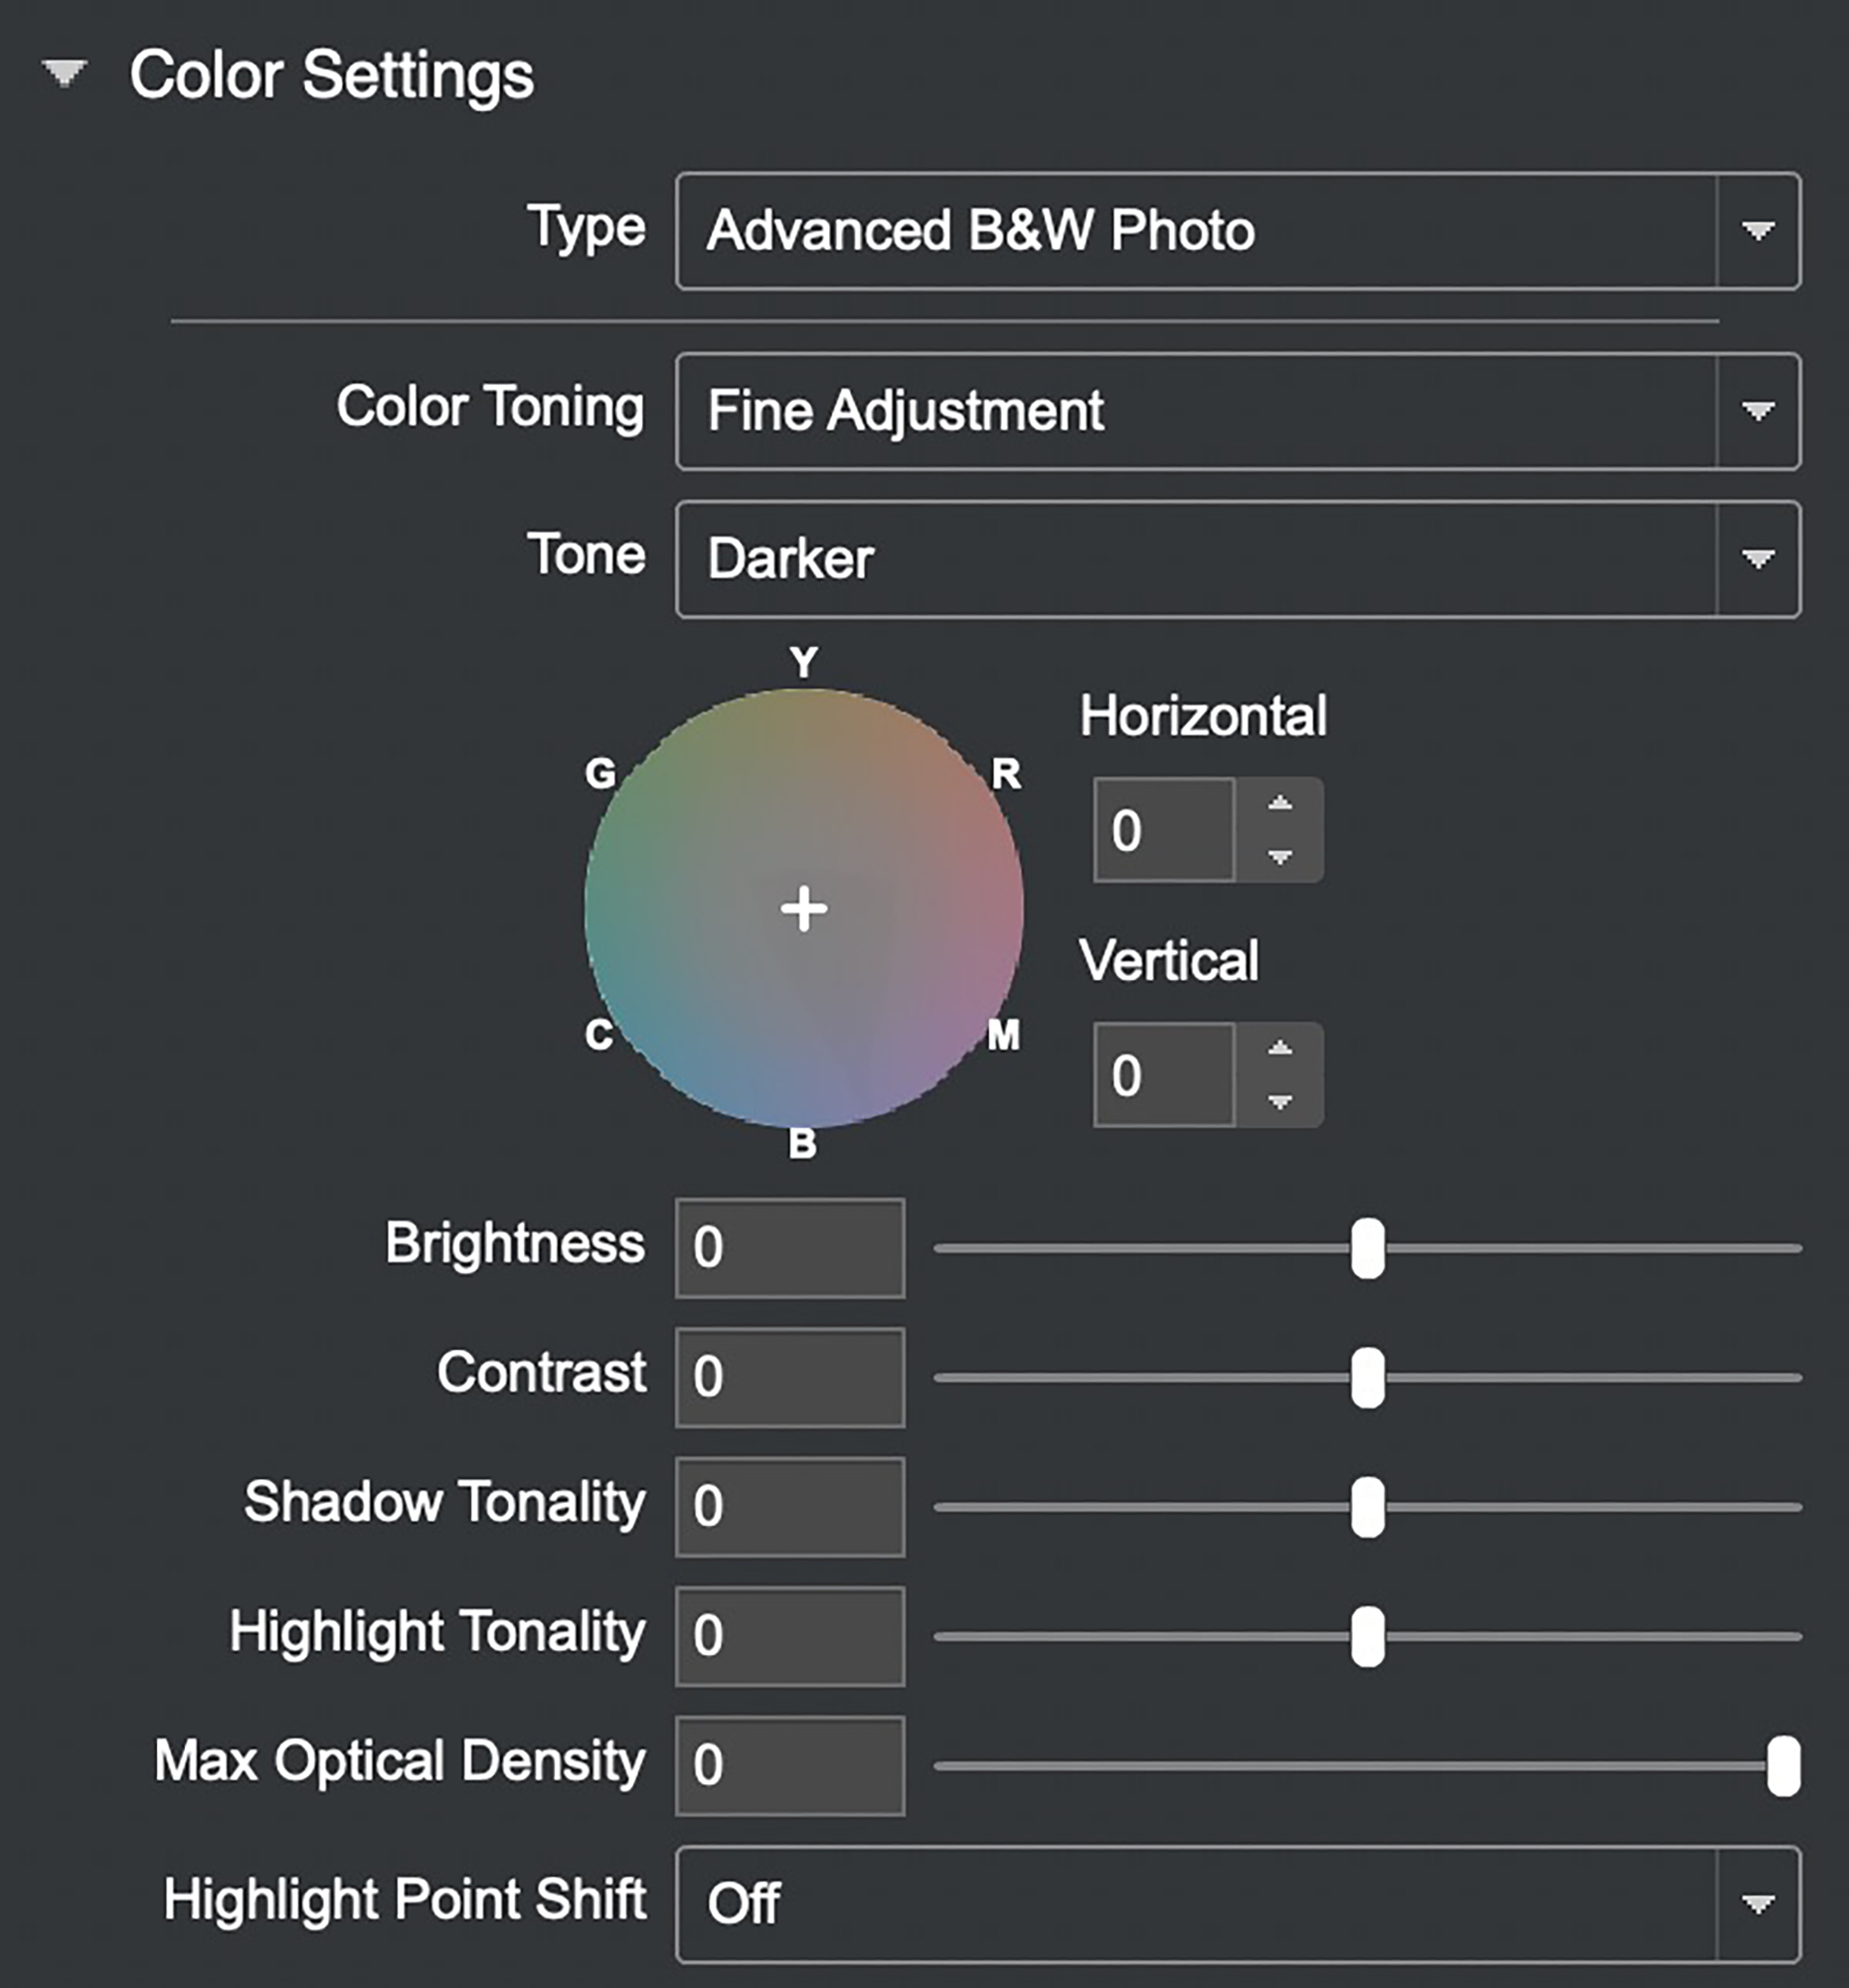
It is best to use ABW on photos that either originated in or have been converted to B&W in say Lightroom or Photoshop beforehand, such as is the case for the photo in Figure 75. To create that version, I simply dragged the “+” sign inside the circle in Figure 74 toward the perimeter between Y and R (for Yellow and Red), and that produced a nice deep Sepia. Using ABW in EPL softproofs the actual photo rather than the proxy used in the driver.
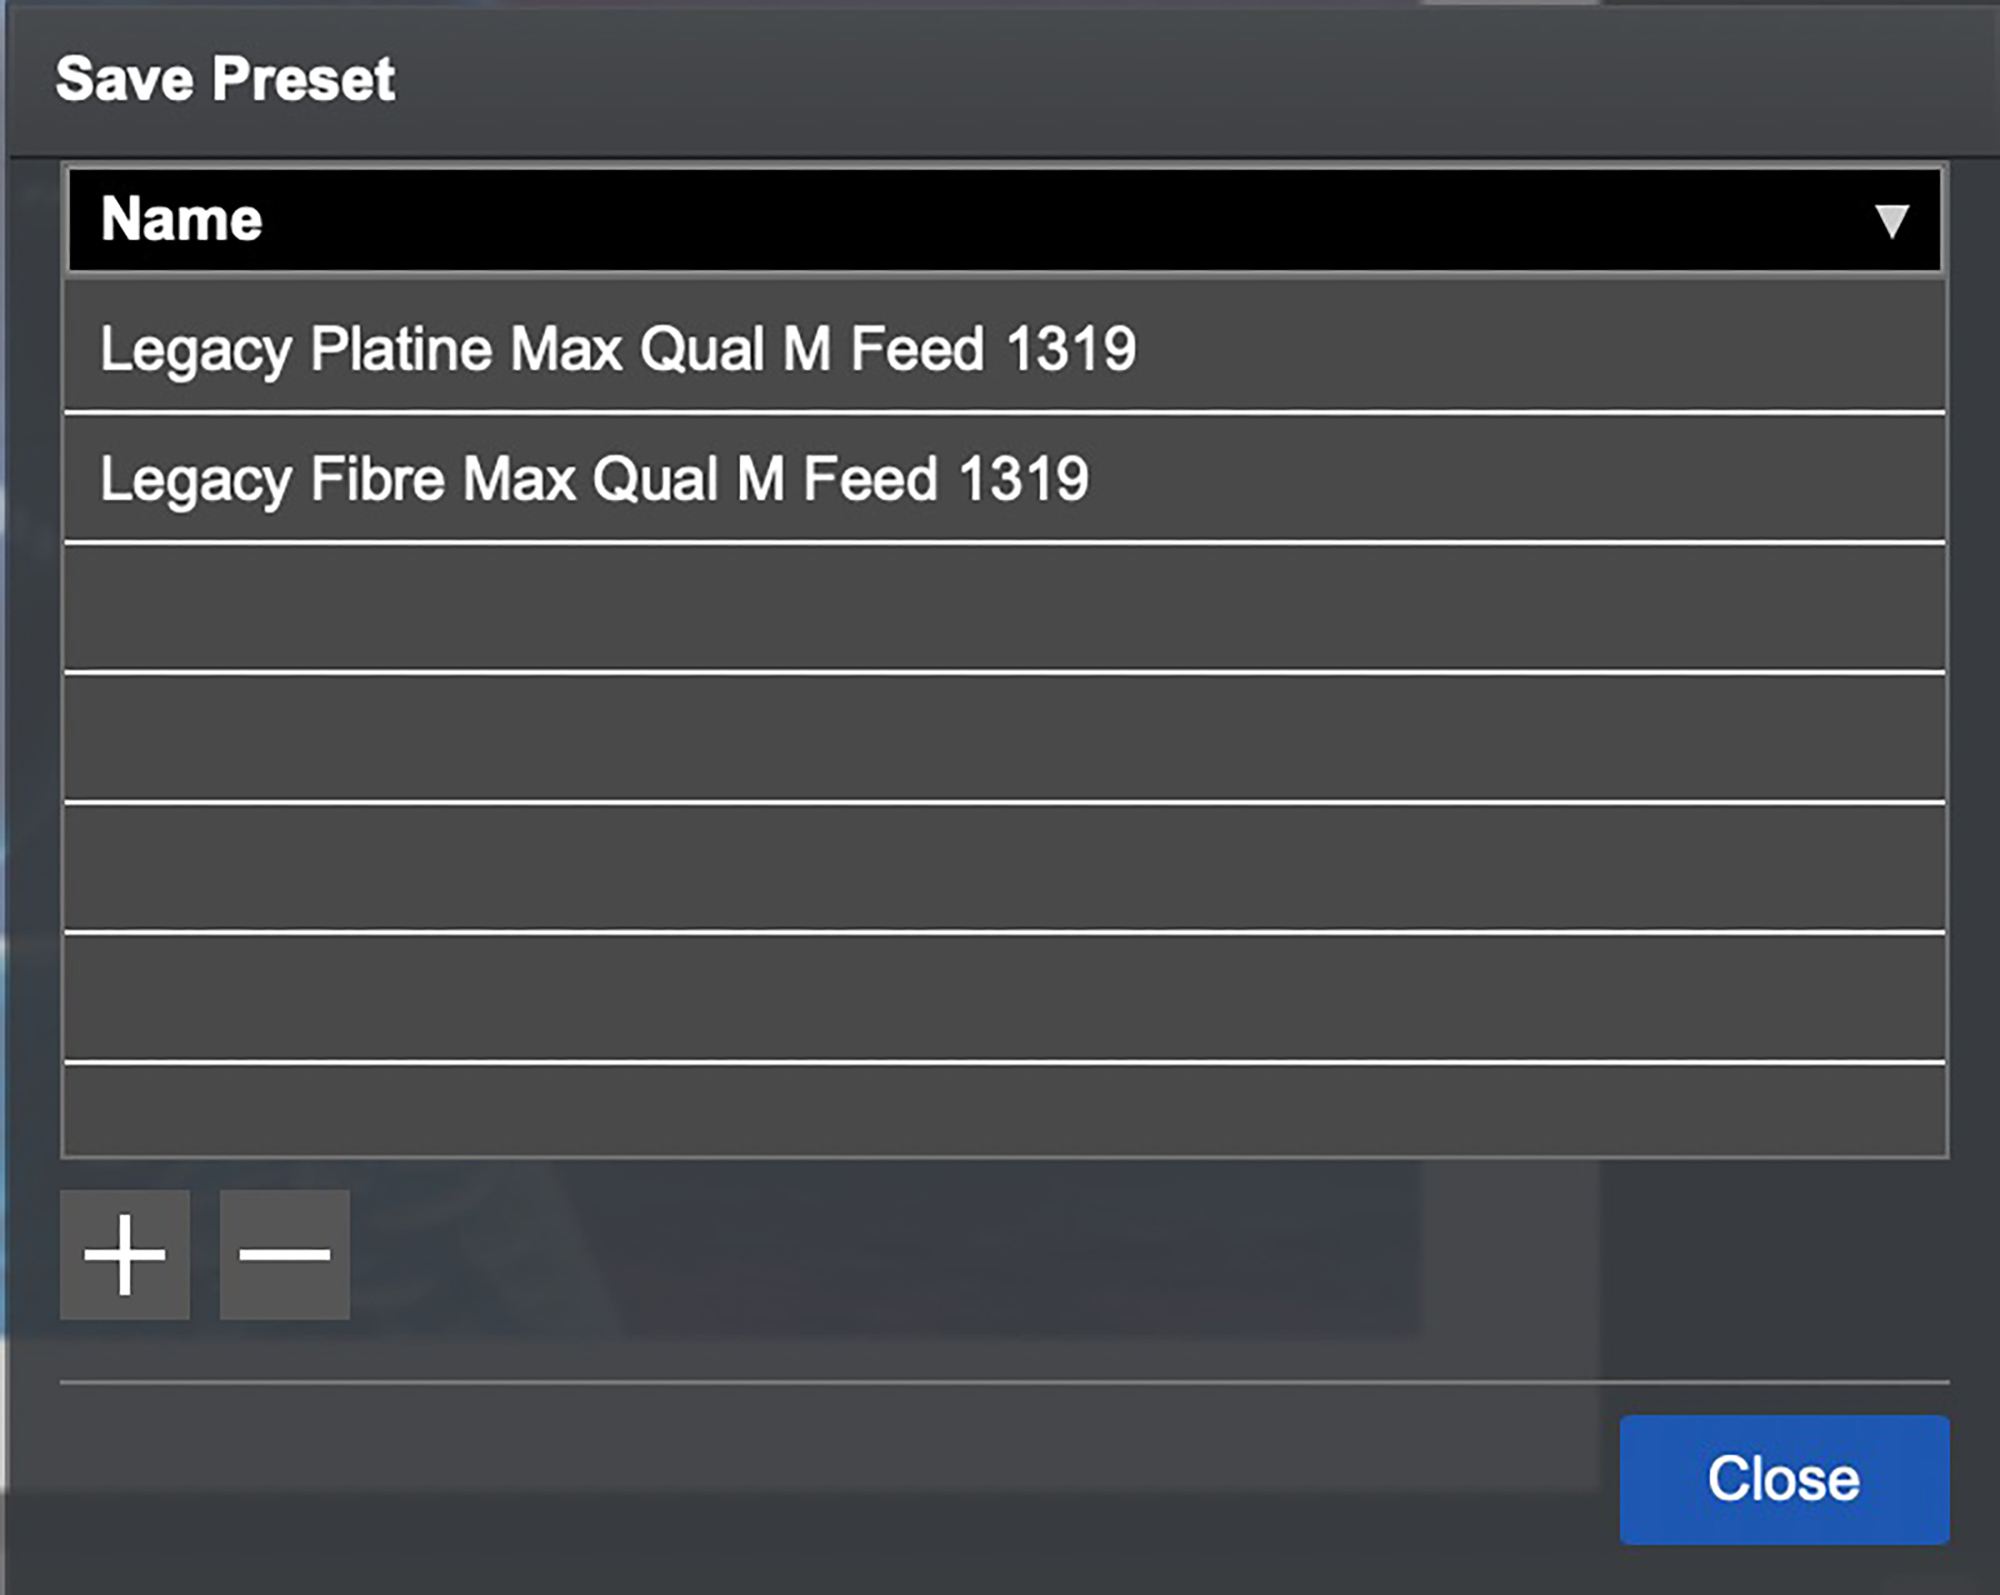
Having made all the choices in these menus down the column, very straightforward, they can be saved as a Preset for future use (Figure 76).
We’ve done a lot here moving down one simple column of settings without messing in either the image editing application or the printer driver to make successful, imaginative prints.
Mark Segal
April 2024


Elevate Your Vision


Read this story and all the best stories on The Luminous Landscape
The author has made this story available to Luminous Landscape members only. Upgrade to get instant access to this story and other benefits available only to members.
Why choose us?
Luminous-Landscape is a membership site. Our website contains over 5300 articles on almost every topic, camera, lens and printer you can imagine. Our membership model is simple, just $2 a month ($24.00 USD a year). This $24 gains you access to a wealth of information including all our past and future video tutorials on such topics as Lightroom, Capture One, Printing, file management and dozens of interviews and travel videos.
- New Articles every few days
- All original content found nowhere else on the web
- No Pop Up Google Sense ads – Our advertisers are photo related
- Download/stream video to any device
- NEW videos monthly
- Top well-known photographer contributors
- Posts from industry leaders
- Speciality Photography Workshops
- Mobile device scalable
- Exclusive video interviews
- Special vendor offers for members
- Hands On Product reviews
- FREE – User Forum. One of the most read user forums on the internet
- Access to our community Buy and Sell pages; for members only.
You may also like