For years, photographers have relied on Adobe’s Lightroom (now called Lightroom Classic) for their entire image-processing pipeline – from initially downloading images from the camera to producing final prints. For three reasons, it is time to reconsider this strategy. First, Lightroom Classic barely counts as “under active development” any more – it has received very few upgrades in the past couple of years. Adobe could pull the rug from under Lightroom Classic at any moment, and, since it is subscription-only software that requires updates to support new cameras (as of April 2020, it IS still getting updated to support essentially every camera on the market), it is not viable to continue using it when and if Adobe pulls support.
Apple’s Aperture lingered in a barely-supported state for years, but it had two major advantages. It was not a subscription product – Apple did not, and in fact could not disable it when users stopped paying. It continued to work until it was killed by operating system incompatibilities, years after it was last updated. Aperture also relied on raw file support that is built into the Mac operating system (that’s how random Mac applications, including Preview, can handle raw files). As long as the Mac knows about a certain camera, Aperture does too – Aperture was last updated in 2014, but can handle files from all but the very newest cameras (since Aperture won’t run on MacOS Catalina, it can’t handle any camera where raw support was added in Catalina). Lightroom has its own built-in raw file support, which needs constant updates to handle new cameras, and since it is subscription software, it’s easy to disable remotely. When Adobe decides it’s time for everyone to shift to cloud-oriented, mobile-first Lightroom CC, they simply need to throw the switch. My hope is that they’ll give us a year of transition time, but it could even be less than that from the time they announce the demise of Lightroom Classic until it no longer works.
The second reason to start looking at Lightroom alternatives is that what is now called Lightroom CC (the cloud-based service) is a very poor fit for most serious photographers. It’s almost certainly a great tool for editing mobile phone images – since I rarely photograph on my phone (and never edit when I do), I haven’t tried it. On the other hand, it lacks several important features that are essential for most versions of artistic photography. Given the emphasis of this series, its most important failing is that it lacks a print command! There is no way to print your images directly from Adobe’s new Lightroom that they are focusing all their effort on to your own printer! They have added support for one particular commercial lab (the well-respected White House Custom Color), and I would expect support for others – but I’m not holding my breath for any support for printing our own images. There is also no plug-in support in New Lightroom – if you love Perfect Resize, or Nik Sharpener, or you use another raw editor altogether as a plugin while managing your images in Lightroom, that’s all gone.
The third reason to be suspicious of Lightroom’s direction is the very high price of the required cloud storage for large photo libraries. Lightroom Classic does not require cloud storage, but new Lightroom CC does, and that is the direction Adobe is heading If Adobe makes new Lightroom CC a viable option for serious photography by adding printing, plug-in support and more advanced editing, it will almost certainly still require a copy of every image to be stored in Adobe’s cloud service. At current pricing, that is about $10 per month per terabyte, and Adobe doesn’t even offer options to store more than ten terabytes as a standard option (it may be available by calling Adobe Support). Many Luminous Landscape readers have libraries that would cost thousands of dollars annually to store in Adobe’s cloud, because their prices are set up for modest numbers of phone-sized images, rather than thousands of 50 MP raw files.
In addition to the price of the cloud storage itself, storing huge numbers of very large files in the cloud requires a very fast, symmetrical Internet connection. Most cable providers offer only asymmetrical connections where uploads are slow even if downloads are quick, or the only symmetrical connections on offer are very expensive business-grade plans. Comcast’s gigabit internet, for example, offers only 35 megabits per second upload speed – approximately 30 seconds per image to upload Nikon Z7 raw files to the cloud. They offer a 2 gigabit symmetrical plan which will upload the image in less than a second, but for $300 per month. Fiber internet providers are generally symmetrical, but much of the world has no fiber options. In the United States, Verizon FiOS and AT&T have limited coverage areas, and there are a relatively small number of municipalities served by municipally owned fiber networks that often offer exceptional speeds for reasonable prices. Unless you live in an area with good options for 200 megabit per second or better upload speeds or have access to a corporate or university network, cloud-based photo storage isn’t really an option for large photo libraries yet. Home Internet plans other than the still relatively rare fiber are really made for downloading video, not working with images.
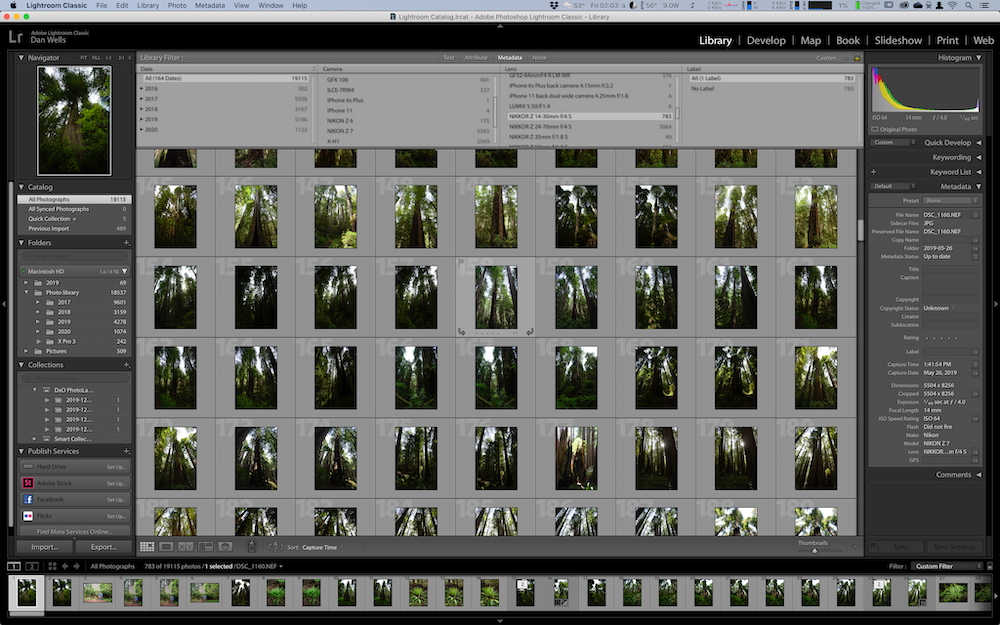
The great strength of Lightroom Classic (simply called Lightroom from now on) is integration – it is an image ingest program/catalog/raw file editor/local editor/panorama stitcher/sharpener/print application. Nothing else covers all of those bases competently. Most other applications do only one or two of those seven things well, and may make limited attempts at a couple of others. Unfortunately, the jack of all trades is master of none. Not only is its core raw file editing capability nowhere near the best on the market, for many camera models, it is at or near the bottom of the major commercial products. The only feature of Lightroom that is competitive with other major applications is its ingest and catalog functionality. Lightroom has become so dominant that many of the other programs that provided image ingest and catalog functionality are dormant, and, while other raw file editors provide some ingest and catalog functionality, only Capture One is anywhere close to Lightroom in its functionality. At the present time, much of Lightroom’s ingest and cataloging functionality works without a subscription, and it is worth considering using as such unless Capture One is your choice as a raw editor, in which case it is worth learning its cataloging features to get rid of Lightroom entirely.
This series of articles assumes that the goal of at least some of your photography is the making of what has traditionally been called a fine print. A fine print is a print, generally assumed to be hung on a wall, that captures the expressive potential of the image and the artist’s intent. Printer, paper and software will work together as tools in service of the artistic vision. Tonal values do not necessarily have to be what was there at the time of capture, but are reflective of what the artist is trying to say with the image. Fine printing has always used technology as a tool in the service of artistic impression – Ansel Adams’ photographic style, for example, depended on the Zone System, which depended in turn on the development of films and papers good enough to do what he wanted. With today’s technology, we have the ability to produce fine inkjet prints in the artist’s choice of black and white or color, on a variety of media that suit the image.
A photographer who aspires to fine printing (we will never fully achieve it, for if we achieve complete satisfaction with the result what more is there to do) may also be interested in printing in less conventional ways. Increasingly, we can take at least much of the ethic of the fine print, the level of expression, and display it in ways other than on the wall, in addition to the traditional display print. A future installment of this series, on print finishing, will explore some alternatives to the wall for printed images. Rather than relying on Shutterfly and friends for low-quality cards, books and other alternative display options, we will be looking at the implications of producing these ourselves, at much higher quality. I am even hoping to look at the possibilities of dye-sublimation printing for producing fine prints on media ranging from fabric to metal, t-shirts to coffee mugs. There is no reason that art cannot be functional as well.
There is also the possibility (for another series of articles) of fine digital display. This would not take place on phone-centric social media, where the maximum quality of an image is restricted by what fits on a small screen with limited and somewhat random color, compressed to make sure that most of the bandwidth is reserved for the all-important advertisements. Instagram and the like may be useful for something like Lomography, where the limits of the medium become part of the art, but they are extremely ill-suited for display of art where the goal isn’t the technology, but for the technology to get out of the way (generally after many hours of fiddling with it) and allow the artist’s vision to shine through. Fine digital display would mean an image displayed in a contemplative setting, on a color-managed wide-gamut display (monitor or projector) of the best possible resolution (today, that means at least 4K and preferably 8K – at some point between 8K and 20K or so, we’ll run into the limits of human vision), without advertising or any other element that distracts from the image itself.
Just as a fine print is made with the printer and paper in mind, and their characteristics become part of the character of the image, a fine digital image will be edited for the character of the display, and, especially in the case of projection, for the interaction of the display and the installation site. What excites me the most about the possibility of fine digital display is that a fine digital display could include motion. Just as really good inkjet printing brought color, for the first time (excluding dye-transfer, which only a few hundred people ever mastered) to parity with black and white, fine digital display can bring motion to parity with stills. The option to photograph a landscape as static will be joined by the possibility of leaving a river running, showing the change in the sun’s position through time-lapse, or having a rainstorm enter and leave the frame. Every element of a fine digital display will be chosen as part of the artistic vision – the artist has the choice of whether to use motion or sound. That doesn’t mean they have to be used, any more than the fact that today’s printers print excellent color means that we can’t choose black and white. Digital display offers us motion and perhaps sound as additional tools – not as tools that have to be a part of every vision.
No matter what the end goal of a photograph is, there are at least two pieces of software necessary in the production of any image using digital technology – something that organizes images and something that edits them. If the goal is a print (defined broadly as “anything that leaves the world of digital display and manifests as a physical object that does not require electricity to see”), a third piece of software manages the transition from the digital to the physical realm.
At the simplest level, those pieces of software are not only integrated into a single package, they are so simplified that many photographers may not realize that they are using them. When you snap an image with an iPhone, the Camera app transfers the image to Photos automatically. Photos takes care of organizing the image (by date, location and some AI-based tools that attempt to identify humans in the image with varying levels of accuracy), and provides some simple editing tools. Between Camera and Photos, a significant amount of automatic, AI-based editing takes place, some of which offers some user control, while much of it is entirely behind the scenes. Photos even offers a simple print manager for sending images to your own printer, and it can be extended to interface with commercial labs. Android’s tools work in pretty much the same way, but as a 30 year user of Apple products, I am not as familiar with the names of Google’s tools.
As we go from iPhone snapshots to more ambitious forms of photography, we need the same tools, but versions of them that offer higher quality and greater control. The organization scheme in Photos works for many purposes, but quickly becomes clunky for large libraries, especially if they don’t fit the “family photos” category it was designed for. Much of Photos’ organizational power is designed around the idea of having the same relatively limited number of people appear in many images – what about the landscape photographer who rarely photographs people? What about the street photographer or photojournalist who has people in every image, but has thousands of subjects? Similarly, Photos’ editing capabilities are designed to be largely automatic, intended to make an image look pretty good for low-resolution digital sharing with a minimum of effort, rather than offering control to shape an image based on artistic intent.
The core of any photographic workflow aimed at making fine prints is the raw file editor. If the photographer has any intent of making artistic edits to an image, it is imperative to start with a raw file of whatever format your camera supports (differences between individual camera raw formats are often trivial, and always relatively small compared to the differences between raw and JPEG). Using your camera on JPEG mode is closely equivalent to using a Polaroid camera – most settings affecting the final image are fixed at the time of capture, often automatically. Capturing a raw file is equivalent to making the image on large-format sheet film instead, since you can develop each individual image as you wish. The photographer is left with choices in overall image development (equivalent to film developing and the simpler parts of darkroom printing), local image characteristics (burning ,dodging and other image manipulation during printing) and print tonality (print development). Unless a Polaroid image is what you’re after (and a small number of artistic images have long been captured on Polaroid as a deliberate choice), you need a raw file to work from – every interchangeable lens camera, most higher-end compact cameras, and even some phones offer the option of shooting raw.
In film-era terms, the quality of today’s raw files is amazing. Even the most basic Micro 4/3 camera has the ability to capture detail and dynamic range that is well into medium-format film territory (in all cases, I’m assuming a good-quality professional film at an ISO comparable to the digital file), assuming the lens is capable. A good 24 MP APS-C sensor with an excellent lens is somewhere in the realm of the largest medium-format negatives (6×9 cm). A 24 MP full-frame sensor with an excellent lens or 24 MP APS-C with a really fantastic lens falls in the gap between 6×9 cm and 4×5 inch film. With the right lens, the 40+ MP full frame sensors and the 50 MP medium format sensors are closer to 5×7 inch film than 4×5, easily capable of making superb 40×60 inch prints. Finally, the Fujifilm GFX 100, with its oversized 100 MP sensor, is capable of outrunning any film short of 8×10 inches.
One factor that complicates this is lousy lenses – a 24 MP APS-C sensor is capable of results similar to 6×9 cm film, but a $100 f4-6.3 kit lens designed for compactness and price instead of optical quality is not. Essentially all kit lenses below full-frame (with a couple of Fujifilm exceptions) are letting their sensor down, and quite a few full-frame lenses are as well. There are many excellent lenses out there from all manufacturers, but they aren’t what you get with a camera, especially in the lower price brackets.
Getting the tonal values out of the raw file and into the image sent to the printer is the job of a good raw file converter and learning to use it. A raw converter often offers a lot of different functions baked into one piece of software, but the core function is the raw editing module (Lightroom calls it the develop module, others use different names, and Capture One iconoclastically spreads these controls across a couple of screens). It is in the raw file editor that most of the work that used to occur under the enlarger light now takes place. There are two basic types of editing functions found in raw converters – preset based editors and flexible, parametric editors. Essentially every program on the market is a hybrid of the two, but different software emphasizes one or the other. In a preset based editor, you load an image and choose from a series of AI-defined preset looks, then tweak the look to taste with individual controls. Luminar and ON1 are two prominent examples of primarily preset based raw converters.
Preset based converters certainly have their place. They are significantly easier to use than getting a really good result out of a parametric converter. They also allow you to apply some pretty extreme effects while looking reasonable – it would take a lot of work to get a parametric converter to look like some of the more extreme options ON1 presents at a single click, for example. What they are not as good at is fine-tuning an image. If you like to experiment with heavily filtered-looking images, it can be worth having a preset converter around – their fake sunsets and the like look better than anything you’ll be able to do by hand without hours of work. They are also good bets for novice photographers just beginning to shoot raw images – they’re easy to use and offer a fair amount of proper parametric control in addition to all of the presets. ON1 in particular is also moving towards Lightroom in the amount of additional functionality they pack into their raw converter on top of basic editing.
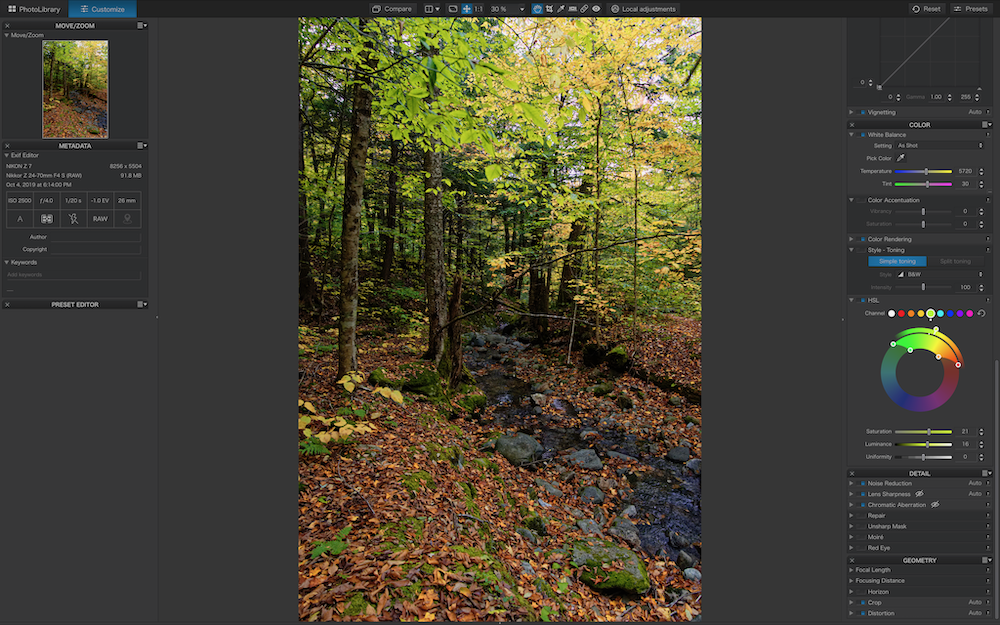
In a parametric editor, AI-based looks are a minor part of the package – some offer them as an option, and almost all will at least accept downloaded presets or looks, but they are not the most important part of editing an image. The editor presents an initial interpretation of the file, and then offers a wide selection of controls to customize it. Much of the rest of this article will focus on the “big three” primarily parametric raw converters – Lightroom, DxO PhotoLab and Capture One. For the average Luminous Landscape reader, especially those who are following this very long printing series, a parametric raw converter is the way to go – you wouldn’t be working your way through these articles if you weren’t trying to fine-tune your images, and nothing can offer that like a parametric converter.
Different converters interpret the file differently to begin with – Adobe is notoriously “flat”, meaning that contrast and vibrancy related controls generally have to be turned up right off the bat. DxO tries to get it as close as possible, which has the advantage of a much better looking starting image, but the disadvantage that you sometimes need to turn controls DOWN to get the image to look right. For whatever reason, it is psychologically easier to turn a control up than down, so there is a risk in displaying an image contrastier than ideal, for example. I find editing in DxO easier, despite occasionally having to turn controls down, but that is more than made up for by the better starting point. Each of us will respond to that in different ways.
The basic editing controls of a raw converter include white balance, several types of exposure controls, a couple of different contrast-related controls and saturation control. In addition, almost all raw converters worthy of the name provide some form of noise reduction and sharpening, although many photographers use additional software to accomplish these tasks. Above and beyond these basics, we get various forms of selective exposure controls that affect certain tonal ranges, some sophisticated contrast-related controls (things like Clarity, Dehaze, Microcontrast and Clearview are all selective contrast controls), and different forms of selective color control.
The real basics are essentially the same across every raw converter – moving a white balance slider or changing exposure are going to be pretty comparable in everything from Photos on up to DxO or Capture One. The difference in these features comes with the more sophisticated versions. All shadow controls do essentially the same thing, but some are “smarter” than others about what they consider a shadow. Capture One offers a great level control in addition to the curve editor and highlight/shadow controls that every converter offers, and its histogram display is incredibly useful.
In terms of image-wide basic controls, Capture One offers the most flexibility of the three, while DxO offers some really useful smart controls on top of a full set of basic “dumb” functions. DxO Clearview Plus is by far the best implementation of a dehaze family control I have seen, although the default amount is set annoyingly high. I’ve never needed to turn Clearview Plus up, and I turn it down at least ¾ of the time I use it. DxO also provides a sophisticated automatic exposure control called Smart Lighting – its basic function is to brighten shadows without losing highlights, but it is more clever and subtle than many similar functions (and it will darken overly bright images, which many similar functions won’t). Both Clearview Plus and Smart Lighting often improve images, and both are worth fooling around with the settings on images they might improve – remembering that they, especially Clearview Plus, often start out set too high.
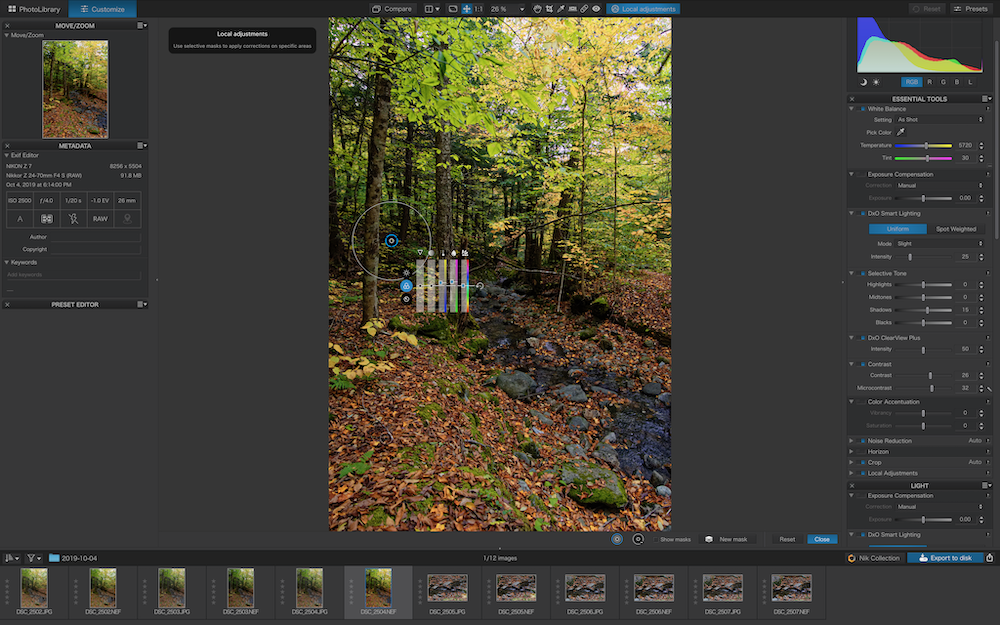
In addition to the basic image-wide color, tone and contrast corrections, every raw converter offers some form of local control. The least sophisticated versions merely allow adding or subtracting exposure from a particular area of an image. This is exactly analogous to burning and dodging in a darkroom. Lightroom does this with an adjustment brush, while Capture One works a little differently – you create a mask and then use the mask to apply the effect. DxO goes much farther than this and offers control points that apply to an area, but only to a certain range of pixel values within an area. If you are trying to add exposure to a particularly dark shadow area, it’s smart enough to realize that you probably don’t want to mess with the few lighter pixels within that shadow. When it sees the shadow area, it recognizes what’s up and provides a pretty darned good selective boost. Rather than a simple dodge and burn in a darkroom, this is analogous to creating a contrast-based mask for certain areas of the image.
While it’s not perfect, and it is possible to go to far and wind up looking unnatural, it is very, very good – by far the best local adjustment tool I’ve seen. The control point tool, while perhaps most useful for exposure, also allows local adjustment (still with the astonishingly smart masking) of a variety of contrast and color-related parameters. This is a major win for DxO, and the most useful single differentiating tool I have seen in any raw converter. I can recover several stops of shadow detail or save blown-out clouds, while making it look very natural. The quality of the semi-automated masking makes short work of burns and dodges that would have required many hours in the darkroom, or with any other raw converter.
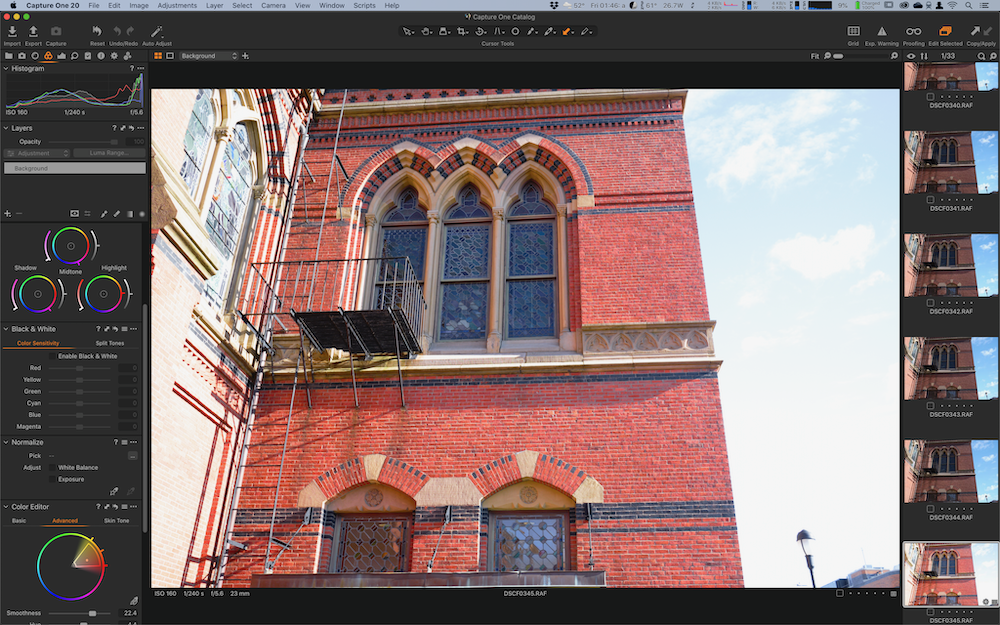
Another major DxO win is their new selective color editor. Adobe, Capture One and DxO all offer the ability to edit color ranges (turn up the saturation of only the greens, for example). All work on a hue/saturation/luminance model, allowing colors to be shifted on the spectrum, intensified or deintensified, and lightened or darkened. Both DxO and Capture One also allow the user to control the size of the range being edited (extend a green edit farther into the yellows or blues, for example), as well as to control the abruptness of the transition from edited to unedited colors. Both of those factors are preset with no adjustments possible in Lightroom, which makes the selective color editor dramatically less useful than its two competitors. As an example, a lot of foliage on deciduous trees (those that lose their leaves), especially early in the year, straddles the boundary between Lightroom’s green and yellow controls. Many of the darker, bluer needle-leafed trees are on the boundary between green and blue. Either group is easy to work with in DxO or Capture One where a custom range takes care of it, but clunky in Lightroom. Between DxO and Capture One , DxO’s interface is a great deal easier to use – it’s a visual representation of what you are doing. Capture One has a tricky interface with even more flexibility than DxO. Capture One offers a sophisticated color balance control, based on what movie and video people use when grading, in addition to the selective color editor. Think of the color balance control as white balance on steroids – no other editor offers anything like it. Lightroom has a simple interface, based on individual sliders for each control in each range, but much less control. DxO wins on color control for most uses, while Capture One offers ultimate flexibility. DxO also offers the unique ability to adjust white balance and hue locally in an image using their sophisticated local controls.
All three editors offer competent basic contrast controls plus several variations on more sophisticated contrast control. A basic contrast control essentially makes the light tones lighter and the dark tones darker throughout the image. It is equivalent to paper grade (or variable-contrast filtration) in the darkroom, except that both film and enlarging silver paper had a “toe” at each end of its contrast range, where contrast was markedly reduced. It took quite a bit of light to cause paper to respond at all (from paper white in Zone X to very light parts of the image in Zones VIII and IX, then it reached a point where more light built up more density in the image in a relatively linear way (this linear part of the exposure curve is where all of the detail in the photograph lives), then it took a surprising amount more light to move from the very dark grays of Zones I and II to maximum black. Simple contrast adjustment doesn’t take this into account, which is one reason why it is easier to blow highlights or muddy shadows than you would think from the dynamic range of digital cameras.
Sophisticated contrast adjustment tools often work mainly in the midtones, leaving the edges of the tonal scale where they are. They also tend to work not only with overall image contrast, but with microcontrast – the contrast between adjoining elements in the image. Microcontrast-driven tools include clarity and structure in Capture One, clarity and dehaze in Lightroom and microcontrast and Clearview Plus in DxO. Microcontrast is a simple implementation, while Clearview Plus uses sophisticated image analysis. Yet again, DxO has a highly sophisticated tool that does a great job (but, as mentioned in the earlier discussion, it is often set too high when first activated). It would be easy for DxO to simply set it to activate at 20% instead of 50%. In addition to its native microcontrast tools, DxO adds a couple of extras when extended with DxO FilmPack, including a fine contrast tool that fits in between overall contrast and microcontrast as well as individual adjustments for the highlights, midtones and shadows. DxO is also unique in allowing easy application of the contrast tools as a local adjustment – some of this can be duplicated through layer masking in other software.
Beyond the basic exposure, color, tone and contrast adjustment tools, every raw converter offers noise reduction, sharpening, cropping and straightening tools. Lightroom offers a smart sharpening toll that is better than the venerable unsharp mask tool in Capture One, while DxO offers sharpening specific to body and lens combinations through the Lens Sharpness tool. If there is no DxO Optics Module for your body and lens, the backup option is a simple unsharp mask. All three converters benefit from output sharpening through a dedicated tool like Nik Sharpener. All offer “smart” noise reduction tools, with DxO’s very computationally intensive PRIME at the head of the pack. Straightening and cropping are similar for all three converters, with each having a few little annoyances. DxO defaults to a crop locked to the same aspect ratio as the original image, while I want an unlocked crop 90% of the time – easy to change, but not the right default for my use. Lightroom has an unusual method of moving the crop box – you are actually moving the image under a fixed box, rather than the box itself. Once you understand what it’s doing, it’s not bad, but it’s the reverse of what I’d expect. Lightroom also offers a pretty good built-in panorama stitcher, which neither DxO nor Capture One do.
All three offer some additional functions beyond what would ordinarily be expected of a raw converter, and that are not duplicated in the others. DxO offers extraordinarily sophisticated profile-based lens corrections (everybody has some version, but not to the same level). Especially with wide angle lenses with complex distortion profiles, these corrections have a major impact on image quality. Capture One offers much more sophisticated support for tethered shooting than other programs, reflecting its origins in working with early Phase One backs that ONLY shot tethered. With four pages in the table of contents of the user manual devoted to tethered capture, it should be obvious how much effort Phase One puts into their tethering. Most professional cameras from Canon, Fujifilm, Mamiya/Leaf, Nikon, Phase One and Sony will tether to Capture One. For quite a while, high-resolution and medium format cameras from manufacturers other than Phase One were unsupported to protect their expensive backs, but that is now fixed (although there is still no Hasselblad support, for tethered shooting or even for raw file editing).
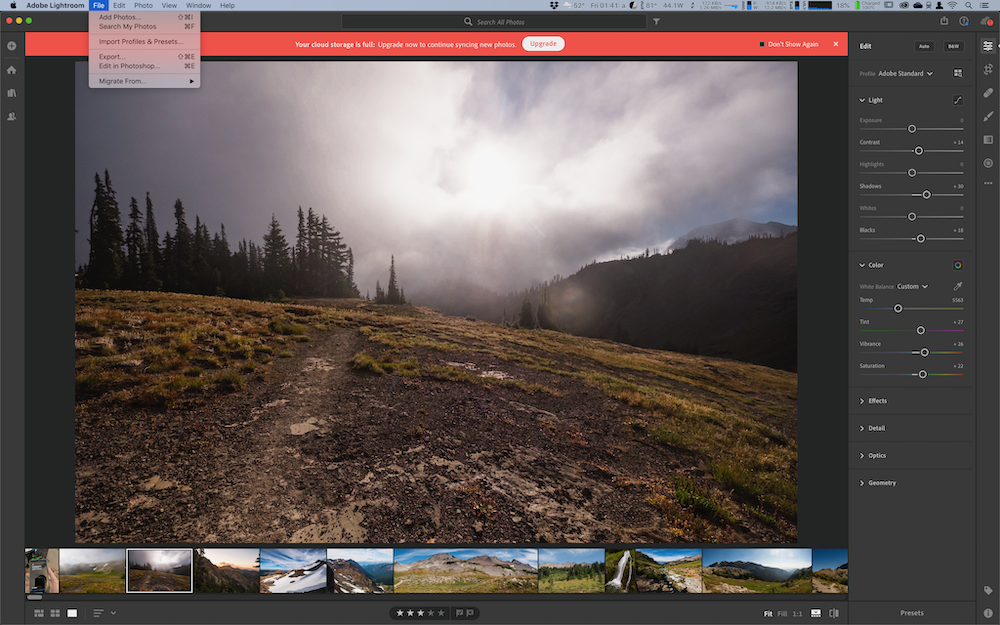
Lightroom offers some tethering support, although nothing like Capture One’s, but that is just the beginning. Looking at the upper left corner of the Lightroom window:

Essentially this entire discussion of raw conversion software has been contained within the Develop module – and there are six other modules! Library is the cataloging module, which both DxO and Capture One also have. DxO’s is very primitive by comparison to Lightroom, and DxO is best used with an external cataloging program (ironically, Lightroom is not a bad choice to use catalog-only). Capture One has a relatively sophisticated, but tricky to use catalog function. It’s almost certainly worth learning if you choose Capture One.
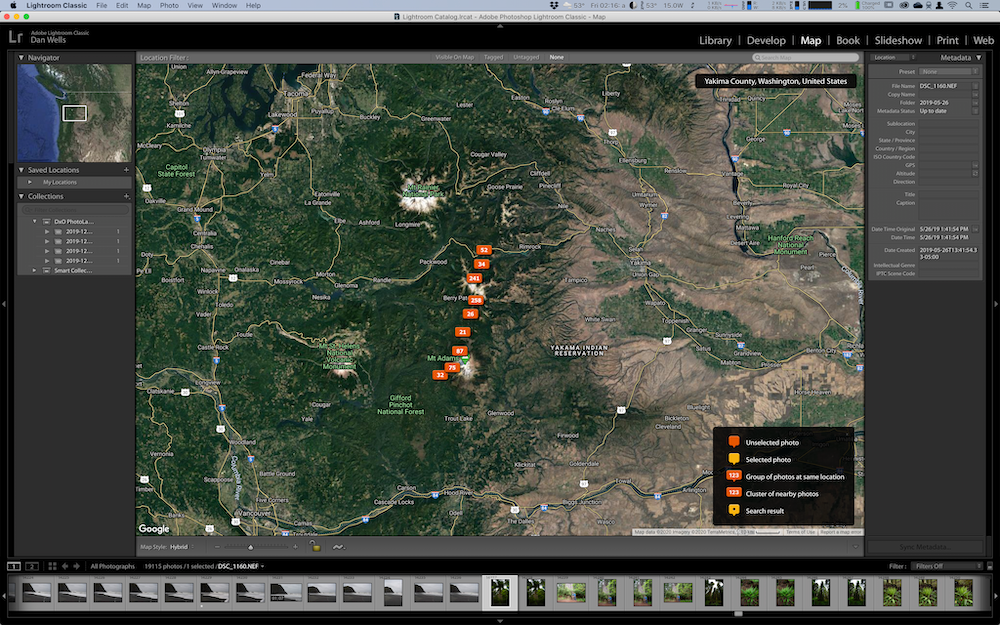
Map displays any images with location information on a map – it’s a simple function, but a fun one, and a useful one for photographers who travel. It also allows searching for images by location – a very handy search function for landscape photographers and others who use location heavily. Almost all smartphone images have location attached, assuming that the camera app is allowed to turn the GPS on. For images from more sophisticated cameras, there are several options. Many cameras will tether to the manufacturer’s smartphone app and automatically include location from the phone’s GPS. This costs significant battery life on both camera and phone, and is vulnerable to serious data-privacy issues, especially if misconfigured, but it is the simplest way. If you are concerned about privacy at all, you don’t want to grant most phone apps access to location – they use it for geotargeted ads. Even if your camera manufacturer’s app isn’t selling data, you want to make sure that nothing else, (especially not any app from Google, Facebook or an untrusted developer) is using location.
Beyond using a phone GPS, the best way to get location into your photos is to use an external GPS to log your route and then connect the GPS file to your photos. Make sure your camera clock is set correctly – this will be the piece of data that ties the two together (the software that ties location to photos does allow you to input a time offset, but it’s simpler if it’s accurate to begin with). There are at least three sorts of GPS receivers that can collect the data. Perhaps the most convenient is a GPS watch that is capable of logging a route – I use a Garmin Fenix 5x, but most outdoor-oriented GPS watches will work. They are accurate enough for photographic applications, but their battery life is less than ideal. For a longer battery life and better accuracy, you can use a hiking GPS, almost certainly from Garmin. These units also have excellent built-in maps, and a few even offer 2-way satellite communication. The best accuracy comes from a GPS data logger that has only a very basic display if any at all. These can also be lighter than a hiking GPS, but they don’t supply the map function.
The Book, Slideshow and Web functions are all fairly basic, if convenient options for image output. The Book module provides layout functions for photo books – nothing like what you could do in InDesign or another dedicated desktop publishing program, but better than the web-based tools offered by online book suppliers. It works directly with Blurb, and it will also output JPEG or PDF files to use with other services or print and bind yourself. Slideshow offers a simple way to create a slide show from your images, and it offers a very good cross-dissolve, which at least older versions of PowerPoint had trouble with. Of course, a custom slideshow made in Keynote or Final Cut Pro will be much more flexible than Adobe’s simple option, but it saves the trouble of exporting a bunch of images as JPEGs and then placing them in a slideshow one at a time. Oddly, some of the best photographic slideshows are made in video editing software like Final Cut Pro or Premiere – a good video editor allows extremely precise placement of transitions and soundtracks. If the slideshow is essentially a presentation with pictures, use Keynote or PowerPoint, but if it’s a self-running multimedia experience, consider a video editor. The Web module is probably the least useful of the three – it doesn’t offer much more customization than many web hosts’ built-in gallery features, and it requires FTP access to your website. If you have FTP access and want more customization than the host’s provided gallery (some of which are quite good, especially on photographer-oriented hosting plans), you’re probably going to be using dedicated web software.
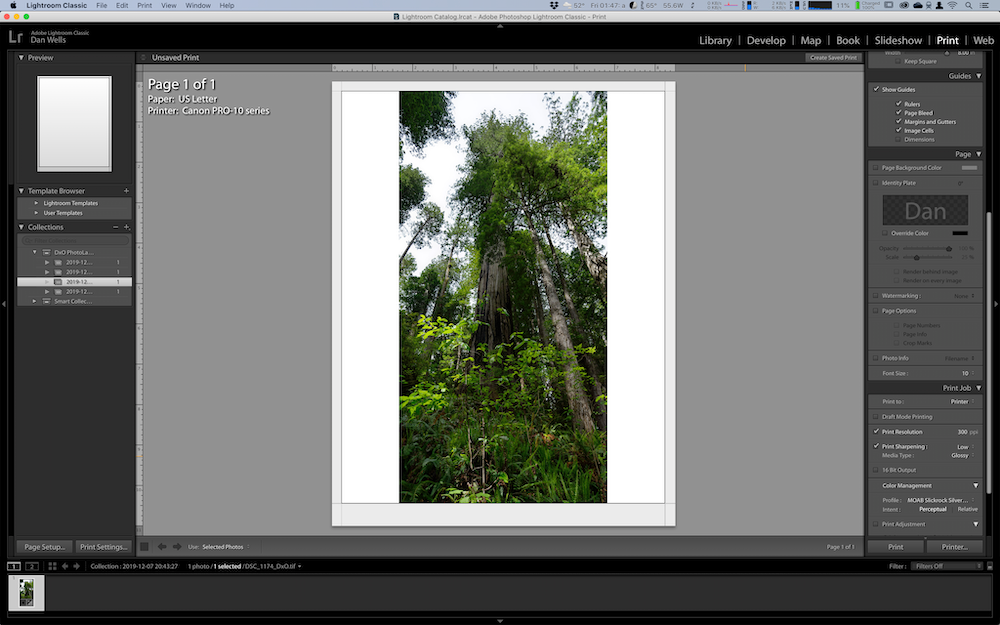
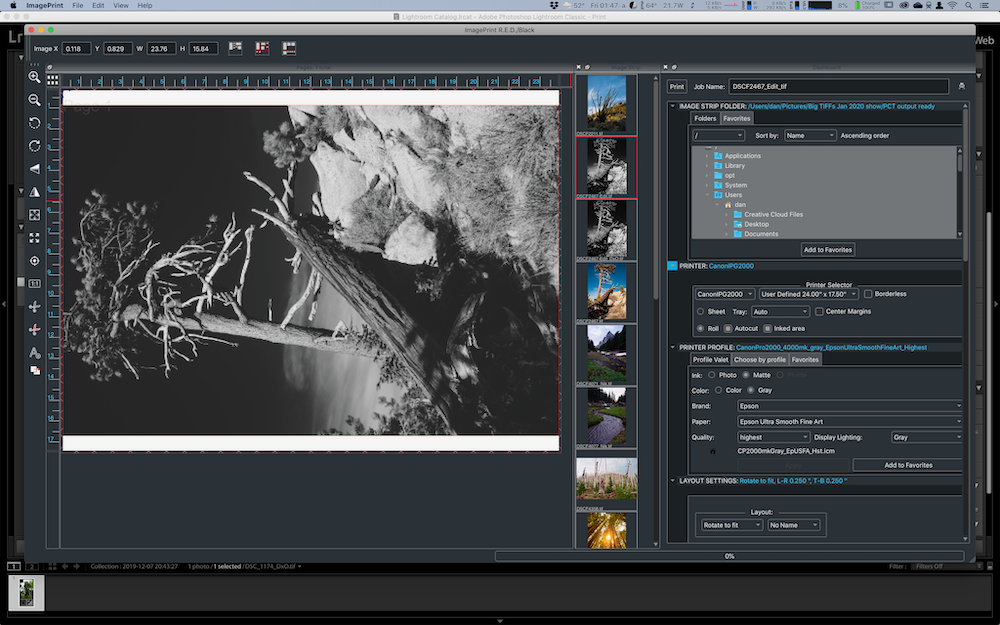
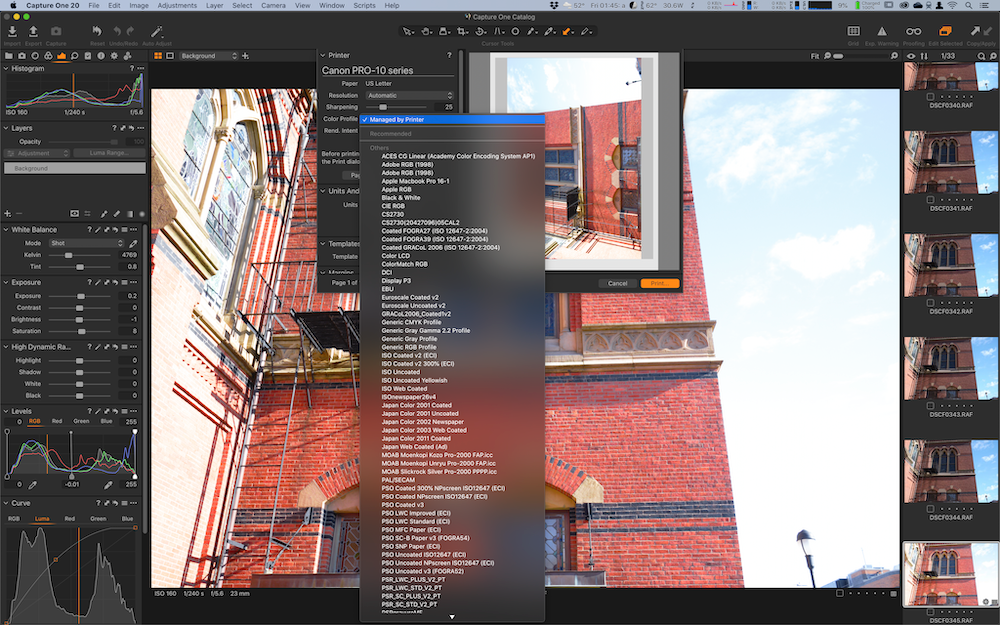
The last of Adobe’s modules, and the most useful outside of Library and Develop, is the Print module. Lightroom includes a relatively full-featured printing setup in Lightroom, which neither DxO or Capture One do. The Print module will automatically resize images to the proper size for the printer, and it can perform basic output sharpening. It is aware of color profiles, and has some level of protection against errors like double-profiling. It has basic template functionality, allowing multiple images or multiple copies of the same image to be printed on a single sheet or a single print from roll paper. It is enough for the beginning or intermediate printmaker, although (as is usual for Adobe), it is nowhere close to what the best standalone products can do. Its resizing is far better than letting the printer driver handle resizing, but it is not anywhere near using something like Perfect Resize to get the image size right before going to the printer. Its sharpening is decent, but not as good as using good sharpening in a raw converter and nowhere near a tool like Nik Sharpener. The template functionality is not bad, but nothing like a real RIP such as photographer favorite ImagePrint. Adobe uses the printer manufacturer’s drivers and the paper manufacturer’s profiles (unless you either own a spectrophotometer or have someone make custom profiles for you). ImagePrint Black uses custom drivers and profiles, and the differences are very noticeable – the next installment of the printing series will focus on ImagePrint, along with the various special purpose programs that can take your printing to the next level.
Which raw converter should you choose? Out of the big three parametric converters, I have little doubt that DxO Photo Lab (Highly Recommended unless you use Fujifilm X-Trans) offers the best image quality on the market – both the starting point and the final edit are ahead of anything else, and I personally like its editing workflow the best. I am seeing files out of DxO that I have never seen out of any other converter. DxO’s Optics Modules and local adjustments are unequalled tools. The local adjustments, in particular, are often the key to that last bit of difference between a very good print you’ll be proud to hang on your wall and a fine print that goes on the gallery wall. I do most of my fine-art work intended for print in DxO (everything except X-Trans), and I am very happy with it. It is not the perfect converter for everyone, though. It is pretty much just a raw converter and editor, requiring additional tools for auxiliary functions that Capture One and especially Lightroom include. It has some omissions in camera support – the big one is Fujifilm X-Trans (the GFX medium format cameras ARE included, and support for those is excellent).
It is also slower than the competition, and this becomes noticeable if you are editing huge numbers of images quickly. Even my very powerful 8-core MacBook Pro has slight but noticeable delays in certain functions in DxO. This is not at all bothersome for fine-art editing where you are making detailed corrections on each image, but it can become annoying when trying to post 50 images to a blog (or edit a wedding). A Puget Systems 16-core tower I have in the lab here (review coming up) is pretty much instant in DxO – more than fast enough for editing sports or wedding photography. If you’re going to use DxO for high volume work, you’ll need a massively powerful desktop like the big Puget.

For most Luminous Landscape readers, other than Fujifilm X-Trans shooters, the choice goes to DxO Photo Lab for its stunning image quality and flexible tools. DxO Photo Lab itself is relatively inexpensive, but does need some auxiliary software, especially a cataloger and a print program. QImage is quite inexpensive and competent for printing, while ImagePrint is expensive, but the best there is. If you want to produce fine-art prints at the highest level, you can’t do better than a toolset including DxO Photo Lab, the Nik Collection (also from DxO), Perfect Resize and ImagePrint Black. It’s not cheap, but it is the best collection of tools I have found in nearly 20 years of fine-art printing. DxO Photo Lab plus QImage, depending on promotions at any given moment, are comparable in cost to a year of a Lightroom subscription (somewhat higher the first year, but with a lower ongoing cost even if you buy all the upgrades), and offer much better image quality. You can then add more tools as you go along.
If you shoot Fujifilm X-Trans or Phase One, have a need for speed, tether your camera or simply want the most flexibility, Capture One (Highly Recommended with minor caveats) is the runner-up. It is intended more for commercial photography than fine art, thus the enormous emphasis on tethering. Other than the local adjustments, it is possible to get quite close to DxO quality – but you lose the local adjustment tools, and they are a substantial loss for careful work. For high-volume work like sports or wedding photography, Capture One is probably the best choice. The color balance tool is an advantage for tricky lighting, and the sheer number of possible adjustments is unequalled. Capture One is very fast on high-end hardware and acceptably quick on midrange hardware.
Capture One’s processing of the tricky Fujifilm X-Trans files is better than anything with the possible exception of Iridient Digital’s dedicated software, and developer Phase One has a close partnership with Fujifilm (and Sony) that should keep Capture One updated and at the forefront of image quality with those files. Capture One can be a bit intimidating to learn, but it is well worth the effort. It has a good cataloger and a very simplified print module built in, but could certainly benefit from being used with ImagePrint or QImage for high-end printing. It is somewhat more expensive than Lightroom, but available without a subscription, and if your only cameras are either Fujifilm or Sony, a significant subset of Capture One is available for free, and a full version for your camera is cheaper than a year of a Lightroom subscription. A full version of Capture One is free with Phase One digital backs, but if you are shooting a Phase back, you probably don’t care what your raw editor costs, anyway.
The final two options are both from Adobe. The easy one to dismiss is Lightroom CC, their new cloud-centric photo editor (Not Recommended). If your library is larger than a terabyte, it becomes more expensive than any other editor. At five terabytes, it is significantly more expensive than DxO Photo Lab plus a full set of tools including the Nik Collection, DxO Film Pack, Perfect Resize and QImage. At ten terabytes, it is more expensive than the same tools but including ImagePrint for a modest-sized printer. This is without considering the cost of the broadband connection necessary to use it – in many places where fiber isn’t available, that might be Comcast’s $300/month plan because anything cheaper is too slow to upload! If you’re paying for ten terabytes of storage plus $300/month for broadband, that’s more expensive than a full suite including ImagePrint for a 44-inch printer and about 15 rolls of paper per year!!! All this for a program that lacks a print command or any ability to use plugins! If you are primarily a mobile phone based photographer, interested in sharing your images digitally, it’s worth considering (the one terabyte base storage will be fine), but for the rest of us, it’s a first draft vision of a future that we might or might not ever reach or even want.
Lightroom Classic (Recommended with serious reservations) is the default choice for many photographers. At $10/month, including a full version of Photoshop, it offers an amazing number of tools for the money. It can get you from pulling the image off your camera’s memory cards to pulling a print off the printer without requiring any other tools. There are two major skunks in the living room, though.
The first is that I will be very surprised if Lightroom Classic still exists in three years. All the development work is going into Lightroom CC, and, while I don’t know exactly when the transition will take place, I am quite sure that it is coming. That $10/month price will probably be $20/month sometime this year, as Adobe bundles a terabyte of cloud storage that you can’t reject and doubles the price. The $10/month Photography Plan is already sometimes hard to find on Adobe’s website as they push the cloud storage bundle.
At some point in the next couple of years, Lightroom CC will be close enough to feature parity that Adobe discontinues Lightroom Classic. While Lightroom CC may support plugins and even a print command by then, it will maintain its most important feature – that every image has to be uploaded to Adobe’s cloud service. It works on local copies of the image for speed, but it requires the full cloud library. Many of us will see storage bills of $50-$100 per month, and it simply won’t work for photographers whose only internet option is slow DSL or highly asymmetrical cable. Even if symmetrical cable with fast upload speeds is available, it is generally very expensive. The only really viable option is fiber, and that is only available to about 30% of US households, although it’s much more broadly available outside the US. The reasons Lightroom CC is Not Recommended probably won’t change much by the time Adobe pulls the plug on Lightroom Classic.
The second problem is Lightroom Classic’s image quality. It’s OK – that’s the best I can say about it. It lags well behind DxO, Capture One and the major preset-based converters. Admittedly, I haven’t used a lot of Canon cameras, and its reputation is that its best quality is with Canon files.
With these problems, why does Lightroom Classic earn a Recommended, even with serious reservations? Basically, for its integration and its library/catalog functions. Nothing else integrates a catalog and a print module that are anywhere near as usable. Nothing else even tries to add a map, a book layout program, a panorama stitcher, a website editor, a slideshow program and an HDR merge program – plus it comes with Photoshop if its own tools aren’t enough! If you actually need or want all of Lightroom Classic’s tools, assembling a mishmash of other software that did the same thing would cost three or four times as much. None of the Adobe tools (except the catalog) are as good as the competition, but they’re all there. If you want to buy (well, rent) a tool that does everything, you have no other choice. If you don’t need most of the more obscure extras, you can get a higher quality raw editor (either DxO Photo Lab or Capture One for Fujifilm or Sony) and a print program (QImage) for around the same price. Either put up with DxO’s subpar cataloging or use an unlicensed copy of Lightroom Classic as a cataloger until Adobe catches on and either disables the catalog in unlicensed Lightroom or refuses to let Lightroom catalog any image that doesn’t exist in the Adobe cloud.
Dan Wells
May 2020

Elevate Your Vision


Read this story and all the best stories on The Luminous Landscape
The author has made this story available to Luminous Landscape members only. Upgrade to get instant access to this story and other benefits available only to members.
Why choose us?
Luminous-Landscape is a membership site. Our website contains over 5300 articles on almost every topic, camera, lens and printer you can imagine. Our membership model is simple, just $2 a month ($24.00 USD a year). This $24 gains you access to a wealth of information including all our past and future video tutorials on such topics as Lightroom, Capture One, Printing, file management and dozens of interviews and travel videos.
- New Articles every few days
- All original content found nowhere else on the web
- No Pop Up Google Sense ads – Our advertisers are photo related
- Download/stream video to any device
- NEW videos monthly
- Top well-known photographer contributors
- Posts from industry leaders
- Speciality Photography Workshops
- Mobile device scalable
- Exclusive video interviews
- Special vendor offers for members
- Hands On Product reviews
- FREE – User Forum. One of the most read user forums on the internet
- Access to our community Buy and Sell pages; for members only.
You may also like