


I have always been fascinated by long exposures, going back to Daguerre, with his incredibly long ones. In Figure 1 below, we see a seemingly empty street, with one lone person in the foreground. In reality, the street is empty only because the people were rendered invisible because they moved during exposure. The man in the foreground appears only because he stopped to get his shoes shined.
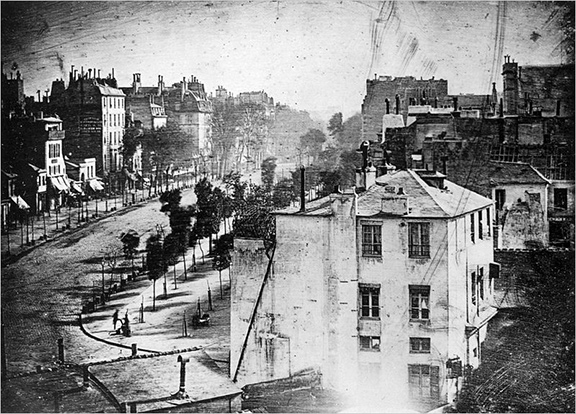
Figure 1.
In this image by Daguerre (1839) any movement on the street was rendered transparent due to the long exposure of the Daguerreotype plate.
The man in the foreground is the first person ever captured in a photograph.
In early processes, lack of speed was a handicap. Exposures were necessarily long, making images such as portraits hard to render without movement. We think of 19th century portraits as being stiff and formal, with sour faces and poor disposition. This was a function of the length of exposure. People had to sit still or be blurred. Smiles are spontaneous, so weren’t seen in portraits.
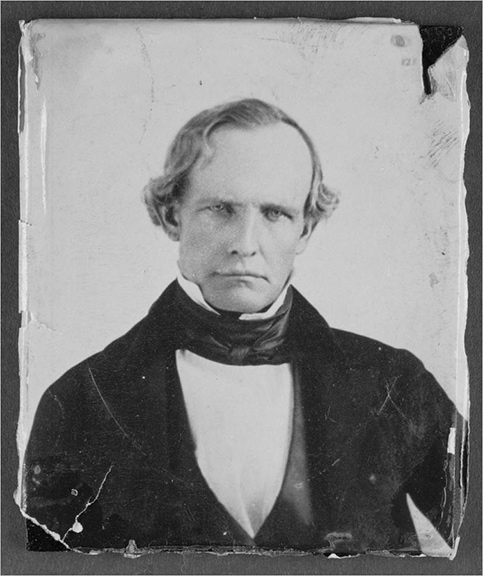
Figure 2. A typical 19th century portrait.
To remedy this, elaborate posing stands were developed to hold the person in place, rendering them still, but very uncomfortable! Hence the expression.
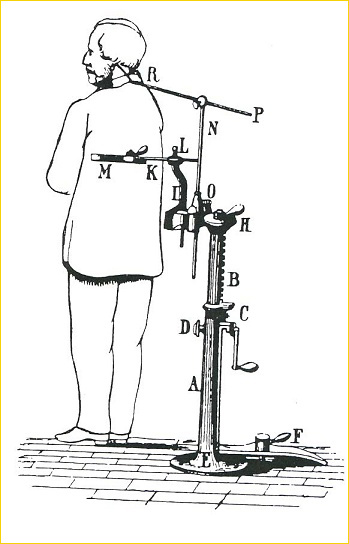
Figure 3.
A 19th century posing stand. Imagine being clamped into this contraption and trying to look pleasant!
Landscape photography in the 19th Century was characterized by fuzzy grass, smooth water and an otherworldly softness. As in the street scene above, any movement in the scene is blurred. In addition, The early processes imparted a very long tonal range, allowing the viewer to see into the very deep shadows.

Figure 4. Venice, 1860.
This image of the canals of Venice is typical of Landscape in the Mid- 19th Century
with smooth, featureless water and a very long tonal range.
JUMP AHEAD 171 YEARS
In the past one and almost three quarters of a century, most of the early “problems” in photography have been solved. Now we are capable of “capturing” at incredible ISO’s, allowing us to capture in almost virtual darkness. We of course now capture in full color, where in the 19th century, many of the processes didn’t even expose in full black and white (many were very blue sensitive, lending to the “white” skies” and “dark” skin tones). We have much greater tonal control than ever before, and our one problem, noise, is all but disappearing. We are capable of making nearly perfect images, easily and quickly.
Still, the inadequacies of the early processes had an aesthetic that is hard for us to achieve, even with our “perfect” equipment. For years, I have wanted to reproduce the old look, with modern equipment.
AN INFLUENCE
I had dabbled with this look off and on over the past 35 years, trying various antique processes, intentionally shooting long exposures, shooting with very short depth of field. It was easier with film, but when I began shooting digitally, it became much more complex, and my look “modernized”.
About 6 years ago, I met a photographer and fellow educator named Ryan Davis Flathau. Ryan was shooting very long exposures. He was shooting film, but using very dense Neutral Density filters and achieving the very mysterious look that I was after. I had studied the look enough, so that when I met Ryan, everything clicked, and I had one of those “Ah Ha” moments, and was off. Ryan and I have become great friends, and recently did a two person exhibition with many images that were time studies.
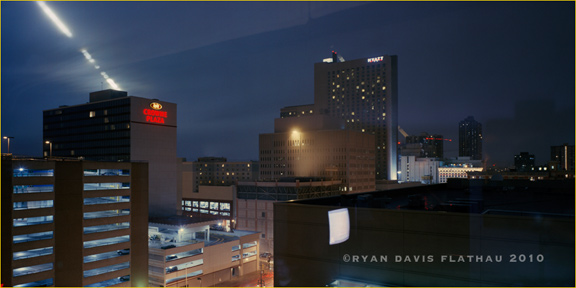
Figure 5. 18 Hours (Sunset and Moonset, Denver Skyline) © Ryan Flathau.
This image was an 18 hour exposure (On film), showing both the travel of the Sun (Behind building on the right) and the moon.
TO START
After seeing what Ryan had done (and stealing a few ideas from him) I set off and began shooting. My first challenge was to identify what look I wanted. Ryan does very very long exposures, and are mostly peopleless, almost without air. Once I began working, I realized that I was interested in using long exposures to capture movement, but wanted to show some structure, and that color is very important to me. At that point, I had been shooting Digitally for many years, so I resolved to try to do it digitally.
My first images were somewhat conventional, scenes of familiar things with the added asset (in my mind of the smooth fuzziness) that long exposures provide. One thing that became immediately apparent was that I was able to see colors that ordinarily, I might not notice. In the image below, the pinks and magentas of evening light blend together giving very subtle transitions, and the water has an almost milky quality. This was done at F/22 with an ND9 filter, requiring a 20 second exposure
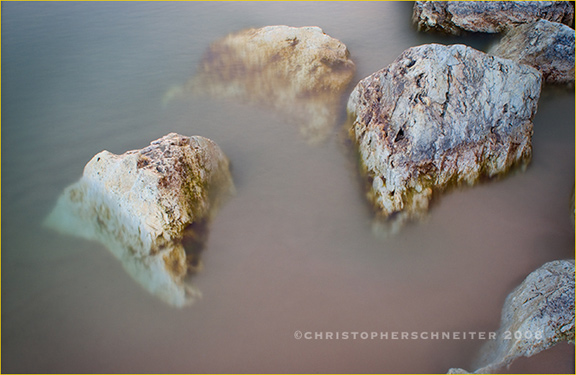
Figure 6. One of my first attempts. Note the abstracted colors.
A significant discovery was that as I included movement into my workflow, things didn’t always appear as I expected. Colors often appeared muted. Shape could be obscured by the blurred tonal range. To bring out what I wanted to see, I found that I needed to saturate, and dodge and burn, just as I used to do in the darkroom. Through experimenting with different exposure ranges, I found that there was much detail that was obscured by very long exposures. Also, I found that to capture that movement, I sometimes needed to make many captures and choose the best ones. I try to start with a good composition, then add the aspect of movement to it.
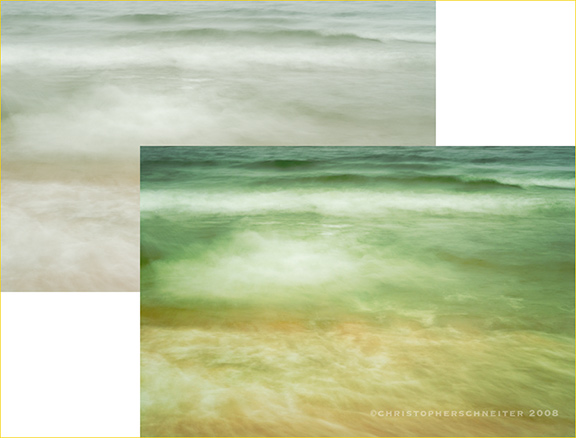
Figure 7.
In this before and after, you can see not only the random nature of shooting long exposures,
but the huge difference between the initial capture and the finished image.
Selectively, saturation and exposure were adjusted to make the image that I saw when I made it.
WHERE TO FROM HERE?
Earlier, I mentioned that the 19th century images, because of the nature of the processes has a very long tonal range. This intrigues me. Digital images are handicapped by having a much shorter tonal range than negative film ever had. A JPEG file has about a five stop range, and even the mighty RAW file is only capable of seven. Obviously, the longest exposures are done at night, or late in the day. Unfortunately, this is also when your tonal range is its longest. You have dark shadows, and bright highlights that you have to deal with. Two good examples of this are sunsets and fireworks. How many times have you shot a potentially beautiful sunset, only to have either the highlights blown out or the shadows dark and muddy. Or how often have you shot fireworks, only to have the sky pitch black and lifeless? These problems are a function of short tonal range. Shooting conventionally, there is nothing you can do about it. The sensor is simply not capable of capturing such a wide tonal range.
My answer to this problem has been HDR. I don’t indulge too often in the usual halos and moody look, and often don’t use Tone Mapping at all. But I do merge (Often up to 9 stops) files to extend the tonal range. I personally prefer to do my merging in Photoshop because it is much smoother and cleaner. If I need Tone Mapping, I do it in Photomatix. I’ve even used it on single captures, just to give just a little bit of extra texture. I find that the tone mapping in CS5 doesn’t do quite enough.
What I achieve in working like this is a sense of body in the tonal range. I’m able to hold detail in the highlights and in the dark areas, as well as mid tone transition areas. In the sunset below, either the highlights in the sky or the detail in the deep shadows would be lost. Even so, the shadows are darker than I might like, but I’m able to maintain the color in the extreme highlights, which is the first thing to go with overexposure.
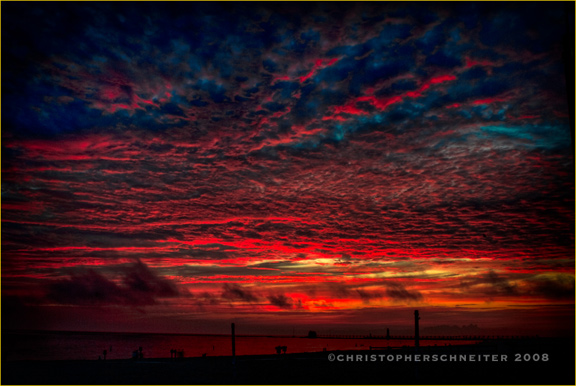
Figure 8. This image is a 7 stop HDR.
This allowed me to maintain detail at the top and bottom of the tonal range.
In the case of Fireworks, you are dealing with several zones of exposure. In the shot below, we have both the complex range of the street scene, but also the huge tonal difference between that and the fireworks. The street scene is already far beyond the practical tonal range of the sensor, so it was shot as an HDR, holding both the highlights and the shadows, and gave a nice glow in the sky. The plume of the fireworks was shot separately as a single capture, and stripped into the street scene. The camera was not moved between captures. It’s tricky, but doable.

Figure 9.
This image is a combination of HDR and a layered secondary file.
This maintained Detail in both the highlights and the shadows while holding midtone body.
CRAZINESS AND BLASPHEMY
Common knowledge is that digitally, you can’t shoot at night. You will have problems with noise. While I think this is true if you don’t follow the rules, if you are careful, you can get away with a lot. The key to clean files is proper exposure. There’s a saying “Expose to the Right”, which means make sure that your histogram has information extending all the way to the right end of your histogram, without clipping. Never use your LCD to judge your exposure! Your histogram is your most reliable means of judging your exposure. If you properly expose your image, usually noise will not be a problem, especially with newer cameras. Often people are thrown off with night histograms because many night images will be very low key, and much of the information will be farther down the scale. The key is to expose until the right end is very close or touches the right end. Below is a histogram from an image that I’ll show in a minute.
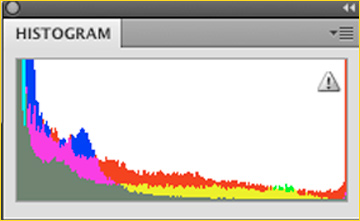
Figure 10. Histogram from a night image.
Note the profound left shift in the information. Even so, you must keep your histogram to the right, without clipping.
Note that there is some red clipping at the far right. There is a lot of red in this image and there are some pure whites.
Areas that will show as clipping, but are appropriate. This is the image for my last figure. You’ll see what I mean about the reds.
One problem with HDR is how it deals with movement. Because you’re shooting several exposures, it tends to give a staccato look to the areas that are moving. I’ve found that this is true with shorter exposures, but with long exposures, say, over a second, all the motion blends together, giving a smooth look. Remember though, that at night, where your exposures will be inherently long, your contrast range will also be long. This is where HDR is very valuable. In this image, I’ve been able to have smoothness in the moving areas (water) while maintaining a desirable tonal range. Don’t forget, that when you are working in such extremes, you usually will need to work on the image to achieve what you want. In this image, the area above the pier was almost a fluorescent orange and needed to be brought down. I also always do some burning to steer where I want the eye to go.
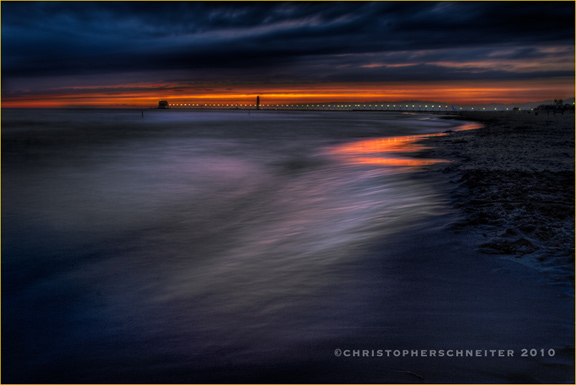
Figure 11.
A long exposure HDR with controlled highlights. Be sure to control your tones!
All of this playing with light and exposure has led me to an area out on the fringe of my field. Recently, I was asked to be a photographer at the Electric Forest Music Festival in Michigan. I wasn’t asked to photograph the musicians, but rather, they wanted me to do my own photography. At these festivals, there is a lot of activity at night and a lot to see and hear. The following image was done by combining light sources. I just used my popup flash (on manual) with an exposure that was long enough to balance with the Hula Hoops. I believe the shutter speed was about 1 second. This exposed the hoopers properly, and froze their motion, while burning in the Hoops and movement making for a joyous image.
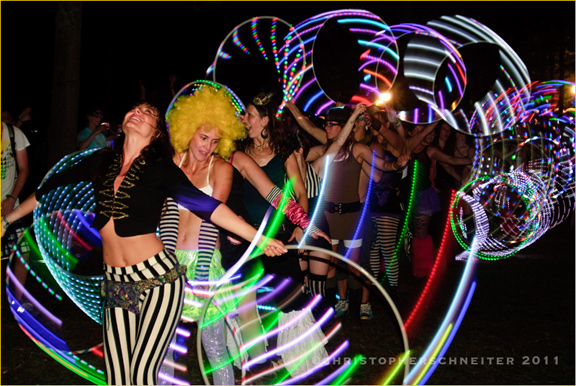
Figure 12.
Mixing light sources, in this case Flash and Hula Hoops, can be an effective way of working,
freezing motion with the flash, and showing blur with the continuous source.
And finally, another image. It’s the one from the Histogram above. This image is the culmination of long exposures, mixing light sources and tonal control. It has pure blacks and pure whites, out of gamut colors, and movement. Shooting using long exposure can be very stimulating, but you have to follow the rules. Use your Histogram to judge your exposure, never judge with your LCD, Control your tonal range and colors, and use your tools to make the viewers eye go where you want it to go.

Figure 13. Crescendo.
This is where I’ve gone with long exposures.
As I said in my last articleUsing HDR for Fine Black and White all of this experimentation has lead me also to very large output. I am presently experimenting with these techniques with film, which I’ll scan and do huge output. The subject of an upcoming article.
December, 2011
© Christopher Schneiter 2011
www.christopherschneiter.com
[email protected]
www.fireflyphotoworkshops.com


Elevate Your Vision


Read this story and all the best stories on The Luminous Landscape
The author has made this story available to Luminous Landscape members only. Upgrade to get instant access to this story and other benefits available only to members.
Why choose us?
Luminous-Landscape is a membership site. Our website contains over 5300 articles on almost every topic, camera, lens and printer you can imagine. Our membership model is simple, just $2 a month ($24.00 USD a year). This $24 gains you access to a wealth of information including all our past and future video tutorials on such topics as Lightroom, Capture One, Printing, file management and dozens of interviews and travel videos.
- New Articles every few days
- All original content found nowhere else on the web
- No Pop Up Google Sense ads – Our advertisers are photo related
- Download/stream video to any device
- NEW videos monthly
- Top well-known photographer contributors
- Posts from industry leaders
- Speciality Photography Workshops
- Mobile device scalable
- Exclusive video interviews
- Special vendor offers for members
- Hands On Product reviews
- FREE – User Forum. One of the most read user forums on the internet
- Access to our community Buy and Sell pages; for members only.
You may also like


