


Practical insights and notes gained from the field
What do you bring on a shoot when you only have three days? How do you approach photographing places that have been captured countless times, yet are brand new to you?
For me, it starts with asking questions: What do I want to see? What time should we go there? What do I want to have with me to express what I might see?
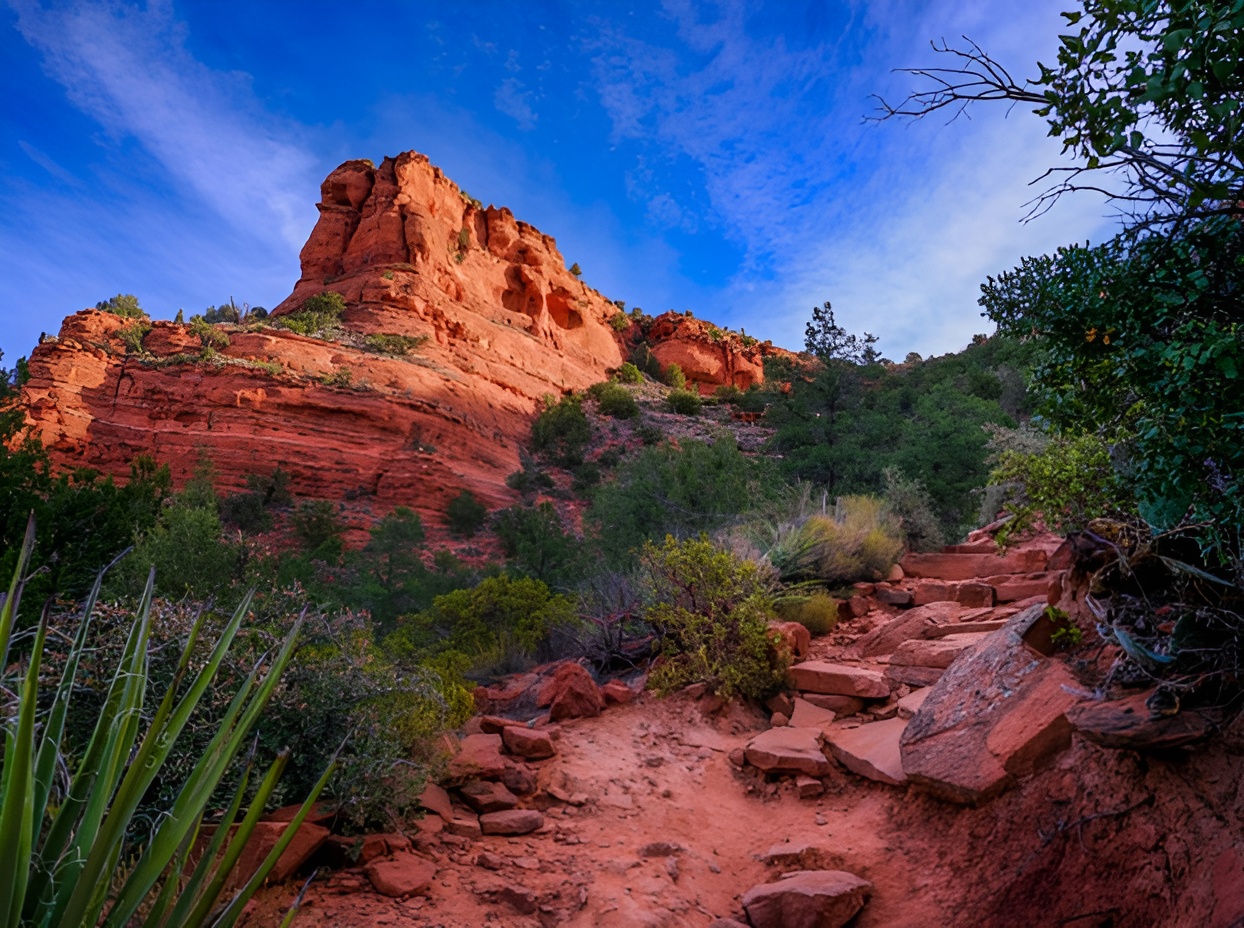
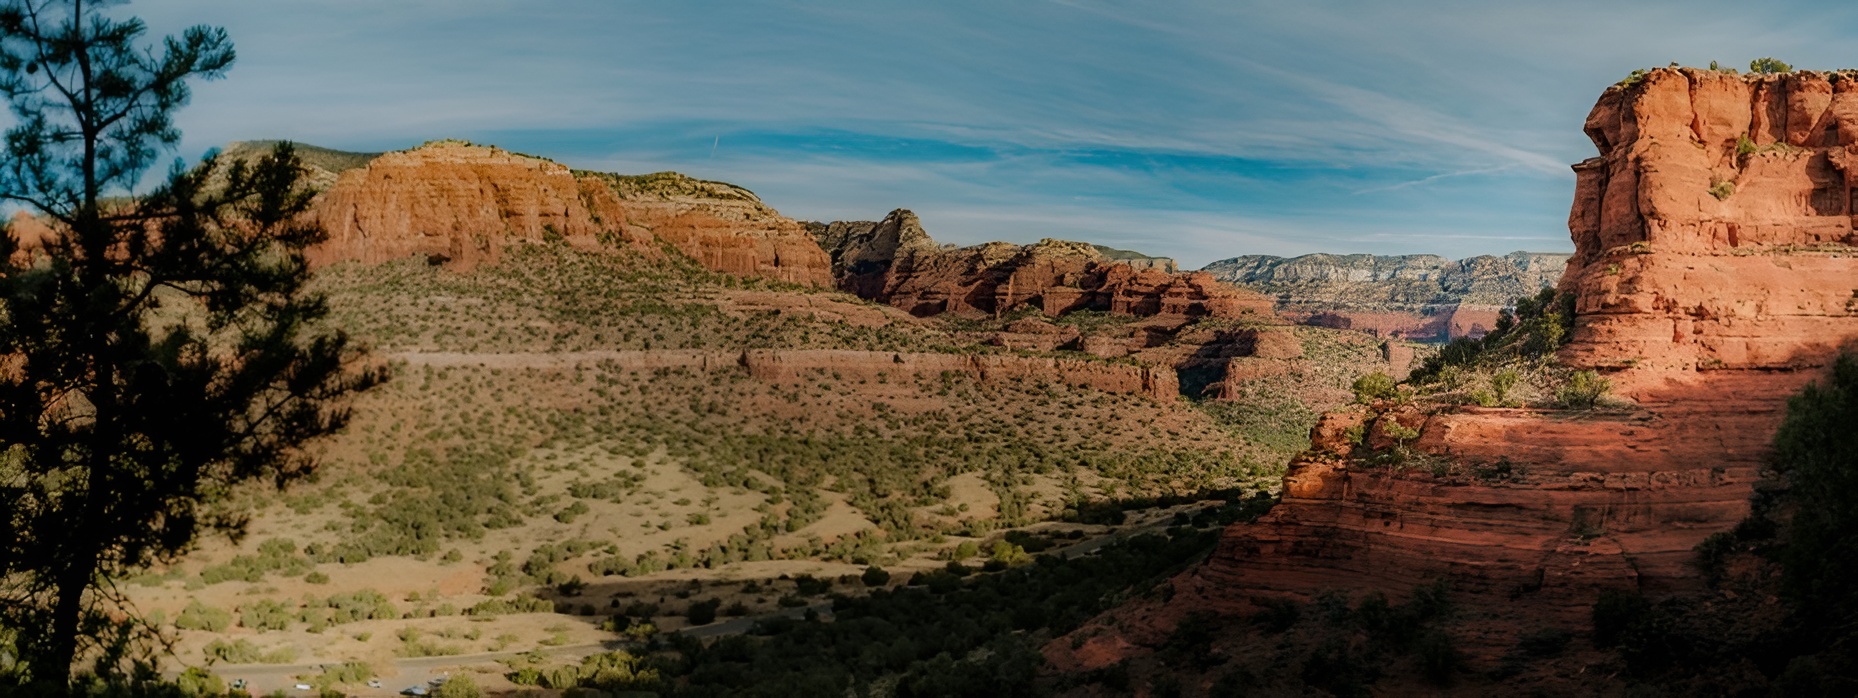
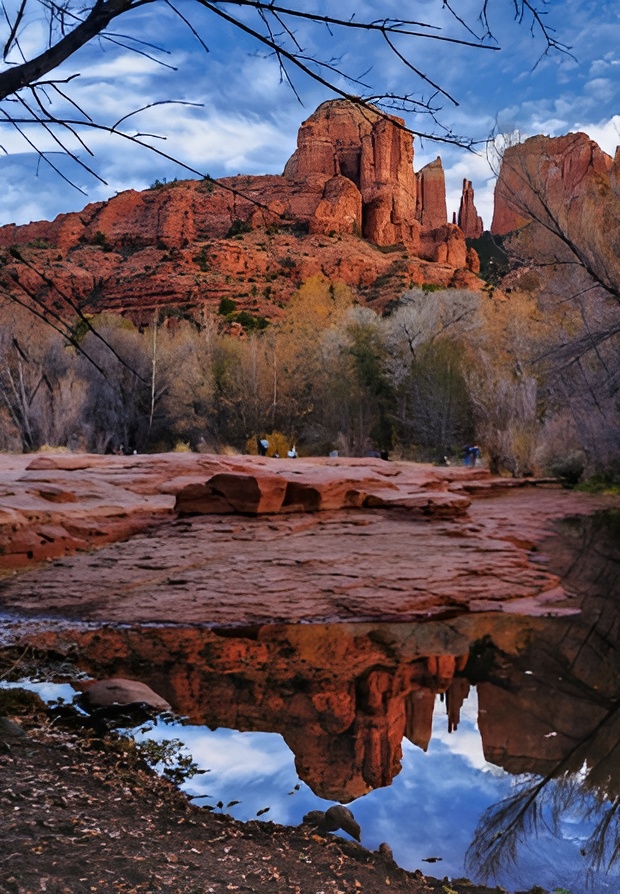
Shooting in Sedona’s iconic red rock country, I focused less on recreating familiar shots and more on finding my perspective. I let the camera become a tool for exploration—helping me capture not just what I saw, but how it felt to experience these landscapes for the first time.
Gear Selection and Management
The Lens Lineup
Fujifilm GF 30mm f/3.5
The workhorse of the trip. Perfect for Sedona’s open vistas and the Grand Canyon’s sprawling expanse. It delivered tack-sharp images that held up even with heavy cropping. It also delivered wonderful panoramas.
Canon 20mm Tilt-Shift Adapted for the GFX100S
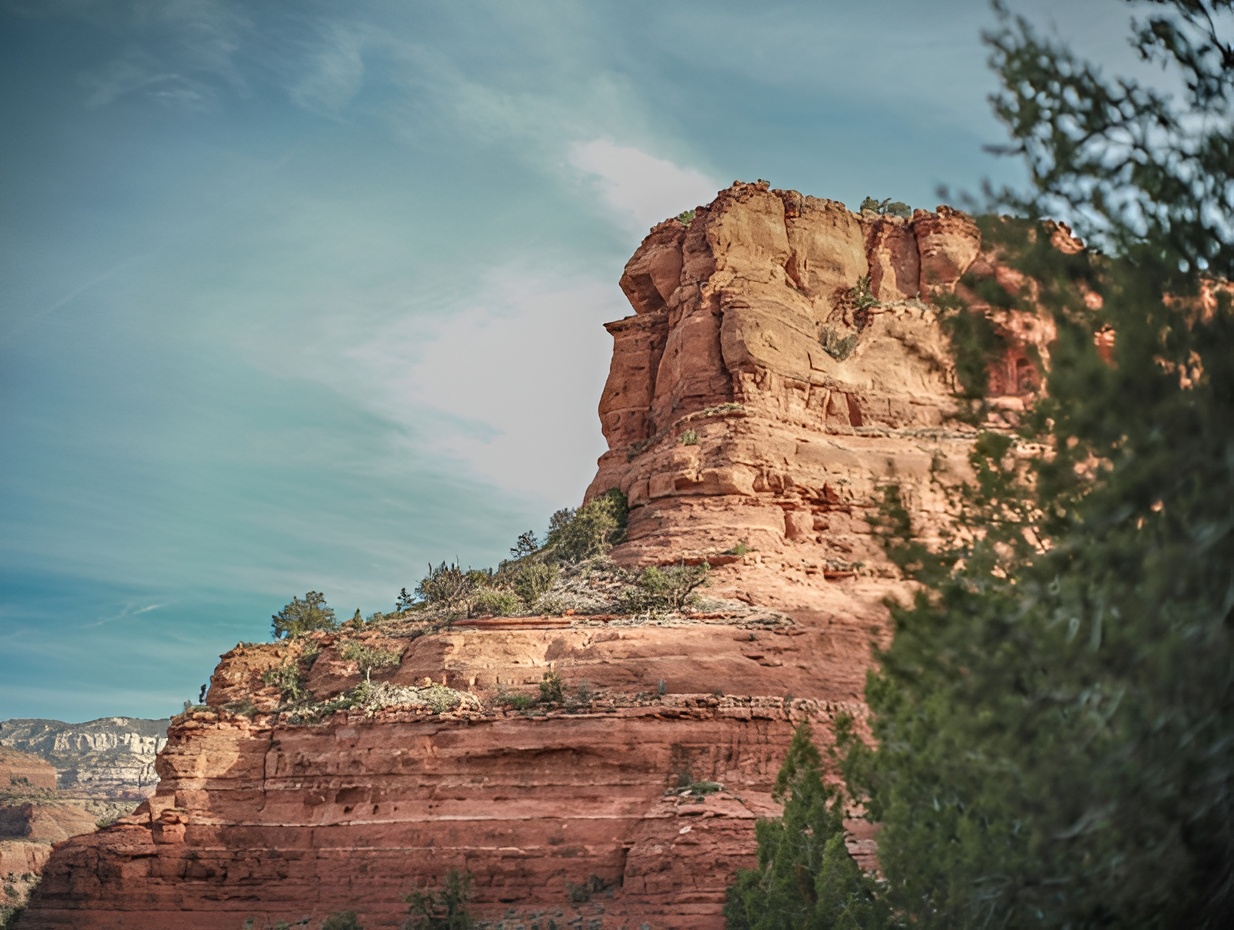
This lens let me control perspective with precision. Ideal for Sedona’s angular formations, but its slow, deliberate process wasn’t always practical. From my days shooting music videos, I’ve always loved playing with shifting focus. In Arizona, I couldn’t resist experimenting again, letting the desert scenery become a little “shifty.”
Pentax 50mm f/1.4
A vintage gem. Wide open, it creates a dreamy, painterly look. Cheap. Not sharp, not practical, but undeniably fun. I attached it to the Fuji GFX 100S with an m42 adapter. A literal “screwy” manual lens because you physically have to screw the lens on to the lens mount. I paired it with bracketing panoramas for a creative twist. I shot mainly at f/8-11 for sharpness and f/2 for subject isolation. The lens goes from 1.8-16. I was surprised at how well it performed with panoramas. The charm was there, but the sharpness?
Fujifilm GFX 80mm
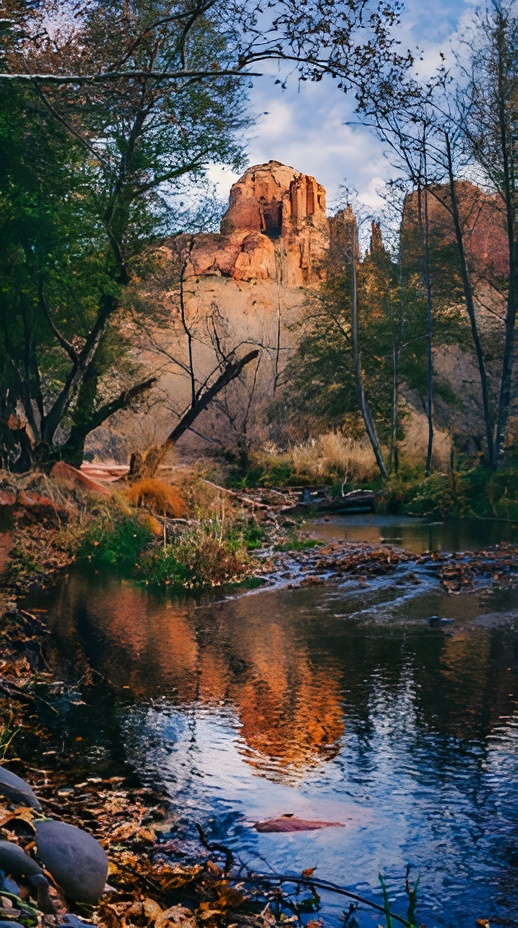
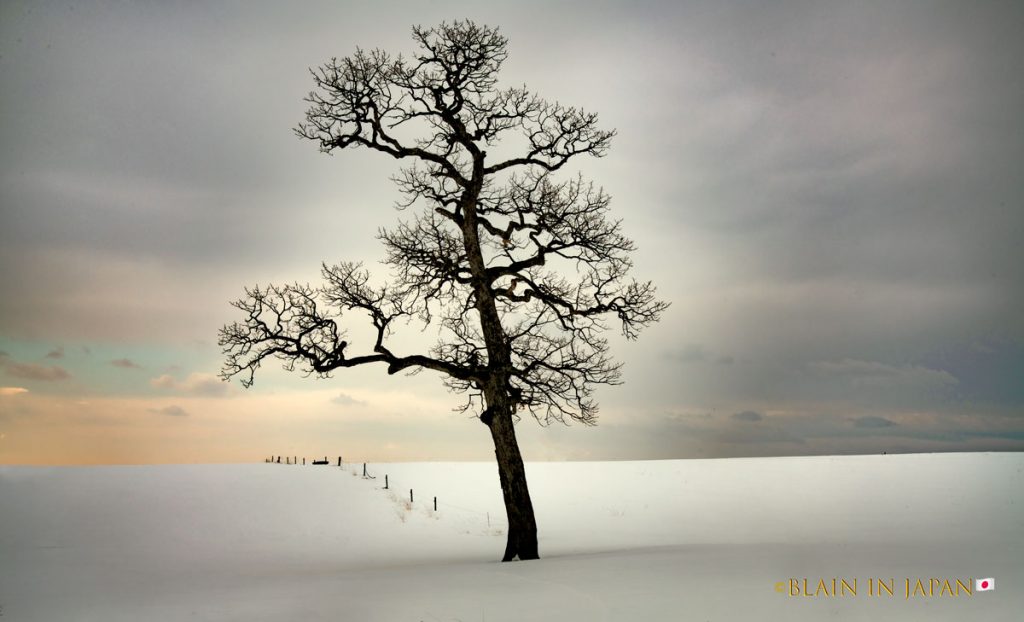
This is a favorite lens. It was great when needing a little longer lens for isolation. It delivered nice panoramas when stitched together and seemed to compress/stack elements in a pleasing way. The sharpness is beautiful, unless you wanted something a little different….
Moment 10% Softening Filter
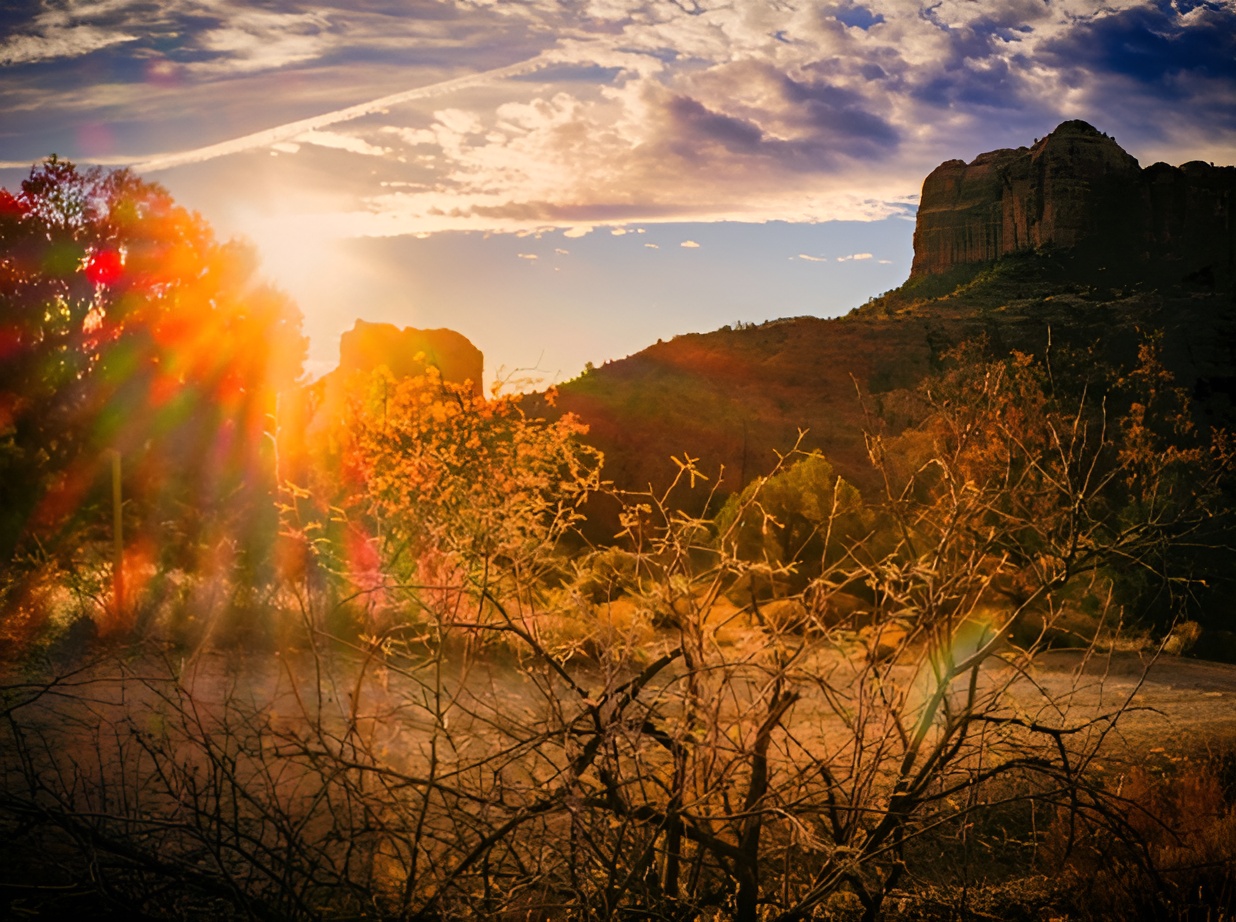
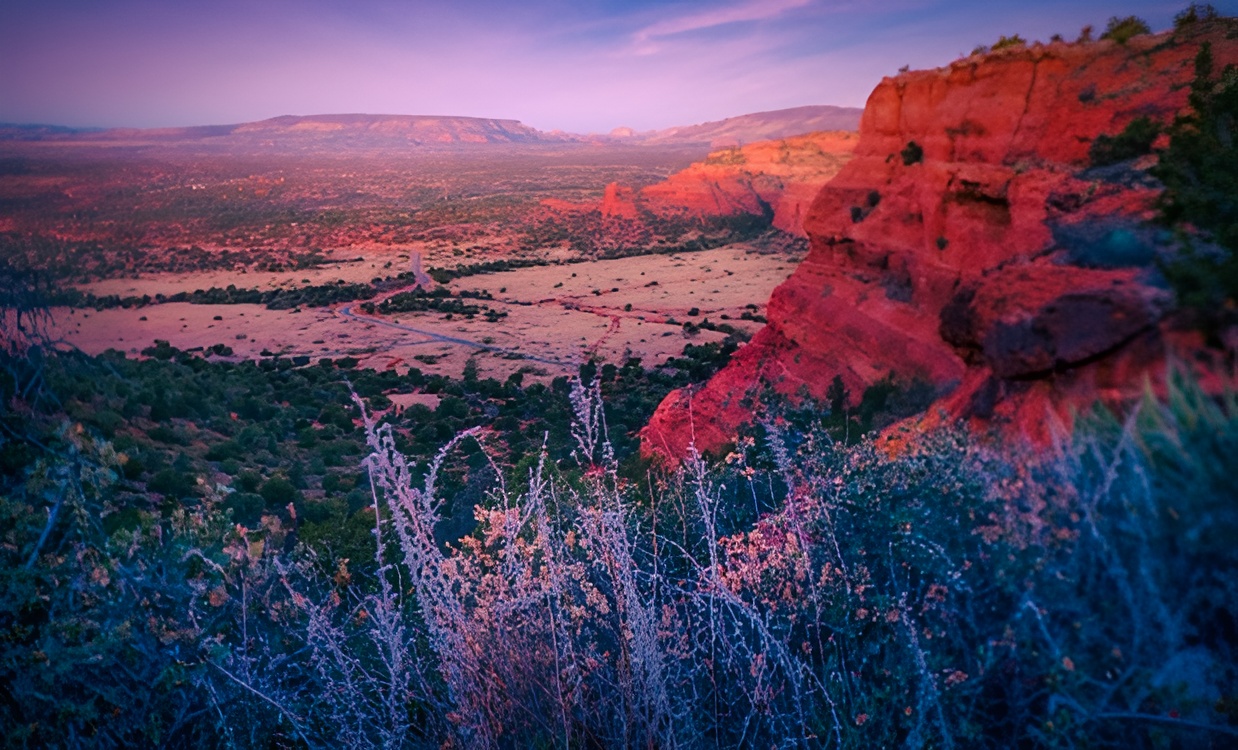
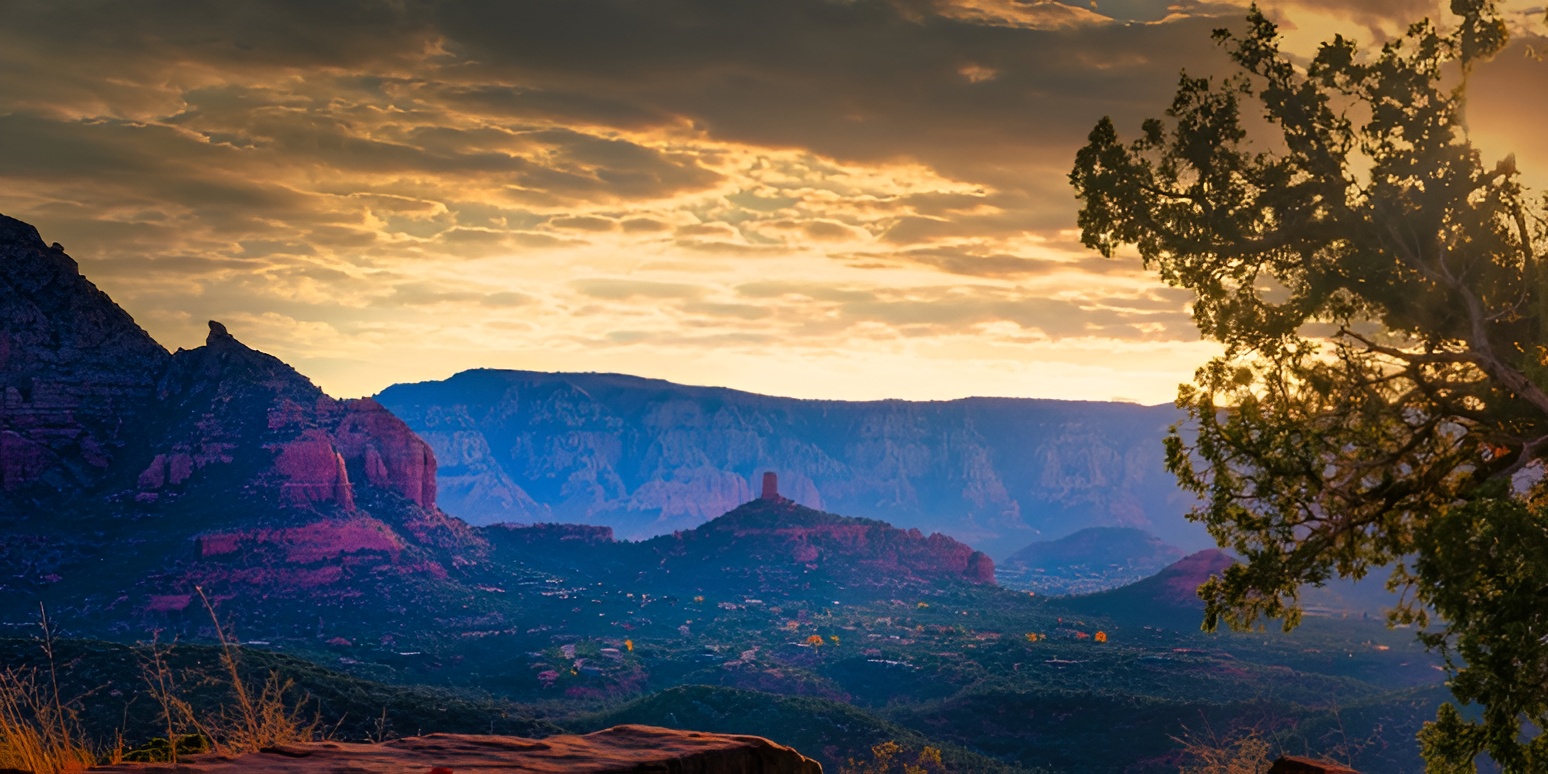
A surprise hit during a Sedona sunrise. It added a soft, ethereal glow to the peaks. Not an everyday tool, I got it for portraiture but I liked what it did with this specific scene. Using the 80mm GFX, it added a touch of halation to the light streaming onto a distant mountain. The effect softened the glow while keeping sharpness intact everywhere else.
Techniques That Shaped the Journey
Bracketing Panoramas For landscapes
Arizona is too vast for one frame, I used overlapping shots with bracketing at +2/-2 stops. The result? Panoramas that captured the full dynamic range of light and shadow. I should have used the electronic shutter instead of the mechanical one which would have avoided motion blur. The middle overexposed shots ended up unusable because of the shutter vibration—a simple mistake, but a lesson learned.
Long Exposures
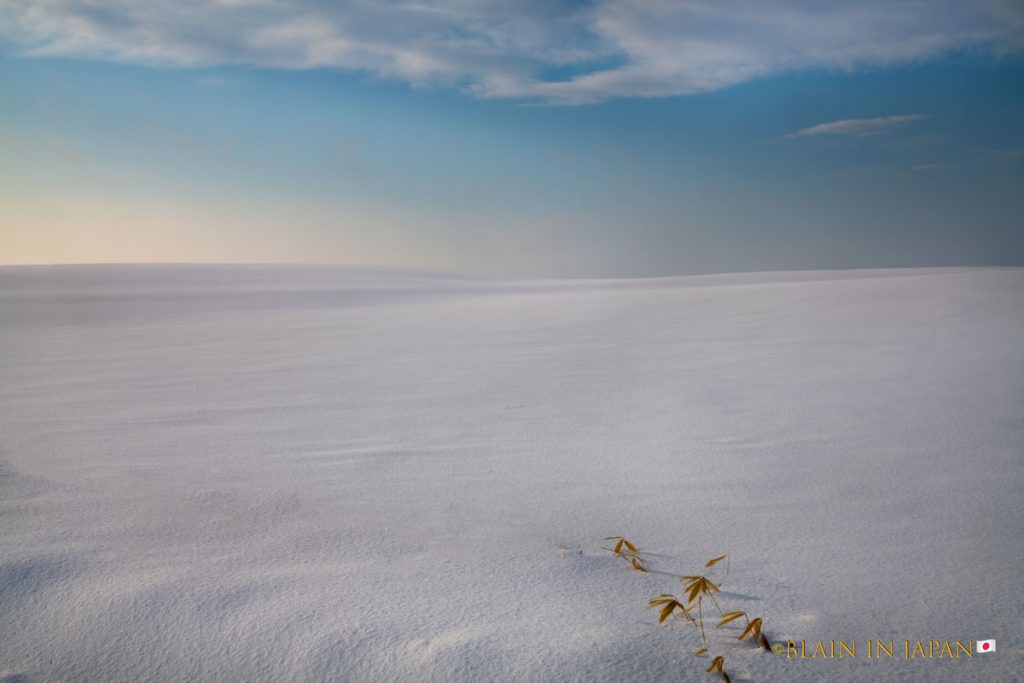
Mornings and evenings were perfect for 30+ second exposures, revealing details invisible to the eye—subtle light, faint stars, and rich textures. I debated about bringing a star mapping head but that wasn’t for this trip – needed to keep “regular hours” (Next time!)
Ground Game Over Aerial Views
I had my drone the DJI Mavic 3 Pro-Cine ready, I carried it but it stayed packed. Perhaps it was the vortices or the sacred feeling of the place, but staying grounded felt like the peaceful choice.
Vintage Lens
Pairing vintage lenses with the GFX100S wasn’t just a lesson in limitations—it was a chance to see the spectrum between classic character and modern sharpness. Rainbow flairs…sure! Sometimes the surprises are worth it, and other times, it’s clear why modern optics steal the show when fidelity and clarity is the priority.
Embracing “bad photography” can be freeing—letting go of perfection often reveals unexpected magic and fun. The “hit-rate” was low but the fun of the challenge was rewarding.
Gear Challenges and Lessons
The Bag
My Maxpedition backpack duffel isn’t made for photography but is an all-purpose, incognito, a backpack with a large opening main opening with dividers and pockets on the side. Wrapping lenses in Domke 19×19″ lens wraps worked but slowed me down as I didn’t create labels for the wraps. Next time: maybe a Peak Design cube system?
The Tripod
K&F Concept D225C2 Carbon Fiber Tripod with Arca-Type Ball Head and Monopod
Lightweight tripod with the functions you need just under 100.00….but I wanted more. It was a little low to set up, too short for my height, and I was a little worried about the sturdiness of it. I considered returning it but for what it is – it’s not bad for the price.
Custom Settings and Lessons Learned
Film Simulation Recipes
Creating custom film simulations is one of the most enjoyable aspects of photography with the GFX100S. It was the first time I’ve played around with them. When setting up custom film simulations, I treated them like creating a LUT (Look Up Table) for a TV show or commercial. I began by dialing in a specific look tailored to the scene, then refined it further during post-processing to achieve the desired aesthetic.
These recipes were a jumping-off point—a way to experiment with looks, colors, and moods tailored to your vision. Whether you’re chasing bold vibrancy or subtle storytelling, these settings let you play with possibilities.
Also, for quick shareable images on the go, it’s pretty easy to dial in a base look with these recipes and then send it to your phone over the wireless connection.
See Footnote at End for Recipes. The Raw Truth
A crucial lesson learned: when setting up custom profiles (C1-C6), each requires individual configuration—including RAW settings. At one point, I accidentally locked myself into JPEG-only captures mid-shoot. Let me tell you, there’s nothing like that sinking “Oh no” moment to remind you to double-check your settings.
While the 50MB JPEGs were workable, it reinforced the importance of double-checking settings especially with any new camera system.
Focus and Exposure Techniques
Focus peaking made all the difference in Sedona’s red rock terrain. Red peaking blended into the landscape’s warm tones, but blue stood out, offering precise contrast for sharp focus. A small adjustment, but the blue peaking was easier to keep “the sharps.”
Pro Tip: Experimenting with focus peaking colors can make a big difference in tricky environments.
Location-Specific Insights
Sedona Strategy
- Early mornings are ESSENTIAL to avoid crowds and capture the best light
- Research locations thoroughly using Google Earth for aerial views, AllTrails for hiking routes, and Reddit for local tips. Got more scouting tips? Share them with us at [email protected].
- Here’s a tip: Camp outside Flagstaff for easy Grand Canyon access, or stay in town. Flagstaff’s pizza and beer scene is surprisingly good—a little reward after a day of adventure. It’s the kind of place that feels like a gem of a place for bougie explorers and tourists.
- Walking sticks, water, and proper hiking gear are probably more important than camera equipment. Probably.
Grand Canyon Approach
- The crowds at the usual spots can feel overwhelming, but they also create a shared experience that connects you to the place. For the best locations and a bit of solitude, consider working with a guide who knows the quieter, optimal shooting spots.
- Plan for extreme depth of field challenges and expanse
- Prepare for rapid weather and lighting changes
- Factor in significant hiking time to reach prime viewpoints, not all are uphill!
Post-Processing Workflow
- Initial quality control check on location
- Voice memo documentation for keepers
- Converting JPEGs to TIFFS for expanded editing latitude when not shooting RAW
Workflow Insight: The voice memo function proved great for recording impressions and technical details at the end of a shooting day. Consider incorporating this into your workflow for more efficient culling later. If using Lightroom, while in the Library select “text” and then search for “.wav” and all the voice memos will pop up.
Looking Forward
Every time we head into the field, we’re not just taking pictures—we’re fine-tuning our craft, our vision, our expression. The gear, the light, the landscape—each moment in the field shapes how we see and create. Stay curious, adapt to the unexpected, get there early and be beautiful —make each image your personal expression
Have questions about shooting in Sedona or the Grand Canyon? Planning your own photo expedition? Have your own approach? How could I have done better? Reach out to us at [email protected] – we’re always eager to hear insights and hear about your experiences.
Technical Sidebar: Recommended “Best Western” Base Recipes
It’d be great to see some of your recipes for the GFX! ([email protected])
C1: Velvia for Vibrant Landscapes
- Use When: Capturing Sedona’s bright red rocks, blue skies, and colorful sunsets.
- Look: Bold, saturated colors with high contrast for maximum vibrancy.
- Settings:
- Film Simulation: Velvia/Vivid
- Dynamic Range: DR200%
- Highlight Tone: +1
- Shadow Tone: +2
- Color: +3
- Sharpness: +1
- Grain Effect: Off
- White Balance: Daylight, +2 Red, -1 Blue
C2: Classic Chrome for Cinematic Desert Scenes
- Use When: Shooting moody, subdued landscapes or portraits with a vintage feel.
- Look: Muted tones and soft contrast for a timeless cinematic aesthetic.
- Settings:
- Film Simulation: Classic Chrome
- Dynamic Range: DR100%
- Highlight Tone: 0
- Shadow Tone: +1
- Color: -1
- Sharpness: +1
- Grain Effect: Weak
- White Balance: Shade, -1 Red, +2 Blue
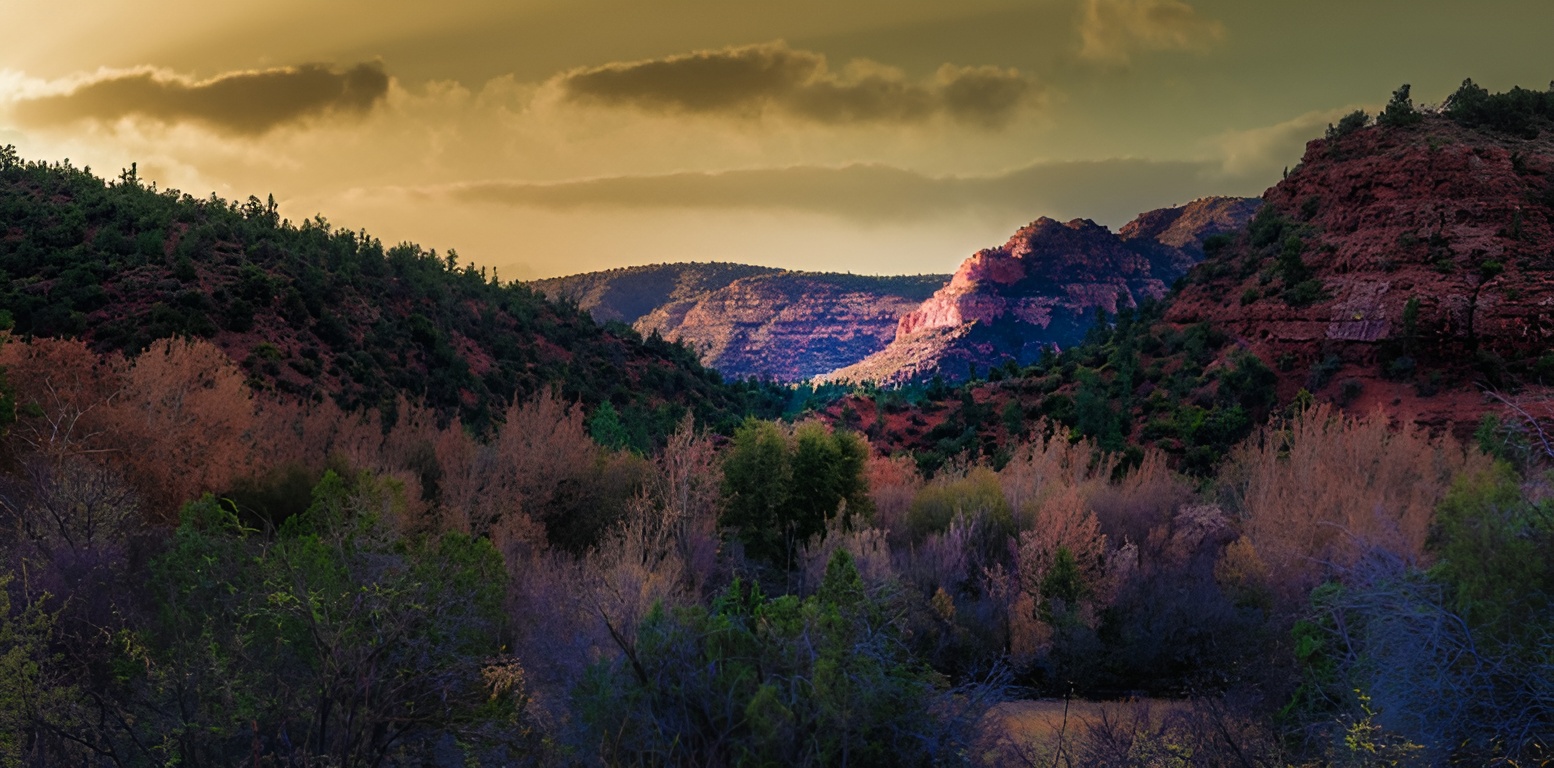
C3: Eterna for Soft Cinematic Shots
- Use When: Storytelling, golden hour scenes, or when subtle tones are preferred.
- Look: Low contrast, desaturated colors for a polished, cinematic vibe.
- Settings:
- Film Simulation: Eterna
- Dynamic Range: DR400%
- Highlight Tone: -2
- Shadow Tone: -1
- Color: -2
- Sharpness: 0
- Grain Effect: Weak
- White Balance: Daylight, +1 Red, -2 Blue
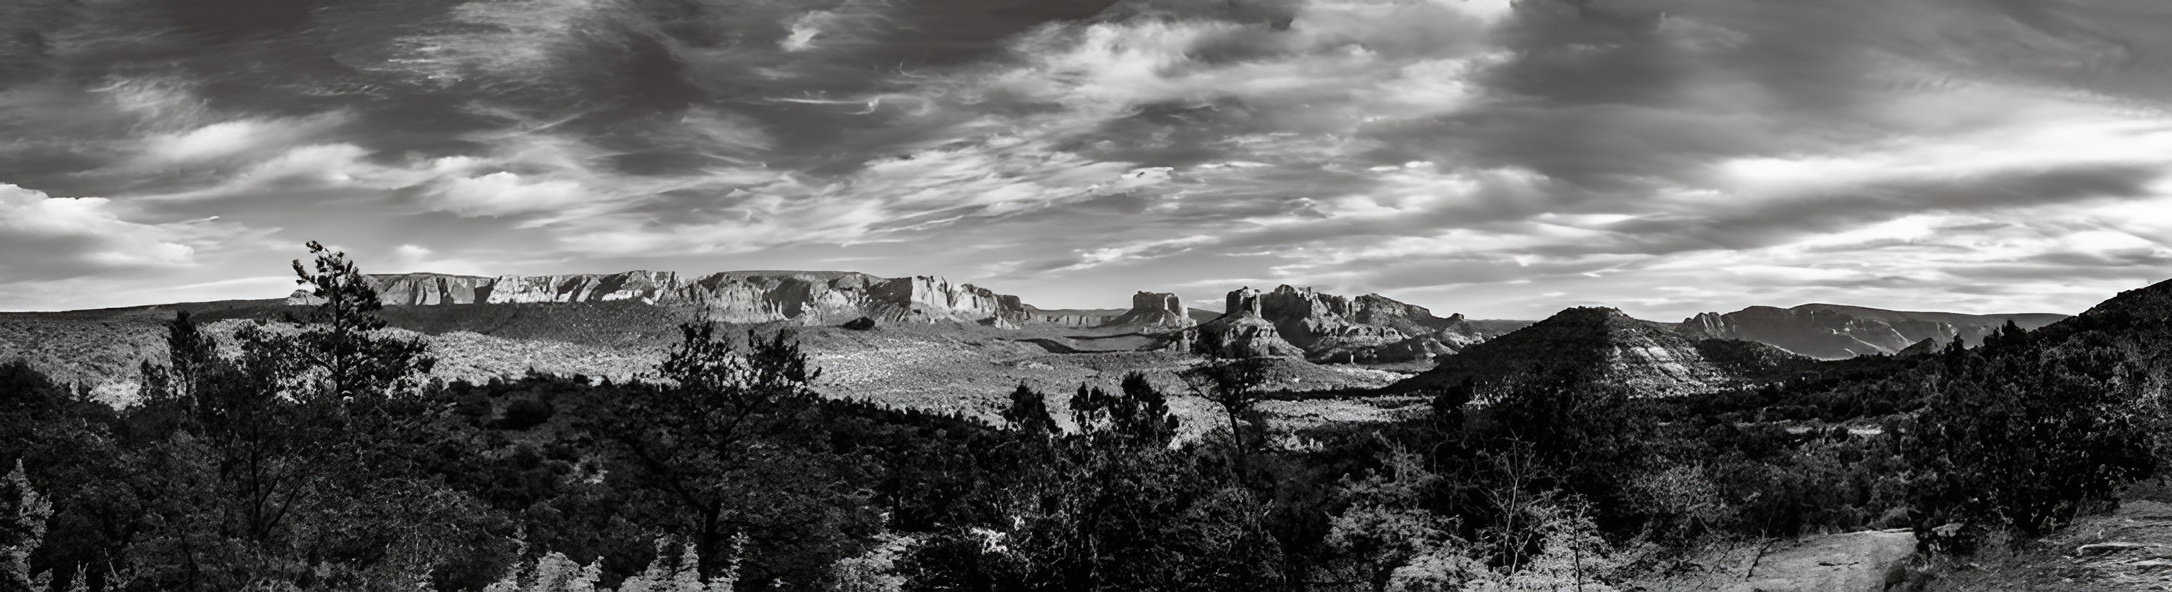
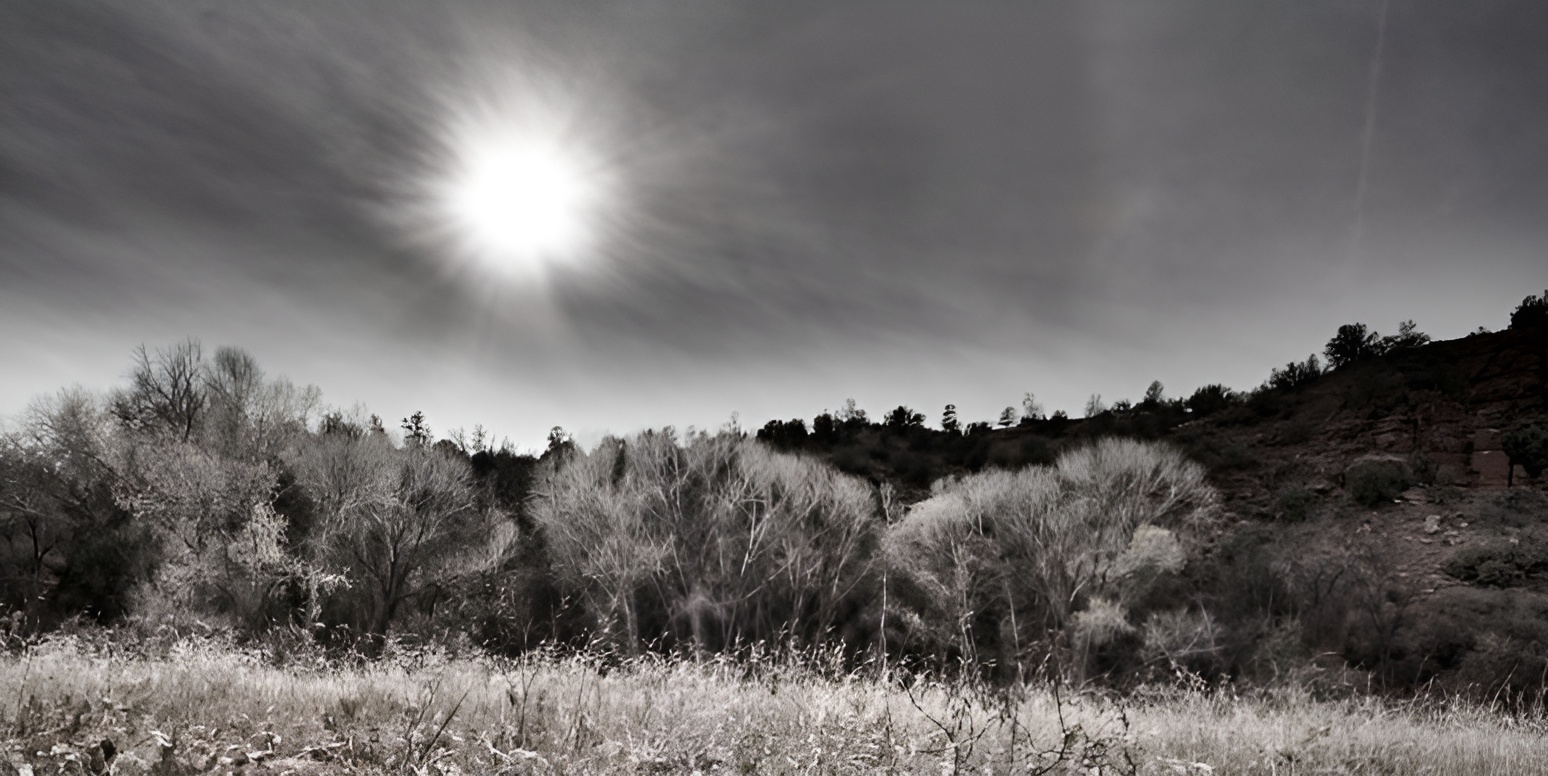
C4: Acros for Black & White Drama
- Use When: Highlighting textures, shadows, and dramatic contrasts in Sedona’s rocky terrain.
- Look: Bold monochrome with deep blacks and sharp details.
- Settings:
- Film Simulation: Acros (Red Filter)
- Dynamic Range: DR200%
- Highlight Tone: +1
- Shadow Tone: +2
- Sharpness: +1
- Grain Effect: Strong
- White Balance: Auto
C5: Provia for Balanced Everyday Shots
- Use When: Capturing a true-to-life representation of Sedona’s colors and light.
- Look: Neutral, well-balanced tones suitable for all-around use.
- Settings:
- Film Simulation: Provia/Standard
- Dynamic Range: DR200%
- Highlight Tone: 0
- Shadow Tone: +1
- Color: +1
- Sharpness: 0
- Grain Effect: Off
- White Balance: Daylight
C6: Eterna Cinematic for Subdued Storytelling
- Use When: Creating an emotional, dreamlike look during soft or harsh light.
- Look: Flat, filmic colors with a slight softness for storytelling or moody shots.
- Settings:
- Film Simulation: Eterna
- Dynamic Range: DR400%
- Highlight Tone: -2
- Shadow Tone: -1
- Color: -2
- Sharpness: 0
- Grain Effect: Weak
- White Balance: Daylight, +1 Red, -2 Blue
- Clarity: -1

Elevate Your Vision


Read this story and all the best stories on The Luminous Landscape
The author has made this story available to Luminous Landscape members only. Upgrade to get instant access to this story and other benefits available only to members.
Why choose us?
Luminous-Landscape is a membership site. Our website contains over 5300 articles on almost every topic, camera, lens and printer you can imagine. Our membership model is simple, just $2 a month ($24.00 USD a year). This $24 gains you access to a wealth of information including all our past and future video tutorials on such topics as Lightroom, Capture One, Printing, file management and dozens of interviews and travel videos.
- New Articles every few days
- All original content found nowhere else on the web
- No Pop Up Google Sense ads – Our advertisers are photo related
- Download/stream video to any device
- NEW videos monthly
- Top well-known photographer contributors
- Posts from industry leaders
- Speciality Photography Workshops
- Mobile device scalable
- Exclusive video interviews
- Special vendor offers for members
- Hands On Product reviews
- FREE – User Forum. One of the most read user forums on the internet
- Access to our community Buy and Sell pages; for members only.
You may also like