


One of the questions that I’m asked most often, both at my seminars, and by e-mail, is – what software tools do I use; particularly for noise reduction and sharpening. And, how do I do my B&W conversions.
Over the past several years I have tried many of the programs and plug-ins to come to market, on both Mac and PC platforms. Below are brief looks at the ones that are my current preferred choices. The ones that I use every day, and that I count on when producing my commercial images and fine-art display prints.
Are these the best programs available of their type? Possibly. Clearly I can’t have tried everything, and even if I had, personal bias and needs play a role in making a statement like this. I should also note that I know personally most of the authors of these programs, though this played no role whatsoever in my selection or mention here.
Please note that these are not reviews; simply descriptions of what I find to be the current best-of-breed in each category. Also, in the case of two of the programs, new versions have just come out this week (early Feb, 2005). Each of these plug-ins are available for both Windows XP as well as Mac OSX.
____________________________________________________________
Noise Ninja
Digital cameras keep getting better and better. In terms of high ISO noise performance, on many of the latest generation cameras ISO 400 is almost as good as ISO 100, and even then shows less noise than film ever did at those speeds. Many photographers now find themselves routinely shooting at ISO 800, 1600 and even 3200 on a regular basis. But, as good as contemporary cameras are at these speeds, theyarerelatively noisy, and you’ll want to clean up these files.
Noise Ninjais one of the newer kids on the block, but in the couple of years that it’s been available it has gone through constant upgrades. A new plug-in version has been in public beta for some months during late 2004, and in Feb 2005 has started shipping. As good as Noise Ninja was, I am always frustrated by image processing utilities that are stand alone programs. Having to switch back and forth between programs, loading and unloading files, can slow one down. Plug-ins simply make the workflow that much more straightforward.
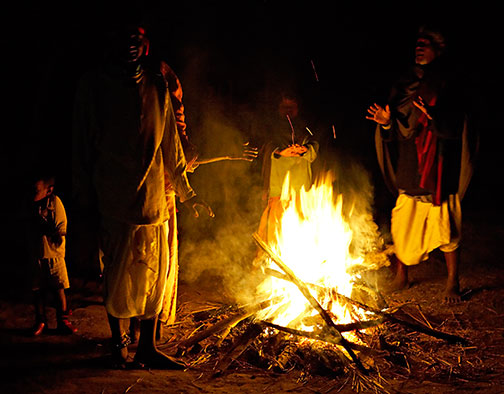
Tribal Bonfire. Bangladesh. January, 2005
Canon 1Ds Mark II with 24-70mm f/2.8L lens @ ISO 3200
Noise Ninja Plug-in used
In addition to now being available as a plug-in, (a stand-alone version is also still available), Noise Ninja has seen a number of strong improvements, both in functionality and in image quality. The new version appears to be faster, and also does a much better job of auto-profiling.
Noise Ninja can be downloaded for a free trial. A fullPro Bundlelicense is $79.95, and includes both the stand-alone and the plug-in version. There are less expensive versions available, but at the price, why not get the best? Current owners can upgrade for just $10.
Simply put, Noise Ninja is the current state-of-the-art in noise reduction software for digital cameras.
____________________________________________________________
Convert To B&W Pro
For a long time it seemed that B&W photography was on the wane. But in recent years it’s made a strong come-back, and many photographers are newly discovering the joys of printing monochrome images with their inkjet printers.
Of course very few people are still shooting B&W film, but instead are finding that by shooting digital they are able to use image processing tools to convert their colour images into stunning B&W, including all of the filter controls that B&W workers used to use in the field, but which now can be done better after the fact in Photoshop.
There are a great many free ways to convert your image to B&W. The simplest method is to useImage / Mode / Grayscale. But this is also the least satisfactory in terms of image quality and versatility of output. A much better technique is to useChannel Mixer. But Channel Mixer is slow and awkward to use, particularly when it comes to balancing the representation in monochrome of colour values.
Convert to B&W Pro(CTBWP from now on) is a Photoshop plug-in that actually makes the conversion process a joy. You are provided with a variable size preview window, (only on the new Mac version, regrettably), and a full set of tools for adjusting the image to just the way you want it to appear. And for those photographers coming from a background in black and white film processing and printing, the controls are even labeled with their analogue equivalents, right down to being able to choosemulti-gradecontrast.
For me one of the most useful capabilities is that of being able to adjust the colour channels to get just the tonal characteristics that best fit the image. This is equivalent to shooting B&W film, and standing in the field with a full set of colour filters, to provide just the tonality separation that you’re looking for. But, of course, now you can do it at the comfort of your desk, change your mind as many times as you like, and do it all at a considered pace.
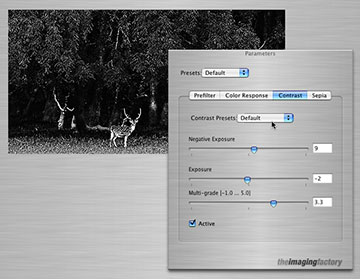
The animation below shows what moving a slider in CTBWP can do to alter the tonal characteristics of a colour image during the process of converting it to B&W.
At $99 CTBWP is not inexpensive, but you can download a full-featured version for a free 30 day trial, so what have you go to loose?
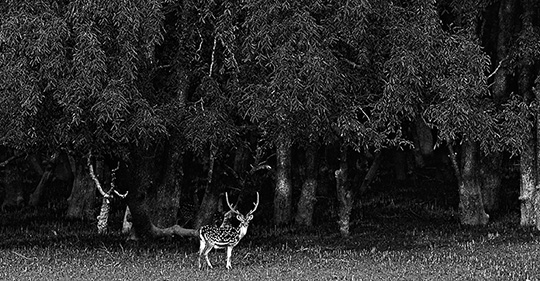
Mangrove Forest Deer. Bangladesh. January, 2005
Canon 20D with 300mm f/2.8L IS lens at ISO 400
Converted to B&W with CTBWP
____________________________________________________________
Photokit Sharpener
Sharpening is the single most misunderstood aspect of digital image processing. When I look at photographer’s prints, especially those relatively new to Photoshop, the most common technical failing is that the prints are usually either seriously oversharpened or undersharpened.
Part of the problem may lie in the fact that digital sharpening has nothing to do with sharpness per se. The wordsharpeningis used, but it really has to do with edge contrast (accutance), not resolution.
The most common tool for doing so-called sharpening is theUnsharp Masktool in Photoshop. The problem with it is that it is difficult to use well, because the settings aren’t intuitive, and they vary considerably depending on the image and its intended use.
There are also a great many variations on using the USM tool, including sharpening only theluminancechannel, usingHigh Passsharpening, and the like. All of these work, and some work very well, but they each require skill and experience to use effectively.
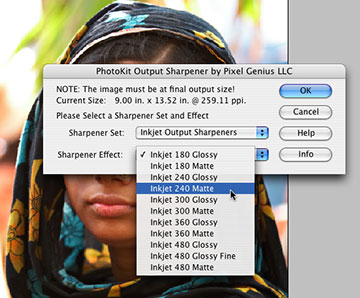
There’s a better way, and it’s calledPhotokit Sharpener. Designed and written by six of the world’s leading Photoshop educators, Photokit Sharpener is a powerful set of image sharpening tools designed to approach the task appropriately from both a workflow and an image quality perspective.
The program breaks sharpening down into three stages;Input Sharpening,Creative Sharpening, andOutput Sharpening. Regard is given to the type of original image one is working with, and also the file’s intended destination. All sharpening is done in Layers within Photoshop, and each adjustment done is user configurable and changeable, even after the fact.
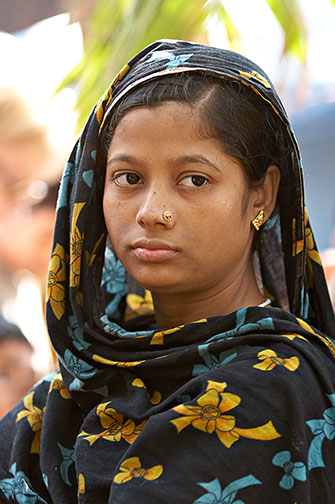
Girl at Pottery Village. Bangladesh. January, 2005
Canon 20D with 70-300mm f/5.6 DO @ ISO 400
Input and Output sharpened with Photokit Sharpener
In my opinion, the $99 thatPixel Geniusis asking for Photokit Sharpener is the best hundred bucks that you’ll ever spend when it comes to improving the quality of your prints. Nothing else that I’ve yet seen even comes close.
By the way, if you’re a long-time user of Photokit Sharpener, please note that it was upgraded in late summer, 2004 to version 1.2.2, and a free update is available for downloading.


Elevate Your Vision


Read this story and all the best stories on The Luminous Landscape
The author has made this story available to Luminous Landscape members only. Upgrade to get instant access to this story and other benefits available only to members.
Why choose us?
Luminous-Landscape is a membership site. Our website contains over 5300 articles on almost every topic, camera, lens and printer you can imagine. Our membership model is simple, just $2 a month ($24.00 USD a year). This $24 gains you access to a wealth of information including all our past and future video tutorials on such topics as Lightroom, Capture One, Printing, file management and dozens of interviews and travel videos.
- New Articles every few days
- All original content found nowhere else on the web
- No Pop Up Google Sense ads – Our advertisers are photo related
- Download/stream video to any device
- NEW videos monthly
- Top well-known photographer contributors
- Posts from industry leaders
- Speciality Photography Workshops
- Mobile device scalable
- Exclusive video interviews
- Special vendor offers for members
- Hands On Product reviews
- FREE – User Forum. One of the most read user forums on the internet
- Access to our community Buy and Sell pages; for members only.
You may also like


