


By Richard Sexton

On a recent trip to the San Francisco Bay Area to deliver a project to my publisher, I traveled down to nearby San Carlos to visit the headquarters of Better Light, the premier manufacturer of scanning backs for large format cameras. When I first contacted Better Light to learn more about their products, I was immediately struck by the candor and accessibility of the company’s founder, Mike Collette. (Let’s face it, there aren’t many digital imaging manufacturers whose technical information line is answered by the guy at the top.) During the course of our conversation I asked where I could actually see a Better Light back expecting to hear about a couple of retail locations or be given the names of some regional sales reps. Instead, Mike said, “If you’re ever in the Bay Area, you’re welcome to come down for a visit. I’ll show you our backs, some work that’s been done with them, and you’re welcome to bring your view camera and photograph with one.” It was an offer too enticing to pass up. My travel plans were cramped, but I made certain that a day trip to San Carlos and Better Light were at the top of the list.
Before I get into the particulars of my Better Light visit, a little background information is in order—Most digital photographers are quite familiar with DSLRs and medium format digital backs. These systems use “one shot” sensors that record an image much like film does. Scanning backs are a different animal altogether. The largest digital sensors currently available are about 36 x 48mm, slightly smaller than the smallest 120 film format–645. The largest DSLR sensors are the size of a frame of 35mm film—24 x 36mm. Due to the cost of sensor manufacture, it’s exceedingly expensive, i. e. impractical, to make sensors any larger than those currently used in medium format backs. For image capture in larger formats and at higher resolution, the scanning back is an ingenious way to circumvent the limitation that a digital sensor comparable in scale to 4×5 film isn’t currently available, and may never be.
A scanning back has a linear sensor consisting of a row of photosites that moves across a rectangular frame. On a Better Light back this frame is 72 x 96mm, 40% smaller than the 96 x 120mm frame of a sheet of 4×5 film. (Another perspective on the scale difference is that a Better Light back has a 1.25 magnification factor relative to 4×5. A 120mm lens would be “normal” for a Better Light back.) Just as a flatbed scanner can scan a piece of film or a print that’s as large as the scan bed by using a sensor (or sensor array) a fraction the size of the bed, a scanning back can effectively emulate a sensor with a size of 72 x 96mm. As for resolution, this depends on the scanning back model. Better Light’s most popular model is the mid-line Super 6K-HS, which has a native maximum resolution of 6000 x 8000 pixels, equivalent to a sensor with 48 million photosites or 48MP. An advantage the 6K-HS back has over a theoretical one shot 48MP sensor is that each photosite on the scanning back captures full RGB color information, whereas an individual photosite of a one shot sensor captures red, green, or blue information, but not all three. True color is interpolated by merging the checkerboard of discrete RGB color information from each photosite. It’s a color system that works at the expense of possible color errors in the smallest resolved detail (color aliasing) and at a loss of acuity (crisp line resolution) due to the anti-aliasing filter that almost all one shot sensors employ. So, for color imaging, the Better Light Super 6K-HS could be considered equivalent to a 144MP sensor because each photosite records full color information.
To summarize, the good news is that image captures can be made with a large sensor area (72 x 96mm) at high resolution (48 million pixels with a 6K-HS) with each photosite recording full color information—no color aliasing and no anti-aliasing filter to soften the resolution of the taking lens. Now, for the bad news—capture times, or more correctly, scan times, are measured in minutes, rather than fractions of a second. And, that’s not all. A scanning back isn’t a self-contained, stand-alone device. Each Better Light back consists of three components. The first component is the back itself, slightly larger than a Polaroid holder that inserts like a sheet film holder in the ground glass frame. The second component is a box about the size of a 5.25” hard drive enclosure that the scanning back connects to via a proprietary cable. This box contains a 40 or 80 GB hard drive and stores the captured images. The hard drive box then connects via a USB2 cable to a computer. For field work, the scanning back and hard drive box are powered by a battery that’s about the size of the batteries in push mowers and motor scooters. A laptop would be the logical field complement, but in the studio, a Better Light system could be connected to a workstation. Better Light’s Viewfinder software runs under Mac (Classic and OS X) or Windows XP. Anyone familiar with scanning film and working with scanner software, such as Lasersoft’s Silverfast or Creo Scitex’s oXYgen software, will find Viewfinder to be somewhat familiar. As with film scanning, the array of image controls prior to capture is extensive. A low-resolution scan preview begins the process. Do everything right and you’ll only need to make one “exposure.”
With the limitation of capture times that can take minutes to record an image, a scanning back isn’t a digital replacement for large format film, but is rather an alternative to many of the applications of film-based large format photography. Landscapes, still life, and architecture are willing subjects for scanning backs. For anything that moves, you’ll need film or a one shot digital sensor. However, when you think about the classic subjects of large format photography, the scanning back is not an illogical compromise. View cameras are predominantly used to photograph stationary subjects. Fast moving subjects beyond the photographer’s control are traditionally photographed with smaller format equipment.
The primary purpose of my field trip to Better Light was to learn about their products. But, for me, an important part of this learning process would be to compare a Better Light scanning back to the camera I use predominantly for digital capture—a Canon 1Ds Mark II. An equally meaningful comparison would be to 4×5 film—the predominant medium I use for large format photography. Better Light’s capabilities and advantages relative to a Canon 1DsII and 4×5 film was the best way for me to personally understand the attributes of this system. So, for the record, this is not a review of Better Light backs or a “bench test” between a scanning back, a high-end DSLR, and 4×5 film. I’m merely sharing my experiences based on one shooting experience and sharing the photographic results of this shooting experience for the sole purpose of providing useful information to any photographer interested in learning more about the relative attributes of the three means of capturing a photographic image that were explored and documented.
The Set-Up
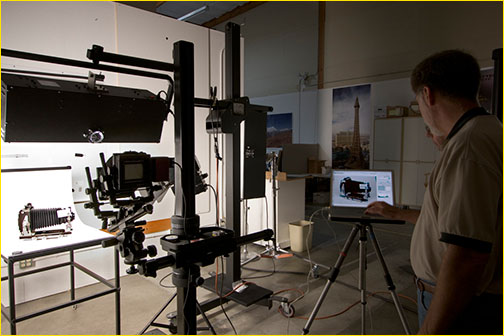
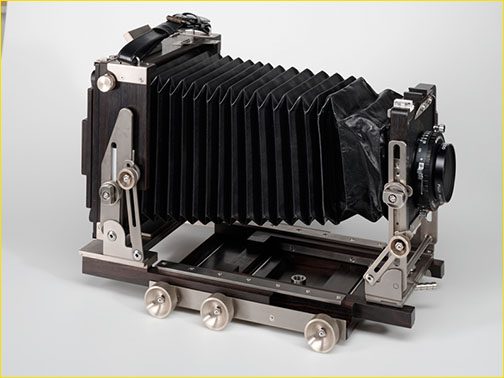
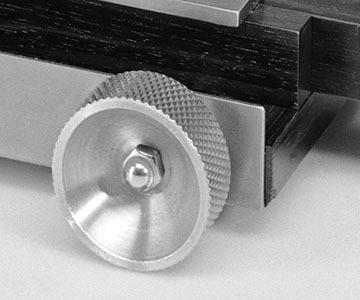
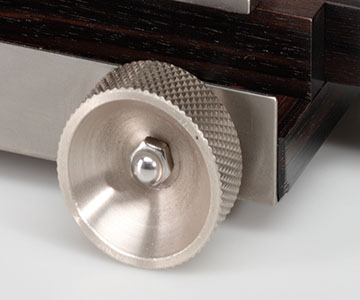
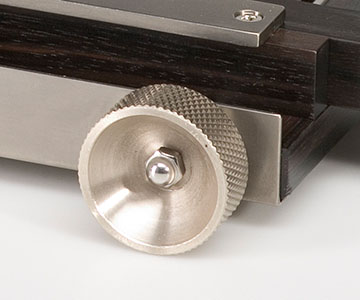
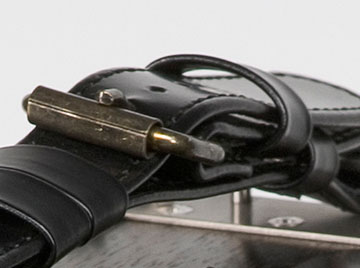
That said, here’s what we did. I had discovered in my initial conversation with Mike Collette that he was a proud owner of an Ebony SV45U2 view camera. I’m also an Ebony user and a professional spokesperson for the company in the U. S. Since we had Ebony cameras in common, I invited Ian Wilson, the import agent for Ebony and (conveniently) a San Francisco resident, to join me for the day. Once we decided to shoot something in the studio, Ian immediately suggested that we photograph Mike’s camera. I felt it would be a good subject for a test of this type—the camera and lens had intricately detailed markings, extreme values from the black bellows to the bright titanium components, and very subtle color and grain in the Ebony wood. Having chosen a subject, we then proceeded to set up a typical product photograph. The lights were continuous source HID (for obvious reasons strobes don’t work with scanning backs). The taking camera was a Cambo Legend with a 180 Apo-Symmar f5.6 lens. This set-up was tethered to my G4 Powerbook. At Mike’s suggestion we shot with Better Light’s Super 6K-HS back. As previously indicated, this is Better Light’s most popular scanning back. Its popularity derives from its balance between reasonably high resolution and reasonably short scan times. The higher the resolution of the scan back, the longer the scan time. The Super 6K-HS has a native resolution of 6000 x 8000 pixels and retails for $14,995.
I should make clear that Mike Collette was the photographer of record for the photograph made with the Better Light back. Ian and I watched as Mike set up the lights, focused the view camera, and employed lens movements to control perspective and depth-of-field. The view camera was angled down at the subject with the standards re-adjusted to vertical. (This configuration is equivalent to front fall, i. e. the taking lens is below its optical axis.) Both a swing and a tilt movement were applied to the lens standard to extend depth-of-field across the primary subject plane. Mike then gave us a brief tutorial on the extensive image controls offered in the Viewfinder software. Once a preview scan is generated critical evaluations regarding color balance, contrast, focus, ISO settings, etc. are made. Once you are confident that all the settings are optimal, then you press the scan button and wait. In this case we made 2 scans. One was at a high ISO equivalent (2344). This scan took 67 seconds. The second scan was the critical one for comparison with the 1DsII. This scan was at a low ISO (300) and took almost 9 minutes. This represented a difference of 3 stops between the 2 scans.
Once the higher quality scan was complete, without changing focus, exposure, or any other settings, I recorded the subject on film. My choice of film might be controversial to some. I shot with Fuji Acros, 100 ISO, B/W film. Why b/w when the other shots would be in color? My philosophy was to go with film’s strength. Fuji Acros is regarded as one of the sharpest, finest grained ISO 100 films available and because it’s b/w film with only one emulsion layer, as opposed to color film’s three layers, it’s inherently sharper than any color emulsion of comparable speed. We constantly compare digital capture to film, but it’s always between color film, typically transparency film, and digital capture. B/W films offer many advantages over color transparency films—higher resolution and greater latitude primary among them. Because so many film-based photographers are committed to black/white photography and because black/white film is seldom compared directly to digital capture, my thought was to go with film’s strength and forego color for the film image.
Having photographed the subject with a Better Light back and with 4×5 film, it was time to replicate the shot with the Canon 1Ds II. I decided to use my 100 f2 lens. I chose a fixed focal length, rather than a zoom. This particular lens would be regarded as “prime,” but is not an L series lens. My motivation was to choose a lens that would appease any skeptics who might allege that the Canon image was negatively affected by lens choice. Personally, I’ve found this lens to be excellent and comparable to L glass, though it doesn’t enjoy that designation. Because the 100mm Canon lens represented a slightly longer lens for the 24x36mm sensor format than the 180mm did for 72 x 96mm format, I needed to move back slightly. I filled the frame with the subject, creating a very similar overall composition to what had been achieved with the scanning back. The subject itself was not moved, nor was any of the lighting changed. The exposure was 1/30th of a second @ f/11 with an ISO of 160.
Full Frame
The Better Light file was archived in TIFF format and saved in 16-bit. It was then opened in Photoshop and inspected. USM was applied with these approximate settings (150%, .3 pixels, 0 threshold). This was based on what Mike Collette considered tried and true USM settings for Better Light scans, in general. The Fuji Acros film was processed in D-76 1:1 and air dried. It was then scanned on a Creo Scitex Eversmart Pro scanner @ 3175 dpi (the maximum optical resolution for this scanner) @ 1:1 in grayscale mode. The resulting single channel file was 366MB in 16-bit. (183MP when converted to 8-bit. A color RGB image at the same scan resolution would be 549MB.) The sharpening/smoothing settings in the scanner software were 2 for sharpening (10 represents maximum sharpening) and smoothing was set to maximum. These are typical settings we use for finer-grained films with this scanner. A setting of 2 in sharpening added just the right snap to line detail and a maximum smoothing setting reduced the salt and pepper appearance of film grain with no detectable effect on the actual photographed image detail. The Canon image was captured in camera raw format and then processed in ACR 2.4. Output resolution was interpolated upward in ACR by the maximum amount (to 4096 x 6144). The native resolution of a 1DsII file is 3328 x 4992. Sharpening in ACR was set at 30 with no luminance or color noise reduction. In Photoshop, USM was applied at these settings (300%, .3 pixels, 0 threshold). These are the baseline settings recommended by Canon for all EOS digital cameras. Image size was further increased using Bicubic Sharper interpolation in CS2. Image size was increased so that the pixel dimensions of the Canon and Better Light files would be relatively the same. Thus, screen views of details would be very close in scale without any aliasing from the Canon file that would ordinarily occur when magnified to more than 100%. The grayscale file from the film scan was interpolated down for the same reason that the Canon file was interpolated up. Comparisons on a monitor need approximately equal pixel dimensions or they are displayed at dramatically different scales making critical comparisons of image detail and color more difficult.
I’ll let the results speak for themselves, i. e., I suggest you look at the pictures first and make some preliminary decisions for yourself before reading my comments. Bear in mind that differences in image sharpness within various subject details are a function of depth-of-field and the lens movements employed. The view camera settings aren’t necessarily perfect and they certainly aren’t the same as those employed on the Canon lens (no movement here). Suffice it to say that overall sharpness and perspective control between the view camera and the 1DsII could have been made to be much closer. However, we lacked the time and equipment to add this additional level of control to the experiment. For instance, Canon’s 90mm TS lens would have been closer in focal length and coverage to the 180 Apo-Symmar. But, I don’t have this lens, so this wasn’t possible. By and large, I think this is a fair and reasonably objective comparison between 3 different imaging systems and a single subject. It should be pointed out that this result should not be considered indicative of the results one might obtain when photographing other subjects. I’ve found that differences in resolution and tonal scale are most apparent in landscape or nature photography. Resolution differences are not as apparent when photographing products in the studio or when photographing architecture. Differences in resolution and tonal gradation can seem dramatically different depending on the subject and lighting. For instance, if you were to photograph the north sky on a cloudless day with a host of different cameras the results obtained from an 8×10 view camera and a 4MP point-and-shoot camera would be more or less the same. For a subject lacking any significant detail and only subtle gradation in tonal values, differences in resolution would be relatively indiscernible. My point here is that a comprehensive test would involve shooting several different subjects, not just one.

Detail 1
Detail 2

Detail 3
Detail 4
Now that you’ve looked over the images yourself, I would characterize the results this way: The Better Light scan clearly has the most detail, though in many areas of the image it’s a subtle difference. Also, the color accuracy of the Better Light scan is the best overall. There isn’t a lot of color in the subject, but there are ample opportunities to compare neutral values. The warmth and richness of the Ebony wood contrasts with the neutrality of the background and metal components with the greatest accuracy and clarity in the Better Light scan. There are hints of color aliasing in the finest details of the 1DsII file that don’t exist in the Better Light file. The lack of an anti-aliasing filter on the Better Light back meant that far less USM (about half of that applied to the Canon file) was required to achieve a similar level of acuity. That said, I think I can speak for all of the participants—myself, Ian Wilson, and Mike Collette—in stating that the 1DsII performed at a level that surprised everyone in the sense that the results were closer than expected. Image comparisons between the Canon and Better Light files are predominantly one of nuance. In comparing the film results, I speak for myself alone when I state that I find the film results quite competitive with both digital systems. Though this was predominantly a “digital” comparison, I actually went into it concealing an intuition that while the focus was on the digital counterparts, good, old b/w film might actually capture the highest quality image. I can’t say that this happened, but large format film held its own, even though my methodology gave it a slight handicap. I immediately threw away 40% of the 4×5 image area, by not moving in closer and filling the frame with the subject, as I did with the 1DsII capture. Also, the digital file of the film image is derived from a flatbed scan, rather than a drum scan, with no oil bath to reduce granularity. Nonetheless, overall resolution between the Fuji Acros and the Better Light scan are close, though the film image clearly shows film granularity interfering with the finest photographed detail. Both the Better Light and Canon files were able to capture subtle textures and details that are undermined by film grain in the b/w file. (Examine the fine lettering on the lens barrel to observe this effect most dramatically. Halation in the film image results in noticeably less line detail and inferior edge sharpness.)
In conclusion, the Better Light Super 6K-HS wins the battle, but it does so at a price. For starters, there’s capture time—9 minutes for Better Light vs. 1/30th of a second (Canon) and 1/8th of a second with film. The financial cost of the Better Light system is higher. The Super 6K-HS back alone is $14,995. A good 4×5 camera and lens would need to be added to this cost to put together a complete imaging system. (I’m not factoring in the cost of a computer because this would be needed for any digital imaging system.) By comparison, a 1DsII with a 100 f2 lens is a little over $8000. It is worth noting that a 4×5 film-based system could be put together for substantially less than the 1DsII. However, every time you press the shutter on a 4×5 film camera you are spending substantially more than with any digital system and this is a difficult variable to factor in, as are the cost of film scans, over the lifetime of a camera or a photographer. Besides, I don’t think anyone really knows what the lifetime of a digital imaging system actually is. The technology is too new. Set-up time is in Canon’s favor by a substantial amount, though a film-based 4×5 camera could be set-up and ready to capture an image in only a slightly longer timeframe. A Better Light system has the most cables to connect and the most pieces of high-tech hardware to interface before a photograph can be captured. For some users, the exacting price of the Better Light system may sufficiently negate image quality advantages to such an extent that on overall balance considering quality for price, capture times, ease of set-up, and sheer versatility, Canon wins on overall merit. For other users, any advantage that would yield a superior print, no matter the cost, is worth it. Certainly, if the view camera is your camera of choice, and is ideal for the subjects you photograph, a Better Light back upgrades your photographic arsenal to the digital age in a manner that could be productive and cost effective. So what, if the Canon DSLR comes close. “Close” may not be enough for some. Personally, speaking as a photographer who during the film era photographed with cameras from 35mm to 4×5 format, I can see substantial merit and viability to all three systems, including large format film. In the end, the choice of tools is an intensely personal choice. When looking at the large scale Iris, color pigment, and lightjet prints that adorn the walls of Better Light, it became quite apparent to me that these were outstanding images and that Better Light scanning backs are a viable high-end digital solution for many photographers. As a working photographer, I’m elated over the choices that we all now have. Others have said, as I have, and it can never be said enough, because these are confusing times for many practitioners who are having difficulty deciding which path to follow and which new technologies to stake their reputation on, but I add to the refrain of the reasoned and open-minded among us—It’s a great time to be a photographer and I’m thankful to be here for it. In the history of photography, we’ve never had the diversity of choices we now have.
I’ll conclude with this general observation-–Better Light should be on the radar of every committed large format film photographer. As one-shot sensors improve in resolution, scanning backs will also need to evolve to remain competitive. Shorter scan times, more compact equipment, including smaller laptops, and lower prices, will have to prevail for scanning backs to expand their current market share. This may seem odd, but I think Better Light is conceivably in a better position than the MF digital back manufacturers who are having a difficult time proving to the industry that they offer a substantial advantage to Canon and Nikon’s best DSLRs. Finally, I shouldn’t conclude without pointing out that the comparative results posted here are not the highest resolution files obtainable from Better Light equipment. The Super 8K-HS back has a native resolution of 8000 x10600 pixels (that’s 85 million pixels of complete RGB data.) Also, with a Pano/WideView adapter a Better Light back can make seamless panoramic images up to 360 degrees, and depending on the scan back used, can be up to 8000 x 65000 pixels in size. Large-scale prints from these panoramas are truly spectacular.
For more information visit Better Light’s web site:www.betterlight.com. For those who value one-on-one conversation for its immediacy and more personable character, you can always call and know that at Better Light, even the guy at the top is accessible. For those intrigued with the subject matter of this test and who want to know more about Ebony view cameras their web site is:www.ebonycamera.com.
_____________________________________________________________________________________
Richard Sexton is a commercial / fine art photographer based in New Orleans, LA.
More information about his work can be found on his web site:www.richardsextonstudio.com.
_____________________________________________________________________________________
UPDATE. August 31, 2005
There is an area of concern with regard to this article. But because Richard lives in Louisiana, and contact with him has been sporadic at best following publication because of Hurricane Katrina,Mike Collette, the president ofBetter Lighthas written a further commentary on the article titledThe Rest of The Picture.
I urge you to also read this addendum. As Mike states in his write-up, "IN CONCLUSION, I agree with everything that Mr. Sexton has to say, but if his article is going to let the images speak for themselves, they should be allowed to tell their entire story". The larger images reproduced on the Better Light site do indeed do a better job of telling the complete story.
UPDATE. September 1, 2005
By coincidenceUwe Steinmuelleroutbackphoto.com has just publishedan article on the BetterLight systemas well.


Elevate Your Vision


Read this story and all the best stories on The Luminous Landscape
The author has made this story available to Luminous Landscape members only. Upgrade to get instant access to this story and other benefits available only to members.
Why choose us?
Luminous-Landscape is a membership site. Our website contains over 5300 articles on almost every topic, camera, lens and printer you can imagine. Our membership model is simple, just $2 a month ($24.00 USD a year). This $24 gains you access to a wealth of information including all our past and future video tutorials on such topics as Lightroom, Capture One, Printing, file management and dozens of interviews and travel videos.
- New Articles every few days
- All original content found nowhere else on the web
- No Pop Up Google Sense ads – Our advertisers are photo related
- Download/stream video to any device
- NEW videos monthly
- Top well-known photographer contributors
- Posts from industry leaders
- Speciality Photography Workshops
- Mobile device scalable
- Exclusive video interviews
- Special vendor offers for members
- Hands On Product reviews
- FREE – User Forum. One of the most read user forums on the internet
- Access to our community Buy and Sell pages; for members only.
You may also like


