
INTRODUCTION
I would like to begin this article with a few basic philosophical points.
One can literally go crazy doing scientifically accurate tests of equipment. These can go from basic things all the way to the most anal minutiae.
I do not want to spend my life testing equipment. I want to make images. My only reason for testing is that I want to know what the best tools are to help me make the best images considering my subject matter and working habits. It is in this vein that I decided to do a comparison between the Hasselblad Multishot system and the PhaseOne system. I am not interested in the Nth degree of scientific and mathematical accuracy. I am interested in practical differences that can have an impact in my photography.
Therefore, I would like the readers to heed the following three warnings:
Epsilon Crowd:
(For those of you who do not know this, epsilon is an infinitesimally small number commonly used in mathematical calculus): If you are interested in every minute detail, down to infinitesimally small differences, you may find this article has a somewhat different focus.
Pixel Peepers:
Beware Pixel Peepers! A typical P65+ file in TIFF format is 386 Megabytes. Hasselblad H3D II files are slightly over 300 Megabytes each. It is totally impractical to present multiple images of this size on line. Furthermore, to even begin to evaluate the color in one of these images requires a perfectly profiled and calibrated professional graphics grade display (no, your mighty 30-inch Apple or NEC or other “standard” computer displays are not even remotely up to the task). The images vastly exceed the color gamut of most monitors. Also, remember that a computer monitor is inherently a low resolution device. Even the best HD monitor has a resolution that pales in comparison to an inkjet printer. Add to that the fact that the images presented in the article are either screen shots or JPEGs in a much reduced color space (sRGB) and the conclusion is that if you try to “pixel peep” you are wasting your time and you are likely to reach meaningless conclusions.
Zealots:
It seems that whenever someone writes an article comparing different brands, there is a group of people that behave like irrational religious zealots. They spend their time and energy writing hate mail or posting hate posts on the forums. Somehow it seems that saying anything other than high praise and total glory for something they own or for a brand that they do not even own, but somehow believe is the best and therefore untouchable, is considered by these people to be some sort of horrible criminal offense. So, to all the zealots I say:Get a life!If you do not believe the facts as presented by others, do your own testing. You might just discover reality, and that is a good thing. And no one is forcing you to read these reviews, so you can always take a blood pressure pill, relax and use your time for something more productive than hate mail or hate posts.
OK, enough said.
___________________________________________________________________________________
BACKGROUND
Prior to using single shot digital backs, I worked extensively with scanning backs and multishot backs. In the early days of digital capture, scanning backs and multishot backs had a huge advantage in image quality versus single shot backs. Even though multishot backs and scanning backs continued to produce higher image quality, eventually single shot backs improved to the point that I was willing to replace my beloved large format film cameras and my 4×5 inch scanning back with a much more convenient and smaller single shot Medium Format back. In fact, once single shot backs became good enough, multishot backs pretty much disappeared from the face of the earth.
It has been a number of years since I worked with a multishot device, and I was extremely curious to see how the latest multishot back from Hasselblad compares to my standard workhorse PhaseOne P65+.
___________________________________________________________________________________
MULTISHOT BACK
For those not familiar with Multishot backs, a Multishot back is designed to take multiple exposures of the same subject in order to capture more information and minimize extrapolation.
Instead of relying on a single shot using the standard Bayer Matrix (or other) sensor patternhttp://en.wikipedia.org/wiki/Bayer_filter, the Hasselblad H3D 50 II in Multishot mode takes 4 separate exposures. It moves the entire sensor one pixel up, one pixel to the right, one pixel down and one pixel left for each of the four exposures.
Theoretically, the advantage is higher detail capture and more accurate color, because a lot more information about the subject has been captured by each photo site in the sensor.
Multishot backs have two huge disadvantages:
You have to shoot tethered. The need to have the back connected to a computer is a real nuisance and sometimes an impediment for certain kinds of field work.
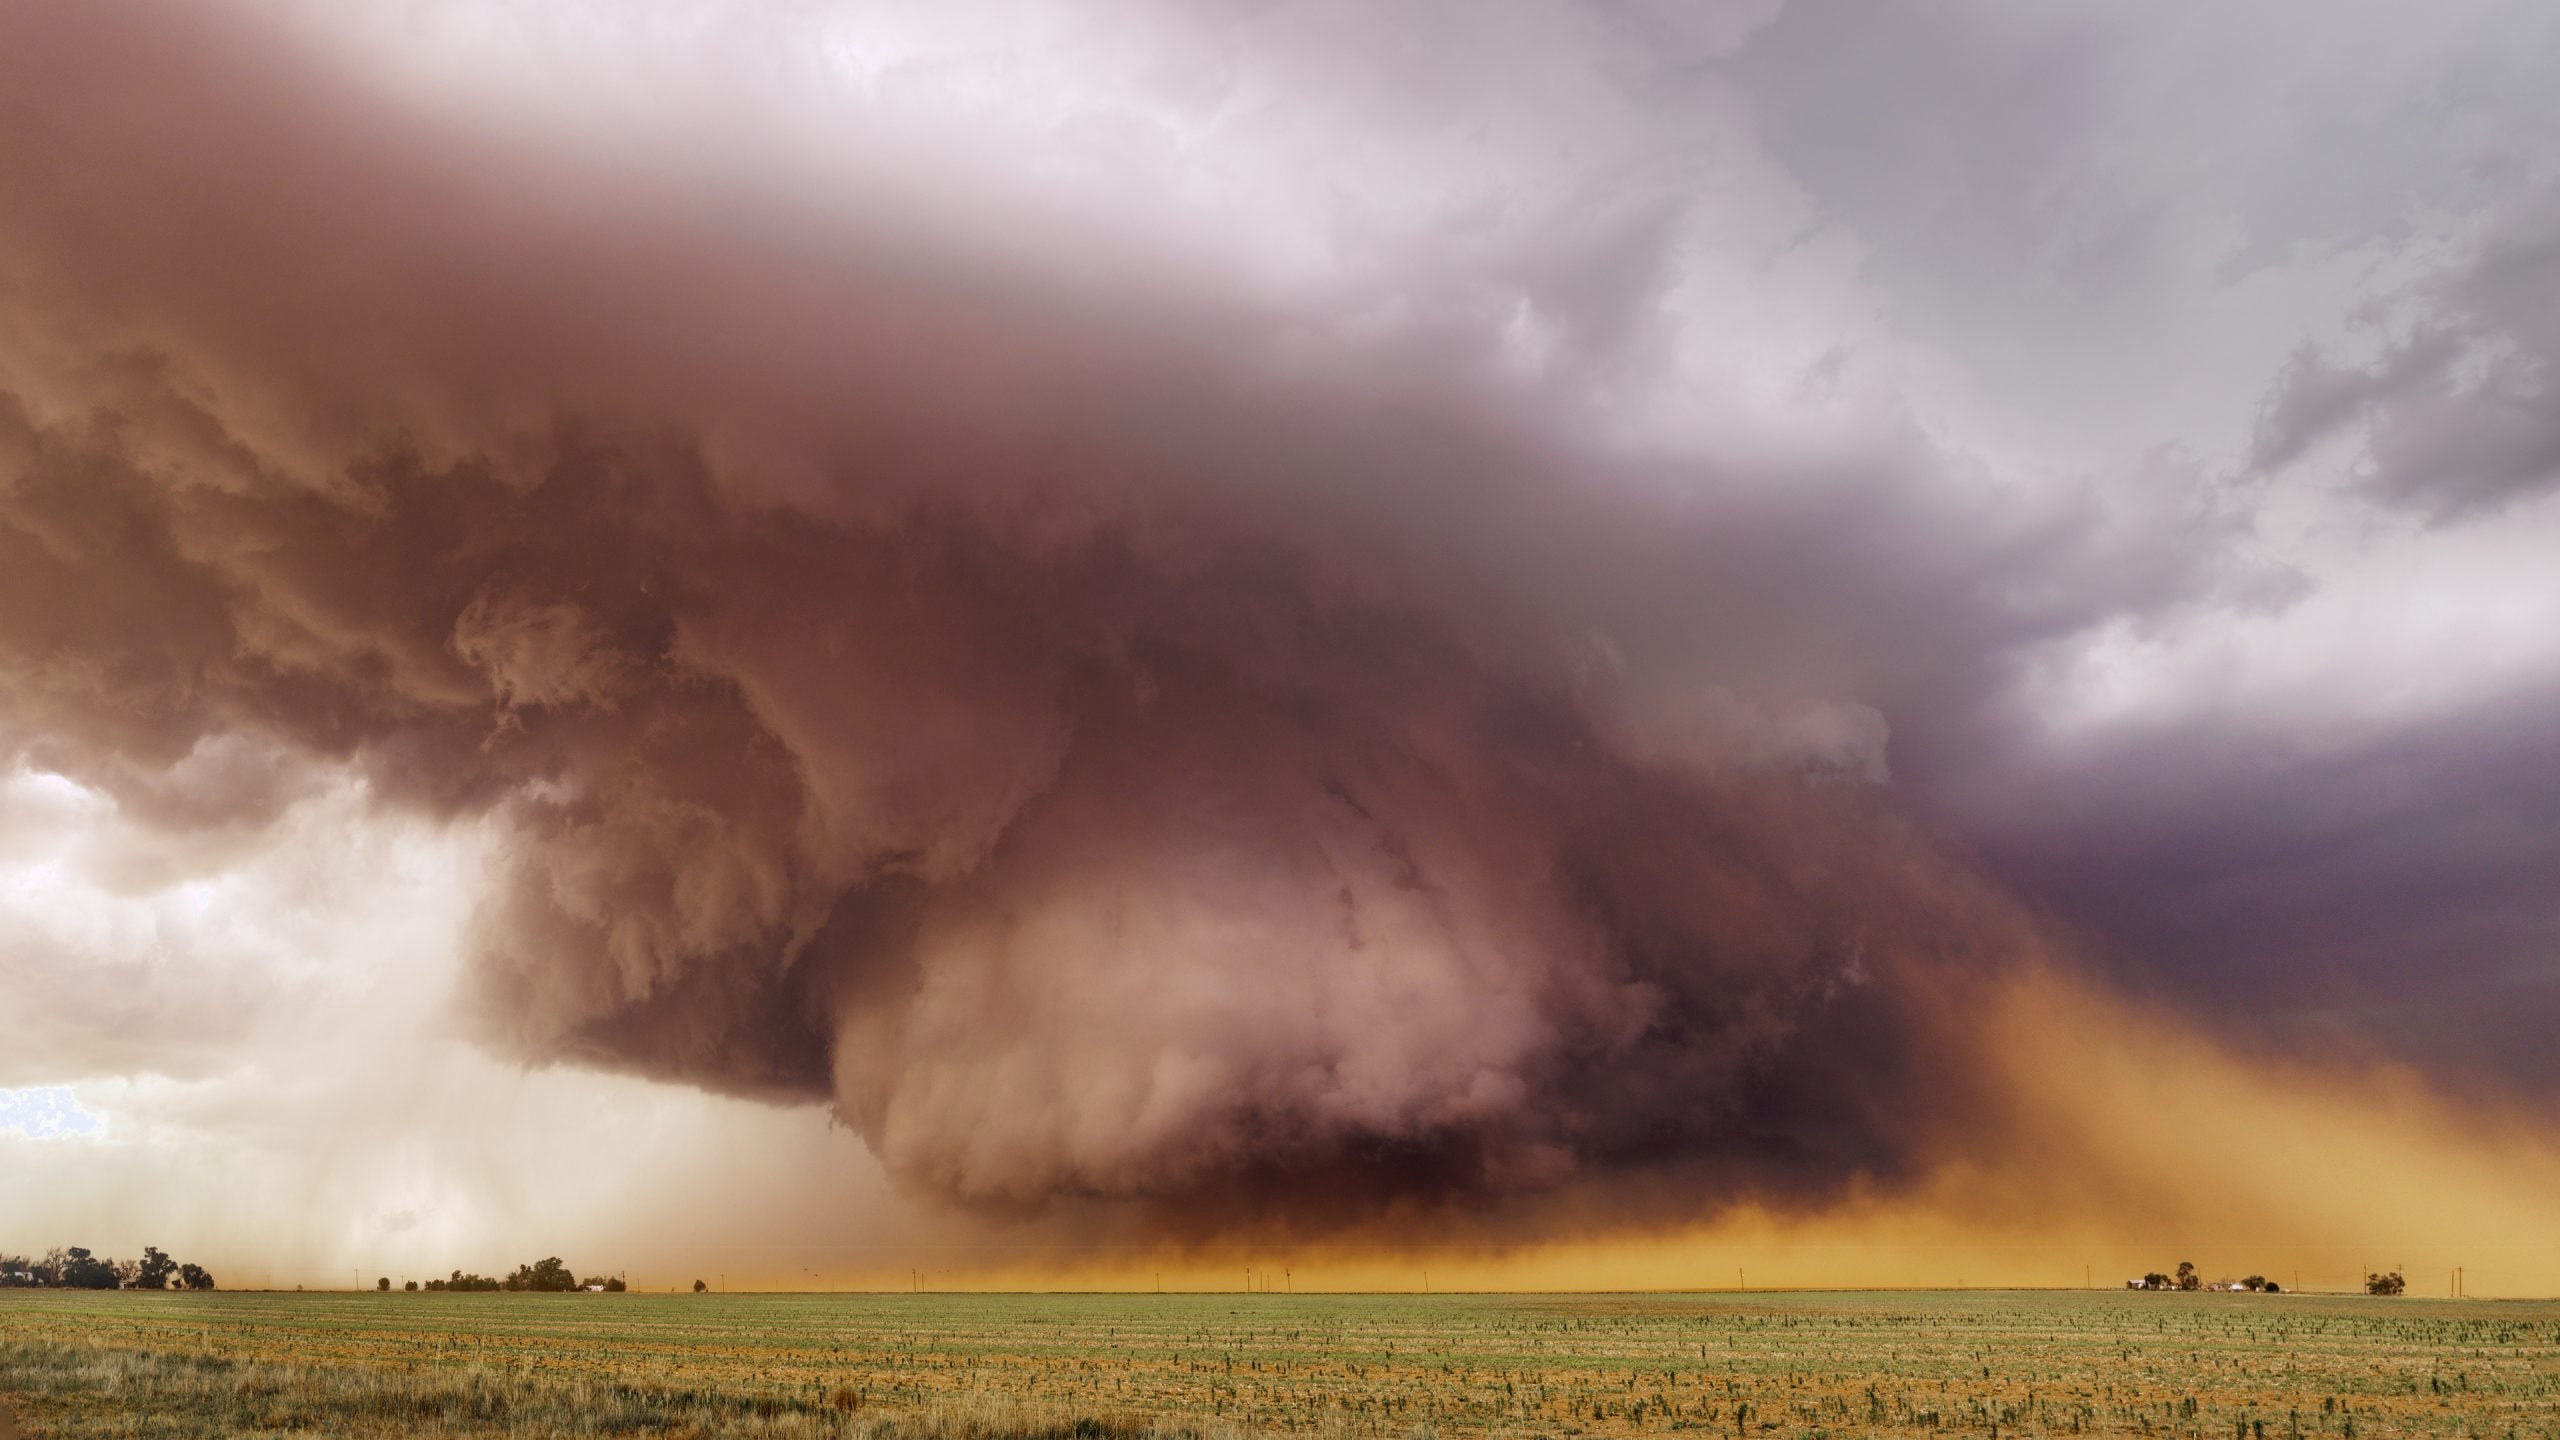
Nothing can move and the light cannot change during the time that it takes to make the multiple exposures, which is at least 30-45 seconds in the case of the Hasselblad. This obviously eliminates certain subjects such as water and moving clouds, and makes it virtually impossible to shoot people portraits or landscapes in the slightest bit of wind. It can only be used for subjects that are totally still. Also, when shooting with strobes, it is imperative to work with strobes that are totally consistent, and the timing of the exposures should be such that the strobes have time to fully charge before each exposure.
___________________________________________________________________________________
BIASES AND CARDS ON THE TABLE
I firmly believe that we all have biases, and I am certainly no exception. Therefore, before jumping into the review and the test results, I thought it would be important to put my cards on the table.
It has been several years since I performed a direct comparison between PhaseOne and Hasselblad equipment. The last time I did it, I owned Hasselblad H2 and Linhof M679 CS cameras that were compatible with all the PhaseOne and Hasselblad backs of the time. Therefore, it was very easy to mount the different backs on the same camera to eliminate body and lens differences and compare just the backs.
Conversely, I was able to test different camera systems and lenses with the same back.
At that point in time my tests revealed that the PhaseOne backs were better than the equivalent Hasselblad backs, and the Rodenstock HR lenses were significantly better than the Hasselblad lenses.
Since I performed those tests, the world has changed. Hasselblad went to a closed system, which prompted me to switch to a PhaseOne camera: I personally need to switch my digital back between various camera bodies and I do not relish the thought of an additional appendage hanging from the side to provide battery power (a necessity with Hasselblad backs) when I mount a digital back on a technical or a view camera.
Since one can no longer swap Hasselblad and PhaseOne backs in the same SLR body, I decided to test two basic systems:
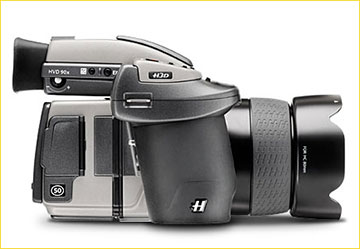
A Hasselblad H3D II Multishot with their 80 mm lens
A PhaseOne camera with a P65+ back and their 80 mm lens.
Thus, the comparison is not a comparison between the digital backs alone. It is a comparison between the complete camera systems with their normal lenses only.
Based on my prior experiences, my biases before I started the test were as follows:
I expected the 50 Megapixel Hasselblad system in one-shot mode to be a fine performer, but not quite as good as the PhaseOne 60 Megapixel system.
I expected the Hasselblad system in multishot mode to be better than the PhaseOne system in terms of both, color fidelity and resolution.
Well, as we used to say when I was a graduate student of Physics:In theory, the theory always works in practice. On the other hand, in practice, the theory does not always work.
Read on.
___________________________________________________________________________________
THE CAMERAS
Although my original intent was to compare only the image quality of both systems, it is hard not to compare the camera systems. Even though the new PhaseOne DF and the Hasselblad H4 will start shipping soon, and I should have those two new cameras in my hands in a few weeks, the differences between the new and the current cameras are not significant enough to invalidate any of the following points:
In my opinion, both cameras have a “plasticky” feel to them that is unbecoming of high end Medium Format systems. The Hasselblad plastic is better and at least strives for a metallic look. The PhaseOne plastic, particularly in the top section leading to the eyepiece is rather ugly and feels very flimsy. I think both cameras, but particularly the PhaseOne owe their customers much better cover materials.
After switching to a PhaseOne camera, I yearned for the Hasselblad viewfinder, which somehow I remembered being clearer and brighter than the PhaseOne viewfinder. Therefore, I was really surprised when I put the cameras side-by-side and discovered exactly the opposite (either my recollection was wrong, or the Hasselblad viewfinder has gotten a lot worse, or both): The PhaseOne viewfinder and screen are much nicer than the Hasselblad.
Camera ergonomics:
This is a personal thing. I find the PhaseOne camera much more ergonomic and natural to use than the Hasselblad. For example, the buttons and the cable release socket in the ridiculously narrow space in front of the Hasselblad (between the grip and the body) are basically inaccessible. I also find the menu system in the Hasselblad to be quite illogical and convoluted, and it is missing some really basic functions, such as “Aperture Priority” (which can only be accessed pushing a button on the prism). The PhaseOne is far from perfect, but to my hands, eyes and brain much easier and more natural to use.
Back Ergonomics:
In terms of the backs, however, the reverse is true. I find it more ergonomic and more direct to use the 4 way toggle switch and the plus minus switch in the Hasselblad back versus the four buttons in the PhaseOne.
System Integration:
This is an area where the Hasselblad is without question much better than the PhaseOne: From simple things like having a single button turn on both the back and the body instead of separate power buttons in the PhaseOne, to using one single battery for the Hasselblad versus two sets of different batteries for the Phase body (six AA batteries) and the Phase back (one LiIon battery), to nice functions like a double tap of the Hasselblad shutter release brings up the Menu on both, the back and the camera. The Hasselblad system is far better integrated than the PhaseOne system.
Advanced camera functions:
Hasselblad seems to be clearly ahead of PhaseOne in this area. For example, it is a well known fact that all lenses experience focus shift when the aperture changes. This is a bad thing, particularly for SLR’s that are focused with the lens wide open (this applies both, to manual as well as autofocus). Since the camera knows which lens is mounted on the body, and also knows the shooting aperture and focusing distance, the Hasselblad body makes a focus shift correction just prior to making the exposure. This is a great feature. For a detailed explanation of this see…http://www.hasselbladusa.com/media/1663143/the_evolution_of_lenses.pdf.
Accessories:
This is another area where the Hasselblad wins. For example they have a great tilt/shift adapter that electronically keeps track of the tilt and the shift positions, so when the file is imported into the (Phocus) RAW conversion software, all the necessary lens and tilt/shift corrections are automatic. Very nice, and in my opinion much better than having specialized tilt/shift lenses. I have never been a fan of tilt/shift lenses, because they are usually very expensive and come in only a couple of focal lengths which the photographer is likely to already own. I do not know about you, but I resent having to re-purchase lenses in focal lengths I already own, and I also resent being limited to only a couple of focal lengths for tilt and shift. I believe a tilt/shift adapter is a much better solution. The only negative of the Hasselblad tilt/shift adapter is that it cannot be used with all the lenses, and because it increases the focal length by a factor of 1.5, the focal length range is somewhat limited and skewed towards longer focal lengths.
As mentioned before in this article, I believe that a major disadvantage of the Hasselblad is the closed system, the lack of interchangeability of backs and bodies, and the necessity to have a separate power supply when mounting one of their backs on a technical or a view camera.
Corrections for sensor position:
I reported ina prior article on this sitethat shimming the back adapter on an ALPA camera in order to compensate for slight differences in the actual sensor position made a very noticeable difference in image quality. As far as I know, the PhaseOne system relies on tight tolerances, but there is no adjustment after manufacture. By contrast, Hasselblad performs a number of adjustments after the bodies and the backs have been manufactured as well as just prior to each exposure:
1. Besides the focus shift correction mentioned above, just prior to each exposure, adjustment is also made for the IR cutoff filter in front of the sensor which again has a slight effect on the focus plane based on the aperture.
2. “Ultra Focus Level 2”: The exact difference between the AF target position and the sensor position is measured for each camera and each back at the factory. Each camera body and back are mated to each other and have a unique calibration ID. This ensures that the AF system will set focus on the exact sensor position at capture. It is possible to order a spare body for a camera system by sending the back in to have it mated with a new body. The back can store information about 3 different camera bodies. I give Hasselblad kudos for their care in terms of their pursuit of perfect focus.
___________________________________________________________________________________
IMAGE QUALITY-METHODOLOGY
We finally get to the main subject of this review. Image quality. I decided to first compare an image with the Hasselblad in single mode, versus the Hasselblad in Multishot mode and then compare both versus the PhaseOne system.
I immediately encountered some complications. The most important complication arose from the fact that the P65+ has a full frame sensor, while the H3D 50 II Multishot does not. Since I was using the same lens on both systems, this resulted in different framing if the cameras were placed at the same distance from the subject, and different perspective if the cameras were set to frame the subject the same, because the cameras had to be placed at different distances from the subject.
Since I am interested in practical results, as opposed to endless scientific tests, I chose to use very simple sets that were essentially flat. The reader will notice immediately that the sets and the objects I used have little or no depth. This was by design, because I could frame the subjects the same and largely avoid the perspective issues.
All the images were shot at F/11 with the cameras on sturdy tripods in mirror up mode. I took great care to try to frame the subjects as close to identical as possible, but some slight differences are inevitable as I had to place the cameras in different locations. I evaluated enough images that I can emphatically state that these slight differences do not affect any of the conclusions.
I decided to shoot in continuous light to avoid potential strobe inconsistencies. I performed tests under tungsten lighting, photographic daylight fluorescent lights and daylight outdoors.
It is also worth mentioning that I used the autofocus mode in each camera with the center pointed at the key subject. After all, I was testing each system as a whole.
At the beginning I had decided to use the camera’s built-in metering systems in Aperture Priority mode. This way, I could compare both systems in Autofocus and Autoexposure mode.
Unfortunately, the Hasselblad is a complete disaster in this regard. When I owned an H2, the meter was so far off the mark that I had my default setting to overexpose by 1.7 F/stops as a starting point. I thought my camera was faulty, but since I could compensate for this in my custom settings, I never bothered to send it in for service. Well, guess what: The meter in the H3D 50 II Multishot also grossly underexposes, so I am beginning to believe that my original H2 was pretty close to normal for a Hasselblad.
With the H3D 50 II, I could not get an even half-way decent exposure until I set the meter to overexpose by at least 1.3 F/stops, and to get a properly exposed image with the histogram to the right takes setting the camera to overexpose by 2.0 to 2.3 F/Stops! I consider this unacceptable in a professional instrument. Frankly, I have no idea what Hasselblad is thinking (or not thinking).
By contrast, the PhaseOne camera usually delivers a centered histogram in default mode, and a properly exposed to the right histogram with about +0.7 F/stop exposure compensation.
While the PhaseOne meter exhibits excellent behavior for 19th Century materials, it is high time for digital camera manufacturers to abandon traditional film metering techniques. A digital camera in autoexposure mode should deliver a histogram that is as far to the right as possible, without clipping the highlights. As far as I know, ALL current digital cameras fail miserably in this regard.
(As a corollary, the screen view in digital cameras should compensate and display the image as if centered, even though it was properly exposed to the right. Similarly, the RAW conversion software should have a button that automatically brings down the exposure for an image exposed as mentioned above).
In view of the above, I determined the exposure by looking at the histogram and shooting with the histogram as far to the right as possible without clipping the highlights.
Please note that even when not shown in the images, I always used an X-Rite Passport inside each setup in order to obtain perfect white balance when making the conversion from RAW to TIFF. If you do not see it in an image, it is because it either got cropped, or was shot with exactly the same lighting conditions in another exposure.
A final, but very important note is that I evaluated all the images not just on a carefully calibrated and profiled EIZO 30-inch monitor, but I also made many prints on an Epson 9900. The images were also compared to the real landscapes on site, and to the real objects using the original lighting setup as well as a calibrated GTI viewing station. This gave me an opportunity to judge color accuracy and resolution quite effectively.
I caution the reader that many of these differences may not be visible or accurately rendered with small files on the internet (and with most monitors), so I urge the readers to always give precedence to the text.
___________________________________________________________________________________
IMAGE QUALITY-RESULTS, PART 1
In terms of image quality, there were three basic things I was looking for:
Resolution (not to be confused with Sharpness)
Color accuracy
Dynamic Range
It is very important not to confuse resolution with sharpness. One can perform all kinds of tricks to sharpen an image in the digital domain, but detail that was not there in the first place can never be recovered. I was looking for fine detail retrieval as opposed to pure sharpness.
This is where the surprises started.
My first surprise was that the Hasselblad was much worse than I had anticipated in single shot mode (the camera is vastly better in multishot mode).
Figure 1 shows one of my test setups.
Figure #1
Figure 2 is a screen shot of an enlarged portion of the setup at 100% comparing the Hasselblad images in single shot mode (left side) versus multishot mode (right side)

Figure #2
Click on Figure #2 to view and download a high resolution (JPG) copy of this image (1.3MB).
Depending on the browser that you are using, once displayed you may be able to click to view
the image at 100%, or you may have to save it and then view in another program.
There is a huge difference in resolution. Also, note how the background color in the newspaper is full of reddish and greenish blotches in the single shot image. This type of color “blotchiness” is evident in all the single shot images I made, but completely disappears in multishot mode.
Based on the color “blotchiness” and the lack of resolution in single shot mode, I would not consider using this camera in anything other than Multishot mode. I hardly need to say this, but the PhaseOne System is far superior to the H3D 50 II in single shot mode, as it never shows any “blotchiness” and has much higher resolution.
At this point, the only comparison worth making was between the PhaseOne System and the Hasselblad in Multishot mode.
___________________________________________________________________________________
A FEW WORDS ABOUT THE SOFTWARE
In the past, one of the common complaints I used to hear from Hasselblad owners was that the “PhaseOne conversion software (CaptureOne, or C1) performed all kinds of magic on the files before rendering them as “without any adjustments”, which wrongly lead people to believe that PhaseOne image quality was better than Hasselblad”.
After working with the Hasselblad software (Phocus) for several weeks, there is no question in my mind that the situation (at least today) is the exact opposite. There is a heck of a lot more image processing going on in Phocus than in C1 before an image is displayed (with all adjustments set to zero) in default mode.
It is crystal clear to me that before Phocus displays an image at its default settings, with “no adjustments”, the software has already applied a large number of adjustments to lead to a specific look in terms of contrast, color, saturation, clarity and sharpness. The look is what I would call Velvia double plus. Imagine the overly saturated and contrasty look of Velvia film and then punch it up not one, but two more notches. This is what you get in Phocus with “no adjustments”.
While some photographers might like this look (I assume that many Hasselblad owners do), personally I think it is grossly overdone. The shadows are way too dark, to the point of loosing much detail, the upper mid-tones and highlights have too much contrast at first and too much compression on the high end; finally, the color is so exaggerated that it is totally unreal.
There is a “Repro” mode somewhat hidden in the software menus, which needs to be activated each and every time you open the application if you want to use it (!). It is supposedly meant for people who need high color accuracy, such as folks making reproductions of fine art. The very existence of this mode confirms that the software defaults to a specific look, rather than accuracy or any semblance of “no adjustments”.
Repro mode is definitely more tame, the contrast is much more controlled and it brings back shadow and highlight detail. In fact, the contrast can often be a little too low. But even in Repro mode the colors and the saturation are quite exaggerated.
As mentioned above, I had the advantage of being able to see the actual objects and compare them to the calibrated EIZO display in my computer, as well as actual prints under controlled lighting conditions with a GTI Graphics print viewing station, so the reader will have to trust me on the following comments:
The default mode with no adjustments in CaptureOne renders deadly accurate color and contrast in the PhaseOne images, both, on the screen and in prints. With the Hasselblad files, I had to turn on Repro mode, modify the contrast curve, desaturate the colors and adjust hues before I could come close to matching the real objects either on the screen or in prints. But even after doing all that, the PhaseOne colors still looked more accurate (perhaps a real expert in Phocus could do better than me).
Figure 3 shows a comparison of color rendition between the PhaseOne system (on the right) and the Hasselblad system in Repro mode (on the left). All adjustments in both pieces of software were set to zero. The only thing I did was set the white balance by clicking the eyedropper in the appropriate patch of the X-Rite Passport.

Figure 3
Click on Figure #3 to view and download a high resolution (JPG) copy of this image (1.3MB).
Depending on the browser that you are using, once displayed you may be able to click to view
the image at 100%, or you may have to save it and then view in another program.
The color rendition of the PhaseOne system (right) is extremely accurate. By comparison, the Hasselblad in Repro mode renders the sky a totally unreal overly saturated cyan, the grass looks luscious, but is overly saturated and the hue is wrong. The color of the bricks is also not nearly as accurate as the PhaseOne system. Note the lower contrast in the Hasselblad image. This type of rendition is typical of Repro mode.
___________________________________________________________________________________
IMAGE QUALITY-RESULTS, PART 2
I carefully evaluated at least a dozen images with very high dynamic range, and both, the PhaseOne system and the Hasselblad did an admirable job. In terms of Dynamic range, I would call it a draw. If there is any difference, it is very minor.
At this juncture, I decided to do a fun experiment:
I took the RAW files of a couple of images and processed them with no adjustments and no sharpening (I disabled sharpening in the conversion from RAW to TIFF). All I did was set the White Balance with the X-Rite Passport. I then enlarged the images in Photoshop to approximately 40×50 inches without resampling. None of the files dropped below 180 ppi, so no resampling was necessary (I suggest the reader visit the Pixel Genius site, or view some of the tutorials with Michael Reichmann and Jeff Schewe for extensive discussions on this topic). The images were then sharpened for printing using Pixel Genius’ Photokit.
Once I was ready to print, I picked different areas of the images, cropped these areas to 16×20 inches and made some prints.
I showed the prints to half a dozen very experienced photographers, asking them to focus on resolution and color, and every single one of them preferred the PhaseOne prints. The score was a perfect 100% to zero in favor of PhaseOne.
The results of the experiment obviously surprised me, so I decided to dig deeper. The results of digging deeper surprised me again!
Figure 4 shows a setup with a printed circuit board with very fine lines and small components, needles and very fine thread. I used this image to judge resolution.
Figure 4
Figure 5 is a comparison of the center section of the image at 100%. The P65+ image is on the left, the Hasselblad image in Multishot mode is on the right. Sharpening was disabled.

Figure #5
Click on Figure #5 to view and download a high resolution (JPG) copy of this image (840K).
Depending on the browser that you are using, once displayed you may be able to click to view
the image at 100%, or you may have to save it and then view in another program.
I hope the reader can tell that both images are absolutely superb, and extremely close in terms of resolution. I looked at this image and several others multiple times without sharpening as well as with sharpening. I also equalized the exposures using the eyedropper tool in Photoshop so my eyes would not fool me. When I sharpened I did my best to make the sharpness look the same before judging actual resolution. I spent a lot of time on the monitor, and I also made some prints.
At the end of the day, my conclusion was that the Hasselblad in Multishot mode had slightly higher resolution than the PhaseOne system, but the systems are extremely close. We are literally splitting hairs here. The slight amount of fuzz in the red thread, and the finest weave in some of the bundles like the white bundle is slightly better resolved by the Hasselblad.
Once I had determined that the Hasselblad had slightly higher resolution, the question was, can I find an image where the theoretical superiority of working in multishot mode would really be evident? Thanks to a suggestion by one of the experienced photographers I mentioned above, I found the “torture test” that would show visually the advantages of less interpolation. Going back to figure 1, I was able to pick a specific part of the newsprint that would be a very difficult subject for a single shot back. I enlarged the image to200%to show this clearly. Figure 6 shows this specific area of the newspaper with the Hasselblad in Multishot mode on the left and the PhaseOne on the right. Again, sharpening was disabled in the RAW to TIFF conversion.

Figure #6
Click on Figure #6 to view and download a high resolution (JPG) copy of this image (1.1MB).
Depending on the browser that you are using, once displayed you may be able to click to view
the image at 100%, or you may have to save it and then view in another program.
Note how the Hasselblad image is a little softer, but extremely smooth and with no artifacts. With just a tad of sharpening, one can easily make it match the PhaseOne image in terms of sharpness. On the other hand, certain areas of the PhaseOne image on the right, such as the sleeve show some color anomalies. On top of this, if you look closely at the sleeve and the male face you can clearly see some artifacts, such as lines forming rectangles. No such lines are visible in the multishot image.
The multishot system seems to be capturing more detail and is devoid of artifacts, but requires a little sharpening to match the unsharpened PhaseOne image.
___________________________________________________________________________________
PRICING
Medium Format equipment is not, and never has been cheap. The main reasons for this are that the equipment is usually pushing the limits of the technology; it has to be extremely well built because it is going to a very demanding user base, and the total market size is rather small, which does not allow the economies of scale that some other consumer products allow. Furthermore, the customer base is not only demanding in terms of the equipment build quality, it is also extremely demanding in terms of customer service and support.
All of these things are quite expensive, so it is no wonder that Medium Format equipment is premium priced. Ever since I can remember, going back all the way to the 1960s, the cost of a Medium Format system has been similar to the cost of a nice luxury mid-sized car.
Some things stay the same, and in this regard, the prices of Medium Format equipment continue at that level. The list price for the Hasselblad H3D II 50 Multishot camera with 80 mm lens is $34,995.00. The PhaseOne camera with P65+ back and 80 mm lens retails for $39,990.00.
A Hasselblad H4 Multishot will retail for $37,995.00, while the new PhaseOne DF camera with a P65+ back and the new 80 mm leaf shutter lens will retail for $41,990.00.
The $4,000.00 difference in price between the new cameras just being released is about what one would expect to pay for the difference between 50 and 60 Megapixels. In fact, the list price of the new Hasselblad H4D 60 Megapixel camera is identical to the new PhaseOne DF – $41,990.00. Therefore, in terms of cost, the systems are pretty much identical.
Of course, the major justification for purchasing a Medium Format system is image quality. While many of the 35 mm DSLR camera manufacturers with their massive PR campaigns try to lead people to believe that they have the best image quality around, let there be no mistake that there is a huge chasm between the image quality of Medium Format versus 35 mm DSLR’s.
Just to mention a few basic differences: All 35mm DSLRs have a blurring filter in front of the sensor. Medium Format cameras do not. A Medium Format camera with roughly 2.5 times the number of Megapixels, plus no blurring filter has massively better detail retrieval capabilities.
Medium Format cameras are true 16-bit per color systems versus 12-14 bit systems for small DSLRs. This, plus the difference of having much larger CCD (versus CMOS) photo sites delivers way better color and way better resolution in terms of subtle gradations across the entire grey scale.
___________________________________________________________________________________
Paragraph Removed – Editor
The struck-out paragraph below was part of the original article. It caused quite a bit of controversy on this site’s forum and elsewhere. I initially added a comment to the bottom of the article, but that wasn’t sufficient. Too many people’s favourite ox had already been gored.
Please consider the paragraph below to be removed. There’s no point in actually removing it, because once on the net, things last forever, and undoubtedly some zealots would consider it a coverup if we did so.
"The dynamic range of a typical high-end professional 35 mm DSLR is around 7 F/stops. Medium Format cameras are closer to 13 F/stops of dynamic range. You can see the difference from 30 feet away in a small print."
The reason that Mark and I have decided to remove it is not because we don’t agree with its basic sentiment, but because it is serving as a distraction for the main point of the review, which is a comparison between two different medium format backs.
There is wide agreement among photographers that use or have used both formats that MF has an advantage of several F/stops in DR versus the small cameras. The precise number will vary depending on the specific camera and back being compared as well as the comparison methodology, but the difference is quite noticeable in actual images. From 30 feet away? Maybe not. Let’s just chalk that phrase up as a bit of editorial hyperbole rather than something intended to be taken literally.
The issue of the differences between medium format and 35mm is a fascinating one though, and Mark and I intend on pursuing it in greater depth in the days ahead, and with more rigour than with a throw-away line or two.
___________________________________________________________________________________
CONCLUSION
This exercise led me to several surprises:
The Hasselblad system turned out to be worse than I had anticipated in single shot mode.
I expected the Hasselblad system in multishot and Repro mode to deliver extremely accurate colors. Unfortunately, I was disappointed. At least in my tests, the PhaseOne consistently delivered better color accuracy.
The Hasselblad system in multishot mode does resolve a little more detail than the PhaseOne system. For the vast majority of subjects it is a very close call. For some subjects, however (as in Figure 6), the superiority of the multishot system is quite visible in highly enlarged portions of an image. Whether one can see this on a print or not, is highly dependent on the size of the print, the specific subject matter, and even the type of paper and printer.
In the end, the two systems are capable of delivering superb image quality under the right conditions. For example, if my job was to shoot textiles or tapestry reproductions, the Hasselblad in multishot mode would be my tool of choice. On the other hand, if I was a landscape or portrait photographer, I would definitely opt for the Phase system.
As Medium Format systems continue to improve, all I can say is –What a great time it is to be a photographer!
March, 2010
___________________________________________________________________________________
About Mark Dubovoy
Dr. Dubovoy is highly regarded as a technical expert in many aspects of printing technology and photography. As such, he is a regular writer of technical articles forThe Luminous Landscape,PHOTO Techniquesmagazine, and a lecturer at various workshops.
His photographs are included in a number of private collections, as well as the permanent collections of theMuseum of Contemporary Artin Mexico City, theSan Francisco Museum of Modern Art, theMonterey Art Museum, theBerkeley Art Museumand theMuseum of Modern Artin Nanao Japan.
___________________________________________________________________________________
Update – Editor’s Note
An aspect of Mark Dubovoy’s comparison review above is the question of dynamic range.
It has long been a contentious issue with regard to digital cameras, medium format backs, and film. In the first few days following publication a debate has raged on this site’s forums, as well as others, over the dynamic range of DSLRs vs medium format backs.
The contention is that DSLRs have a DR of about 6-7 stops, while the better medium format backs are 12-13 stops. Most knowledgeable observers seem to agree with this, but there are some who don’t, and in my opinion there are two reasons why.
1: They have not done the comparison themselves.
2: They are using a definition of dynamic range that is at odds with common practice.
The first point is, regrettable, all too common in photographic circles. Some people read something on the net that suits their preconception or predilection, and then continue to spread the word. On the other hand, it doesn’t take long for someone who has access to both products to do a simple comparison themselves, buthey–why spoil a good story?
The second point is much more problematic. The standard definition of dynamic range in the industry has always been how many F stops above and below middle gray can be recorded while delivering full texture and detail.
This isn’t that straightforward a measurement to make though. At both the the low and high end it is open to subjective interpretation. That’s why I, and most observers like to express DR as a range, such as 6–7 stops, rather than as an absolute number.
UnfortunatelyDxO Labshas complicated matters. TheirDxO Markcamera tests have become widely read by photographers around the world, and are quoted as gospel by many. Regrettably there are concerns that I, and others have expressed about some aspects of DXO’s tests, and I have been in communication with them over this in the past.
The only aspect that is relevant tothisdiscussion is with regard to dynamic range. The standard definition is, as mentioned above, how many F stops above and below middle gray can be recorded while delivering full texture and detail. The DXO definition, according to their web site, is the range between zero signal to noise and full saturation of the sensor.
This approach is not inherently flawed, it’s just that it does not take into account the linear nature of sensors. It is therefore not a particularly relevant way of measuring DR to a photographer, as opposed to an engineer.
Tests done by me in the past, as well as others more recently, show that DSLRs have a dynamic range of 6–7 stops while top medium format backs are in the 12-13 stop range. This is using the common definition of DR as mentioned above.
The exact numbers are open to some debate because of the subjective aspect of the test, but usually a one stop differential is the most seen between testers or test runs. But, if someone is using a different set of criteria for their tests then obviously results can differ much more widely.
I thank the members of this site’s forums for their lively debate on this, though on at least one other site’s forum this issue was regrettably allowed to degenerate into personal ad-homonim attacks.
This is a shame really, but all too common on the web where people with axes to grind have free reign. It’s an interesting subject though, and worthy of continued reasoned discussion.
Michael Reichmann
Elevate Your Vision


Read this story and all the best stories on The Luminous Landscape
The author has made this story available to Luminous Landscape members only. Upgrade to get instant access to this story and other benefits available only to members.
Why choose us?
Luminous-Landscape is a membership site. Our website contains over 5300 articles on almost every topic, camera, lens and printer you can imagine. Our membership model is simple, just $2 a month ($24.00 USD a year). This $24 gains you access to a wealth of information including all our past and future video tutorials on such topics as Lightroom, Capture One, Printing, file management and dozens of interviews and travel videos.
- New Articles every few days
- All original content found nowhere else on the web
- No Pop Up Google Sense ads – Our advertisers are photo related
- Download/stream video to any device
- NEW videos monthly
- Top well-known photographer contributors
- Posts from industry leaders
- Speciality Photography Workshops
- Mobile device scalable
- Exclusive video interviews
- Special vendor offers for members
- Hands On Product reviews
- FREE – User Forum. One of the most read user forums on the internet
- Access to our community Buy and Sell pages; for members only.
You may also like