


Kevin Raber’s articleHaving Fun with Panoramasis a great introduction to the process of creating a large image by combining smaller, overlapping pictures. For that article, he assumed that the result would look just the way you want it, needing only horizontal adjustment and cropping. Sometimes things do work out that nicely, but it isn’t common. Most of the time, you need additional processing to make things look right.
I used to use Photoshop’sLens Correctionfilter to make vertical or horizontal lines parallel. But for the last couple of versions, Photoshop has provided theAdaptive Wide Anglefilter, which is even more powerful. Lens Correction assumes there is a single vertical and a single horizontal direction and all of the image is modified relative to that.Adaptive Wide Angleoverlays a mesh on the image, and different sections of the mesh can be distorted in different ways, allowing more sophisticated corrections.
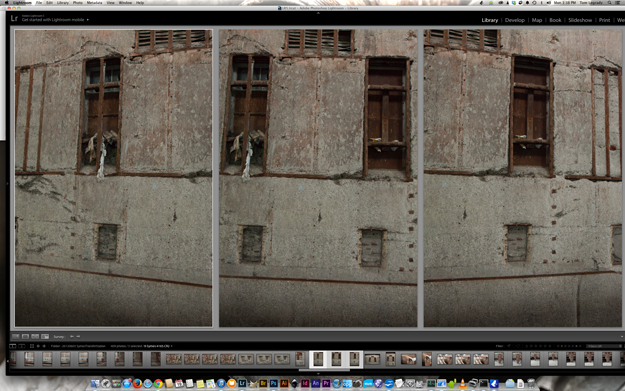
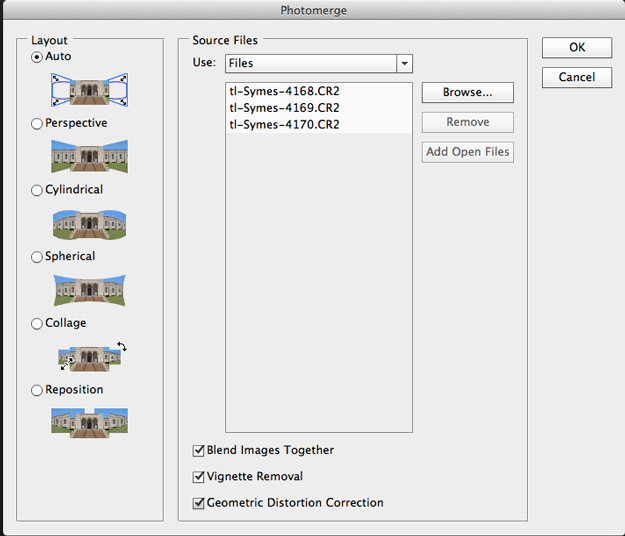
These images were taken at the Symes Transfer Station, a long-abandoned and now mostly demolished garbage facility in Toronto, using a Canon 5D Mk II, 24-105 mm lens at 28mm. Using Lightroom’s Merge to panorama in Photoshop, leads to thePhotomergemenu where I activateVignette Removaland Geometric Distortion Correction.
After a short while, Photoshop presents the merged image. I immediately collapse the layers (shift-Cmd-e on my Mac), because arriving to this point is a totally mechanical process, requiring only a few minutes of Photoshop’s time.

To process the image using Lens Correction, switch to the Customtab and define a horizontal and vertical centre, using the straightentool ( note the tool pallette at the top left ). In this case, the metal bars are vertical and horizontal, so choosing one closest to the centre, makes it easy to fix image rotation.
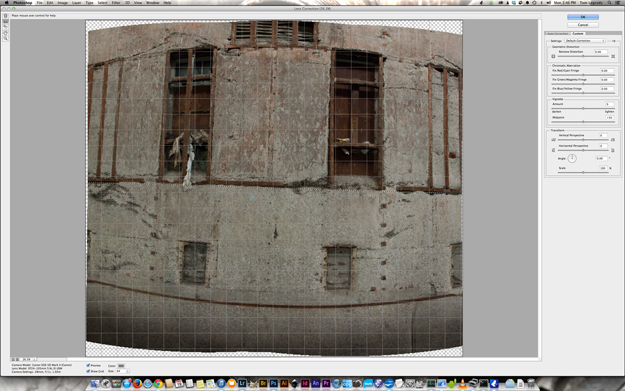
Perspective can be adjusted usingVertical PerspectiveandHorizontal Perspectivein the bottomTransformsection. Recusing the scale reveals the entire image.
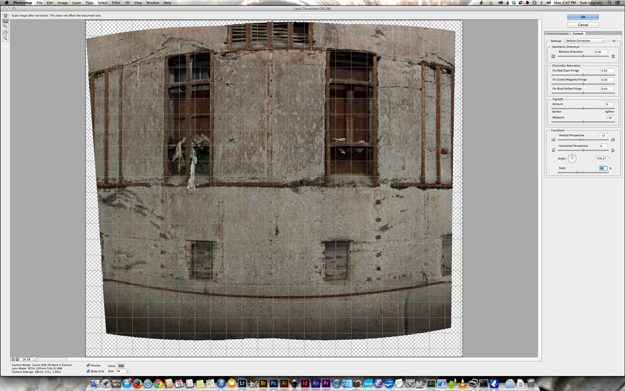
Merging wide angle images has resulted in strong barrel distortion, but only in the direction of the merge. Attempting to fix this using Remove Distortion at the top of the right hand adjustments panel causes straight vertical lines to take on a pincushion distortion.
One solution would be to use a normal lens or a telephoto, and shoot from further away. I seem to remember there was an obstruction preventing me from backing up, and in any case, sometimes you don’t want to do that. The solution is to switch to the Adaptive Wide Anglefilter.
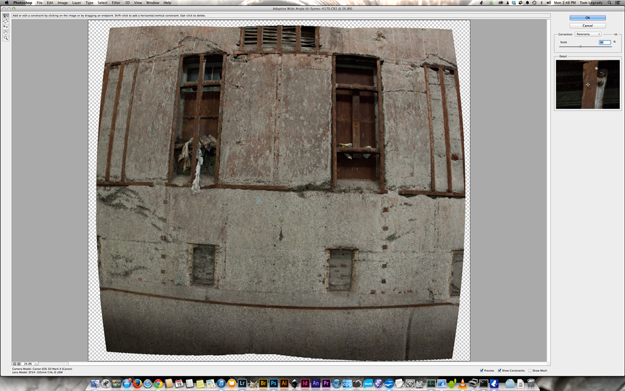
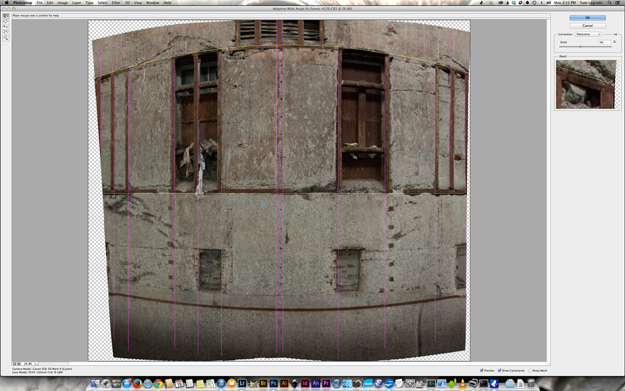
The first step is to reduce the image slightly to see all of it. Clicking in the Scaletext-box, I useshift-downarrowto reduce the scale in multiples of 10%. Then use the straighten tool (top left) to adjust the central reference line. Click at the first endpoint of the line or curve you want to process, and the filter will draw a rubber-band line as you move the cursor. The filter knows the distortion present in the image, and will curve the line appropriately. In the centre, of course, there is no curvature. Once you have selected the second endpoint, the line will be displayed with a circle through it, the line-circle intersections being marked with white dots. Click on one of the white dots, and you can rotate the line. If you know you want a line to be vertical or horizontal, press the shift key while clicking the second endpoint, and the filter will handle things by itself. Or you can shift-click on the white dot, if you forgot to press shift while defining the line. The white squares at the ends of the line give you an opportunity to adjust the endpoint locations.
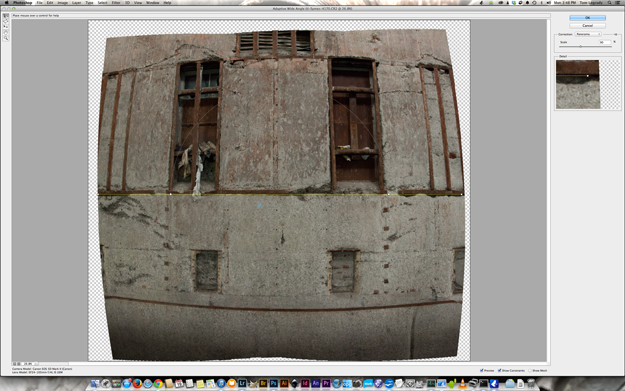
You can begin by straightening some line near the edge, but the filter will warp the image in strange ways, thinking that that is the only modification you wish to make. Adding the remaining corrections then becomes complicated. I find it simplest to define some central lines, which will define the overall alignment of the image. Then I use all the reference points I can find, to straighten out the remainder of the image.
I defined the verticals by starting at the top of the metal bars, and drawing a line down, even beyond the bottom of the bars, to the bottom of the image, and getting it as aligned as I could. I used to worry about being off a few tenths of a degree, but frankly, it doesn’t make any noticeable problems in my work. Perhaps with rural landscape or with architectural work things would be more critical. While I could grab the top control point, once the line is defined, and drag it higher to correct the image from top to bottom, in this case there are more reference points than I really need. So I used some to draw down to the bottom of the image, and used a few others to adjust the top portion of the image. In the image above, I’m defining the right-hand line. Notice how the control line wiggles to match the distortion, partially caused by the original image and the merging, and partially from the existing corrections
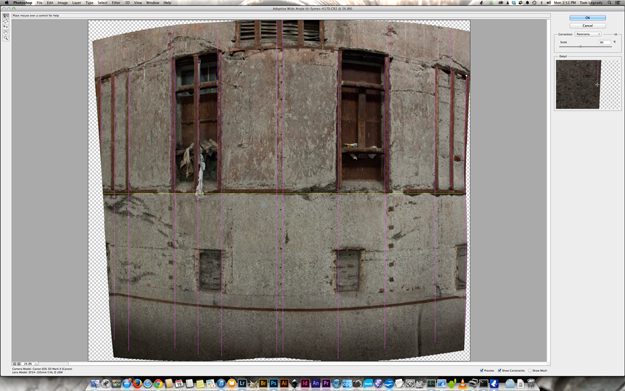
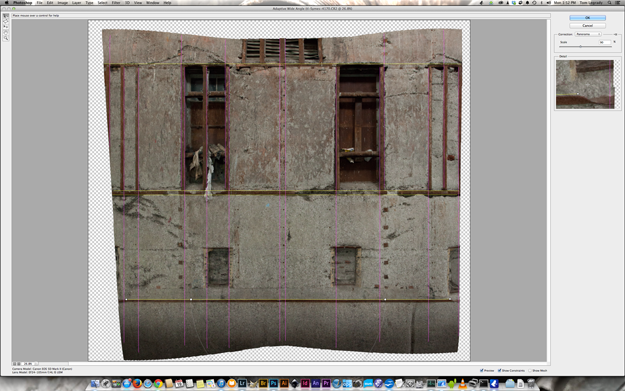
You can define corrections in any order you like, but in this case I’ve done all the verticals first. Notice how the control line curves to match the distortion of the image. I like to do very long panoramas, for example 5′ high and 1′ wide, which sometimes confuses the filter, and it produces the wrong curve. In that case I will do a piece-wise approximation to the curve, keeping the bits short enough that they do not wander too far from the reference …. for some personal definition ofnot wandering too far.
Once the image is all squared up, I’ll increase the scale to crop three sides the way I want, and then handle the fourth side with Photoshop’s crop tool In this case, the image fits perfectly into the view window, but then it isn’t very panoramic.
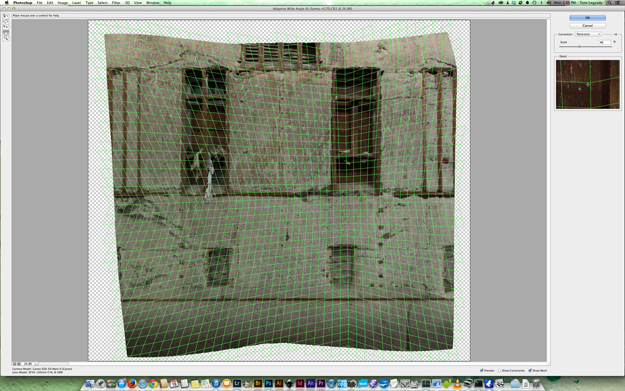
At the bottom right, there’s an option to show the mesh being applied to the original image.
For very large images, I sometimes work zoomed in close, panning my way across the image. As a result, preview is very slow, it’s spending a lot of time to generate a zoomed in preview of regions I’m not looking at. In this case, it’s work it to turn off preview, at the bottom, and just add constraint lines to the original image.
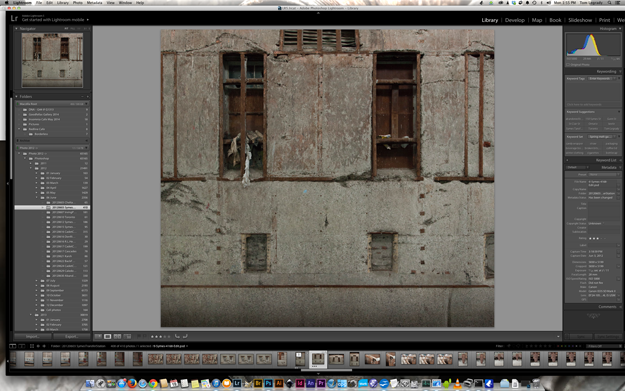
The end result is 5800 x 5200 pixels, or 30 MP. So my 21 MP 5DMk II has provided me an image with medium format detail. I personally use panorama techniques to affect the viewers relationship with the image. I particularly like extreme ratios, especially vertical panoramas.
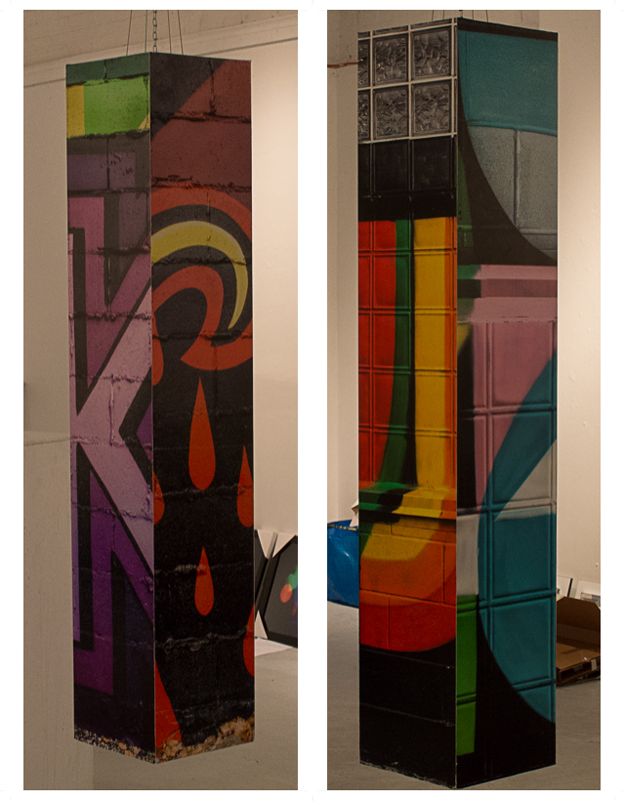
The image at the top of this article is installation-day of my piecePillar of Graffitiat Gallery 1313 in theContact Festivalgroup show,DNA – Do Not Assume.
Tom Legrady


Elevate Your Vision


Read this story and all the best stories on The Luminous Landscape
The author has made this story available to Luminous Landscape members only. Upgrade to get instant access to this story and other benefits available only to members.
Why choose us?
Luminous-Landscape is a membership site. Our website contains over 5300 articles on almost every topic, camera, lens and printer you can imagine. Our membership model is simple, just $2 a month ($24.00 USD a year). This $24 gains you access to a wealth of information including all our past and future video tutorials on such topics as Lightroom, Capture One, Printing, file management and dozens of interviews and travel videos.
- New Articles every few days
- All original content found nowhere else on the web
- No Pop Up Google Sense ads – Our advertisers are photo related
- Download/stream video to any device
- NEW videos monthly
- Top well-known photographer contributors
- Posts from industry leaders
- Speciality Photography Workshops
- Mobile device scalable
- Exclusive video interviews
- Special vendor offers for members
- Hands On Product reviews
- FREE – User Forum. One of the most read user forums on the internet
- Access to our community Buy and Sell pages; for members only.
You may also like


