


For Windows
Every now and then a tool comes along that completely redefines its category. FocalBlade is just such a tool. It is a Photoshop plug-in and also works with dozens of programs that following the Adobe plug-in standard. Its raison-d’etre is to provide the user with the most powerful and varied tools possible for sharpening photographic images.
If you are new to digital image processing, or not completely familiar with the concept of sharpening and the use of theUnsharp Masktool, here are a few links on this site that will get you started and also give background to the tools that have been available prior to FocalBlade. You may wish to review these before continuing —Understanding Sharpness—Understanding Digital USM—Instant Photoshop—Smart Sharpening—High Pass Sharpening—nik Sharpening Pro—PhotoKit Sharpener—Local Contrast Enhancement.
From Dummy to Demanding
Digital image sharpening is possibly the most difficult task for beginners to get their heads around and to master. A number of automated tools have been brought to market over the past few years, and endless tutorials have been written on the subject. But, oversharpened and undersharpened images are the biggest failings that I see when reviewing people’s prints. Very good sharpening can be accomplished simply using the basic USM tool in Photoshop, but mastery is slow. Programs likenik Sharpening Procan be helpful, but depending on their settings usually do either too much or too little.
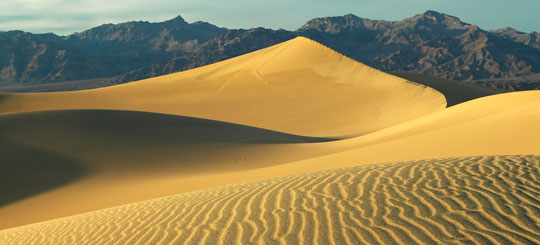
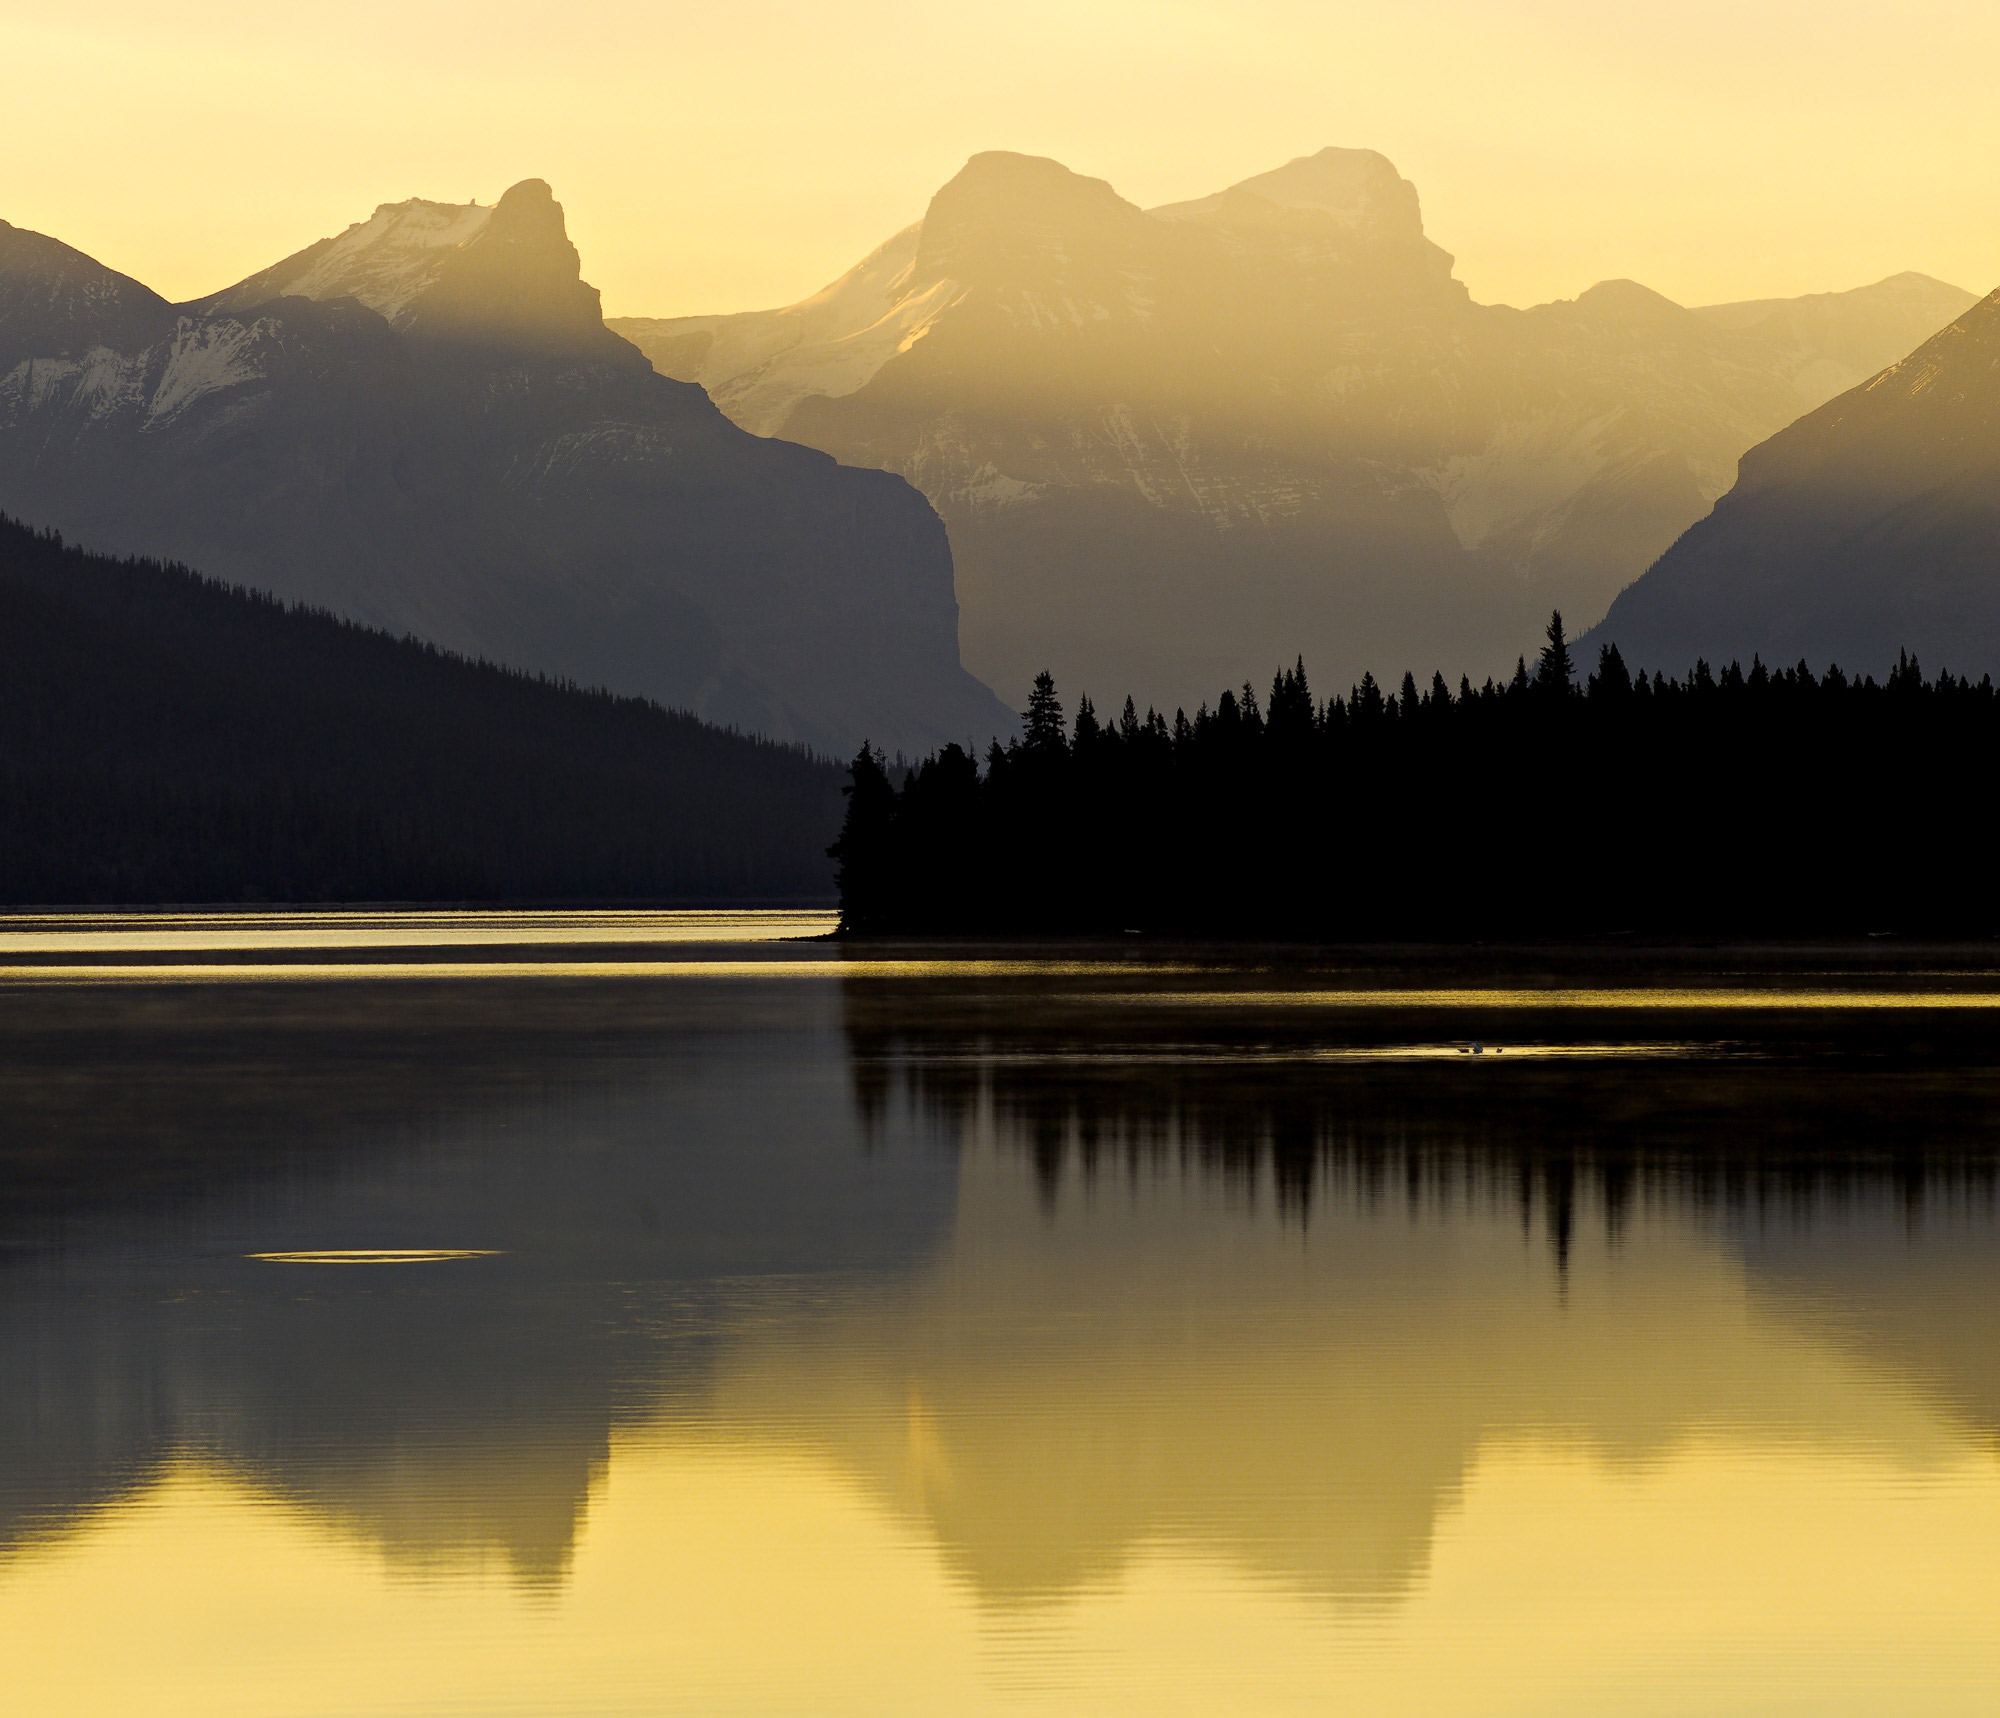
Dunes. Death Valley — May, 2003
Canon 1Ds with 70-200mm f/2.8L IS @ 200mm. ISO 200
What sets FocalBlade apart from any previous sharpening tool is its flexibility. It can be used by beginners inNovice Modeor by the most experienced digital maven inExpert Mode, with several levels in between. It is not hyperbolic to say that this is likely the ultimate sharpening tool yet produced, and if it can’t meet your sharpening needs, nothing likely can.
But, as will be quickly seen, to use FocalBlade in its simplest automated modes is to bypass its many strengths, and therefore itsExpertmode is what we will look at most closely below.
A Wealth of Tools
Expert Mode is where the real power of FocalBlade lies.Figure 1below gives an overview of what the plug-in’s pop-up screen looks like. It is dominated by a window which can show a dynamic before and after preview of the sharpening settings. This preview window can be set to split in a number of different ways to compliment the way that you prefer to work.
It is preferable to work at 100% magnification, but you can set magnification to any size that you wish. You also can scroll the preview windows by right-clicking the mouse and dragging the image.
FocalBlade keeps you constantly informed of not only what it’s doing but what each control does. In the lower left there is a check box that allows you to turn auto-preview on and off, and next to it is a window that shows how long each change will take in the preview window, and how long it will take to process the whole image. For this 22 MB file on a 2.4 Ghz Pentium 4 with 1G of RAM preview updates take about 2.5 seconds, and a full rendering of the image will take approximately 45 seconds. Needless to say this is a processor intensive program and can use all of the speed and RAM that one can give it.
On the lower right is a text window that constantly provides a paragraph or so about about the function that is currently under the cursor. With this is a guide, and with the virtually instant feedback of the split preview screen, it takes little time to be become proficient with the program.
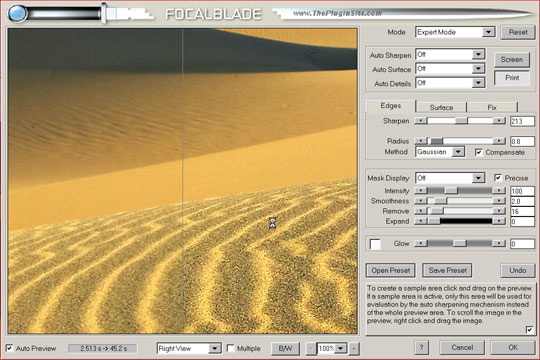
Fig. 1
To the right of the preview window lies the menu screen, which is shown in greater detail below in Figure 2. While there are selections for various Auto settings I think you’ll find that after a half hour with the program and the excellent HTML manual that the manual settings are much more powerful and even fun to use. Since there’s a large number of possible settings, I’ll just focus on a few which are the most relevant to everyday sharpening.
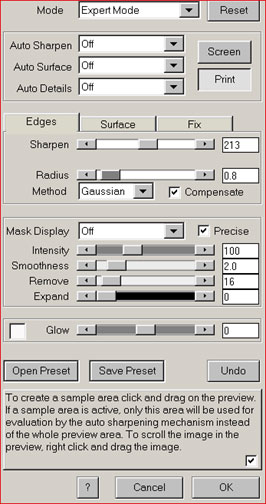
Fig. 2
You’ll notice three tabs;Edges,SurfaceandFix. This hints at one of the main strengths of FocalBlade —edges and surfaces are sharpened separately. This is a huge plus, especially with an image like the one used in the example above. The foreground dunes have tremendous detail and are very sharply delineated by the low angle of the sun. The more distant dunes and mountains recede in focus and have large areas without strong detail. This is the type of image that is usually very difficult to sharpen well, since setting a high sharpening value for the detailed areas will cause a lot of artifacts in the smooth areas.
FocalBlade let’s you separately set sharpening for edges and surfaces, and then, if there are any white or black halos visible, theFixtab allows you to eliminate this as well. Once you have settings that work for a certain type of image or camera system you can save these as named presets and easily bring them back the next time a similar image presents itself.
Workflow
Sharpen Last and Sharpen on a Layer
From a workflow point of view it is always best to sharpen last, and to do so for the specific size of image and type of output. It is recommended that you set the final image size before running FocalBlade, and you’ll note that there is a set of radio buttons markedScreenandPrint, because each type of use has different sharpening requirements.
As for workflow, my recommendation is to work one of two ways. With the first way you do all adjustments to the image prior to printing, and then save it unsharpened. I will name the file with the wordunsharpenedappended, so that years from now there won’t be any misunderstanding about the status of the image. Then, when I’m ready to print, I apply an appropriate amount of sharpening for the image size. This is why FocalBlade wants you to size the image first, because it knows that different output sizes need different amounts of sharpening. For convenience I will also save a version of the file that has been sharpened, set for the size that I’m most likely to print. This way making future prints is a quick process — load and print. The downside of this approach is the space taken on disk by two large files, one sharpened and one unsharpened.
The alternative way of working, and the one that I prefer, is to sharpen on a Layer. I will make a duplicate layer, name it "sharpening" and then apply FocalBlade to it. This means that there’s only one file, but of course it is twice the size because of the full extra layer. But, the advantage is that I can delete the layer at any time and redo it if my sharpening needs change for a different type of output.
Note though that while Focalblade can work on a 16 bit image, you’ll need to reduce the file to 8 bit mode to be able to create a duplicate layer. This limitation is likely to be removed withPhotoshop 8, coming later in 2003.
Conclusion
FocalBladeis currently (summer 2003) only available forWindows, though aMacversion is in development. The download price is $49.95 and a free evaluation version is available. There is also a student / academic discounted price of $29.95.
If you care about producing the finest possible prints of your photographs, then sharpening them appropriately is a must. With FocalBlade you are provided with the most powerful and flexible tool yet produced for image sharpening. The only problem is that you’re going to now want to go back and resharpen and reprint every image in your portfolio. It’s that good!


Elevate Your Vision


Read this story and all the best stories on The Luminous Landscape
The author has made this story available to Luminous Landscape members only. Upgrade to get instant access to this story and other benefits available only to members.
Why choose us?
Luminous-Landscape is a membership site. Our website contains over 5300 articles on almost every topic, camera, lens and printer you can imagine. Our membership model is simple, just $2 a month ($24.00 USD a year). This $24 gains you access to a wealth of information including all our past and future video tutorials on such topics as Lightroom, Capture One, Printing, file management and dozens of interviews and travel videos.
- New Articles every few days
- All original content found nowhere else on the web
- No Pop Up Google Sense ads – Our advertisers are photo related
- Download/stream video to any device
- NEW videos monthly
- Top well-known photographer contributors
- Posts from industry leaders
- Speciality Photography Workshops
- Mobile device scalable
- Exclusive video interviews
- Special vendor offers for members
- Hands On Product reviews
- FREE – User Forum. One of the most read user forums on the internet
- Access to our community Buy and Sell pages; for members only.
You may also like


